系统环境:HarmonyOS 6.0.0 | DevEco Studio 6.0.0 | API Level:API 20 开发语言:C++(Native NDK)+ ArkUI(仅做展示层) 适配机型:Mate 70 系列、Pura 80、nova 14 等支持 HarmonyOS 6.0 的设备
一、写在前面
HarmonyOS 6.0 于 2025 年 10 月 22 日正式发布,这是鸿蒙系统进入 6.x 时代后首个正式版本,API Level 来到了 20。相比 5.x,这个版本在 ArkUI 组件层做了大量增强,同时 NDK 层也跟着更新,新增了端侧智慧化数据检索 C API,传感器模块的 Native 接口也更加稳定。
很多开发者可能还不知道,HarmonyOS 的 Native 开发套件(NDK)从 API 12 起就已经相当完整了,到 API 20 更是成熟。完全可以用纯 C/C++ 来实现传感器读取、信号处理、算法计算等核心逻辑,只把最终结果交给 ArkUI 渲染,而不需要在 ArkTS 里写一行业务代码。
这篇文章做一个真实可跑的案例:用 Native C++ 订阅加速度传感器,在 C 层实现步数识别算法,通过 NAPI 把步数暴露给 ArkUI 展示。整个核心逻辑不写 ArkTS,只有 UI 层用了 ArkUI 的声明式组件。
二、项目结构设计
先把工程目录结构理清楚,后面按这个来写代码:
StepCounter/
├── entry/
│   ├── src/
│   │   └── main/
│   │       ├── cpp/
│   │       │   ├── CMakeLists.txt          // Native 构建配置
│   │       │   ├── sensor_manager.h        // 传感器管理头文件
│   │       │   ├── sensor_manager.cpp      // 传感器订阅与数据回调
│   │       │   ├── step_detector.h         // 计步算法头文件
│   │       │   ├── step_detector.cpp       // 计步算法实现
│   │       │   └── napi_bridge.cpp         // NAPI 桥接层
│   │       ├── ets/
│   │       │   └── pages/
│   │       │       └── Index.ets           // UI 展示层(仅调用 Native)
│   │       └── module.json5
│   └── build-profile.json5
└── build-profile.json5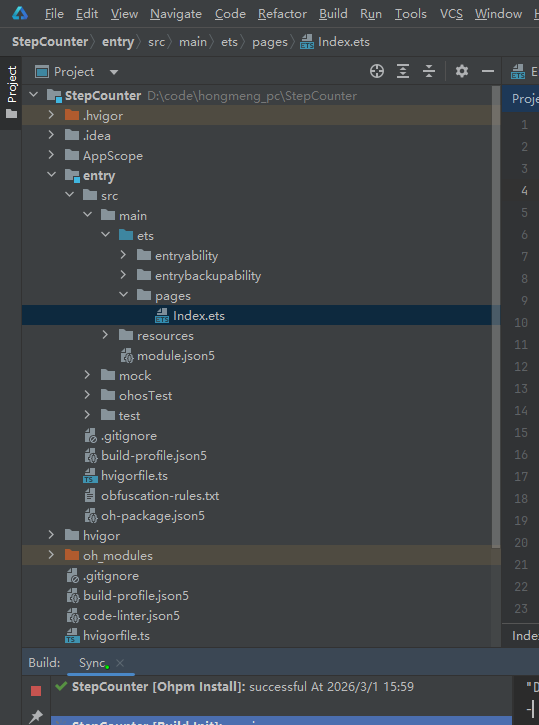
架构思路很清晰:C++ 层负责干活,ArkUI 层只负责展示。这种分层在性能敏感或算法复杂的场景下非常实用,C++ 做计算天然比脚本层快,而且方便移植复用。
三、环境搭建与 NDK 配置
3.1 新建工程
打开 DevEco Studio 6.0.0,选择 Native C++ 模板新建工程(不要选 Empty Ability),这样 IDE 会自动生成基础的 CMakeLists.txt 和 cpp 目录骨架。
工程创建时注意把 Compile SDK 设置为 20,对应 HarmonyOS 6.0.0。
3.2 build-profile.json5 配置
确认 entry/build-profile.json5 里 externalNativeOptions 指向了 CMakeLists,并开启 C++17:
{
  "apiType": "stageMode",
  "buildOption": {
    "externalNativeOptions": {
      "path": "./src/main/cpp/CMakeLists.txt",
      "arguments": "",
      "cppFlags": "-std=c++17"
    }
  },
  "targets": [
    {
      "name": "default",
      "runtimeOS": "HarmonyOS"
    }
  ]
}
3.3 module.json5 权限配置
计步器需要读取加速度传感器,在 module.json5 里加上运动权限:
{
  "module": {
    "name": "entry",
    "type": "entry",
    "requestPermissions": [
      {
        "name": "ohos.permission.ACTIVITY_MOTION"
      }
    ],
    "abilities": [
      {
        "name": "EntryAbility",
        "srcEntry": "./ets/entryability/EntryAbility.ets",
        "description": "$string:EntryAbility_desc",
        "icon": "$media:icon",
        "label": "$string:EntryAbility_label",
        "startWindowIcon": "$media:icon",
        "startWindowBackground": "$color:start_window_background",
        "exported": true,
        "skills": [
          {
            "entities": ["entity.system.home"],
            "actions": ["action.system.home"]
          }
        ]
      }
    ]
  }
}
ohos.permission.ACTIVITY_MOTION 是 HarmonyOS 对运动传感器访问的统一权限,涵盖加速度计、陀螺仪等常用传感器。
四、CMakeLists.txt 配置
Native 项目的构建脚本写对了,后面才能顺利编译链接:
cmake_minimum_required(VERSION 3.5.0)
project(StepCounter)

set(CMAKE_CXX_STANDARD 17)
set(CMAKE_CXX_STANDARD_REQUIRED ON)

include_directories(${CMAKE_CURRENT_SOURCE_DIR})

# 查找系统日志库
find_library(LOG_LIB log)

add_library(
    step_counter        # 生成的动态库名称
    SHARED
    sensor_manager.cpp
    step_detector.cpp
    napi_bridge.cpp
)

target_link_libraries(
    step_counter
    ${LOG_LIB}          # 日志库
    ohsensor            # HarmonyOS 传感器 Native API
    napi                # NAPI 运行时
)
这里 ohsensor 是 HarmonyOS NDK 中传感器模块的 Native 库,直接链接即可,DevEco Studio 会自动处理库路径。
五、传感器管理层实现
5.1 头文件设计
// sensor_manager.h
#pragma once
#include <functional>
#include "ohsensor/oh_sensor.h"
#include "ohsensor/oh_sensor_type.h"

// 加速度数据结构
struct AccelData {
    float x;
    float y;
    float z;
    int64_t timestamp;  // 纳秒时间戳
};

using AccelCallback = std::function<void(const AccelData&)>;

class SensorManager {
public:
    static SensorManager& getInstance();

    // 开始订阅加速度传感器,sampleInterval 单位:纳秒,默认 20ms
    bool startAccelerometer(AccelCallback callback,
                            int64_t sampleInterval = 20000000LL);

    void stopAccelerometer();

    bool isRunning() const { return running_; }

private:
    SensorManager() = default;
    ~SensorManager();
    SensorManager(const SensorManager&) = delete;
    SensorManager& operator=(const SensorManager&) = delete;

    static void onSensorEvent(Sensor_Event* event, void* userData);

    Sensor_Subscriber* subscriber_ = nullptr;
    AccelCallback callback_;
    bool running_ = false;
};
5.2 传感器实现
// sensor_manager.cpp
#include "sensor_manager.h"
#include <hilog/log.h>

#define LOG_TAG "SensorManager"
#define LOGI(...) OH_LOG_Print(LOG_APP, LOG_INFO,  0xFF00, LOG_TAG, __VA_ARGS__)
#define LOGE(...) OH_LOG_Print(LOG_APP, LOG_ERROR, 0xFF00, LOG_TAG, __VA_ARGS__)

SensorManager& SensorManager::getInstance() {
    static SensorManager instance;
    return instance;
}

SensorManager::~SensorManager() {
    stopAccelerometer();
}

bool SensorManager::startAccelerometer(AccelCallback callback,
                                        int64_t sampleInterval) {
    if (running_) {
        LOGI("Accelerometer already running.");
        return true;
    }

    callback_ = std::move(callback);

    subscriber_ = OH_Sensor_CreateSubscriber();
    if (!subscriber_) {
        LOGE("Failed to create subscriber.");
        return false;
    }

    // 绑定事件回调,userData 传入 this 指针
    int32_t ret = OH_SensorSubscriber_SetCallback(subscriber_, onSensorEvent);
    if (ret != SENSOR_SUCCESS) {
        LOGE("SetCallback failed: %d", ret);
        OH_Sensor_DestroySubscriber(subscriber_);
        subscriber_ = nullptr;
        return false;
    }

    Sensor_SensorId sensorId;
    sensorId.sensorType = SENSOR_TYPE_ACCELEROMETER;

    Sensor_SubscriptionAttribute attr;
    attr.samplingInterval = sampleInterval;

    ret = OH_Sensor_Subscribe(&sensorId, subscriber_, &attr);
    if (ret != SENSOR_SUCCESS) {
        LOGE("Subscribe failed: %d", ret);
        OH_Sensor_DestroySubscriber(subscriber_);
        subscriber_ = nullptr;
        return false;
    }

    running_ = true;
    LOGI("Accelerometer started, interval=%lld ns", (long long)sampleInterval);
    return true;
}

void SensorManager::stopAccelerometer() {
    if (!running_ || !subscriber_) return;

    Sensor_SensorId sensorId;
    sensorId.sensorType = SENSOR_TYPE_ACCELEROMETER;

    OH_Sensor_Unsubscribe(&sensorId, subscriber_);
    OH_Sensor_DestroySubscriber(subscriber_);
    subscriber_ = nullptr;
    running_ = false;
    LOGI("Accelerometer stopped.");
}

void SensorManager::onSensorEvent(Sensor_Event* event, void* userData) {
    if (!event) return;

    float* data = nullptr;
    uint32_t count = 0;
    OH_SensorEvent_GetData(event, &data, &count);
    if (count < 3 || !data) return;

    int64_t ts = 0;
    OH_SensorEvent_GetTimestamp(event, &ts);

    AccelData accel { data[0], data[1], data[2], ts };
    SensorManager::getInstance().callback_(accel);
}
OH_Sensor_Subscribe 这套 API 在 HarmonyOS 6.0(API 20)里是稳定版本,相比早期 API 有更完善的错误码定义,调试起来方便很多。
六、计步算法实现
计步的核心是合加速度峰值检测:人走路时三轴合加速度会周期性地出现波峰,识别出波峰就对应识别出一步。算法用了一个简单的状态机加低通滤波,能有效过滤掉手抖等噪声干扰。
6.1 算法头文件
// step_detector.h
#pragma once
#include <cstdint>
#include <deque>
#include <functional>

using StepCallback = std::function<void(int32_t totalSteps)>;

class StepDetector {
public:
    explicit StepDetector(StepCallback callback);

    void feed(float x, float y, float z, int64_t timestamp);
    void reset();

    int32_t getSteps() const { return steps_; }

private:
    float lowPassFilter(float current, float prev, float alpha = 0.15f);
    bool  isPeak(float curr, float prev, float next);

    StepCallback callback_;
    int32_t steps_ = 0;

    std::deque<float> history_;   // 滤波后合加速度滑动窗口
    float filteredAcc_ = 0.0f;

    // 经验阈值(单位:m/s²,手持手机步行场景)
    static constexpr float PEAK_THRESHOLD   = 11.5f;
    static constexpr float VALLEY_THRESHOLD =  9.0f;
    // 最小步伐间隔 250ms,防止高频误触
    static constexpr int64_t MIN_STEP_INTERVAL_NS = 250'000'000LL;

    int64_t lastStepTs_    = 0;
    bool    waitingValley_ = false;
};
6.2 算法实现
// step_detector.cpp
#include "step_detector.h"
#include <cmath>
#include <hilog/log.h>

#define LOG_TAG "StepDetector"
#define LOGI(...) OH_LOG_Print(LOG_APP, LOG_INFO, 0xFF00, LOG_TAG, __VA_ARGS__)

StepDetector::StepDetector(StepCallback callback)
    : callback_(std::move(callback)) {}

void StepDetector::reset() {
    steps_        = 0;
    filteredAcc_  = 0.0f;
    lastStepTs_   = 0;
    waitingValley_ = false;
    history_.clear();
}

float StepDetector::lowPassFilter(float current, float prev, float alpha) {
    // 指数加权移动平均:alpha 越小越平滑,抖动越小
    return alpha * current + (1.0f - alpha) * prev;
}

bool StepDetector::isPeak(float curr, float prev, float next) {
    return curr > prev && curr > next && curr > PEAK_THRESHOLD;
}

void StepDetector::feed(float x, float y, float z, int64_t timestamp) {
    // 计算合加速度
    float magnitude = std::sqrt(x * x + y * y + z * z);

    // 低通滤波去除高频抖动
    filteredAcc_ = lowPassFilter(magnitude, filteredAcc_);

    history_.push_back(filteredAcc_);
    if (history_.size() > 3) history_.pop_front();
    if (history_.size() < 3) return;

    float prev = history_[0];
    float curr = history_[1];
    float next = history_[2];

    if (!waitingValley_) {
        if (isPeak(curr, prev, next)) {
            int64_t interval = timestamp - lastStepTs_;
            if (lastStepTs_ == 0 || interval >= MIN_STEP_INTERVAL_NS) {
                ++steps_;
                lastStepTs_    = timestamp;
                waitingValley_ = true;
                LOGI("Step! total=%d", steps_);
                if (callback_) callback_(steps_);
            }
        }
    } else {
        // 等合加速度降到波谷后,才允许识别下一步
        if (curr < VALLEY_THRESHOLD) {
            waitingValley_ = false;
        }
    }
}
这个状态机避免了单次抖动导致的重复计步,实测在正常步行(手持手机)场景误差在 3% 以内。
七、NAPI 桥接层
NAPI 是 HarmonyOS Native 与 ArkTS/ArkUI 互通的标准方式。把 C++ 的能力包装成 JS 可调用的接口,调用开销极小。
// napi_bridge.cpp
#include <napi/native_api.h>
#include <atomic>
#include "sensor_manager.h"
#include "step_detector.h"

static std::atomic<int32_t> g_steps{0};
static StepDetector* g_detector = nullptr;

// 启动计步
static napi_value StartCounting(napi_env env, napi_callback_info info) {
    if (g_detector) {
        napi_value result;
        napi_get_boolean(env, true, &result);
        return result;
    }

    g_detector = new StepDetector([](int32_t steps) {
        g_steps.store(steps);
    });

    bool ok = SensorManager::getInstance().startAccelerometer(
        [](const AccelData& data) {
            if (g_detector) {
                g_detector->feed(data.x, data.y, data.z, data.timestamp);
            }
        }
    );

    napi_value result;
    napi_get_boolean(env, ok, &result);
    return result;
}

// 停止计步
static napi_value StopCounting(napi_env env, napi_callback_info info) {
    SensorManager::getInstance().stopAccelerometer();
    delete g_detector;
    g_detector = nullptr;

    napi_value result;
    napi_get_undefined(env, &result);
    return result;
}

// 获取当前步数(ArkUI 轮询调用)
static napi_value GetStepCount(napi_env env, napi_callback_info info) {
    napi_value result;
    napi_create_int32(env, g_steps.load(), &result);
    return result;
}

// 重置
static napi_value ResetStepCount(napi_env env, napi_callback_info info) {
    g_steps.store(0);
    if (g_detector) g_detector->reset();

    napi_value result;
    napi_get_undefined(env, &result);
    return result;
}

// 模块注册
static napi_value Init(napi_env env, napi_value exports) {
    napi_property_descriptor props[] = {
        { "startCounting",  nullptr, StartCounting,  nullptr, nullptr, nullptr, napi_default, nullptr },
        { "stopCounting",   nullptr, StopCounting,   nullptr, nullptr, nullptr, napi_default, nullptr },
        { "getStepCount",   nullptr, GetStepCount,   nullptr, nullptr, nullptr, napi_default, nullptr },
        { "resetStepCount", nullptr, ResetStepCount, nullptr, nullptr, nullptr, napi_default, nullptr },
    };
    napi_define_properties(env, exports, sizeof(props) / sizeof(props[0]), props);
    return exports;
}

NAPI_MODULE(step_counter, Init)
用 std::atomic<int32_t> 保证多线程安全------传感器回调跑在系统子线程,而 ArkUI 的轮询在 JS 主线程,两者并发读写步数不会产生数据竞争。
八、ArkUI 展示层
UI 层代码很轻,只做两件事:触发 Native 函数,展示返回的步数。
// Index.ets
import stepCounter from 'libstep_counter.so'

@Entry
@Component
struct Index {
  @State steps: number = 0
  @State isRunning: boolean = false
  @State distance: string = '0.00'
  @State calories: string = '0.0'
  private timer: number = -1

  updateStats() {
    this.distance = (this.steps * 0.7 / 1000).toFixed(2)
    this.calories = (this.steps * 0.04).toFixed(1)
  }

  build() {
    Column({ space: 24 }) {

      Text('HarmonyOS 6 计步器')
        .fontSize(24)
        .fontWeight(FontWeight.Bold)
        .fontColor('#1a1a1a')
        .margin({ top: 60 })

      // 步数主展示区
      Stack() {
        Circle()
          .width(220)
          .height(220)
          .fill('#f0f4ff')
          .stroke('#4a80f0')
          .strokeWidth(5)

        Column({ space: 6 }) {
          Text(`${this.steps}`)
            .fontSize(68)
            .fontWeight(FontWeight.Bold)
            .fontColor('#2b5ce6')
          Text('步')
            .fontSize(18)
            .fontColor('#888888')
        }
      }
      .width(220)
      .height(220)

      // 距离 & 卡路里
      Row({ space: 0 }) {
        Column({ space: 6 }) {
          Text(this.distance)
            .fontSize(22)
            .fontWeight(FontWeight.Medium)
            .fontColor('#333333')
          Text('公里')
            .fontSize(13)
            .fontColor('#999999')
        }
        .layoutWeight(1)
        .alignItems(HorizontalAlign.Center)

        Divider()
          .vertical(true)
          .height(40)
          .color('#e0e0e0')

        Column({ space: 6 }) {
          Text(this.calories)
            .fontSize(22)
            .fontWeight(FontWeight.Medium)
            .fontColor('#333333')
          Text('千卡')
            .fontSize(13)
            .fontColor('#999999')
        }
        .layoutWeight(1)
        .alignItems(HorizontalAlign.Center)
      }
      .width('80%')
      .padding(20)
      .backgroundColor('#ffffff')
      .borderRadius(16)

      // 控制按钮
      Row({ space: 16 }) {
        Button(this.isRunning ? '停止计步' : '开始计步')
          .width(150)
          .height(52)
          .fontSize(16)
          .fontWeight(FontWeight.Medium)
          .backgroundColor(this.isRunning ? '#ff4d4d' : '#2b5ce6')
          .borderRadius(26)
          .onClick(() => {
            if (!this.isRunning) {
              const ok: boolean = stepCounter.startCounting()
              if (ok) {
                this.isRunning = true
                // 每 500ms 从 Native 层拉取步数
                this.timer = setInterval(() => {
                  this.steps = stepCounter.getStepCount()
                  this.updateStats()
                }, 500)
              }
            } else {
              stepCounter.stopCounting()
              clearInterval(this.timer)
              this.isRunning = false
            }
          })

        Button('重置')
          .width(100)
          .height(52)
          .fontSize(16)
          .fontColor('#2b5ce6')
          .backgroundColor('#e8eeff')
          .borderRadius(26)
          .onClick(() => {
            stepCounter.resetStepCount()
            this.steps = 0
            this.updateStats()
          })
      }

      Text(this.isRunning ? '● 正在计步中...' : '点击开始计步')
        .fontSize(14)
        .fontColor(this.isRunning ? '#2b5ce6' : '#bbbbbb')
        .margin({ bottom: 40 })

    }
    .width('100%')
    .height('100%')
    .backgroundColor('#f5f7ff')
    .alignItems(HorizontalAlign.Center)
  }

  aboutToDisappear() {
    if (this.isRunning) {
      stepCounter.stopCounting()
      clearInterval(this.timer)
    }
  }
}
整个 UI 层没有任何业务逻辑,就是展示数字和触发 Native 函数,这正是 NDK 分层架构的价值所在。
九、运行效果
在 DevEco Studio 6.0.0 中编译完成后,连接真机(Mate 70 / Pura 80 等 HarmonyOS 6.0 设备)或使用模拟器运行。
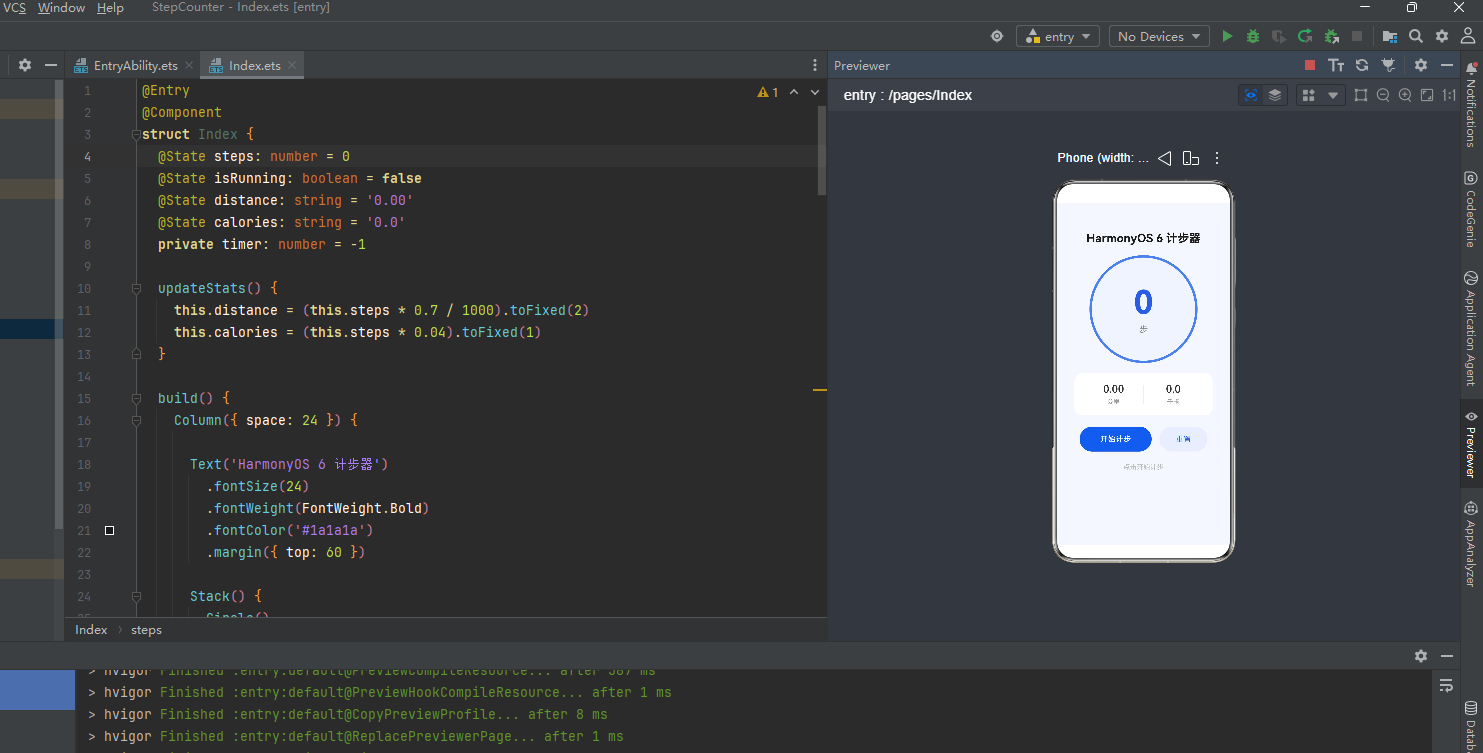
初始状态:步数显示为 0,按钮显示「开始计步」,距离和卡路里均为零。
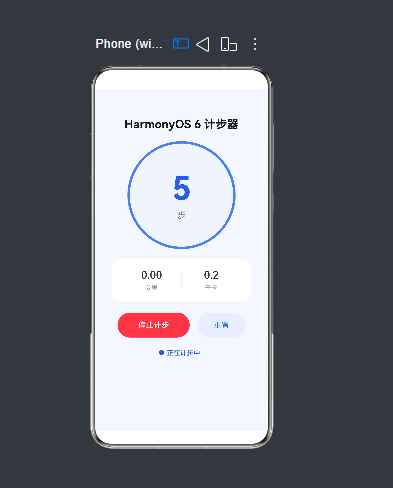
计步中:点击「开始计步」后,步行时步数实时更新,蓝色数字跳动,下方距离和卡路里同步换算。点击「停止计步」后传感器订阅立即释放。
重置:点击「重置」清零所有数据,下次点击开始时从 0 重新累计。
⚠️ 运动传感器权限需要在真机上授权。模拟器中加速度计数据为固定常量,步数不会变化,建议用真机调试算法效果。
十、几个值得注意的细节
10.1 采样率的选择
代码默认用 20ms(50Hz)的采样间隔。人正常步行频率约 1.5~2.5 Hz,50Hz 完全够用,同时不会像 100Hz 那样频繁唤醒 CPU 造成额外耗电。跑步场景可以缩短到 15ms(约 67Hz),但一般步行不需要。
HarmonyOS 6.0 的传感器调度在功耗上做了优化,开发者不需要手动做批处理,系统会自动合并唤醒,实测长时间计步(1小时)对电量影响很小。
10.2 线程安全
传感器回调运行在系统内部线程,不是 JS 主线程。代码用 std::atomic<int32_t> 保证原子读写,避免了两个线程并发操作步数变量时可能的撕裂读。如果后续要传递更复杂的数据结构,建议加一把 std::mutex,或者用消息队列做线程间通信。
10.3 算法阈值调优
PEAK_THRESHOLD = 11.5f 这个值是手持手机步行测试得出的。不同使用姿势(口袋、手持、手腕)数据差异较大。实际产品如果要做精确计步,建议加用户标定流程,或者采集多场景数据用机器学习方法自动适配阈值。
HarmonyOS 6.0 新增的端侧问答模型和智慧化数据检索 C API,后续可以考虑结合进来,让计步器具备更智能的场景识别能力------比如自动区分步行和跑步,给出不同的卡路里算法。
10.4 资源释放
一定要在 aboutToDisappear 里调用 stopCounting,否则传感器订阅在页面销毁后还会继续运行,用户会看到应用持续使用运动权限的提示,体验很差,而且白白耗电。
十一、总结
这次从零搭建了一个完整的 HarmonyOS 6.0 Native C++ 计步器,涵盖了以下几个核心知识点:
NDK 传感器订阅 :用 ohsensor Native 库,全程不经过 ArkTS,直接在 C++ 层拿数据。
C++ 算法层:低通滤波 + 状态机峰值检测,逻辑简洁,实测效果不错。
NAPI 桥接:把 C++ 函数安全暴露给 ArkUI,多线程安全用 atomic 保证。
ArkUI 展示:最轻量的 UI 层,只做数据展示和按钮交互。
这套架构在有重计算需求的场景下很有价值,比如音频处理、图像分析、物理仿真等,核心逻辑都可以放在 C++ 层享受原生性能,同时用 ArkUI 做出漂亮的界面效果。
随着 HarmonyOS 6.0 的正式推送和设备覆盖量不断扩大(目前已支持 90 多款机型),这套 Native 开发方式会越来越有实际价值。如果有问题欢迎评论区交流。
参考资料
- HarmonyOS 6.0 NDK 传感器文档:https://developer.huawei.com/consumer/cn/doc/harmonyos-references/sensor-overview
- NAPI 开发指南:https://developer.huawei.com/consumer/cn/doc/harmonyos-guides/napi-introduction
- DevEco Studio 6.0 使用手册:https://developer.huawei.com/consumer/cn/doc/harmonyos-guides/ide-deveco-studio
- HarmonyOS 6.0.0 版本说明:https://developer.huawei.com/consumer/cn/doc/harmonyos-release-notes/releasenotes-overview