Gemini大模型可以实现类似deepseek或者豆包,实现聊天、图片生成、抠图、图片处理、OCR等。这里简单实现聊天、生图、抠图、还有图像处理。
一、前期准备
1.首先去https://aistudio.google.com/prompts/new_chat注册创建项目得到API key。建议将密钥存储在环境变量中。

2.添加build.gradle配置
Kotlin
dependencies {
    implementation 'com.google.ai.client.generativeai:generativeai:0.9.0'
    implementation 'com.squareup.okhttp3:okhttp:5.3.2'
    implementation 'com.google.code.gson:gson:2.13.2'
}
3.测试API key是否可用,并获取大模型所有支持大模型。
Kotlin
private const val BASE_URL = "https://generativelanguage.googleapis.com/v1beta"
/**
* 判断API Key是否有效
*/
suspend fun testApiKey(): Boolean = withContext(Dispatchers.IO) {
try {
val request = Request.Builder()
.url("$BASE_URL/models?key=$apiKey")
.get()
.build()
val response = okHttpClient.newCall(request).execute()
val responseBody = response.body?.string()
val json = Gson().fromJson(responseBody, JsonObject::class.java)
val models = json.getAsJsonArray("models")
models.forEach { model ->
val name = model.asJsonObject.get("name").asString
val displayName = model.asJsonObject.get("displayName")?.asString ?: ""
val supportedMethods = model.asJsonObject.get("supportedGenerationMethods")?.asJsonArray
println("Model: $name")
println(" Display: $displayName")
println(" Methods: $supportedMethods")
println("---")
}
Log.e("GeminiApiClient", "code =${response.code} ")
response.isSuccessful
} catch (e: Exception) {
Log.e("GeminiApiClient", "Error testing API key: $e")
false
}
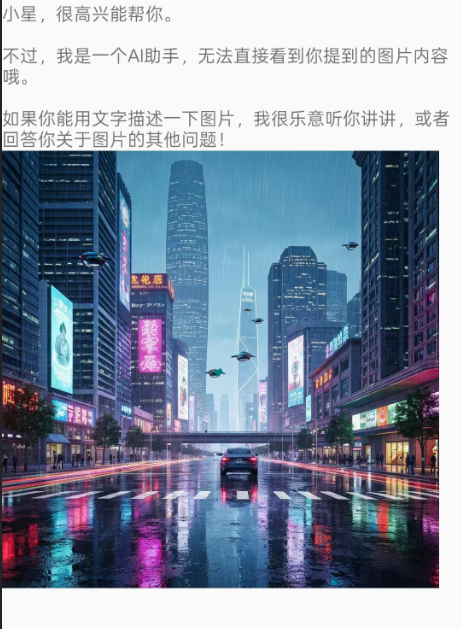
}二、实现聊天功能
聊天我们可以使用gemini-2.5-flash模型,可以一次性显示返回内容,也可以按流式显示,对reader数据做处理即可
Kotlin
    val requestBody = buildRequestBody(systemInstruction, messages, temperature)

        // 使用 streamGenerateContent 端点(流式)
        val request = Request.Builder()
            .url("$BASE_URL/models/$MODEL_GEMINI_2_5_FLASH:streamGenerateContent?key=$apiKey")
            .post(requestBody.toRequestBody(jsonMediaType))
            .build()

        val response = okHttpClient.newCall(request).execute()

        if (!response.isSuccessful) {
            val errorBody = response.body.string()
            throw Exception("API Error: $errorBody")
        }

        val reader = response.body.byteStream().bufferedReader()
三、实现生图功能
生图我们可以使用imagen-4.0-fast-generate-001模型,可以输入提示词、生成图片的张数、比例等。
Kotlin
 /**
     * 使用 Imagen 模型生成图片
     * @param prompt 描述词
     * @param sampleCount 生成图片的数量
     * @return 生成的 Bitmap 列表
     */
    suspend fun generateImages(
        prompt: String,
        sampleCount: Int = 1
    ): List<Bitmap> = withContext(Dispatchers.IO) {

        // 1. 构建请求对象 (这里使用 Gson 序列化,需确保已引入)
        val imagenRequest = ImagenRequest(
            instances = listOf(PromptInstance(prompt)),
            parameters = ImagenParameters(sampleCount = sampleCount)
        )
        val requestJson = Gson().toJson(imagenRequest)

        // 2. 构建 Request
        // 注意:Imagen 3 属于 Vertex AI 体系,其 URL 格式与 Gemini API Key 略有不同
        // 如果你使用的是 Google AI Studio 的 API Key,通常使用以下 Endpoint:
       val url = "$BASE_URL/models/imagen-4.0-fast-generate-001:predict?key=$apiKey"
      //  val url = "https://generativelanguage.googleapis.com/v1beta/models/imagen-3:predict?key=$apiKey"

        val request = Request.Builder()
            .url(url)
            .post(requestJson.toRequestBody("application/json".toMediaType()))
            .build()

        // 3. 执行请求
        val response = okHttpClient.newCall(request).execute()
        val responseBody = response.body?.string() ?: throw Exception("Empty response from Imagen")

        if (!response.isSuccessful) {
            throw Exception("Imagen API Error: $responseBody")
        }

        // 4. 解析响应并转换为 Bitmap
        val result = Gson().fromJson(responseBody, ImagenResponse::class.java)
        val bitmaps = mutableListOf<Bitmap>()

        result.predictions?.forEach { prediction ->
            val imageBytes = Base64.decode(prediction.bytesBase64Encoded, Base64.DEFAULT)
            val bitmap = BitmapFactory.decodeByteArray(imageBytes, 0, imageBytes.size)
            if (bitmap != null) {
                bitmaps.add(bitmap)
            }
        }

        if (bitmaps.isEmpty()) throw Exception("No images generated or parsing failed")

        bitmaps
    }
效果
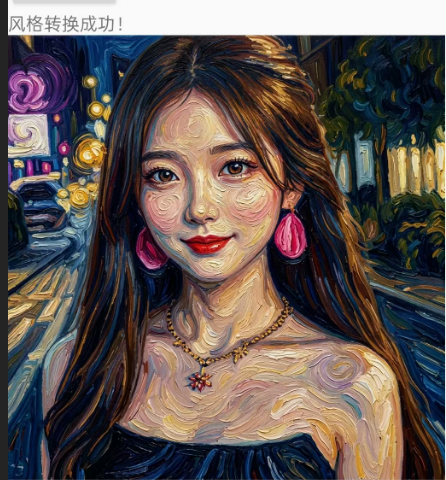
四、实现图片风格化
图像风格化我们可以使用gemini-3.1-flash-image-preview模型来实现,需要注意的是传入的图片不能太大,需要做缩放处理再传入
Kotlin
 /**
     * 使用 Imagen 模型转换图片风格 (Image-to-Image)
     * @param sourceBitmap 原图 Bitmap
     * @param stylePrompt 目标风格描述词,例如 "Van Gogh style"
     * @return 转换风格后的 Bitmap
     */
    suspend fun transformImageStyle(
        sourceBitmap: Bitmap,
        stylePrompt: String
    ): Bitmap = withContext(Dispatchers.IO) {

        // 1. 压缩并转 Base64
        val scaledBitmap = scaleBitmapDown(sourceBitmap, 1024)
        val baos = ByteArrayOutputStream()
        scaledBitmap.compress(Bitmap.CompressFormat.JPEG, 85, baos)
        val sourceBase64 = Base64.encodeToString(baos.toByteArray(), Base64.NO_WRAP)
        if (scaledBitmap != sourceBitmap) scaledBitmap.recycle()

        // 2. 构造 generateContent 格式的 JSON
        // 注意:这里的 URL 结尾是 generateContent 而不是 predict
        val rootJson = JSONObject().apply {
            val contents = JSONArray().apply {
                put(JSONObject().apply {
                    val parts = JSONArray().apply {
                        // 指令:要求模型根据原图生成特定风格的新图
                        put(JSONObject().put("text", "请参考这张图片的构图和内容,将其转换为${stylePrompt}风格。请直接输出处理后的图片数据。"))
                        put(JSONObject().apply {
                            put("inlineData", JSONObject().apply {
                                put("mimeType", "image/jpeg")
                                put("data", sourceBase64)
                            })
                        })
                    }
                    put("parts", parts)
                })
            }
            put("contents", contents)

            // 设置参数:生图任务建议温度低一点,保持稳定性
            put("generationConfig", JSONObject().apply {
                put("temperature", 0.4)
            })
        }

        // 3. 构建请求 - 切换模型到支持图进图出的 Nano Banana 2
        val url = "$BASE_URL/models/gemini-3.1-flash-image-preview:generateContent?key=$apiKey"

        val request = Request.Builder()
            .url(url)
            .post(rootJson.toString().toRequestBody("application/json".toMediaType()))
            .build()

        // 4. 执行请求
        val response = okHttpClient.newCall(request).execute()
        val responseBody = response.body?.string() ?: throw Exception("Empty response")

        if (!response.isSuccessful) {
            throw Exception("API Error: $responseBody")
        }

        // 5. 解析多模态响应
        // 注意:generateContent 返回的结构与 predict 不同
        val responseJson = JSONObject(responseBody)
        val candidates = responseJson.optJSONArray("candidates")
        val firstCandidate = candidates?.optJSONObject(0)
        val parts = firstCandidate?.optJSONObject("content")?.optJSONArray("parts")
        Log.d(TAG, "transformImageStyle responseJson: $responseJson")
        // 遍历 Part 寻找返回的 inlineData (图片)
        var resultBase64: String? = null
        if (parts != null) {
            for (i in 0 until parts.length()) {
                val part = parts.optJSONObject(i)
                val inlineData = part?.optJSONObject("inlineData")
                if (inlineData != null) {
                    resultBase64 = inlineData.optString("data")
                    break
                }
            }
        }

        if (resultBase64.isNullOrEmpty()) {
            throw Exception("模型没有返回处理后的图片,请检查模型能力或 Prompt。")
        }

        // 6. 解码为 Bitmap
        val imageBytes = Base64.decode(resultBase64, Base64.DEFAULT)
        BitmapFactory.decodeByteArray(imageBytes, 0, imageBytes.size) ?: throw Exception("Decode failed")
    }
    /**
     * 辅助函数:将 Bitmap 等比例缩放到指定最大尺寸以下,防止 Base64 过大
     */
    private fun scaleBitmapDown(bitmap: Bitmap, maxDimension: Int): Bitmap {
        val width = bitmap.width
        val height = bitmap.height

        if (width <= maxDimension && height <= maxDimension) {
            return bitmap
        }

        val aspectRatio = width.toFloat() / height.toFloat()
        val newWidth: Int
        val newHeight: Int

        if (width > height) {
            newWidth = maxDimension
            newHeight = (maxDimension / aspectRatio).toInt()
        } else {
            newHeight = maxDimension
            newWidth = (maxDimension * aspectRatio).toInt()
        }

        return bitmap.scale(newWidth, newHeight)
    }
原图

实现效果
五、实现抠图
我们可以使用gemini-3.1-flash-image-preview模型实现抠图功能
Kotlin
 /**
     * 使用 Gemini 3.1 Flash Image (Nano Banana 2) 实现智能抠图 (主体提取)
     * @param sourceBitmap 原图 Bitmap
     * @return 提取出的前景主体 Bitmap
     */
    suspend fun extractForeground(
        sourceBitmap: Bitmap
    ): Bitmap = withContext(Dispatchers.IO) {

        // 1. [关键步骤] 压缩并转 Base64 (NO_WRAP 必不可少)
        // 抠图通常需要较高细节,可以将最大尺寸设为 1024 或保持原大
        val scaledBitmap = scaleBitmapDown(sourceBitmap, 1024)
        val baos = ByteArrayOutputStream()
        // 使用 JPEG 压缩上传,节省流量
        scaledBitmap.compress(Bitmap.CompressFormat.JPEG, 90, baos)
        val sourceBase64 = Base64.encodeToString(baos.toByteArray(), Base64.NO_WRAP)
        if (scaledBitmap != sourceBitmap) scaledBitmap.recycle()

        // 2. [关键修改] 构建针对抠图任务的多模态请求体
        val extractionPrompt = "请分析这张图片,准确识别并提取出图中的主要前景主体(例如人、动物、物体)。将主体之外的所有背景区域替换为纯白色(或者是透明背景,如果支持)。请直接输出处理后的图片数据。"

        val generateRequest = GeminiGenerateRequest(
            contents = listOf(
                ContentItem(
                    parts = listOf(
                        // Prompt Part
                        GeminiPart(text = extractionPrompt),
                        // Image Part
                        GeminiPart(inlineData = InlineData(data = sourceBase64))
                    )
                )
            )
        )
        val requestJson = Gson().toJson(generateRequest)

        // 3. 构建 Request - 使用专用网络 URL 结尾:generateContent
        val url = "$BASE_URL/models/gemini-3.1-flash-image-preview:generateContent?key=$apiKey"

        val request = Request.Builder()
            .url(url)
            .post(requestJson.toRequestBody("application/json".toMediaType()))
            .build()

        // 4. 执行请求
        val response = okHttpClient.newCall(request).execute()
        val responseBody = response.body?.string() ?: throw Exception("Empty response from API")

        if (!response.isSuccessful) {
            throw Exception("API Error: $responseBody")
        }

        // 5. [关键修改] 解析 generateContent 响应结构
        val result = Gson().fromJson(responseBody, GeminiGenerateResponse::class.java)
        val parts = result.candidates?.firstOrNull()?.content?.parts

        // 寻找返回的图片 Part
        var resultBase64: String? = null
        parts?.forEach { part ->
            if (part.inlineData != null) {
                resultBase64 = part.inlineData.data
                return@forEach
            }
        }

        if (resultBase64.isNullOrEmpty()) {
            throw Exception("API 没有返回抠图结果,可能主体识别失败。")
        }

        // 6. 解码为 Bitmap
        val imageBytes = Base64.decode(resultBase64, Base64.DEFAULT)
        val resultBitmap = BitmapFactory.decodeByteArray(imageBytes, 0, imageBytes.size)
            ?: throw Exception("Failed to decode result image")

        resultBitmap
    }
实现效果

六、扩展功能
除上述功能外,Gemini 模型还支持:
-
视频生成:基于图文描述生成短视频内容
-
多模态理解:同时分析图像、文本、视频等多种输入
-
视觉问答:基于图片内容进行问答交互
你可以根据实际需求进一步探索和扩展。