文章目录
- [什么是 Grafana](#什么是 Grafana)
- 准备
- authentik配置
- [Grafana 配置](#Grafana 配置)
-
- Docker
- Standalone
- Helm
- 角色映射
- [Grafana 配置注意事项](#Grafana 配置注意事项)
什么是 Grafana
Grafana 是一个多平台开源分析和交互式可视化网络应用程序。当连接到支持的数据源时,它可以提供网络图表、图形和警报。企业版 Grafana 也提供附加功能。它可以通过插件系统进行扩展。
准备
在本指南中,使用了以下占位符:
grafana.company 是 Grafana 安装的 FQDN。
authentik.company 是 authentik 安装的 FQDN。
authentik配置
为了支持将 Grafana 与 authentik 集成,您需要在 authentik 中创建一个应用程序/提供程序对。
-
作为管理员登录到 authentik 并打开 authentik 管理员界面。
-
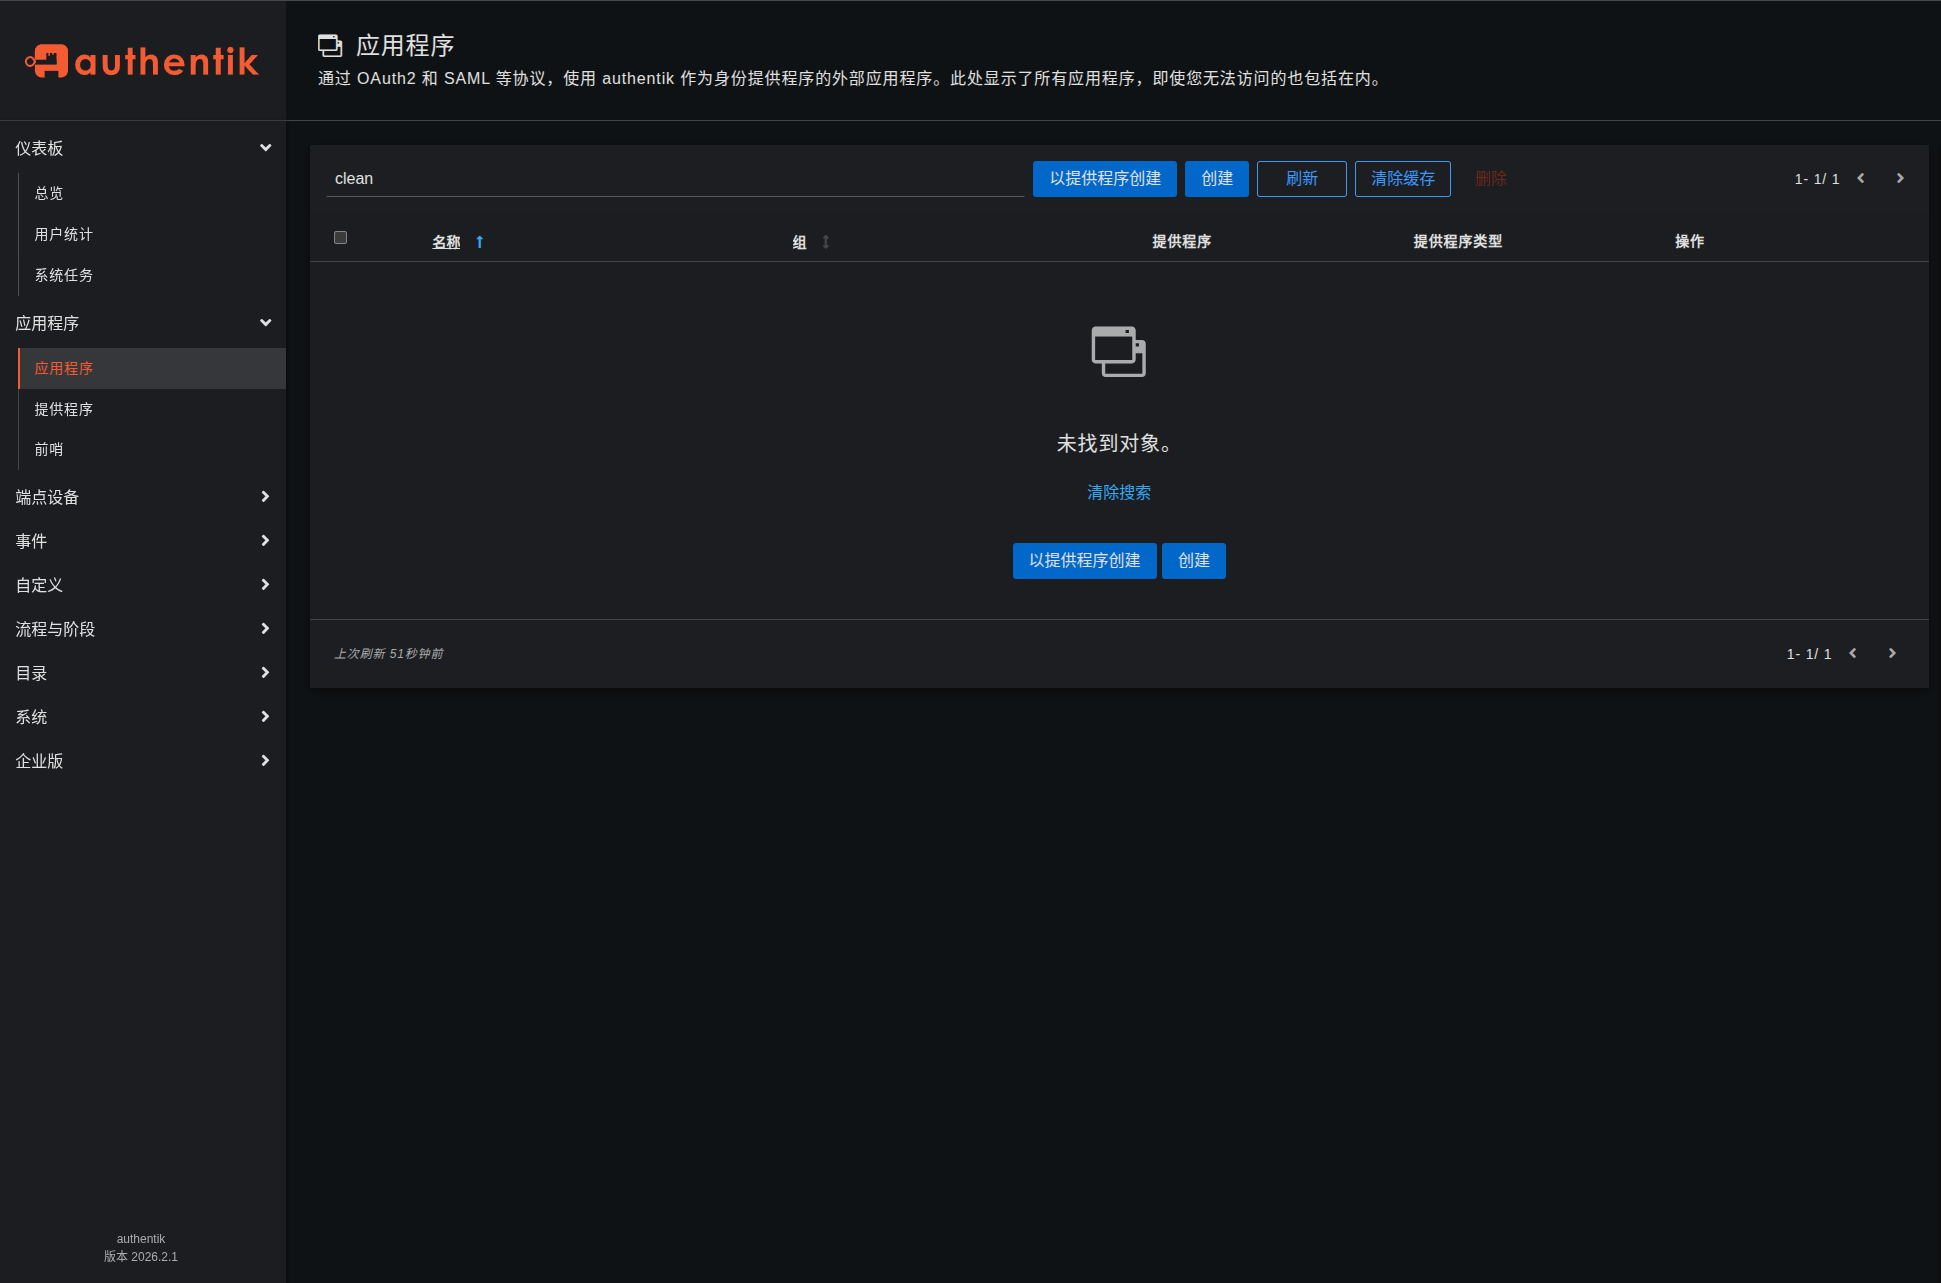
导航至
应用程序 > 应用程序,然后单击使用提供程序创建以创建应用程序和提供程序对。 (或者,您可以先单独创建提供程序,然后创建应用程序并将其连接到提供程序。)
-
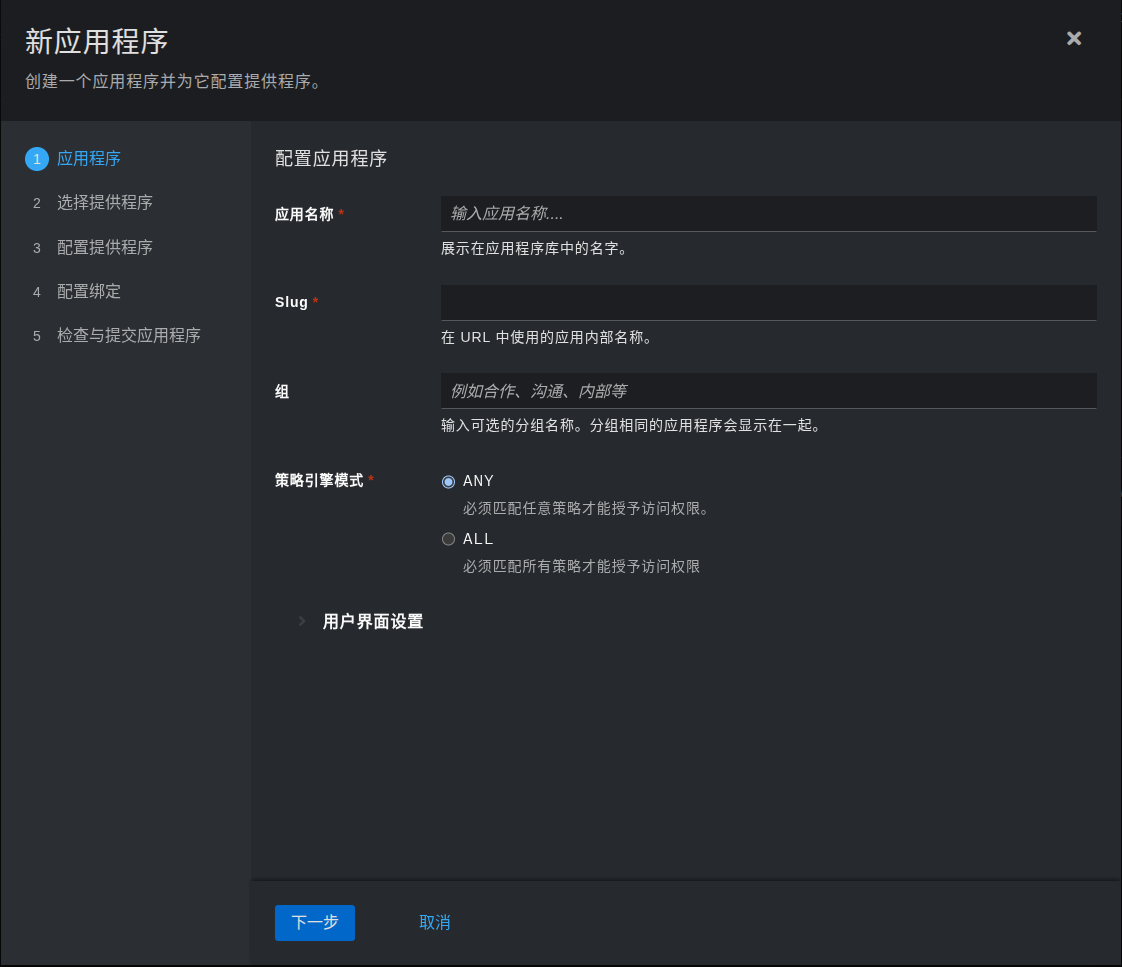
应用程序 :提供一个描述性名称、一个可选的应用程序类型组、策略引擎模式和可选的 UI 设置。
应用名称:Grafana, Slug会自动带出:grafana
-
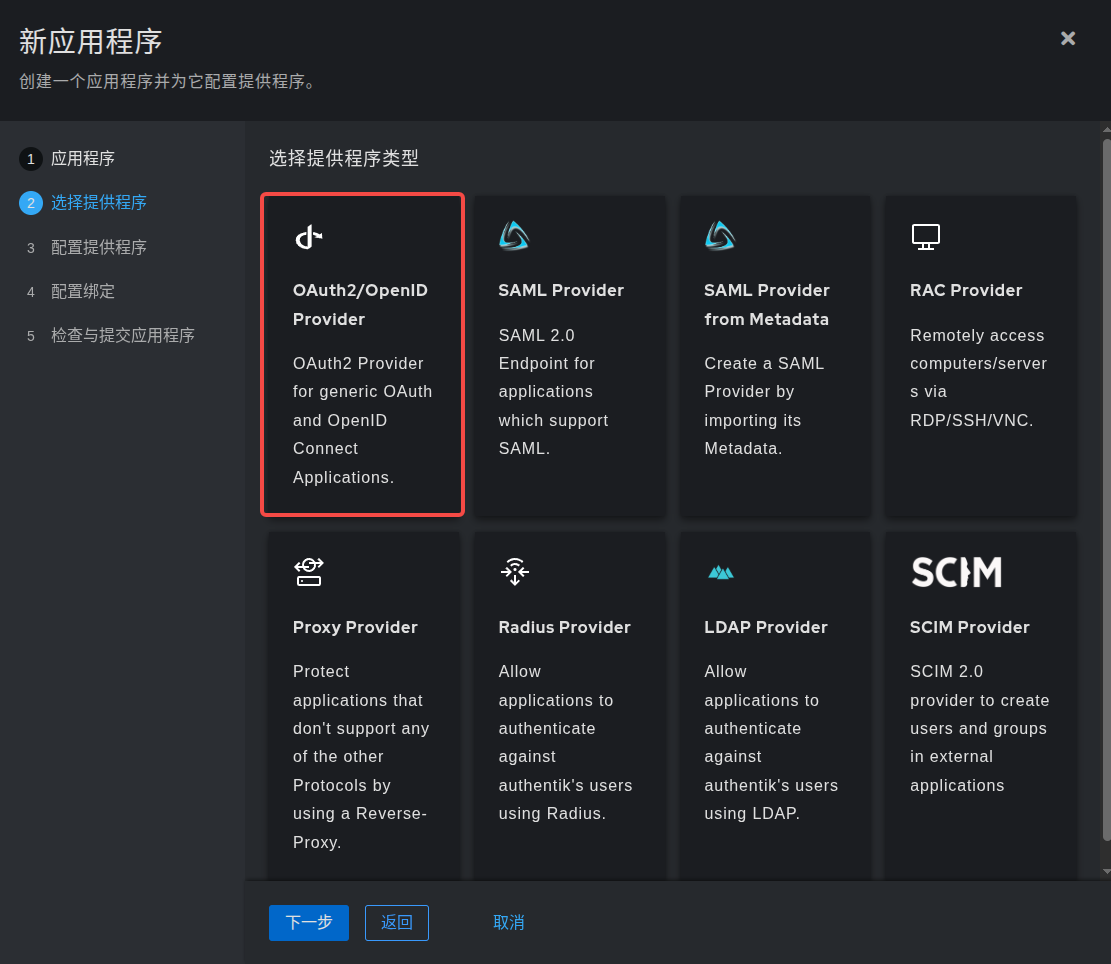
选择提供者类型 :选择
OAuth2/OpenID Connect作为提供者类型。
-
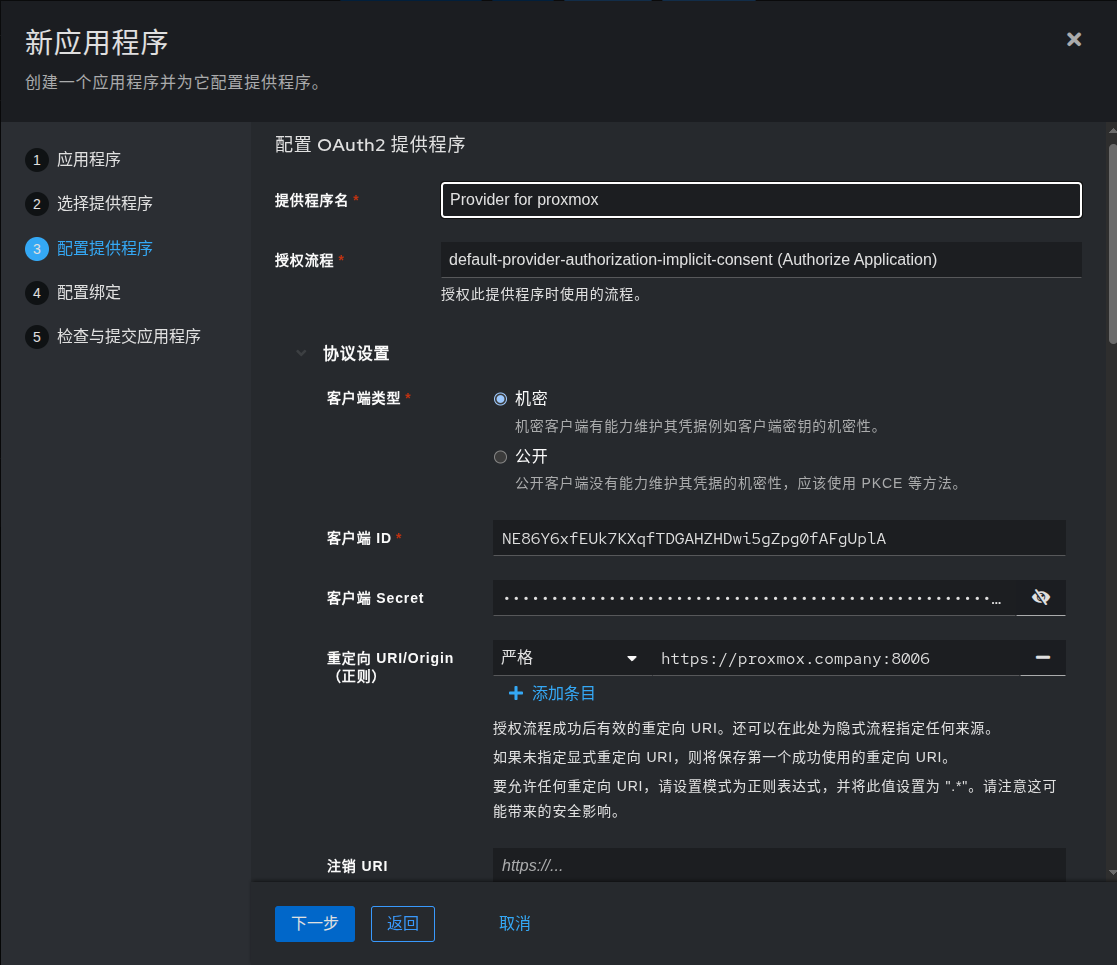
配置提供者 :提供名称(或接受自动提供的名称)、用于此提供者的授权流程以及以下必需配置。
注意客户端 ID、 客户端密钥和 slug 值,因为它们将在稍后需要。设置一个 Strict 重定向 URI 为 https://grafana.company/login/generic_oauth 。
将注销 URI 设置为 https://grafana.company/logout 。
将"注销方式"设置为"前端通道"。
选择任何可用的签署密钥。
确保禁用加密。
-
配置绑定 (可选):您可以创建一个 绑定 (策略、组或用户)来管理用户"我的应用程序"页面上应用程序的列表和访问权限。
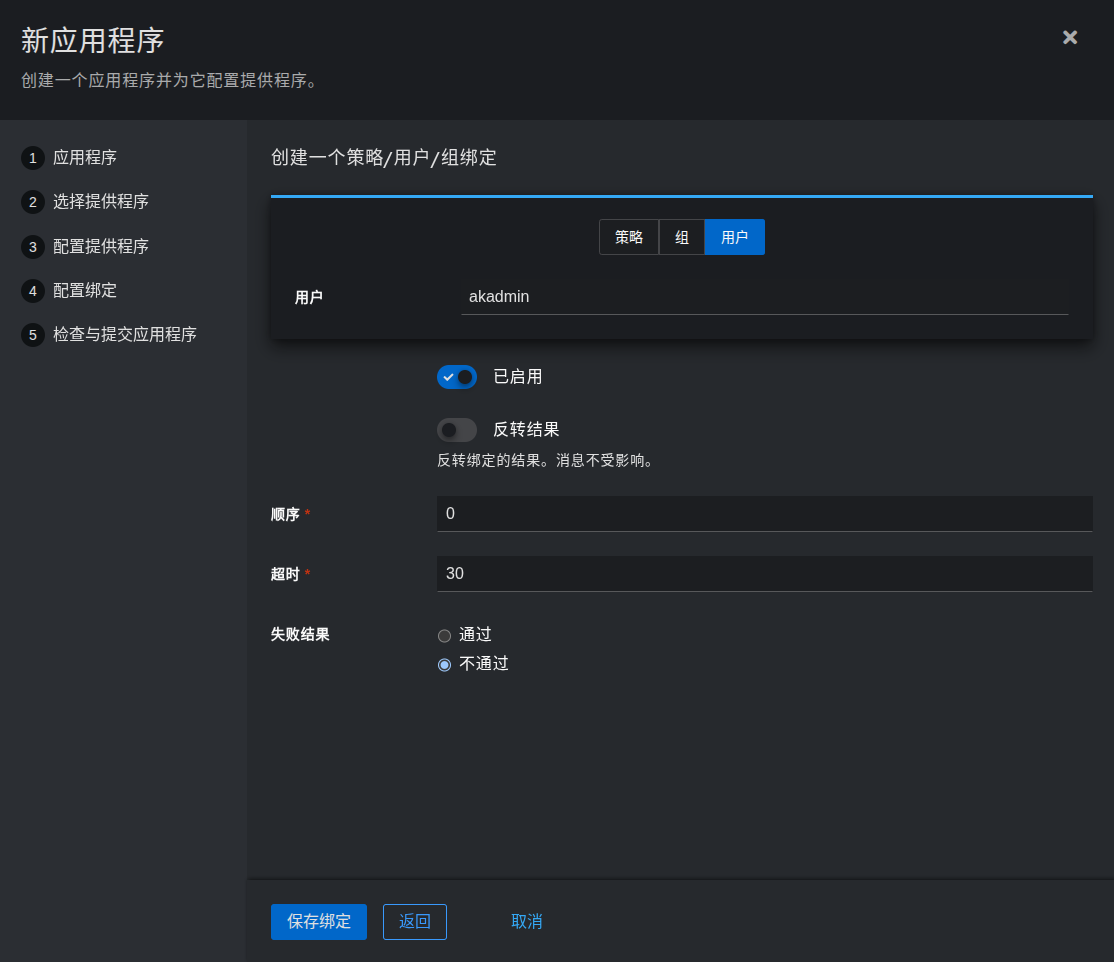
-
-
单击提交以保存新应用程序和提供程序。
Grafana 配置
Docker
如果您的 Grafana 实例在 Docker 中运行,请设置以下环境变量:
yaml
environment:
    GF_AUTH_GENERIC_OAUTH_ENABLED: "true"
    GF_AUTH_GENERIC_OAUTH_NAME: "authentik"
    GF_AUTH_GENERIC_OAUTH_CLIENT_ID: "<Client ID from above>"
    GF_AUTH_GENERIC_OAUTH_CLIENT_SECRET: "<Client Secret from above>"
    GF_AUTH_GENERIC_OAUTH_SCOPES: "openid profile email"
    GF_AUTH_GENERIC_OAUTH_AUTH_URL: "https://authentik.company/application/o/authorize/"
    GF_AUTH_GENERIC_OAUTH_TOKEN_URL: "https://authentik.company/application/o/token/"
    GF_AUTH_GENERIC_OAUTH_API_URL: "https://authentik.company/application/o/userinfo/"
    GF_AUTH_SIGNOUT_REDIRECT_URL: "https://authentik.company/application/o/<application_slug>/end-session/"
    # Optionally enable auto-login (bypasses Grafana login screen)
    GF_AUTH_OAUTH_AUTO_LOGIN: "true"
    # Optionally map user groups to Grafana roles
    GF_AUTH_GENERIC_OAUTH_ROLE_ATTRIBUTE_PATH: "contains(groups[*], 'Grafana Admins') && 'Admin' || contains(groups[*], 'Grafana Editors') && 'Editor' || 'Viewer'"
    # Required if Grafana is running behind a reverse proxy
    GF_SERVER_ROOT_URL: "https://grafana.company"
Standalone
如果您使用配置文件,必须设置以下选项:
bash
[auth]
signout_redirect_url = https://authentik.company/application/o/<application_slug>/end-session/
# Optionally enable auto-login
oauth_auto_login = true

[auth.generic_oauth]
name = authentik
enabled = true
client_id = <Client ID from above>
client_secret = <Client Secret from above>
scopes = openid email profile
auth_url = https://authentik.company/application/o/authorize/
token_url = https://authentik.company/application/o/token/
api_url = https://authentik.company/application/o/userinfo/
# Optionally map user groups to Grafana roles
role_attribute_path = contains(groups, 'Grafana Admins') && 'Admin' || contains(groups, 'Grafana Editors') && 'Editor' || 'Viewer'
Helm
如果您使用的是 Helm 的 values.yaml 文件,您必须设置以下选项:
yaml
grafana.ini:
    auth:
        signout_redirect_url: "https://authentik.company/application/o/<application_slug>/end-session/"
        oauth_auto_login: true
    auth.generic_oauth:
        name: authentik
        enabled: true
        client_id: "<Client ID from above>"
        client_secret: "<Client Secret from above>"
        scopes: "openid profile email"
        auth_url: "https://authentik.company/application/o/authorize/"
        token_url: "https://authentik.company/application/o/token/"
        api_url: "https://authentik.company/application/o/userinfo/"
        # Optionally map user groups to Grafana roles
        role_attribute_path: contains(groups, 'Grafana Admins') && 'Admin' || contains(groups, 'Grafana Editors') && 'Editor' || 'Viewer'
角色映射
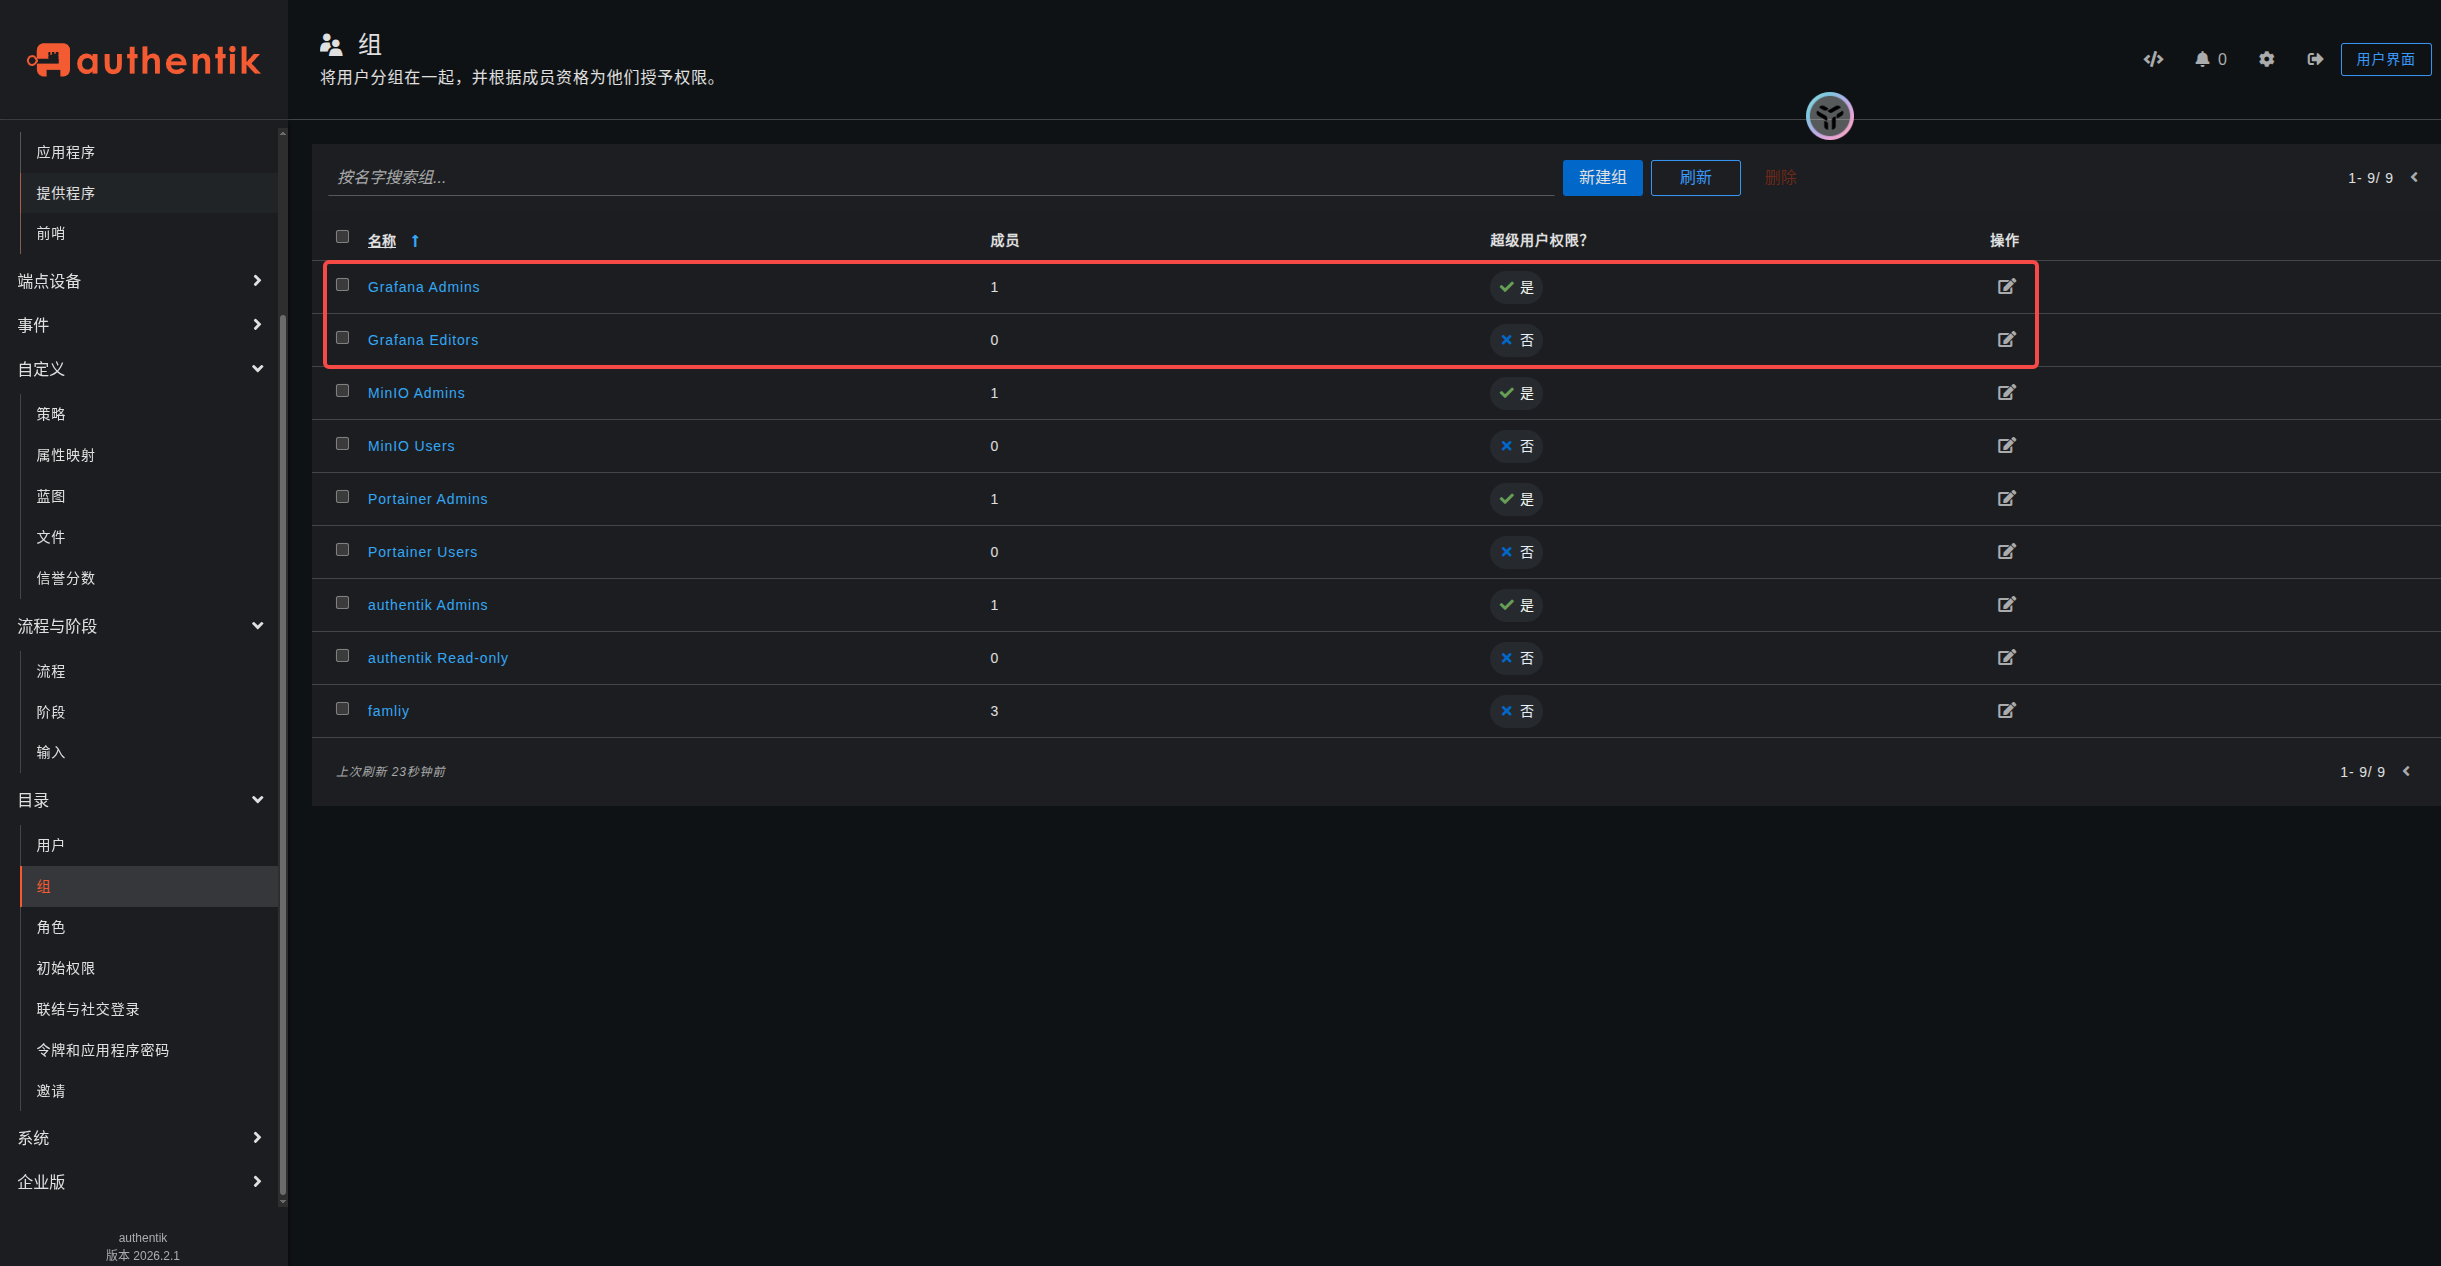
在上面的配置中,您可以看到一个角色映射示例。登录时,此配置会查看当前用户所属的组。如果找到指定的组名称之一,用户将被授予在 Grafana 中的相应角色。
在上面的示例中,指定的组名称之一是"Grafana Admins"。如果用户是该组的成员,则在 Grafana 中授予"管理员"角色。如果用户不是"Grafana Admins"组的成员,它会跳到查看用户是否是"Grafana 编辑器"组的成员。如果是,它会授予"编辑器"角色。最后,如果用户未被发现是这些组中的任何一个成员,则会返回授予"查看者"角色。
有关组/角色映射的更多信息,请参见 grafana 的文档 。
Grafana 配置注意事项
为了确保重定向在 Grafana 中正常工作,请确保配置中的 root_url 正确地反映用户通过代理访问 Grafana 的方式。例如,如果您的 Grafana 实例位于代理后面,且通过代理访问的是 https://grafana.company,则将 root_url 设置为 https://grafana.company。这可确保 OAuth 和其他重定向使用正确的 URL,例如 https://grafana.company/login/generic_oauth ,而不是默认使用诸如 localhost:3000。
如果您在第一次使用 OAuth 登录到 grafana 时遇到"user does not belong to org" 错误,请检查您是否有 ID 为"1"的组织,如果没有,请在 grafana 配置文件中添加以下内容:
bash
[users]
auto_assign_org = true
auto_assign_org_id = <id-of-your-default-organization>