文章目录
- 工程创建
- 类的样式绑定
- [vue3 引用element plus](#vue3 引用element plus)
-
- [一、安装 Element Plus](#一、安装 Element Plus)
- [二、在项目中引入 Element Plus](#二、在项目中引入 Element Plus)
- 三、使用布局组件搭建页面
- [四、基于布局1-spring boot完善后端](#四、基于布局1-spring boot完善后端)
-
- 前端
- [安装 Element Plus](#安装 Element Plus)
- 安装axios
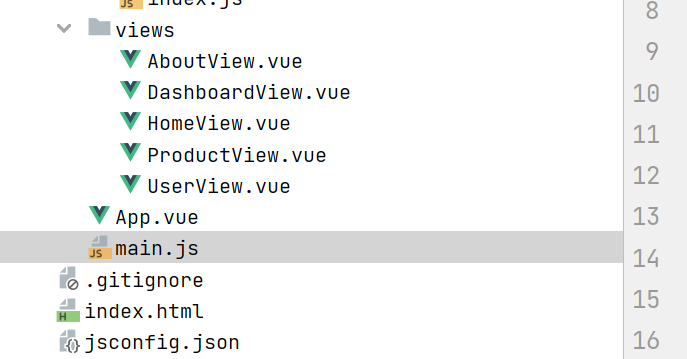
- App.vue
- DashboardView.vue
- ProductView.vue
- UserView.vue
- 配置路由
- [在index.js 挂在路由](#在index.js 挂在路由)
- 后端
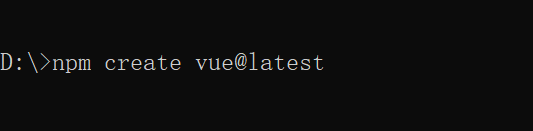
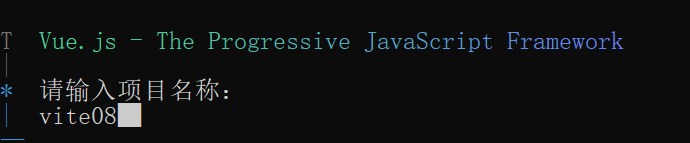
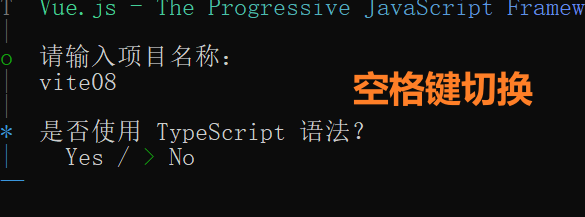
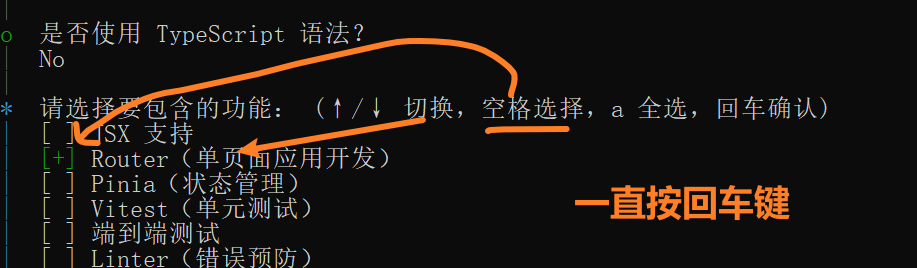
工程创建
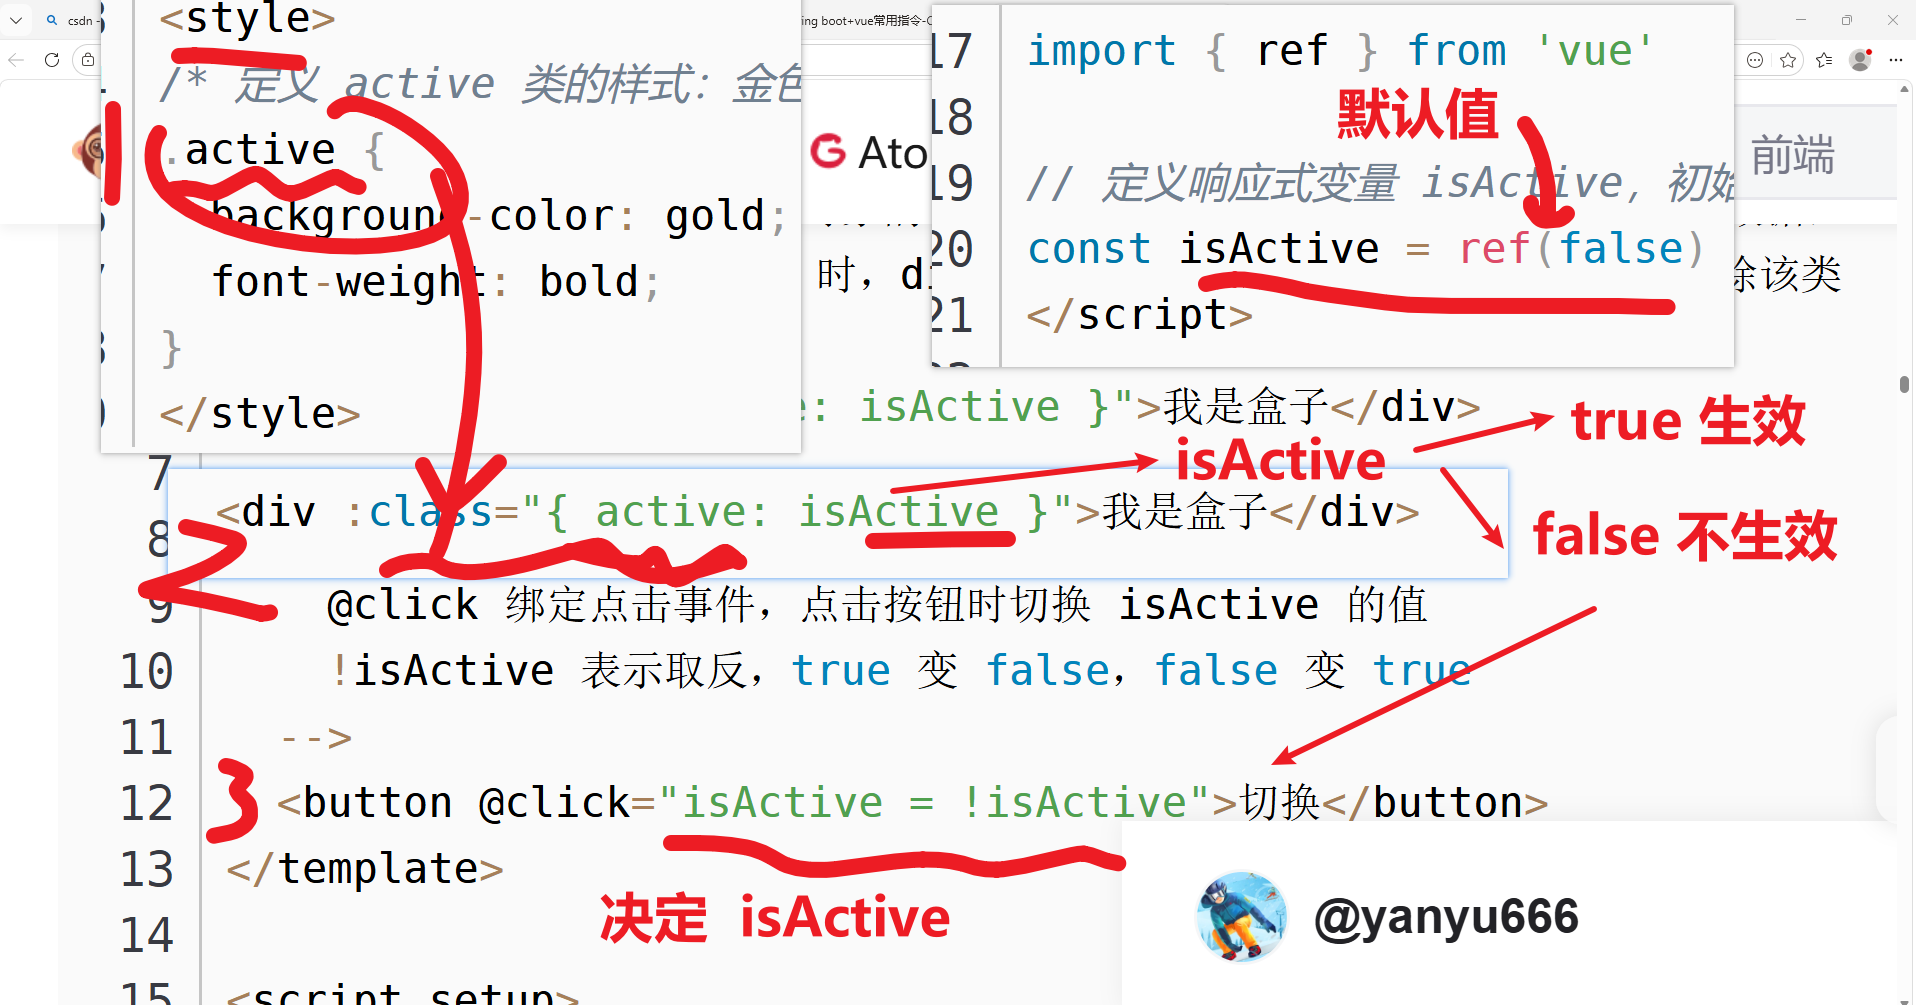
类的样式绑定
vue3 引用element plus
官网: https://element-plus.org/zh-CN/在 Vue 3 项目中集成 Element Plus 并实现页面布局,主要分为三步:安装 → 引入 → 使用布局组件。下面是完整流程:
一、安装 Element Plus
在项目根目录下执行:
bash
复制下载
javascript
npm install element-plus --save
# 或
yarn add element-plus
如果需要使用图标,还需安装图标库:
bash
复制下载
javascript
npm install @element-plus/icons-vue二、在项目中引入 Element Plus
打开 src/main.js(或 main.ts),进行全局引入:
javascript
复制下载
javascript
import { createApp } from 'vue'
import App from './App.vue'
import ElementPlus from 'element-plus'
import 'element-plus/dist/index.css'  // 引入样式
// 如果使用图标
import * as ElementPlusIconsVue from '@element-plus/icons-vue'

const app = createApp(App)

// 全局注册 Element Plus
app.use(ElementPlus)

// 全局注册图标组件(可选)
for (const [key, component] of Object.entries(ElementPlusIconsVue)) {
    app.component(key, component)
}

app.mount('#app')
三、使用布局组件搭建页面
布局1
javascript
<template>
<!--
el-container:Element Plus 布局容器,用于构建页面的整体框架
class="app":添加自定义类名,用于样式控制
-->
<el-container class="app">
<!-- ==================== 侧边栏区域 ==================== -->
<!--
el-aside:侧边栏组件,通常用于放置导航菜单
:width:动态绑定宽度属性
- 当 isCollapse 为 true(折叠状态):宽度 64px(只显示图标)
- 当 isCollapse 为 false(展开状态):宽度 200px(显示图标+文字)
-->
<el-aside class="sidebar" :width="isCollapse ? '64px' : '200px'">
<!-- Logo 区域 -->
<!--
isCollapse ? 'M' : '管理系统'
- 折叠时显示简写 "M"
- 展开时显示完整文字 "管理系统"
-->
<div class="logo">{{ isCollapse ? 'M' : '管理系统' }}</div>
<!--
el-menu:导航菜单组件
:collapse="isCollapse":控制菜单的折叠/展开状态
:collapse-transition="false":禁用折叠/展开时的过渡动画(让切换更干脆)
router:启用路由模式,点击菜单项时会自动调用 router.push() 进行路由跳转
-->
<el-menu :collapse="isCollapse" :collapse-transition="false" router>
<!-- 仪表盘菜单项 -->
<!--
el-menu-item:菜单项组件
index="/dashboard":菜单项的唯一标识,同时作为路由跳转的路径
-->
<el-menu-item index="/dashboard">
<!-- el-icon:Element Plus 图标容器,用于包裹图标组件 -->
<el-icon>
<DataLine /> <!-- 数据线图标,代表仪表盘/数据统计 -->
</el-icon>
<span>仪表盘</span> <!-- 菜单文字 -->
</el-menu-item>
<!-- 用户管理菜单项 -->
<el-menu-item index="/user">
<el-icon>
<User /> <!-- 用户图标,代表用户管理 -->
</el-icon>
<span>用户管理</span>
</el-menu-item>
<!-- 商品管理菜单项 -->
<el-menu-item index="/product">
<el-icon>
<Goods /> <!-- 商品图标,代表商品管理 -->
</el-icon>
<span>商品管理</span>
</el-menu-item>
</el-menu>
</el-aside>
<!-- ==================== 右侧主区域 ==================== -->
<!-- 嵌套 el-container,用于组织头部和内容区 -->
<el-container>
<!-- ==================== 头部导航栏 ==================== -->
<!--
el-header:头部组件,通常放置 logo、用户信息、折叠按钮等
class="header":自定义样式类
-->
<el-header class="header">
<!-- 折叠/展开按钮 -->
<!--
el-icon:图标容器
class="collapse-btn":自定义样式
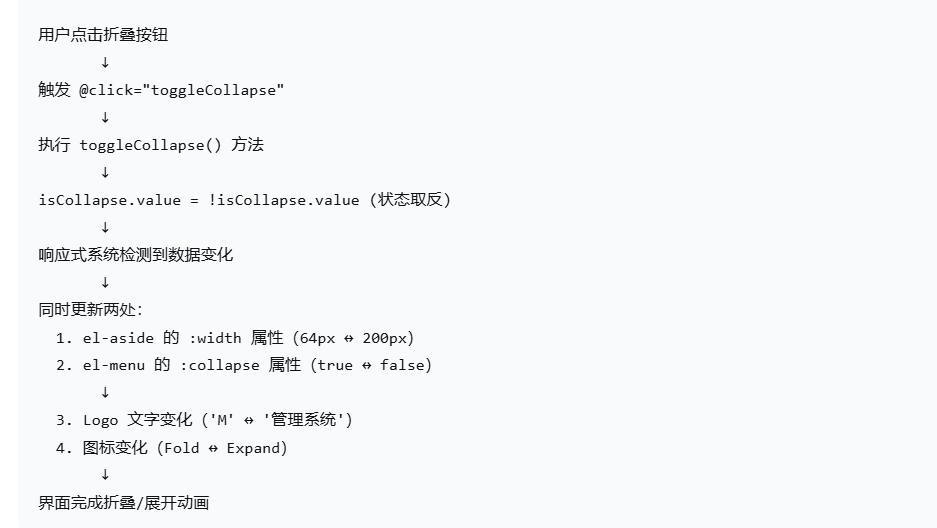
@click="toggleCollapse":点击时触发 toggleCollapse 方法,切换折叠状态
-->
<el-icon class="collapse-btn" @click="toggleCollapse">
<!--
条件渲染:根据 isCollapse 状态显示不同图标
v-if="!isCollapse":未折叠时显示 Fold 图标(表示可以折叠)
v-else:折叠时显示 Expand 图标(表示可以展开)
-->
<Fold v-if="!isCollapse" /> <!-- 折叠图标(两条横线) -->
<Expand v-else /> <!-- 展开图标(类似菜单图标) -->
</el-icon>
<!-- 页面标题 -->
<span class="title">后台管理系统</span>
</el-header>
<!-- ==================== 主要内容区域 ==================== -->
<!--
el-main:主要内容区域组件,页面核心内容显示在这里
class="main-content":自定义样式类
-->
<el-main class="main-content">
<!--
router-view:Vue Router 的路由出口
所有匹配到的路由组件都会渲染在这里
例如:访问 /dashboard 时,仪表盘组件会显示在这个位置
-->
<router-view />
</el-main>
</el-container>
</el-container>
</template>
<!-- ==================== 脚本部分 ==================== -->
<!--
script setup:Vue 3 的组合式 API 语法糖
特点:代码更简洁,组件会自动导出,无需手动 export
-->
<script setup>
// 导入 Vue 的响应式 API
// ref:创建响应式数据,.value 访问和修改
import { ref } from 'vue'
// 导入 Element Plus 图标组件
// DataLine:数据折线图图标(仪表盘用)
// User:用户图标(用户管理用)
// Goods:商品/礼物图标(商品管理用)
// Fold:折叠图标(表示可以折叠侧边栏)
// Expand:展开图标(表示可以展开侧边栏)
import { DataLine, User, Goods, Fold, Expand } from '@element-plus/icons-vue'
/**
* 侧边栏折叠状态(响应式数据)
* ref(false) 表示:
* - 初始值为 false(展开状态)
* - 可以通过 isCollapse.value 读取和修改
* - 数据变化时,所有使用的地方会自动更新
*/
const isCollapse = ref(false)
/**
* 切换侧边栏折叠/展开状态的方法
* 点击折叠按钮时触发
* 作用:将 isCollapse 的值取反(true → false 或 false → true)
*/
const toggleCollapse = () => {
// isCollapse.value:获取当前状态
// !isCollapse.value:取反(true 变 false,false 变 true)
// 然后将新值赋回去,触发界面更新
isCollapse.value = !isCollapse.value
}
</script>
<!-- ==================== 样式部分 ==================== -->
<!--
注意:没有添加 scoped 属性
意味着这些样式是全局的,会影响整个应用
-->
<style>
/* ----- 全局重置样式 ----- */
/*
*:通配符选择器,选中页面所有元素
作用:清除浏览器默认的边距,统一盒模型
*/
* {
margin: 0; /* 清除外边距 */
padding: 0; /* 清除内边距 */
box-sizing: border-box; /* 盒模型:宽度/高度包含 padding 和 border */
}
/* ----- 应用容器 ----- */
.app {
height: 100vh; /* 占满整个视口高度(100% 视口高度) */
}
/* ----- 侧边栏样式 ----- */
.sidebar {
background-color: #001529; /* 深蓝灰色背景(类似 Ant Design Pro) */
transition: width 0.3s; /* 宽度变化时的过渡动画,持续时间 0.3 秒,让折叠更平滑 */
overflow-x: hidden; /* 水平方向溢出隐藏,防止内容超出 */
}
/* ----- Logo 样式 ----- */
.logo {
height: 60px; /* 固定高度 60 像素 */
line-height: 60px; /* 行高等于高度,实现文字垂直居中 */
text-align: center; /* 文字水平居中 */
color: white; /* 文字颜色白色 */
font-size: 18px; /* 字体大小 18 像素 */
font-weight: bold; /* 粗体 */
background-color: #002140; /* 比侧边栏稍深的背景色,形成层次感 */
}
/* ----- 菜单样式 ----- */
.el-menu {
border-right: none; /* 移除菜单右侧边框(Element Plus 默认有边框) */
background-color: #001529; /* 菜单背景色与侧边栏一致 */
}
.el-menu-item {
color: #bfbfbf; /* 菜单项文字颜色:浅灰色 */
}
/*
菜单项激活状态样式
.is-active 是 Element Plus 自动添加的类名
当菜单项的 index 与当前路由匹配时自动添加
*/
.el-menu-item.is-active {
color: #409eff; /* 激活时文字颜色:Element Plus 主题蓝色 */
background-color: #002140; /* 激活时背景色:深蓝色,与 Logo 背景一致 */
}
/* ----- 头部样式 ----- */
.header {
background-color: white; /* 白色背景 */
display: flex; /* 弹性盒布局,让子元素水平排列 */
align-items: center; /* 垂直居中对齐 */
box-shadow: 0 1px 4px rgba(0, 21, 41, 0.08); /* 底部阴影,增加层次感 */
z-index: 1; /* 设置层级,确保头部在内容之上 */
}
/* ----- 折叠按钮样式 ----- */
.collapse-btn {
font-size: 20px; /* 图标大小 */
cursor: pointer; /* 鼠标悬停时显示手型指针,表示可点击 */
margin-right: 16px; /* 右侧外边距,与标题文字保持距离 */
}
/* 折叠按钮悬停效果 */
.collapse-btn:hover {
color: #409eff; /* 鼠标悬停时变成主题蓝色 */
}
/* ----- 标题文字样式 ----- */
.title {
font-size: 18px; /* 字体大小 */
font-weight: 500; /* 字重 500(中等粗细,介于 normal 和 bold 之间) */
}
/* ----- 主要内容区域样式 ----- */
.main-content {
background-color: #f0f2f5; /* 浅灰蓝色背景,与侧边栏形成对比 */
padding: 20px; /* 内边距 20 像素,让内容与边缘保持距离 */
}
</style>路由的配置
javascript
import { createApp } from 'vue'
import App from './App.vue'
import ElementPlus from 'element-plus'
import 'element-plus/dist/index.css' // 引入样式
// 如果使用图标
import * as ElementPlusIconsVue from '@element-plus/icons-vue'
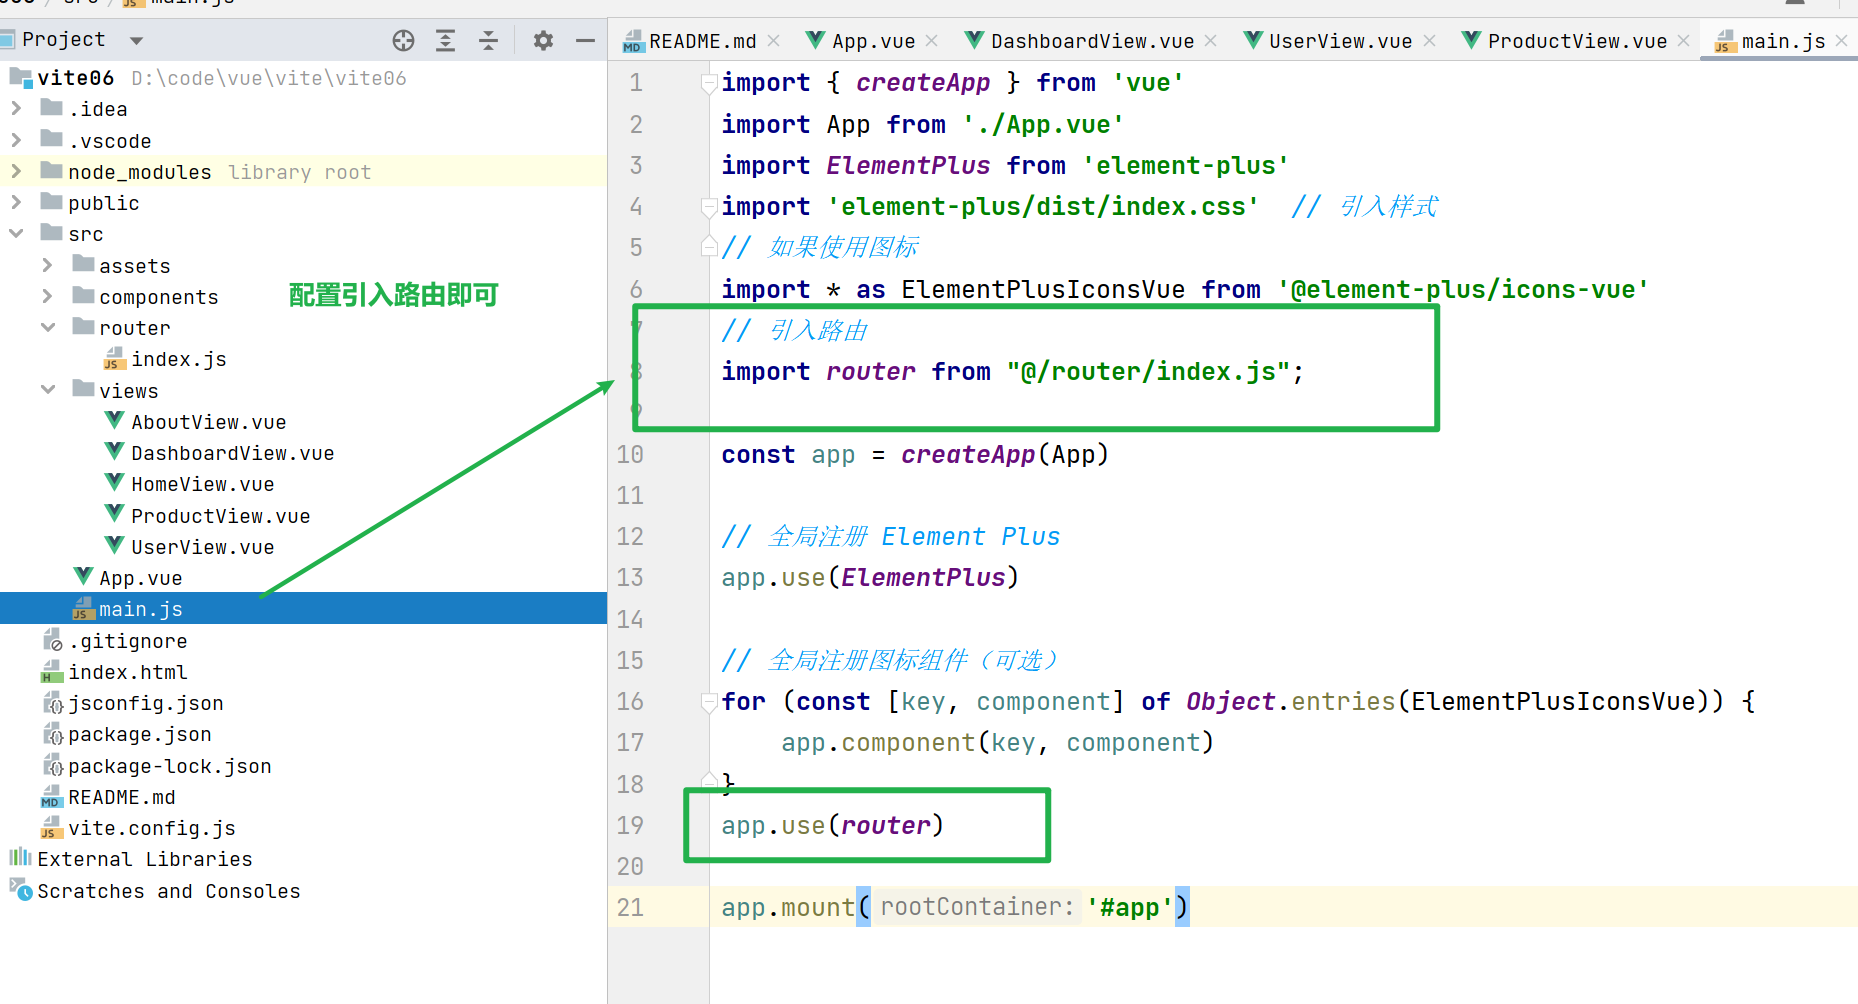
// 引入路由
import router from "@/router/index.js";
const app = createApp(App)
// 全局注册 Element Plus
app.use(ElementPlus)
// 全局注册图标组件(可选)
for (const [key, component] of Object.entries(ElementPlusIconsVue)) {
app.component(key, component)
}
app.use(router)
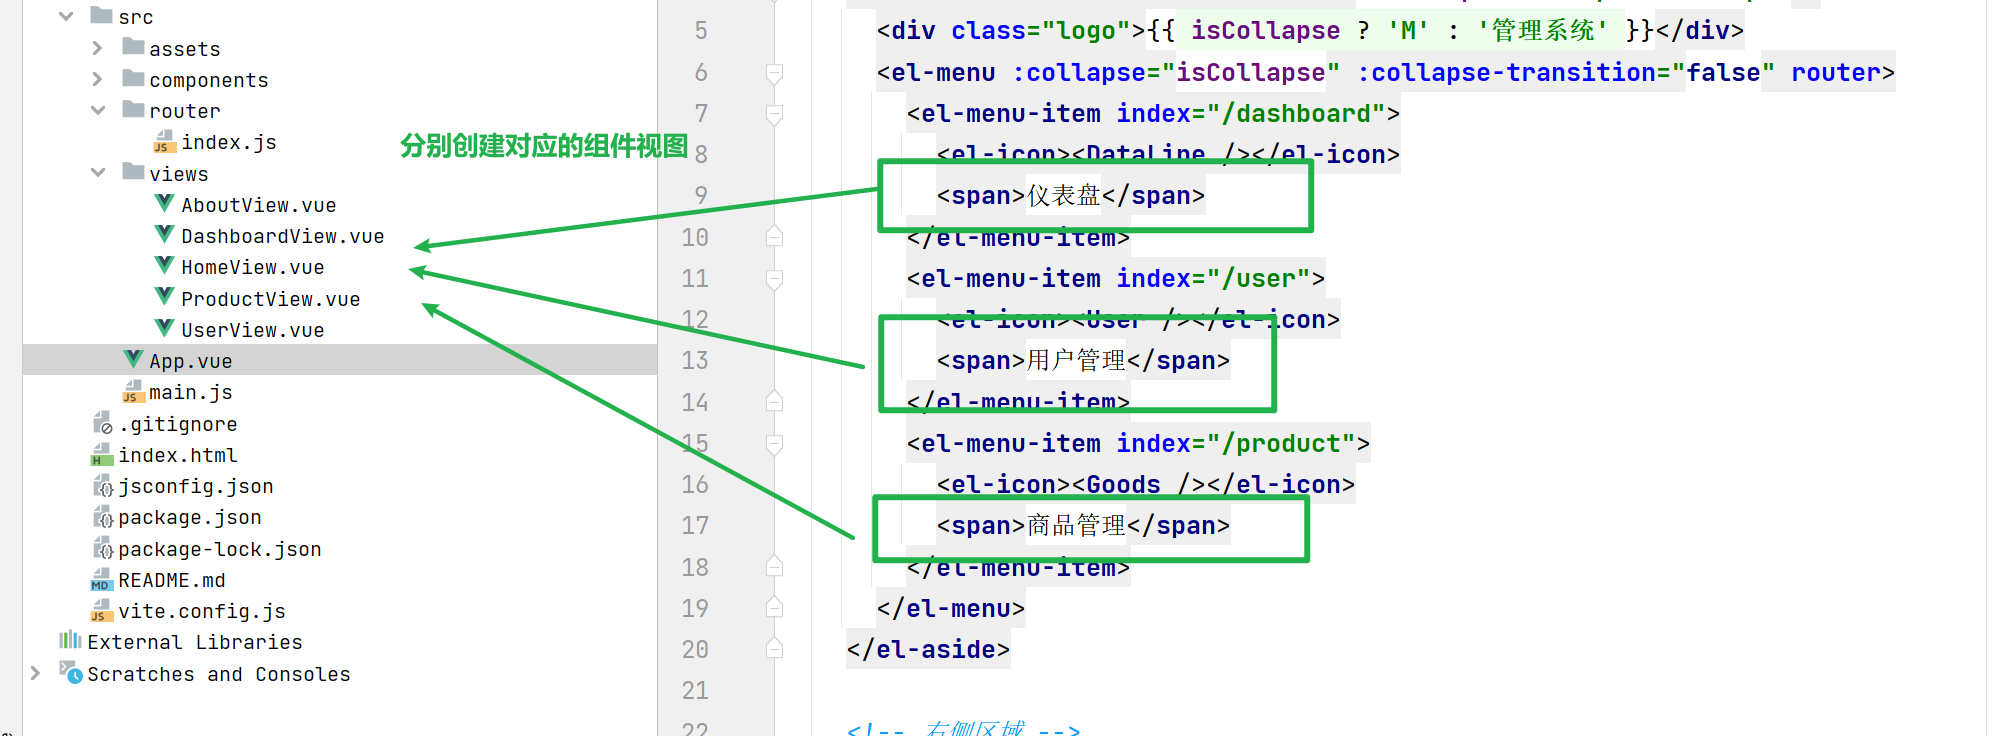
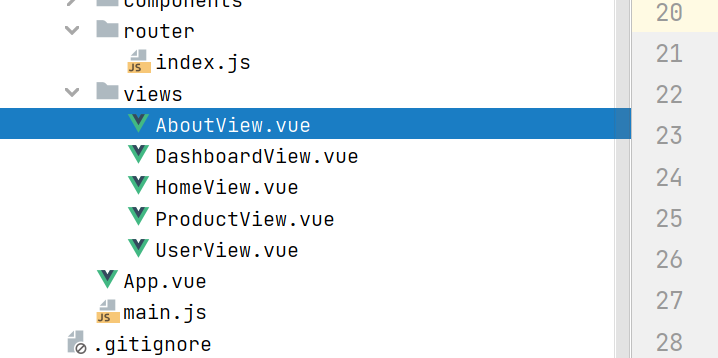
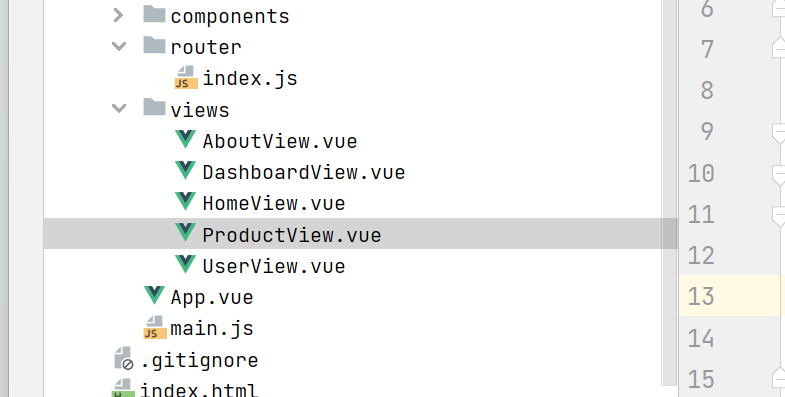
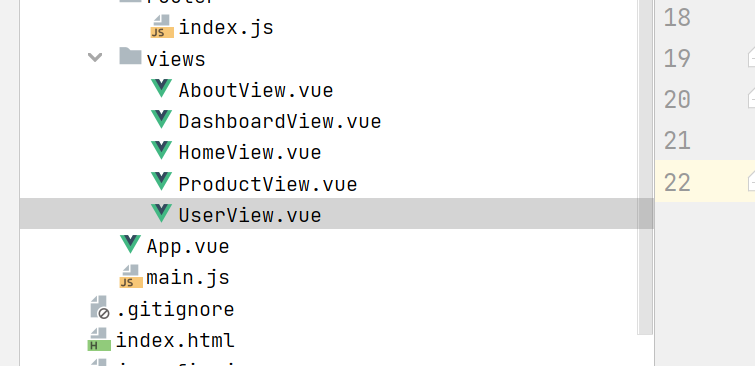
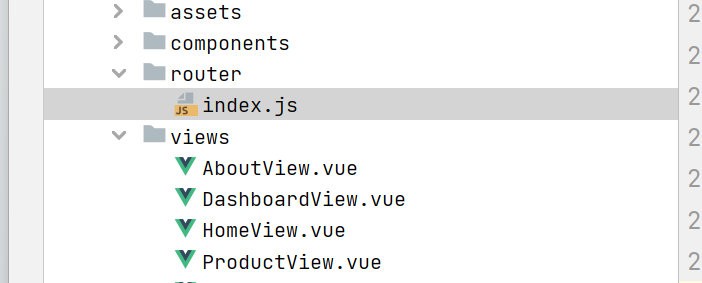
app.mount('#app')创建组件视图
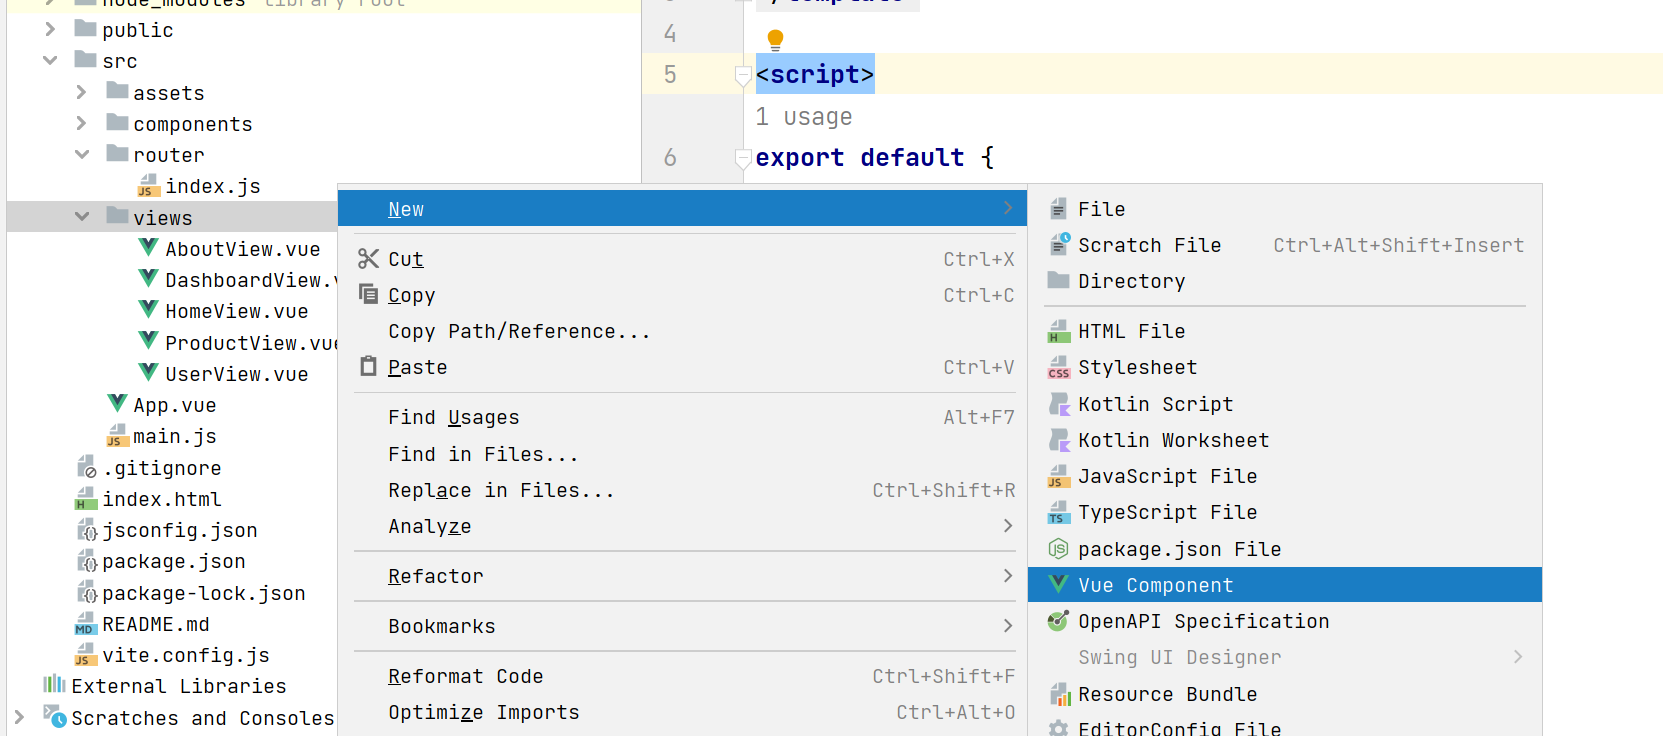
配置router.js

推荐使用该方式
javascript
import { createRouter, createWebHistory } from 'vue-router'
// import HomeView from '../views/HomeView.vue'
const router = createRouter({
history: createWebHistory(import.meta.env.BASE_URL),
routes: [
{
path: '/',
// name: 'home',
// component: HomeView,
redirect:'/dashboard'
},
{
path: '/dashboard',
name: 'dashboard',
// route level code-splitting
// this generates a separate chunk (About.[hash].js) for this route
// which is lazy-loaded when the route is visited.
component: () => import('../views/DashboardView.vue'),
},
{
path: '/user',
name: 'user',
// route level code-splitting
// this generates a separate chunk (About.[hash].js) for this route
// which is lazy-loaded when the route is visited.
component: () => import('../views/UserView.vue'),
},
{
path: '/product',
name: 'product',
// route level code-splitting
// this generates a separate chunk (About.[hash].js) for this route
// which is lazy-loaded when the route is visited.
component: () => import('../views/ProductView.vue'),
},
],
})
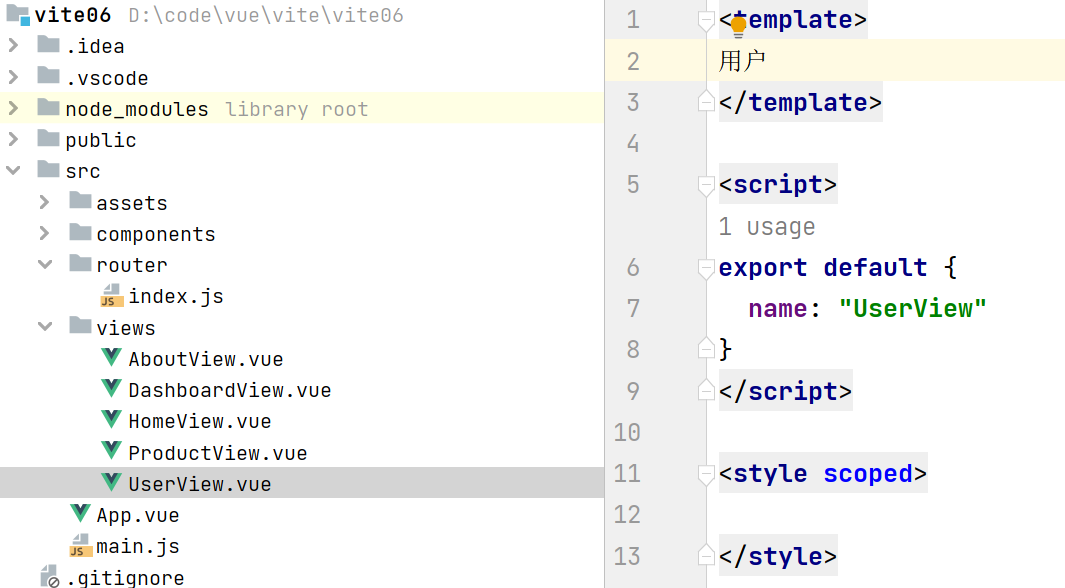
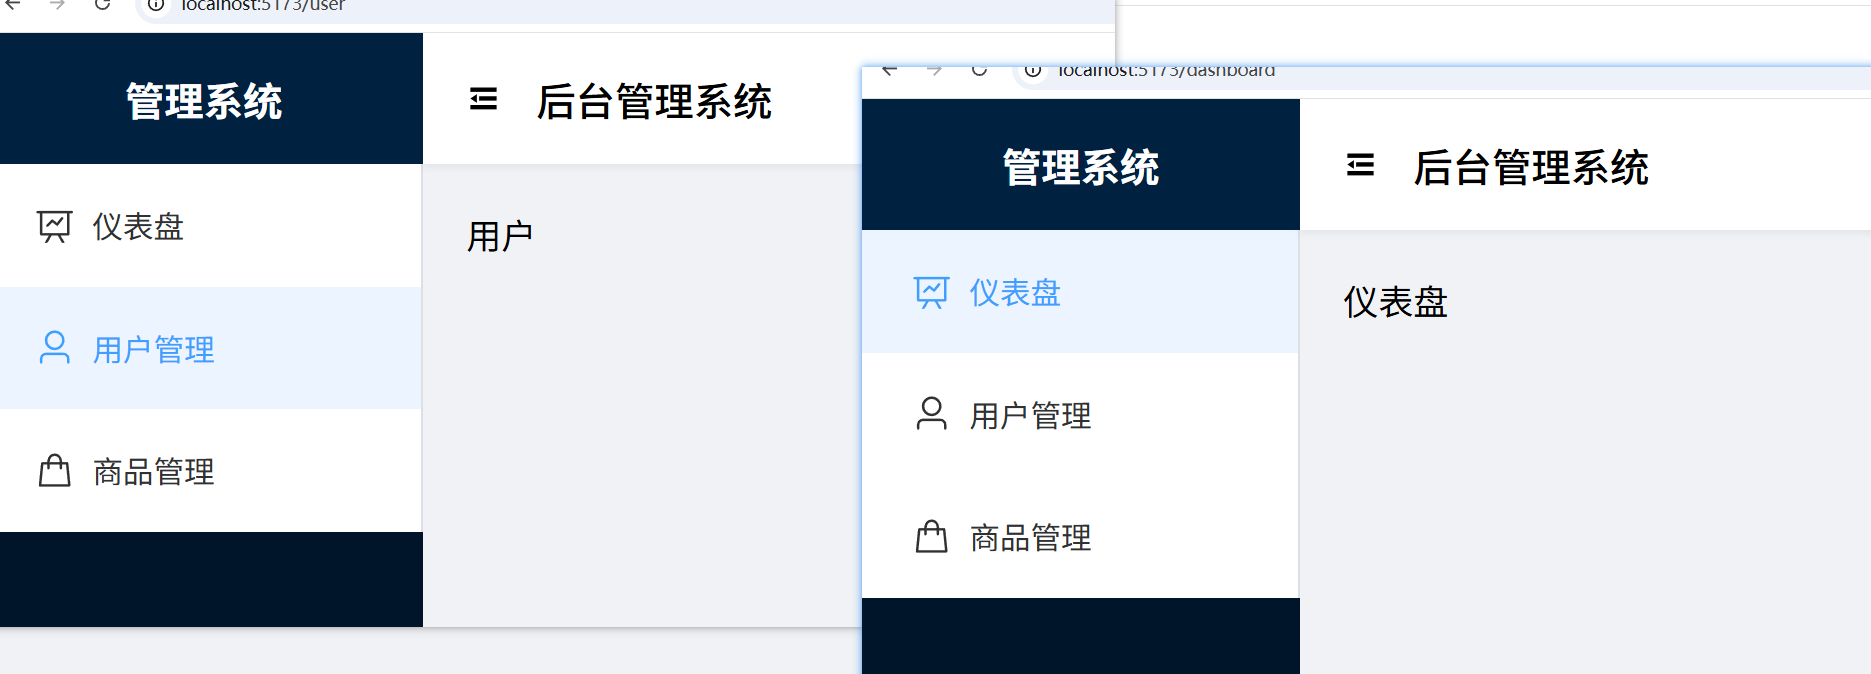
export default router路由测试
在组件视图上写最简单的内容
四、基于布局1-spring boot完善后端
前端
安装 Element Plus
在项目根目录下执行:
bash
复制下载
javascript
npm install element-plus --save
# 或
yarn add element-plus
如果需要使用图标,还需安装图标库:
bash
复制下载
javascript
npm install @element-plus/icons-vue在项目中引入 Element Plus
打开 src/main.js(或 main.ts),进行全局引入:
javascript
复制下载
javascript
import { createApp } from 'vue'
import App from './App.vue'
import ElementPlus from 'element-plus'
import 'element-plus/dist/index.css'  // 引入样式
// 如果使用图标
import * as ElementPlusIconsVue from '@element-plus/icons-vue'

const app = createApp(App)

// 全局注册 Element Plus
app.use(ElementPlus)

// 全局注册图标组件(可选)
for (const [key, component] of Object.entries(ElementPlusIconsVue)) {
    app.component(key, component)
}

app.mount('#app')
安装axios
npm install axios
无须挂在
Vite + Vue 3 项目使用 组合式 API(Composition API) ,axios 作为第三方库,直接导入使用 即可,不需要像 Vue 2 那样通过 Vue.prototype 挂载到全局。
Vue 2 vs Vue 3 对比
表格
| Vue 2 (Options API) | Vue 3 (Composition API) | |
|---|---|---|
| 方式 | Vue.prototype.$http = axios |
import axios from 'axios' |
| 使用 | this.$http.get() |
直接调用 axios.get() |
| 需要挂载? | ✅ 需要 | ❌ 不需要 |
App.vue
javascript
<template>
  <el-container class="app">
    <!-- 侧边栏 -->
    <el-aside class="sidebar" :width="isCollapse ? '64px' : '200px'">
      <div class="logo">{{ isCollapse ? 'M' : '管理系统' }}</div>
      <el-menu :collapse="isCollapse" :collapse-transition="false" router>
        <el-menu-item index="/dashboard">
          <el-icon><DataLine /></el-icon>
          <span>仪表盘</span>
        </el-menu-item>

        <el-menu-item index="/p1">
          <el-icon><User /></el-icon>
          <span>用户管理</span>
        </el-menu-item>
        <el-menu-item index="/product">
          <el-icon><Goods /></el-icon>
          <span>商品管理</span>
        </el-menu-item>
      </el-menu>
    </el-aside>

    <!-- 右侧区域 -->
    <el-container>
      <el-header class="header">
        <el-icon class="collapse-btn" @click="toggleCollapse">
          <Fold v-if="!isCollapse" />
          <Expand v-else />
        </el-icon>
        <span class="title">后台管理系统</span>
      </el-header>

      <el-main class="main-content">
        <router-view />
      </el-main>
    </el-container>
  </el-container>
</template>

<script setup>
import { ref } from 'vue'
import { DataLine, User, Goods, Fold, Expand } from '@element-plus/icons-vue'

const isCollapse = ref(false)

const toggleCollapse = () => {
  isCollapse.value = !isCollapse.value
}
</script>

<style>
* {
  margin: 0;
  padding: 0;
  box-sizing: border-box;
}

.app {
  height: 100vh;
}

.sidebar {
  background-color: #001529;
  transition: width 0.3s;
  overflow-x: hidden;
}

.logo {
  height: 60px;
  line-height: 60px;
  text-align: center;
  color: white;
  font-size: 18px;
  font-weight: bold;
  background-color:#002140;
}

.el-menu {
  border-right: none;
  background-color: #001529;
}

.el-menu-item {
  color: #bfbfbf;
}

.el-menu-item.is-active {
  color: #409eff;
  background-color: #002140;
}

.header {
  background-color: white;
  display: flex;
  align-items: center;
  box-shadow: 0 1px 4px rgba(0, 21, 41, 0.08);
  z-index: 1;
}

.collapse-btn {
  font-size: 20px;
  cursor: pointer;
  margin-right: 16px;
}

.collapse-btn:hover {
  color: #409eff;
}

.title {
  font-size: 18px;
  font-weight: 500;
}

.main-content {
  background-color: #f0f2f5;
  padding: 20px;
}
</style>
DashboardView.vue
javascript
<template>
  <div class="mb-4 flex items-center">
    <el-form-item label="Scroll pixels" class="mr-4">
      <el-input v-model="scrollDelta" />
    </el-form-item>
    <el-form-item label="Scroll rows">
      <el-input v-model="scrollRows" />
    </el-form-item>
  </div>
  <div class="mb-4 flex items-center">
    <el-button @click="scrollByPixels"> Scroll by pixels </el-button>
    <el-button @click="scrollByRows"> Scroll by rows </el-button>
  </div>
  <div style="height: 400px">
    <el-auto-resizer>
      <template #default="{ height, width }">
        <el-table-v2
            ref="tableRef"
            :columns="columns"
            :data="data"
            :width="width"
            :height="height"
            fixed
        />
      </template>
    </el-auto-resizer>
  </div>
</template>

<script setup>
import { ref } from 'vue'

const generateColumns = (length = 10, prefix = 'column-', props) =>
    Array.from({ length }).map((_, columnIndex) => ({
      ...props,
      key: `${prefix}${columnIndex}`,
      dataKey: `${prefix}${columnIndex}`,
      title: `Column ${columnIndex}`,
      width: 150,
    }))

const generateData = (columns, length = 200, prefix = 'row-') =>
    Array.from({ length }).map((_, rowIndex) => {
      return columns.reduce(
          (rowData, column, columnIndex) => {
            rowData[column.dataKey] = `Row ${rowIndex} - Col ${columnIndex}`
            return rowData
          },
          {
            id: `${prefix}${rowIndex}`,
            parentId: null,
          }
      )
    })

const columns = generateColumns(10)
const data = generateData(columns, 200)
const tableRef = ref()
const scrollDelta = ref(200)
const scrollRows = ref(10)

function scrollByPixels() {
  tableRef.value?.scrollToTop(scrollDelta.value)
}

function scrollByRows() {
  tableRef.value?.scrollToRow(scrollRows.value)
}
</script>
ProductView.vue
javascript
<template>
  <el-table :data="tableData" style="width: 100%">
    <el-table-column prop="date" label="Date" width="180" />
    <el-table-column prop="name" label="Name" width="180" />
    <el-table-column prop="address" label="Address" />
  </el-table>
</template>

<script setup>
const tableData = [
  {
    date: '2016-05-03',
    name: 'Tom',
    address: 'No. 189, Grove St, Los Angeles',
  },
  {
    date: '2016-05-02',
    name: 'Tom',
    address: 'No. 189, Grove St, Los Angeles',
  },
  {
    date: '2016-05-04',
    name: 'Tom',
    address: 'No. 189, Grove St, Los Angeles',
  },
  {
    date: '2016-05-01',
    name: 'Tom',
    address: 'No. 189, Grove St, Los Angeles',
  },
]
</script>
UserView.vue
javascript
<!-- ========== 模板部分:Element Plus 表格 UI ========== -->
<template>
  <!--
    el-table:Element Plus 的表格组件
    :data="students" ------ 动态绑定表格数据源,students 是响应式数组
    style="width: 100%") ------ 表格宽度占满父容器
  -->
  <el-table :data="students" style="width: 100%">

    <!--
      el-table-column:定义表格的列
      prop="name" ------ 对应数据对象中的 name 属性(如 student.name)
      label="Name" ------ 表头显示的标题文字
      width="180" ------ 列宽固定为 180 像素
    -->
    <el-table-column prop="name" label="Name" width="180" />

    <!-- 学号列:prop 对应 stuid 属性 -->
    <el-table-column prop="stuid" label="Stuid" width="180" />

    <!--
      专业列:不设置 width,自动占据剩余空间
      prop="major" 对应数据中的 major 属性
    -->
    <el-table-column prop="major" label="Major" />

  </el-table>
</template>

<!-- ========== 脚本部分:Vue 3 组合式 API ========== -->
<script setup>
// 导入 Vue 3 的组合式 API 函数
// onMounted ------ 组件挂载完成后的生命周期钩子
// ref ------ 创建响应式数据的函数
import { onMounted, ref } from "vue";

// 导入 axios HTTP 请求库,用于向后端 API 发送请求
import axios from "axios";

// 使用 ref 创建响应式数据 students
// 初始值为空数组 [],表格初始时显示为空
// 必须通过 students.value 来修改值,才能触发视图更新
const students = ref([]);

// onMounted 钩子:组件挂载到 DOM 后自动执行
// 适合在这里发起数据请求,确保 DOM 已准备好
onMounted(() => {

  // axios.get 发起 GET 请求,访问本地后端接口
  // 返回 Promise 对象,使用 .then() 处理成功响应
  axios.get('http://localhost:8080/p1')
    .then((resp) => {
      // resp 是 axios 的响应对象,包含完整的 HTTP 响应信息
      // resp.data 是服务器返回的实际数据(通常是 JSON 数组)
      // 赋值给 students.value,表格会自动重新渲染显示数据
      students.value = resp.data;


    })

});
</script>

<!-- ========== 样式部分:当前为空,可添加自定义样式 ========== -->
<style scoped>
/* scoped 表示样式只作用于当前组件 */
</style>
配置路由
javascript
import { createRouter, createWebHistory } from 'vue-router'
// import HomeView from '../views/HomeView.vue'

const router = createRouter({
  history: createWebHistory(import.meta.env.BASE_URL),
  routes: [
    {
      path: '/',
      // name: 'home',
      // component: HomeView,
      redirect:'/dashboard'
    },

    {
      path: '/dashboard',
      name: 'dashboard',
      // route level code-splitting
      // this generates a separate chunk (About.[hash].js) for this route
      // which is lazy-loaded when the route is visited.
      component: () => import('../views/DashboardView.vue'),
    },
    {
      path: '/p1',
      name: 'p1',
      // route level code-splitting
      // this generates a separate chunk (About.[hash].js) for this route
      // which is lazy-loaded when the route is visited.
      component: () => import('../views/UserView.vue'),
    },
    {
      path: '/product',
      name: 'product',
      // route level code-splitting
      // this generates a separate chunk (About.[hash].js) for this route
      // which is lazy-loaded when the route is visited.
      component: () => import('../views/ProductView.vue'),
    },
  ],
})

export default router
在index.js 挂在路由
javascript
import { createApp } from 'vue'
import App from './App.vue'
import ElementPlus from 'element-plus'
import 'element-plus/dist/index.css'  // 引入样式
// 如果使用图标
import * as ElementPlusIconsVue from '@element-plus/icons-vue'
// 引入路由
import router from "@/router/index.js";

const app = createApp(App)

// 全局注册 Element Plus
app.use(ElementPlus)

// 全局注册图标组件(可选)
for (const [key, component] of Object.entries(ElementPlusIconsVue)) {
    app.component(key, component)
}
app.use(router)

app.mount('#app')
后端
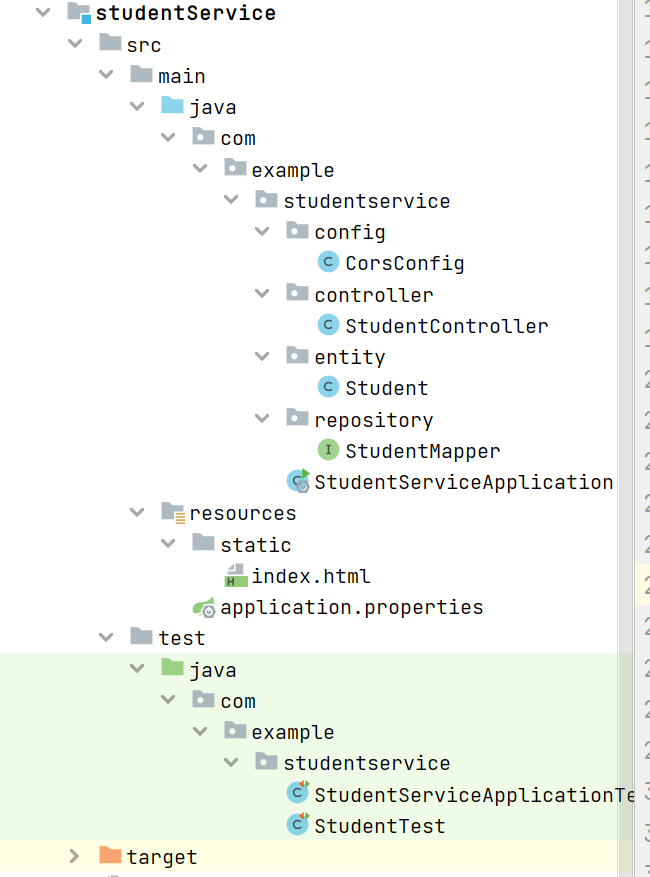
application.properties
properties
mybatis.mapper-locations=classpath:mappers/*xml

mybatis.type-aliases-package=com.example.studentservice.mybatis.entity


server.port=8080
#HikariCP 是一个高性能的 Java 数据库连接池,也是 Spring Boot 的默认数据源实现。
spring.datasource.type=com.zaxxer.hikari.HikariDataSource
#配置数据库的基本属性
spring.datasource.driver-class-name=com.mysql.cj.jdbc.Driver
spring.datasource.url=jdbc:mysql://localhost:3306/school?serverTimezone=Asia/Shanghai&useUnicode=true&characterEncoding=utf8&autoReconnect=true&useSSL=false
spring.datasource.username=root
spring.datasource.password=yanyu666
pom.xml
xml
<?xml version="1.0" encoding="UTF-8"?>
<project xmlns="http://maven.apache.org/POM/4.0.0" xmlns:xsi="http://www.w3.org/2001/XMLSchema-instance"
    xsi:schemaLocation="http://maven.apache.org/POM/4.0.0 https://maven.apache.org/xsd/maven-4.0.0.xsd">
    <modelVersion>4.0.0</modelVersion>
    <groupId>com.example</groupId>
    <artifactId>studentService</artifactId>
    <version>0.0.1-SNAPSHOT</version>
    <name>studentService</name>
    <description>studentService</description>
    <properties>
        <java.version>1.8</java.version>
        <project.build.sourceEncoding>UTF-8</project.build.sourceEncoding>
        <project.reporting.outputEncoding>UTF-8</project.reporting.outputEncoding>
        <spring-boot.version>2.6.13</spring-boot.version>
    </properties>
    <dependencies>
        <dependency>
            <groupId>org.springframework.boot</groupId>
            <artifactId>spring-boot-starter-web</artifactId>
        </dependency>
        <dependency>
            <groupId>org.mybatis.spring.boot</groupId>
            <artifactId>mybatis-spring-boot-starter</artifactId>
            <version>2.2.2</version>
        </dependency>

        <dependency>
            <groupId>com.mysql</groupId>
            <artifactId>mysql-connector-j</artifactId>
            <scope>runtime</scope>
        </dependency>
        <dependency>
            <groupId>org.springframework.boot</groupId>
            <artifactId>spring-boot-starter-test</artifactId>
            <scope>test</scope>
        </dependency>
    </dependencies>
    <dependencyManagement>
        <dependencies>
            <dependency>
                <groupId>org.springframework.boot</groupId>
                <artifactId>spring-boot-dependencies</artifactId>
                <version>${spring-boot.version}</version>
                <type>pom</type>
                <scope>import</scope>
            </dependency>
        </dependencies>
    </dependencyManagement>

    <build>
        <plugins>
            <plugin>
                <groupId>org.apache.maven.plugins</groupId>
                <artifactId>maven-compiler-plugin</artifactId>
                <version>3.8.1</version>
                <configuration>
                    <source>1.8</source>
                    <target>1.8</target>
                    <encoding>UTF-8</encoding>
                </configuration>
            </plugin>
            <plugin>
                <groupId>org.springframework.boot</groupId>
                <artifactId>spring-boot-maven-plugin</artifactId>
                <version>${spring-boot.version}</version>
                <configuration>
                    <mainClass>com.example.studentservice.StudentServiceApplication</mainClass>
                    <skip>true</skip>
                </configuration>
                <executions>
                    <execution>
                        <id>repackage</id>
                        <goals>
                            <goal>repackage</goal>
                        </goals>
                    </execution>
                </executions>
            </plugin>
        </plugins>
    </build>

</project>
解决跨域
CorsConfig.java
java
package com.example.studentservice.config;

import org.springframework.context.annotation.Configuration;
import org.springframework.web.servlet.config.annotation.CorsRegistry;
import org.springframework.web.servlet.config.annotation.WebMvcConfigurer;

/**
 * @Author: yanyu666_508200729@qq.com
 * @Date 2026/3/8 23:24
 * @description:  解决跨域问题
 */
@Configuration
public class CorsConfig implements WebMvcConfigurer {
    @Override
    public void addCorsMappings(CorsRegistry registry) {
        registry.addMapping("/**")  // 只允许 /**   任意 开头的路径
                .allowedOriginPatterns("*") // 只允许前端地址
                .allowedMethods("GET", "POST", "PUT", "DELETE","OPTIONS")
                .allowedHeaders("*")
                .allowCredentials(true)
                .maxAge(3600);
    }
}
控制器
StudentController.java
java
package com.example.studentservice.controller;

import com.example.studentservice.entity.Student;
import com.example.studentservice.repository.StudentMapper;
import org.springframework.beans.factory.annotation.Autowired;
import org.springframework.stereotype.Controller;
import org.springframework.web.bind.annotation.GetMapping;
import org.springframework.web.bind.annotation.RequestMapping;
import org.springframework.web.bind.annotation.RestController;

import java.util.List;

/**
 * @Author: yanyu666_508200729@qq.com
 * @Date 2026/3/8 22:23
 * @description:
 */
@RestController
@RequestMapping("/student")
public class StudentController {
    @Autowired
    private StudentMapper studentMapper;
    @GetMapping("/findAll")
    public List<Student> findAll(){
        return studentMapper.findAll();
    }

}
映射实体类
java
package com.example.studentservice.entity;

import java.util.Objects;

/**
 * @Author: yanyu666_508200729@qq.com
 * @Date 2026/3/8 22:02
 * @description:
 */
public class Student {
    String name;
    String stuid;
    String major;

    @Override
    public String toString() {
        return "Student{" +
                "name='" + name + '\'' +
                ", stuid='" + stuid + '\'' +
                ", major='" + major + '\'' +
                '}';
    }

    @Override
    public boolean equals(Object o) {
        if (this == o) return true;
        if (o == null || getClass() != o.getClass()) return false;
        Student student = (Student) o;
        return Objects.equals(name, student.name) && Objects.equals(stuid, student.stuid) && Objects.equals(major, student.major);
    }

    @Override
    public int hashCode() {
        return Objects.hash(name, stuid, major);
    }

    public String getName() {
        return name;
    }

    public void setName(String name) {
        this.name = name;
    }

    public String getStuid() {
        return stuid;
    }

    public void setStuid(String stuid) {
        this.stuid = stuid;
    }

    public String getMajor() {
        return major;
    }

    public void setMajor(String major) {
        this.major = major;
    }

    public Student() {
    }

    public Student(String name, String stuid, String major) {
        this.name = name;
        this.stuid = stuid;
        this.major = major;
    }
}
dao层
java
package com.example.studentservice.repository;

import org.apache.ibatis.annotations.Select;

import java.util.List;

/**
 * @Author: yanyu666_508200729@qq.com
 * @Date 2026/3/8 22:04
 * @description:
 */
public interface StudentMapper {
    @Select("select * from student")
    List<com.example.studentservice.entity.Student> findAll();


}
启动类
java
package com.example.studentservice;

import org.mybatis.spring.annotation.MapperScan;
import org.springframework.boot.SpringApplication;
import org.springframework.boot.autoconfigure.SpringBootApplication;

@SpringBootApplication
@MapperScan("com/example/studentservice/repository")
public class StudentServiceApplication {

    public static void main(String[] args) {
        SpringApplication.run(StudentServiceApplication.class, args);
    }

}