UI学习2
定时器和视图移动
NSTimer是Foundation框架提供的定时器,可以在指定时间间隔后执行某个方法。通过定时器,我们可以让视图连续移动,实现简单的动画效果。
我们先定义一个定时器对象
objectivec
#import <UIKit/UIKit.h>

@interface ViewController : UIViewController
{
    NSTimer* time;
}
@property (retain, nonatomic) NSTimer* timeView;
@end
objectivec
#import "ViewController.h"

@interface ViewController ()

@end

@implementation ViewController
@synthesize timeView = time;

- (void)viewDidLoad {
    [super viewDidLoad];

    // 创建"启动定时器"按钮
    UIButton *button = [UIButton buttonWithType:UIButtonTypeRoundedRect];
    button.frame = CGRectMake(100, 100, 100, 100);
    [button setTitle:@"启动定时器" forState:UIControlStateNormal];
    [button addTarget:self action:@selector(pressStart) forControlEvents:UIControlEventTouchUpInside];
    [self.view addSubview:button];

    // 创建"停止定时器"按钮
    UIButton *buttonStop = [UIButton buttonWithType:UIButtonTypeRoundedRect];
    buttonStop.frame = CGRectMake(100, 200, 100, 100);
    [buttonStop setTitle:@"停止定时器" forState:UIControlStateNormal];
    [buttonStop addTarget:self action:@selector(pressStop) forControlEvents:UIControlEventTouchUpInside];
    [self.view addSubview:buttonStop];

    // 创建一个蓝色方块,设置初始位置和大小
    UIView *view = [[UIView alloc] init];
    view.frame = CGRectMake(0, 0, 80, 80);   // 初始位置 (0,0)
    view.backgroundColor = [UIColor blueColor];
    [self.view addSubview:view];
    view.tag = 101;   // 设置标签,便于在定时器回调中获取该视图
}

// 启动定时器的方法
- (void)pressStart {
    // 如果定时器已经存在,先停止并释放
    if (time != nil) {
        [time invalidate];
        time = nil;
    }
    // 创建并启动一个重复定时器,每 0.1 秒调用 updateTimer: 方法
    // 注意:必须将定时器赋值给 time 变量,否则 pressStop 无法停止
    time = [NSTimer scheduledTimerWithTimeInterval:0.1 target:self selector:@selector(updateTimer:) userInfo:@"小明" repeats:YES];
}

// 定时器回调方法
- (void)updateTimer:(NSTimer *)timer {
    // 打印 userInfo 中的信息
    NSLog(@"%@ test", timer.userInfo);
    // 通过 tag 获取之前创建的蓝色方块
    UIView *view = [self.view viewWithTag:101];
    // 每次移动视图的 origin 向右下各增加 1 点
    view.frame = CGRectMake(view.frame.origin.x + 1,
                            view.frame.origin.y + 1,
                            80, 80);
}

// 停止定时器的方法
- (void)pressStop {
    if (time != nil) {
        [time invalidate];   // 停止定时器
        time = nil;          // 清空指针,防止野指针
    }
}

@endscheduledTimerWithTimeInterval:0.1表示每隔 0.1 秒触发一次。target:self指定回调方法所在的对象。selector:@selector(updateTimer:)时间到了就调用updateTimer:方法。userInfo:@"小明"可以携带额外信息,回调里通过timer.userInfo取出。repeats:YES表示重复执行,否则只执行一次。invalidate让定时器失效,并且要把指针清空,避免再次调用时出现野指针。
UISwitch
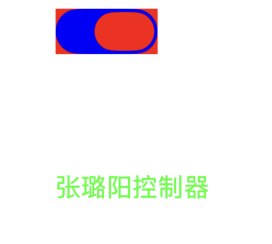
UISwitch常用于开/关状态,常用于设置选项
objectivec
#import <UIKit/UIKit.h>

@interface ViewController : UIViewController

{
    UISwitch* _switch;
}

@property (retain, nonatomic) UISwitch* mySwitch;
@end
objectivec
#import "ViewController.h"

@interface ViewController ()

@end

@implementation ViewController
@synthesize mySwitch = _switch;

- (void)viewDidLoad {
    [super viewDidLoad];

    // 创建 UISwitch 开关控件
    _switch = [[UISwitch alloc] init];
    // 设置开关的位置(大小固定,只有 origin 有效,width/height 被忽略)
    _switch.frame = CGRectMake(100, 100, 80, 40);
    // 设置开关的背景颜色
    _switch.backgroundColor = [UIColor redColor];
    // 设置开关初始状态为开启
    _switch.on = YES;
    // 重复设置 on 状态(无额外效果)
    [_switch setOn:YES];
    // 带动画地设置开关状态(这里再次设为 YES,因为已经是 YES,动画无变化)
    [_switch setOn:YES animated:YES];
    // 将开关添加到当前视图
    [self.view addSubview:_switch];

    // 设置开关开启时的轨道颜色(蓝色)
    [_switch setOnTintColor:[UIColor blueColor]];
    // 设置开关滑块的颜色(红色)
    [_switch setThumbTintColor:[UIColor redColor]];

    // 为开关添加事件:值改变时调用 swChange: 方法
    [_switch addTarget:self action:@selector(swChange:) forControlEvents:UIControlEventValueChanged];

    // 创建 UILabel 标签
    UILabel *label = [[UILabel alloc] init];
    label.text = @"张璐阳控制器";
    label.font = [UIFont systemFontOfSize:16];
    // 设置标签位置和大小(x=100, y=110, width=100, height=200)
    label.frame = CGRectMake(100, 110, 100, 200);
    label.textColor = [UIColor greenColor];
    [self.view addSubview:label];
}

// 开关状态改变时调用的方法
- (void)swChange:(UISwitch *)sw {
    if (sw.on == YES) {
        NSLog(@"已打开");
    } else if (sw.on == NO) {
        NSLog(@"已关闭");
    }
}

@end- 虽然
frame可以设置位置,但开关的尺寸是系统固定的,宽高设置会被忽略。 addTarget:action:forControlEvents:监听值改变事件,当用户拨动开关时就会调用swChange:方法。- 通过
sw.on获取当前开关状态,做对应的逻辑处理。
UISlider和UIprogressView
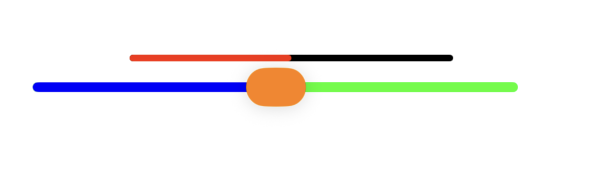
UISlider 允许用户在最小值和最大值之间选择一个值,常用于音量、亮度调节等,UIProgressView 用于显示任务完成进度,如下载进度、播放进度等。
objectivec
#import <UIKit/UIKit.h>

@interface ViewController : UIViewController
{
    UIProgressView* pro;
    UISlider* sli;
}

@property (retain, nonatomic) UIProgressView* Pro;
@property (retain, nonatomic) UISlider* Sli;
@end
objectivec
#import "ViewController.h"

@implementation ViewController

- (void)viewDidLoad {
    [super viewDidLoad];

    // 创建进度条 UIProgressView
    pro = [[UIProgressView alloc] init];
    // 设置进度条的位置和大小(x=100, y=100, width=200, height=40,但高度固定,实际只有约2~4点)
    pro.frame = CGRectMake(100, 100, 200, 40);
    // 设置进度条已完成部分的颜色(红色)
    pro.progressTintColor = [UIColor redColor];
    // 设置进度条未完成部分的颜色(黑色)
    pro.trackTintColor = [UIColor blackColor];
    // 设置初始进度为 0.5(50%)
    pro.progress = 0.5;
    // 设置进度条样式(默认样式)
    pro.progressViewStyle = UIProgressViewStyleDefault;
    // 将进度条添加到当前视图
    [self.view addSubview:pro];

    // 创建滑动条 UISlider
    sli = [[UISlider alloc] init];
    // 设置滑动条的位置和大小(x=40, y=100, width=300, height=40)
    sli.frame = CGRectMake(40, 100, 300, 40);
    // 设置滑动条的最大值(100)
    sli.maximumValue = 100;
    // 设置滑动条的最小值(0)
    sli.minimumValue = 0;
    // 设置滑动条的初始值(50)
    sli.value = 50;
    // 设置滑动条左侧(最小值一侧)轨道的颜色(蓝色)
    sli.minimumTrackTintColor = [UIColor blueColor];
    // 设置滑动条右侧(最大值一侧)轨道的颜色(绿色)
    sli.maximumTrackTintColor = [UIColor greenColor];
    // 设置滑块(圆形按钮)的颜色(橙色)
    sli.thumbTintColor = [UIColor orangeColor];
    // 为滑动条添加事件监听:值改变时调用 presssli 方法
    [sli addTarget:self action:@selector(presssli) forControlEvents:UIControlEventValueChanged];
    // 将滑动条添加到当前视图
    [self.view addSubview:sli];
}

// 滑动条值改变时调用的方法
- (void)presssli {
    // 根据滑动条的当前值计算进度(归一化到 0~1 范围)
    pro.progress = (sli.value - sli.minimumValue) / (sli.maximumValue - sli.minimumValue);
    // 打印当前滑动条的值
    NSLog(@"位置在%f", sli.value);
}

@endminimumValue/maximumValue决定了滑动条的数值范围。- 值改变时触发
presssli方法。
等待指示器和警告对话框
objective
#import <UIKit/UIKit.h>

@interface ViewController : UIViewController
{
    UIAlertController* _alertView;
    UIActivityIndicatorView* _activityIndicator;
}

@property (retain, nonatomic) UIAlertController* alertView;
@property (retain, nonatomic) UIActivityIndicatorView* activityIndicator;
@end
objectivec
#import "ViewController.h"
// 类扩展,用于声明私有属性(原代码未展示,但实际需要)
@interface ViewController ()
// 注意:实际使用前应在 @interface 中声明 _alertView 和 _activityIndicator
// 例如:
// @property (nonatomic, strong) UIAlertController *alertView;
// @property (nonatomic, strong) UIActivityIndicatorView *activityIndicator;
@end
@implementation ViewController
- (void)viewDidLoad {
[super viewDidLoad];
// Do any additional setup after loading the view.
// 循环创建两个按钮
for (int i = 0; i < 2; i++) {
// 创建圆角矩形按钮
UIButton* btn = [UIButton buttonWithType:UIButtonTypeRoundedRect];
// 设置按钮位置:x=100, y 从 100 开始,每个按钮间隔 100 点
btn.frame = CGRectMake(100, 100 + 100 * i, 100, 40);
// 根据循环索引设置按钮标题
if (i == 0) {
[btn setTitle:@"提示对话框" forState:UIControlStateNormal];
} else if (i == 1) {
[btn setTitle:@"等待" forState:UIControlStateNormal];
}
// 设置按钮标签,方便在点击方法中区分不同按钮
btn.tag = 101 + i;
// 添加点击事件监听
[btn addTarget:self action:@selector(pressBtn:) forControlEvents:UIControlEventTouchUpInside];
// 将按钮添加到当前视图
[self.view addSubview:btn];
}
}
// 按钮点击回调方法
-(void) pressBtn : (UIButton*) btn {
// 根据按钮标签执行不同操作
if (btn.tag == 101) {
// 创建警告框控制器(UIAlertController),样式为弹窗(Alert)
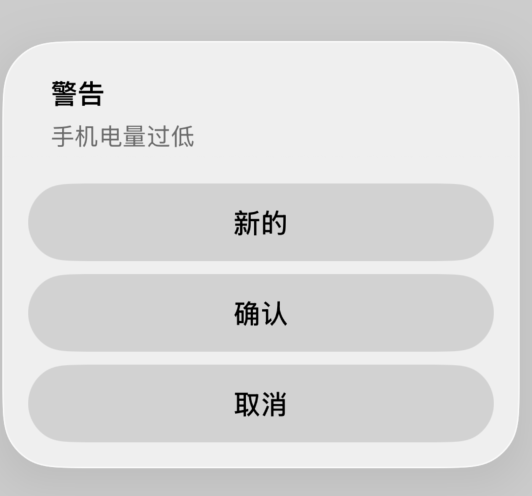
_alertView = [UIAlertController alertControllerWithTitle:@"警告" message:@"手机电量过低" preferredStyle:UIAlertControllerStyleAlert];
// 创建"取消"动作,样式为取消样式,点击后不做额外处理(handler 为 nil)
UIAlertAction* cancle = [UIAlertAction actionWithTitle:@"取消" style:UIAlertActionStyleCancel handler:nil];
[_alertView addAction:cancle];
// 创建"新的"动作,样式为默认样式,点击后也不做处理
UIAlertAction* newAction = [UIAlertAction actionWithTitle:@"新的" style:UIAlertActionStyleDefault handler:nil];
[_alertView addAction:newAction];
// 创建"确认"动作,并添加一个 block 回调,点击时输出日志
UIAlertAction* confirm = [UIAlertAction actionWithTitle:@"确认"
style:UIAlertActionStyleDefault handler:^(UIAlertAction* _Nonnull action) {
NSLog(@"确认");
}];
[_alertView addAction:confirm];
// 以模态方式显示警告框
[self presentViewController:_alertView animated:YES completion:nil];
} else if (btn.tag == 102) {
// 创建活动指示器(菊花转圈),并设置其位置和大小
_activityIndicator = [[UIActivityIndicatorView alloc] initWithFrame:CGRectMake(157, 300, 100, 100)];
// 设置指示器样式为大号(白色)
_activityIndicator.activityIndicatorViewStyle = UIActivityIndicatorViewStyleLarge;
// 将指示器添加到当前视图
[self.view addSubview:_activityIndicator];
// 开始动画(旋转显示)
[_activityIndicator startAnimating];
}
}
@end- UIAlertController:使用
alertControllerWithTitle:message:preferredStyle:创建,样式有UIAlertControllerStyleAlert(弹窗)和ActionSheet(底部上滑)。 - UIAlertAction:代表一个按钮,可以设置标题、样式和点击后的回调
handler。 presentViewController:animated:completion:显示对话框。- UIActivityIndicatorView:创建后设置样式(
UIActivityIndicatorViewStyleLarge为大号),调用startAnimating开始旋转,stopAnimating停止。

生命周期
init/initWithCoder:
- 调用时机:控制器通过代码或 Storyboard/XIB 创建时。
- 作用:执行最基本的初始化,此时视图尚未加载。
- 注意:一般不在这里操作界面相关的属性,因为视图还未存在。
loadView
- 调用时机 :当控制器的
view被访问但为nil时调用。 - 作用:创建控制器的根视图。如果使用 Storyboard 或 XIB,通常不需要重写此方法;纯代码方式可以在这里自定义根视图。
- 注意 :不要 手动调用此方法。如果重写,必须自己创建
self.view,并且不要调用[super loadView]。
viewDidLoad
- 调用时机:视图加载完成后调用(只调用一次)。
- 作用:进行界面初始化、添加子视图、加载数据、设置通知等。
- 注意 :此时视图的
frame可能还未最终确定(因为布局尚未计算),不要在这里依赖视图的尺寸进行精细布局。
objectivec
- (void)viewDidLoad {
    [super viewDidLoad];
    // 添加子视图、设置初始数据
    self.view.backgroundColor = [UIColor whiteColor];
    UIButton *btn = [UIButton buttonWithType:UIButtonTypeSystem];
    btn.frame = CGRectMake(100, 100, 100, 40);
    [btn setTitle:@"点我" forState:UIControlStateNormal];
    [self.view addSubview:btn];
}
viewWillAppear:
- 调用时机:视图即将添加到视图层级上并显示在屏幕上时调用(每次出现都会调用)。
- 作用:执行每次显示前需要做的操作,比如更新数据、刷新界面、注册键盘通知等。
- 参数 :
animated表示是否有动画。
viewDidAppear:
- 调用时机:视图已经完全显示在屏幕上后调用(每次出现都会调用)。
- 作用:开始动画、启动定时器、发起网络请求等。用户已经看到界面,适合做需要可见后才执行的操作。
viewWillDisappear:
- 调用时机:视图即将从视图层级中移除(即将被遮盖或关闭)时调用。
- 作用:保存用户输入、停止正在进行的任务、释放临时资源等。
viewDidDisappear:
- 调用时机:视图已经从视图层级中移除后调用。
- 作用:停止动画、移除通知、清理不需要的资源。
didReceiveMemoryWarning
- 调用时机:系统内存紧张时调用。
- 作用 :释放可重建的资源(如缓存图片、未显示的视图等)。如果控制器有不再需要的视图,系统会自动将
view设为nil。
objectivec
- (void)didReceiveMemoryWarning {
    [super didReceiveMemoryWarning];
    // 清理缓存等可重建的资源
}
dealloc
- 调用时机:控制器被释放时调用。
- 作用:清理通知、定时器、代理等,避免内存泄漏。
objectivec
- (void)dealloc {
    [[NSNotificationCenter defaultCenter] removeObserver:self];
    [timer invalidate];
    timer = nil;
}