1.1 用户信息管理功能概述
- 项目回顾:简要回顾仿"小红书"项目的注册与登录功能,点明用户信息管理功能是在其基础上的重要延伸。
- 功能重要性:阐述用户信息管理功能对于完善用户体验、维护系统数据完整性的重要意义。
- 技术栈说明:再次强调 Spring MVC、Thymeleaf、Spring Data、Spring Security、Bootstrap 在该功能实现中的具体作用。
下面我将实现一个基于 Spring MVC、Thymeleaf、Spring Data、Spring Security 和 Bootstrap 的小红书风格用户信息管理功能。用户信息管理功能将包含个人信息管理、密码修改等核心功能。
功能亮点
-
用户信息管理:
- 完整的用户信息展示和编辑功能
- 密码修改功能带旧密码验证
- 用户头像上传
-
安全特性:
- 密码加密存储(BCrypt)
- 基于角色的访问控制
-
小红书风格:
- 采用小红书标志性的红色调
- 简洁明了的界面设计
- 响应式布局适配各种设备
-
用户体验优化:
- 表单验证和错误提示
- 操作成功/失败的反馈信息
这个实现提供了一个基础的用户信息管理系统,你可以根据需要进一步扩展功能,如社交绑定、隐私设置等功能。
1.2 使用Bootstrap响应式设计实现用户信息展示页面
- 借助 Bootstrap 的各类组件(如Card、Form等)设计用户信息展示页面
- 为编辑按钮添加点击事件,实现信息编辑与展示状态的切换
- 提供友好的确认和提示信息
- 响应式设计适配移动端
设计用户信息展示视图模板
在src/main/resources/templates目录下新建user-profile.html文件:
html
<!DOCTYPE html>
<html lang="en" xmlns:th="http://www.thymeleaf.org"
      xmlns:sec="http://www.thymeleaf.org/extras/spring-security">
<head>
    <meta charset="UTF-8">
    <meta name="viewport" content="width=device-width, initial-scale=1.0">
    <title>RN - 个人资料</title>
    <!-- 引入 Bootstrap CSS -->
    <link href="https://cdn.bootcdn.net/ajax/libs/bootstrap/5.3.6/css/bootstrap.min.css"
          th:href="@{/css/bootstrap.min.css}" rel="stylesheet">

    <!-- 引入 Font Awesome -->
    <link href="https://cdn.bootcdn.net/ajax/libs/font-awesome/4.7.0/css/font-awesome.min.css"
          th:href="@{/css/font-awesome.min.css}" rel="stylesheet">

          <style>
    /* 小红书风格 */
    * {
        font-family: "PingFang SC", "Hiragino Sans GB", "Microsoft YaHei", sans-serif;
        box-sizing: border-box;
        margin: 0;
        padding: 0;
    }

    body {
        background-color: #f5f5f5;
    }

    /* 顶部导航栏 */
    .header {
        position: sticky;
        top: 0;
        background-color: white;
        padding: 16px;
        box-shadow: 0 1px 2px rgba(0, 0, 0, 0.05);
    }

    .user-info {
        display: flex;
        align-items: center;
        gap: 12px;
    }

    .user-avatar {
        width: 48px;
        height: 48px;
        border-radius: 50%;
        background-color: #f0f0f0;
    }

    .user-name {
        font-size: 16px;
        font-weight: 600;
        color: #333;
    }

    .user-meta {
        font-size: 12px;
        color: #666;
    }

    .action-btn {
        margin-left: auto;
        font-size: 14px;
        color: #ff2442;
    }
</style>
</head>
<body>
<!-- 导航栏 -->
<nav class="navbar navbar-expand-lg navbar-light bg-light">
    <div class="container">
        <a class="navbar-brand" href="/" th:href="@{/}">
            <img src="../static/images/rn_logo.png" th:src="@{/images/rn_logo.png}" alt="RN" height="24">
        </a>
        <button class="navbar-toggler" type="button" data-bs-toggle="collapse" data-bs-target="#navbarNav"
                aria-controls="navbarNav" aria-expanded="false" aria-label="Toggle navigation">
            <span class="navbar-toggler-icon"></span>
        </button>
        <div class="collapse navbar-collapse" id="navbarNav">
            <ul class="navbar-nav ms-auto">
                <li class="nav-item">
                    <a class="nav-link" href="#" sec:authentication="name">
                        [[${#authentication.name}]]
                    </a>
                </li>
                <li class="nav-item">
                    <a class="nav-link" href="/user/profile" th:href="@{/user/profile}">个人资料</a>
                </li>
                <li class="nav-item">
                    <!-- 注销 -->
                    <form action="/logout" th:action="@{/logout}" method="post">
                        <button type="submit" class="nav-link">退出登录</button>
                    </form>
                </li>
            </ul>
        </div>
    </div>
</nav>

<!-- 主体部分 -->
<div class="container mt-5">
    <div class="row justify-content-center">
        <div class="col-md-8">
            <div class="card">
                <div class="card-header">
                    个人资料
                </div>
                <div class="card-body">
                    <div class="row">
                        <div class="col-md-4 text-center">
                            <img src="../static/images/rn_avatar.png"
                                 th:src="${user.avatar ?: '/images/rn_avatar.png'}}"
                                 class="rounded-circle" alt="用户头像" height="88" width="88">
                            <p class="mt-3">[[${user.username}]]</p>
                            <a href="/user/edit" th:href="@{/user/edit}" class="btn btn-primary btn-sm">编辑资料</a>
                        </div>

                        <div class="col-md-8">
                            <dive class="mb-3">
                                <label class="form-label">手机号</label>
                                <p class="form-control-plaintext">[[${user.phone}]]</p>
                            </dive>
                            <dive class="mb-3">
                                <label class="form-label">个人简介</label>
                                <p class="form-control-plaintext">[[${user.bio ?: '这家伙很懒,什么都没写'}]]</p>
                            </dive>

                            <a href="/user/change-password" th:href="@{/user/change-password}"
                               class="btn btn-outline-secondary">修改密码</a>
                        </div>
                    </div>
                </div>
            </div>
        </div>
    </div>
</div>

<!-- Bootstrap JS -->
<script src="https://cdn.bootcdn.net/ajax/libs/bootstrap/5.3.6/js/bootstrap.bundle.min.js"
        th:src="@{/js/bootstrap.bundle.min.js}"></script>

</body>
</html>
1.3 使用Spring MVC控制器将后端用户信息绑定到前端页面进行显示
- 创建处理用户信息管理请求的控制器类
- 定义不同请求方法对应的处理方法
- 将不同的请求路径映射到相应的处理方法
- 接收前端传来的用户信息参数,进行必要的格式校验
- 根据业务逻辑处理结果,返回合适的响应信息
更新User实体
增加了以下字段:
java
/**
  * 头像
  */
private String avatar;

/**
  * 简介
  */
private String bio;
新建用户控制器 UserController
java
package com.waylau.rednote.controller;

import com.waylau.rednote.entity.User;
import com.waylau.rednote.service.UserService;
import org.springframework.beans.factory.annotation.Autowired;
import org.springframework.stereotype.Controller;
import org.springframework.ui.Model;
import org.springframework.web.bind.annotation.GetMapping;
import org.springframework.web.bind.annotation.RequestMapping;

/**
 * UserController 用户控制器
 *
 * @author <a href="https://waylau.com">Way Lau</a>
 * @version 2025/08/17
 **/
@Controller
@RequestMapping("/user")
public class UserController {

    @Autowired
    private UserService userService;

    @GetMapping("/profile")
    public String profile(Model model) {
        // 获取当前用户信息
        User user = userService.getCurrentUser();

        model.addAttribute("user", user);

        return "user-profile";
    }
}
其中,需要UserService提供新的接口getCurrentUser()来获取当前用户的信息。
java
/**
* 获取当前用户
*/
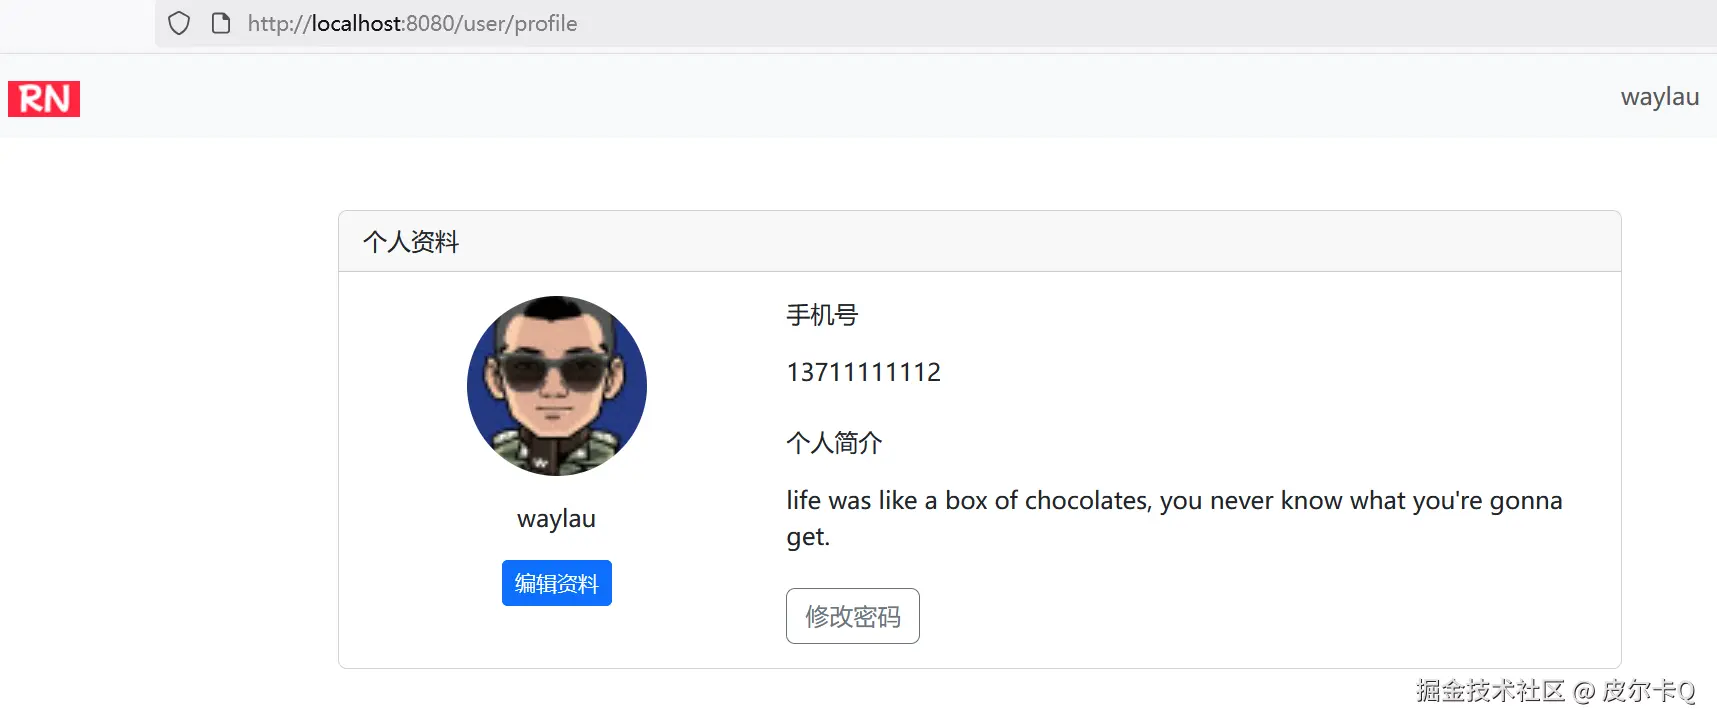
User getCurrentUser();接着,将该用户信息绑定到模型,并通过前端页面user-profile.html进行显示。
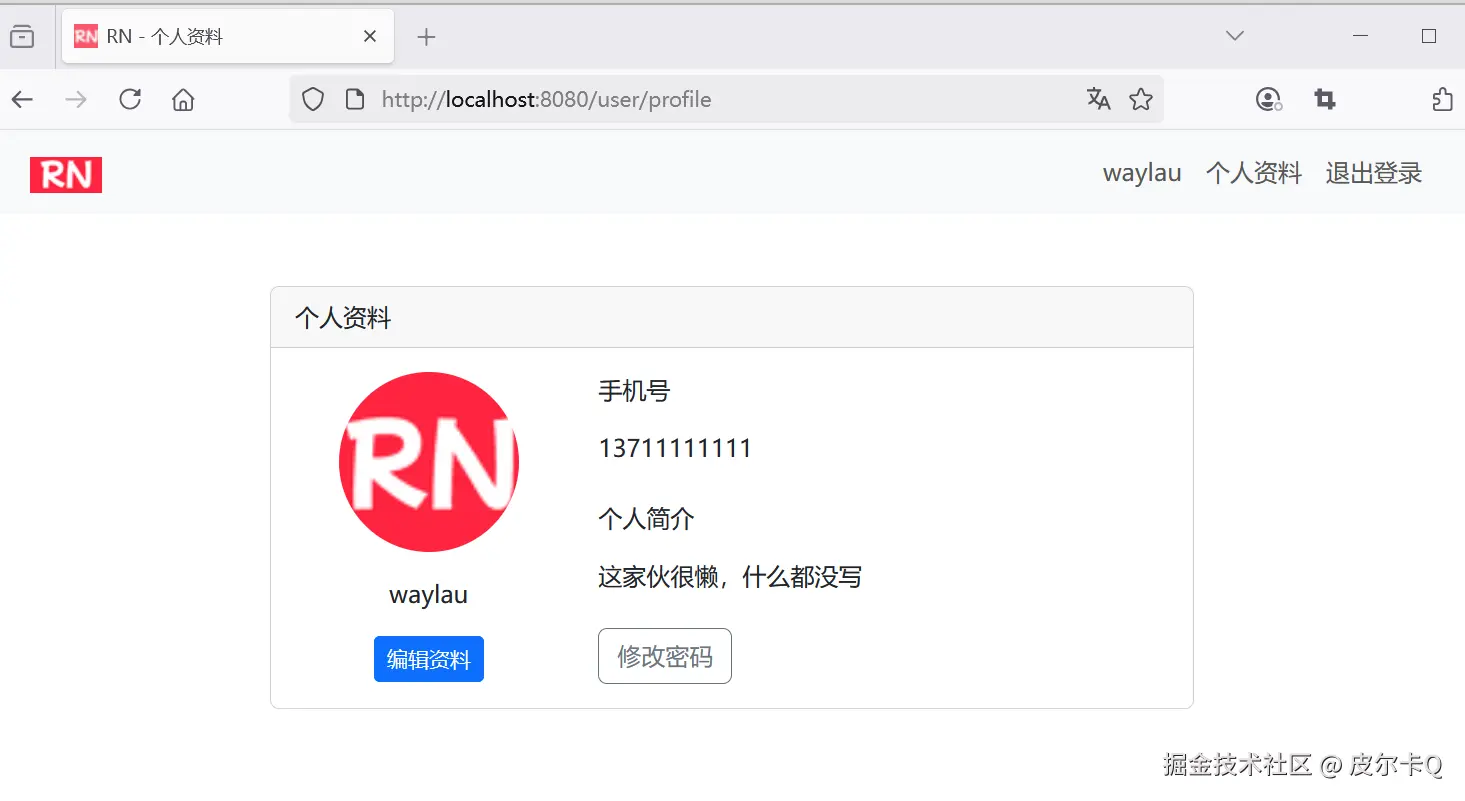
访问地址:http://localhost:8080/user/profile,可以看到如下图6-1所示的界面。
1.4 从Spring Security中获取当前认证信息
在控制器方法中,从 Spring Security 的上下文获取当前登录用户的信息
在UserServiceImpl中实现getCurrentUser()
getCurrentUser()实现如下:
java
@Override
public User getCurrentUser() {
    // 从安全上下文中获取认证信息
    Authentication authentication = SecurityContextHolder.getContext().getAuthentication();
    if (authentication != null && authentication.isAuthenticated()) {
        // 获取当前用户名
        String username = authentication.getName();
        // 根据用户名查询用户
        Optional<User> optionalUser = userRepository.findByUsername(username);
        if (optionalUser.isPresent()) {
            return optionalUser.get();
        }
    }

    throw new UsernameNotFoundException(ExceptionType.USERNAME_NOT_FOUND);
}
SecurityContextHolder.getContext().getAuthentication() 详解
SecurityContextHolder.getContext().getAuthentication() 是 Spring Security 中获取当前认证信息的核心方法。这个方法链涉及三个主要组件:SecurityContextHolder、SecurityContext 和 Authentication,下面我将深入解析它们的工作原理和使用场景。
工作流程如下:
-
用户登录:
- 用户提交凭证(用户名/密码)
AuthenticationProvider验证凭证- 验证成功后,创建已认证的
Authentication对象 - 通过
SecurityContextHolder.getContext().setAuthentication(auth)设置认证信息
-
请求处理:
- 每个请求通过
SecurityContextPersistenceFilter从 Session 或其他存储中恢复安全上下文 - 安全上下文被设置到当前线程的
SecurityContextHolder - 在整个请求处理过程中,可以随时通过
SecurityContextHolder.getContext().getAuthentication()获取当前用户信息 - 请求处理完毕后,安全上下文可能被持久化到 Session 中
- 每个请求通过
-
请求结束:
SecurityContextPersistenceFilter清除当前线程的安全上下文(防止线程池复用导致的安全问题)
核心组件解析
1. SecurityContextHolder
-
作用 :存储当前线程的安全上下文(
SecurityContext) -
实现方式 :
- ThreadLocal:默认模式,每个线程独立存储安全上下文(最常用)
- InheritableThreadLocal:子线程可以继承父线程的安全上下文
- 全局模式:所有线程共享同一个安全上下文(极少使用)
-
关键方法 :
javaSecurityContext context = SecurityContextHolder.getContext(); // 获取当前安全上下文 SecurityContextHolder.setContext(context); // 设置安全上下文 SecurityContextHolder.clearContext(); // 清除安全上下文
2. SecurityContext
-
作用 :存储当前认证信息(
Authentication对象)的容器 -
关键方法 :
javaAuthentication authentication = context.getAuthentication(); // 获取认证对象 context.setAuthentication(authentication); // 设置认证对象
3. Authentication
-
作用:表示当前用户的认证信息
-
核心属性 :
javaprincipal // 用户身份(通常是 UserDetails 实现) credentials // 凭证(通常是密码,认证后会被清除) authorities // 用户权限(GrantedAuthority 集合) authenticated // 是否已认证的标志
1.5 调整安全配置类细化用户信息管理页面的访问权限
- 在 Spring Security 配置类中,进一步细化用户信息管理页面的访问权限
- 确保只有已登录用户可以访问自己的信息管理页面
- 验证用户请求的信息是否与当前登录用户的身份匹配,防止越权操作
假设所有的用户都是USER角色:
java
import org.springframework.security.core.authority.SimpleGrantedAuthority;

//  ...为节约篇幅,此处省略非核心内容


@Service
public class UserDetailsServiceImpl implements UserDetailsService {
    @Autowired
    private UserRepository userRepository;

    @Override
    public UserDetails loadUserByUsername(String username) throws UsernameNotFoundException {
        //  ...为节约篇幅,此处省略非核心内容

        // 将User转为UserDetails对象
        return org.springframework.security.core.userdetails.User
                .withUsername(user.getUsername())
                .password(user.getPassword())
                .disabled(false)
                // 设置所有的数据库里面的用户都是USER角色
                /*.authorities(Collections.emptyList())*/
                .authorities(new SimpleGrantedAuthority("ROLE_USER"))
                .build();
    }
}
1.5 实现用户基本信息的编辑页面
在src/main/resources/templates目录下新建user-profile-edit.html文件:
html
<!DOCTYPE html>
<html  lang="en" xmlns:th="http://www.thymeleaf.org"
       xmlns:sec="http://www.thymeleaf.org/extras/spring-security">
<head>
    <meta charset="UTF-8">
    <meta name="viewport" content="width=device-width, initial-scale=1.0">
    <title>RN - 个人资料编辑</title>
    <!-- 引入 Bootstrap CSS -->
    <link href="https://cdn.jsdelivr.net/npm/bootstrap@5.3.6/dist/css/bootstrap.min.css" th:href="@{/css/bootstrap.min.css}" rel="stylesheet">
    <!-- 引入 Font Awesome -->
    <link href="https://cdn.jsdelivr.net/npm/font-awesome@4.7.0/css/font-awesome.min.css" th:href="@{/css/font-awesome.min.css}" rel="stylesheet">
    <!-- 自定义样式 -->
    <style>
        .profile-container {
            max-width: 800px;
            margin: 0 auto;
            padding: 32px;
        }

        .profile-header {
            text-align: center;
            margin-bottom: 32px;
        }

        .profile-avatar {
            width: 120px;
            height: 120px;
            border-radius: 50%;
            margin: 0 auto 20px;
            position: relative;
        }

        .profile-avatar img {
            width: 100%;
            height: 100%;
            object-fit: cover;
            border: 4px solid white;
            box-shadow: 0 2px 8px rgba(0, 0, 0, 0.1);
        }

        .avatar-upload {
            position: absolute;
            bottom: 0;
            left: 50%;
            transform: translateX(-50%);
            background-color: #ff2442;
            color: white;
            padding: 4px 12px;
            border-radius: 20px;
            cursor: pointer;
            font-size: 12px;
            transition: background-color 0.3s;
        }

        .avatar-upload:hover {
            background-color: #e61e3a;
        }

        .form-group {
            margin-bottom: 24px;
        }

        .form-label {
            font-weight: 600;
            color: #333;
        }

        .form-control {
            border-radius: 12px;
            border: 1px solid #e8e8e8;
            padding: 12px 16px;
        }

        .form-control:focus {
            border-color: #ff2442;
            box-shadow: 0 0 0 2px rgba(255, 36, 66, 0.1);
        }

        .btn-primary {
            background-color: #ff2442;
            border-color: #ff2442;
            border-radius: 24px;
            padding: 12px 48px;
            font-weight: 600;
            width: 100%;
        }

        .btn-primary:hover {
            background-color: #e61e3a;
            box-shadow: 0 4px 12px rgba(255, 36, 66, 0.2);
        }

        .error-message {
            color: #ff2442;
            font-size: 12px;
            margin-top: 4px;
        }
    </style>
</head>
<body>
<!-- 导航栏 -->
<nav class="navbar navbar-expand-lg navbar-light bg-light">
    <div class="container">
        <a class="navbar-brand" href="/" th:href="@{/}">
            <img src="../static/images/rn_logo.png" th:src="@{/images/rn_logo.png}" alt="RN" height="24">
        </a>
        <button class="navbar-toggler" type="button" data-bs-toggle="collapse" data-bs-target="#navbarNav"
                aria-controls="navbarNav" aria-expanded="false" aria-label="Toggle navigation">
            <span class="navbar-toggler-icon"></span>
        </button>
        <div class="collapse navbar-collapse" id="navbarNav">
            <ul class="navbar-nav ms-auto">
                <li class="nav-item">
                    <a class="nav-link" href="#" sec:authentication="name">
                        [[${#authentication.name}]]
                    </a>
                </li>
                <li class="nav-item">
                    <a class="nav-link" href="/user/profile" th:href="@{/user/profile}">个人资料</a>
                </li>
                <li class="nav-item">
                    <!-- 注销 -->
                    <form action="/logout" th:action="@{/logout}" method="post">
                        <button type="submit" class="nav-link">退出登录</button>
                    </form>
                </li>
            </ul>
        </div>
    </div>
</nav>

<!-- 主体部分 -->
<div class="profile-container">
    <!-- 编辑标题 -->
    <div class="profile-header">
        <h2 class="text-center">编辑个人资料</h2>
        <p>请填写或者更新你的个人信息</p>
    </div>

    <!-- 编辑表单 -->
    <form action="/user/edit" th:action="@{/user/edit}" method="post" th:object="${user}" enctype="multipart/form-data">
        <!-- 头像 -->
        <div class="form-group position-relative">
            <div class="profile-avatar">
                <img src="../static/images/rn_avatar.png" th:src="${user.avatar ?: '/images/rn_avatar.png'}" alt="用户头像" height="88" width="88">
                <div class="avatar-upload">
                    <label>更换头像</label>
                </div>
            </div>
            <div class="error-message" th:if="${#fields.hasErrors('avatar')}" th:errors="*{avatar}">
                头像格式错误(支持JPG/PNG,最大10MB)
            </div>
        </div>

        <!-- 用户名(不可编辑) -->
        <div class="form-group">
            <label class="form-label">用户名</label>
            <input type="text" class="form-control" th:value="${user.username}" disabled>
        </div>

        <!-- 手机号 -->
        <div class="form-group">
            <label class="form-label">手机号</label>
            <input type="tel" class="form-control" th:field="*{phone}" placeholder="请输入手机号">
            <div class="error-message" th:if="${#fields.hasErrors('phone')}" th:errors="*{phone}">
                请输入有效的手机号
            </div>
        </div>

        <!-- 个人简介 -->
        <div class="form-group">
            <label class="form-label">个人简介</label>
            <textarea class="form-control" th:field="*{bio}" rows="3" placeholder="请输入个人简介(最多255字)"></textarea>
            <div class="error-message" th:if="${#fields.hasErrors('bio')}" th:errors="*{bio}">
                个人简介最多255字
            </div>
        </div>

        <!-- 提交按钮 -->
        <button type="submit" class="btn btn-primary">保存修改</button>
    </form>

    <!-- 操作反馈 -->
    <div th:if="${success}" class="alert alert-success mt-3">
        [[${success}]]
    </div>
    <div th:if="${error}" class="alert alert-danger mt-3">
        [[${error}]]
    </div>
</div>

<!-- Bootstrap JS -->
<script src="https://cdn.jsdelivr.net/npm/bootstrap@5.3.6/dist/js/bootstrap.bundle.min.js" th:src="@{/js/bootstrap.bundle.min.js}"></script>

</body>
</html>
其中,更换头像的功能在后续的课程中还做介绍。
1.7 用户对可编辑信息进行修改,并将修改后的数据保存到数据库
修改用户控制器UserController
新增对编辑的页面处理:
java
package com.waylau.rednote.controller;

// ...为节约篇幅,此处省略非核心内容

import org.springframework.web.servlet.mvc.support.RedirectAttributes;

/**
 * UserController 用户控制器
 *
 * @author <a href="https://waylau.com">Way Lau</a>
 * @version 2025/06/05
 **/
@Controller
@RequestMapping("/user")
public class UserController {

    // ...为节约篇幅,此处省略非核心内容

    @GetMapping("/edit")
    public String editProfile(Model model) {
        User user = userService.getCurrentUser();

        model.addAttribute("user", user);

        return "user-profile-edit";
    }


    @PostMapping("/edit")
    public String updateProfile(@ModelAttribute User user, RedirectAttributes redirectAttributes) {
        User currentUser = userService.getCurrentUser();

        // 更新用户信息
        currentUser.setPhone(user.getPhone());
        currentUser.setAvatar(user.getAvatar());
        currentUser.setBio(user.getBio());

        // 修改内容保存到数据库
        userService.updateUser(currentUser);

        // 重定向到指定页面,并传递参数
        redirectAttributes.addFlashAttribute("success", "个人信息更新成功");

        return "redirect:/user/profile";
    }

}
其中:
userService.updateUser()接口用于将修改后的数据保存到数据库;redirectAttributes.addFlashAttribute()重定向到页面时,传递消息。
修改后的数据保存到数据库
修改UserService,增加如下接口:
java
/**
* 更新用户
*/
User updateUser(User currentUser);
修改UserServiceImpl,增加如下方法:
java
@Override
public User updateUser(User user) {
    return userRepository.save(user);
}
运行调测
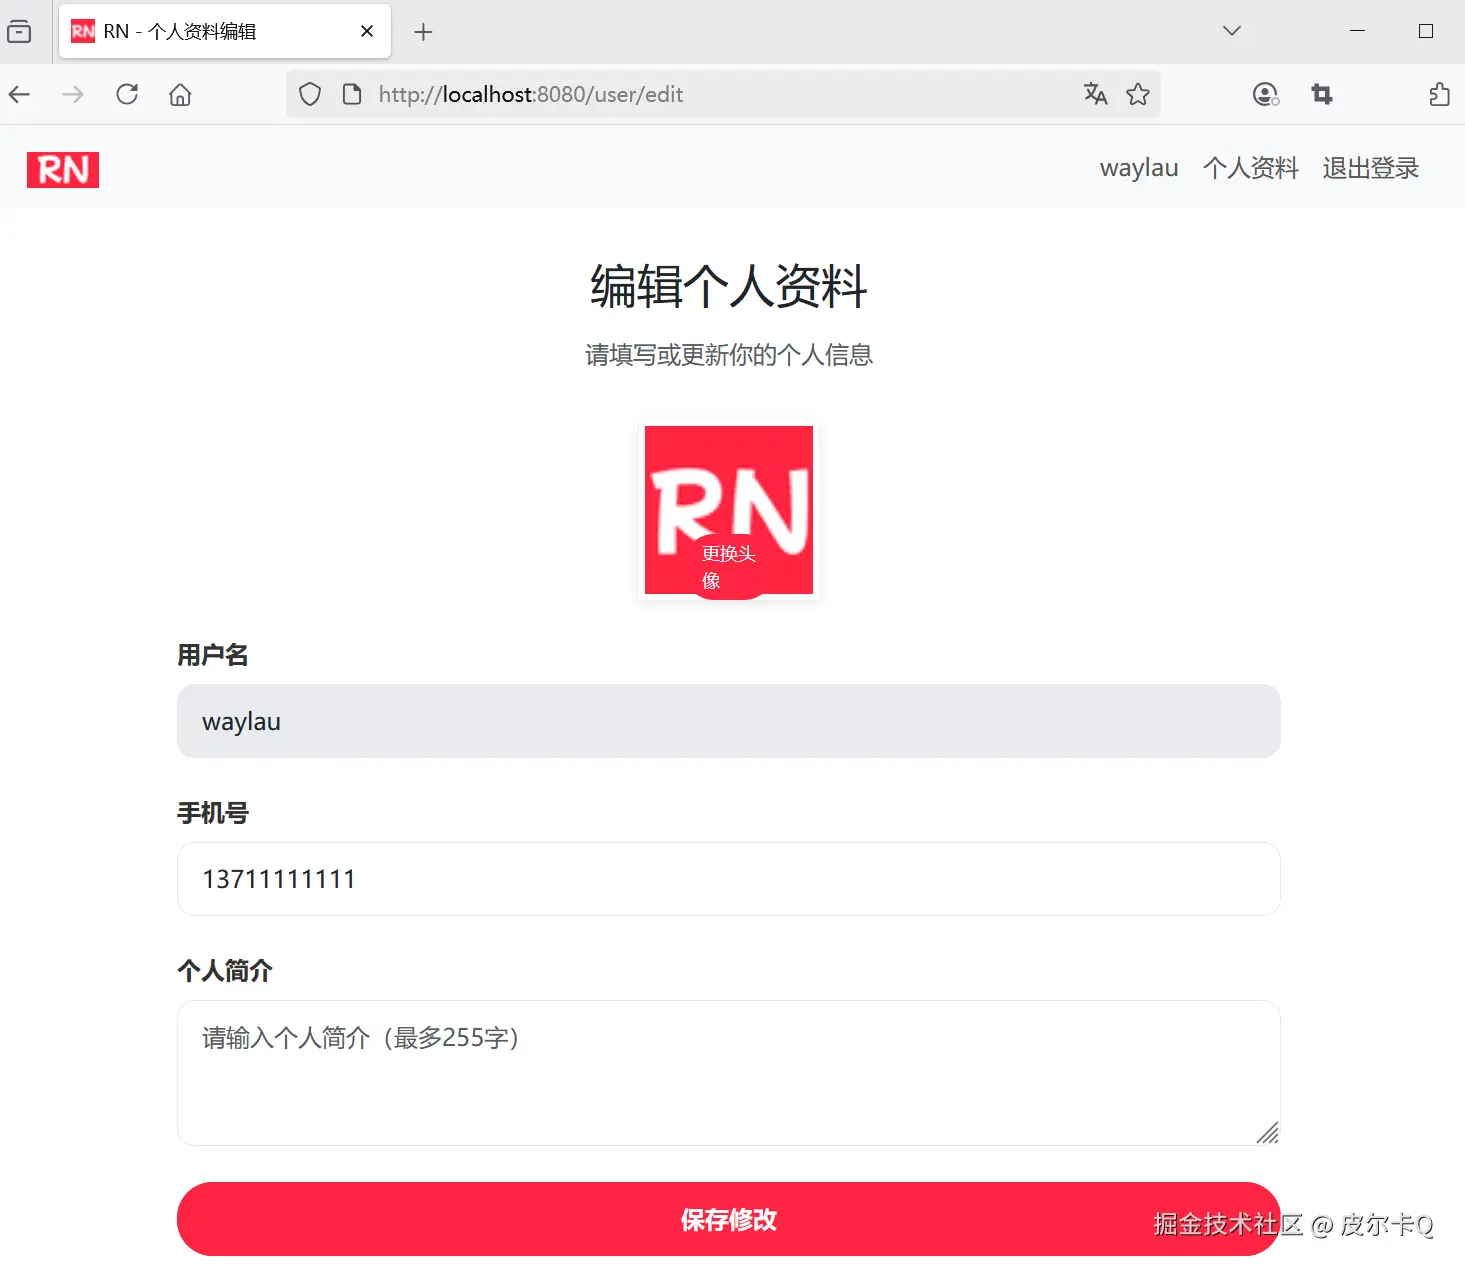
用户信息编辑页面如下:
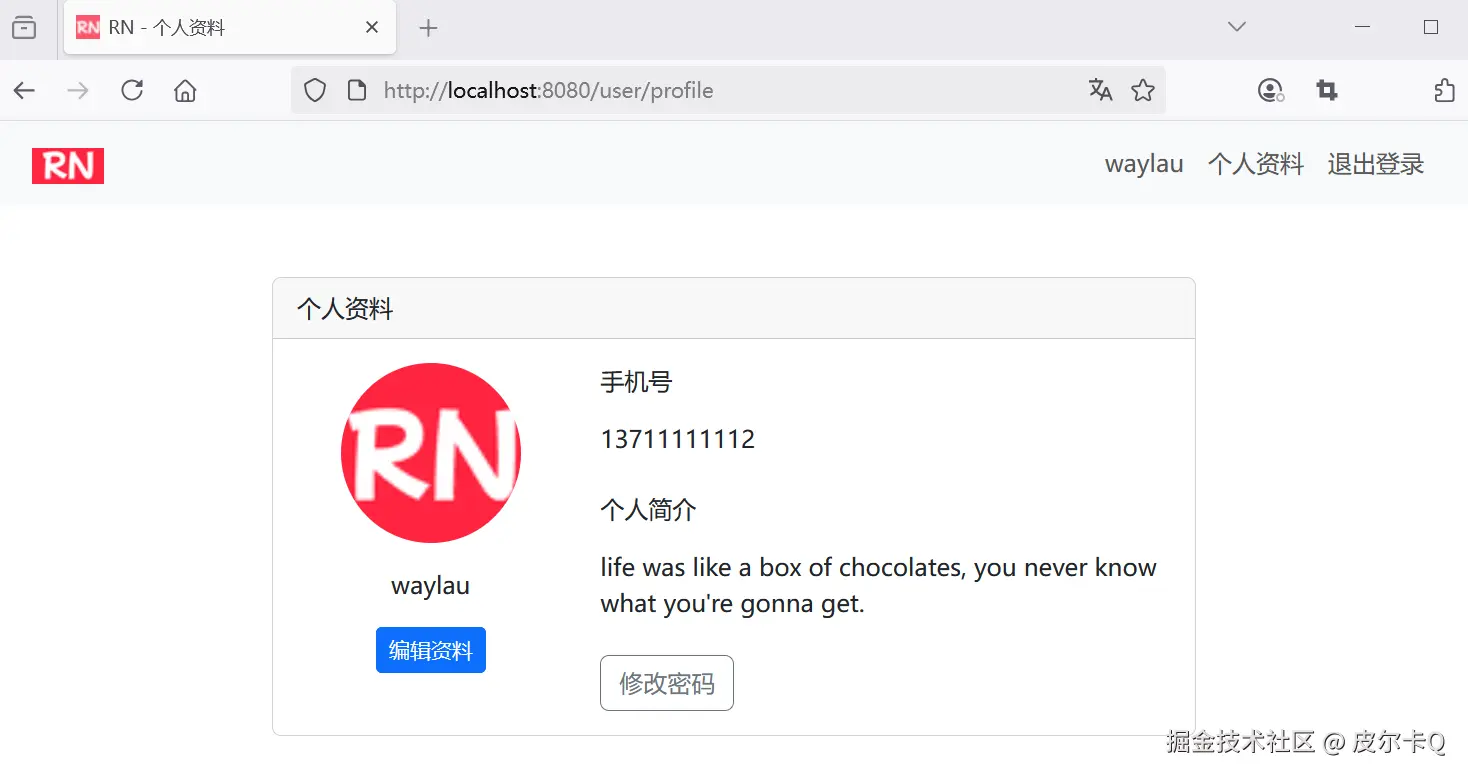
用户信息更新完成之后的页面如下:
1.8 RedirectAttributes深入解析,Spring MVC重定向数据传递的核心工具
在 Spring MVC 开发中,重定向(Redirect)是一种常见的页面跳转方式。但直接重定向会导致请求参数丢失,RedirectAttributes 正是为解决这一问题而生的核心工具。它提供了一种安全、灵活的方式,在重定向过程中传递数据,并且能自动处理数据的存储与清理。本文将从原理、用法、最佳实践等方面深入解析这一组件。
一、核心作用与原理
1. 作用
- 跨请求传递数据 :在重定向场景下(如
return "redirect:/target"),传递临时数据(如提示信息、表单参数)。 - 支持闪存(Flash)机制:数据仅在一次请求中有效,使用后自动清除,避免数据泄漏或冗余。
- 兼容 URL 编码参数:可将数据直接附加到 URL 中(适用于非敏感数据)。
2. 实现原理
- 基于 Session 的闪存存储:数据会被临时存储在 Session 中,重定向后取出并立即清除。
- 两种数据存储方式 :
- 闪存属性(Flash Attributes) :通过
addFlashAttribute()存储,适用于敏感或较大的数据(如错误信息)。 - URL 参数 :通过
.addAttribute()存储,数据会被编码到 URL 中(如?key=value)。
- 闪存属性(Flash Attributes) :通过
二、核心方法与使用场景
1. 关键方法列表
| 方法签名 | 作用描述 |
|---|---|
addAttribute(String key, Object value) |
将数据作为 URL 参数传递(直接拼接在 URL 中),适用于非敏感数据。 |
addFlashAttribute(String key, Object value) |
将数据存入 Session(闪存),重定向后取出并清除,适用于敏感或临时数据。 |
getAttribute(String name) |
获取指定名称的属性(通常在重定向目标中使用)。 |
getFlashAttributes() |
获取所有闪存属性(自动清除已读取的数据)。 |
mergeAttributes(Map<String, ?> attributes) |
合并外部属性到当前 RedirectAttributes 中。 |
2. 典型使用场景
场景 1:重定向时传递成功/错误消息(推荐使用闪存)
java
@PostMapping("/user/save")
public String saveUser(@Valid UserForm form, BindingResult result, RedirectAttributes redirectAttributes) {
    if (result.hasErrors()) {
        // 重定向回表单页,传递错误消息(闪存存储)
        redirectAttributes.addFlashAttribute("error", "表单填写有误,请检查!");
        return "redirect:/user/form";
    }
    userService.save(form);
    // 重定向到列表页,传递成功消息(闪存存储)
    redirectAttributes.addFlashAttribute("success", "用户保存成功!");
    return "redirect:/user/list";
}-
在目标页面中获取消息 (Thymeleaf 示例):
html<div th:if="${success}" class="alert alert-success" th:text="${success}"></div> <div th:if="${error}" class="alert alert-danger" th:text="${error}"></div>
场景 2:重定向时携带查询参数(URL 参数方式)
java
@GetMapping("/user/delete/{id}")
public String deleteUser(@PathVariable Long id, RedirectAttributes redirectAttributes) {
    userService.delete(id);
    // 重定向到列表页,并携带当前页码(URL 参数)
    redirectAttributes.addAttribute("page", 1); // 生成 ?page=1
    return "redirect:/user/list";
}-
目标 URL 效果 :
/user/list?page=1 -
在目标控制器中接收参数 :
java@GetMapping("/user/list") public String listUsers(@RequestParam(defaultValue = "1") int page, Model model) { // ... }
场景 3:组合使用闪存与 URL 参数
java
@PostMapping("/user/update")
public String updateUser(@Valid UserForm form, BindingResult result, RedirectAttributes redirectAttributes) {
    if (result.hasErrors()) {
        // 传递错误消息(闪存)+ 保留原始表单参数(URL 参数)
        redirectAttributes.addFlashAttribute("error", "更新失败,请检查!");
        redirectAttributes.addAttribute("id", form.getId()); // 回传 ID 到 URL
        return "redirect:/user/edit";
    }
    userService.update(form);
    return "redirect:/user/detail/" + form.getId();
}
三、与 Model、Session 的区别
| 特性 | Model | RedirectAttributes | Session |
|---|---|---|---|
| 作用范围 | 当前请求(Request) | 重定向前后两次请求 | 跨会话(Session) |
| 数据持久化 | 仅在当前请求有效 | 基于 Session 临时存储 | 直到手动清除或 Session 过期 |
| 适用场景 | 渲染视图时传递数据 | 重定向时传递临时数据 | 跨请求长期存储数据 |
| 安全性 | 无特殊处理 | 闪存数据自动清除 | 需手动管理清除,存在泄漏风险 |
| URL 可见性 | 不可见 | addAttribute 可见 |
不可见 |
四、最佳实践与注意事项
1. 优先使用闪存传递敏感数据
-
避免通过
addAttribute()传递密码、手机号等敏感信息,防止 URL 被拦截或日志泄漏。 -
正确示例 :
javaredirectAttributes.addFlashAttribute("error", "密码错误"); // 安全 // redirectAttributes.addAttribute("password", "123"); // 危险!绝不允许
2. 合理处理数据清除
- 闪存数据在读取后会自动清除,无需手动操作。
- 若需在重定向目标中多次使用同一数据,需重新存储(但不建议,违背闪存"单次使用"原则)。
3. 结合 @ControllerAdvice 统一处理消息
java
@ControllerAdvice
public class GlobalMessageHandler {

    @ModelAttribute
    public void addMessages(Model model, HttpServletRequest request) {
        // 从闪存中获取消息并放入 Model,供所有视图使用
        FlashMap inputFlashMap = RequestContextUtils.getInputFlashMap(request);
        if (inputFlashMap != null) {
            model.mergeAttributes(inputFlashMap);
        }
    }
}- 无需在每个控制器中手动传递消息,全局统一处理。
4. 处理重定向循环(Redirect Loop)
- 避免在重定向目标中再次使用
RedirectAttributes导致循环重定向。 - 检查逻辑是否存在递归重定向(如保存失败后反复重定向到同一页面)。
5. 在测试中模拟闪存数据
java
@SpringBootTest(webEnvironment = WebEnvironment.RANDOM_PORT)
public class UserControllerTest {

    @Autowired
    private TestRestTemplate restTemplate;

    @Test
    public void testSaveUserWithError() {
        // 模拟表单提交失败
        UserForm form = new UserForm();
        ResponseEntity<String> response = restTemplate.postForEntity(
            "/user/save", form, String.class);

        // 断言重定向到 /user/form
        assertThat(response.getHeaders().getLocation().getPath()).isEqualTo("/user/form");

        // 从 Session 中获取闪存属性(需手动获取,测试时需配置 Session 管理)
        MockHttpSession session = (MockHttpSession) request.getSession();
        Map<String, Object> flashAttributes = (Map<String, Object>)
            session.getAttribute(FlashMapManager.FLASH_ATTRS_SESSION_ATTRIBUTE);
        assertThat(flashAttributes.get("error")).isEqualTo("表单填写有误,请检查!");
    }
}
五、源码视角:关键实现类
-
RedirectAttributesModelMap- 实现
RedirectAttributes接口的核心类,继承自LinkedHashMap,同时支持闪存属性和 URL 参数。 - 内部维护两个存储区域:
attributes:用于 URL 参数的普通属性。flashAttributes:用于闪存的临时属性(基于 Session 存储)。
- 实现
-
FlashMapManager- 负责管理闪存属性的存储与迁移,在请求处理前后自动将闪存数据写入/读取 Session。
六、扩展应用:与 Spring Security 结合
在登录场景中,常使用 RedirectAttributes 传递认证相关消息:
java
@Controller
public class AuthController {

    @GetMapping("/login")
    public String loginPage(@RequestParam(required = false) String error, Model model) {
        if (error != null) {
            model.addAttribute("error", "用户名或密码错误");
        }
        return "login";
    }

    @PostMapping("/login")
    public String handleLogin(@Valid UserLoginForm form, BindingResult result,
                              RedirectAttributes redirectAttributes) {
        if (result.hasErrors()) {
            redirectAttributes.addFlashAttribute("error", "表单填写有误");
            return "redirect:/login";
        }
        // 认证逻辑...
        return "redirect:/home";
    }
}
总结
RedirectAttributes 是 Spring MVC 重定向场景下的核心工具,通过灵活运用 addAttribute() 和 addFlashAttribute(),可以安全高效地实现跨请求数据传递。其核心优势在于:
- 临时存储:数据仅在重定向前后有效,自动清理避免泄漏。
- 场景适配:URL 参数适合公开数据,闪存适合敏感或非公开数据。
- 与视图解耦:无需依赖 Session 或复杂的参数拼接,简化开发流程。
在实际开发中,应根据数据敏感性和使用场景选择合适的传递方式,并结合全局异常处理、测试框架等提升开发效率与代码健壮性。
1.9 设计密码修改表单,对新密码进行强度校验和确认匹配
- 设计密码修改表单,包含原密码、新密码和确认新密码输入框
- 验证原密码的正确性,对新密码进行强度校验和确认匹配
设计密码修改表单
在src/main/resources/templates目录下新建user-change-password.html文件:
html
<!DOCTYPE html>
<html lang="en" xmlns:th="http://www.thymeleaf.org"
      xmlns:sec="http://www.thymeleaf.org/extras/spring-security">
<head>
    <meta charset="UTF-8">
    <meta name="viewport" content="width=device-width, initial-scale=1.0">
    <title>RN - 修改密码</title>
    <!-- 引入 Bootstrap CSS -->
    <link href="https://cdn.bootcdn.net/ajax/libs/bootstrap/5.3.6/css/bootstrap.min.css"
          th:href="@{/css/bootstrap.min.css}" rel="stylesheet">

    <!-- 引入 Font Awesome -->
    <link href="https://cdn.bootcdn.net/ajax/libs/font-awesome/4.7.0/css/font-awesome.min.css"
          th:href="@{/css/font-awesome.min.css}" rel="stylesheet">

    <!-- 自定义样式 -->
    <style>
        .password-container {
            max-width: 500px;
            margin: 0 auto;
            padding: 32px;
        }

        .password-card {
            border-radius: 16px;
            box-shadow: 0 4px 20px rgba(0, 0, 0, 0.08);
            border: none;
        }

        .card-header {
            background-color: white;
            border-bottom: none;
            padding: 32px 32px 0;
        }

        .card-body {
            padding: 32px;
        }

        .form-group {
            margin-bottom: 24px;
        }

        .form-label {
            font-weight: 600;
            color: #333;
            margin-bottom: 8px;
        }

        .form-control {
            border-radius: 12px;
            border: 1px solid #e8e8e8;
            padding: 12px 16px;
            height: 48px;
        }

        .form-control:focus {
            border-color: #ff2442;
            box-shadow: 0 0 0 2px rgba(255, 36, 66, 0.1);
        }

        .btn-primary {
            background-color: #ff2442;
            border-color: #ff2442;
            border-radius: 24px;
            padding: 12px 48px;
            font-weight: 600;
            height: 48px;
            width: 100%;
            transition: all 0.3s ease;
        }

        .btn-primary:hover {
            background-color: #e61e3a;
            box-shadow: 0 4px 12px rgba(255, 36, 66, 0.2);
        }

        .error-message {
            color: #ff2442;
            font-size: 12px;
            margin-top: 4px;
        }

        .back-link {
            display: block;
            text-align: center;
            margin-top: 24px;
            color: #999;
            font-size: 14px;
        }

        .back-link:hover {
            color: #ff2442;
        }
    </style>
</head>
<body>
<!-- 导航栏 -->
<nav class="navbar navbar-expand-lg navbar-light bg-light">
    <div class="container">
        <a class="navbar-brand" href="/" th:href="@{/}">
            <img src="../static/images/rn_logo.png" th:src="@{/images/rn_logo.png}" alt="RN" height="24">
        </a>
        <button class="navbar-toggler" type="button" data-bs-toggle="collapse" data-bs-target="#navbarNav"
                aria-controls="navbarNav" aria-expanded="false" aria-label="Toggle navigation">
            <span class="navbar-toggler-icon"></span>
        </button>
        <div class="collapse navbar-collapse" id="navbarNav">
            <ul class="navbar-nav ms-auto">
                <li class="nav-item">
                    <a class="nav-link" href="#" sec:authentication="name">
                        [[${#authentication.name}]]
                    </a>
                </li>
                <li class="nav-item">
                    <a class="nav-link" href="/user/profile" th:href="@{/user/profile}">个人资料</a>
                </li>
                <li class="nav-item">
                    <!-- 注销 -->
                    <form action="/logout" th:action="@{/logout}" method="post">
                        <button type="submit" class="nav-link">退出登录</button>
                    </form>
                </li>
            </ul>
        </div>
    </div>
</nav>

<!-- 主体部分 -->
<div class="password-container">
    <div class="card password-card">
        <!-- 编辑标题 -->
        <div class="card-header">
            <h2 class="text-center">修改密码</h2>
            <p>请输入当前密码和新密码</p>
        </div>

        <div class="card-body">
            <form action="/user/change-password" th:action="@{/user/change-password}" method="post">
                <!-- 当前密码 -->
                <div class="form-group">
                    <label for="oldPassword" class="form-label">当前密码</label>
                    <input type="password" class="form-control" id="oldPassword" name="oldPassword" required/>
                </div>

                <!-- 新密码 -->
                <div class="form-group">
                    <label for="newPassword" class="form-label">新密码</label>
                    <input type="password" class="form-control" id="newPassword" name="newPassword" required/>
                    <div class="error-message" id="newPasswordError"></div>
                </div>

                <!-- 确认密码 -->
                <div class="form-group">
                    <label for="confirmPassword" class="form-label">确认密码</label>
                    <input type="password" class="form-control" id="confirmPassword" name="confirmPassword" required/>
                    <div class="error-message" id="confirmPasswordError"></div>
                </div>

                <!-- 提交按钮 -->
                <button type="submit" class="btn btn-primary">确认修改</button>
            </form>

            <!-- 返回个人资料 -->
            <a href="/user/profile" th:href="@{/user/profile}" class="back-link">返回个人资料</a>
        </div>
    </div>

    <!-- 操作反馈 -->
    <div th:if="${success}" class="alert alert-success mt-3" role="alert">
        [[${success}]]
    </div>
    <div th:if="${error}" class="alert alert-danger mt-3" role="alert">
        [[${error}]]
    </div>
</div>

<!-- Bootstrap JS -->
<script src="https://cdn.bootcdn.net/ajax/libs/bootstrap/5.3.6/js/bootstrap.bundle.min.js"
        th:src="@{/js/bootstrap.bundle.min.js}"></script>

<!-- TODO 密码校验 -->
</body>
</html>
密码校验
验证原密码的正确性,对新密码进行强度校验和确认匹配:
html
<script>
    // 密码验证,验证两次输入的密码是否一致
    document.querySelector('#confirmPassword').addEventListener('input', function () {
        const newPassword = document.querySelector('#newPassword').value;
        const confirmPasswordError = document.querySelector('#confirmPasswordError');

        if (this.value !== newPassword) {
            confirmPasswordError.textContent = '两次输入的密码不一致';
        } else {
            confirmPasswordError.textContent = '';
        }
    });

    // 密码强度验证
    document.querySelector('#newPassword').addEventListener('input', function () {
        const newPassword = this.value;
        const errorMessage = document.querySelector('#newPasswordError');

        // 密码长度至少8位
        if (newPassword.length < 8) {
            errorMessage.textContent = '密码长度至少8位';
            return;
        }

        // 密码必须包含字母和数字
        if (!/[a-zA-Z]/.test(newPassword) || !/[0-9]/.test(newPassword)) {
            errorMessage.textContent = '密码必须包含字母和数字';
            return;
        }

        errorMessage.textContent = '';
    })
</script>
1.10 使用BCryptPasswordEncoder对新密码进行加密并更新到数据库
修改用户控制器UserController
新增对修改密码页面处理:
java
package com.waylau.rednote.controller;
// ...为节约篇幅,此处省略非核心内容
@Controller
@RequestMapping("/user")
public class UserController {
// ...为节约篇幅,此处省略非核心内容
@GetMapping("/change-password")
public String changePasswordForm() {
return "user-change-password";
}
@PostMapping("/change-password")
public String changePassword(@RequestParam String oldPassword, @RequestParam String newPassword, @RequestParam String confirmPassword, RedirectAttributes redirectAttributes) {
// 密码验证,验证两次输入的密码是否一致
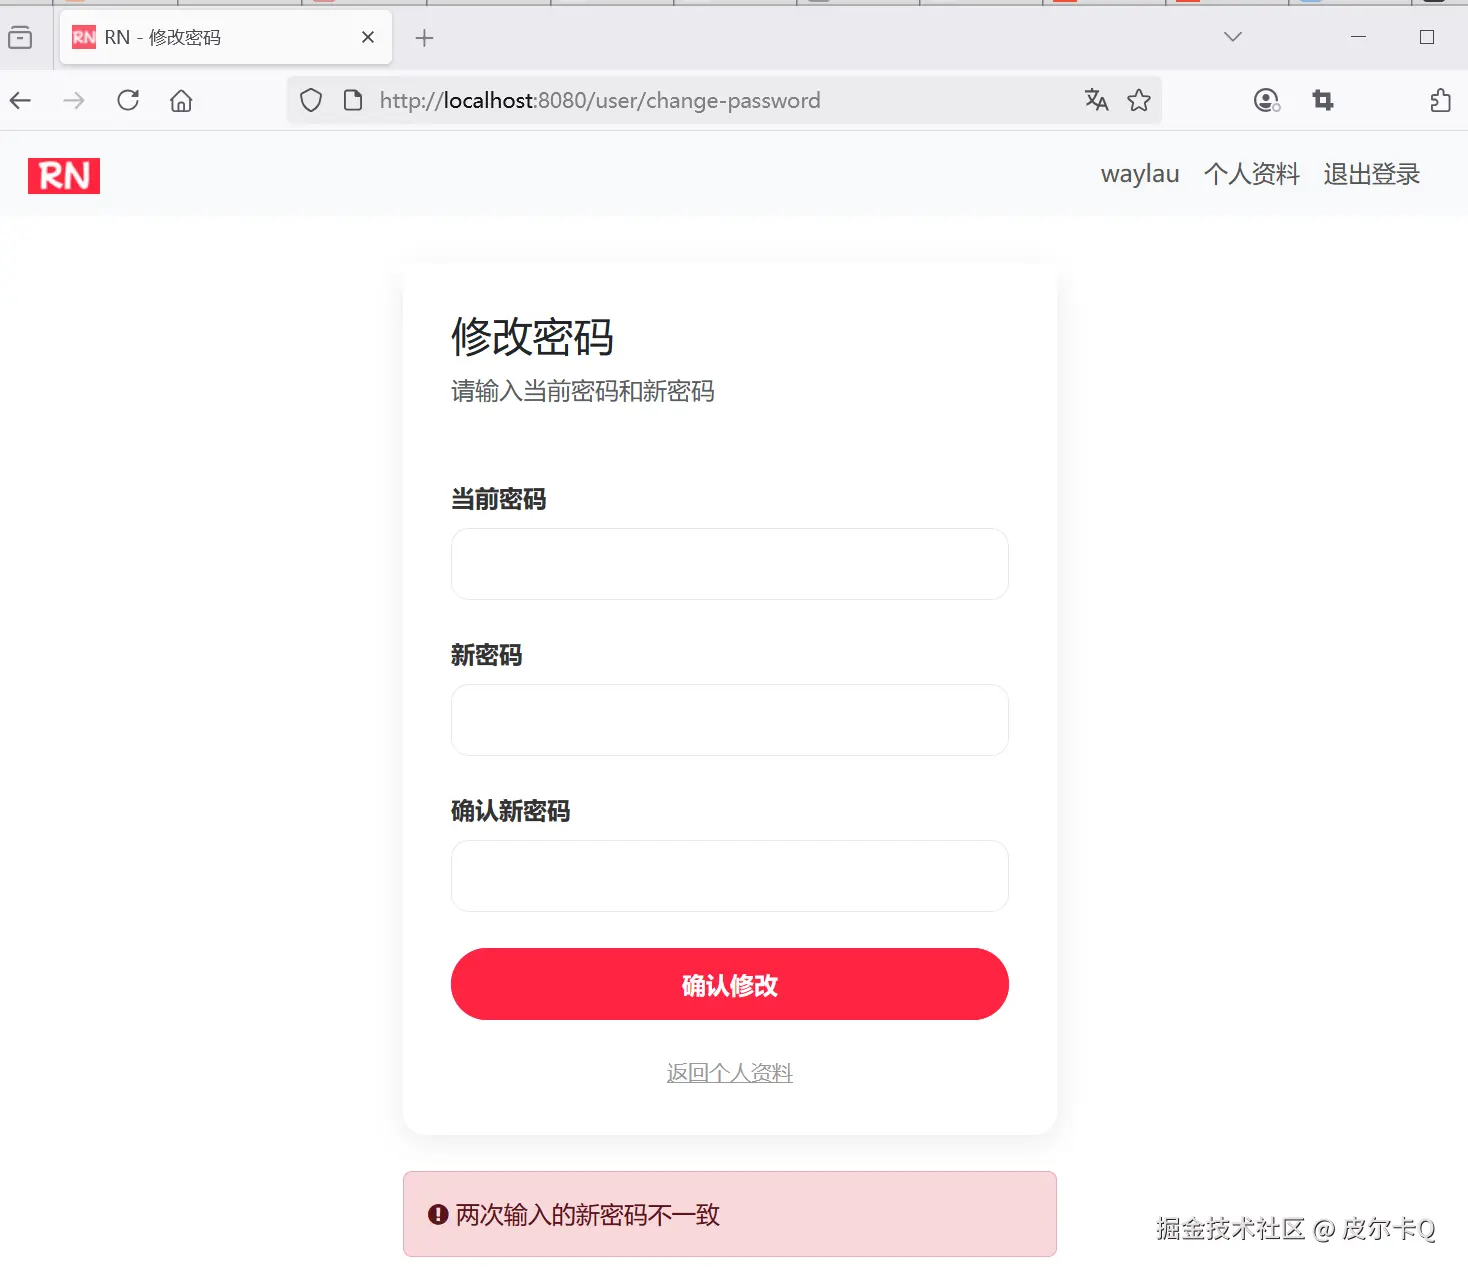
if (!newPassword.equals(confirmPassword)) {
redirectAttributes.addFlashAttribute("error", "两次输入的密码不一致");
return "redirect:/user/change-password";
}
// 密码旧密码是否正确
if (!userService.verifyPassword(userService.getCurrentUser().getUsername(), oldPassword)) {
redirectAttributes.addFlashAttribute("error", "旧密码错误");
return "redirect:/user/change-password";
}
// 新密码强度验证
if (!newPassword.matches("^[a-zA-Z0-9_]{8,20}$")) {
redirectAttributes.addFlashAttribute("error", "新密码强度不够");
return "redirect:/user/change-password";
}
// 更新密码到数据库
userService.changePassword(userService.getCurrentUser().getUsername(), newPassword);
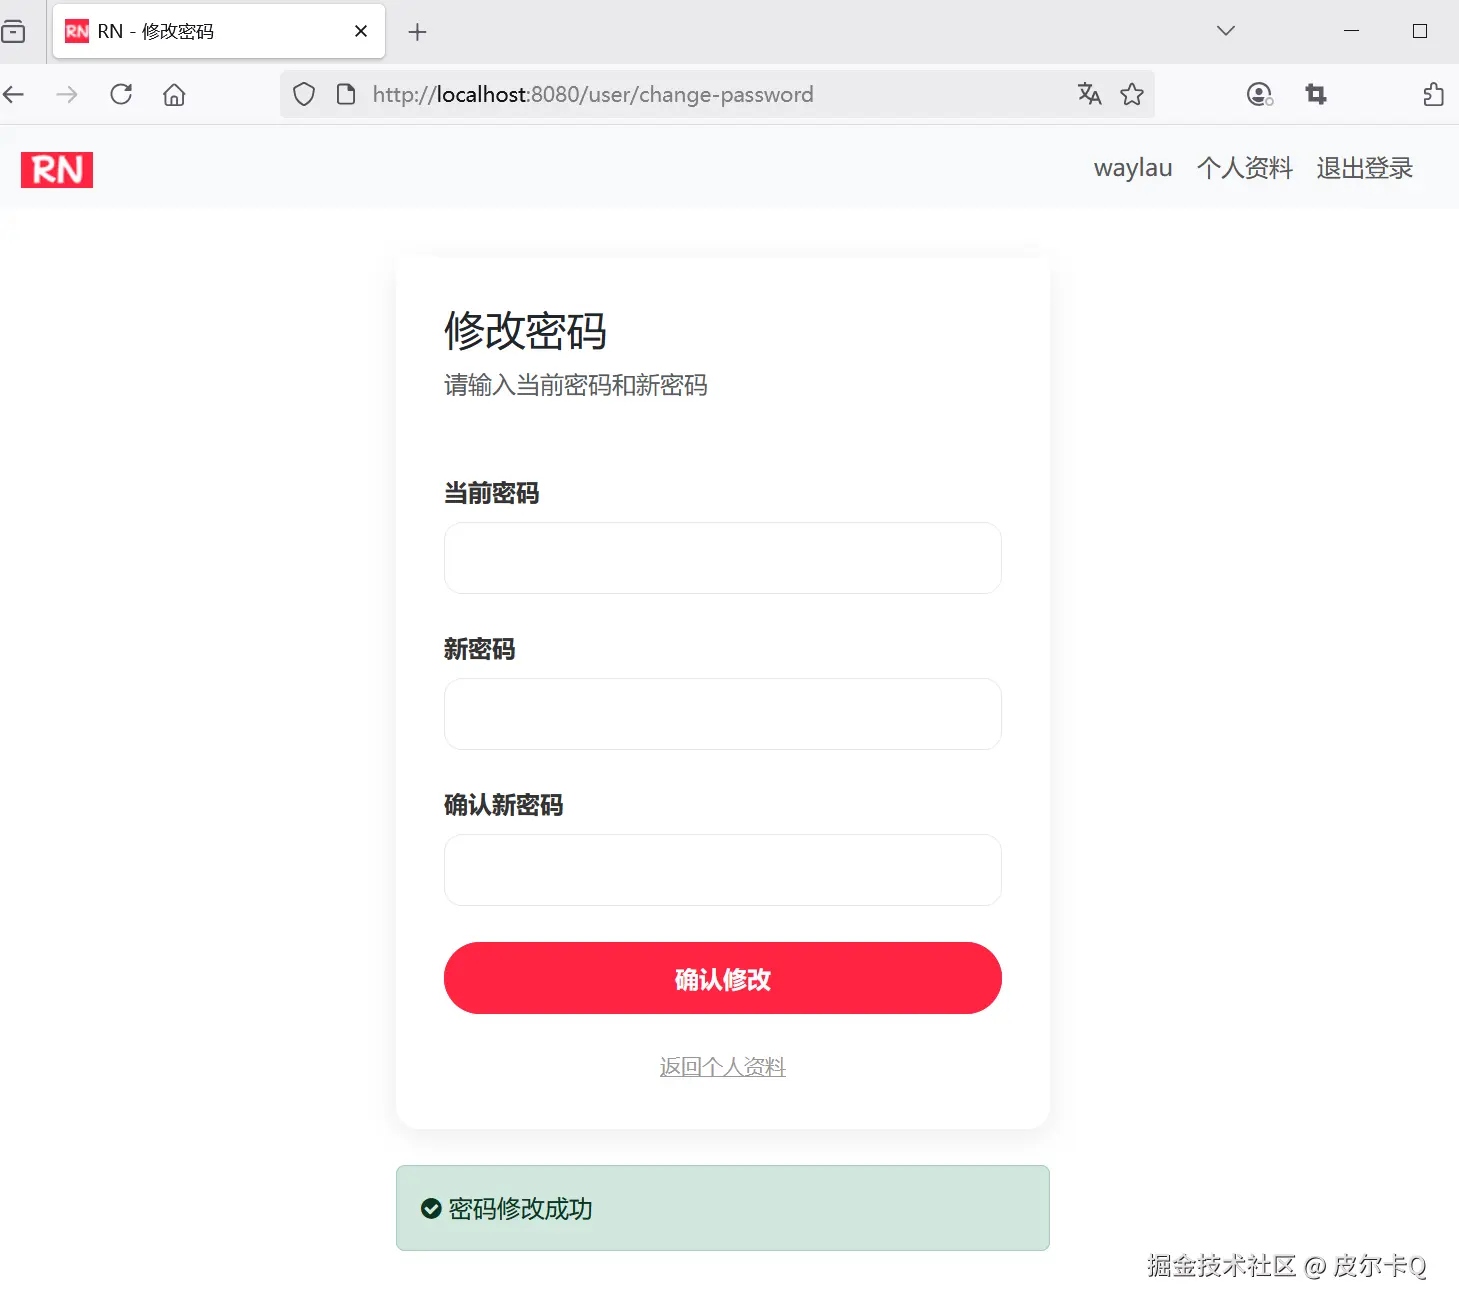
redirectAttributes.addFlashAttribute("success", "密码修改成功");
return "redirect:/user/change-password";
}
}其中:
userService.changePassword()接口用于将修改后的密码保存到数据库;redirectAttributes.addFlashAttribute()重定向到页面时,传递消息。
修改后的密码保存到数据库
修改UserService,增加如下接口:
java
/**
* 修改密码
*/
void changePassword(String username, String newPassword);
修改UserServiceImpl,增加如下方法:
java
@Override
public void changePassword(String username, String newPassword) {
    User user = userRepository.findByUsername(username)
            .orElseThrow(() -> new UsernameNotFoundException(ExceptionType.USERNAME_NOT_FOUND));

    // 加密密码
    String encodedPassword = passwordEncoder.encode(newPassword);
    user.setPassword(encodedPassword);

    userRepository.save(user);
}
新密码需要通过 BCryptPasswordEncoder 加密后存储。
运行调测
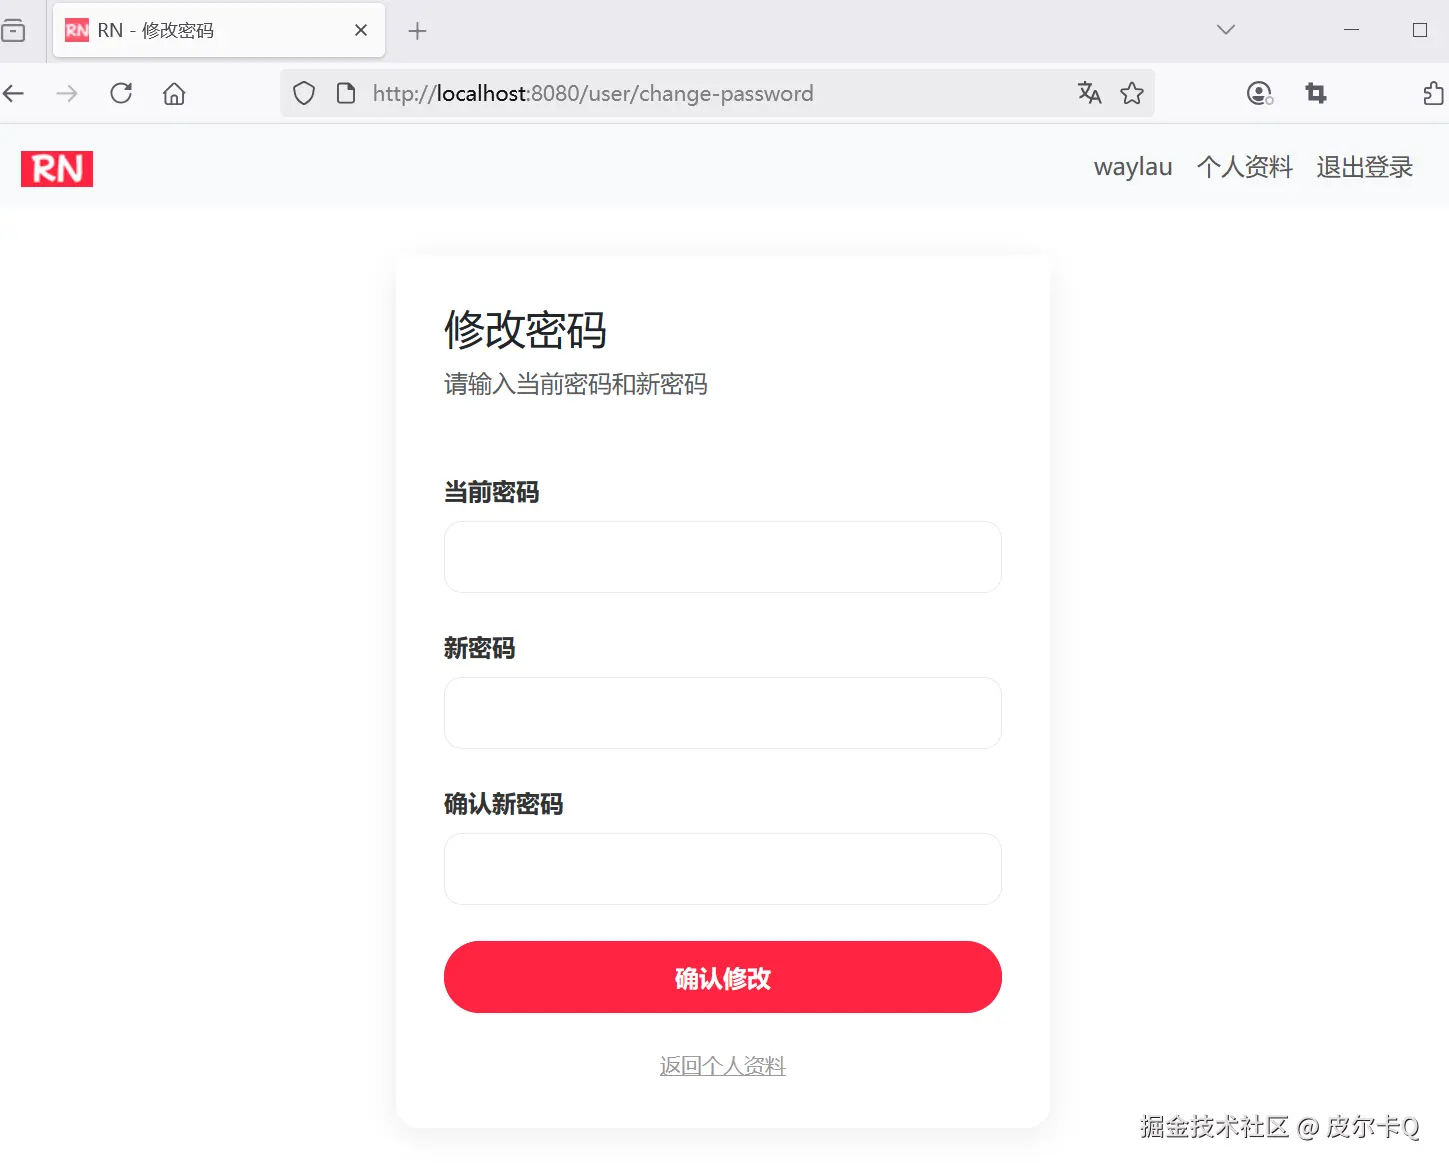
用户修改密码页面如下:
用户修改密码完成之后的页面如下:
用户修改密码失败之后的页面如下:
1.11 Spring MVC实现头像图片上传
在 Spring MVC 中实现头像上传功能,需要处理文件接收、存储、安全验证和 URL 管理等多个环节。下面我将详细介绍实现步骤和最佳实践。
文件上传配置:
- 表单使用 enctype="multipart/form-data"
- 需要在控制器中处理 MultipartFile 参数
静态资源映射配置
新增Spring MVC的配置文件WebMvcConfig.java,用于映射文件上传目录到URL路径:
java
package com.waylau.rednote.config;

import org.springframework.beans.factory.annotation.Value;
import org.springframework.context.annotation.Configuration;
import org.springframework.web.servlet.config.annotation.ResourceHandlerRegistry;
import org.springframework.web.servlet.config.annotation.WebMvcConfigurer;

/**
 * WebMvcConfig MVC配置
 *
 * @author <a href="https://waylau.com">Way Lau</a>
 * @version 2025/08/18
 **/
@Configuration
public class WebMvcConfig implements WebMvcConfigurer {
    // 文件存储根路径,可以配置在应用配置文件中
    @Value("${file.upload-dir:./rednote}")
    private String uploadDir;

    // 静态资源访问路径前缀,可以配置在应用配置文件中
    @Value("${file.static-path-prefix:/uploads/}")
    private String staticPathPrefix;

    // 添加资源处理器
    @Override
    public void addResourceHandlers(ResourceHandlerRegistry registry) {
        registry.addResourceHandler("/uploads/**")
                .addResourceLocations("file:" + uploadDir + staticPathPrefix);
    }
}
控制器实现
修改UserController控制器,增加对头像上传的处理:
java
import org.springframework.transaction.annotation.Transactional;

// ...为节约篇幅,此处省略非核心内容

@Autowired
private FileStorageService fileStorageService;

@Transactional
@PostMapping("/edit")
public String updateProfile(@ModelAttribute User user, RedirectAttributes redirectAttributes,
                            @RequestParam("avatarFile") MultipartFile avatarFile) {
    User currentUser = userService.getCurrentUser();
    String oldAvatar = currentUser.getAvatar();

    // 验证文件类型和大小
    if (avatarFile != null && !avatarFile.isEmpty()) {
        // 验证文件类型
        String contentType = avatarFile.getContentType();
        if (!contentType.startsWith("image/")) {
            redirectAttributes.addFlashAttribute("error", "请上传图片文件");

            return "redirect:/user/edit";
        }

        // 文件名
        String fileName = avatarFile.getOriginalFilename();

        // 处理文件上传
        String fileUrl = fileStorageService.saveFile(avatarFile, fileName);
        currentUser.setAvatar(fileUrl);

        // 删除旧头像文件
        fileStorageService.deleteFile(oldAvatar);
    }

    // 更新用户信息
    currentUser.setPhone(user.getPhone());
    /*currentUser.setAvatar(user.getAvatar());*/
    currentUser.setBio(user.getBio());

    // 修改内容保存到数据库
    userService.updateUser(currentUser);

    // 重定向到指定页面,并传递参数
    redirectAttributes.addFlashAttribute("success", "个人信息更新成功");

    return "redirect:/user/profile";
}
其中
- MultipartFile用于处理头像文件
- FileStorageService.saveFile()用于保存文件
- FileStorageService.deleteFile()用于删除文件
文件存储服务接口
接口如下:
java
package com.waylau.rednote.service;

import org.springframework.web.multipart.MultipartFile;

/**
 * FileStorageService 文件存储服务
 *
 * @author <a href="https://waylau.com">Way Lau</a>
 * @version 2025/06/07
 **/
public interface FileStorageService {

    /**
     * 保存文件
     *
     * @param file     上传的文件
     * @param fileName 文件名
     * @return 文件访问路径
     */
    String saveFile(MultipartFile file, String fileName);

    /**
     * 删除文件
     *
     * @param filePath 文件路径
     */
    void deleteFile(String filePath);

}
1.12 实现文件存储服务器
文件存储服务实现
实现如下:
java
package com.waylau.rednote.service.impl;

import com.waylau.rednote.exception.FileStorageException;
import com.waylau.rednote.service.FileStorageService;
import org.springframework.beans.factory.annotation.Value;
import org.springframework.stereotype.Service;
import org.springframework.web.multipart.MultipartFile;

import java.io.InputStream;
import java.nio.file.Files;
import java.nio.file.Path;
import java.nio.file.Paths;
import java.nio.file.StandardCopyOption;
import java.time.LocalDate;
import java.util.UUID;

/**
 * FileStorageServiceImpl 文件存储服务
 *
 * @author <a href="https://waylau.com">Way Lau</a>
 * @version 2025/08/18
 **/
@Service
public class FileStorageServiceImpl implements FileStorageService {

    // 文件存储根路径,可以配置在应用配置文件中
    @Value("${file.upload-dir:/data/rednote}")
    private String uploadDir;

    // 静态资源访问路径前缀,可以配置在应用配置文件中
    @Value("${file.static-path-prefix:/uploads/}")
    private String staticPathPrefix;

    @Override
    public String saveFile(MultipartFile file, String filename) {
        // 确保文件名唯一
        String uniqueFileName = UUID.randomUUID() + "_" + filename;

        // 生成文件存储路径,按照日期分目录,提高文件系统的性能
        String subDir = LocalDate.now().toString();
        Path uploadPath = Paths.get(uploadDir + staticPathPrefix + subDir);

        try {
            // 创建目录(如果不存在)
            if (!Files.exists(uploadPath)) {
                Files.createDirectories(uploadPath);
            }

            // 拷贝文件。使用完后释放资源
            try (InputStream inputStream = file.getInputStream()) {
                Files.copy(inputStream, uploadPath.resolve(uniqueFileName), StandardCopyOption.REPLACE_EXISTING);
            }
        } catch (Exception e) {
            // 抛出自定义运行时异常
            throw new FileStorageException("文件上传失败:" + filename, e);
        }

        // 返回可访问的URL路径
        return staticPathPrefix + subDir + "/" + uniqueFileName;
    }

    @Override
    public void deleteFile(String filePath) {
        // 判定文件路径是否为空
        if (filePath == null || filePath.isEmpty()) {
            return;
        }

        // 安全检查,确保路径在上传目录内
        Path fullPath = Paths.get(uploadDir + filePath).normalize();

        try {
            // 删除文件
            Files.deleteIfExists(fullPath);
        } catch (Exception e) {
            // 抛出自定义运行时异常
            throw new FileStorageException("文件删除失败:" + filePath, e);
        }
    }
}
在视图中显示头像上传功能
修改user-profile-edit.html:
html
<div class="avatar-upload">
    <!-- 文件上传 --->
    <input type="file" id="avatarFile" name="avatarFile" accept="image/*" class="d-none"></input>
    <label for="avatarFile">更换头像</label>
</div>
异常处理
1. 自定义文件存储异常
java
package com.waylau.rednote.exception;

/**
 * FileStorageException 文件存储异常
 *
 * @author <a href="https://waylau.com">Way Lau</a>
 * @version 2025/06/07
 **/
public class FileStorageException extends ValidationException {
    public FileStorageException(String message) {
        super("文件存储异常. " + message);
    }

    public FileStorageException(String message, Throwable cause) {
        super("文件存储异常. " + message, cause);
    }
}
2. 自定义验证相关异常
java
package com.waylau.rednote.exception;

/**
 * ValidationException 验证相关异常
 *
 * @author <a href="https://waylau.com">Way Lau</a>
 * @version 2025/06/07
 **/
public class ValidationException extends BusinessException {
    public ValidationException(String message) {
        super(message);
    }

    public ValidationException(String message, Throwable cause) {
        super(message, cause);
    }
}
3. 自定义基础业务异常
java
package com.waylau.rednote.exception;

/**
 * BusinessException 基础业务异常
 *
 * @author <a href="https://waylau.com">Way Lau</a>
 * @version 2025/06/07
 **/
public class BusinessException extends RuntimeException {
    public BusinessException(String message) {
        super(message);
    }

    public BusinessException(String message, Throwable cause) {
        super(message, cause);
    }
}
应用配置
ini
# 文件上传配置
file.upload-dir=/data/rednote
file.static-path-prefix=/uploads/

# 上传文件大小限制
spring.servlet.multipart.max-file-size=10MB
spring.servlet.multipart.max-request-size=10MB
运行调测
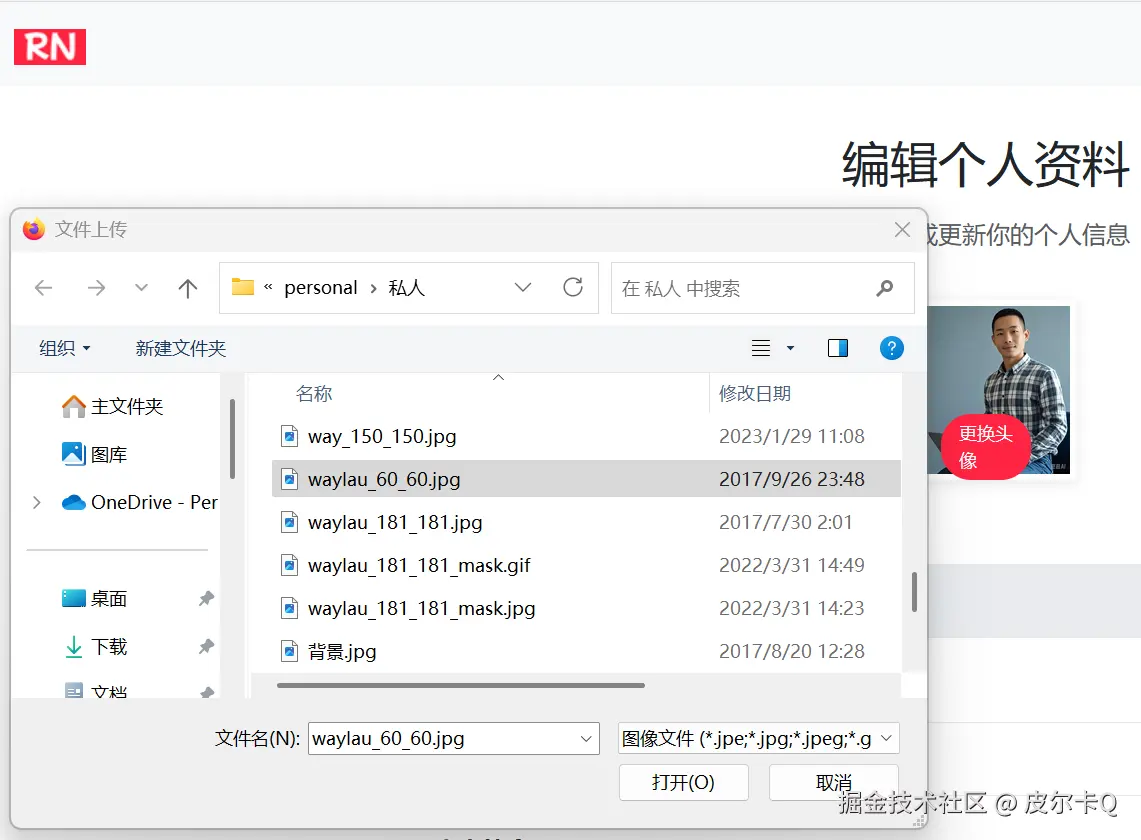
点击"更换头像"按钮,会弹出文件上传选取框如下:
头像更新之后,会重定向到用户信息展示页面,可以看到头像更新后的图片,如下:
头像图片会存储在指定目录下,如下:
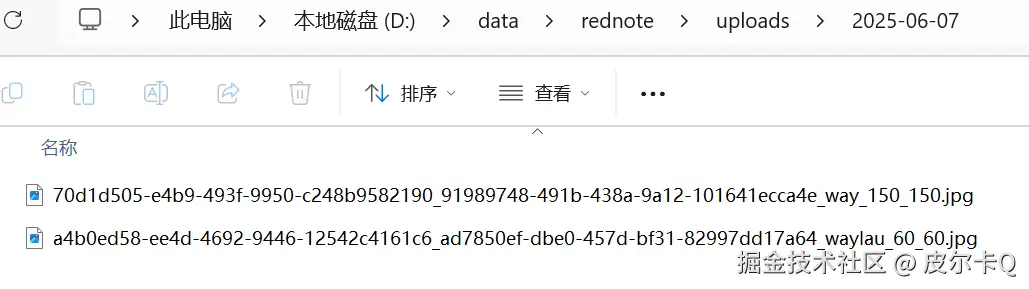
总结
实现 Spring MVC 文件上传需要关注以下关键点:
- 配置 MultipartResolver 处理文件上传请求
- 安全验证:类型检查、大小限制、路径验证
- 文件存储策略:本地存储或云存储
- 数据库关联:保存文件路径到数据库
- 静态资源映射:确保文件可被访问
- 异常处理:完善的错误处理机制
通过以上步骤,你可以实现一个安全、高效的头像上传功能,同时支持本地存储和云存储方案,满足不同规模应用的需求。
1.13 经验总结及优化建议
前端用户信息管理页面搭建
- Bootstrap 组件运用
- 借助 Bootstrap 的各类组件(如
Card、Form等)设计用户信息展示与编辑页面。 - 合理布局页面元素,包括基本信息展示区、编辑表单区等。
- 借助 Bootstrap 的各类组件(如
- 页面交互设计
- 为编辑按钮添加点击事件,实现信息编辑与展示状态的切换。
- 提供友好的确认和提示信息。
- 数据绑定与显示
- 使用 Thymeleaf 的表达式将后端传来的用户信息绑定到前端页面进行显示。
- 确保信息展示的格式规范、清晰。
Spring MVC 处理用户信息请求
- 控制器设计
- 创建处理用户信息管理请求的控制器类,使用
@Controller注解。 - 定义不同请求方法(如
GET获取信息、POST保存信息)对应的处理方法。
- 创建处理用户信息管理请求的控制器类,使用
- 请求映射与参数接收
- 使用
@RequestMapping或其派生注解将不同的请求路径映射到相应的处理方法。 - 准确接收前端传来的用户信息参数,进行必要的格式校验。
RedirectAttributes.addFlashAttribute()重定向到页面时,传递消息。
- 使用
- 响应处理
- 根据业务逻辑处理结果,返回合适的响应信息,如成功提示、错误信息等。
- 支持 HTML 页面响应。
Spring Data JPA 进行用户信息持久化操作
-
实体类关联与扩展
- 检查并完善用户实体类,确保包含所有需要管理的用户信息字段。
-
Repository 接口方法实现
- 在用户 Repository 接口中添加用于更新、查询用户信息的方法。
- 利用 Spring Data JPA 的方法命名规则或自定义查询语句实现这些功能。
Spring Security 权限控制与用户身份验证
- 权限配置调整
- 在 Spring Security 配置类中,进一步细化用户信息管理页面的访问权限。
- 确保只有已登录用户可以访问自己的信息管理页面。
- 用户身份验证与信息匹配
- 在控制器方法中,从 Spring Security 的上下文获取当前登录用户的信息。
- 验证用户请求的信息是否与当前登录用户的身份匹配,防止越权操作。
用户信息管理功能实现
- 基本信息查看与编辑
- 实现用户基本信息(如昵称、头像、联系方式等)的查看功能。
- 允许用户对可编辑信息进行修改,并将修改后的数据保存到数据库。
- 密码修改功能
- 设计密码修改表单,包含原密码、新密码和确认新密码输入框。
- 验证原密码的正确性,对新密码进行强度校验和确认匹配。
- 使用
BCryptPasswordEncoder对新密码进行加密并更新到数据库。
错误处理与性能优化建议
- 全局异常处理增强
- 扩展全局异常处理器,处理用户信息管理过程中可能出现的异常,如数据库操作异常、权限验证异常等。
- 返回清晰易懂的错误信息给用户。
- 性能优化策略
- 对数据库查询进行优化,如使用索引、分页查询等。
- 优化前端页面的加载速度,如异步加载数据、缓存常用信息。
- 拓展建议 :
- 提出一些可拓展的功能方向,如用户信息备份与恢复、多语言支持的信息展示等。
2.1 笔记模块功能概述
仿"小红书"单体项目笔记模块,围绕"用户生成内容(UGC)"核心,聚焦笔记的全生命周期管理,涵盖内容创作、发布、展示、互动等核心功能,同时兼顾用户体验与系统稳定性。以下是整体功能概述总结:
核心功能模块
1. 笔记基础管理
- 创建与发布:支持用户上传图文内容(标题、正文、话题、分类),提供富文本编辑(换行、emoji),发布时自动关联用户信息(作者ID、昵称、头像)。
- 修改与删除:作者可编辑已发布笔记的内容(标题、正文、话题、分类),或彻底删除笔记(删除后不可恢复,同时清理关联互动数据)。
2. 内容展示与检索
- 首页推荐:基于用户兴趣标签(如"美食""穿搭")和热门度(点赞、评论数),展示个性化笔记列表,支持下拉刷新和分页加载。
- 详情页展示:完整呈现笔记内容(标题、正文、图片组、发布时间),关联显示作者信息、互动数据(点赞数、评论数)。
- 检索功能:支持按关键词(话题、分类)搜索笔记,结果按相关性排序,支持筛选(如"最新发布")。
3. 多媒体处理
- 图片上传与展示:支持多图上传。
- 图片存储:本地文件系统私有化部署,通过URL路径访问,确保图片加载速度。
4. 标签与分类体系
- 话题标签:用户可手动添加话题,单篇笔记可以添加多个话题,话题关联笔记用于搜索。
- 分类管理:预设一级分类(如"美食""旅行""美妆"),用户发布时选择对应分类,用于内容归类和精准推荐。
5. 技术实现亮点
- 数据模型设计 :核心实体包括
Note(笔记基本信息),通过外键关联保证数据一致性。 - 前端交互优化:采用异步加载(AJAX)实现点赞、收藏等操作的实时反馈,图片懒加载减少初始加载时间,提升页面流畅度。
- 扩展性预留 :模块内部通过接口隔离业务逻辑(如
NoteService、CommentService),为后续拆分微服务、集成AI功能(如AI文案生成、AI评论助)预留扩展点。
业务价值
该笔记模块作为仿"小红书"项目的核心内容载体,实现了用户"记录生活、分享体验"的核心需求,通过话题标签和分类体系实现内容聚合,为平台构建了UGC社区的基础生态。同时,功能设计贴合小红书"年轻、潮流、生活化"的产品调性,为后续迭代(AI辅助创作)奠定了基础。
2.2 笔记发布功能概述
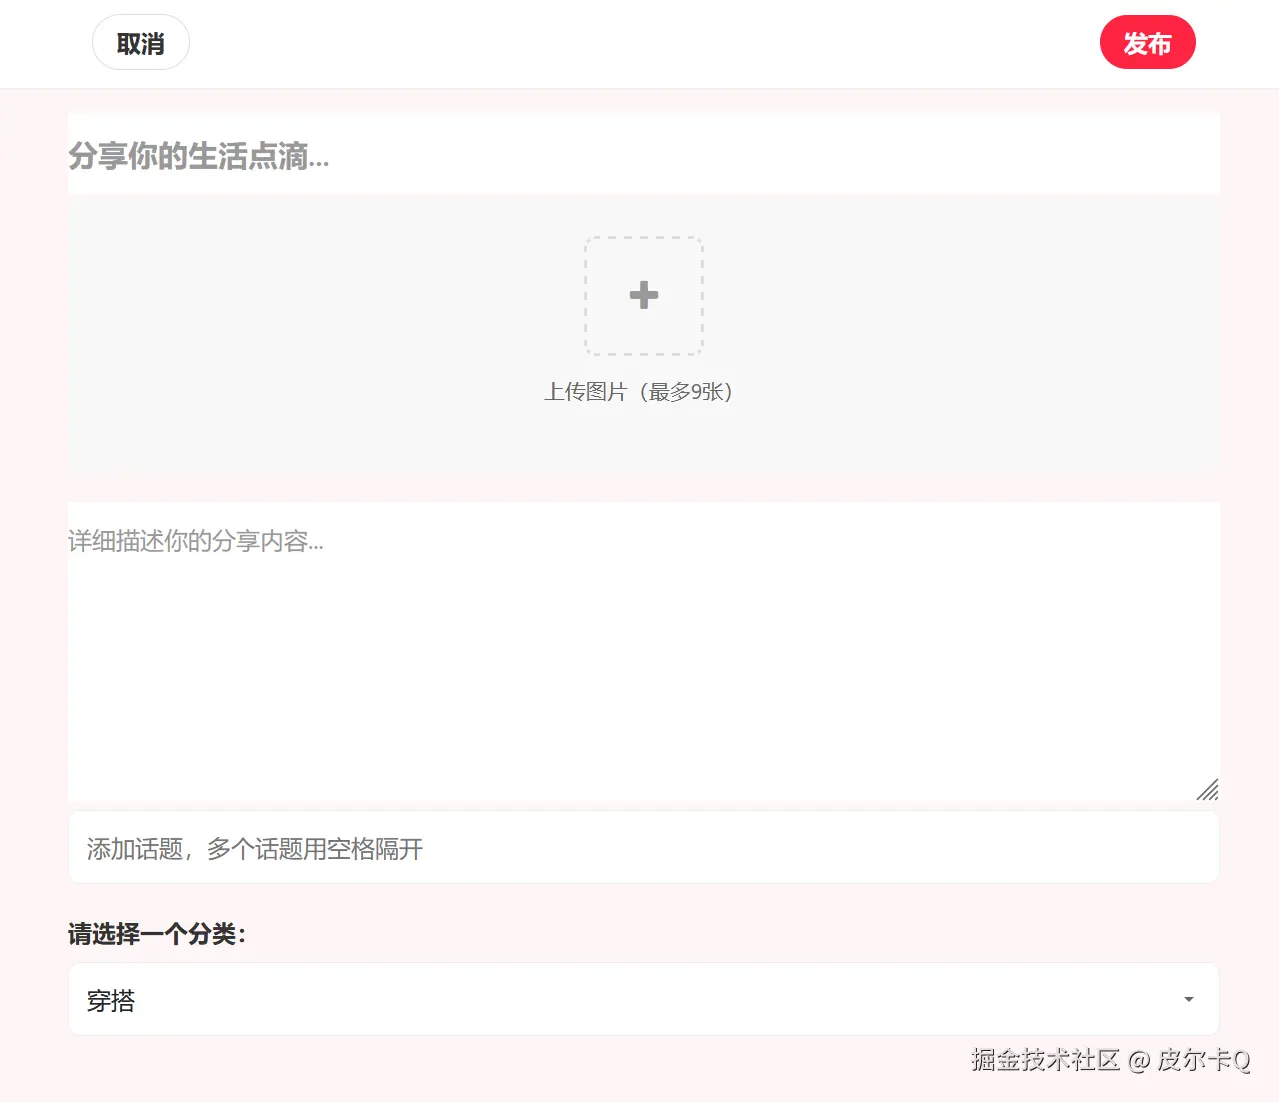
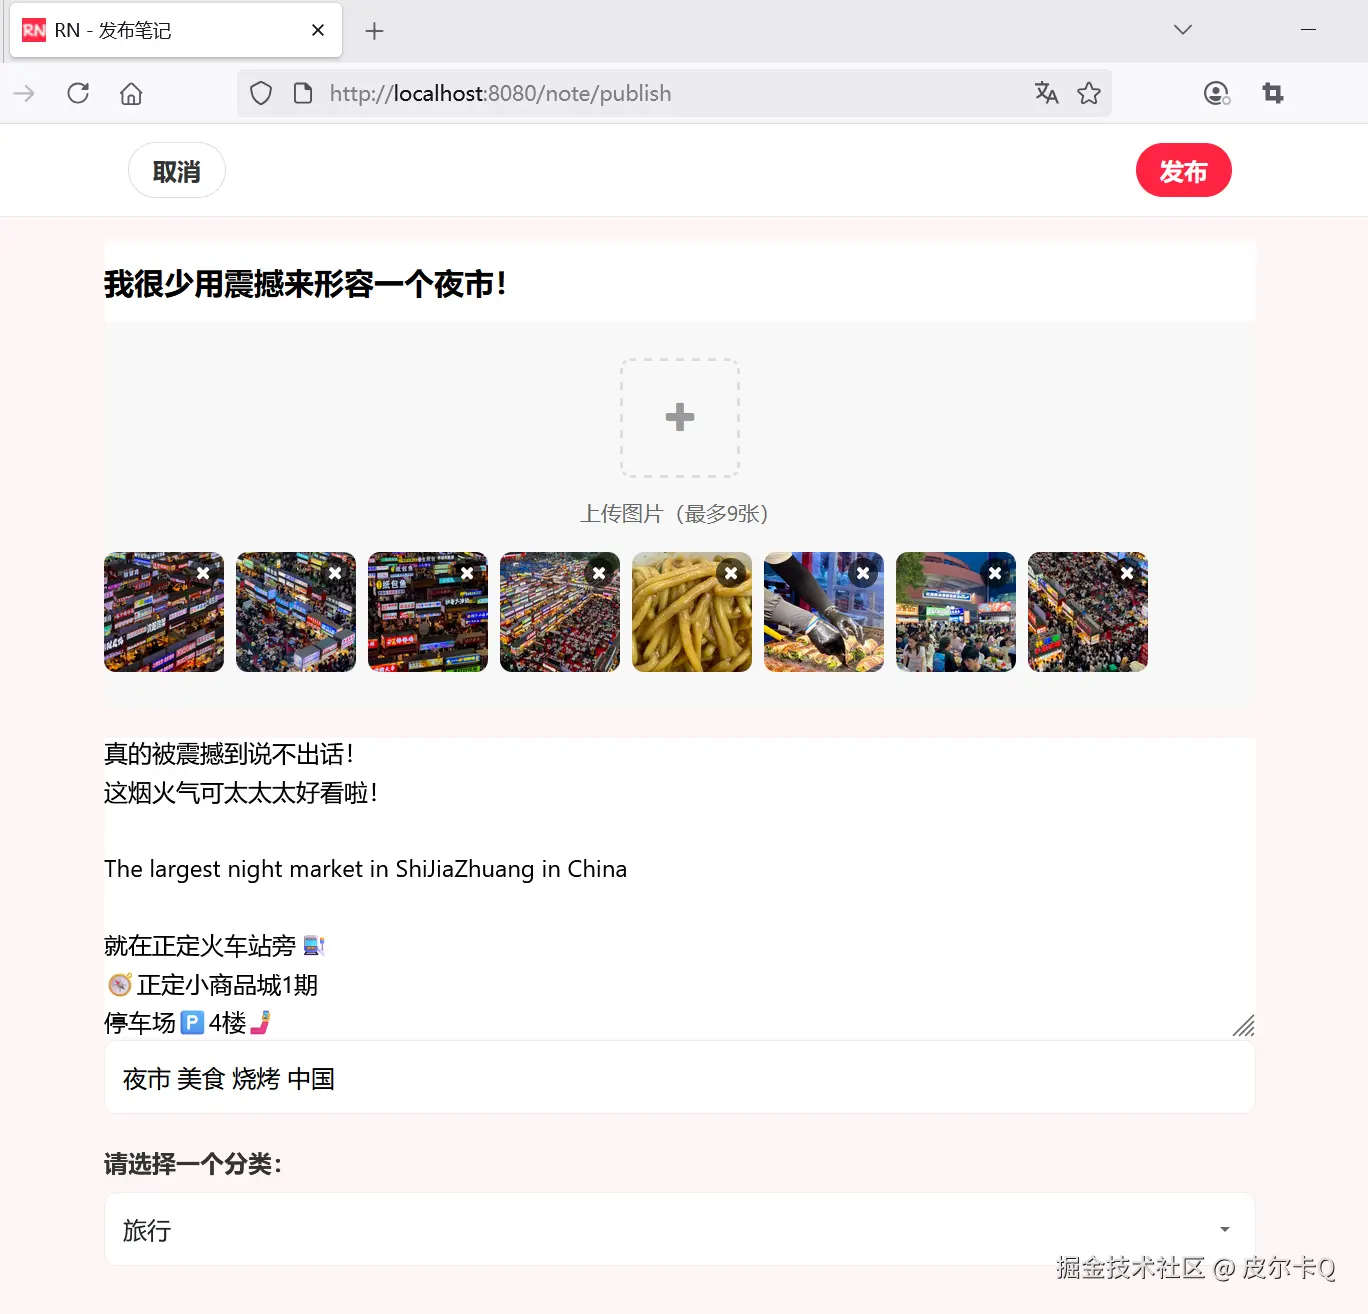
笔记模块的发布功能界面包含了内容编辑器、图片上传、话题、分类等核心功能,整体风格与交互体验都尽量贴近小红书平台。
界面功能亮点
-
小红书风格设计:
- 采用小红书标志性的红色调
- 简洁明快的界面布局
- 精心设计的卡片、按钮和交互元素
-
完整的笔记发布功能:
- 标题和内容编辑器
- 支持多图上传与预览
- 支持多话题输入
- 分类选择
-
丰富的交互体验:
- 图片上传预览和删除功能
- 快速输入多个话题
- 发布成功反馈
- 表单验证和错误提示
-
响应式设计:
- 适配手机、平板和桌面设备
- 在不同屏幕尺寸下保持良好的用户体验
-
前端交互逻辑:
- 使用纯 JavaScript 实现所有交互功能
- 无额外依赖,保证加载速度
2.3 使用Bootstrap、Font Awesome以及Thymeleaf构建笔记发布表单界面
页面设计
新增note-publish.html
html
<!DOCTYPE html>
<html lang="en" xmlns:th="http://www.thymeleaf.org">
<head>
    <meta charset="UTF-8">
    <meta name="viewport" content="width=device-width, initial-scale=1.0">
    <title>RN - 笔记发布</title>
    <!-- 引入 Bootstrap CSS -->
    <link href="https://cdn.bootcdn.net/ajax/libs/bootstrap/5.3.6/css/bootstrap.min.css"
          th:href="@{/css/bootstrap.min.css}" rel="stylesheet">

    <!-- 引入 Font Awesome -->
    <link href="https://cdn.bootcdn.net/ajax/libs/font-awesome/4.7.0/css/font-awesome.min.css"
          th:href="@{/css/font-awesome.min.css}" rel="stylesheet">

    <!-- 自定义样式 -->
    <style>
        /* 基础样式 */
        body {
            background-color: #fef6f6;
            font-family: -apple-system, BlinkMacSystemFont, "Segoe UI", Roboto, Helvetica, Arial, sans-serif;
        }

        .container {
            max-width: 768px;
            margin: 0 auto;
            padding: 0 16px;
        }

        /* 顶部导航栏 */
        .header {
            background-color: white;
            border-bottom: 1px solid #eee;
            padding: 12px 0;
            position: sticky;
            top: 0;
            z-index: 100;
        }

        .header .btn {
            padding: 6px 16px;
            border-radius: 20px;
            font-weight: 600;
        }

        .btn-cancel {
            color: #333;
            border: 1px solid #ddd;
        }

        .btn-publish {
            background-color: #ff2442;
            color: white;
            border: none;
        }

        .btn-publish:hover {
            background-color: #e61e3a;
        }

        /* 内容区域 */
        .content {
            padding: 16px 0;
        }

        /* 标题输入框 */
        .note-title {
            border: none;
            width: 100%;
            font-size: 20px;
            font-weight: 600;
            padding: 12px 0;
            outline: none;
        }

        .note-title::placeholder {
            color: #999;
        }

        /* 图片上传区域 */
        .image-upload {
            background-color: #f8f8f8;
            border-radius: 8px;
            padding: 24px 0;
            text-align: center;
            margin-bottom: 20px;
        }

        .image-upload .upload-btn {
            width: 80px;
            height: 80px;
            border: 2px dashed #ddd;
            border-radius: 8px;
            margin: 0 auto;
            display: flex;
            align-items: center;
            justify-content: center;
            cursor: pointer;
            transition: all 0.3s;
        }

        .image-upload .upload-btn:hover {
            border-color: #ff2442;
        }

        .image-upload .upload-btn i {
            font-size: 24px;
            color: #999;
        }

        .image-upload p {
            margin-top: 12px;
            color: #666;
            font-size: 14px;
        }

        /* 已上传图片展示 */
        .uploaded-images {
            display: flex;
            flex-wrap: wrap;
            gap: 8px;
            margin-top: 16px;
        }

        .uploaded-image {
            width: 80px;
            height: 80px;
            border-radius: 8px;
            overflow: hidden;
            position: relative;
        }

        .uploaded-image img {
            width: 100%;
            height: 100%;
            object-fit: cover;
        }

        .uploaded-image .delete-btn {
            position: absolute;
            top: 4px;
            right: 4px;
            width: 20px;
            height: 20px;
            background-color: rgba(0, 0, 0, 0.6);
            color: white;
            border-radius: 50%;
            display: flex;
            align-items: center;
            justify-content: center;
            cursor: pointer;
            font-size: 12px;
        }

        /* 笔记内容编辑器 */
        .note-content {
            width: 100%;
            min-height: 200px;
            border: none;
            outline: none;
            font-size: 16px;
            line-height: 1.6;
            padding: 12px 0;
        }

        .note-content::placeholder {
            color: #999;
        }

        /* 话题选择 */
        .topic-input {
            position: relative;
            margin-bottom: 20px;
        }

        .topic-input input {
            width: 100%;
            padding: 12px;
            border: 1px solid #eee;
            border-radius: 8px;
            outline: none;
        }

        /* 分类选择 */
        .category-selector {
            margin-bottom: 20px;
        }

        .category-input i {
            color: #ff2442;
        }

        /* 添加到 style 标签中 */
        .category-selector select {
            width: 100%;
            padding: 12px;
            border: 1px solid #eee;
            border-radius: 8px;
            background-color: white;
            appearance: none;
            -webkit-appearance: none;
            background-image: url("data:image/svg+xml,%3Csvg xmlns='http://www.w3.org/2000/svg' viewBox='0 0 24 24' fill='%23666'%3E%3Cpath d='M7 10l5 5 5-5z'/%3E%3C/svg%3E");
            background-repeat: no-repeat;
            background-position: right 12px center;
            background-size: 16px;
            cursor: pointer;
        }

        .category-selector select:focus {
            outline: none;
            border-color: #ff2442;
            box-shadow: 0 0 0 2px rgba(255, 36, 66, 0.1);
        }

        .form-label {
            font-weight: 600;
            color: #333;
        }

        .error-message {
            color: #ff2442;
            font-size: 12px;
            margin-top: 4px;
        }
    </style>
</head>
<body>
<!-- 操作栏 -->
<div class="header">
    <div class="container">
        <div class="d-flex justify-content-between align-items-center">
            <button class="btn btn-cancel" id="cancelPublishBtn">
                取消
            </button>
            <button class="btn btn-publish" id="publishNoteBtn">
                发布
            </button>
        </div>
    </div>
</div>

<!-- 主体部分 -->
<div class="container content">
    <form id="noteForm" method="post" action="/note/publish" th:object="${note}"
          th:action="@{/note/publish}" enctype="multipart/form-data">
        <!-- 标题输入框 -->
        <input type="text" class="note-title" id="title" name="title"
               th:field="*{title}" placeholder="分享你的生活点滴...">
        <div class="error-message" th:if="${#fields.hasErrors('title')}" th:errors="*{title}">
        </div>

        <!-- 图片上传区域 -->
        <div class="image-upload">
            <!-- 图片选取上传按钮 -->
            <div class="upload-btn" onclick="document.getElementById('imageUpload').click()">
                <i class="fa fa-plus"></i>
            </div>
            <p>上传图片(最多9张)</p>
            <input type="file" id="imageUpload" name="images" multiple="multiple" style="display: none;"
                   accept="image/*" th:field="*{images}">

            <!-- 已上传图片预览 -->
            <div class="uploaded-images" id="uploadedImages"></div>

            <!-- 错误消息 -->
            <div class="error-message" th:if="${#fields.hasErrors('images')}" th:errors="*{images}">
            </div>
        </div>

        <!-- 笔记内容 -->
        <textarea class="note-content" id="content" name="content"
                  th:field="*{content}" placeholder="详细描述你的分享内容..."></textarea>
        <div class="error-message" th:if="${#fields.hasErrors('content')}" th:errors="*{content}">
        </div>

        <!-- 话题 -->
        <div class="topic-input">
            <input type="text" class="form-control" id="topicInput" name="topics"
                   th:field="*{topics}" placeholder="添加话题,多个话题用空格隔开">
        </div>

        <!-- 分类 -->
        <div class="category-selector">
            <label for="categorySelect" class="form-label">请选择一个分类:</label>
            <select class="form-control" id="categorySelect" name="category"
                    th:field="*{category}">
                <option value="穿搭">穿搭</option>
                <option value="美食">美食</option>
                <option value="彩妆">彩妆</option>
                <option value="影视">影视</option>
                <option value="职场">职场</option>
                <option value="情感">情感</option>
                <option value="家居">家居</option>
                <option value="游戏">游戏</option>
                <option value="旅行">旅行</option>
                <option value="健身">健身</option>
            </select>
            <div class="error-message" th:if="${#fields.hasErrors('category')}" th:errors="*{category}">
            </div>
        </div>
    </form>
</div>

<!-- Bootstrap JS -->
<script src="https://cdn.bootcdn.net/ajax/libs/bootstrap/5.3.6/js/bootstrap.bundle.min.js"
        th:src="@{/js/bootstrap.bundle.min.js}"></script>

</body>
</html>
笔记发布界面效果如下图7-1所示:
笔记发布表单的校验
js
<script>
    // 笔记发布表单的校验
    // 在发布按钮上设置点击事件
    document.getElementById("publishNoteBtn").addEventListener("click", function (event) {
        // 获取笔记标题
        const title = document.getElementById("title").value;
        if (title.trim() === "") {
            alert("请输入笔记标题");
            return;
        }

        // 获取笔记内容
        const content = document.getElementById("content").value;
        if (content.trim() === "") {
            alert("请输入笔记内容");
            return;
        }

        // 提交表单
        document.getElementById("noteForm").submit();
    })
</script>
2.4 攻克多图选择及多次选择的难点
本节实现
- 为图片上传组件添加预览功能,让用户可以实时看到上传的图片
- 实现图片的动态添加和删除功能,提升用户体验
- 设计提交按钮,并添加点击事件,在提交前进行表单验证
图片预览、多图选择及多次选择
在 HTML 中,<input type="file" multiple> 允许用户一次选择多个文件。然而,这个功能本身并不支持"多次选择"同一个文件输入框中的文件。用户每次点击文件选择对话框时,只能选择一组新的文件,这些文件会替换之前选择的文件。
如果你希望实现多次选择文件的功能(即用户可以选择文件多次,并将所有选择的文件累积到一个列表中),你需要使用 JavaScript 来实现这个功能。以下是一个简单的实现方案:
js
<script>
    // ...为节约篇幅,此处省略非核心内容

    // 收集选择的文件
    let selectedFiles = [];

    // 监听文件的选择
    document.getElementById("imageUpload").addEventListener("change", function (event) {
        // 获取选择的文件
        const files = Array.from(event.target.files);

        // 添加到已收集的选择数组里面去
        selectedFiles = selectedFiles.concat(files);

        // 更新文件列表显示
        updateFileList();
    })


    // 获取已上传图片预览的 DOM 元素
    const uploadedImages = document.getElementById("uploadedImages");

    // 更新文件列表显示
    function updateFileList() {
        // 清空图片预览
        uploadedImages.innerHTML = "";

        // 生成图片预览
        for (let i = 0; i < selectedFiles.length; i++) {
            const fileItem = document.createElement("div");
            fileItem.className = "uploaded-image";

            const deleteBtn = document.createElement("div");
            deleteBtn.className = "delete-btn";
            deleteBtn.onclick = () => deleteFile(i);
            fileItem.appendChild(deleteBtn);

            const deleteBtnIcon = document.createElement("i");
            deleteBtnIcon.className = "fa fa-times";
            deleteBtn.appendChild(deleteBtnIcon);

            const imagePreview = document.createElement("img");
            imagePreview.className = "preview-img";
            imagePreview.alt = "预览";
            fileItem.appendChild(imagePreview);

            const reader = new FileReader();
            reader.onload = function (e) {
                imagePreview.src = e.target.result;
            }
            reader.readAsDataURL(selectedFiles[i]);

            uploadedImages.appendChild(fileItem);
        }
    }

    // 删除预览文件
    function deleteFile(i) {
        selectedFiles.splice(i, 1);
        updateFileList();
    }

    // 取消发布的事件处理
    document.getElementById("cancelPublishBtn").addEventListener("click", function (event) {
        // 用户确认是否取消发布
        if (confirm("确定要取消发布吗?所有内容将不会被保存")) {
            window.history.back();
        }
    })
});

</script>
上述代码:
- 可以通过使用 FileReader 来实现图片的预览功能。FileReader 允许我们读取文件的内容,并将其转换为 Data URL,这样我们就可以直接在 标签中显示图片
- updateFileList 函数现在为每个文件项添加了一个删除按钮。
- deleteFile 函数用于从 selectedFiles 数组中删除指定索引的文件,并更新文件列表显示。
如何将文件数组赋值给 <form>?
在 JavaScript 中,<form> 元素不能直接接收文件数组作为其内容。文件数组通常是指用户通过 <input type="file"> 元素选择的文件列表,这些文件需要以特定的方式添加到表单中,以便在提交表单时能够上传到服务器。
如果你希望将文件数组的内容上传到服务器,通常需要使用 FormData 对象来构建表单数据,然后通过 POST 请求发送这些数据。
如果你需要模拟文件选择或拖放操作,可以使用 DataTransfer 对象来构建一个文件列表,然后通过编程的方式将其赋值给一个 <input type="file"> 元素。
以下示例展示了如何将将文件数组赋值给 <form>:
js
// 在发布按钮上设置点击事件
document.getElementById("publishNoteBtn").addEventListener("click", function (event) {
    // ...为节约篇幅,此处省略非核心内容

    // 将收集到的图片上传,需要创建DataTransfer对象
    const dataTransfer = new DataTransfer();
    for (let i = 0; i < selectedFiles.length; i++) {
        // 将文件添加到DataTransfer对象中
        dataTransfer.items.add(selectedFiles[i]);
    }

    // 将DataTransfer对象设置给上传文件的input元素
    document.getElementById("imageUpload").files = dataTransfer.files;

    // 提交表单
    document.getElementById("noteForm").submit();
})
2.5 掌握自定义校验器处理复杂数据类型
基于之前的笔记发布界面,我将补充完整的后端接口实现,包括表单处理、图片上传和安全校验。以下是核心代码实现:
DTO 对象
java
package com.waylau.rednote.dto;

import jakarta.validation.constraints.NotEmpty;
import jakarta.validation.constraints.Size;
import lombok.Getter;
import lombok.Setter;
import org.springframework.web.multipart.MultipartFile;

import java.util.List;

/**
 * NotePublishDto 笔记发布DTO
 *
 * @author <a href="https://waylau.com">Way Lau</a>
 * @version 2025/08/18
 **/
@Getter
@Setter
public class NotePublishDto {
    @NotEmpty(message = "标题不能为空")
    @Size(max = 60, message = "标题长度不能超过60个字符")
    private String title;

    @NotEmpty(message = "内容不能为空")
    @Size(max = 900, message = "内容长度不能超过900个字符")
    private String content;

    private String topics;

    @NotEmpty(message = "分类不能为空")
    private String category;

    @NotEmpty(message = "图片不能为空")
    @Size(min = 1, max = 9, message = "上传图片最多9张")
    private List<MultipartFile> images;
}List<MultipartFile>用于接收前端传过来的图片数组。由于List<MultipartFile>的校验较为复杂,因此需要自定义校验器。
支持对集合中每个元素的验证
在使用 jakarta.validation 来验证 List<MultipartFile> 中的每个 MultipartFile 是否为空时,你可以创建一个自定义验证器。由于 jakarta.validation 本身不直接支持对集合中每个元素的验证,你需要实现一个自定义的验证注解和对应的验证器。
以下是一个完整的实现步骤。
1. 创建自定义验证注解
首先,创建一个自定义注解来标记需要验证的字段:
java
package com.waylau.rednote.annotation;

import jakarta.validation.Constraint;
import jakarta.validation.Payload;

import java.lang.annotation.*;

/**
 * NotEmptyMultipartFileList 验证 List<MultipartFile> 中的每个 MultipartFile 是否为空
 *
 * @author <a href="https://waylau.com">Way Lau</a>
 * @version 2025/08/18
 **/
@Documented
@Constraint(validatedBy = NotEmptyMultipartFileListValidator.class)
@Target({ElementType.FIELD, ElementType.PARAMETER})
@Retention(RetentionPolicy.RUNTIME)
public @interface NotEmptyMultipartFileList {
    String message() default "文件列表不能包含空文件";

    Class<?>[] groups() default {};

    Class<? extends Payload>[] payload() default {};
}
2. 实现自定义验证器
接下来,实现一个验证器来检查 List<MultipartFile> 中的每个文件是否为空:
java
package com.waylau.rednote.annotation;

import jakarta.validation.ConstraintValidator;
import jakarta.validation.ConstraintValidatorContext;
import org.springframework.web.multipart.MultipartFile;

import java.util.List;

/**
 * NotEmptyMultipartFileListValidator 自定义验证器来检查 List<MultipartFile> 中的每个文件是否为空
 *
 * @author <a href="https://waylau.com">Way Lau</a>
 * @version 2025/08/18
 **/
public class NotEmptyMultipartFileListValidator implements ConstraintValidator<NotEmptyMultipartFileList, List<MultipartFile>> {
    @Override
    public boolean isValid(List<MultipartFile> multipartFiles, ConstraintValidatorContext constraintValidatorContext) {
        if (multipartFiles != null && !multipartFiles.isEmpty()) {
            for (MultipartFile multipartFile : multipartFiles) {
                if (multipartFile.isEmpty()) {
                    return false;
                }
            }

            return true;
        }

        return false;
    }
}
在DTO中使用自定义校验器注解
现在,你可以在DTO中使用这个自定义注解来验证文件列表:
java
import com.waylau.rednote.annotation.NotEmptyMultipartFileList;

// ...为节约篇幅,此处省略非核心内容

@Getter
@Setter
public class NotePublishDto {
    // ...为节约篇幅,此处省略非核心内容

    /*@NotEmpty(message = "图片不能为空")*/
    // 添加自定义的验证器注解
    @NotEmptyMultipartFileList(message = "图片不能为空")
    @Size(min = 1, max = 9, message = "上传图片最多9张")
    private List<MultipartFile> images;

}在控制器中使用@Valid注解
在控制器中使用@Valid注解,实现对DTO对象的自动校验:
java
package com.waylau.rednote.controller;

import com.waylau.rednote.dto.NotePublishDto;
import com.waylau.rednote.entity.User;
import com.waylau.rednote.service.UserService;
import jakarta.validation.Valid;
import org.springframework.beans.factory.annotation.Autowired;
import org.springframework.stereotype.Controller;
import org.springframework.ui.Model;
import org.springframework.validation.BindingResult;
import org.springframework.web.bind.annotation.GetMapping;
import org.springframework.web.bind.annotation.ModelAttribute;
import org.springframework.web.bind.annotation.PostMapping;
import org.springframework.web.bind.annotation.RequestMapping;

/**
 * NoteController 笔记控制器
 * @author <a href="https://waylau.com">Way Lau</a>
 * @version 2025/08/18
**/
@Controller
@RequestMapping("/note")
public class NoteController {

    @Autowired
    private UserService userService;

    /**
     * 显示笔记发布页面
     */
    @GetMapping("/publish")
    public String showPublishForm(Model model) {
        model.addAttribute("note", new NotePublishDto());
        return "note-publish";
    }

    /**
     * 处理笔记发布请求
     */
    @PostMapping("/publish")
    public String publishNote(@Valid @ModelAttribute("note") NotePublishDto notePublishDto,
                              BindingResult bindingResult,
                              Model model){
        // 验证表单
        if (bindingResult.hasErrors()) {
            model.addAttribute("note", notePublishDto);
            return "note-publish";
        } else {
            // TODO 通过笔记服务创建笔记

            // 显示笔记发布成功页面
            return "note-publish-success";
        }

    }
}
上述代码
- 校验失败,则返回note-publish.html
- 校验成功,则返回note-publish-success.html
2.6 笔记发布成功的界面设计
笔记发布可能成功或者失败:
- 校验失败,则返回note-publish.html
- 校验成功,则返回note-publish-success.html
note-publish-success.html内容如下:
html
<!DOCTYPE html>
<html lang="en" xmlns:th="http://www.thymeleaf.org">
<head>
    <meta charset="UTF-8">
    <meta name="viewport" content="width=device-width, initial-scale=1.0">
    <title>RN - 笔记发布成功</title>
    <!-- 引入 Bootstrap CSS -->
    <link href="https://cdn.bootcdn.net/ajax/libs/bootstrap/5.3.6/css/bootstrap.min.css"
          th:href="@{/css/bootstrap.min.css}" rel="stylesheet">

    <!-- 引入 Font Awesome -->
    <link href="https://cdn.bootcdn.net/ajax/libs/font-awesome/4.7.0/css/font-awesome.min.css"
          th:href="@{/css/font-awesome.min.css}" rel="stylesheet">

    <!-- 自定义样式 -->
    <style>
        /* 全局样式 */
        * {
            font-family: -apple-system, BlinkMacSystemFont, "Segoe UI", Roboto, "Helvetica Neue", Arial, sans-serif;
            box-sizing: border-box;
        }

        body {
            background-color: #f5f5f5;
            margin: 0;
            padding: 0;
            display: flex;
            justify-content: center;
            align-items: center;
            min-height: 100vh;
            background-image: linear-gradient(135deg, #ffecd2 0%, #fcb69f 100%);
        }

        /* 发布成功弹窗 */
        .success-modal {
            position: fixed;
            top: 0;
            left: 0;
            width: 100%;
            height: 100%;
            display: flex;
            justify-content: center;
            align-items: center;
            z-index: 1000;
        }

        .success-content {
            background-color: white;
            border-radius: 24px;
            padding: 48px 32px;
            text-align: center;
            box-shadow: 0 12px 32px rgba(255, 36, 66, 0.15);
            animation: fadeInUp 0.5s ease-out;
        }

        /* 动画效果 */
        @keyframes fadeInUp {
            from {
                opacity: 0;
                transform: translateY(20px);
            }
            to {
                opacity: 1;
                transform: translateY(0);
            }
        }

        /* 图标样式 */
        .success-icon {
            width: 80px;
            height: 80px;
            background-color: #ff2442;
            border-radius: 50%;
            display: flex;
            justify-content: center;
            align-items: center;
            margin: 0 auto 24px;
        }

        .success-icon i {
            font-size: 36px;
            color: white;
            animation: bounce 1.5s infinite;
        }

        @keyframes bounce {
            0%, 100% { transform: translateY(0); }
            50% { transform: translateY(-8px); }
        }

        /* 标题与文案 */
        .success-title {
            font-size: 24px;
            font-weight: 600;
            color: #333;
            margin-bottom: 12px;
        }

        .success-desc {
            font-size: 16px;
            color: #666;
            margin-bottom: 32px;
        }

        /* 操作按钮 */
        .btn-group {
            display: flex;
            gap: 16px;
            justify-content: center;
        }

        .btn-view {
            background-color: #ff2442;
            color: white;
            padding: 12px 32px;
            border: none;
            border-radius: 24px;
            font-weight: 600;
            cursor: pointer;
            transition: transform 0.2s;
        }

        .btn-view:hover {
            transform: translateY(-2px);
            box-shadow: 0 4px 12px rgba(255, 36, 66, 0.2);
        }

        .btn-continue {
            background-color: white;
            color: #666;
            padding: 12px 32px;
            border: 2px solid #ff2442;
            border-radius: 24px;
            font-weight: 600;
            cursor: pointer;
        }

    </style>
</head>
<body>

<div class="success-modal">
    <div class="success-content">
        <div class="success-icon">
            <i class="fa fa-check"></i>
        </div>

        <h2 class="success-title">发布成功!</h2>
        <p class="success-desc">
            你的笔记已被推荐到首页,快去看看有没有新互动吧~
        </p>

        <div class="btn-group">
            <button class="btn-view" onclick="goToNote()">查看笔记</button>
            <button class="btn-continue" onclick="continuePublish()">继续发布</button>
        </div>
    </div>
</div>

<!-- Bootstrap JS -->
<script src="https://cdn.bootcdn.net/ajax/libs/bootstrap/5.3.6/js/bootstrap.bundle.min.js"
        th:src="@{/js/bootstrap.bundle.min.js}"></script>

<script>
    // 跳转到笔记详情页面
    function goToNote() {
        // TODO 跳转到笔记详情页面,替换为实际笔记ID
        window.location.href = '/note/1234';
    }

    // 继续发布
    function continuePublish() {
        window.history.back();
    }
</script>

</body>
</html>
2.7 掌握Repository设计模式来实现笔记保存
- 笔记表结构设计
- 创建笔记实体类,使用
@Entity、@Table等注解映射到数据库表 - 处理笔记实体类与用户实体类的关联关系,确保笔记与发布用户的对应
- 创建笔记 Repository 接口NoteRepository
- 配置笔记发布页面的访问权限,确保只有已登录用户可以访问笔记发布页面并发布笔记
- 在控制器方法中,从 Spring Security 的上下文获取当前登录用户的信息
- 将笔记的作者信息设置为当前登录用户,并进行必要的权限验证,防止非法发布
定义实体
java
package com.waylau.rednote.entity;

import jakarta.persistence.*;
import lombok.AllArgsConstructor;
import lombok.Data;
import lombok.NoArgsConstructor;

import java.time.LocalDateTime;
import java.util.ArrayList;
import java.util.List;

/**
 * Note 笔记实体
 *
 * @author <a href="https://waylau.com">Way Lau</a>
 * @version 2025/08/18
 **/
@Entity
@Table(name = "t_note")
// @Data集合了@Getter @Setter @ToString @EqualsAndHashCode
@Data
// 无参构造器
@NoArgsConstructor
// 包含所有参数的构造器
@AllArgsConstructor
public class Note {
    @Id
    @GeneratedValue(strategy = GenerationType.AUTO)
    private Long noteId;

    private String title;

    private String content;

    @ElementCollection
    private List<String> topics = new ArrayList<>();

    @ElementCollection
    private List<String> images = new ArrayList<>();

    private String category;

    @ManyToOne(fetch = FetchType.LAZY)
    @JoinColumn(name = "user_id")
    private User author;

    @Column(updatable = false)
    private LocalDateTime createAt = LocalDateTime.now();

    private LocalDateTime updateAt = LocalDateTime.now();
}
实现NoteRepository
java
package com.waylau.rednote.repository;

import com.waylau.rednote.entity.Note;
import com.waylau.rednote.entity.User;
import org.springframework.data.repository.Repository;

import java.util.Optional;

/**
 * NoteRepository 笔记仓库
 *
 * @author <a href="https://waylau.com">Way Lau</a>
 * @version 2025/06/09
 **/
public interface NoteRepository extends Repository<Note, Long> {

    /**
     * 保存笔记
     *
     * @param note
     * @return
     */
    Note save(Note note);

}
3. 服务层实现
接口如下:
java
package com.waylau.rednote.service;

import com.waylau.rednote.dto.NotePublishDto;
import com.waylau.rednote.entity.Note;
import com.waylau.rednote.entity.User;


/**
 * NoteService 笔记服务
 *
 * @author <a href="https://waylau.com">Way Lau</a>
 * @version 2025/06/08
 **/
public interface NoteService {
    /**
     * 创建笔记
     *
     * @param notePublishDto
     * @param author
     * @return
     */
    Note createNote(NotePublishDto notePublishDto, User author);

}
实现如下:
java
package com.waylau.rednote.service.impl;

import com.waylau.rednote.common.StringUtil;
import com.waylau.rednote.dto.NotePublishDto;
import com.waylau.rednote.entity.Note;
import com.waylau.rednote.entity.User;
import com.waylau.rednote.repository.NoteRepository;
import com.waylau.rednote.service.FileStorageService;
import com.waylau.rednote.service.NoteService;
import org.springframework.beans.factory.annotation.Autowired;
import org.springframework.stereotype.Service;
import org.springframework.transaction.annotation.Transactional;
import org.springframework.web.multipart.MultipartFile;

import java.util.List;

/**
 * NoteServiceImpl 笔记服务
 *
 * @author <a href="https://waylau.com">Way Lau</a>
 * @version 2025/08/18
 **/
@Service
public class NoteServiceImpl implements NoteService {
    @Autowired
    private NoteRepository noteRepository;

    @Autowired
    private FileStorageService fileStorageService;

    @Transactional
    @Override
    public Note createNote(NotePublishDto notePublishDto, User author) {
        Note note = new Note();

        note.setTitle(notePublishDto.getTitle());
        note.setContent(notePublishDto.getContent());
        note.setCategory(notePublishDto.getCategory());
        note.setAuthor(author);

        // 话题字符串转为List
        note.setTopics(StringUtil.splitToList(notePublishDto.getTopics(), " "));

        // 处理图片上传
        List<MultipartFile> images = notePublishDto.getImages();
        if (images != null) {
            for (MultipartFile image : images) {
                if (!image.isEmpty()) {
                    String fileName = image.getOriginalFilename();
                    String fileUrl = fileStorageService.saveFile(image, fileName);
                    note.getImages().add(fileUrl);
                }

            }
        }

        return noteRepository.save(note);
    }
}
这里主要注意:
- 前端传入的topics是空格间隔的字符串,因此需要通过StringUtil.splitToList()工具将主题转为List结构。
- 前端传入的
List<MultipartFile> images,需要通过遍历的方式处理列表中的每个文件。最终,文件通过FileStorageService.saveFile()实现存储。 - 笔记Note对象,通过NoteRepository.save()保存入库。
@Transactional确保笔记和图片的原子性操作,失败时自动回滚。
StringUtil工具类如下:
java
package com.waylau.rednote.common;

import java.util.Arrays;
import java.util.Collections;
import java.util.List;

/**
 * StringUtil 字符串工具类
 *
 * @author <a href="https://waylau.com">Way Lau</a>
 * @version 2025/08/18
 **/
public class StringUtil {
    // 字符串转为List
    public static List<String> splitToList(String source, String regex) {
        if (source == null) {
            return null;
        }

        if (source.isEmpty()) {
            return Collections.emptyList();
        }

        return Arrays.asList(source.split(regex));
    }
}
安全配置增强
确保 Spring Security 配置允许用户访问/note/**路径下的资源:
java
@Bean
public SecurityFilterChain filterChain(HttpSecurity http) throws Exception {
    http

            .authorizeHttpRequests(authorize -> authorize
                    // ...为节约篇幅,此处省略非核心内容

                    // 允许普通用户角色访问
                    .requestMatchers("/note/**").hasRole("USER")
                    // 其他请求需要认证
                    .anyRequest().authenticated()
            )
            // ...为节约篇幅,此处省略非核心内容
修改笔记控制器
通过笔记服务创建笔记:
java
@PostMapping("/publish")
public String publishNote(@Valid @ModelAttribute("note") NotePublishDto notePublishDto,
                            BindingResult bindingResult,
                            Model model){
    // 验证表单
    if (bindingResult.hasErrors()) {
        model.addAttribute("note", notePublishDto);
        return "note-publish";
    } else {
        // 获取当前用户信息
        User user = userService.getCurrentUser();

        // 通过笔记服务创建笔记
        noteService.createNote(notePublishDto, user);

        // 显示笔记发布成功页面
        return "note-publish-success";
    }
}
修改应用配置
为了便于保存测试数据,将以下配置create改为update:
ini
# create:每次运行程序,没有表会新建表,表内有数据会清空
# update:启动时更新表结构,添加缺少的列,修改已有列类型等,但不会删除任何东西。
spring.jpa.properties.hibernate.hbm2ddl.auto=update
运行调测
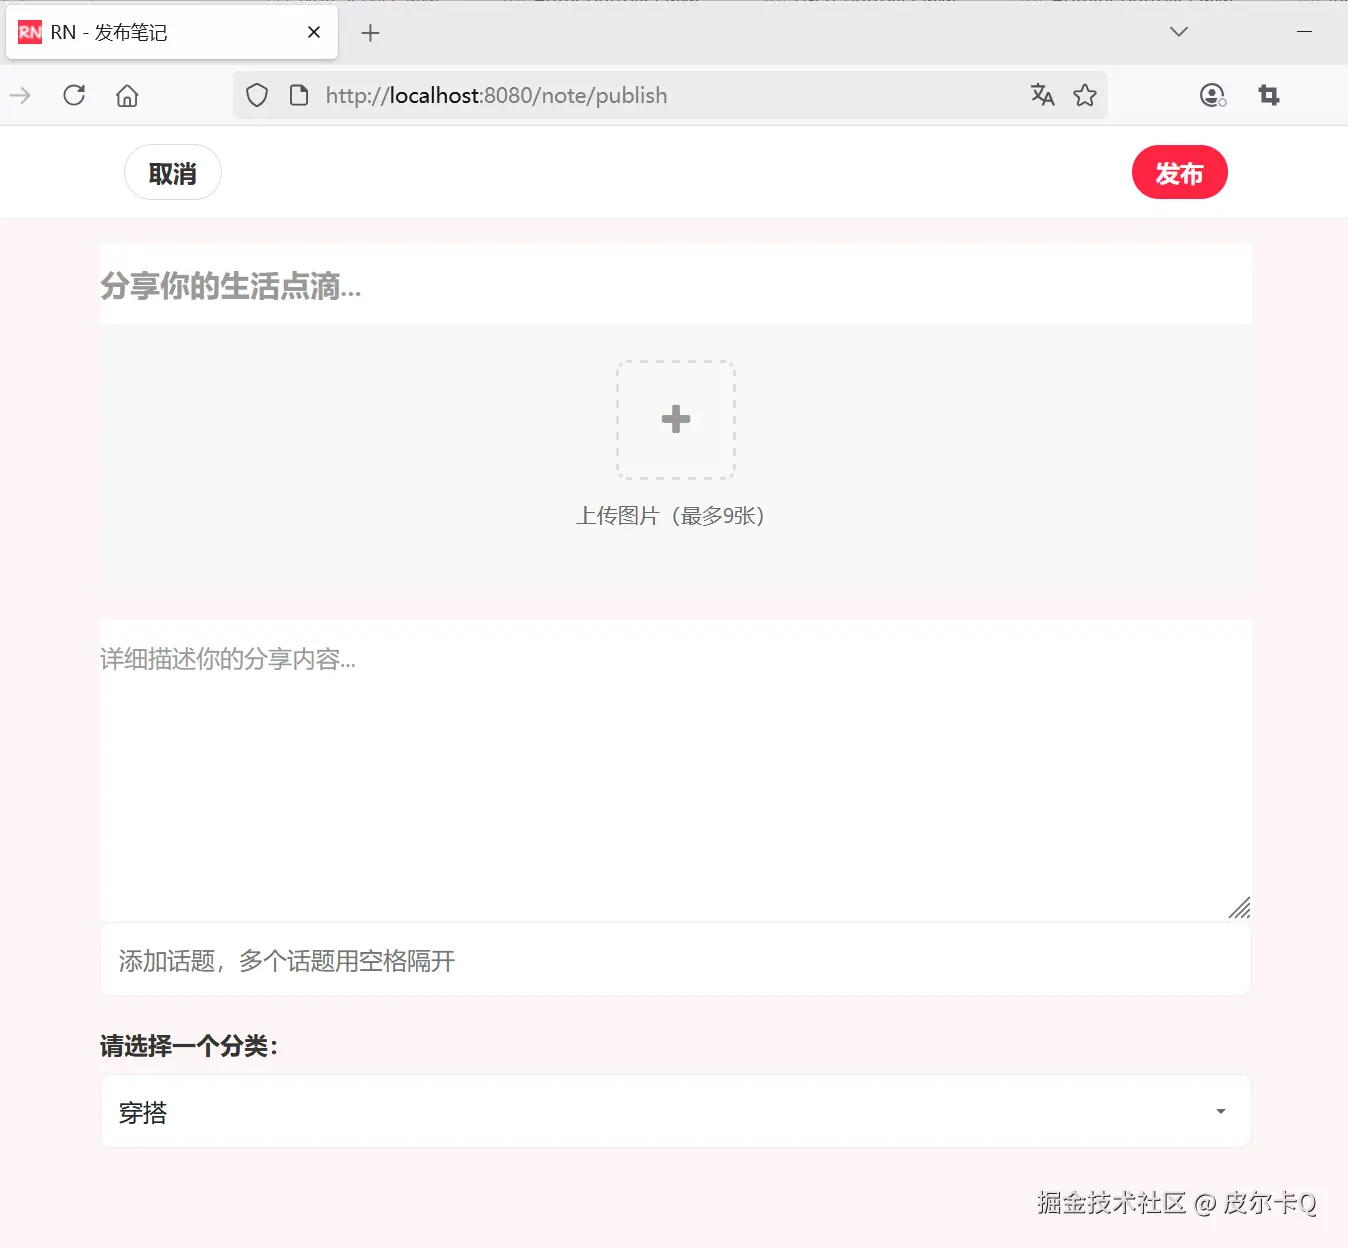
访问笔记发布界面地址:http://localhost:8080/note/publish,效果如下图7-2所示:
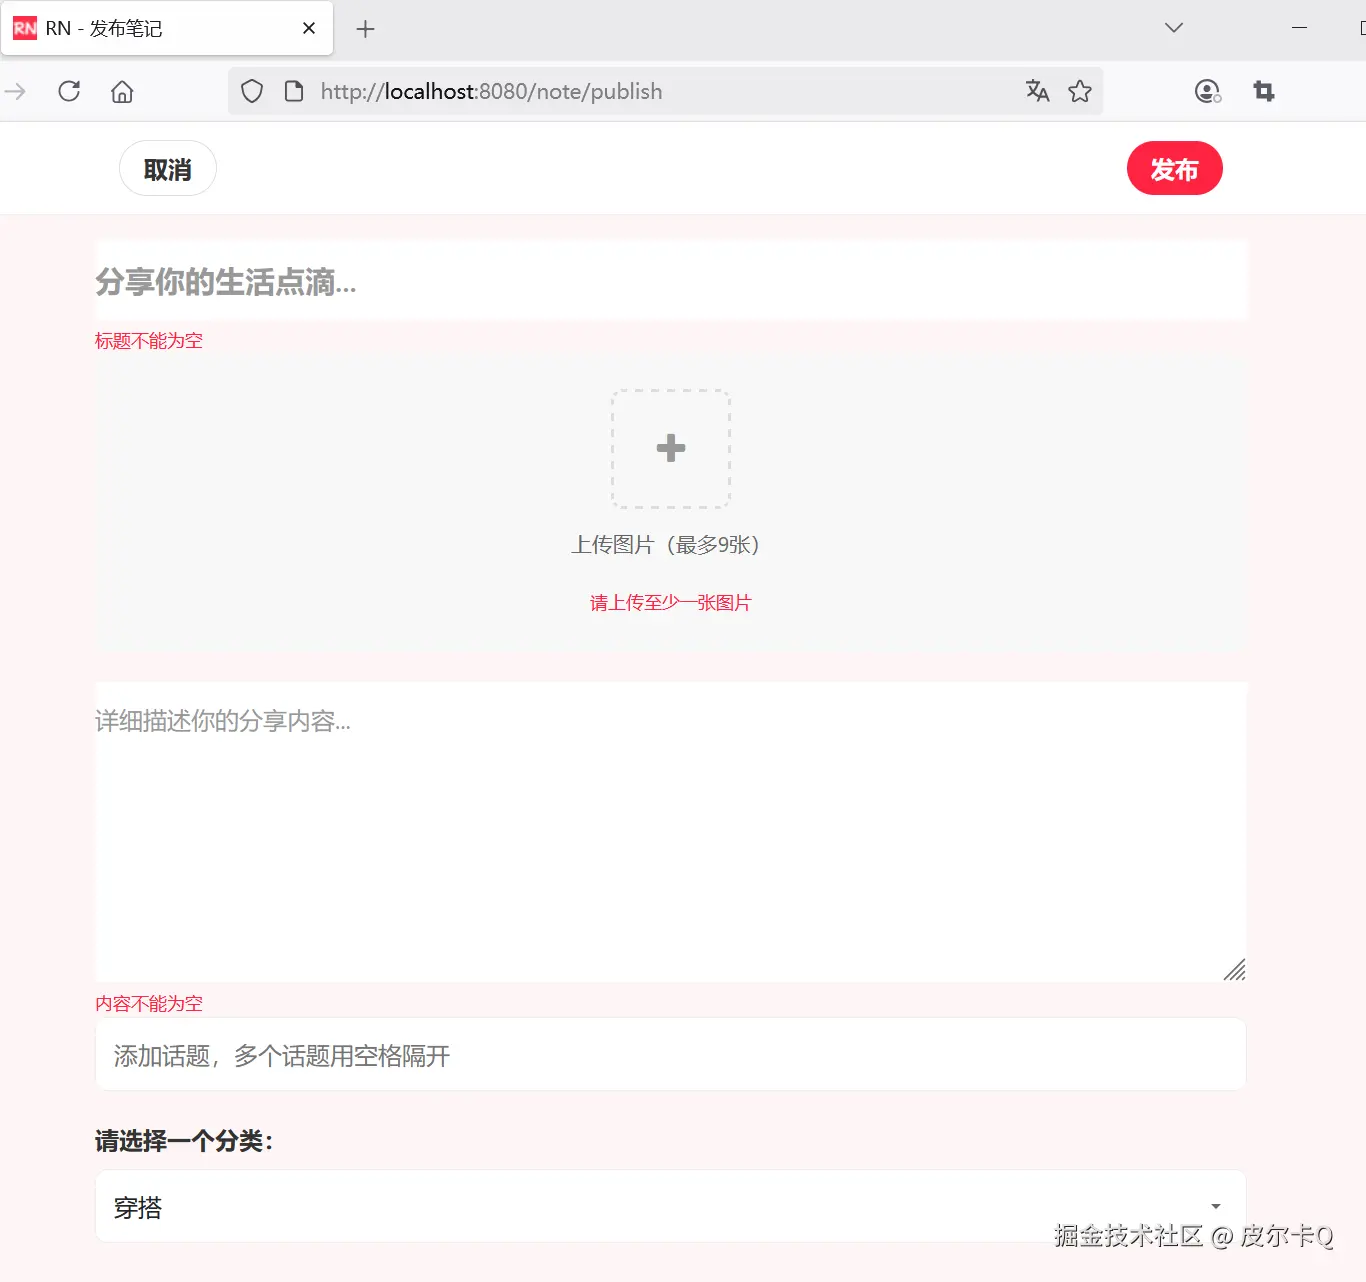
下图7-3展示的是校验提示信息:
下图7-4展示填写笔记内容的效果展示:
下图7-5展示的是笔记发布成功的效果展示:

2.8 定义全局异常处理器,处理笔记发布过程中可能出现的异常
如果你的文件过多,体积过大,则可能遇到如下异常:
ini
2025-06-09T16:03:39.448+08:00 WARN 36316 --- [rednote] [nio-8080-exec-7] .w.s.m.s.DefaultHandlerExceptionResolver : Resolved [org.springframework.web.multipart.MaxUploadSizeExceededException: Maximum upload size exceeded]这个异常表示上传的文件大小超过了配置的限制。除了调整文件上传的最大大小限制配置spring.servlet.multipart.max-file-size和spring.servlet.multipart.max-request-size之外,还需要定义全局异常处理器,处理笔记发布过程中可能出现的异常。
配置全局异常处理
为了处理验证失败的情况,你可以配置一个全局异常处理器:
java
package com.waylau.rednote.exception;

import org.slf4j.Logger;
import org.slf4j.LoggerFactory;
import org.springframework.ui.Model;
import org.springframework.web.bind.annotation.ControllerAdvice;
import org.springframework.web.bind.annotation.ExceptionHandler;
import org.springframework.web.multipart.MaxUploadSizeExceededException;


/**
 * GlobalExceptionHandler 全局异常处理
 *
 * @author <a href="https://waylau.com">Way Lau</a>
 * @version 2025/08/18
 **/
@ControllerAdvice
public class GlobalExceptionHandler {
    private static final Logger log = LoggerFactory.getLogger(GlobalExceptionHandler.class);

    @ExceptionHandler(MaxUploadSizeExceededException.class)
    public String handleMaxSizeException(MaxUploadSizeExceededException exc, Model model) {
        log.error("服务器异常:{}", exc.getMessage(), exc);

        model.addAttribute("errorCode", 400);
        model.addAttribute("errorMessage", "服务器异常:" + exc.getMessage());

        return "400-error";
    }
}
在 Spring MVC 中,@ControllerAdvice 通常用于全局处理控制器层的异常或进行一些全局的数据预处理。 @ExceptionHandler用于捕获特定类型的异常,并返回相应的视图。
使用 Thymeleaf 实现错误页面
当采用 Thymeleaf 技术时,我们可以创建专门的错误页面模板,并通过 Spring MVC 的错误处理机制将异常信息传递给这些模板。以下是完整的实现方案:
在 src/main/resources/templates 目录下创建错误页面400-error.html(可以复用403-error.html代码):
html
<!DOCTYPE html>
<html lang="en" xmlns:th="http://www.thymeleaf.org">

<head>
    <meta charset="UTF-8">
    <meta name="viewport" content="width=device-width, initial-scale=1.0">
    <title>RN - 服务器异常</title>
    <!-- 引入 Bootstrap CSS -->
    <link href="https://cdn.bootcdn.net/ajax/libs/bootstrap/5.3.6/css/bootstrap.min.css"
          th:href="@{/css/bootstrap.min.css}" rel="stylesheet">

    <!-- 引入 Font Awesome -->
    <link href="https://cdn.bootcdn.net/ajax/libs/font-awesome/4.7.0/css/font-awesome.min.css"
          th:href="@{/css/font-awesome.min.css}" rel="stylesheet">

    <!-- 自定义样式-->
    <style>
        body {
            background-color: #fef6f6;
            font-family: -apple-system, BlinkMacSystemFont, "Segoe UI", Roboto, Helvetica, Arial, sans-serif;
        }

        .error-container {
            max-width: 400px;
            margin: 0 auto;
            padding: 40px 20px;
            text-align: center;
        }

        .error-icon {
            font-size: 80px;
            color: #ff2442;
            margin-bottom: 20px;
        }

        .error-title {
            font-size: 24px;
            font-weight: 700;
            color: #333;
            margin-bottom: 10px;
        }

        .error-message {
            font-size: 16px;
            color: #666;
            margin-bottom: 30px;
        }

        .btn-primary {
            background-color: #ff2442;
            border-color: #ff2442;
            border-radius: 12px;
            padding: 12px;
            font-size: 16px;
            font-weight: 600;
            transition: all 0.3s ease;
            width: 100%;
        }

        .btn-primary:hover,
        .btn-primary:focus {
            background-color: #e61e3a;
            border-color: #e61e3a;
            box-shadow: 0 4px 12px rgba(255, 36, 66, 0.2);
        }

        .back-home {
            margin-top: 20px;
            font-size: 14px;
            color: #999;
        }

        .back-home a {
            color: #ff2442;
            text-decoration: none;
        }

        .back-home a:hover {
            text-decoration: underline;
        }

        .error-image {
            width: 200px;
            height: 200px;
            margin: 0 auto 30px;
            background-color: #fff;
            border-radius: 50%;
            display: flex;
            align-items: center;
            justify-content: center;
            box-shadow: 0 4px 20px rgba(0, 0, 0, 0.05);
        }

        .error-image img {
            width: 120px;
            height: 120px;
        }
    </style>
</head>
<body class="d-flex align-items-center min-vh-100 py-4">
<div class="container">
    <div class="error-container">
        <!-- 错误图标 -->
        <div class="error-image">
            <i class="fa fa-lock fa-5x text-danger"></i>
        </div>

        <!-- 错误标题 -->
        <h2 class="error-code" th:text="${errorCode}">400</h2>
        <h2 class="error-title">服务器内部错误</h2>

        <!-- 错误信息 -->
        <p class="error-message" th:text="${errorMessage}">
            服务器遇到了问题,请稍后再试。
        </p>
        <div class="error-details">
            <p>
                如果问题持续存在,请联系管理员。
            </p>
        </div>

        <!-- 返回按钮 -->
        <button class="btn btn-primary" onclick="goBack()">返回上一页</button>

        <!-- 跳转到首页 -->
        <p class="back-home">
            <a href="/" th:href="@{/}">返回RN首页</a>
        </p>
    </div>
</div>

<!-- Bootstrap JS -->
<script src="https://cdn.bootcdn.net/ajax/libs/bootstrap/5.3.6/js/bootstrap.bundle.min.js"
        th:src="@{/js/bootstrap.bundle.min.js}"></script>

<script>
    // 返回按钮点击事件
    function goBack() {
        window.history.back();
    }
</script>
</body>
</html>
未跳转到指定的错误页面?
虽然配置了全局异常处理,但也可能未跳转到未跳转到指定的错误页面400-error.html,具体界面显示如下:
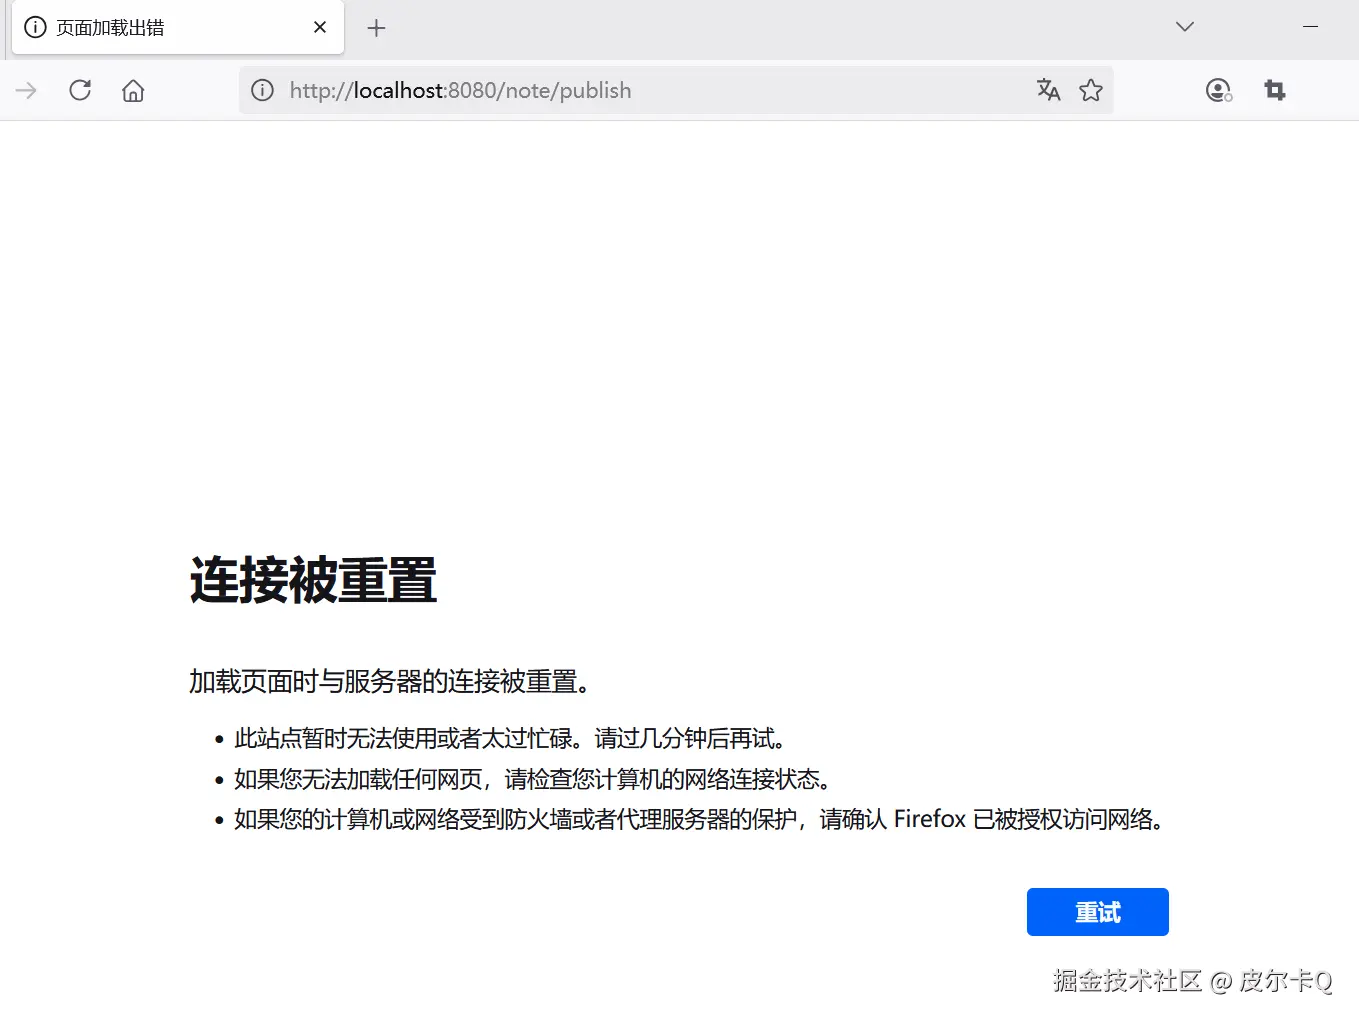
观察控制台日志,可以看到报错信息:
less
Caused by: org.apache.tomcat.util.http.fileupload.impl.SizeLimitExceededException: the request was rejected because its size (10692204) exceeds the configured maximum (10485760)
	at org.apache.tomcat.util.http.fileupload.impl.FileItemIteratorImpl.init(FileItemIteratorImpl.java:161) ~[tomcat-embed-core-10.1.41.jar:10.1.41]
	at org.apache.tomcat.util.http.fileupload.impl.FileItemIteratorImpl.getMultiPartStream(FileItemIteratorImpl.java:205) ~[tomcat-embed-core-10.1.41.jar:10.1.41]
	at org.apache.tomcat.util.http.fileupload.impl.FileItemIteratorImpl.findNextItem(FileItemIteratorImpl.java:224) ~[tomcat-embed-core-10.1.41.jar:10.1.41]
	at org.apache.tomcat.util.http.fileupload.impl.FileItemIteratorImpl.<init>(FileItemIteratorImpl.java:142) ~[tomcat-embed-core-10.1.41.jar:10.1.41]
	at org.apache.tomcat.util.http.fileupload.FileUploadBase.getItemIterator(FileUploadBase.java:252) ~[tomcat-embed-core-10.1.41.jar:10.1.41]
	at org.apache.tomcat.util.http.fileupload.FileUploadBase.parseRequest(FileUploadBase.java:276) ~[tomcat-embed-core-10.1.41.jar:10.1.41]
	at org.apache.catalina.connector.Request.parseParts(Request.java:2584) ~[tomcat-embed-core-10.1.41.jar:10.1.41]
	... 68 common frames omitted
当上传文件超 Tomcat 的大小限制后会先于 Controller 触发异常,所以这时我们的异常处理类无法捕获 Controller 层的异常。
增设如下应用配置即可:
ini
# 配置内嵌的 tomcat 的最大吞吐量
server.tomcat.max-swallow-size = 100MB
注意上面最重要的是要配置内嵌的 tomcat 的最大吞吐量即 max-swallow-size,可以设置 -1 不限制,也可以设置一下比较大的数字这里微酷设置 100M。 这样当上传文件超大小限制后就可以被全局异常处理类捕获了,具体界面显示如下:
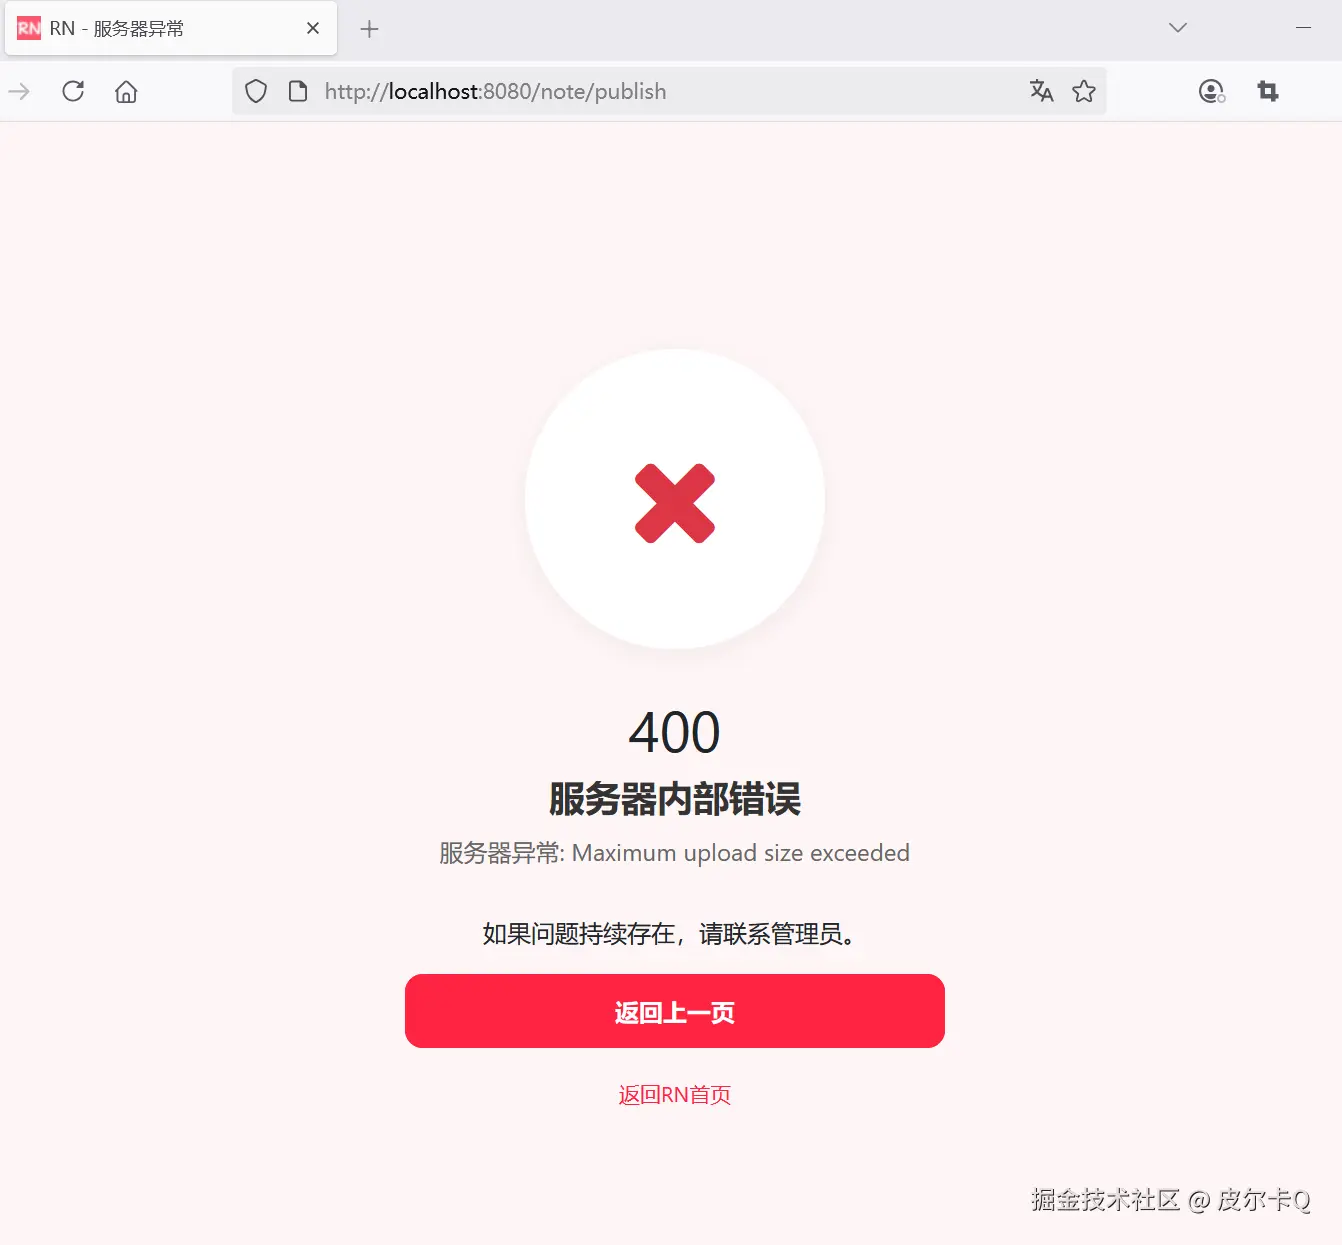
2.9 安全特性、异常处理、事务管理经验总结及扩展
-
完整的表单处理:
- 支持多文件上传
- 自动关联当前用户
- 表单数据验证
-
图片管理:
- 文件上传和存储服务
- 自动生成唯一文件名
- 图片路径管理和安全访问
-
安全特性:
- 用户认证和权限控制
- 文件路径安全校验
-
异常处理:
- 统一的异常处理机制
- 友好的错误信息返回
-
事务管理:
- 确保笔记和图片的原子性操作
- 失败时自动回滚
这个实现提供了一个完整的笔记发布功能,从前端表单到后端处理都进行了详细实现。你可以根据需要进一步扩展功能,如添加图片压缩、水印、笔记审核等功能。