很多人做内网穿透只用单纯 FRP,不仅端口杂乱不好管理,还无法多域名、多站点共用端口,稳定性和美观度都很差。本文手把手教你FRP 结合 Nginx 反向代理搭建高性能内网穿透方案,通过 Nginx 统一解析域名、分流服务、隐藏内网端口,实现 80/443 端口正常穿透,完美适配网站、后台、API、智能家居等各类内网服务。全程从零配置,服务器 + 内网客户端分步讲解,附带常见报错避坑要点,零基础也能轻松看懂,快速搭建稳定安全、公网随时访问内网的专属隧道。

一 frps下载及配置
1 frps下载及安装
frp下载地址:frp_release
进入网站后会出现一下界面:
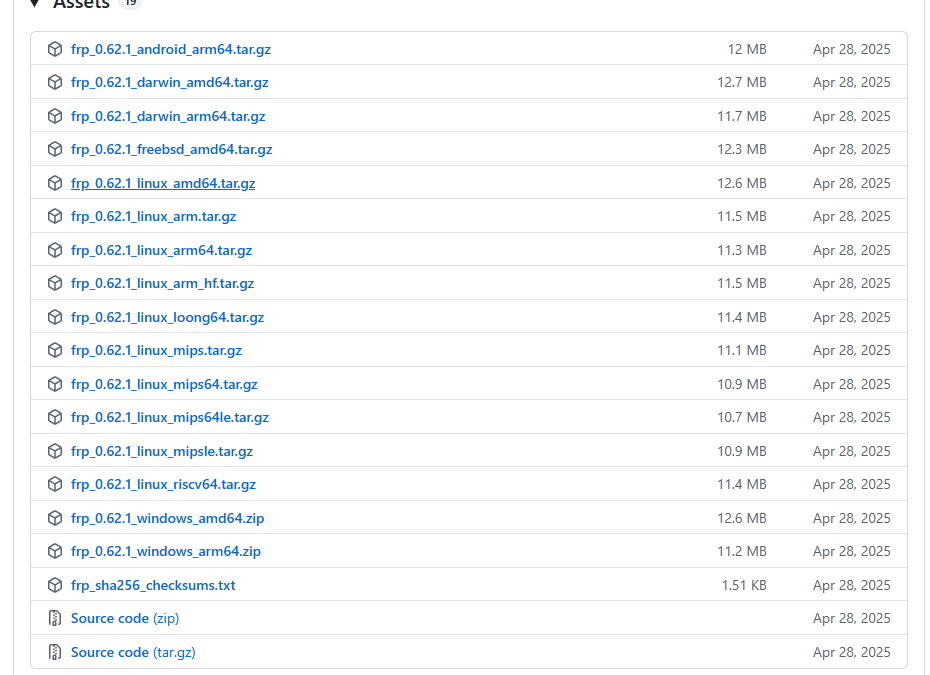
文件名命名格式为:frp_版本号 _系统_架构.压缩格式,具体含义可以查看下表:
| 文件名 | 适用 CPU | 常见设备 |
|---|---|---|
| linux_amd64 | x86 64 位英特尔 / AMD | 绝大多数阿里云 / 腾讯云 Linux 服务器、台式 Linux 主机 |
| linux_arm64 | ARM 64 位 | 树莓派 4/5、RK3568/NPU 开发板、新款 ARM 软路由、安卓盒子 |
| linux_arm | ARM 32 位 | 老旧 32 位单片机、老款路由、古董 ARM 设备 |
| linux_loong64 | 龙芯 64 位 | 国产龙芯 CPU 服务器 / 主机 |
| linux_riscv64 | RISC-V 64 位 | 国产 RISC-V 架构开发板、芯片 |
| linux_mips* | MIPS 架构 | 极老款路由器、烽火等老旧广电 / 路由设备 |
下载之后,直接解压即可:
shell
tar -zxvf frp_0.62.1_linux_amd64.tar.gz2 frps配置
2.1 frps启动配置
txt
# 监听地址与端口(必须)
bindAddr = "0.0.0.0"
bindPort = 7000

# 用于 HTTP/HTTPS 穿透的端口(配合 Nginx 使用)
vhostHTTPPort = 7788
vhostHTTPSPort = 7789

# 安全认证(必须)
auth.method = "token"
auth.token = "你的密码"

# 仪表盘(可选,方便查看状态)
webServer.addr = "0.0.0.0"
webServer.port = 1234
webServer.user = "仪表盘用户名"
webServer.password = "仪表盘密码"

# 日志(精简版)
log.to = "/var/log/frp/frp.log"
log.level = "info"
2.2 frps服务配置
使用一下命令配置frps服务:
CMD
vim /etc/systemd/system/frps.service然后将以下内容放到frps.service中:
txt
[Unit]
Description=frps
After=network.target syslog.target
Wants=network.target

[Service]
Type=simple
ExecStart=/root/LMZPro/frp/frp_0.62.1_linux_amd64/frps -c /root/LMZPro/frp/frp_0.62.1_linux_amd64/frps.toml
Restart=always

[Install]
WantedBy=multi-user.target
编辑之后使用一下命令将frps注册成服务:
shell
# 重新加载服务配置文件
sudo systemctl daemon-reload
# 设置 frps 开机自启动
sudo systemctl enable frps
# 立刻启动 frps 服务
sudo systemctl start frps
# 查看 frps 运行状态
sudo systemctl status frps
启动之后使用http://你的域名:1234访问仪表盘,会出现以下界面:
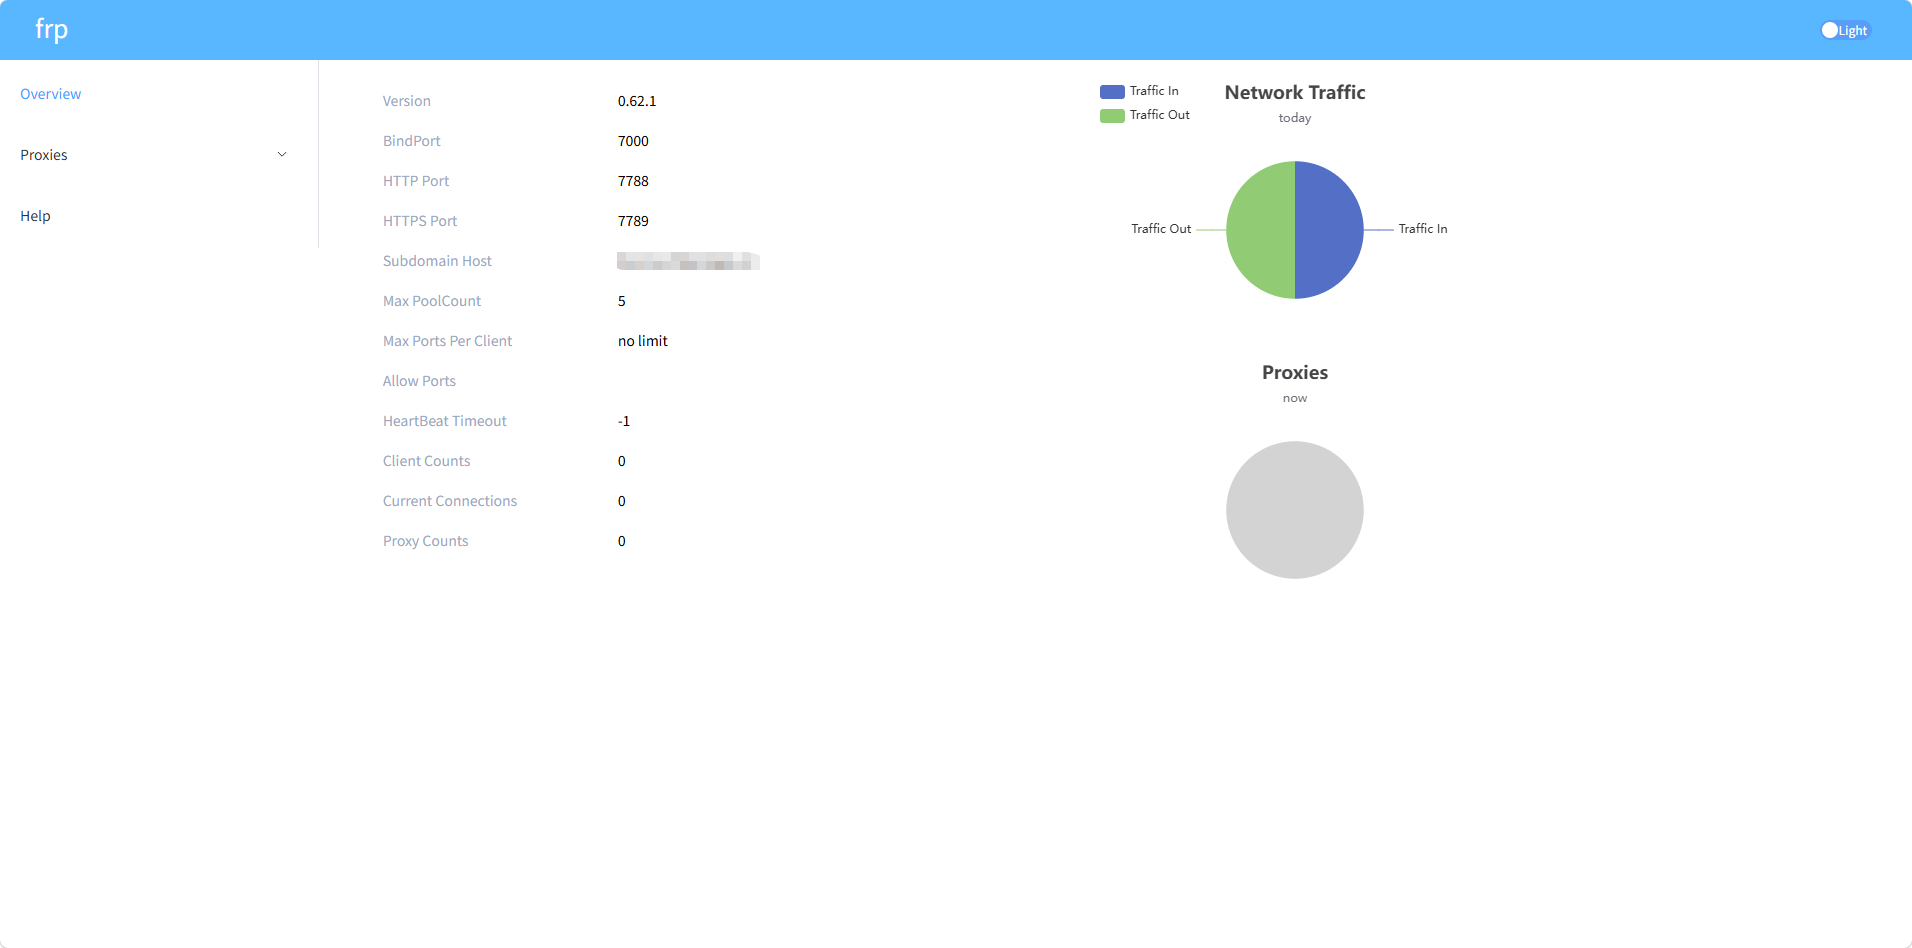
这样就算frps启动成功了。
二 Nignx下载及配置
1 nginx下载
nginx下载地址:nginx download
打开之后会有以下界面:
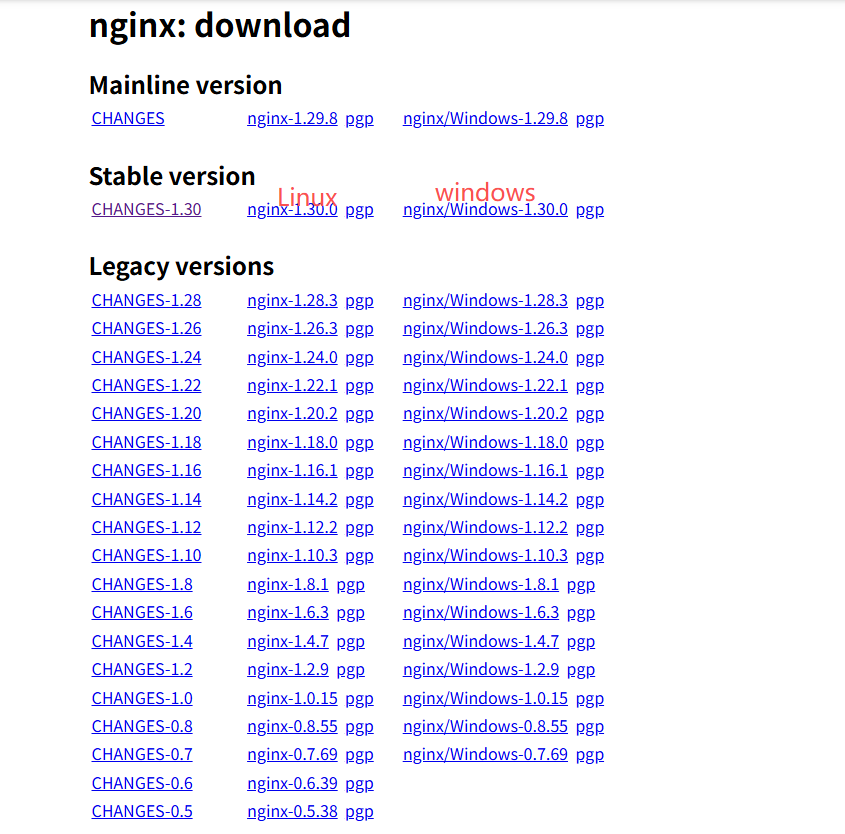
这里可以看到官方给我们提供了三个版本,Mainline version 为主线开发版,迭代最新功能、BUG 修复快,稳定性一般,Stable version为稳定版,官方长期稳定维护、漏洞少、兼容性极强,Legacy version 为历史旧版。
使用以下命令解压安装nginx:
shell
tar -zxvf nginx-1.30.0.tar.gz
cd nginx-1.30.0
./configure --prefix=/root/LMZPro/nginx_/ --with-http_ssl_module
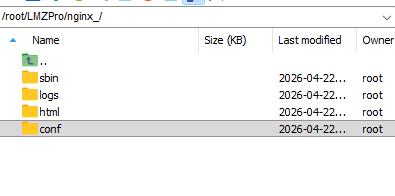
make && make installprefix后面跟的是你的安装目录,安装成功后是这样的:
2 nginx配置
conf
#user  nobody;
worker_processes  1;

events {
    worker_connections  1024;
}

http {
    include       mime.types;
    default_type  application/octet-stream;
    sendfile        on;
    keepalive_timeout 65;

server {
    listen 666;
    server_name zjjj.cn;

    location / {
        proxy_pass http://127.0.0.1:7788;
        proxy_set_header Host $host;
        proxy_set_header X-Real-IP $remote_addr;
        proxy_set_header X-Forwarded-For $proxy_add_x_forwarded_for;

        # Next.js 必加
        proxy_http_version 1.1;
        proxy_set_header Upgrade $http_upgrade;
        proxy_set_header Connection "upgrade";
        proxy_buffering off;
        proxy_connect_timeout 300s;
        proxy_send_timeout 300s;
        proxy_read_timeout 300s;
    }
}

    server {
        listen 667;
        server_name zjjj.cn;

        location / {
            proxy_pass http://127.0.0.1:1234;
            proxy_set_header Host $host;
            proxy_set_header X-Real-IP $remote_addr;
            proxy_set_header X-Forwarded-For $proxy_add_x_forwarded_for;
        }
    }

    server {
        listen 666 default_server;
        server_name _;
        return 404;
    }
}
2 将nginx做成服务
使用以下命令创建nginx服务配置文件:
shell
sudo vim /etc/systemd/system/lmz_nginx.service然后配置一下nginx位置:
shell
[Unit]
Description=lmz_nginx
After=network-online.target

[Service]
Type=forking

ExecStart=/root/LMZPro/nginx_/sbin/nginx -c /root/LMZPro/nginx_/conf/nginx.conf
ExecStop=/bin/kill -TERM $MAINPID
ExecReload=/bin/kill -HUP $MAINPID
KillMode=control-group
Restart=on-failure
StandardOutput=journal+console
StandardError=journal+console


[Install]
WantedBy=graphical.target
注:这里的type一定设置为forking,不然会报错,Type=simple 时 systemd 无法正确追踪 nginx 的主进程 PID
保存之后使用以下命令注册nginx为服务:
shell
# 服务注册
sudo systemctl daemon-reload
# 开机自启
sudo systemctl enable lmz_nginx
# 开启nginx
sudo systemctl start lmz_nginx
# 查看nginx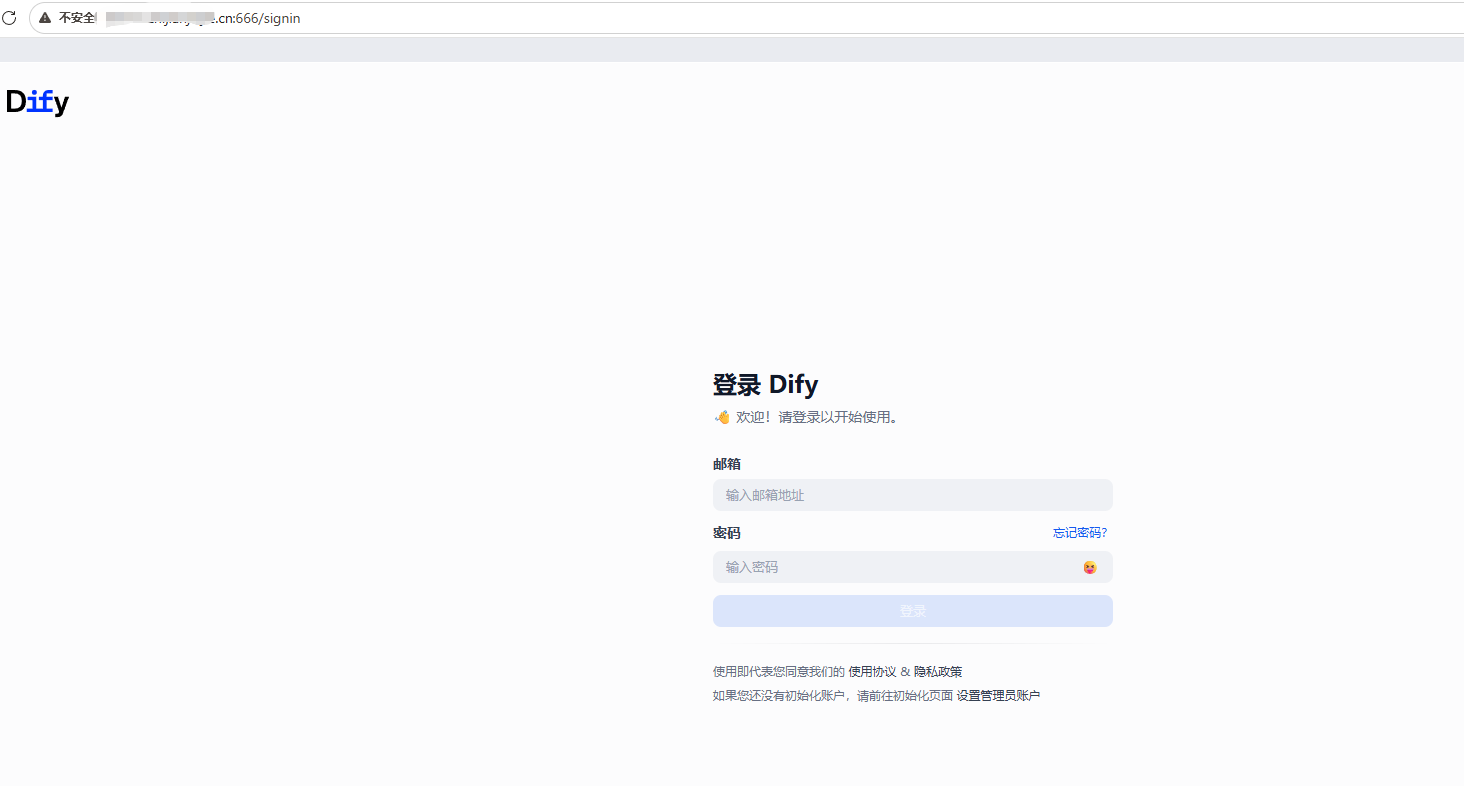
sudo systemctl status lmz_nginx这样之后你就可以使用http://zjjj.cn:667/来访问仪表盘了,无需再使用 1234 端口。
三 frpc下载及配置
frpc的下载与frps的下载相同,这里就不赘述。
1 frpc配置文件
shell
# frpc.toml
serverAddr = "zjjj.cn"
serverPort = 7000
auth.method = "token"
auth.token = "你的密码"
[[proxies]]
name = "dify"
type = "http"
localIP = "127.0.0.1"
localPort = 80
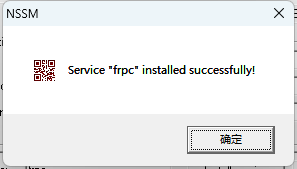
customDomains = ["zjjj.cn"]2 将frpc做成服务
shell
nssm install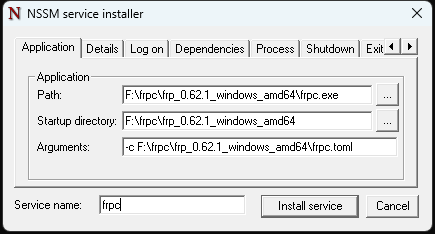
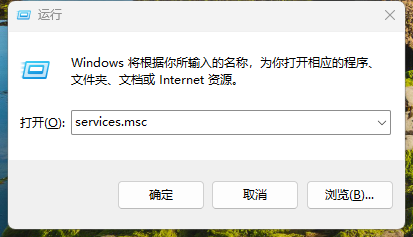
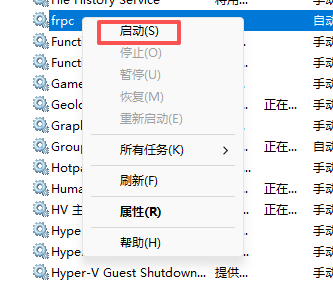
Win+R,然后进入services.msc:
使用之后,就可以使用http://zjjj.cn:666/访问你映射的项目了: