上回我们学到了使用配置文件形式实现spring框架的依赖注入,这一次我们来看看使用半注解形式实现依赖注入的相关操作(为什么叫半注解呢?因为介绍的依赖注入方法并不是完全的注解形式,还需要配置文件来配置注解扫描器)。
1.创建注解扫描
在resources文件夹下创建一个新的配置文件(我将它命名为applicationContextScan),并在配置文件中输入如下内容来配置注解扫描:
XML
<?xml version="1.0" encoding="UTF-8"?>
<beans xmlns="http://www.springframework.org/schema/beans"
       xmlns:xsi="http://www.w3.org/2001/XMLSchema-instance"
       xmlns:context="http://www.springframework.org/schema/context"
       xsi:schemaLocation="
        http://www.springframework.org/schema/beans
        http://www.springframework.org/schema/beans/spring-beans.xsd
        http://www.springframework.org/schema/context
        http://www.springframework.org/schema/context/spring-context.xsd">

    <!--半注解形式-->
    <context:component-scan base-package="com.newFile"></context:component-scan>

</beans>
如果需要测试的话可以直接将Test.java文件中读取配置文件的内容更改为:
java
ApplicationContext context = new ClassPathXmlApplicationContext("applicationContextScan.xml");2.对象注解
对于对象注解来说,可以使用:@Component 通用对象注解、 @Service 业务层对象注解、 @Repository 数据层对象注解 @Controller 控制层对象注解。
我们点击开User类文件,首先在User类文件上使用@Component(value="user1")标注一个名为user1的对象,其他对象注解的使用方法相同。

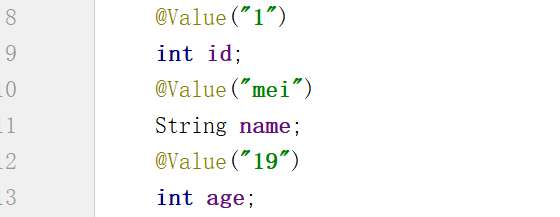
3.普通属性值注入
使用@Value标签为普通类型属性注入值:
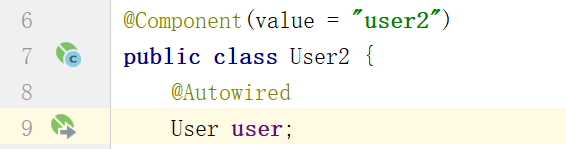
4.复杂属性值注入
那么当一个类的属性是其他非基本数据类型时,该如何进行依赖注入呢?这时就可以使用@Autowired 注解来实现自动注入非基本数据类型属性了。
@Autowired注解相关属性required :
required 属性默认情况下为true
@Autowired(required=true):必须找到 Bean,否则抛异常
@Autowired(required=false):找不到时不报错,注入null
我们已经在User类中注入User类的相关基本数据类型属性,所以可以直接使用Autowired注入非基本数据类型属性。如果Autowired标注的包装类属性没有注入基本数据类型属性,那么int类型会显示0,String类型或其他类型会显示null。
有一些特殊情况需要使用 @Qualifier 注解来区分实现的具体类:
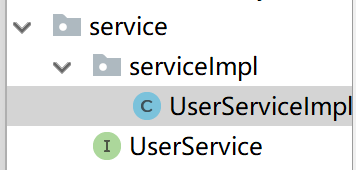
首先创建service包,在service包下创建UserService接口和serviceImpl包,并在UserService包下创建UserServiceImpl1类和UserServiceImpl2两个类共同实现UserService接口。
是不是很奇怪?为什么要两个实现类来实现一个接口呢?
就拿实际业务过程来举例子吧,比如一个接口中的查找方法可以由Mysql实现也可以由Redis来实现。再比如说一个交易方法可以使用微信交易API来实现,也可以使用支付宝API来实现
java//创建service接口 package com.newFile.service; public interface UserService { public void test(); } //实现类1 package com.newFile.service.serviceImpl; import com.newFile.service.UserService; import org.springframework.stereotype.Service; @Service public class UserServiceImpl1 implements UserService{ public void test(){ System.out.println("这是方法1"); } } //实现类2 package com.newFile.service.serviceImpl; import com.newFile.service.UserService; import org.springframework.stereotype.Service; @Service public class UserServiceImpl2 implements UserService{ public void test(){ System.out.println("这是方法2"); } }此时如果我们创建一个Controller类并创建一个UserService类型对象并使用Autowired注入:
javapackage com.newFile.Controller; import com.newFile.service.UserService; import org.springframework.beans.factory.annotation.Autowired; import org.springframework.beans.factory.annotation.Qualifier; import org.springframework.stereotype.Controller; @Controller public class UserController { @Autowired UserService userService; }就会报错:
Could not autowire. There is more than one bean of 'UserService' type.
Beans:
userServiceImpl1 (UserServiceImpl1.java)userServiceImpl2 (UserServiceImpl2.java)
原因就是UserService接口由两个Service来实现,当创建UserService对象并使用Autowired进行注入时,Spring容器无法识别是是注入Service1类还是注入Service2类。
此时就需要使用@Qualifired标签来标注需要注入的真实类。
java@Autowired @Qualifier(value = "userServiceImpl1") UserService userService;