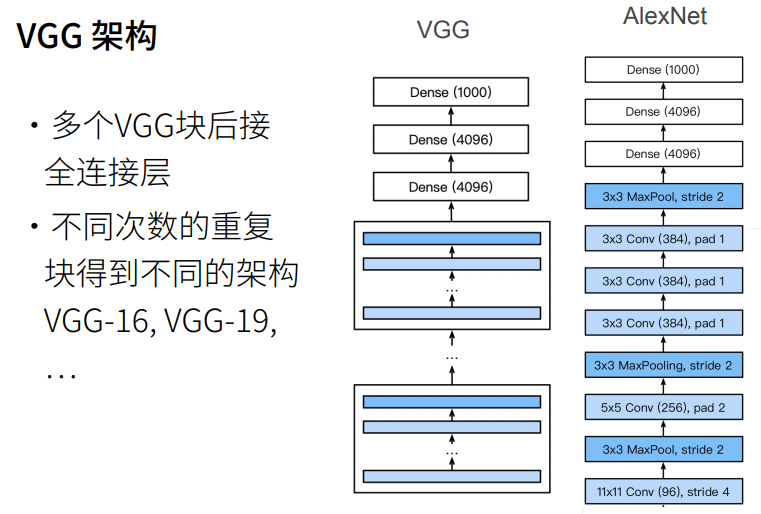
1. VGG网络
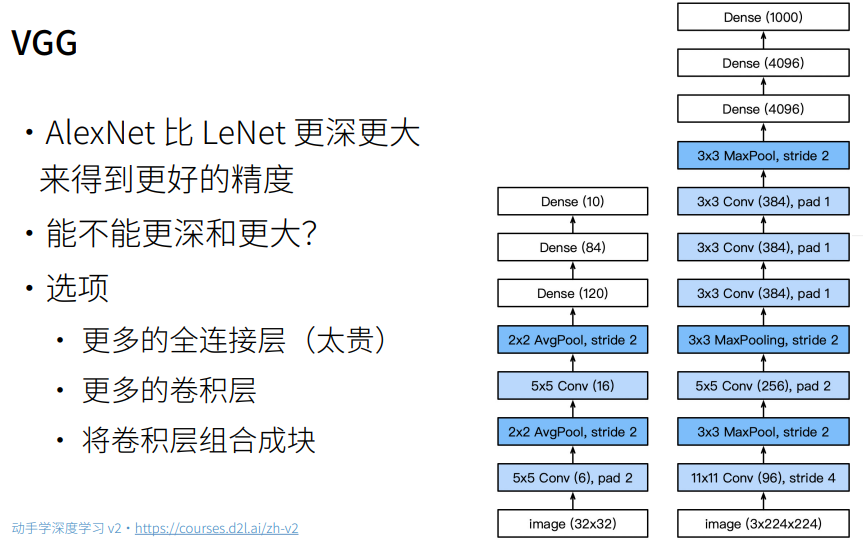
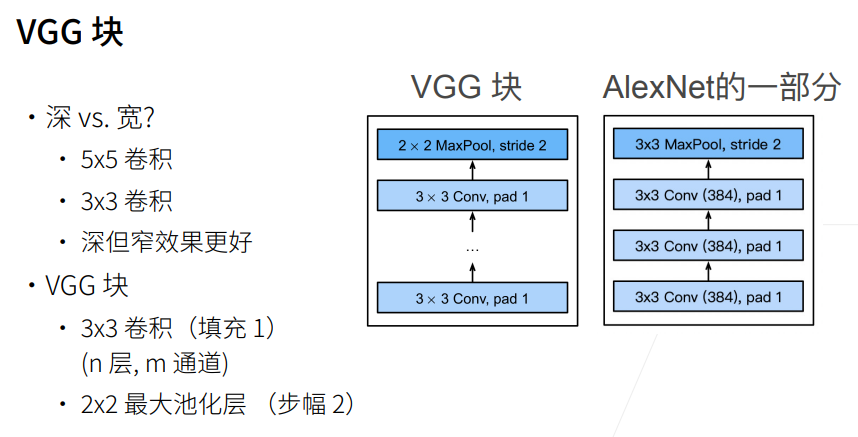
经测试后,发现3*3的效果比5*5的效果要好
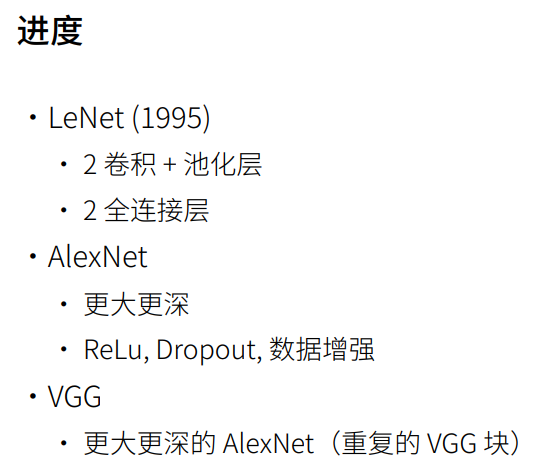
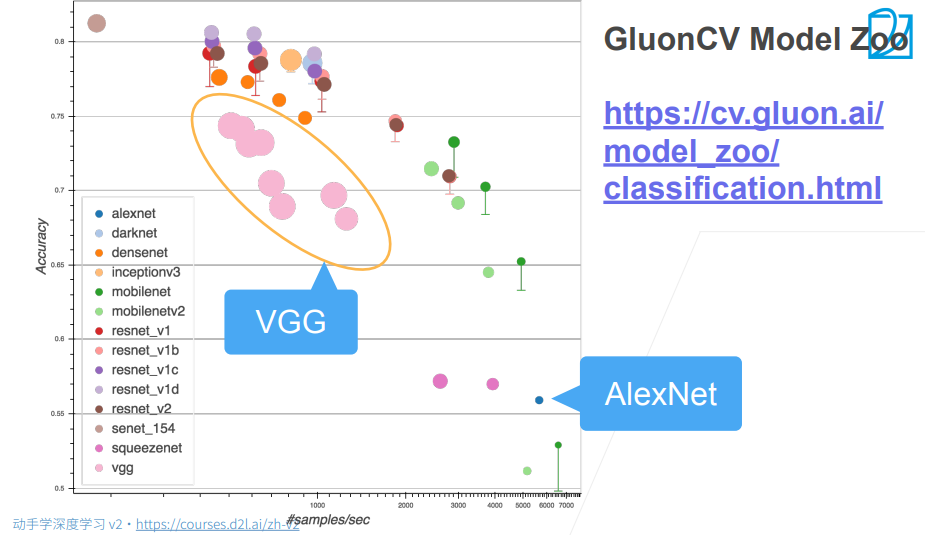
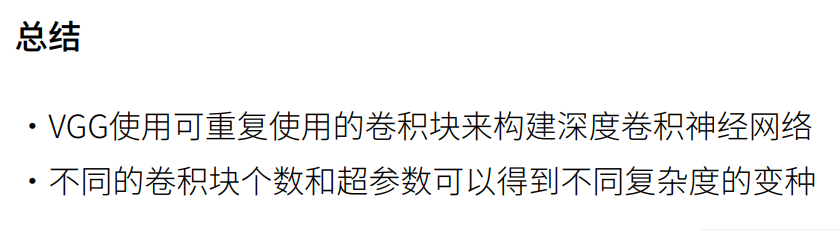
2. 总结
1. VGG网络(使用自定义)
一、VGG块(核心思想)
pythondef vgg_block(num_convs, in_channels, out_channels):👉 一个 VGG block = 多个卷积层 + 1个池化层
结构:
python(Conv + ReLU) × num_convs → MaxPool代码解析:
pythonlayers = [] for _ in range(num_convs): layers.append(nn.Conv2d(in_channels,out_channels,kernel_size=3,padding=1)) layers.append(nn.ReLU()) in_channels = out_channels
kernel_size=3, padding=1
👉 保证卷积前后 高宽不变每一层卷积后:
👉 通道数变成out_channelslayers.append(nn.MaxPool2d(kernel_size=2,stride=2))
👉 池化层作用:
高宽减半(224 → 112 → 56 → ...
return nn.Sequential(*layers)
👉 把列表展开成一个顺序模型
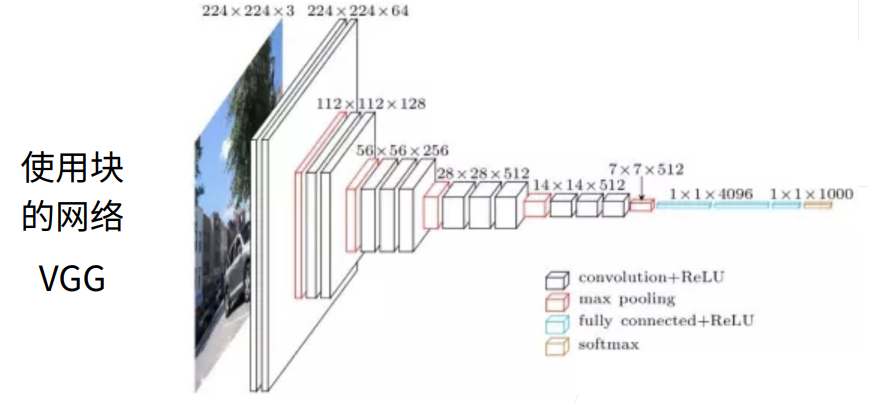
二、VGG整体结构
conv_arch = ((1,64),(1,128),(2,256),(2,512),(2,512))👉 表示 5 个 block:
block 卷积层数 输出通道 1 1 64 2 1 128 3 2 256 4 2 512 5 2 512
构建网络
def vgg(conv_arch):卷积部分:
for (num_convs, out_channels) in conv_arch: conv_blks.append(vgg_block(num_convs,in_channels,out_channels))👉 每个 block:
- 通道数逐渐增加
- 空间尺寸逐渐减小
全连接部分:
nn.Flatten(), nn.Linear(out_channels * 7 * 7, 4096)👉 为什么是
7×7?因为输入是 224×224:
224 → 112 → 56 → 28 → 14 → 7(5次池化)
后面结构:
ReLU → Dropout → Linear → ReLU → Dropout → Linear👉 经典 VGG 全连接设计:
- 两个 4096 层
- Dropout 防止过拟合
三、输出尺寸变化(重点)
X = torch.randn(size=(1,1,224,224))👉 输入:1张灰度图
循环打印:
for blk in net:你会看到类似:
Sequential output shape: (1, 64, 112, 112) Sequential output shape: (1, 128, 56, 56) Sequential output shape: (1, 256, 28, 28) Sequential output shape: (1, 512, 14, 14) Sequential output shape: (1, 512, 7, 7)👉 总结规律:
- 高宽:不断减半
- 通道:不断增加
四、为什么要缩小模型(关键优化)
ratio = 4 small_conv_arch = [(pair[0], pair[1]//ratio) for pair in conv_arch]👉 原始 VGG 太大:
- 参数太多
- 训练慢
- 显存占用高
👉 所以:
64 → 16 128 → 32 256 → 64 ...👉 这样:
- 计算量 ↓↓↓
- 更适合普通GPU/CPU
五、数据加载
train_iter, test_iter = d2l.load_data_fashion_mnist(batch_size,resize=224)👉 关键点:
- Fashion-MNIST 原本是 28×28
- resize 到 224×224
👉 原因:
- VGG 是为 ImageNet 设计的(224×224)
六、训练过程
d2l.train_ch6(net,train_iter,test_iter,num_epochs,lr,d2l.try_gpu())👉 做了几件事:
- 前向传播
- 计算损失
- 反向传播
- 更新参数
- 在 GPU 上训练(如果有)
七、整体流程总结
输入图像 (1×224×224) ↓ 5个VGG块(卷积+池化) ↓ 特征图 (512×7×7) ↓ Flatten ↓ 全连接层 ↓ 输出10类
八、核心思想总结(非常重要🔥)
1️⃣ 小卷积核(3×3)
- 提取局部特征
- 堆叠增强表达能力
2️⃣ 深层结构
- 多层卷积比大卷积更有效
3️⃣ 通道数逐步增加
- 表示更复杂特征
4️⃣ 池化逐步降维
- 减少计算量
python
import torch
from torch import nn
from d2l import torch as d2l
#构造一个VGG块
def vgg_block(num_convs,in_channels,out_channels): # 卷积层个数、输入通道数、输出通道数
layers = []
for _ in range(num_convs):
    layers.append(nn.Conv2d(in_channels,out_channels,kernel_size=3,padding=1))
    layers.append(nn.ReLU())
    in_channels = out_channels
layers.append(nn.MaxPool2d(kernel_size=2,stride=2))
return nn.Sequential(*layers) # *layers表示把列表里面的元素按顺序作为参数输入函数
conv_arch = ((1,64),(1,128),(2,256),(2,512),(2,512)) # 第一个参数为几层卷积,第二个参数为输出通道数
def vgg(conv_arch):
conv_blks = []
in_channels = 1
for (num_convs, out_channels) in conv_arch:
    conv_blks.append(vgg_block(num_convs,in_channels,out_channels))
in_channels = out_channels
return nn.Sequential(*conv_blks, nn.Flatten(),
nn.Linear(out_channels * 7 * 7, 4096),nn.ReLU(),
nn.Dropout(0.5), nn.Linear(4096,4096),nn.ReLU(),
nn.Dropout(0.5), nn.Linear(4096,10))
net = vgg(conv_arch)
# 观察每个层输出的形状
X = torch.randn(size=(1,1,224,224))
for blk in net:
X = blk(X)
print(blk.__class__.__name__,'output shape:\t', X.shape) # VGG使得高宽减半,通道数加倍Sequential output shape: torch.Size([1, 64, 112, 112])
Sequential output shape: torch.Size([1, 128, 56, 56])
Sequential output shape: torch.Size([1, 256, 28, 28])
Sequential output shape: torch.Size([1, 512, 14, 14])
Sequential output shape: torch.Size([1, 512, 7, 7])
Flatten output shape: torch.Size([1, 25088])
Linear output shape: torch.Size([1, 4096])
ReLU output shape: torch.Size([1, 4096])
Dropout output shape: torch.Size([1, 4096])
Linear output shape: torch.Size([1, 4096])
ReLU output shape: torch.Size([1, 4096])
Dropout output shape: torch.Size([1, 4096])
Linear output shape: torch.Size([1, 10])
python
# 由于VGG-11比AlexNet计算量更大,因此构建了一个通道数较少的网络
ratio = 4
small_conv_arch = [(pair[0], pair[1]//ratio) for pair in conv_arch] # 所有输出通道除以4
net = vgg(small_conv_arch)
lr, num_epochs, batch_size = 0.05, 10, 128
train_iter, test_iter = d2l.load_data_fashion_mnist(batch_size,resize=224)
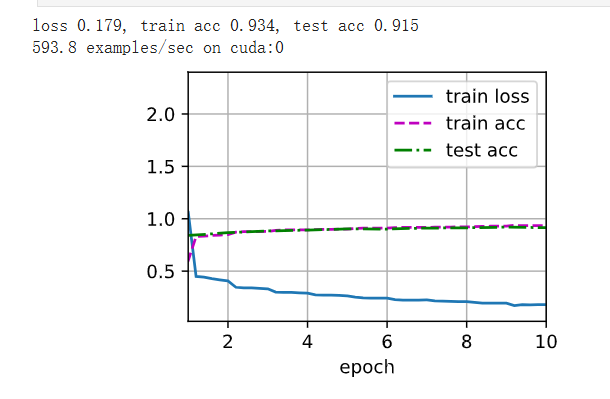
d2l.train_ch6(net,train_iter,test_iter,num_epochs,lr,d2l.try_gpu())loss 0.179, train acc 0.934, test acc 0.915
593.8 examples/sec on cuda:0