UI多界面传值
文章目录
在iOS开发过程中,多界面之间的传值时最核心、最常用的需求,因此我们需要掌握一些多界面传值的方法,本篇博客将介绍5种方法供以参考学习
一、属性传值
这是iOS最基础与常用的传值方式
- 原理:在目标界面(B 界面)的 .h 文件中声明公开属性,当前界面(A 界面)跳转时,创建 B 界面的实例对象,直接给其公开属性赋值,赋值完成后再执行跳转操作,B 界面即可在自身代码中使用该属性值。
- 适用场景:用于正向传值
- 代码演示:
objc
// BViewController.h
#import <UIKit/UIKit.h>

@interface BViewController : UIViewController

// 声明需要接收的属性(公开属性,供A界面赋值)
@property (nonatomic, copy) NSString *goodsName;
@property (nonatomic, assign) NSInteger goodsId;
@property (nonatomic, strong) NSDictionary *userInfo;

@end
objc
// AViewController.m
#import "AViewController.h"
#import "BViewController.h"

@interface AViewController ()
// 可声明A界面自身的属性(如模拟数据)
@property (nonatomic, copy) NSString *aName;
@property (nonatomic, assign) NSInteger aId;
@property (nonatomic, strong) NSDictionary *aUserInfo;
@end

@implementation AViewController

- (void)viewDidLoad {
    [super viewDidLoad];
    // 模拟A界面的初始数据(实际开发中可能是接口请求、用户输入的数据)
    self.aName = @"iPhone 15 Pro";
    self.aId = 10001;
    self.aUserInfo = @{@"userName": @"OC开发者", @"age": @25};
    self.title = @"A界面(传值方)";
    UIButton *jumpBtn = [UIButton buttonWithType:UIButtonTypeSystem];
    jumpBtn.frame = CGRectMake(100, 200, 200, 50);
    [jumpBtn setTitle:@"跳转至B界面" forState:UIControlStateNormal];
    [jumpBtn addTarget:self action:@selector(jumpToBViewController) forControlEvents:UIControlEventTouchUpInside];
    [self.view addSubview:jumpBtn];
}

// 跳转按钮点击事件:跳转至B界面,并传值
- (void)jumpToBViewController {
    BViewController *bVC = [[BViewController alloc] init];
    // 2. 给B界面的公开属性赋值(核心步骤)
    bVC.goodsName = self.aName;
    bVC.goodsId = self.aId;
    bVC.userInfo = self.aUserInfo;
    [self.navigationController pushViewController:bVC animated:YES];
}

@end
objc
// BViewController.m
#import "BViewController.h"

@implementation BViewController

- (void)viewDidLoad {
    [super viewDidLoad];
    self.title = @"B界面(接收方)";
    self.view.backgroundColor = [UIColor whiteColor];

    // 接收并使用A界面传递过来的值(直接访问自身属性即可)
    NSLog(@"接收的商品名称:%@", self.goodsName);
    NSLog(@"接收的商品ID:%ld", self.goodsId);
    NSLog(@"接收的用户信息:%@", self.userInfo);
    UILabel *nameLabel = [[UILabel alloc] initWithFrame:CGRectMake(50, 150, 300, 30)];
    nameLabel.text = [NSString stringWithFormat:@"商品名称:%@", self.goodsName];
    [self.view addSubview:nameLabel];

    UILabel *idLabel = [[UILabel alloc] initWithFrame:CGRectMake(50, 200, 300, 30)];
    idLabel.text = [NSString stringWithFormat:@"商品ID:%ld", self.goodsId];
    [self.view addSubview:idLabel];

    UILabel *userLabel = [[UILabel alloc] initWithFrame:CGRectMake(50, 250, 300, 30)];
    userLabel.text = [NSString stringWithFormat:@"用户信息:%@", self.userInfo[@"userName"]];
    [self.view addSubview:userLabel];
}

@end-
缺点:
-
仅支持正向传值(A→B),无法反向传值;
-
多层级传值繁琐,需层层中转;
-
无法实现全局共享,仅能在两个有跳转关系的界面之间传递。
-
二、代理传值
-
原理:通过"协议"定义传值方法,目标界面(B 界面)声明一个代理属性(遵循该协议),当前界面(A 界面)遵守该协议并实现协议中的传值方法,同时将 B 界面的代理设置为 A 自身。当 B 界面需要回传数据时,调用代理的传值方法,将数据作为参数传递,A 界面通过实现的方法接收数据。
-
适用场景:反向传值
-
核心要素:
-
定义协议:
objc@protocol BViewControllerDelegate <NSObject> - (void)didPassData:(NSString *)data; // 传值方法 @end -
声明弱引用代理属性
objc@interface BViewController : UIViewController @property (nonatomic, weak) id<BViewControllerDelegate> delegate; @end -
设置代理
objcBViewController *bVC = [[BViewController alloc] init]; bVC.delegate = self; // 关键:指定代理为当前 VC [self.navigationController pushViewController:bVC animated:YES]; -
安全调用代理方法
objcif ([self.delegate respondsToSelector:@selector(didPassData:)]) { [self.delegate didPassData:@"要传的值"]; // 回传数据 } -
遵守协议并实现方法
objc// AViewController.h @interface AViewController : UIViewController <BViewControllerDelegate> // AViewController.m - (void)didPassData:(NSString *)data { NSLog(@"收到值:%@", data); // 接收并使用数据 }
-
三、Block传值
- 原理:在目标界面(B 界面)的 .h 文件中定义一个 Block 类型(Block 的参数即为需要回传的数据类型),并声明一个 Block 属性;当前界面(A 界面)跳转时,给 B 界面的 Block 属性赋值(实现 Block 的具体逻辑);当 B 界面需要回传数据时,调用该 Block,将数据作为参数传入,A 界面通过 Block 的实现逻辑接收数据。
- 适用场景:反向传值
- 代码演示:
objc
//FirstViewController.m

#import "FirstViewController.h"
#import "SecondViewController.h"
@interface FirstViewController ()

@end

@implementation FirstViewController

- (void)viewDidLoad {
    [super viewDidLoad];
    // Do any additional setup after loading the view.
    self.view.backgroundColor = [UIColor whiteColor];
    self.title = @"首页";
    // 按钮:跳转到第二个界面
    UIButton *btn = [UIButton buttonWithType:(UIButtonTypeRoundedRect)];
    btn.frame = CGRectMake(150, 150, 150, 50);
    [btn setTitle:@"跳转到第二个界面" forState:UIControlStateNormal];
    [btn addTarget:self action:@selector(jumpClick) forControlEvents:UIControlEventTouchUpInside];
    [self.view addSubview:btn];

}
- (void)jumpClick {
    SecondViewController *secondVC = [[SecondViewController alloc] init];

    // Block 核心:接收第二个界面传回来的值
    secondVC.sendBackBlock= ^(NSString *text) {
    NSLog(@"首页收到回传:%@", text);

    // 这里可以更新 UI
        UILabel* lable = [[UILabel alloc] init];
        lable.text = text;
        lable.frame = CGRectMake(100, 300, 100, 100);
        [self.view addSubview:lable];

    };

    [self.navigationController pushViewController:secondVC animated:YES];
}

@end
objc
//  SecondViewController.h

#import <UIKit/UIKit.h>

NS_ASSUME_NONNULL_BEGIN

@interface SecondViewController : UIViewController
  //定义Block
@property(nonatomic,copy)void(^sendBackBlock)(NSString*text);
@end

NS_ASSUME_NONNULL_END
objc
//  SecondViewController.m


#import "SecondViewController.h"

@interface SecondViewController ()

@end

@implementation SecondViewController

- (void)viewDidLoad {
    [super viewDidLoad];
    // Do any additional setup after loading the view.
    self.view.backgroundColor = [UIColor greenColor];
    UIButton* btn = [UIButton buttonWithType:UIButtonTypeRoundedRect];
    btn.frame = CGRectMake(100, 300, 150, 50);
    [btn setTitle:@"回传给上一个界面" forState:(UIControlStateNormal)];
    [btn addTarget:self action:@selector(sendvalueback) forControlEvents:(UIControlEventTouchUpInside)];
    [self.view addSubview:btn];
}

-(void)sendvalueback
{
    if(self.sendBackBlock){
        self.sendBackBlock(@"我是第二个界面回传的值");
    }
    [self.navigationController popViewControllerAnimated:YES];
}


@end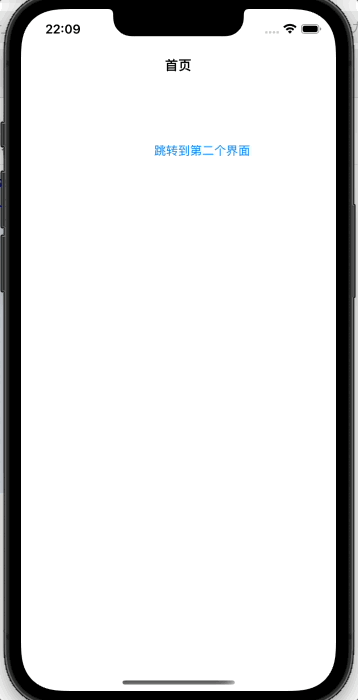
四、通知传值
-
原理:利用 NSNotificationCenter(通知中心),一个界面(发送者)发送通知,并携带需要传递的数据;多个界面(接收者)注册该通知,当通知发送后,所有注册了该通知的接收者都会收到通知,并获取携带的数据。
-
适用场景:一对多传值
-
关键语法
objc- (void)addObserver:(id)observer selector:(SEL)aSelector name:(nullable NSString *)aName object:(nullable id)anObject;//添加观察者 - (void)postNotificationName:(NSString *)aName object:(nullable id)anObject userInfo:(nullable NSDictionary *)aUserInfo;//发布通知 - (void)removeObserver:(id)observer;//移处观察者 -
运用模版
步骤 1:定义常量(用于防止写错名字)
objc// 推荐做法:定义常量 #define kNotificationName_UserLogin @"UserLoginSuccessNotification"步骤 2:接收方 - 订阅
objc// 1. 在 viewDidLoad 注册 - (void)viewDidLoad { [super viewDidLoad]; [[NSNotificationCenter defaultCenter] addObserver:self selector:@selector(handleLogin:) name:kNotificationName_UserLogin object:nil]; // object 填 nil 表示接收所有发送者的通知 } // 2. 接收消息的方法 - (void)handleLogin:(NSNotification *)notification { // 3. 取出数据 NSDictionary *info = notification.userInfo; NSString *token = info[@"token"]; NSLog(@"登录成功,token 是:%@", token); // 4. 拿到数据后,做你想做的事(比如刷新 UI) [self refreshUIWithToken:token]; } // 5. 离开时移除(必写) - (void)dealloc { [[NSNotificationCenter defaultCenter] removeObserver:self]; }步骤 3:发送方 - 发布
objc// 构造要传递的数据 NSDictionary *userInfo = @{@"token": @"123456abcdef", @"userId": @"10086"}; // 发送通知 [[NSNotificationCenter defaultCenter] postNotificationName:kNotificationName_UserLogin object:nil userInfo:userInfo];
五、单例传值
-
原理:创建一个单例类(整个项目只有一个实例),在该类中声明共享属性;任何界面都能通过单例类的类方法获取实例,对共享属性进行存值、取值,实现多个界面的数据共享。
-
适用场景:全局共享数据
-
代码演示
先创建单例类,数据存在这里可以在多个界面共享
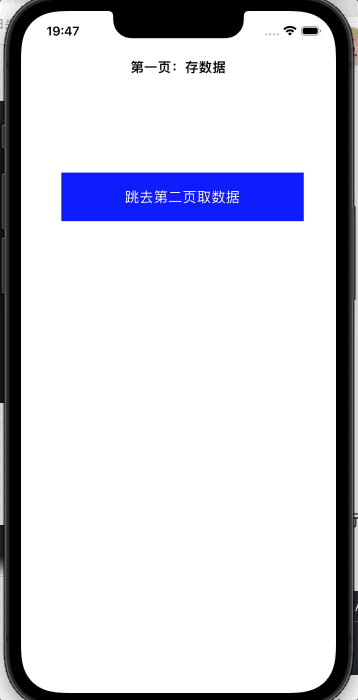
objc// SingletonManager.h #import <Foundation/Foundation.h> NS_ASSUME_NONNULL_BEGIN @interface SingletonManager : NSObject + (instancetype)sharedManager; @property (nonatomic, copy) NSString *contentText; @end NS_ASSUME_NONNULL_ENDobjc// SingletonManager.m #import "SingletonManager.h" @implementation SingletonManager + (instancetype)sharedManager { static SingletonManager *instance = nil; static dispatch_once_t onceToken; dispatch_once(&onceToken, ^{ instance = [[super allocWithZone:NULL] init]; }); return instance; } // 防止外部手动 alloc 生成新实例 + (instancetype)allocWithZone:(struct _NSZone *)zone { return [self sharedManager]; } @end界面一,存值
objc// ViewController.m #import "ViewController.h" #import "SecondViewController.h" #import "SingletonManager.h" @interface ViewController () @end @implementation ViewController - (void)viewDidLoad { [super viewDidLoad]; // Do any additional setup after loading the view. self.view.backgroundColor = [UIColor whiteColor]; self.title = @"第一页:存数据"; // 给单例存数据 SingletonManager *manager = [SingletonManager sharedManager]; manager.contentText = @"我是来自第一页的消息:单例传值成功啦!"; // 打印验证 NSLog(@"第一页存入:%@", manager.contentText); // 跳转到第二页的按钮 UIButton *btn = [[UIButton alloc] initWithFrame:CGRectMake(50, 200, 300, 60)]; btn.backgroundColor = [UIColor blueColor]; [btn setTitle:@"跳去第二页取数据" forState:UIControlStateNormal]; [btn addTarget:self action:@selector(jump) forControlEvents:UIControlEventTouchUpInside]; [self.view addSubview:btn]; } - (void)jump { SecondViewController *vc2 = [[SecondViewController alloc] init]; [self.navigationController pushViewController:vc2 animated:YES]; } @end界面二取值
objc// SecondViewController.m #import "SecondViewController.h" #import "SingletonManager.h" @interface SecondViewController () @end @implementation SecondViewController - (void)viewDidLoad { [super viewDidLoad]; // Do any additional setup after loading the view. self.view.backgroundColor = [UIColor whiteColor]; self.title = @"第二页:取数据"; // 从单例取数据(跨界面!) SingletonManager *manager = [SingletonManager sharedManager]; NSString *result = manager.contentText; NSLog(@" 第二页取到:%@", result); // 显示在界面上 UILabel *label = [[UILabel alloc] initWithFrame:CGRectMake(30, 200, 350, 100)]; label.numberOfLines = 0; label.text = result; label.textColor = [UIColor redColor]; [self.view addSubview:label]; } @end