8.5 本节知识总结
回调函数 vs 高阶函数关系图
回调函数三个判定条件
我定义的
✅ 三条都满足 = 回调
不是我直接调用的
最终被执行了
高阶函数
(概念)
以函数为参数
以函数为返回值
使用了回调函数
forEach / sort / filter
setTimeout / addEventListener
工厂函数 / 闭包
| 概念 | 定义 | 核心价值 |
|---|---|---|
| 函数是一等公民 | 函数可像数值一样传递、存储、返回 | 回调和高阶函数的基础 |
| 回调函数 | 我定义,不直接调,最终被调 | 解耦调用时机与调用逻辑 |
| 高阶函数 | 接收/返回函数的函数 | 逻辑抽象与复用的核心工具 |
| 回调 + 词法作用域 | 回调依然遵循词法作用域 | 回调作用域链由书写位置决定,不受调用链影响 |
经典应用场景
js
// 场景一:数据处理管道(filter + map + reduce 链式回调)
var scores = [85, 92, 67, 78, 95, 43, 88];
var result = scores
  .filter(function(s) { return s >= 70; })     // 过滤不及格
  .map(function(s)    { return s + 5; })        // 加5分
  .reduce(function(sum, s) { return sum + s; }, 0);  // 求总分
console.log('调整后总分:', result);

// 场景二:通用排序函数(策略回调)
function sortBy(arr, compareFn) {
  return arr.slice().sort(compareFn);
}
var people = [
  { name: 'Alex', age: 30 },
  { name: 'Bo',   age: 25 },
  { name: 'Cara', age: 35 }
];
// 传入不同的策略,复用 sortBy 函数
var byAge  = sortBy(people, function(a, b) { return a.age  - b.age;  });
var byName = sortBy(people, function(a, b) { return a.name > b.name ? 1 : -1; });
console.log('按年龄:', byAge.map(function(p){ return p.name; }));
console.log('按名字:', byName.map(function(p){ return p.name; }));

// 场景三:事件委托(利用回调解耦点击处理)
document.body.addEventListener('click', function(e) {
  if (e.target.matches('.btn-delete')) {
    var id = e.target.dataset.id;
    console.log('删除 id =', id);
  }
});九、Array.prototype.sort:比较器深度解析
9.1 理论深度:sort 的内部机制
Array.prototype.sort 是 JavaScript 内置的排序方法。其关键特性:
- ES2019+ 保证稳定排序:相同键值的元素,排序前后的相对顺序不变(V8 引擎从 7.0 版本起对所有数组使用 TimSort 算法保证稳定性)
- 不传比较器时的行为:元素被转为字符串,按 UTF-16 码元排序------这对字母表排序是正确的,但对数值排序会产生错误结果
- 原地修改 :
sort会直接修改原数组,若不想修改原数组,需先.slice()复制
各主流引擎的排序实现:
| 引擎 | 默认算法(数值型数组) | 默认算法(非数值) | 稳定性 | 版本 |
|---|---|---|---|---|
| V8(Chrome/Node) | TimSort(V8 7.0+) | QuickSort(旧版本) | 稳定(V8 7.0+) | Chrome 70+ |
| SpiderMonkey(Firefox) | MergeSort | MergeSort | 稳定 | 始终 |
| JavaScriptCore(Safari) | MergeSort | MergeSort | 稳定 | 始终 |
| Chakra(Edge Legacy) | QuickSort | QuickSort | 不稳定 | 已废弃 |
TimSort 算法简介(V8 当前实现):
- 来源:由 Tim Peters 于 2002 年为 Python 设计,后广泛应用于 Java、Android、JavaScript
- 核心思想 :混合插入排序 + 归并排序
- 小数组(< 64 元素):使用插入排序(Insertion Sort)
- 大数组:划分为「运行」(run),归并有序的 run
- 自适应:检测已排序或逆序的子数组,避免不必要的操作
- 时间复杂度 :
- 最好情况(已有序):O(n)------仅需一次遍历识别为有序
- 平均/最坏:O(n log n)
不传比较器时的字符串排序机制:
ECMAScript 规范(ECMA-262 §22.1.3.25)规定,若未提供 compareFn:
- 调用
ToString抽象操作将每个元素转为字符串 - 按 UTF-16 码元单位(Code Unit)比较字符串
- 关键陷阱 :
10→"10",2→"2",比较时按字符字典序:"1" < "2",所以"10" < "2"
javascript
// 规范层面的行为
[10, 2, 1].sort();
// 等价于:
["10", "2", "1"].sort(function(a, b) {
  return a < b ? -1 : a > b ? 1 : 0;  // 字符串字典序
});
// 结果:[1, 10, 2] ← 不是数值排序!比较器的返回值语义(规范定义):
比较器 function(a, b)
返回值 r
r < 0
a 排在 b 前面
r = 0
保持原有相对顺序
r > 0
b 排在 a 前面
升序技巧
return a - b
a 小时 a-b 为负,a 在前 ✅
降序技巧
return b - a
b 小时 b-a 为负,b 在前 ✅
9.2 案例⑩:数组排序方法 sort(完整可运行版)
html
<!DOCTYPE html>
<html lang="zh-CN">
<head>
  <meta charset="UTF-8" />
  <title>Array.prototype.sort 比较器演示</title>
  <style>
    body { font-family: system-ui, sans-serif; margin: 2rem; background: #f8fafc; }
    .wrap { max-width: 580px; }
    h2 { color: #1e40af; }
    .result {
      background: #0b1020; color: #e2e8f0; padding: 1.25rem;
      border-radius: 10px; font-family: monospace; font-size: 0.9rem;
      line-height: 2; margin-top: 1rem;
    }
    .danger { color: #f87171; }
    .safe   { color: #4ade80; }
    .info   { color: #fbbf24; }
  </style>
</head>
<body>
  <div class="wrap">
    <h2>sort 比较器:升序 / 降序 / 陷阱演示</h2>
    <div class="result" id="out"></div>
  </div>

  <script>
    var nums = [23, 101, 12, 45, 89, 56, 78, 18];
    var html = '';

    // ─── 陷阱:不传比较器(字符串排序)────────────────────
    // 不传比较器时,元素被转为字符串,按 UTF-16 码元比较
    // [10, 2, 1] → ["10","2","1"] → 字典序 "1"<"10"<"2"
    // 结果是 [1, 10, 2],而不是 [1, 2, 10]
    var trap = [10, 2, 1, 20, 100].sort();
    html += '<span class="danger">// ⚠ 不传比较器:按字符串排序(数值场景下是陷阱)</span>\n';
    html += '[10, 2, 1, 20, 100].sort() → [' + trap.join(', ') + ']\n\n';

    // ─── 升序:(a, b) => a - b ─────────────────────────
    // a=12, b=23 → 12-23=-11 < 0 → a(12) 在前 → 正确:小的在前
    var asc = nums.slice().sort(function (a, b) {
      return a - b;   // 差值为负:a 在前(升序)
    });
    html += '<span class="safe">// ✅ 升序:比较器返回 a - b</span>\n';
    html += '升序 → [' + asc.join(', ') + ']\n\n';

    // ─── 降序:(b, a) => b - a ─────────────────────────
    // a=12, b=23 → b-a=23-12=11 > 0 → b(23) 在前 → 正确:大的在前
    var desc = nums.slice().sort(function (a, b) {
      return b - a;   // 差值为负:b 在前(降序)
    });
    html += '<span class="safe">// ✅ 降序:比较器返回 b - a</span>\n';
    html += '降序 → [' + desc.join(', ') + ']\n\n';

    // ─── 使用自定义比较逻辑(等效写法)────────────────────
    // 原始写法:使用 next/prev 命名
    var asc2 = nums.slice().sort(function(next, prev) {
      // next > prev → 返回正数 → prev 在前 → 较小值在前 → 升序
      return next - prev;
    });
    html += '<span class="info">// ℹ 原始写法(next/prev 命名)</span>\n';
    html += '升序(next-prev)→ [' + asc2.join(', ') + ']\n';

    var desc2 = nums.slice().sort(function(next, prev) {
      return prev - next;   // 降序
    });
    html += '降序(prev-next)→ [' + desc2.join(', ') + ']\n';

    document.getElementById('out').innerHTML = html;
    console.log('陷阱:', trap);
    console.log('升序:', asc);
    console.log('降序:', desc);
  </script>
</body>
</html>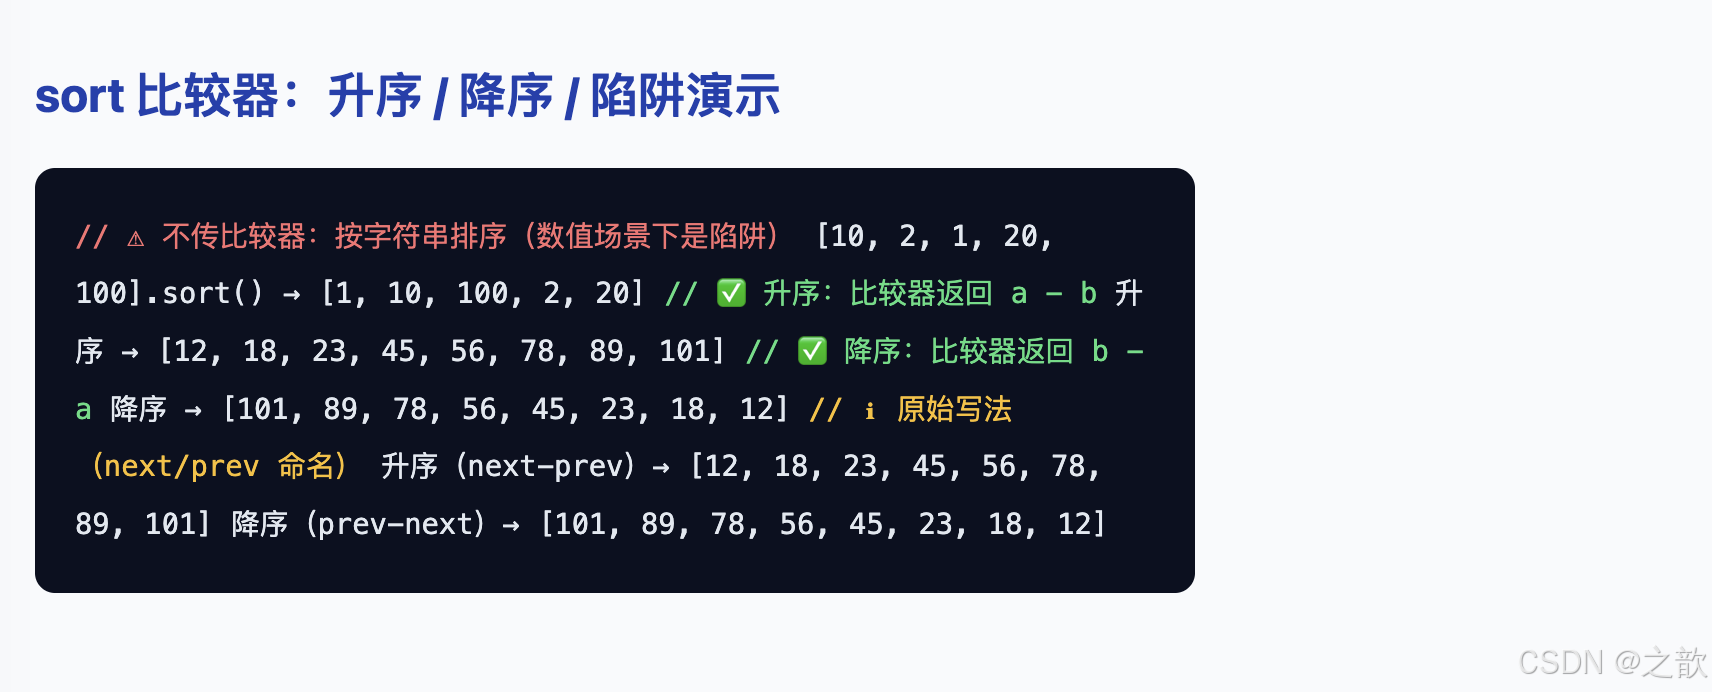
案例解析
本案例是 Array.prototype.sort 的核心演示,重点揭示**「不传比较器」的经典陷阱**以及正确使用比较器的方法。
核心代码分析:
-
陷阱演示(不传比较器):
javascriptvar trap = [10, 2, 1, 20, 100].sort(); // 实际结果:[1, 10, 100, 2, 20] ← 按字符串排序!- 不传比较器时,元素被转为字符串:
"1" < "10" < "100" < "2" < "20" - 字典序比较:
"10"的首字符"1"<"2"的"2" - 对数值排序是错误的! 一定要传比较器
- 不传比较器时,元素被转为字符串:
-
升序比较器
a - b:javascriptvar asc = nums.slice().sort(function (a, b) { return a - b; // 差值为负:a 在前(升序) });- 核心逻辑 :
return a - ba=12, b=23→12 - 23 = -11 < 0→a(12)在前 → 小的在前 ✅
- 先
.slice()复制,不修改原数组
- 核心逻辑 :
-
降序比较器
b - a:javascriptvar desc = nums.slice().sort(function (a, b) { return b - a; // b 在前 });a=12, b=23→23 - 12 = 11 > 0→b(23)在前 → 大的在前 ✅
-
原始写法(next/prev 命名):
javascriptvar asc2 = nums.slice().sort(function(next, prev) { return next - prev; // next > prev → 正数 → prev 在前 → 升序 }); var desc2 = nums.slice().sort(function(next, prev) { return prev - next; // 降序 });- 与
a - b完全等效,只是形参名不同
- 与
比较器返回值记忆口诀:
返回负数 → 第一个参数(a)排前面
返回  0   → 相对顺序不变
返回正数 → 第二个参数(b)排前面

升序口诀:a - b(a 小则 a - b 为负,a 排前面)
降序口诀:b - a(b 大则 b - a 为负,b 排前面)
9.3 案例⑪:对象数组按 age 排序(完整可运行版)
html
<!DOCTYPE html>
<html lang="zh-CN">
<head>
  <meta charset="UTF-8" />
  <title>对象数组排序:按年龄</title>
  <style>
    body { font-family: system-ui, sans-serif; margin: 2rem; background: #f8fafc; }
    h2 { color: #1e40af; }
    .btn-row { display: flex; gap: 10px; margin-bottom: 1rem; }
    button { padding: 8px 18px; border-radius: 8px; border: none; cursor: pointer; font-size: 0.9rem; transition: opacity 0.15s; }
    button:hover { opacity: 0.85; }
    .asc  { background: #3b82f6; color: #fff; }
    .desc { background: #64748b; color: #fff; }
    table { border-collapse: collapse; width: 100%; max-width: 540px; }
    th { background: #1e40af; color: #fff; padding: 10px 16px; text-align: left; font-weight: 600; }
    td { padding: 10px 16px; border-bottom: 1px solid #e2e8f0; }
    tr:nth-child(even) td { background: #f1f5f9; }
    tr:hover td { background: #dbeafe; transition: background 0.1s; }
    .age-cell { font-weight: bold; color: #2563eb; }
    .tip { font-size: 0.85rem; color: #64748b; margin-top: 1rem; }
  </style>
</head>
<body>
  <h2>对象数组排序:按年龄升降序</h2>
  <div class="btn-row">
    <button class="asc" onclick="render('asc')">年龄升序 ↑</button>
    <button class="desc" onclick="render('desc')">年龄降序 ↓</button>
  </div>
  <table>
    <thead><tr><th>姓名</th><th>年龄</th><th>城市</th></tr></thead>
    <tbody id="tbody"></tbody>
  </table>
  <p class="tip">提示:排序使用 <code>sort(function(a,b){ return a.age - b.age; })</code>,不修改原数组(先 .slice() 复制)。</p>

  <script>
    /*
     * 原始数据(作业题):按年龄升序排列
     * 对象属性:name(姓名)、age(年龄)、city(城市)
     * 排序规则:比较器访问 a.age 和 b.age,与数值排序完全一致
     */
    var users = [
      { name: 'Alex Chen',  age: 67, city: 'Springfield' },
      { name: 'Blake Lee',  age: 47, city: 'Riverside'   },
      { name: 'Casey Kim',  age: 37, city: 'Lakeside'    },
      { name: 'Drew Park',  age: 51, city: 'Hilltown'    },
      { name: 'Evan Wu',    age: 46, city: 'Mapleford'   },
      { name: 'Fiona Su',   age: 52, city: 'Pinewood'    }
    ];

    function render(dir) {
      // 使用 .slice() 复制,避免修改 users 原数组
      var sorted = users.slice().sort(function (a, b) {
        // dir==='asc':a.age - b.age → 小年龄在前(升序)
        // dir==='desc':b.age - a.age → 大年龄在前(降序)
        return dir === 'asc' ? a.age - b.age : b.age - a.age;
      });

      // 清空并重新渲染表格
      var tbody = document.getElementById('tbody');
      tbody.innerHTML = '';
      sorted.forEach(function (u) {
        var tr = document.createElement('tr');
        tr.innerHTML =
          '<td>' + u.name + '</td>' +
          '<td class="age-cell">' + u.age + '</td>' +
          '<td>' + u.city + '</td>';
        tbody.appendChild(tr);
      });
    }

    render('asc');   // 页面加载时默认升序
  </script>
</body>
</html>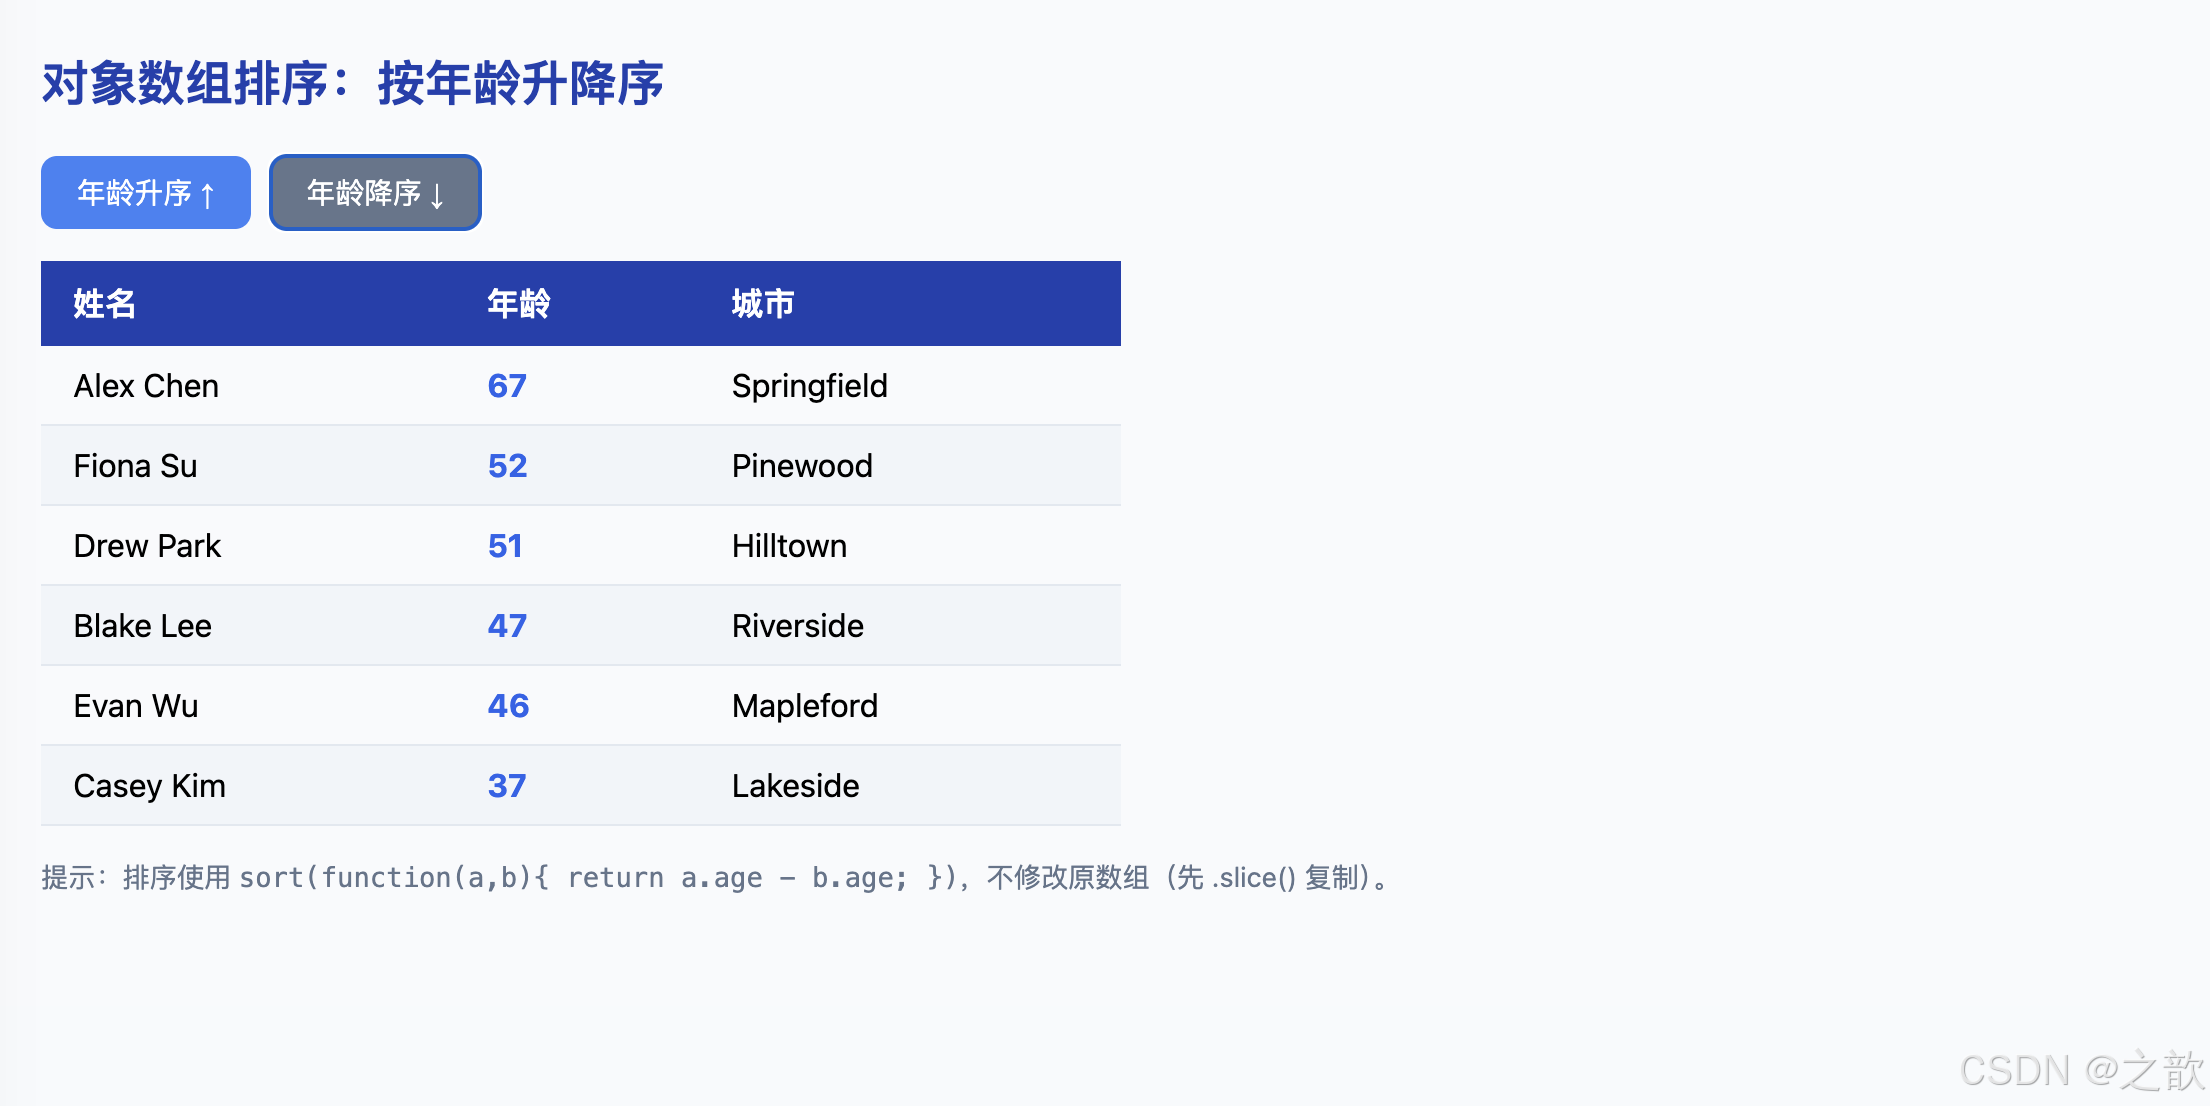
案例解析
本案例展示了对对象数组按某个属性排序的完整实现,体现了比较器在实际业务中的典型应用。
核心代码分析:
-
对象数组数据:
javascriptvar users = [ { name: 'Alex Chen', age: 67, city: 'Springfield' }, { name: 'Blake Lee', age: 47, city: 'Riverside' }, // ... ];- 每个元素都是对象,有
name、age、city三个属性
- 每个元素都是对象,有
-
核心排序逻辑:
javascriptfunction render(dir) { var sorted = users.slice().sort(function (a, b) { // dir==='asc':a.age - b.age → 小年龄在前(升序) // dir==='desc':b.age - a.age → 大年龄在前(降序) return dir === 'asc' ? a.age - b.age : b.age - a.age; }); // ... }users.slice():先复制,不修改原数组users,保持原始数据不变- 比较器访问属性 :
a.age - b.age与数值排序完全一致,只是从直接比较数字变为比较对象属性 - 三元表达式:一个比较器处理升序/降序两种情况
-
动态表格渲染:
javascriptsorted.forEach(function (u) { var tr = document.createElement('tr'); tr.innerHTML = '<td>' + u.name + '</td>' + '<td class="age-cell">' + u.age + '</td>' + '<td>' + u.city + '</td>'; tbody.appendChild(tr); });- 每次点击按钮都清空
tbody.innerHTML = ''再重新渲染 - 使用
forEach遍历已排序数组,逐行插入<tr>
- 每次点击按钮都清空
扩展:多字段排序:
javascript
// 先按年龄排序,年龄相同再按姓名排序
users.slice().sort(function (a, b) {
  if (a.age !== b.age) return a.age - b.age;   // 主排序:年龄
  return a.name > b.name ? 1 : -1;             // 次排序:姓名
});
9.4 本节知识总结
| 要点 | 规则 | 示例 |
|---|---|---|
| 不传比较器 | 元素转字符串,按 UTF-16 排序 | [10,2,1].sort() → [1,10,2](陷阱!) |
| 升序比较器 | (a, b) => a - b |
负数时 a 在前,符合「小的在前」 |
| 降序比较器 | (a, b) => b - a |
负数时 b 在前,符合「大的在前」 |
| 对象数组排序 | 在比较器中访问对象属性 | (a, b) => a.age - b.age |
| 不修改原数组 | 先 .slice() 复制再排序 |
arr.slice().sort(fn) |
| 稳定性(ES2019+) | 相同键值元素相对顺序不变 | 多字段排序时依赖此特性 |
十、递归函数:栈视角与终止条件
10.1 理论深度:递归的本质与调用栈
递归(Recursion)是一种编程技巧:函数通过调用自身来解决问题的子集,直到问题规模缩减到可以直接求解的基础情形(Base Case)。
递归与迭代的本质关系:任何递归都可以改写为迭代(用显式栈替代调用栈),反之亦然。递归代码更贴近问题的数学定义,代价是每次调用都消耗一个调用栈帧。
递归成功的两个必要条件:
是(n <= 临界值)
否
是
否
递归函数调用 f(n)
满足终止条件?
Base Case
直接返回基础结果
不再递归
将问题规模缩小
递归调用 f(n-1) 或 f(n/2) 等
问题规模
是否在收敛?
⚠ 无限递归 → 调用栈溢出
RangeError: Maximum call stack size exceeded
调用栈视角 (以 factorial(5) 为例):
调用 factorial(5)  → 压栈帧 EC(5)
  调用 factorial(4) → 压栈帧 EC(4)
    调用 factorial(3) → 压栈帧 EC(3)
      调用 factorial(2) → 压栈帧 EC(2)
        n<=2:return 2  → 弹栈帧 EC(2)
      EC(3) 得到 2,return 3*2=6 → 弹栈帧 EC(3)
    EC(4) 得到 6,return 4*6=24 → 弹栈帧 EC(4)
  EC(5) 得到 24,return 5*24=120 → 弹栈帧 EC(5)
最终结果:120
10.2 案例⑫:阶乘递归(完整可运行版,带调用栈可视化)
html
<!DOCTYPE html>
<html lang="zh-CN">
<head>
  <meta charset="UTF-8" />
  <title>递归函数:阶乘与调用栈可视化</title>
  <style>
    body { font-family: system-ui, sans-serif; margin: 2rem; background: #f8fafc; }
    h2 { color: #1e40af; }
    .controls { display: flex; align-items: center; gap: 10px; margin-bottom: 1rem; flex-wrap: wrap; }
    input[type=number] { width: 72px; padding: 6px 10px; border-radius: 6px; border: 1px solid #cbd5e1; font-size: 1rem; }
    button { padding: 8px 20px; border-radius: 8px; border: none; background: #3b82f6; color: #fff; cursor: pointer; font-size: 0.95rem; }
    button:hover { background: #2563eb; }
    .stack-label { font-size: 0.85rem; color: #64748b; margin-bottom: 4px; }
    /* 调用栈从底部开始堆叠(flex 列反向)*/
    .stack-wrap { display: flex; flex-direction: column-reverse; gap: 4px; max-width: 400px; margin: 0.75rem 0; }
    .frame {
      border-radius: 6px; padding: 8px 14px; font-family: monospace; font-size: 0.875rem;
      animation: slideIn 0.25s ease;
    }
    .frame.base { background: #10b981; color: #fff; }      /* 终止条件帧:绿色 */
    .frame.rec  { background: #3b82f6; color: #fff; }      /* 递归帧:蓝色 */
    @keyframes slideIn { from { opacity:0; transform:translateX(-10px); } to { opacity:1; } }
    .result { font-size: 1.4rem; font-weight: 700; color: #059669; margin: 0.75rem 0; }
    .trace {
      background: #0b1020; color: #e2e8f0; padding: 1rem; border-radius: 10px;
      font-family: monospace; font-size: 0.85rem; margin-top: 1rem; max-width: 420px;
      line-height: 1.9; white-space: pre-wrap;
    }
  </style>
</head>
<body>
  <h2>递归函数:阶乘计算 + 调用栈可视化</h2>
  <div class="controls">
    <label>输入 n(建议 2--8):</label>
    <input type="number" id="nInput" value="5" min="1" max="12" />
    <button onclick="run()">计算</button>
  </div>

  <div class="stack-label">调用栈(从底部往上展开):</div>
  <div class="stack-wrap" id="stack"></div>
  <div class="result" id="result"></div>
  <div class="trace" id="trace"></div>

  <script>
    /*
     * 版阶乘函数(原始代码)
     * 终止条件:n <= 2 时直接返回 n
     *   - factorial(1) = 1
     *   - factorial(2) = 2
     * 递推公式:factorial(n) = n * factorial(n-1)
     *
     * 注意:数学标准 n! 的终止条件通常是 n <= 1
     * 版 n <= 2 是简化写法,factorial(2)=2 与标准相同,factorial(1)=1 也相同
     */
    function factorial(n) {
      if (n <= 2) {
        return n;                    // 基础情形:直接返回,不再递归
      }
      return n * factorial(n - 1);  // 递推:n 乘以 (n-1) 的阶乘
    }

    // 带深度追踪的版本(用于可视化)
    var traceLog = [];
    function factorialTrace(n, depth) {
      var indent = '  '.repeat(depth);
      traceLog.push(indent + 'factorial(' + n + ') 开始调用');
      if (n <= 2) {
        traceLog.push(indent + 'factorial(' + n + ') 终止,返回 ' + n);
        return n;
      }
      var r = n * factorialTrace(n - 1, depth + 1);
      traceLog.push(indent + 'factorial(' + n + ') 返回 ' + r);
      return r;
    }

    function run() {
      var n = parseInt(document.getElementById('nInput').value, 10);
      if (isNaN(n) || n < 1) { alert('请输入正整数'); return; }

      // 渲染调用栈帧(从底到顶:从 1 到 n)
      var stackEl = document.getElementById('stack');
      stackEl.innerHTML = '';
      for (var i = 1; i <= n; i++) {
        var frame = document.createElement('div');
        if (i <= 2) {
          frame.className = 'frame base';
          frame.textContent = 'factorial(' + i + ')  ← 终止条件,直接返回 ' + i;
        } else {
          frame.className = 'frame rec';
          frame.textContent = 'factorial(' + i + ')  → ' + i + ' × factorial(' + (i-1) + ')';
        }
        stackEl.appendChild(frame);
      }

      // 计算结果
      var ans = factorial(n);
      document.getElementById('result').textContent =
        'factorial(' + n + ') = ' + ans;

      // 生成追踪日志
      traceLog = [];
      factorialTrace(n, 0);
      document.getElementById('trace').textContent = traceLog.join('\n');
    }

    run();  // 初始计算 factorial(5) = 120

    // 控制台直接验证
    console.log('factorial(5) =', factorial(5));   // 120
    console.log('factorial(10) =', factorial(10)); // 3628800
  </script>
</body>
</html>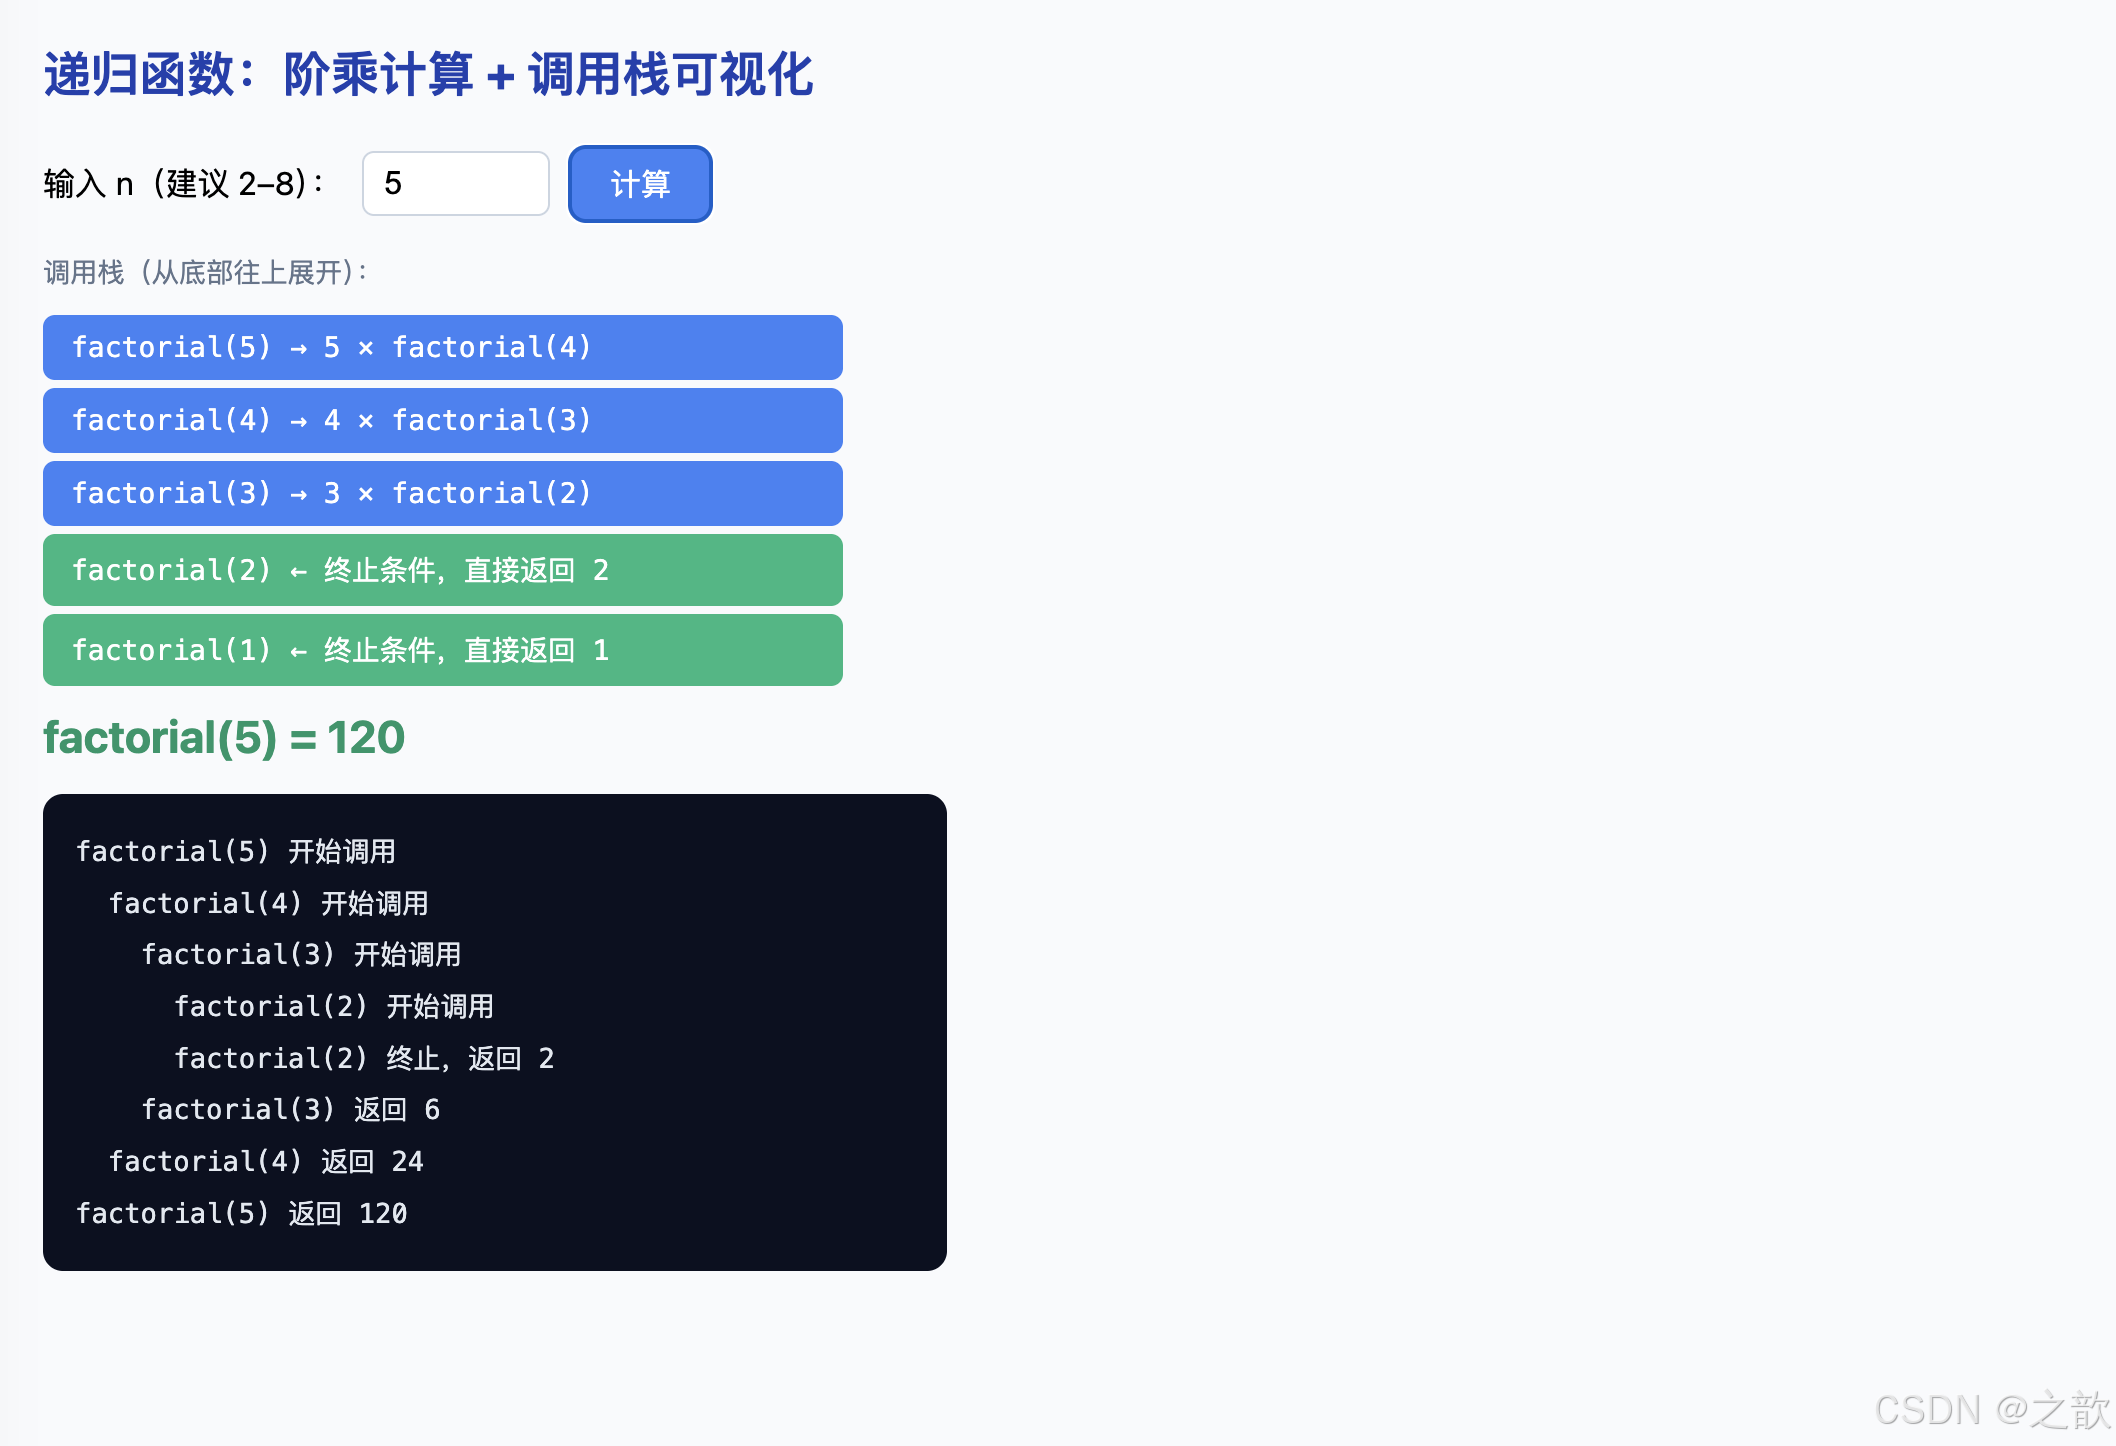
案例解析
本案例是递归函数的入门标准案例,以阶乘为例演示递归的「分解 → 回溯」执行机制。
核心代码分析:
-
阶乘递归函数:
javascriptfunction factorial(n) { if (n <= 2) { return n; // 基础情形:n=1 返回 1,n=2 返回 2 } return n * factorial(n - 1); // 递推:n 乘以 (n-1) 的阶乘 }- 终止条件(Base Case) :
n <= 2→ 直接返回n,不再递归 - 递推关系 :
n! = n × (n-1)!,每次将问题规模缩小 1 - 收敛性 :每次调用
n都减 1,必然到达n <= 2的终止条件
- 终止条件(Base Case) :
-
调用栈展开(以
factorial(5)为例):factorial(5) 调用 → 压栈帧 [EC5] factorial(4) 调用 → 压栈帧 [EC5, EC4] factorial(3) 调用 → 压栈帧 [EC5, EC4, EC3] factorial(2) 调用 → 压栈帧 [EC5, EC4, EC3, EC2] n<=2,return 2 → 弹栈帧 [EC5, EC4, EC3] 得到 2,return 3×2=6 → 弹栈帧 [EC5, EC4] 得到 6,return 4×6=24 → 弹栈帧 [EC5] 得到 24,return 5×24=120 → 弹栈帧 [] 最终结果:120 -
追踪版本
factorialTrace(带深度参数):javascriptfunction factorialTrace(n, depth) { var indent = ' '.repeat(depth); // 用缩进表示递归深度 traceLog.push(indent + 'factorial(' + n + ') 开始调用'); if (n <= 2) { traceLog.push(indent + 'factorial(' + n + ') 终止,返回 ' + n); return n; } var r = n * factorialTrace(n - 1, depth + 1); traceLog.push(indent + 'factorial(' + n + ') 返回 ' + r); return r; }depth参数记录当前递归深度,用于缩进展示- 在调用前、返回前分别记录日志,完整还原调用栈行为
-
可视化调用栈帧渲染:
javascriptfor (var i = 1; i <= n; i++) { var frame = document.createElement('div'); if (i <= 2) { frame.className = 'frame base'; // 终止条件帧:绿色 frame.textContent = 'factorial(' + i + ') ← 终止条件,直接返回 ' + i; } else { frame.className = 'frame rec'; // 递归帧:蓝色 frame.textContent = 'factorial(' + i + ') → ' + i + ' × factorial(' + (i-1) + ')'; } stackEl.appendChild(frame); }- 使用
column-reverseFlex 布局从底部堆叠,模拟真实调用栈(LIFO) - 绿色帧 = 终止条件(base case),蓝色帧 = 递归帧
- 使用
递归必须满足的两个条件:
- ✅ 有终止条件 :
n <= 2直接返回,不再递归 - ✅ 问题规模收敛 :每次
n - 1,规模不断减小
10.3 案例⑬:递归对称输出 func(n)(完整可运行版)
html
<!DOCTYPE html>
<html lang="zh-CN">
<head>
  <meta charset="UTF-8" />
  <title>递归对称输出</title>
  <style>
    body { font-family: system-ui, sans-serif; margin: 2rem; background: #f8fafc; }
    h2 { color: #1e40af; }
    .pre {
      background: #0b1020; color: #e2e8f0; padding: 1rem 1.5rem;
      border-radius: 10px; font-family: monospace; font-size: 0.9rem;
      max-width: 360px; line-height: 2;
    }
    .enter { color: #4ade80; }
    .leave { color: #f87171; }
  </style>
</head>
<body>
  <h2>递归对称输出:func(3)</h2>
  <div class="pre" id="out"></div>

  <script>
    /*
     * 案例原始代码:
     *   func(3) 的执行轨迹(见下方注释中的树形展开):
     *
     *   func(3) 开始         → 输出 "进入 3"
     *     func(2) 开始       → 输出 "进入 2"
     *       func(1) 开始     → 输出 "进入 1"
     *       func(1) 结束(n<=1,不再递归)→ 输出 "离开 1"
     *     func(2) 结束       → 输出 "离开 2"
     *   func(3) 结束         → 输出 "离开 3"
     *
     * 最终输出顺序:进入3 进入2 进入1 离开1 离开2 离开3
     * 呈现「对称镜像」结构,因为 console.log(n) 在递归调用前后各一次
     */
    var lines = [];

    function func(n) {
      lines.push({ type: 'enter', n: n });  // ← 递归调用前输出
      console.log('进入', n);

      if (n > 1) {
        func(n - 1);  // 递归:规模减小 1,向终止条件收敛
      }

      lines.push({ type: 'leave', n: n });  // ← 递归调用后输出(return 后执行)
      console.log('离开', n);
    }

    func(3);

    // 渲染可视化
    var html = '';
    lines.forEach(function(l) {
      if (l.type === 'enter') {
        html += '<span class="enter">进入 ' + l.n + '</span><br/>';
      } else {
        html += '<span class="leave">离开 ' + l.n + '</span><br/>';
      }
    });
    document.getElementById('out').innerHTML = html;
  </script>
</body>
</html>
序列图分析
func(1) func(2) func(3) func(1) func(2) func(3) ① 输出「进入 3」 ② 输出「进入 2」 ③ 输出「进入 1」 n<=1,不再递归 ④ 输出「离开 1」 ⑤ 输出「离开 2」 ⑥ 输出「离开 3」 n>1,调用 func(2) n>1,调用 func(1) 返回 返回
案例解析
本案例展示了递归调用时,函数体内代码的执行顺序。理解「递归前后」各有一次输出,是理解递归回溯的关键。
核心代码分析:
javascript
function func(n) {
  console.log(n);      // ← 第一次输出:在递归调用「之前」

  if (n > 1) {
    func(n - 1);       // 递归调用:规模减小 1
  }

  console.log(n);      // ← 第二次输出:在递归调用「之后」(回溯时)
}

func(3);
关键理解:
- 递归调用之前 的
console.log(n)→ 函数「进入」时执行 - 递归调用之后 的
console.log(n)→ 函数「返回」后(回溯时)执行 - 因为递归调用会暂停当前函数,等子调用返回后才继续执行后续代码
执行顺序详解:
func(3) 进入 → 输出 3
  func(2) 进入 → 输出 2
    func(1) 进入 → 输出 1
    func(1): n<=1 不递归,跳过
    func(1) 回溯 → 输出 1    ← 注意:这里再次输出 1
  func(2) 回溯 → 输出 2     ← 回溯时继续执行 func(2) 中的第二个 console.log
func(3) 回溯 → 输出 3

最终输出:3 2 1 1 2 3  ← 完美对称!
为什么会对称?
- 「进入」顺序:3 → 2 → 1(由外向内)
- 「回溯」顺序:1 → 2 → 3(由内向外)
- 两组输出合并:
3 2 1(进入) +1 2 3(回溯) =3 2 1 1 2 3
工程应用:递归前后打印日志
javascript
function dfs(node) {
  console.log('进入节点', node.id);   // 前序
  node.children.forEach(dfs);         // 递归
  console.log('离开节点', node.id);   // 后序
}
// 这是树/图的「前序 + 后序遍历」模式
10.4 案例⑭:嵌套数组扁平化(选做,完整可运行版)
html
<!DOCTYPE html>
<html lang="zh-CN">
<head>
  <meta charset="UTF-8" />
  <title>嵌套数组扁平化(递归实现)</title>
  <style>
    body { font-family: system-ui, sans-serif; margin: 2rem; background: #f8fafc; }
    h2 { color: #1e40af; }
    pre {
      background: #0b1020; color: #e2e8f0; padding: 1.25rem;
      border-radius: 10px; font-size: 0.875rem; max-width: 580px;
      overflow: auto; line-height: 1.7;
    }
  </style>
</head>
<body>
  <h2>嵌套数组扁平化(递归实现)</h2>
  <pre id="out"></pre>

  <script>
    /*
     * 作业原始数据(选做题)
     * 目标:把任意深度的嵌套数组拉平为一维
     */
    var nums = [
      [1000, 2000, 3000],
      'hello',
      [
        [10, 20, 30],
        [
          'a',
          'b',
          ['A', 'B', 'C']    // 三层嵌套
        ],
        'label'
      ],
      12313,
      [101, 202, 303]
    ];

    /*
     * 递归扁平化函数 flatten
     *
     * 算法思路(递归):
     *   对输入数组的每个元素 item:
     *     - 如果 item 是数组 → 递归处理,把结果合并进 res
     *     - 如果 item 不是数组 → 直接推入 res
     *
     * 子问题与原问题同构:
     *   flatten([1, [2, 3]]) = [1, ...flatten([2, 3])] = [1, 2, 3]
     */
    function flatten(input) {
      var res = [];                         // 结果数组
      for (var i = 0; i < input.length; i++) {
        var item = input[i];
        if (Array.isArray(item)) {
          // item 是数组 → 递归展开,得到一维子结果
          var inner = flatten(item);
          // 把子结果的每个元素逐一推入 res
          for (var j = 0; j < inner.length; j++) {
            res.push(inner[j]);
          }
        } else {
          // item 不是数组(数字/字符串等)→ 直接推入
          res.push(item);
        }
      }
      return res;
    }

    var flat = flatten(nums);

    // 渲染对比结果
    var out = document.getElementById('out');
    out.textContent =
      '原数组(嵌套结构):\n' +
      JSON.stringify(nums, null, 2) +
      '\n\n' +
      '扁平化后(一维):\n' +
      JSON.stringify(flat) +
      '\n\n' +
      '现代等价写法(ES2019):\n' +
      'nums.flat(Infinity) → ' + JSON.stringify(nums.flat ? nums.flat(Infinity) : '(环境不支持)');

    console.log('flatten 结果:', flat);
    // → [1000,2000,3000,"hello",10,20,30,"a","b","A","B","C","label",12313,101,202,303]
  </script>
</body>
</html>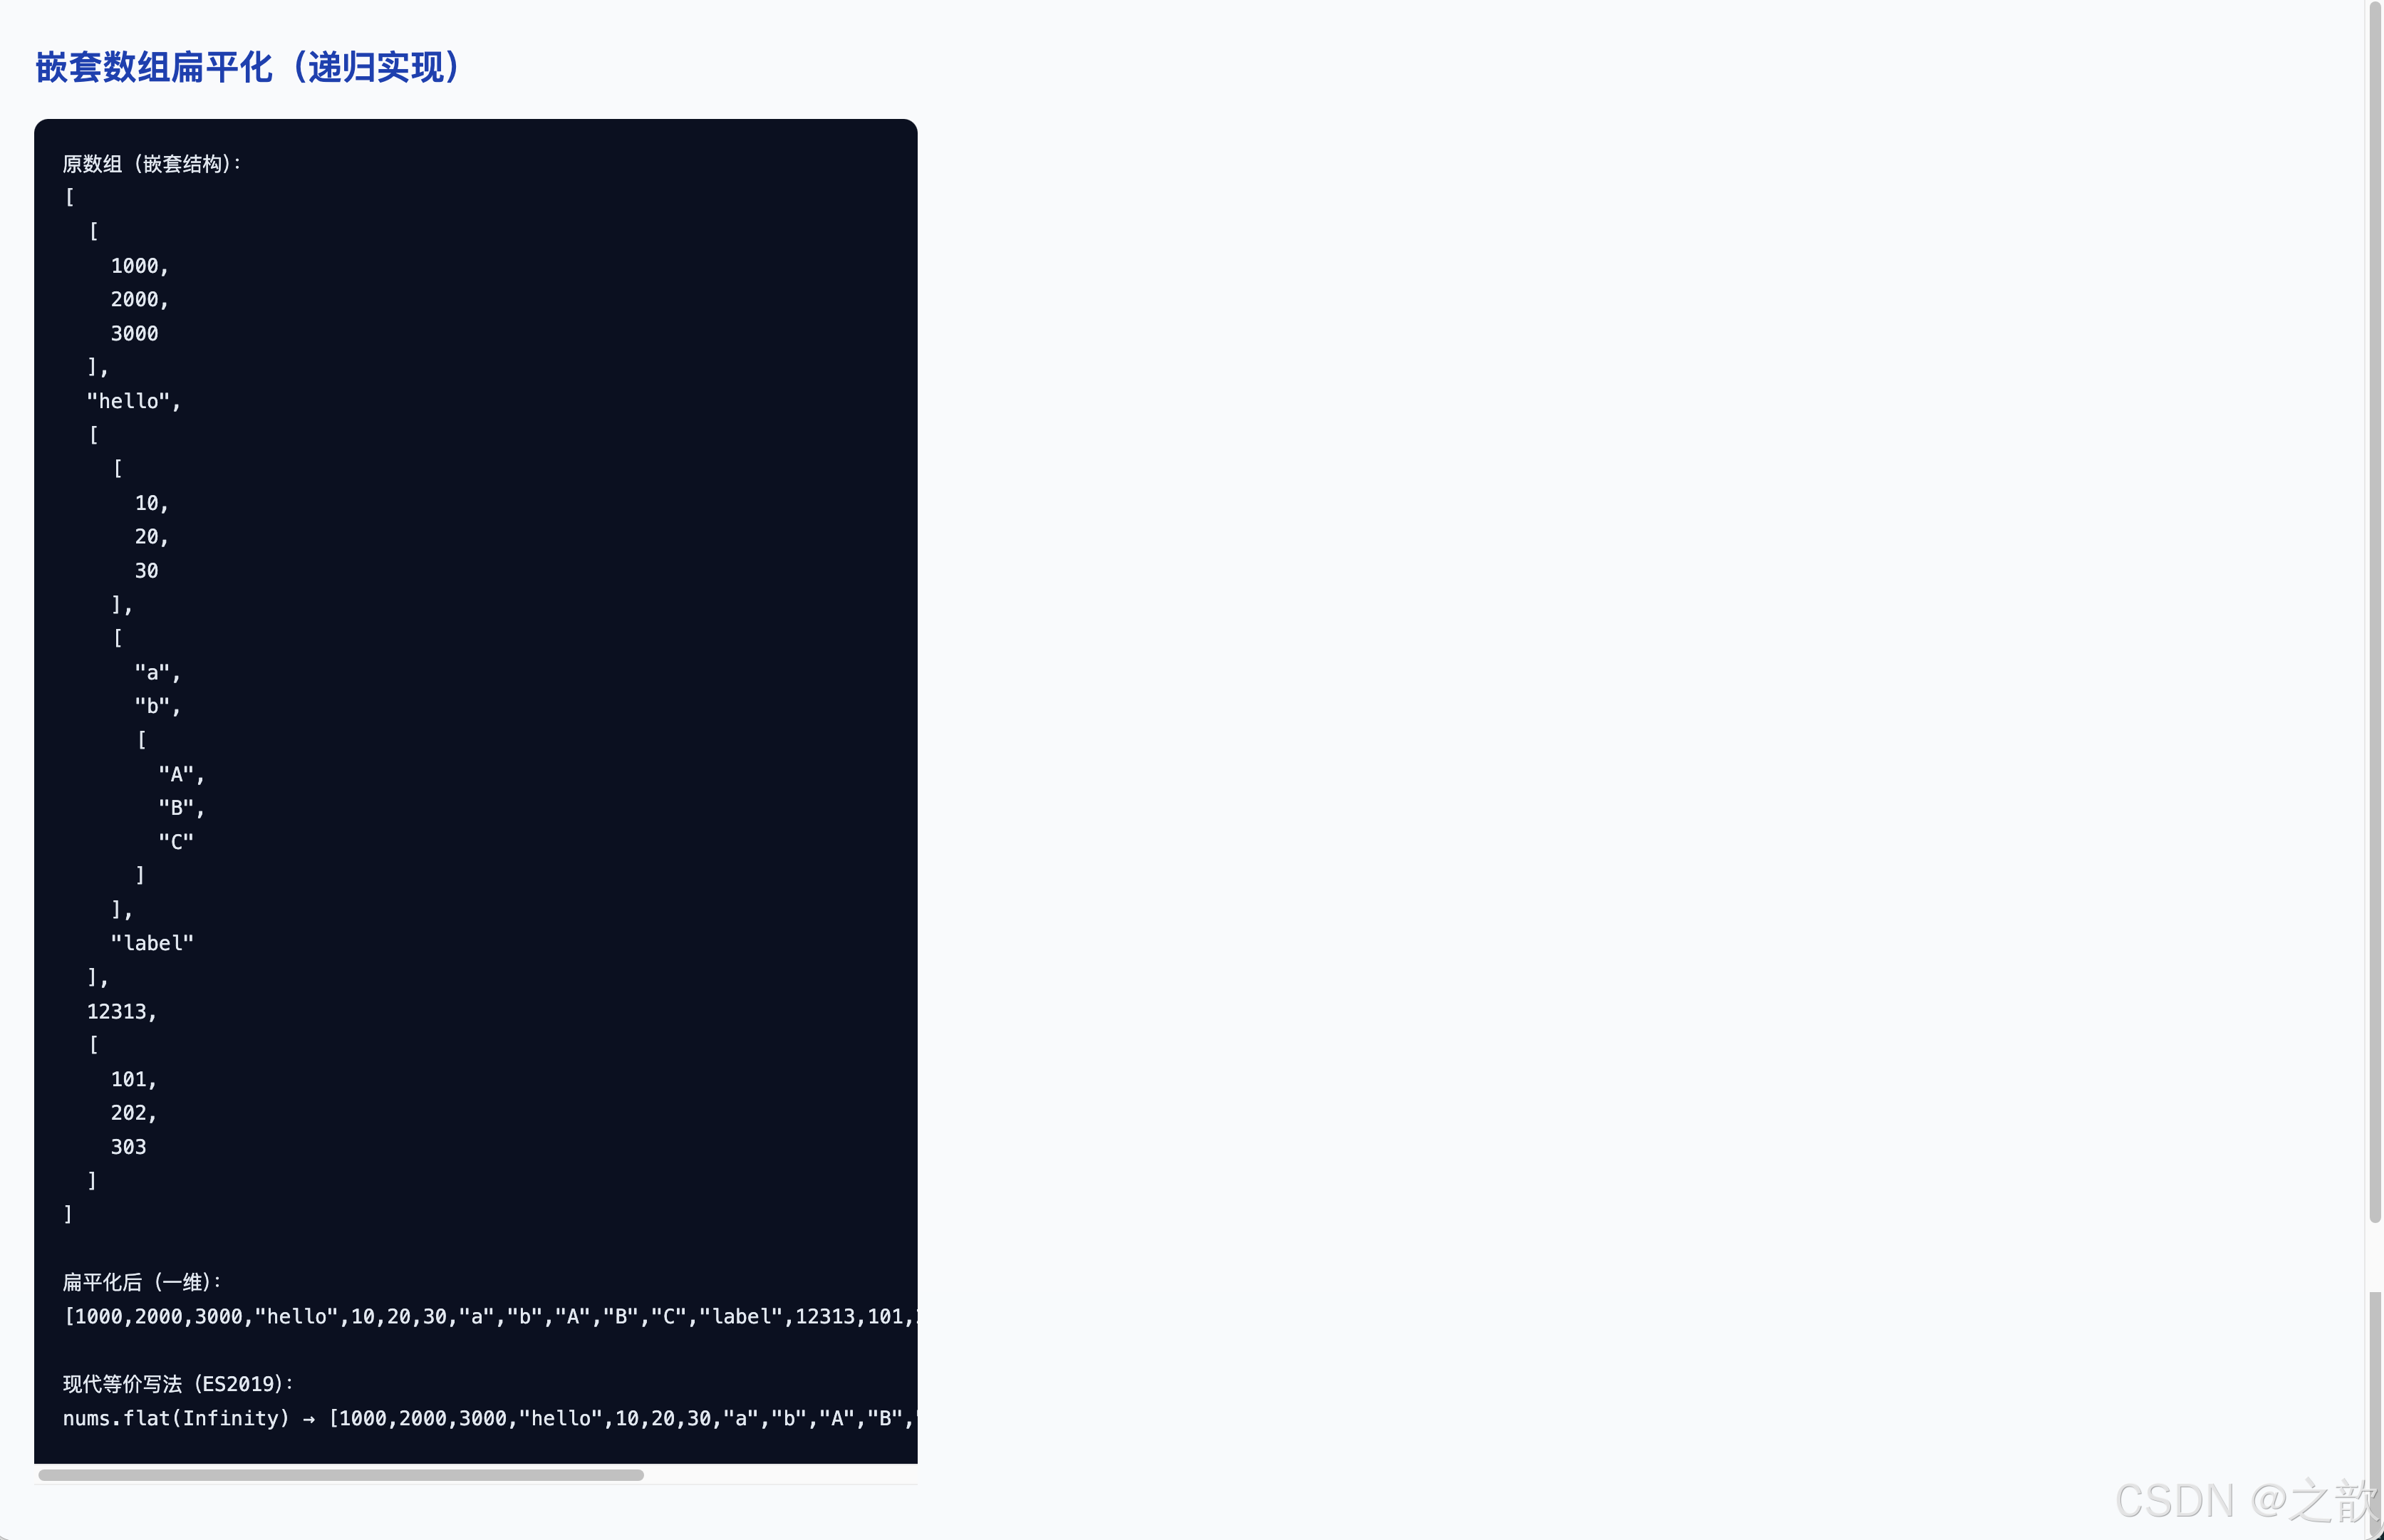
案例解析
本案例展示了用递归解决树形/嵌套结构问题,即将任意深度嵌套的数组拉平为一维数组。
核心代码分析:
-
递归扁平化函数
flatten:javascriptfunction flatten(input) { var res = []; for (var i = 0; i < input.length; i++) { var item = input[i]; if (Array.isArray(item)) { // item 是数组 → 递归扁平化,得到一维结果后逐个推入 var inner = flatten(item); for (var j = 0; j < inner.length; j++) { res.push(inner[j]); } } else { // item 不是数组(数字/字符串等)→ 直接推入 res.push(item); } } return res; } -
递归结构分解(以
flatten([1, [2, [3]]])为例):flatten([1, [2, [3]]]) item=1:不是数组 → res.push(1) item=[2, [3]]:是数组 → 递归 flatten([2, [3]]) item=2:不是数组 → res.push(2) item=[3]:是数组 → 递归 flatten([3]) item=3:不是数组 → res.push(3) → 返回 [3] → res = [2, 3] → 返回 [2, 3] → 将 [2, 3] 逐个推入外层 res → 最终返回 [1, 2, 3] -
关键判断:
Array.isArray(item):- 区分「是数组」和「是普通值」
- 是数组 → 继续递归(问题规模缩小)
- 不是数组 → 终止条件(直接使用该值)
-
现代等价写法(ES2019):
javascript// 展开一层 nums.flat(); // 展开指定层数 nums.flat(2); // 展开任意深度(等价于 flatten 函数) nums.flat(Infinity);
递归思路总结(问题 → 子问题):
- 原问题:把
input扁平化 - 子问题:把
input中每个「是数组的元素」扁平化 - 终止条件:当前项
item不是数组,直接推入结果
10.5 本节知识总结
❌ 常见错误
无终止条件
→ 无限递归 → 栈溢出
终止条件错误
→ 跳过了终止点
规模不收敛
→ 同样无限递归
✅ 成功递归的要素
明确的终止条件
Base Case
每次调用规模缩小
向终止条件收敛
子问题与原问题
结构相同(同构)
| 对比维度 | 递归 | 迭代(循环) |
|---|---|---|
| 代码简洁性 | 高(贴近数学定义) | 较低(需手动管理状态) |
| 执行效率 | 较低(函数调用有开销) | 较高(无额外调用开销) |
| 栈溢出风险 | 有(深度过大时) | 无 |
| 适用场景 | 树/图遍历、分治算法、嵌套结构 | 简单重复计算、数组线性处理 |
| 现代替代 | arr.flat(Infinity) 替代扁平化递归 |
--- |
经典应用场景
js
// 场景一:树形菜单的 DOM 渲染(JSON 嵌套)
function renderTree(items, container) {
  var ul = document.createElement('ul');
  items.forEach(function(item) {
    var li = document.createElement('li');
    li.textContent = item.label;
    if (item.children && item.children.length) {
      renderTree(item.children, li);  // 子菜单递归渲染
    }
    ul.appendChild(li);
  });
  container.appendChild(ul);
}

// 场景二:深度克隆对象(简单版)
function deepClone(obj) {
  if (obj === null || typeof obj !== 'object') return obj;
  if (Array.isArray(obj)) return obj.map(deepClone);
  var clone = {};
  Object.keys(obj).forEach(function(key) {
    clone[key] = deepClone(obj[key]);   // 递归克隆每个属性
  });
  return clone;
}

// 场景三:斐波那契数列(递归经典但低效,演示用)
function fib(n) {
  if (n <= 1) return n;
  return fib(n - 1) + fib(n - 2);
}
// 生产环境应使用记忆化(Memoization)优化
十一、Object 对象:创建、读写与动态键名
11.1 理论深度:Object 的规范定义
在 ECMAScript 规范中,Object 是属性的集合,每个属性由一个键(key)和一组描述符(descriptor)组成。普通属性(数据属性)的描述符包含:
- \[Value]:属性的值
- \[Writable]:是否可修改
- \[Enumerable] :是否可枚举(
for...in/Object.keys) - \[Configurable]:是否可删除或修改描述符
对于初学阶段,可以简化理解为:Object 是「键→值」的无序映射,键是字符串(或 Symbol),值可以是任意类型。
Object 对象
属性名键
string | Symbol
属性值
任意类型
基础类型
数字 / 字符串 / 布尔
引用类型
数组 / 嵌套对象
函数
值为函数的属性 = 方法
三层理解
广义:一切皆对象
狭义:Object 类型
实践:键值对建模工具
11.2 案例⑮:三种创建 Object 的方式(完整可运行版)
html
<!DOCTYPE html>
<html lang="zh-CN">
<head>
  <meta charset="UTF-8" />
  <title>创建 Object 对象:三种方式</title>
  <style>
    body { font-family: system-ui, sans-serif; margin: 2rem; background: #f8fafc; }
    h2 { color: #1e40af; }
    .card {
      background: #fff; border: 1px solid #e2e8f0; border-radius: 14px;
      padding: 1.5rem; max-width: 560px; box-shadow: 0 4px 20px rgba(15,23,42,0.08);
      margin-bottom: 1.25rem;
    }
    h3 { margin: 0 0 0.75rem; color: #7c3aed; }
    pre { background: #f1f5f9; border-radius: 8px; padding: 0.75rem; font-size: 0.875rem; overflow: auto; margin-top: 0.5rem; }
    .tag { display: inline-block; padding: 2px 10px; border-radius: 999px; background: #dbeafe; color: #1d4ed8; font-size: 0.78rem; margin-bottom: 0.5rem; }
    .tip { font-size: 0.85rem; color: #64748b; margin-top: 0.5rem; }
  </style>
</head>
<body>
  <h2>Object 对象:三种创建方式</h2>

  <div class="card">
    <span class="tag">方式一(推荐)</span>
    <h3>字面量语法 {} ------工程中最常用</h3>
    <pre id="obj2out"></pre>
    <p class="tip">
      语法最简洁,一次定义所有属性。属性名若含特殊字符(如连字符 -),必须加引号。<br/>
      属性值为函数时,该属性称为「方法」。
    </p>
  </div>

  <div class="card">
    <span class="tag">方式二</span>
    <h3>Object() 工厂函数</h3>
    <pre id="obj3out"></pre>
    <p class="tip">与 new Object() 效果基本相同,较少使用。</p>
  </div>

  <div class="card">
    <span class="tag">方式三</span>
    <h3>new Object() 构造函数</h3>
    <pre id="obj4out"></pre>
    <p class="tip">语义上更明确,等价于空字面量 {},但写法更冗长。</p>
  </div>

  <script>
    // ─── 方式一:字面量(Literal Notation)──────────────────
    // 最常见最推荐的写法,一行内完整定义所有属性
    var obj2 = {
      username: '高小乐',          // 普通字符串属性
      age: 67,                      // 数字属性
      'home-address': '上海',      // 含连字符,必须加引号(否则语法错误)
      schoolAddress: '北京',        // 驼峰命名可省略引号
      friends: ['刘姥姥', '欧阳姥姥', '司马姥姥'],   // 数组属性
      child: {
        name: '高小小乐',           // 嵌套 Object(值是另一个对象)
        age: 37
      },
      getInfo: function () {        // 方法(属性值为函数)
        console.log('obj2 getInfo 被调用');
      },
      eat: function () {
        console.log('高小乐爱吃!');
      }
    };

    // JSON.stringify 不序列化函数,用替换器将函数转为字符串标记
    document.getElementById('obj2out').textContent =
      JSON.stringify(obj2, function(key, value) {
        return typeof value === 'function' ? '[Function: ' + key + ']' : value;
      }, 2);
    console.log('方式一 字面量:', obj2);

    // ─── 方式二:Object() 函数 ─────────────────────────────
    // 调用 Object() 不传参,返回空对象,然后逐个添加属性
    var obj3 = Object();    // 等价于 {}
    obj3.name = '通过 Object() 创建';
    obj3.type = '方式二';
    document.getElementById('obj3out').textContent = JSON.stringify(obj3, null, 2);
    console.log('方式二 Object():', obj3, typeof obj3);  // object

    // ─── 方式三:new Object() 构造函数 ────────────────────
    // 使用 new 关键字调用 Object 构造函数,语义上最明确
    var obj4 = new Object();  // 与 {} 等价
    obj4.name = '通过 new Object() 创建';
    obj4.type = '方式三';
    document.getElementById('obj4out').textContent = JSON.stringify(obj4, null, 2);
    console.log('方式三 new Object():', obj4);
  </script>
</body>
</html>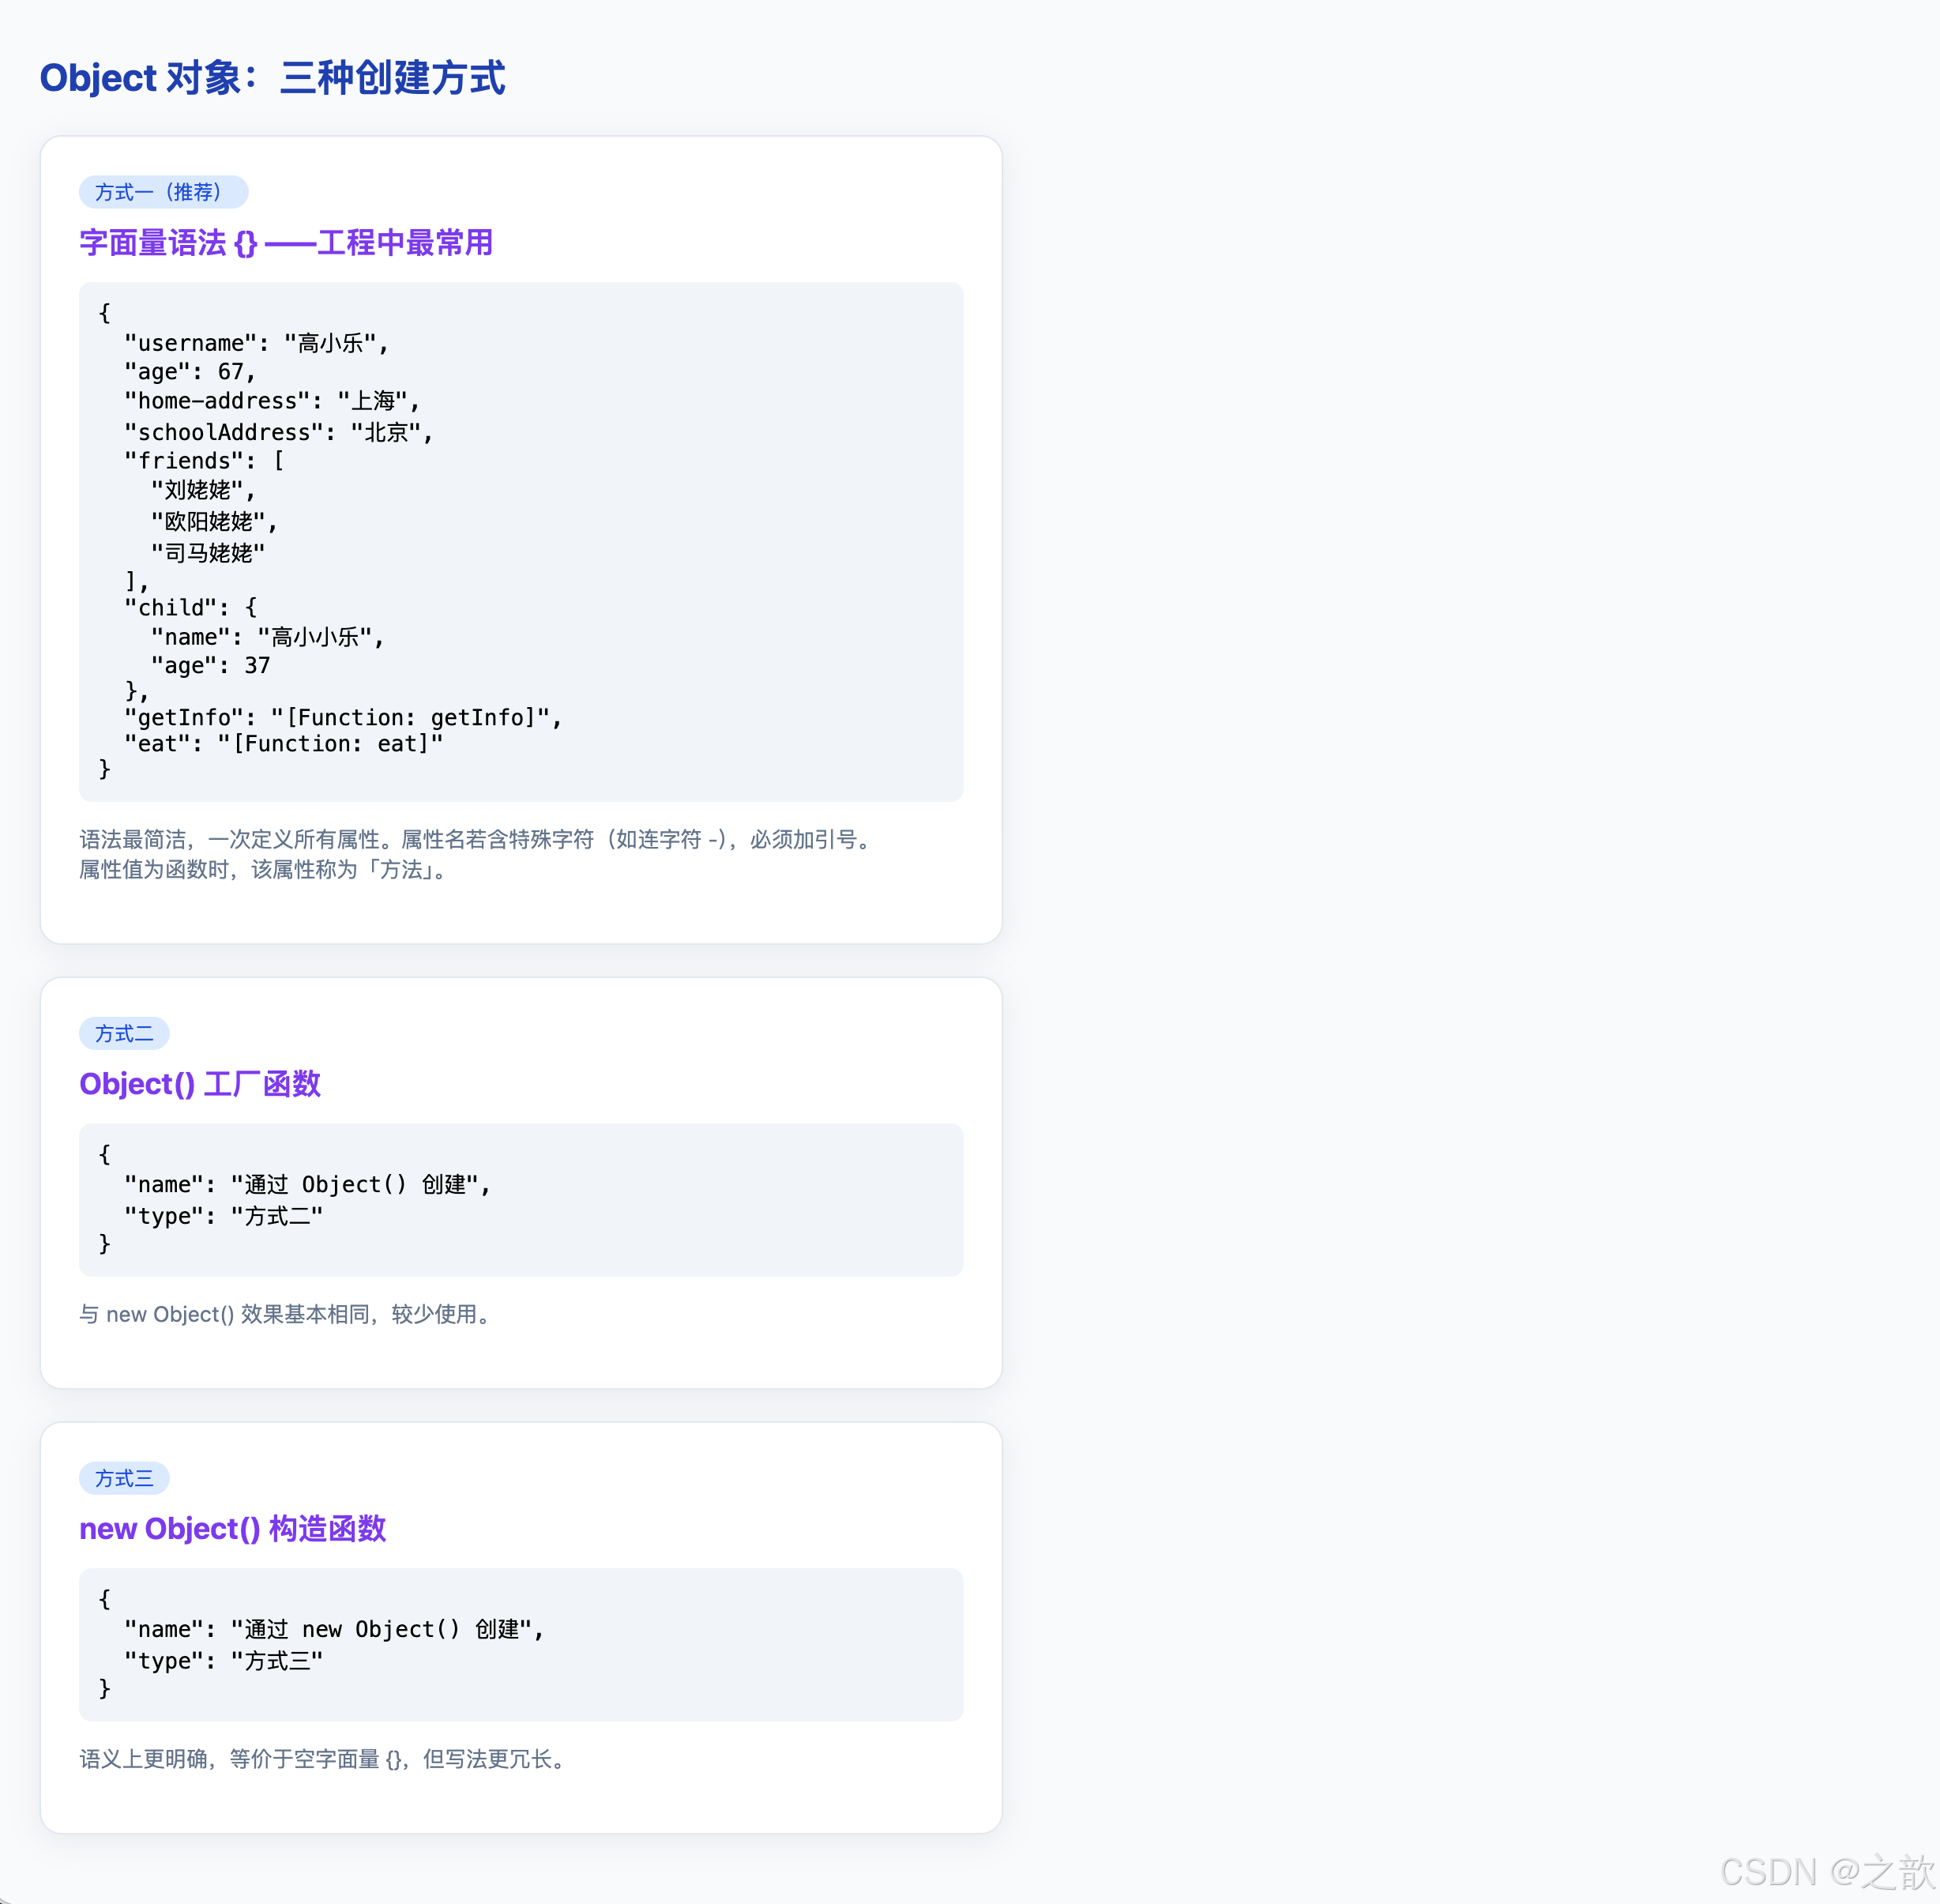
案例解析
本案例演示了创建 Object 对象的三种方式,以及每种方式的使用场景和特点。
核心代码分析:
-
方式一:对象字面量
{}(推荐):javascriptvar obj1 = {}; // 空对象 var obj2 = { username: '高小乐', // 字符串属性 age: 67, // 数字属性 'home-address': '上海', // 含特殊字符 → 必须用引号 friends: ['刘姥姥', '欧阳姥姥'], // 数组属性 child: { name: '高小小乐', age: 37 }, // 嵌套对象 getInfo: function() { // 方法(值为函数的属性) console.log('obj2 getInfo'); } };- 优点:语法简洁,可同时声明属性
- 含特殊字符的键名 :
'home-address'含-,必须用引号包裹 - 方法 :值为函数的属性,通过
obj.方法名()调用
-
方式二:
Object()函数:javascriptvar obj3 = Object(); // 等价于 {},返回空对象 obj3.name = '通过 Object() 创建'; // 后续逐个添加属性Object()不加new调用,与加new效果相同- 先创建空对象,再逐步添加属性
-
方式三:
new Object()构造函数:javascriptvar obj4 = new Object(); // 语义最明确的写法 obj4.name = '通过 new Object() 创建';new Object()与{}完全等价- 语义上强调「通过构造函数创建」
三种方式的本质对比:
javascript
var a = {};           // 字面量(引擎内部优化最好)
var b = Object();     // 函数调用
var c = new Object(); // 构造函数

console.log(typeof a, typeof b, typeof c);   // object object object
console.log(a instanceof Object);             // true
console.log(b instanceof Object);             // true

// 三者完全等价,字面量 {} 是日常开发首选
什么时候用哪种方式:
| 场景 | 推荐写法 |
|---|---|
| 日常创建对象 | {} 字面量 |
| 初始值未知,需动态添加 | {} 或 Object() |
| 强调是「构造实例」 | new Object() |
| 需要传入值转为对象 | Object(value) |
11.3 案例⑯:读写 Object 属性(完整可运行版)
html
<!DOCTYPE html>
<html lang="zh-CN">
<head>
  <meta charset="UTF-8" />
  <title>读写 Object 对象属性</title>
  <style>
    body { font-family: system-ui, sans-serif; margin: 2rem; background: #f8fafc; }
    h2 { color: #1e40af; }
    .row { display: flex; gap: 1rem; flex-wrap: wrap; margin-bottom: 1rem; }
    .box {
      flex: 1; min-width: 240px; background: #fff; border: 1px solid #e2e8f0;
      border-radius: 12px; padding: 1.25rem;
      box-shadow: 0 2px 12px rgba(15,23,42,0.06);
    }
    h3 { margin: 0 0 0.5rem; font-size: 1rem; color: #1e40af; }
    .out {
      background: #0b1020; color: #e2e8f0; padding: 0.75rem 1rem;
      border-radius: 8px; font-family: monospace; font-size: 0.82rem;
      white-space: pre-wrap; margin-top: 0.5rem; line-height: 1.8;
    }
    .ok  { color: #4ade80; }
    .err { color: #f87171; }
  </style>
</head>
<body>
  <h2>Object 属性读写:点语法 vs 括号语法</h2>
  <div class="row">
    <div class="box">
      <h3>① 点语法(.)</h3>
      <div class="out" id="dot"></div>
    </div>
    <div class="box">
      <h3>② 括号语法([])</h3>
      <div class="out" id="bracket"></div>
    </div>
  </div>
  <div class="box" style="max-width:560px;">
    <h3>③ 必须用 [] 的两种情况</h3>
    <div class="out" id="must"></div>
  </div>

  <script>
    /*
     * 原始对象(含多种属性类型)
     * - 含特殊字符的键:'home-address'(含连字符,不是合法标识符)
     * - 嵌套数组:friends
     * - 嵌套对象:child
     * - 方法:getInfo, eat
     */
    var user = {
      username: '高小乐',
      age: 67,
      'home-address': '上海',      // 含连字符,不能用点语法访问
      schoolAddress: '北京',
      friends: ['刘姥姥', '欧阳姥姥', '司马姥姥'],
      child: { name: '高小小乐', age: 37 },
      getInfo: function () { return 'getInfo 返回值'; },
      eat: function () { return '高小乐爱吃!'; }
    };

    function a(id, text) {
      document.getElementById(id).textContent += text + '\n';
    }

    // ─── ① 点语法 ─────────────────────────────────────────
    a('dot', 'user.username = ' + user.username);           // 读取字符串属性
    a('dot', 'user.age * 6 = ' + (user.age * 6));          // 读取数字属性并计算
    a('dot', 'user.getInfo = ' + user.getInfo);             // 读取函数引用(不调用)
    a('dot', 'user.getInfo() = ' + user.getInfo());         // 调用方法
    a('dot', 'user.job = ' + user.job);                     // 读取不存在的属性 → undefined

    // 修改属性值
    user.username = '老头乐';        // 修改已有属性
    user.age += 10;                   // 数值运算后赋值
    user.phone = 123123123;           // 给不存在的属性赋值 → 自动创建该属性

    a('dot', '修改后 username = ' + user.username);         // 老头乐
    a('dot', '修改后 age = ' + user.age);                   // 77
    a('dot', '新增 phone = ' + user.phone);                 // 123123123
    a('dot', 'user.friends[2] = ' + user.friends[2]);       // 访问嵌套数组
    a('dot', 'user.child.name = ' + user.child.name);       // 访问嵌套对象

    // ─── ② 括号语法 ────────────────────────────────────────
    a('bracket', "user['username'] = " + user['username']);
    a('bracket', "user['getInfo']() = " + user['getInfo']());
    a('bracket', "user['friends'][2] = " + user['friends'][2]);
    a('bracket', "user['child']['name'] = " + user['child']['name']);
    a('bracket', "user['child'].name = " + user['child'].name);   // 混用也合法
    a('bracket', "user['drink'] = " + user['drink']);              // undefined(不报错)

    // ─── ③ 必须使用 [] 的两种情况 ─────────────────────────
    //
    // 情况一:属性名不符合标识符规范(含连字符、空格等)
    //   user.home-address  → 语法错误(JS 把 - 解析为减法运算符)
    //   user['home-address'] → 正确
    a('must', '情况一:含特殊字符的键');
    a('must', "user['home-address'] = " + user['home-address']);

    // 情况二:用变量表示属性名(动态键名)
    //   属性名在运行时才确定,如从接口、配置、用户输入中获取
    var prop = 'friends';           // 变量 prop 存储属性名
    a('must', '');
    a('must', '情况二:动态键名(变量)');
    a('must', "var prop='friends'; user[prop] = " + user[prop]);

    // 扩展演示:循环遍历属性名(进阶)
    var keys = ['username', 'age', 'schoolAddress'];
    a('must', '');
    a('must', '循环动态访问属性:');
    keys.forEach(function(key) {
      a('must', '  user["' + key + '"] = ' + user[key]);
    });

    console.log('user 完整对象:', user);
  </script>
</body>
</html>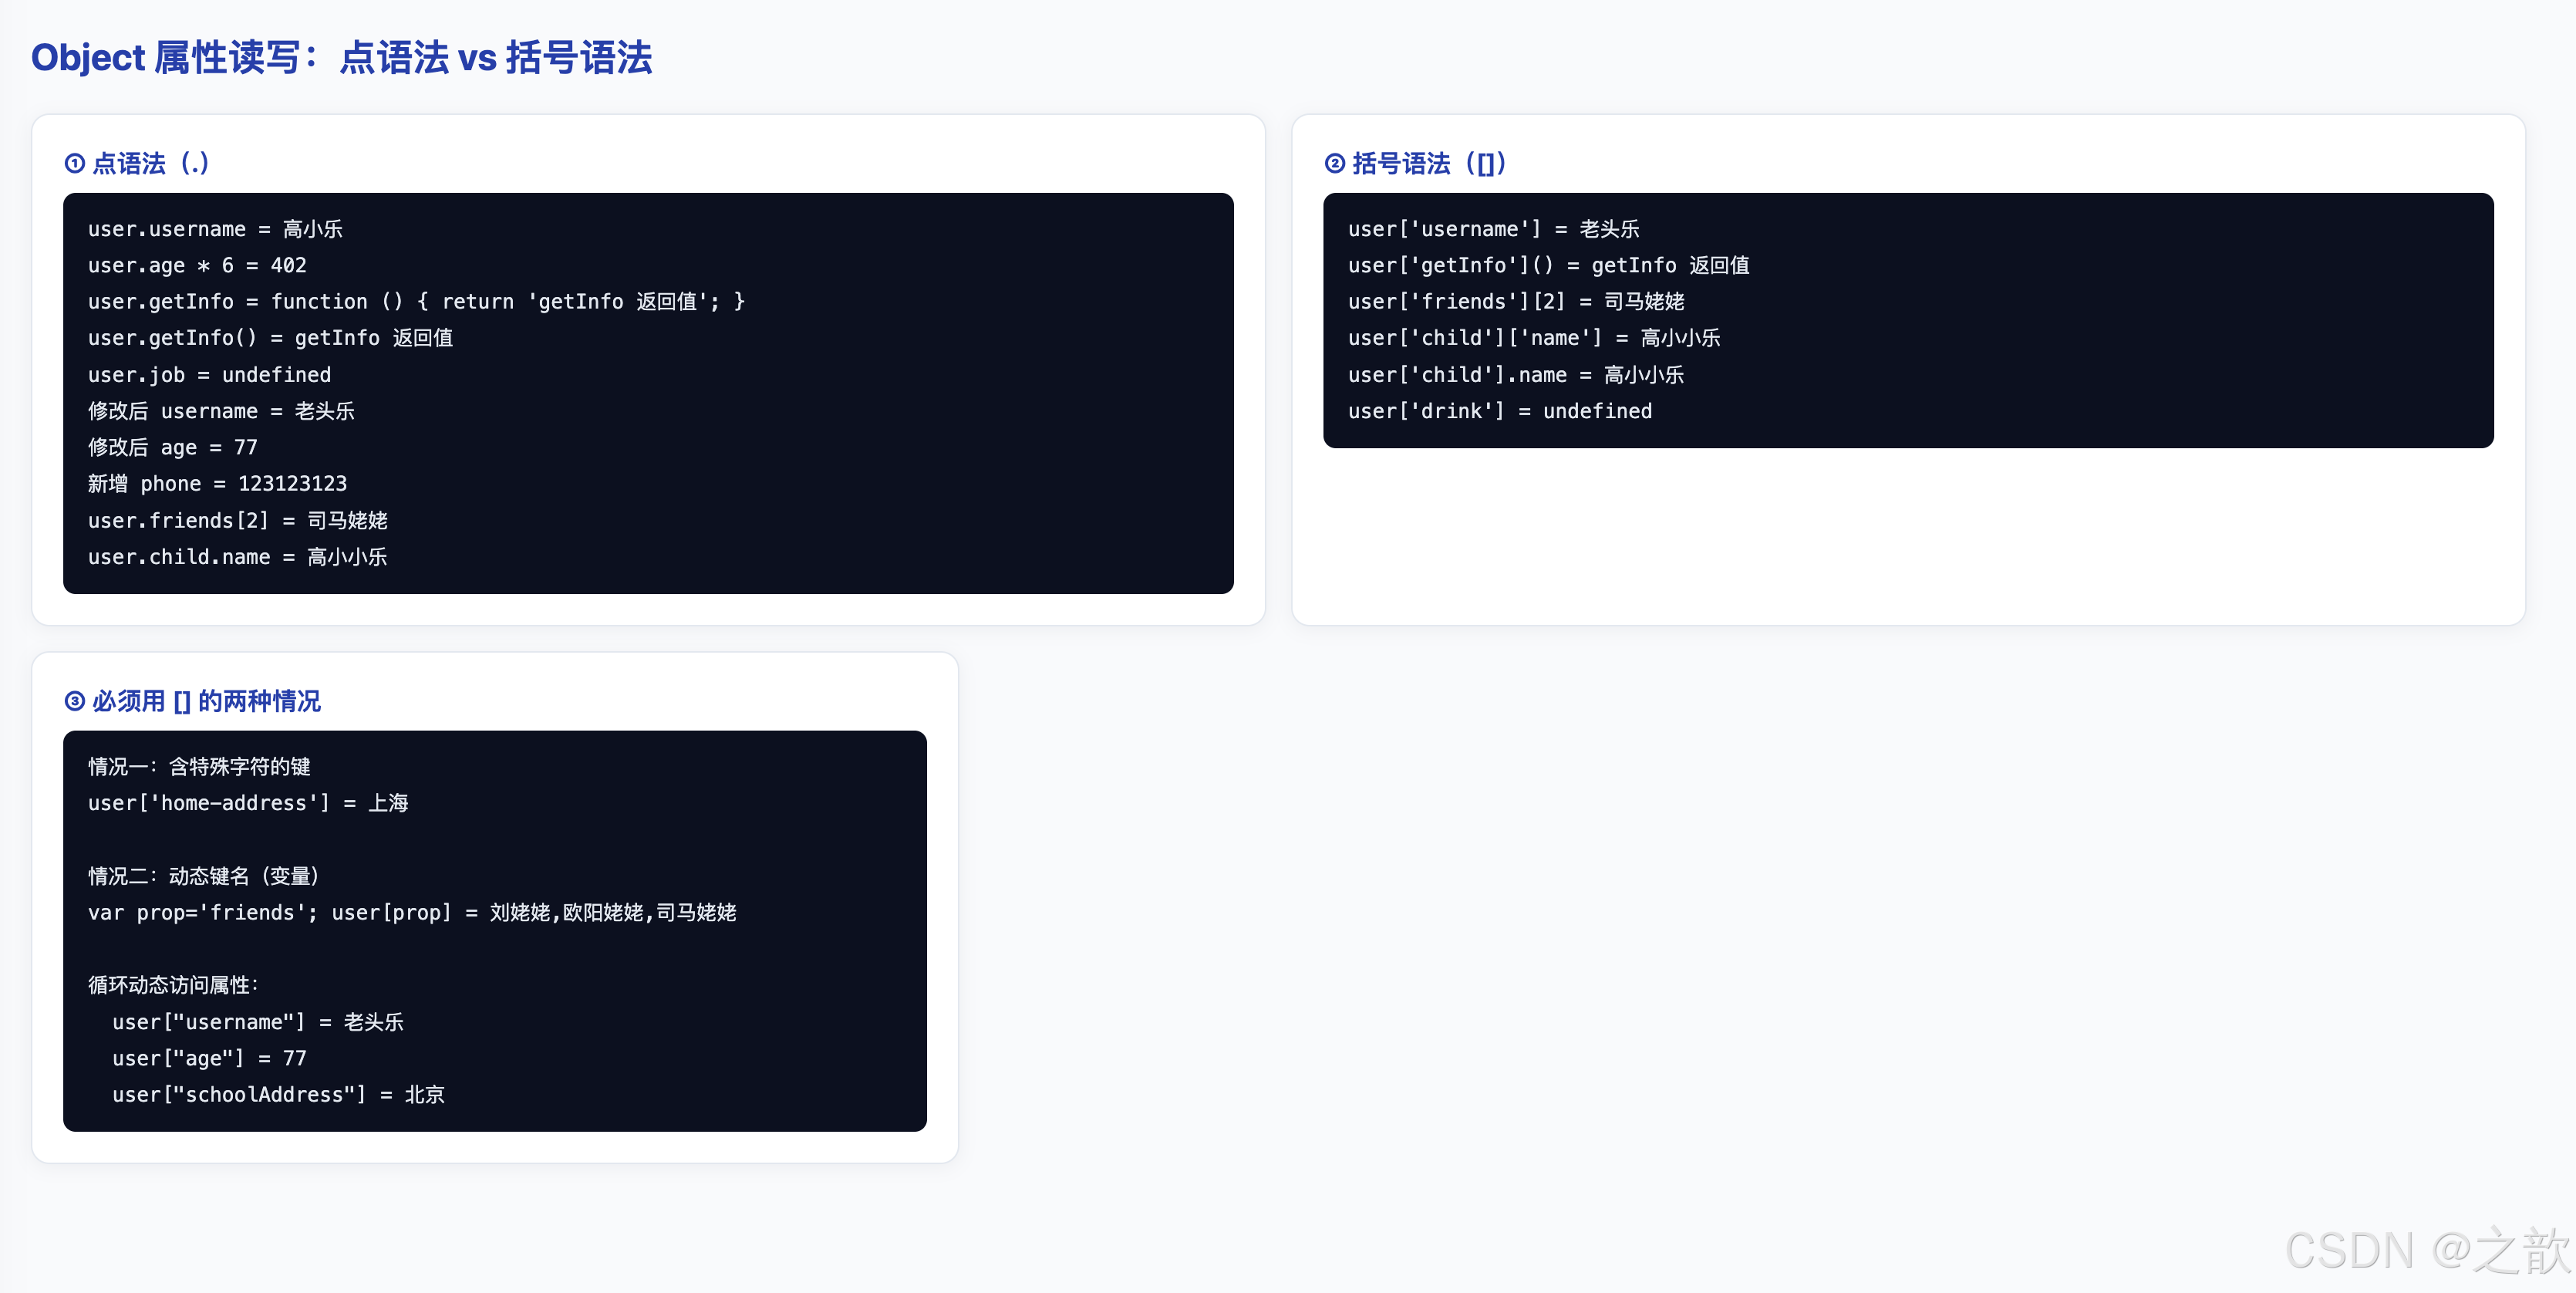
案例解析
本案例完整演示了 Object 属性的读取、修改、新增 以及点语法与括号语法的使用场景。
核心代码分析:
-
① 点语法(
.)------ 最常用:javascript// 读取属性 console.log(user.username); // '高小乐' console.log(user.age * 6); // 可以直接参与运算 console.log(user.getInfo); // 属性本身(函数对象) user.getInfo(); // 调用方法(加括号) console.log(user.job); // undefined(读取不存在的属性不报错) // 修改属性 user.username = '老头乐'; // 覆盖已有属性 user.age += 10; // 数值运算后赋值 user.phone = 123123123; // 给不存在的属性赋值 → 自动创建- 读取不存在的属性返回
undefined,不报错 - 赋值给不存在的属性会自动创建该属性
- 读取不存在的属性返回
-
② 括号语法(
[]):javascriptconsole.log(user['username']); // 等价于 user.username user['getInfo'](); // 等价于 user.getInfo() console.log(user['friends'][2]); // 访问嵌套数组 console.log(user['child']['name']); // 访问嵌套对象 console.log(user['child'].name); // 混用也合法:[] + . console.log(user['drink']); // undefined- 括号中放字符串,功能与点语法完全等价
-
③ 必须用
[]的两种情况:情况一:属性名含特殊字符(连字符、空格等):
javascriptuser.home-address // ❌ 语法错误:- 被解析为减法运算符 user['home-address'] // ✅ 正确:字符串不受标识符限制情况二:属性名是变量(动态键名):
javascriptvar prop = 'friends'; user[prop] // ✅ 等价于 user['friends'] = user.friends user.prop // ❌ 读取的是名为 "prop" 的属性,不是变量 prop 的值 // 实际应用:遍历动态属性 var keys = ['username', 'age', 'schoolAddress']; keys.forEach(function(key) { console.log('user["' + key + '"] =', user[key]); // 动态访问 });
点语法 vs 括号语法决策表:
| 使用场景 | 推荐语法 | 原因 |
|---|---|---|
| 属性名是合法标识符 | . |
简洁、可读 |
属性名含特殊字符(-、空格等) |
[] |
点语法会报语法错误 |
| 属性名存储在变量中 | [] |
点语法只读取字面名称 |
| 运行时动态决定属性名 | [] |
必须用变量 |
11.4 本节知识总结
Object 三种创建方式对比
| 创建方式 | 语法 | 推荐度 | 适用场景 |
|---|---|---|---|
字面量 {} |
var o = { key: val } |
★★★★★ | 绝大多数场景的首选 |
Object() |
var o = Object() |
★★ | 几乎不用,功能等同 {} |
new Object() |
var o = new Object() |
★★ | 理解构造函数语法时用 |
| 构造函数(进阶) | var o = new Person() |
★★★★ | 需要创建同类型多个实例 |
Object.create() |
var o = Object.create(proto) |
★★★★ | 显式指定原型时 |
属性访问方式决策树
是
是
否
否
需要访问对象属性
属性名是合法
标识符吗?
属性名在代码中
硬编码吗?
✅ 用点语法
obj.key
✅ 用括号语法
objvariable
✅ 必须用括号
obj'key-with-dash'
十二、配图:使用本目录 images 下的素材
本目录 images/demo-avatar.svg 可作为通用占位头像,用于信息卡片、用户列表、评论区等场景。
html
<!DOCTYPE html>
<html lang="zh-CN">
<head>
  <meta charset="UTF-8" />
  <title>Object 建模:用户信息卡片</title>
  <style>
    body { font-family: system-ui, sans-serif; margin: 3rem; background: #f1f5f9; }
    .card {
      display: flex; gap: 1.25rem; align-items: center;
      max-width: 360px; padding: 1.25rem 1.5rem;
      border-radius: 16px; border: 1px solid #e2e8f0;
      box-shadow: 0 12px 32px rgba(15,23,42,0.10);
      background: #ffffff;
    }
    /* object-fit: cover 保持头像比例,填满圆形区域,不变形 */
    .card img {
      width: 72px; height: 72px; border-radius: 50%;
      object-fit: cover; border: 2px solid #bfdbfe;
    }
    .meta h2 { margin: 0 0 0.3rem; font-size: 1.1rem; color: #0f172a; }
    .meta p  { margin: 0; color: #64748b; font-size: 0.9rem; }
    .badge {
      display: inline-block; margin-top: 0.4rem;
      padding: 2px 10px; border-radius: 999px;
      background: #dbeafe; color: #1d4ed8; font-size: 0.75rem;
    }
    h2 { color: #1e40af; }
  </style>
</head>
<body>
  <h2>Object 建模 + 图片渲染</h2>
  <article class="card" id="card"></article>

  <script>
    /*
     * 用 Object 字面量建模用户数据
     * avatar 属性指向本目录下的 images/demo-avatar.svg
     */
    var profile = {
      name:   'Alex Chen',
      role:   'Frontend Engineer',
      badge:  'Senior',
      avatar: 'images/demo-avatar.svg'   // 使用本目录下的图片资源
    };

    // 通过 Object 属性动态生成 HTML(点语法读取各属性)
    var card = document.getElementById('card');
    card.innerHTML =
      '<img src="' + profile.avatar + '" alt="' + profile.name + ' 的头像" />' +
      '<div class="meta">' +
        '<h2>' + profile.name + '</h2>' +
        '<p>' + profile.role + '</p>' +
        '<span class="badge">' + profile.badge + '</span>' +
      '</div>';
  </script>
</body>
</html>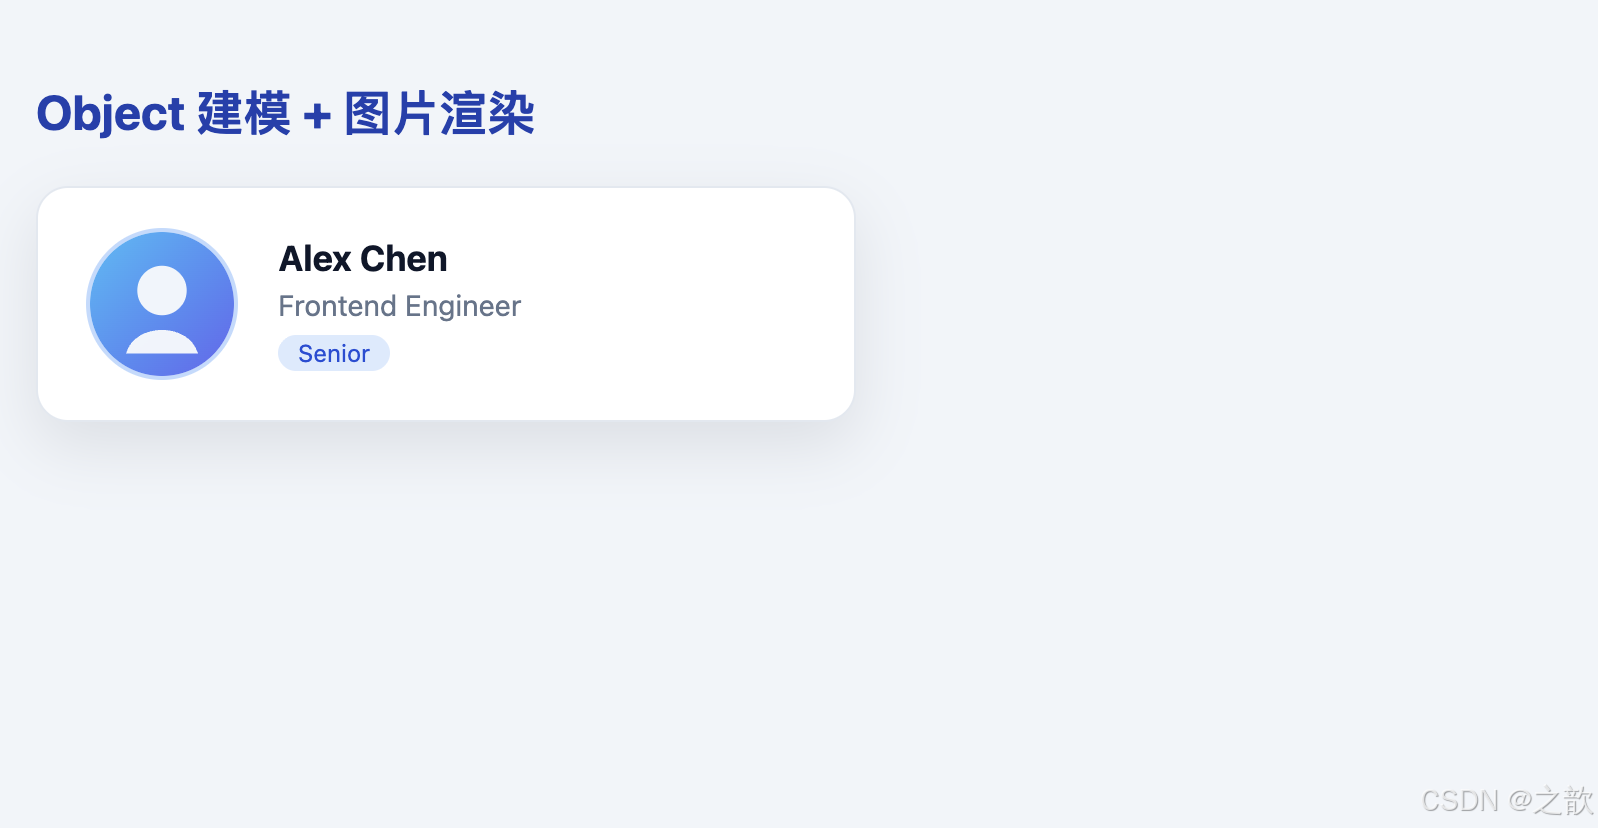
十三、CSS 样式属性深度解析
本章所有 CSS 示例均以完整可运行 HTML 形式给出,同时标注定义、参数含义、经典使用场景与知名站点技术气质参考。
13.1 color / background-color
属性定义:
color:设置元素内文本的前景色(含文字、边框颜色等继承场景)background-color:设置元素的背景填充色,默认transparent
取值格式 :关键词(red)、十六进制(#2563eb)、rgb(r,g,b)、rgba(r,g,b,a)、hsl(h,s,l)
WCAG 无障碍要求 :正文文字与背景的对比度需达到 4.5:1 (AA 级),大标题需达到 3:1。
html
<!DOCTYPE html>
<html lang="zh-CN">
<head>
  <meta charset="UTF-8" />
  <title>color 与 background-color</title>
  <style>
    body { font-family: system-ui, sans-serif; margin: 2rem; background: #f8fafc; }
    .row { display: flex; gap: 10px; flex-wrap: wrap; margin-bottom: 1.5rem; align-items: center; }

    /* 文档站风格:深色字 + 浅色底(高可读性)*/
    .chip-light   { color: #0f172a;  background-color: #e2e8f0; padding: 0.5rem 1rem; border-radius: 8px; }
    /* 品牌主色按钮:白字 + 品牌蓝底 */
    .chip-brand   { color: #ffffff;  background-color: #2563eb; padding: 0.5rem 1rem; border-radius: 8px; }
    /* 警告状态:琥珀色系 */
    .chip-warn    { color: #92400e;  background-color: #fef3c7; padding: 0.5rem 1rem; border-radius: 8px; }
    /* 错误状态:红色系 */
    .chip-danger  { color: #991b1b;  background-color: #fee2e2; padding: 0.5rem 1rem; border-radius: 8px; }
    /* 成功状态:绿色系 */
    .chip-success { color: #065f46;  background-color: #d1fae5; padding: 0.5rem 1rem; border-radius: 8px; }
    /* 代码高亮:深色底 + 紫色字 */
    .chip-code    { color: #a855f7;  background-color: #0b1020; padding: 0.5rem 1rem; border-radius: 8px; font-family: monospace; }
    /* 中性 / 信息:蓝灰色系 */
    .chip-info    { color: #1e40af;  background-color: #dbeafe; padding: 0.5rem 1rem; border-radius: 8px; }

    .legend { font-size: 0.82rem; color: #64748b; line-height: 1.8; background: #fff; border: 1px solid #e2e8f0; border-radius: 10px; padding: 0.75rem 1rem; max-width: 560px; }
  </style>
</head>
<body>
  <h2>color + background-color:语义色彩系统</h2>
  <div class="row">
    <span class="chip-light">文档站样式</span>
    <span class="chip-brand">品牌主色</span>
    <span class="chip-warn">⚠ 警告</span>
    <span class="chip-danger">✕ 错误</span>
    <span class="chip-success">✓ 成功</span>
    <span class="chip-info">ℹ 信息</span>
    <span class="chip-code">const x = 42;</span>
  </div>

  <div class="legend">
    <strong>经典使用场景:</strong><br/>
    • GitHub Issues 标签系统:用 background-color + color 组合区分 bug / feature / enhancement<br/>
    • Stripe Dashboard:状态 badge 用 success(绿)/ warning(黄)/ error(红)语义色<br/>
    • MDN 文档:代码块使用深色底 + 浅色字,提升代码可读性<br/>
    • 实用建议:正文对比度 ≥ 4.5:1(WCAG AA),大标题 ≥ 3:1
  </div>
</body>
</html>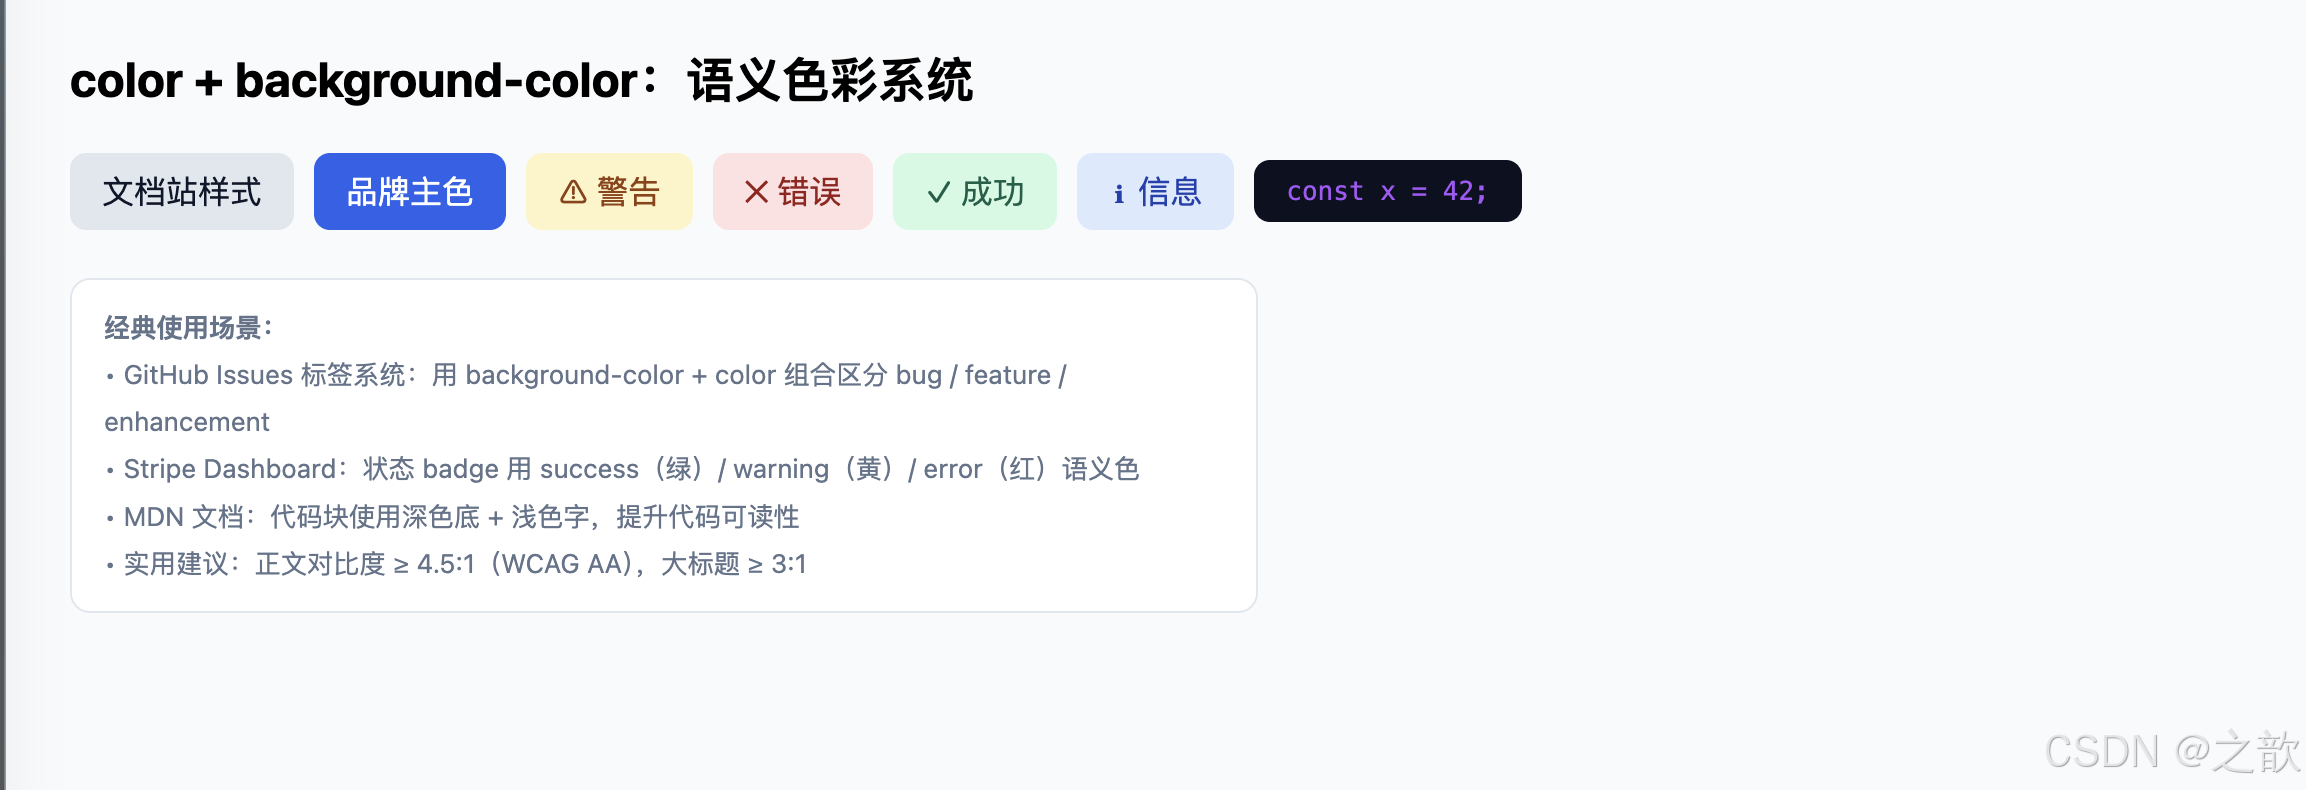
13.2 font-family / font-size / font-weight / line-height
属性定义:
font-family:字体族列表,引擎使用第一个可用字体,后面是降级备选font-size:字号,px固定像素,rem相对根元素(响应式首选),em相对父元素font-weight:字重,数值 100--900,400正常,700加粗line-height:行高,推荐用无单位数值(如1.7),表示字号的倍数
html
<!DOCTYPE html>
<html lang="zh-CN">
<head>
  <meta charset="UTF-8" />
  <title>字体属性演示</title>
  <style>
    body { margin: 2rem; background: #fafafa; font-family: system-ui, sans-serif; }

    /* 系统字体栈(UI 风格,无需加载外部字体,渲染最快)*/
    .font-system {
      font-family: -apple-system, BlinkMacSystemFont, 'Segoe UI', system-ui, sans-serif;
      font-size: 1rem; line-height: 1.6; color: #0f172a;
    }
    /* 衬线字体(博客/文章风格,阅读更有人文感)*/
    .font-serif {
      font-family: ui-serif, Georgia, 'Times New Roman', serif;
      font-size: 1.1rem; line-height: 1.8; color: #1e293b;
    }
    /* 等宽字体(代码块标配)*/
    .font-mono {
      font-family: ui-monospace, 'Cascadia Code', 'Fira Code', 'Courier New', monospace;
      font-size: 0.9rem; line-height: 1.7; color: #a855f7;
      background: #0b1020; padding: 1rem; border-radius: 8px;
    }

    .demo-row   { display: flex; gap: 16px; align-items: baseline; flex-wrap: wrap; margin: 0.75rem 0; }
    .weight-row { display: flex; gap: 24px; flex-wrap: wrap; margin: 0.75rem 0; font-family: system-ui; }

    /* 行高对比展示 */
    .lh-demo { display: flex; gap: 12px; flex-wrap: wrap; margin: 0.75rem 0; }
    .lh-box  { width: 200px; padding: 12px; border-radius: 8px; font-size: 0.88rem; }
    .lh-tight  { line-height: 1.2; background: #fef9c3; }
    .lh-normal { line-height: 1.7; background: #dcfce7; }
    .lh-loose  { line-height: 2.2; background: #fee2e2; }
  </style>
</head>
<body>
  <h2 style="font-family:system-ui;">字体属性演示</h2>

  <h3 style="color:#475569;">font-family --- 字体族</h3>
  <p class="font-system">系统字体栈:清晰无缝,零加载开销,适合 UI 组件与应用界面。</p>
  <p class="font-serif">衬线字体(ui-serif, Georgia):更有阅读质感,博客与文学网站首选。</p>
  <div class="font-mono">const scope = 'lexical';<br/>// 等宽字体让代码对齐整洁,diff 视图必备</div>

  <h3 style="color:#475569; margin-top:1.5rem;">font-size --- 字号层级</h3>
  <div class="demo-row">
    <span style="font-size:12px;">12px 注释/辅助</span>
    <span style="font-size:14px;">14px 次要文字</span>
    <span style="font-size:16px;">16px 正文基准</span>
    <span style="font-size:20px;">20px 小标题</span>
    <span style="font-size:28px;">28px 大标题</span>
    <span style="font-size:40px;">40px 主标题</span>
  </div>

  <h3 style="color:#475569;">font-weight --- 字重</h3>
  <div class="weight-row">
    <span style="font-weight:300;">300 Light</span>
    <span style="font-weight:400;">400 Regular</span>
    <span style="font-weight:500;">500 Medium</span>
    <span style="font-weight:600;">600 SemiBold</span>
    <span style="font-weight:700;">700 Bold</span>
    <span style="font-weight:900;">900 Black</span>
  </div>

  <h3 style="color:#475569;">line-height --- 行高对比</h3>
  <div class="lh-demo">
    <div class="lh-box lh-tight"><strong>1.2 紧凑</strong><br/>行间距过密,适合标题,不适合正文长文阅读。</div>
    <div class="lh-box lh-normal"><strong>1.7 舒适</strong><br/>正文黄金区间(1.6--1.8),MDN 与大多数技术博客的选择。</div>
    <div class="lh-box lh-loose"><strong>2.2 宽松</strong><br/>过于稀疏,段落感弱,适合大字广告或特殊排版需求。</div>
  </div>
</body>
</html>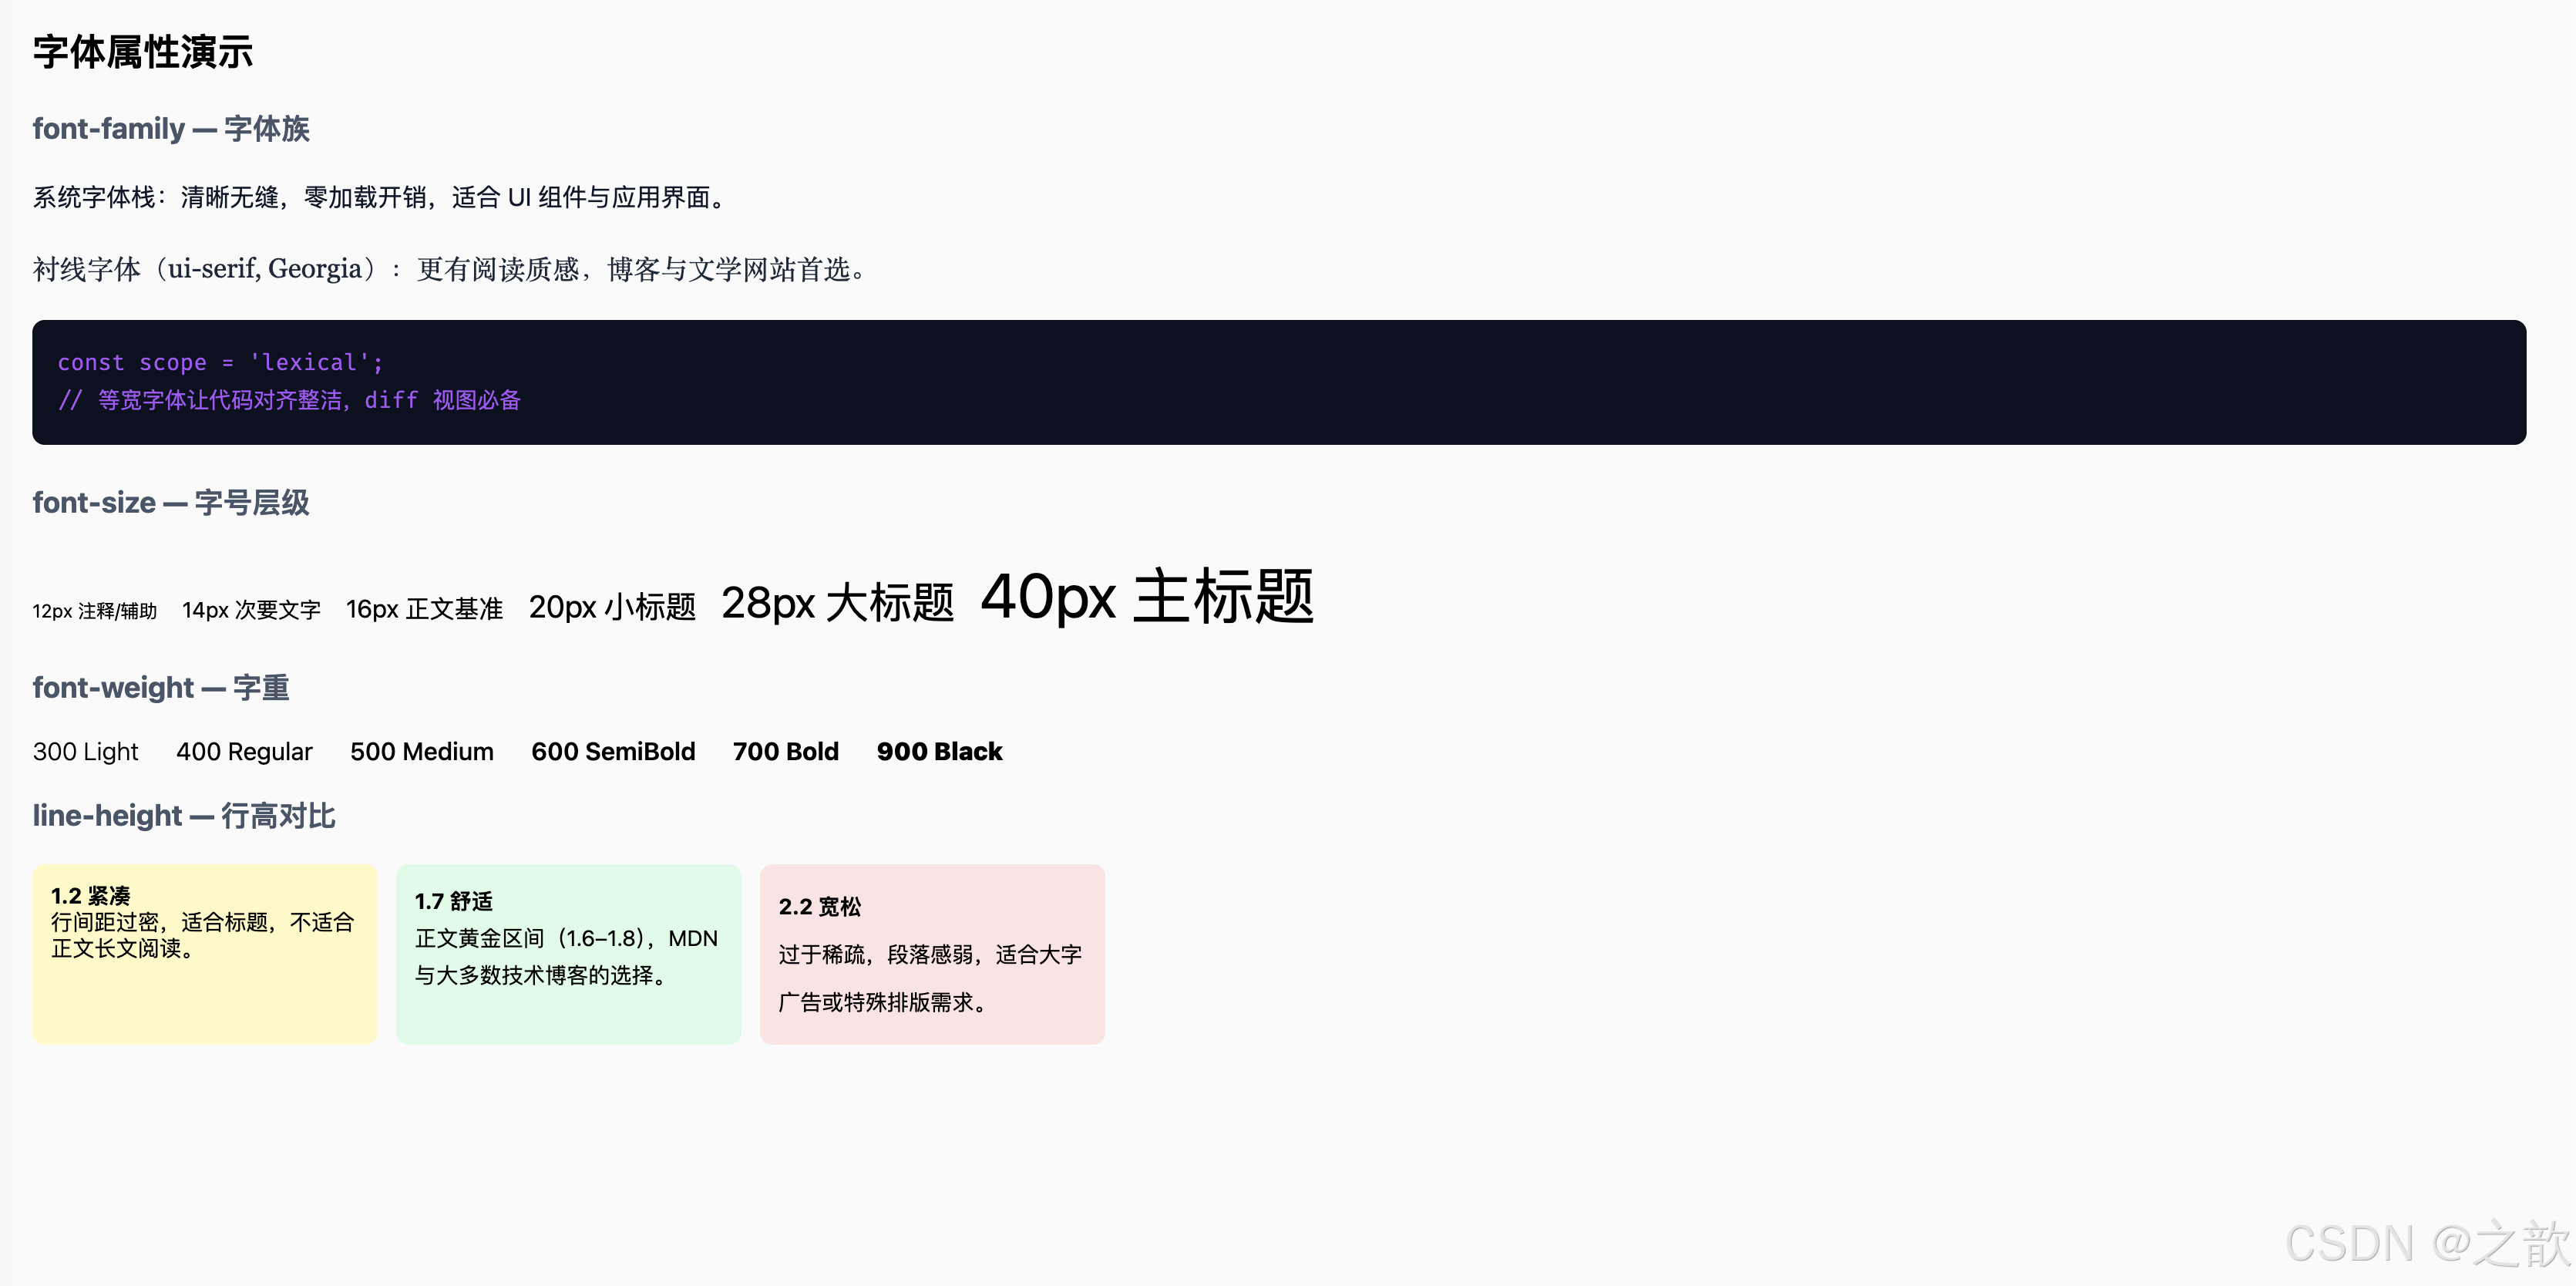
13.3 margin / padding
属性定义:
margin:元素外部空白区域,用于控制元素与周围元素的距离;不包含在元素背景内padding:元素内部空白区域,位于内容与边框之间;包含在元素背景内
CSS 盒模型 (Box Model):content → padding → border → margin(由内到外)
html
<!DOCTYPE html>
<html lang="zh-CN">
<head>
  <meta charset="UTF-8" />
  <title>margin 与 padding 演示</title>
  <style>
    body { font-family: system-ui, sans-serif; margin: 2rem; background: #f8fafc; }

    /* 盒模型可视化:从外到内展示 margin → padding → content */
    .box-vis {
      width: 260px; margin: 2rem auto;
      border: 2px dashed #94a3b8; padding: 20px;
      background: #eff6ff; border-radius: 8px; text-align: center; position: relative;
    }
    .box-vis::before { content: 'margin 区域(外部间距)'; position: absolute; top: -22px; left: 50%; transform: translateX(-50%); font-size: 0.72rem; color: #64748b; white-space: nowrap; }
    .box-inner { background: #bfdbfe; padding: 16px; border-radius: 4px; font-size: 0.85rem; color: #1e40af; }
    .box-inner::before { content: 'padding 区域(内部间距)'; display: block; font-size: 0.72rem; color: #3b82f6; margin-bottom: 6px; }
    .box-content { background: #2563eb; color: #fff; padding: 8px; border-radius: 4px; font-size: 0.8rem; }

    /* 实战:卡片间距 */
    .card-list { max-width: 380px; }
    .card-item { background: #fff; border: 1px solid #e2e8f0; padding: 14px 18px; font-size: 0.9rem; }
    .card-item + .card-item { margin-top: 8px; }

    /* 实战:margin:auto 水平居中 */
    .centered { max-width: 360px; margin: 1rem auto; background: #fff; padding: 1rem; border-radius: 10px; border: 1px solid #e2e8f0; text-align: center; font-size: 0.9rem; color: #475569; }

    /* 多值语法演示 */
    .padding-demo { display: flex; gap: 10px; flex-wrap: wrap; margin-top: 0.75rem; }
    .pd { font-size: 0.8rem; border-radius: 6px; color: #0f172a; }
    .pd1 { padding: 8px;           background: #fef9c3; }
    .pd2 { padding: 8px 24px;      background: #dcfce7; }
    .pd3 { padding: 4px 16px 12px; background: #dbeafe; }
    .pd4 { padding: 4px 16px 12px 8px; background: #fce7f3; }
  </style>
</head>
<body>
  <h2>margin / padding:盒模型间距</h2>

  <!-- 盒模型可视化 -->
  <div class="box-vis">
    <div class="box-inner">
      <div class="box-content">内容区(content)</div>
    </div>
  </div>

  <h3 style="color:#475569;">卡片列表间距(margin-top: 8px)</h3>
  <div class="card-list">
    <div class="card-item">卡片 A(第一个,margin-top: 0)</div>
    <div class="card-item">卡片 B(margin-top: 8px)</div>
    <div class="card-item">卡片 C(margin-top: 8px)</div>
  </div>

  <h3 style="color:#475569; margin-top:1.5rem;">margin: auto ------ 水平居中经典写法</h3>
  <div class="centered">
    max-width + margin: 0 auto<br/>是块级元素水平居中的标准方式
  </div>

  <h3 style="color:#475569; margin-top:1.5rem;">padding 多值语法</h3>
  <div class="padding-demo">
    <div class="pd pd1">padding: 8px(四边相同)</div>
    <div class="pd pd2">padding: 8px 24px(上下 / 左右)</div>
    <div class="pd pd3">padding: 4px 16px 12px(上 / 左右 / 下)</div>
    <div class="pd pd4">padding: 4px 16px 12px 8px(上右下左)</div>
  </div>
</body>
</html>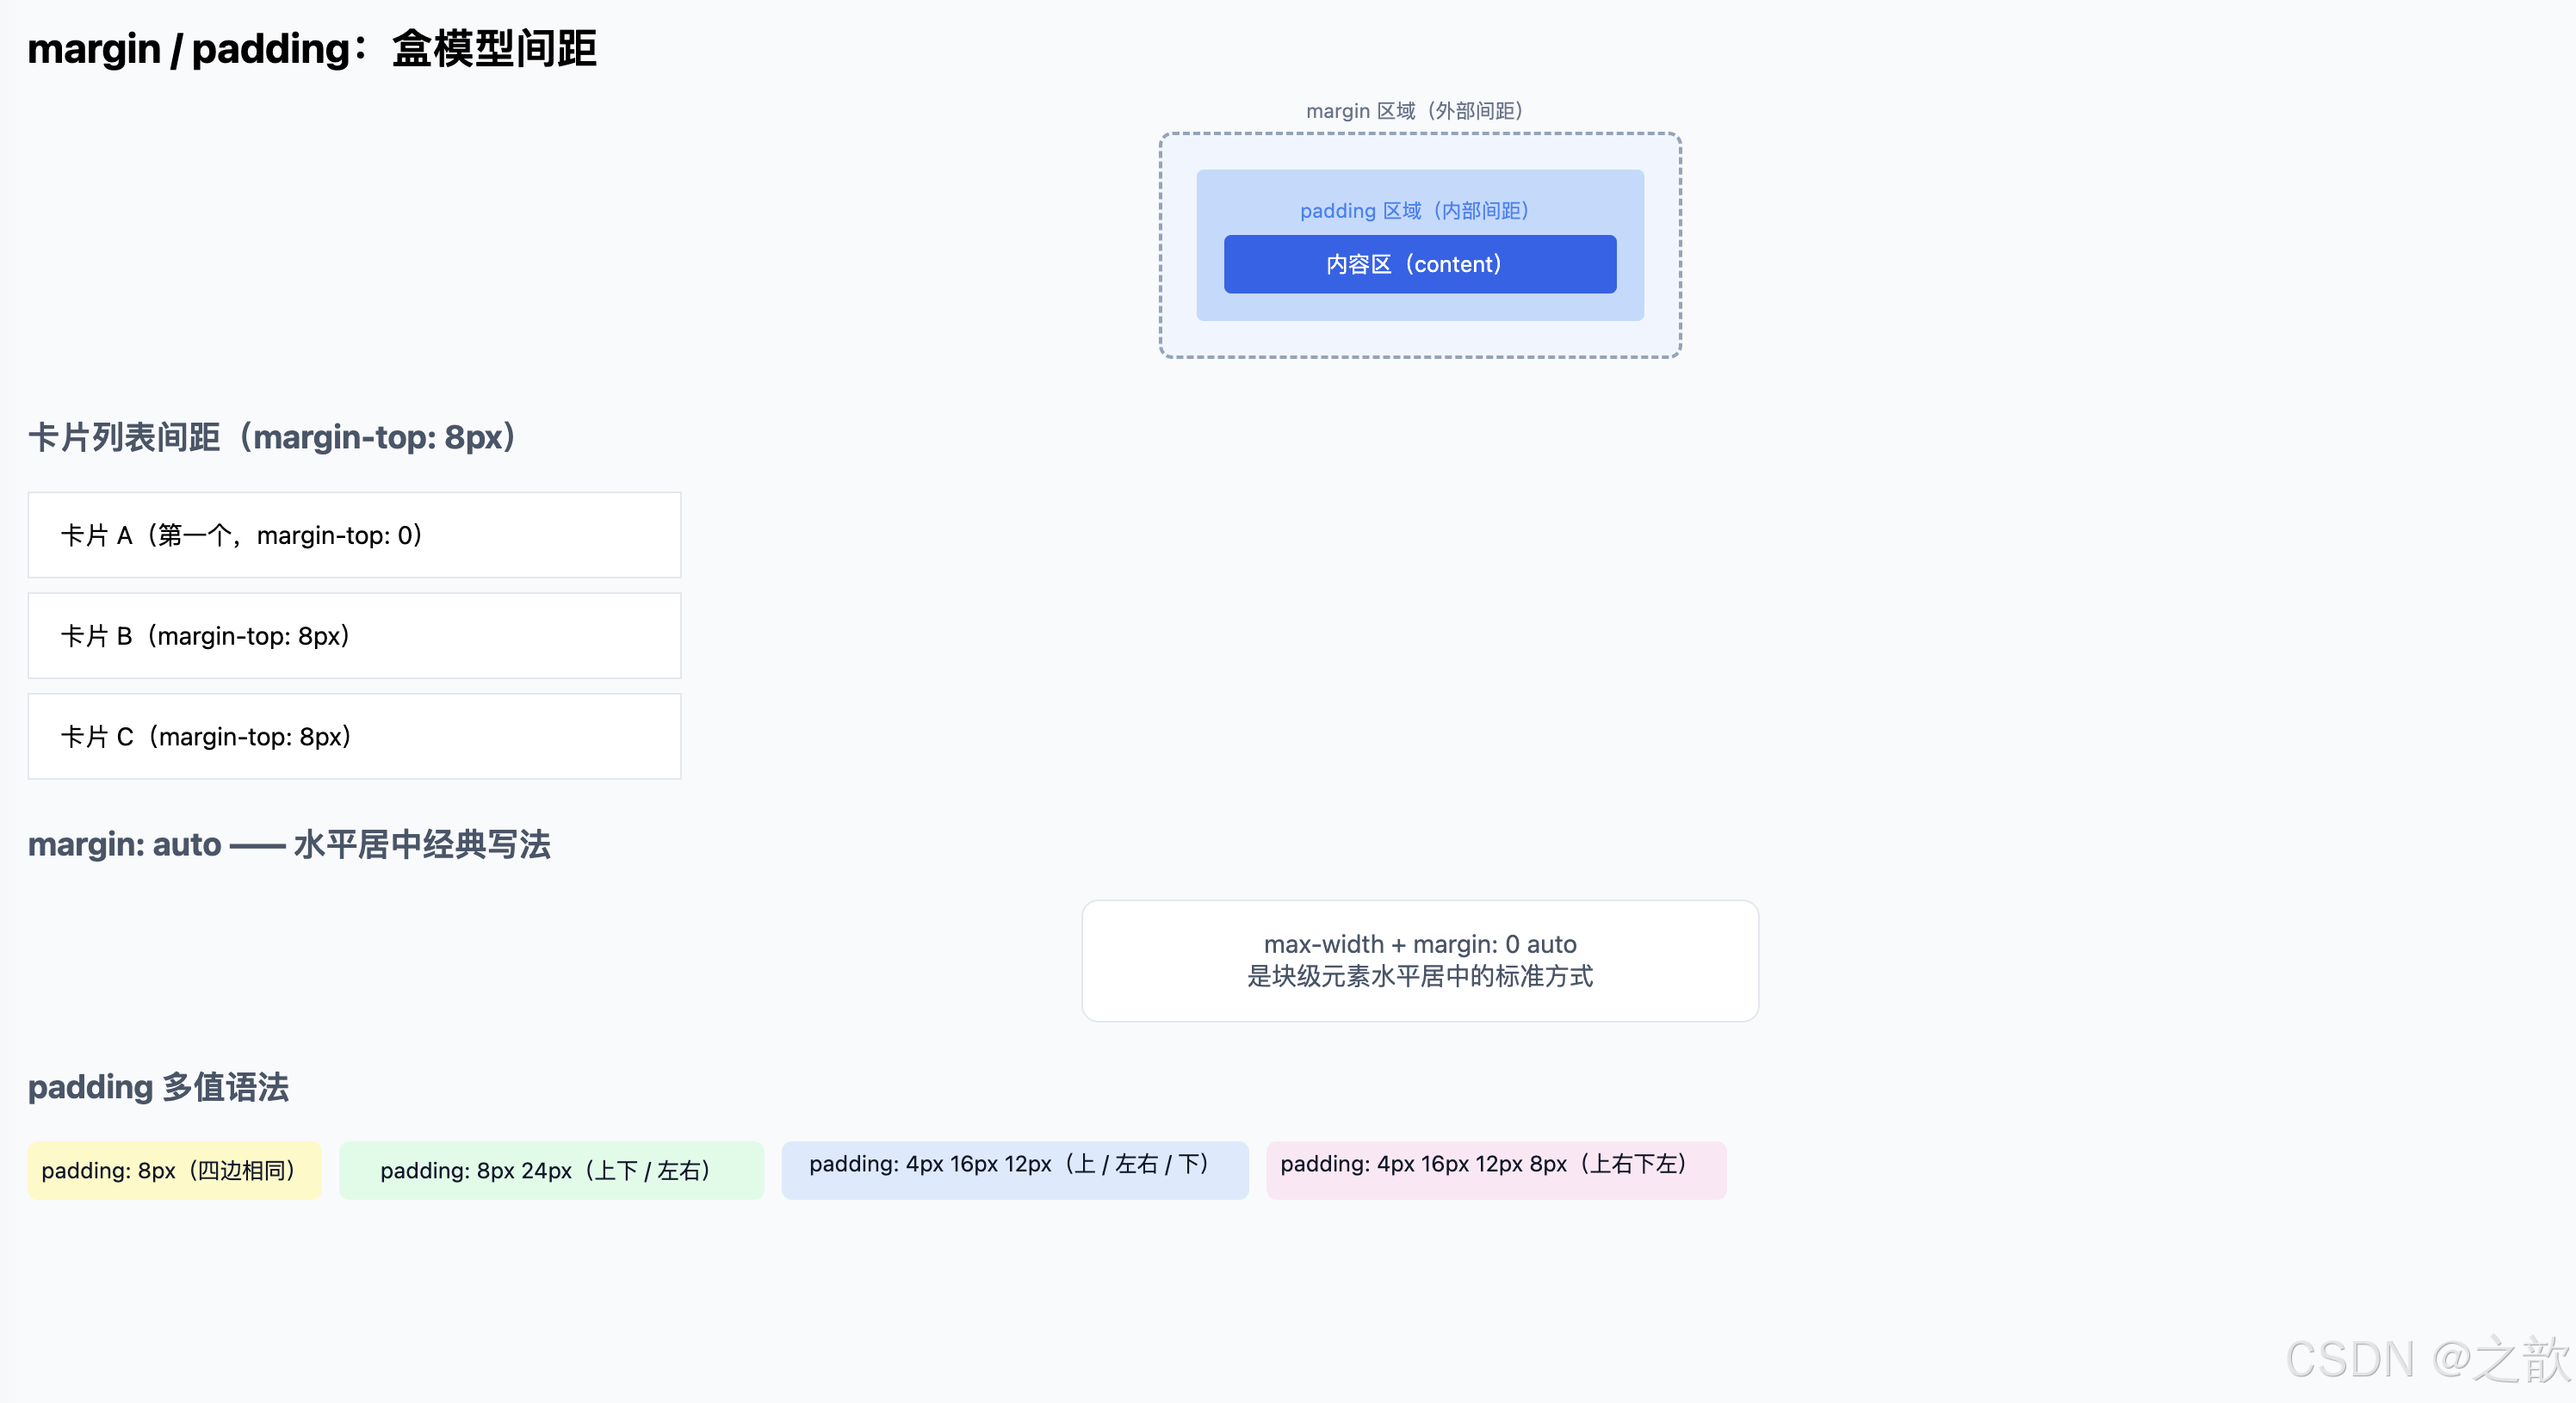
13.4 border / border-radius
属性定义:
border:元素边框,复合属性(border-width border-style border-color)border-radius:圆角半径,支持单个值(统一圆角)或最多四个值(四角独立)
html
<!DOCTYPE html>
<html lang="zh-CN">
<head>
  <meta charset="UTF-8" />
  <title>border 与 border-radius</title>
  <style>
    body { font-family: system-ui, sans-serif; margin: 2rem; background: #f8fafc; }
    .row { display: flex; gap: 14px; flex-wrap: wrap; align-items: center; margin-bottom: 1.5rem; }

    /* 四种边框类型 */
    .b-solid  { border: 2px solid #3b82f6;  padding: 8px 16px; border-radius: 4px; }
    .b-dashed { border: 2px dashed #f59e0b; padding: 8px 16px; border-radius: 4px; }
    .b-dotted { border: 2px dotted #10b981; padding: 8px 16px; border-radius: 4px; }
    .b-double { border: 4px double #7c3aed; padding: 8px 16px; border-radius: 4px; }

    /* border-radius 变化 */
    .r-box { width: 80px; height: 80px; background: #3b82f6; display:flex; align-items:center; justify-content:center; color:#fff; font-size:0.72rem; text-align:center; }
    .r-0   { border-radius: 0;    }
    .r-8   { border-radius: 8px;  }
    .r-16  { border-radius: 16px; }
    .r-50p { border-radius: 50%;  }

    /* 胶囊按钮 (Pill Button):border-radius: 999px */
    .pill       { border: 1px solid #cbd5e1; border-radius: 999px; padding: 8px 22px; background: #fff; cursor: pointer; font-size: 0.95rem; }
    .pill-brand { border: none; border-radius: 999px; padding: 8px 22px; background: #2563eb; color: #fff; cursor: pointer; font-size: 0.95rem; }

    .hr { border: none; border-top: 1px solid #e2e8f0; margin: 1.25rem 0; }
    .note { font-size: 0.82rem; color: #64748b; line-height: 1.7; }
  </style>
</head>
<body>
  <h2>border / border-radius</h2>

  <h3 style="color:#475569;">边框类型(border-style)</h3>
  <div class="row">
    <span class="b-solid">solid 实线</span>
    <span class="b-dashed">dashed 虚线</span>
    <span class="b-dotted">dotted 点线</span>
    <span class="b-double">double 双线</span>
  </div>

  <hr class="hr"/>

  <h3 style="color:#475569;">border-radius 圆角变化</h3>
  <div class="row">
    <div class="r-box r-0">0<br/>直角</div>
    <div class="r-box r-8">8px<br/>小圆角</div>
    <div class="r-box r-16">16px<br/>中圆角</div>
    <div class="r-box r-50p">50%<br/>圆形</div>
  </div>

  <hr class="hr"/>

  <h3 style="color:#475569;">胶囊按钮(border-radius: 999px)</h3>
  <div class="row">
    <button class="pill">普通胶囊</button>
    <button class="pill-brand">品牌胶囊</button>
  </div>

  <p class="note">
    💡 <strong>经典使用场景:</strong><br/>
    • <code>border-radius: 8--12px</code>:卡片、对话框、输入框(现代 UI 标准圆角)<br/>
    • <code>border-radius: 50%</code>:圆形头像、状态指示点<br/>
    • <code>border-radius: 999px</code>:胶囊标签、Pill Button(GitHub Label、Stripe Badge)<br/>
    • <code>border: 1px dashed #cbd5e1</code>:文件拖拽上传区域的边框提示
  </p>
</body>
</html>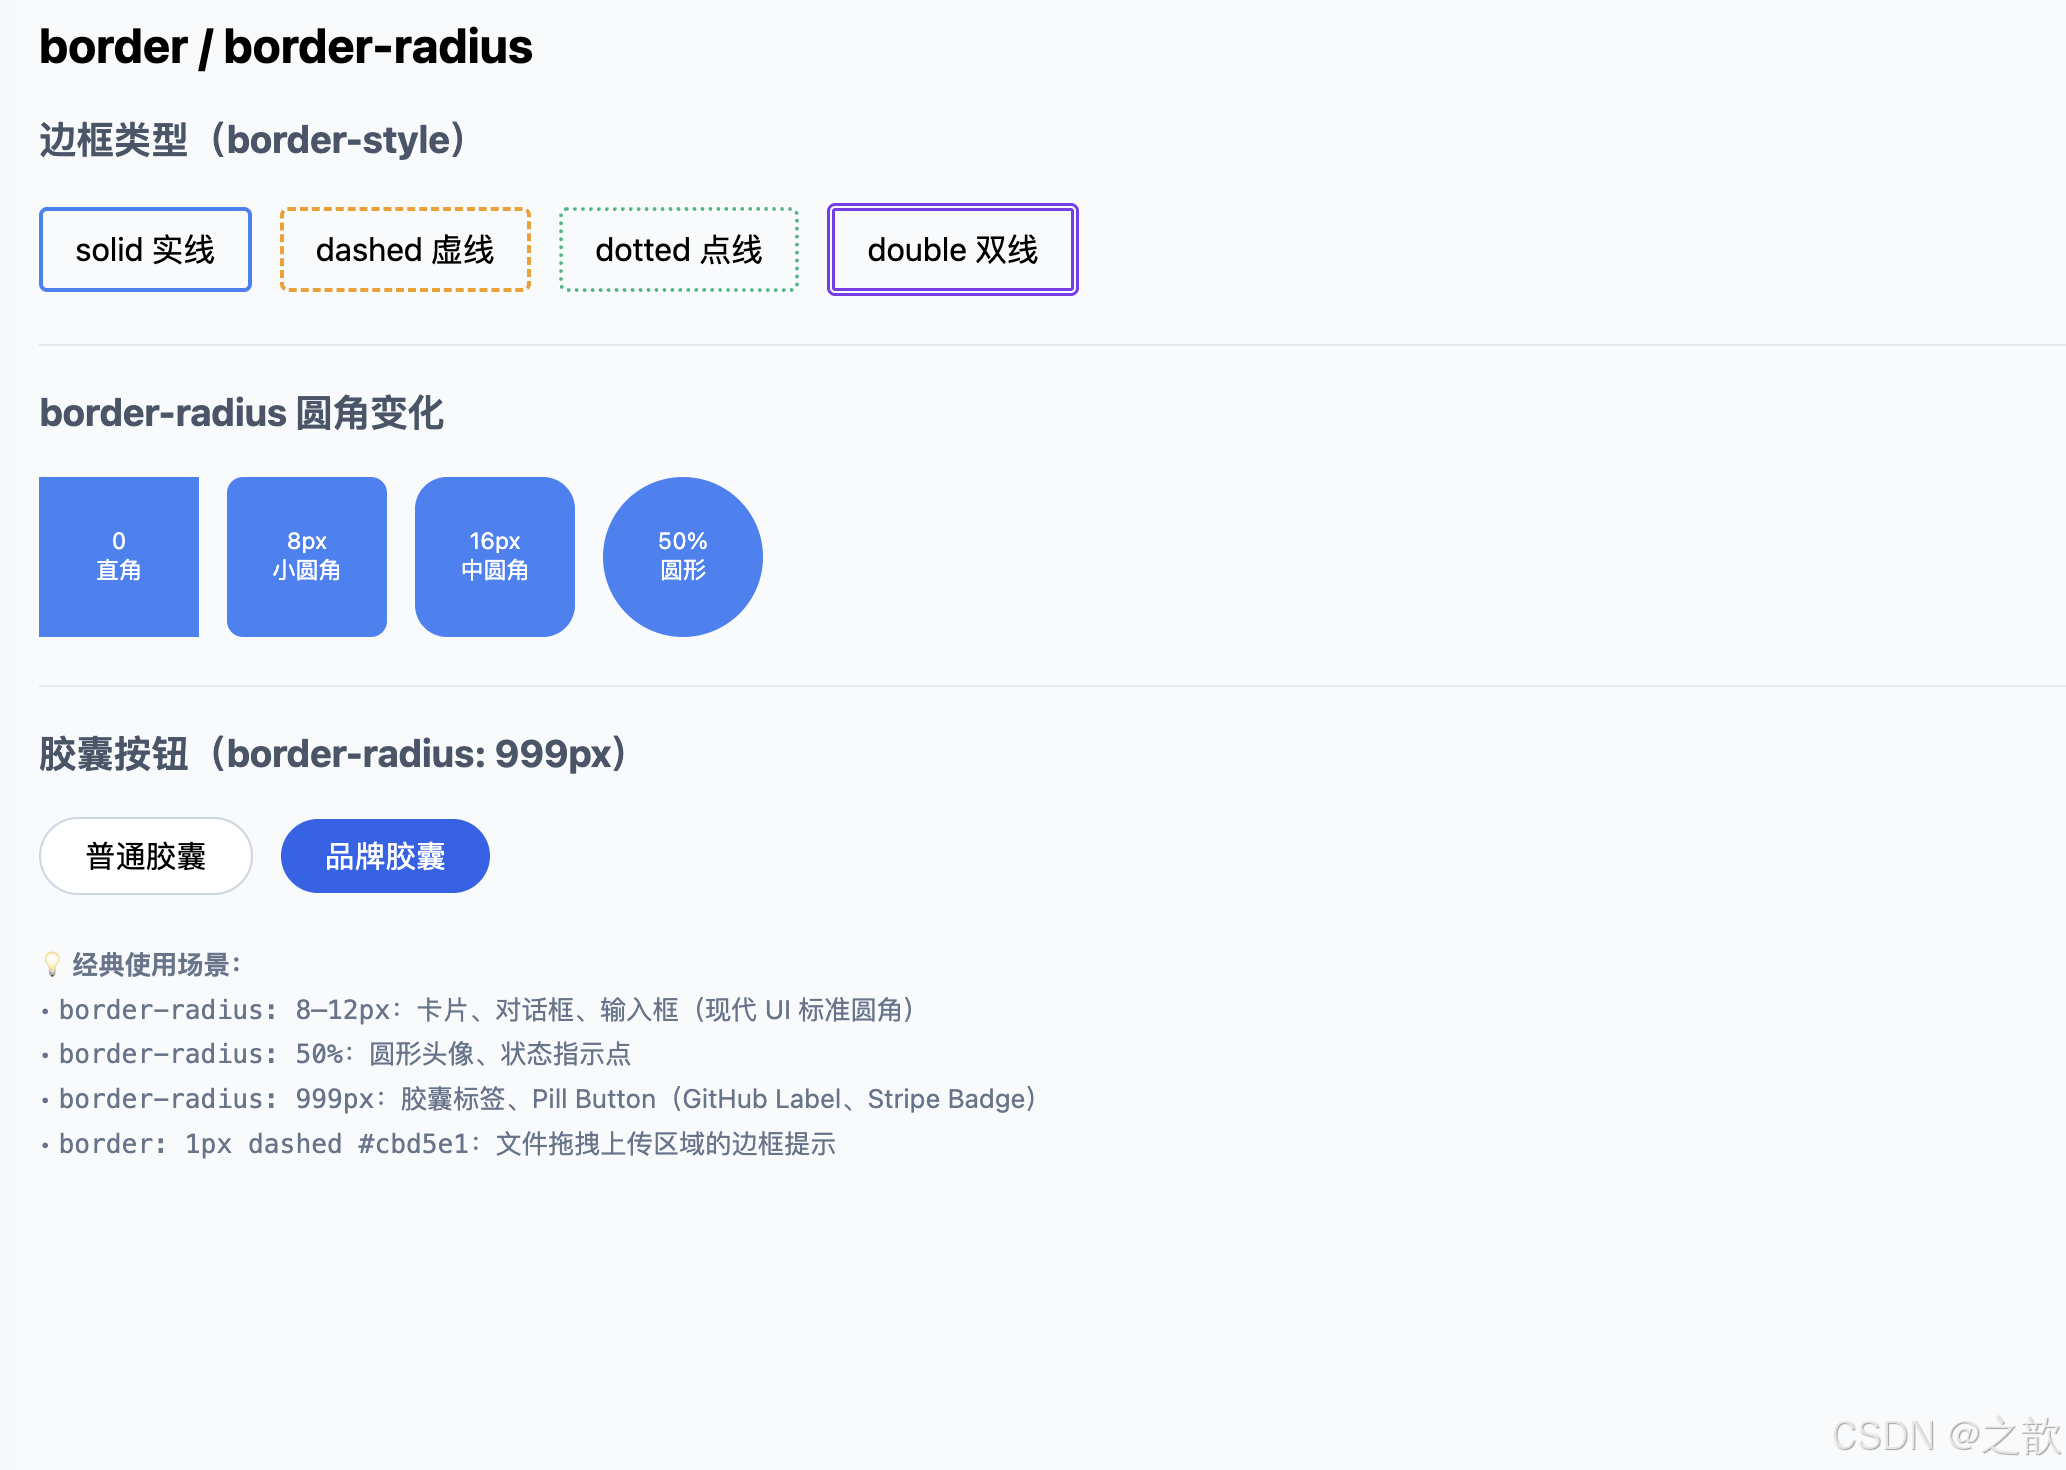
13.5 box-shadow
语法 :box-shadow: offset-x offset-y blur-radius spread-radius color [inset]
| 参数 | 含义 |
|---|---|
offset-x |
水平偏移(正值向右) |
offset-y |
垂直偏移(正值向下) |
blur-radius |
模糊半径(越大越柔和) |
spread-radius |
扩散半径(正值放大阴影,负值收缩) |
color |
阴影颜色(常用 rgba 控制透明度) |
inset |
内阴影(凹陷效果) |
html
<!DOCTYPE html>
<html lang="zh-CN">
<head>
  <meta charset="UTF-8" />
  <title>box-shadow 演示</title>
  <style>
    body { font-family: system-ui, sans-serif; margin: 2rem; background: #f1f5f9; }
    .row { display: flex; gap: 24px; flex-wrap: wrap; align-items: flex-start; }
    .shadow-card {
      width: 160px; height: 100px; background: #fff; border-radius: 12px;
      display: flex; align-items: center; justify-content: center;
      text-align: center; font-size: 0.78rem; color: #475569; padding: 10px;
      transition: box-shadow 0.25s, transform 0.25s; cursor: default;
    }
    /* 小阴影(列表卡片、普通内容块) */
    .s-sm    { box-shadow: 0 1px 3px rgba(15,23,42,0.10); }
    /* 中阴影(弹出菜单、浮层) */
    .s-md    { box-shadow: 0 4px 14px rgba(15,23,42,0.12); }
    /* 大阴影(模态框、Stripe 风格卡片) */
    .s-lg    { box-shadow: 0 18px 45px rgba(15,23,42,0.18); }
    /* 内阴影(凹陷效果,如输入框 focus 状态) */
    .s-in    { box-shadow: inset 0 2px 8px rgba(15,23,42,0.15); }
    /* 多层叠加(高端设计系统,Vercel Dashboard 风格) */
    .s-multi { box-shadow: 0 1px 2px rgba(15,23,42,0.05), 0 4px 12px rgba(15,23,42,0.10), 0 16px 40px rgba(15,23,42,0.12); }
    /* hover 增强(卡片「提起」感,鼠标移上去效果更强) */
    .s-hover { box-shadow: 0 4px 14px rgba(15,23,42,0.10); }
    .s-hover:hover { box-shadow: 0 20px 50px rgba(15,23,42,0.22); transform: translateY(-4px); }
  </style>
</head>
<body>
  <h2>box-shadow 多种层次</h2>
  <div class="row">
    <div class="shadow-card s-sm">小阴影<br/><code style="font-size:0.68rem;">0 1px 3px</code></div>
    <div class="shadow-card s-md">中阴影<br/><code style="font-size:0.68rem;">0 4px 14px</code></div>
    <div class="shadow-card s-lg">大阴影<br/><code style="font-size:0.68rem;">0 18px 45px</code></div>
    <div class="shadow-card s-in">内阴影<br/><code style="font-size:0.68rem;">inset</code></div>
    <div class="shadow-card s-multi">多层叠加<br/><code style="font-size:0.68rem;">3层 rgba</code></div>
    <div class="shadow-card s-hover">悬停增强<br/>(鼠标移上来)</div>
  </div>
  <p style="color:#64748b;font-size:0.82rem;margin-top:1rem;">
    💡 Stripe / Vercel / Linear 的卡片均使用多层低透明度阴影,制造「漂浮」质感,避免生硬的单层深阴影。
  </p>
</body>
</html>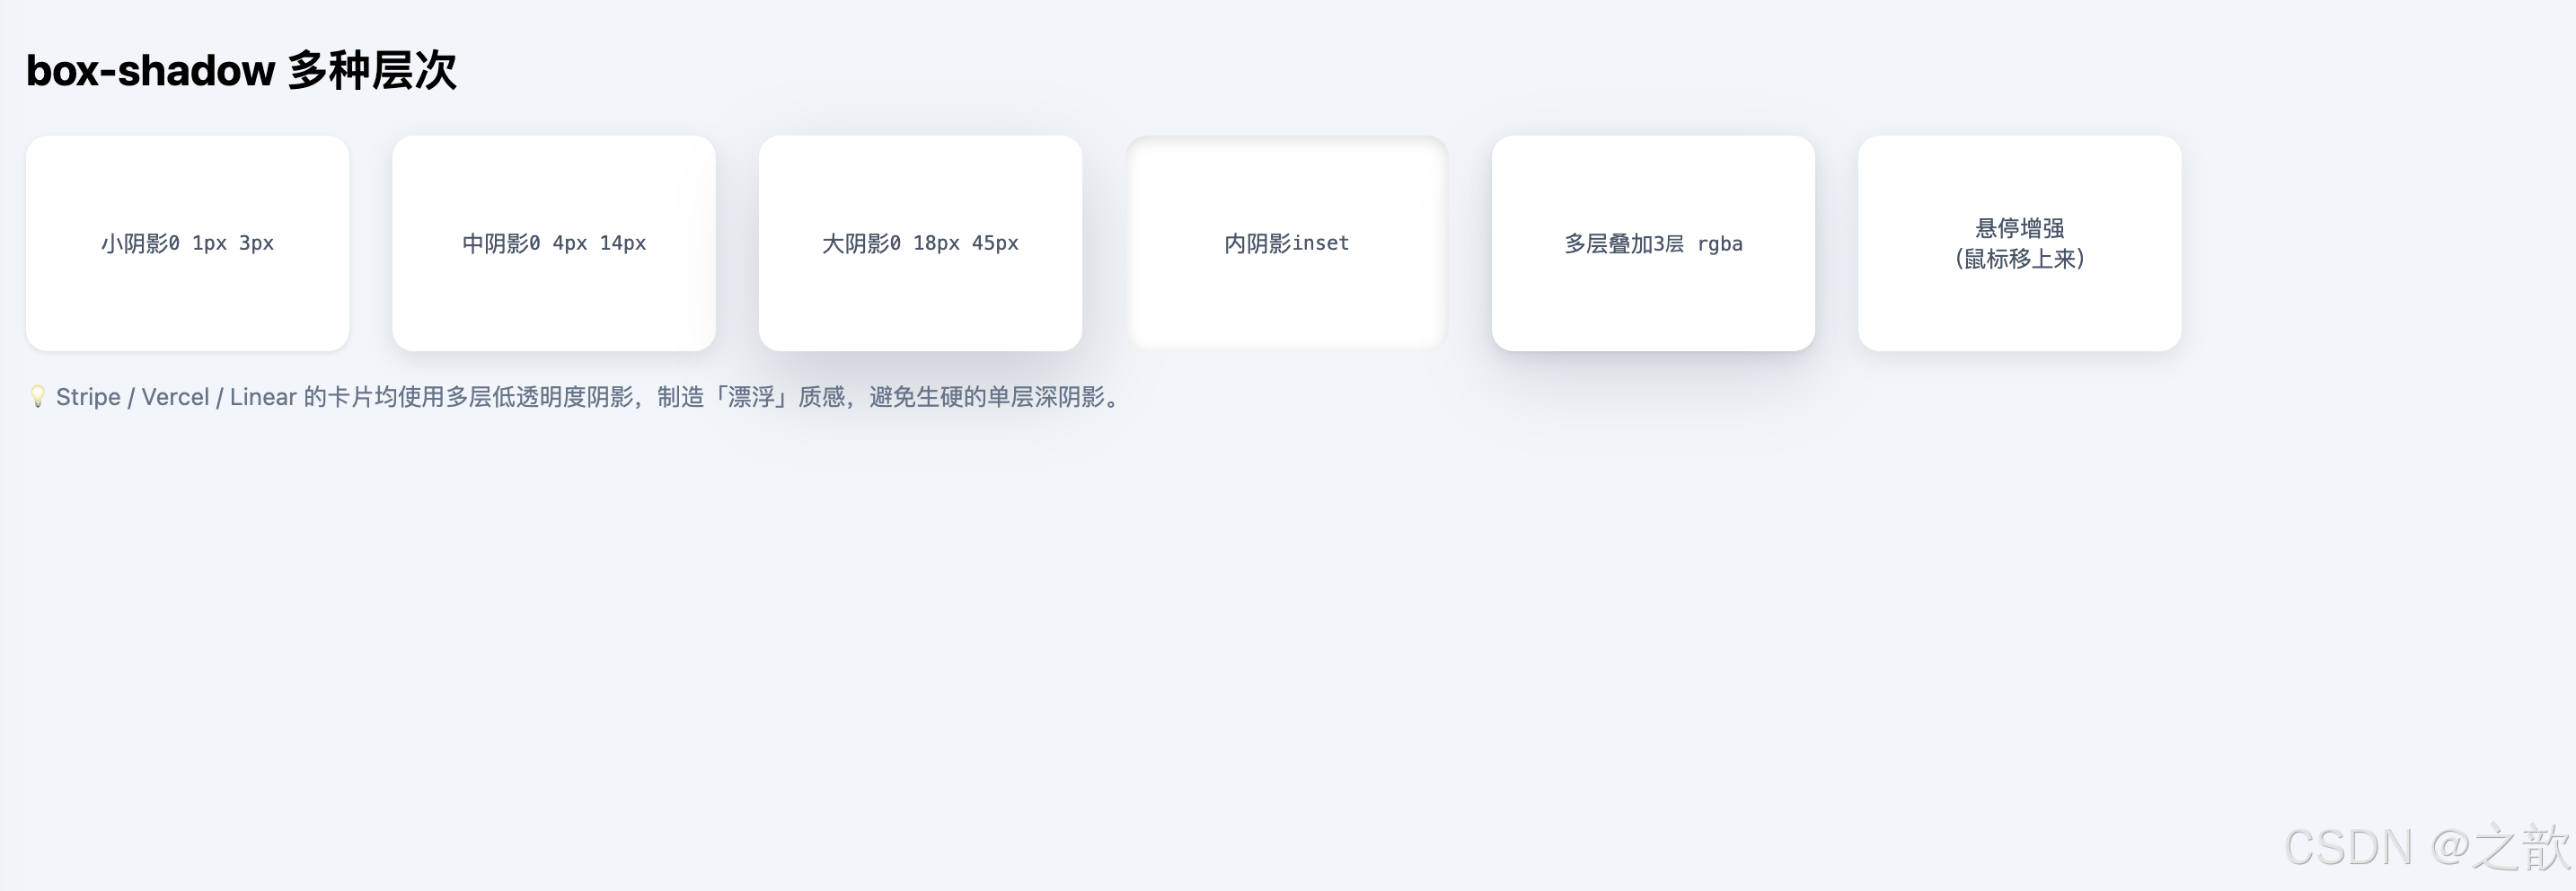
13.6 display: flex:弹性布局
核心概念 :Flexbox 是一维布局模型,控制容器内子元素在主轴 方向的排列与在交叉轴方向的对齐。
| 属性 | 作用对象 | 常用值 |
|---|---|---|
flex-direction |
容器 | row(默认)/column |
justify-content |
容器(主轴) | flex-start / center / space-between / space-around |
align-items |
容器(交叉轴) | stretch / center / flex-start / flex-end |
gap |
容器 | 长度值(行/列间距) |
flex-wrap |
容器 | nowrap(默认)/wrap |
flex |
子项 | 1(平均分配)/ 0 0 auto(固定) |
html
<!DOCTYPE html>
<html lang="zh-CN">
<head>
  <meta charset="UTF-8" />
  <title>Flexbox 完整演示</title>
  <style>
    body { font-family: system-ui, sans-serif; margin: 2rem; background: #f8fafc; }
    h3 { color: #1e40af; margin-top: 2rem; }

    /* 公共演示容器 */
    .fb { display: flex; border: 2px dashed #94a3b8; border-radius: 10px; padding: 10px; gap: 8px; background: #fff; margin-bottom: 0.75rem; }
    .it { background: #3b82f6; color: #fff; border-radius: 8px; padding: 10px 16px; font-size: 0.875rem; font-weight: 500; }
    .it-g { flex: 1; background: #10b981; }   /* flex:1 伸展填充剩余空间 */

    /* 实战:导航栏 */
    .navbar {
      display: flex; justify-content: space-between; align-items: center;
      background: #0f172a; color: #f8fafc; padding: 0 1.5rem;
      border-radius: 10px; height: 52px;
    }
    .navbar .logo   { font-weight: 700; font-size: 1rem; }
    .navbar .links  { display: flex; gap: 22px; font-size: 0.875rem; color: #94a3b8; }
    .navbar .action { background: #3b82f6; color: #fff; padding: 5px 16px; border-radius: 8px; font-size: 0.875rem; cursor: pointer; }

    /* 实战:媒体卡片(图文并排) */
    .media-card { display: flex; gap: 1rem; align-items: flex-start; background: #fff; border: 1px solid #e2e8f0; border-radius: 12px; padding: 1rem; box-shadow: 0 2px 12px rgba(15,23,42,0.06); max-width: 440px; }
    .media-card img { width: 60px; height: 60px; border-radius: 50%; object-fit: cover; flex-shrink: 0; }
    .media-body h4  { margin: 0 0 4px; font-size: 0.95rem; }
    .media-body p   { margin: 0; color: #64748b; font-size: 0.85rem; line-height: 1.5; }
  </style>
</head>
<body>
  <h2>display: flex 弹性布局</h2>

  <h3>① flex-direction: row(默认,水平排列)</h3>
  <div class="fb" style="flex-direction:row;">
    <div class="it">A</div><div class="it">B</div><div class="it">C</div>
  </div>

  <h3>② flex-direction: column(垂直排列)</h3>
  <div class="fb" style="flex-direction:column; max-width:180px;">
    <div class="it">顶部</div><div class="it">中间</div><div class="it">底部</div>
  </div>

  <h3>③ justify-content: space-between(两端对齐)</h3>
  <div class="fb" style="justify-content:space-between;">
    <div class="it">左</div><div class="it">中</div><div class="it">右</div>
  </div>

  <h3>④ align-items: center(交叉轴居中)</h3>
  <div class="fb" style="height:80px; align-items:center;">
    <div class="it" style="height:40px;">短</div>
    <div class="it" style="height:64px;">高</div>
    <div class="it" style="height:28px;">矮</div>
  </div>

  <h3>⑤ flex: 1(等比例填充剩余空间)</h3>
  <div class="fb">
    <div class="it">固定</div>
    <div class="it it-g">flex:1 填充剩余</div>
    <div class="it">固定</div>
  </div>

  <h3>⑥ flex-wrap: wrap(响应式换行)</h3>
  <div class="fb" style="flex-wrap:wrap; max-width:360px;">
    <div class="it">Alpha</div><div class="it">Beta</div><div class="it">Gamma</div>
    <div class="it">Delta</div><div class="it">Epsilon</div><div class="it">Zeta</div>
  </div>

  <h3>⑦ 实战:顶部导航栏</h3>
  <nav class="navbar">
    <span class="logo">DevBlog</span>
    <div class="links">
      <a href="#" style="color:#94a3b8; text-decoration:none;">文章</a>
      <a href="#" style="color:#94a3b8; text-decoration:none;">教程</a>
      <a href="#" style="color:#94a3b8; text-decoration:none;">关于</a>
    </div>
    <span class="action">开始使用</span>
  </nav>

  <h3>⑧ 实战:媒体卡片(图文并排)</h3>
  <div class="media-card">
    <img src="images/demo-avatar.svg" alt="头像" />
    <div class="media-body">
      <h4>Alex Chen</h4>
      <p>前端工程师,专注 JavaScript 基础与工程化实践,喜欢分享技术心得。</p>
    </div>
  </div>
</body>
</html>
13.7 max-width + 居中容器
html
<!DOCTYPE html>
<html lang="zh-CN">
<head>
  <meta charset="UTF-8" />
  <title>max-width 居中容器</title>
  <style>
    body { margin: 0; background: #f1f5f9; font-family: system-ui, sans-serif; }

    /* Hero 区域:全宽背景 + 限宽内容 */
    .hero { background: linear-gradient(135deg, #1e40af 0%, #7c3aed 100%); color: #fff; padding: 4rem 0; }
    .hero-inner { max-width: 640px; margin: 0 auto; padding: 0 1.5rem; text-align: center; }
    .hero h2 { font-size: 2.2rem; margin-bottom: 0.5rem; }
    .hero p  { font-size: 1.05rem; opacity: 0.85; }

    /* 文章主体:限宽 + 居中 + 两侧内边距(小屏防止内容贴边)*/
    .article { max-width: 720px; margin: 0 auto; padding: 2.5rem 1.5rem; }
    .article h1 { font-size: 1.8rem; color: #0f172a; margin-bottom: 0.5rem; }
    .article .meta { color: #64748b; font-size: 0.875rem; margin-bottom: 1.75rem; }
    .article p { line-height: 1.75; color: #1e293b; }
  </style>
</head>
<body>
  <!-- 全宽背景 -->
  <section class="hero">
    <div class="hero-inner">
      <h2>JavaScript 函数进阶</h2>
      <p>作用域 · 递归 · 回调 · 对象建模 · 从原理到工程</p>
    </div>
  </section>

  <!-- 限宽文章内容 -->
  <article class="article">
    <h1>max-width 居中容器</h1>
    <div class="meta">2026-05-10 · 阅读约 15 分钟</div>
    <p>
      内容区域限制在 640--800px 之间是前端排版的基础实践。
      过宽的文字行(超过 90 字符)会导致眼部跟踪困难;过窄则频繁换行,破坏节奏。
      <code>max-width + margin: 0 auto</code> 配合 <code>padding: 0 1.5rem</code>,
      是零成本移动端友好方案------小屏时内容不贴边,大屏时内容不过宽。
    </p>
  </article>
</body>
</html>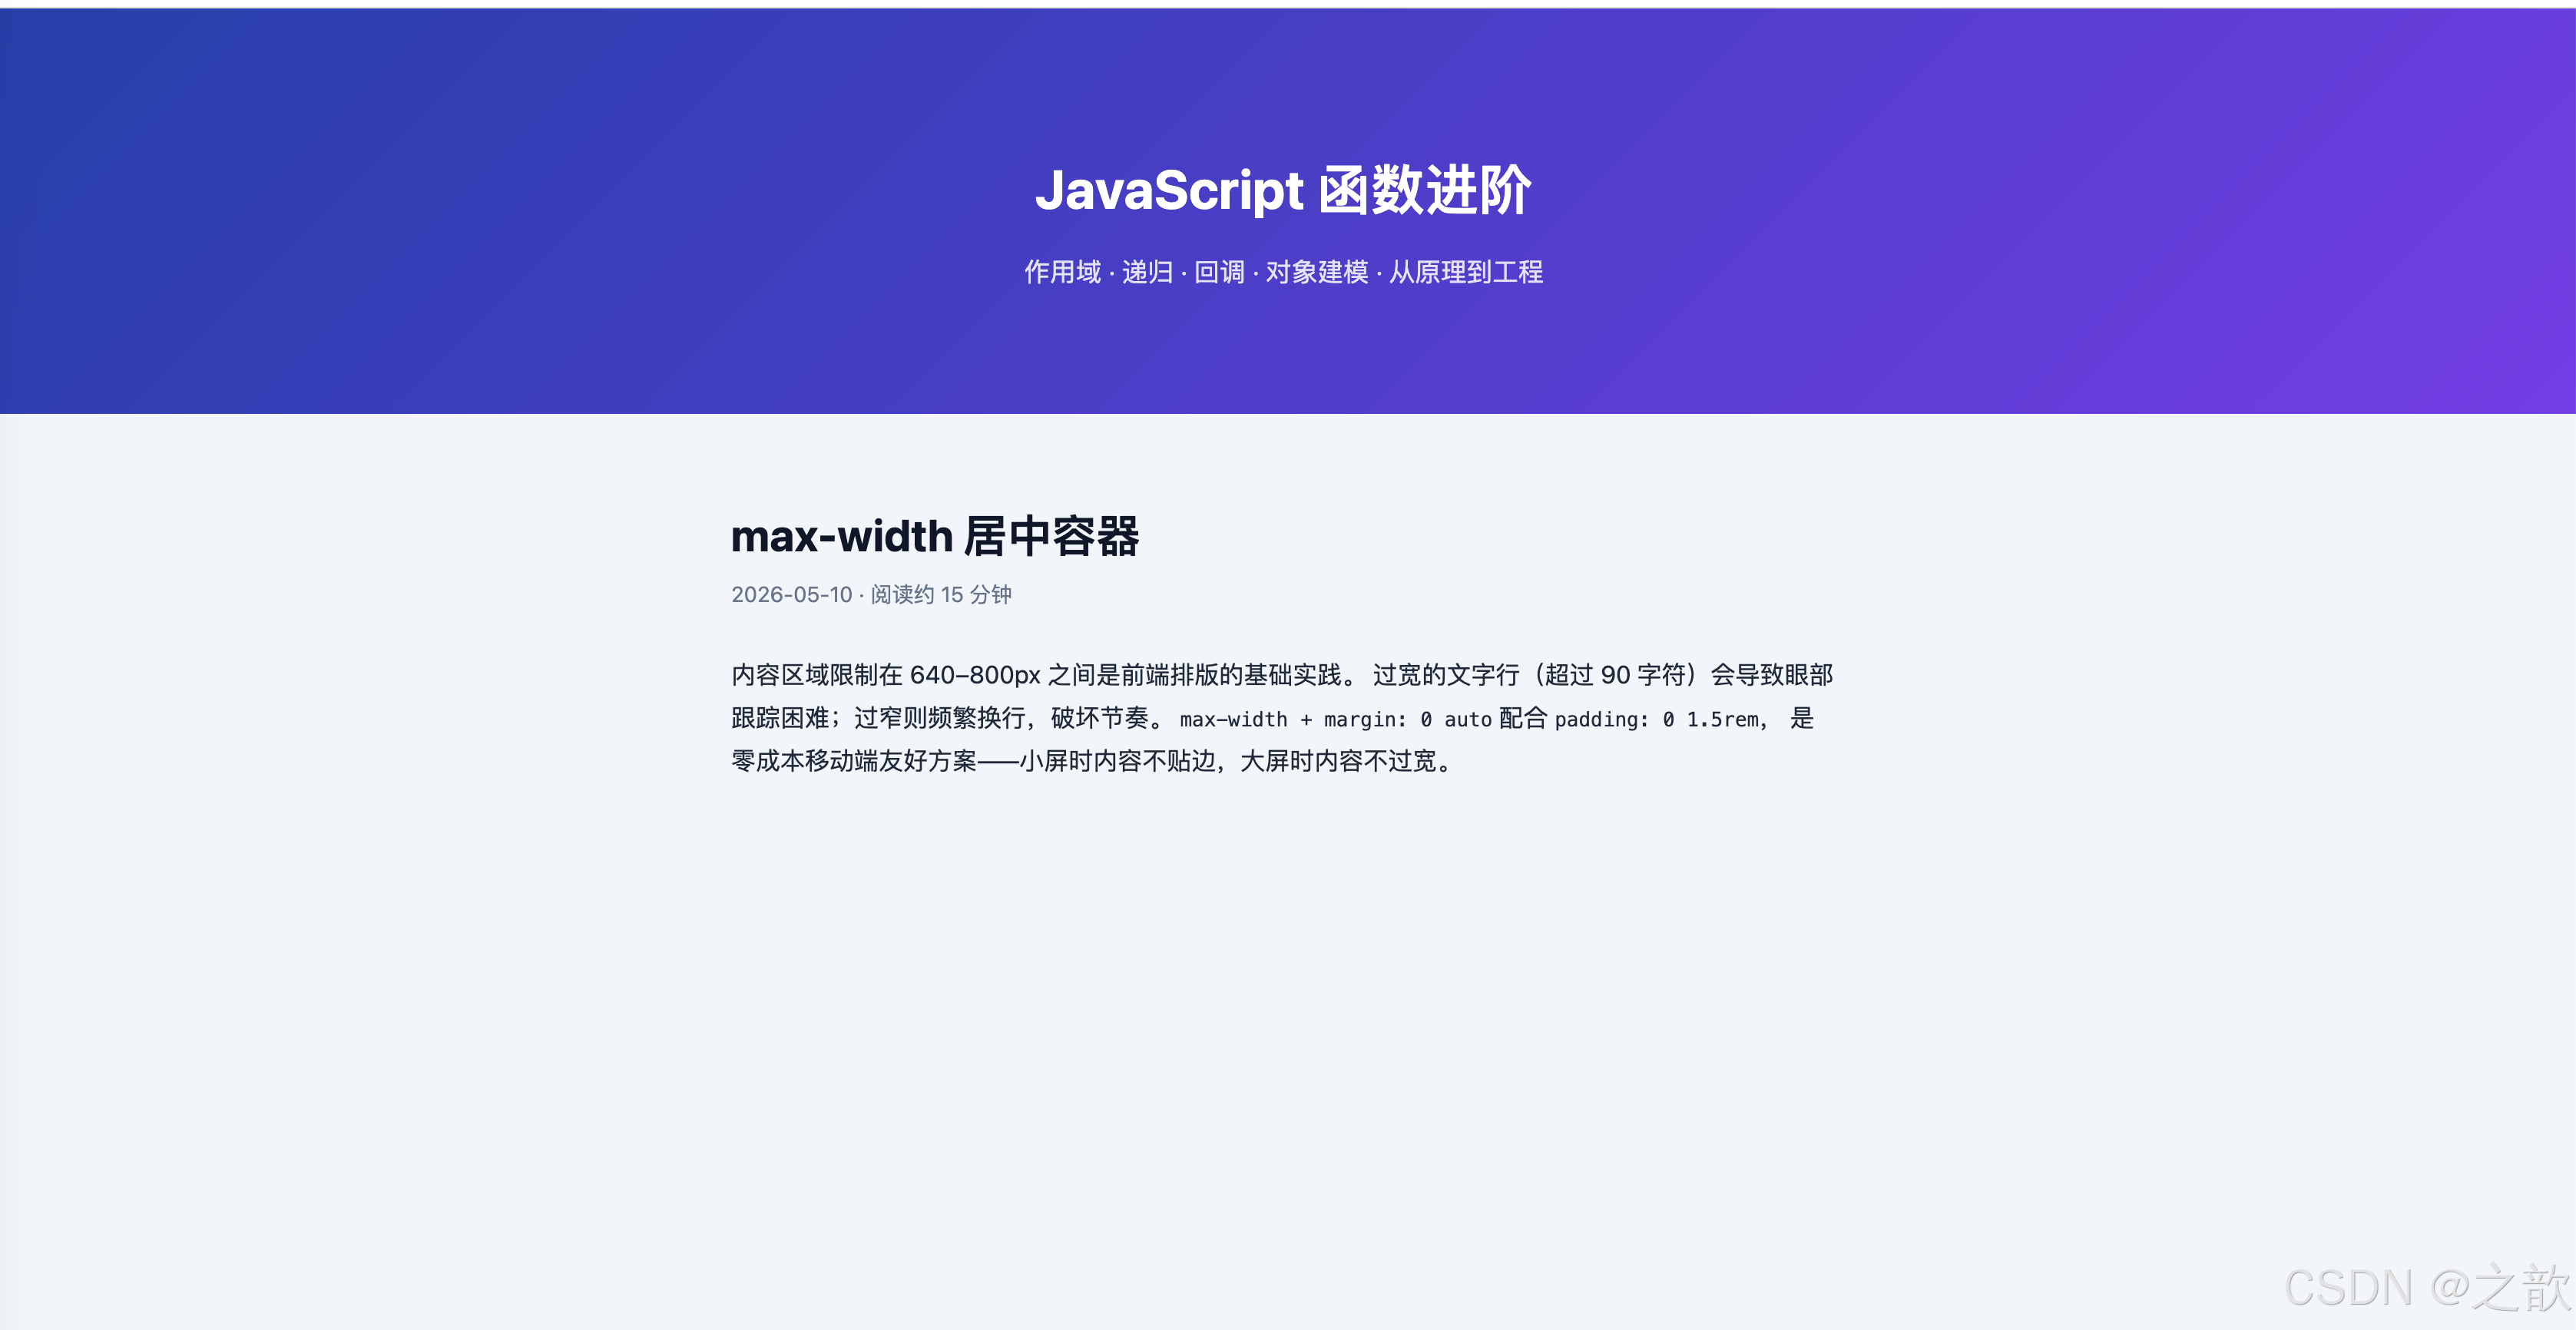
13.8 object-fit / overflow
object-fit 取值对比
| 值 | 效果 | 适用场景 |
|---|---|---|
fill |
拉伸填满(可能变形) | 不推荐 |
contain |
保持比例,完整显示(可能留白) | Logo、图标 |
cover |
保持比例,填满容器(可能裁剪) | 头像、封面图 |
none |
原始尺寸(可能溢出) | 特殊场景 |
scale-down |
取 none / contain 较小者 |
小图不放大 |
html
<!DOCTYPE html>
<html lang="zh-CN">
<head>
  <meta charset="UTF-8" />
  <title>object-fit 与 overflow</title>
  <style>
    body { font-family: system-ui, sans-serif; margin: 2rem; background: #f8fafc; }
    .row { display: flex; gap: 20px; flex-wrap: wrap; align-items: flex-start; }
    .demo { text-align: center; }
    .demo label { display: block; font-size: 0.78rem; color: #64748b; margin-top: 6px; }

    /* 固定容器:展示不同 object-fit 效果 */
    .img-box { width: 120px; height: 120px; border: 2px solid #cbd5e1; border-radius: 8px; overflow: hidden; background: #e2e8f0; }
    .img-box img { width: 100%; height: 100%; }

    /* 圆形头像(最经典用法:cover + 50%)*/
    .avatar { width: 88px; height: 88px; border-radius: 50%; overflow: hidden; border: 3px solid #bfdbfe; }
    .avatar img { width: 100%; height: 100%; object-fit: cover; }

    /* 新闻卡封面图 */
    .news-card { width: 240px; border: 1px solid #e2e8f0; border-radius: 12px; overflow: hidden; background: #fff; box-shadow: 0 2px 12px rgba(15,23,42,0.06); }
    .news-card .cover { width: 100%; height: 130px; overflow: hidden; }
    .news-card .cover img { width: 100%; height: 100%; object-fit: cover; display: block; }
    .news-card .body { padding: 12px; }
    .news-card h4 { margin: 0 0 4px; font-size: 0.9rem; }
    .news-card p  { margin: 0; font-size: 0.78rem; color: #64748b; }
  </style>
</head>
<body>
  <h2>object-fit:图片填充方式</h2>

  <h3 style="color:#475569;">五种 object-fit 值对比</h3>
  <div class="row">
    <div class="demo">
      <div class="img-box"><img src="images/demo-avatar.svg" alt="" style="object-fit:fill;"/></div>
      <label>fill(变形)</label>
    </div>
    <div class="demo">
      <div class="img-box"><img src="images/demo-avatar.svg" alt="" style="object-fit:contain;"/></div>
      <label>contain(留白)</label>
    </div>
    <div class="demo">
      <div class="img-box"><img src="images/demo-avatar.svg" alt="" style="object-fit:cover;"/></div>
      <label>cover(裁剪填满)</label>
    </div>
    <div class="demo">
      <div class="img-box"><img src="images/demo-avatar.svg" alt="" style="object-fit:none;"/></div>
      <label>none(原始尺寸)</label>
    </div>
    <div class="demo">
      <div class="img-box"><img src="images/demo-avatar.svg" alt="" style="object-fit:scale-down;"/></div>
      <label>scale-down</label>
    </div>
  </div>

  <h3 style="color:#475569; margin-top:2rem;">实战:圆形头像(cover + 50%)</h3>
  <div class="avatar"><img src="images/demo-avatar.svg" alt="头像" /></div>

  <h3 style="color:#475569; margin-top:2rem;">实战:新闻卡片封面图</h3>
  <div class="news-card">
    <div class="cover"><img src="images/demo-avatar.svg" alt="封面" /></div>
    <div class="body">
      <h4>JavaScript 递归函数详解</h4>
      <p>从阶乘到树形遍历,深度解析递归思维。</p>
    </div>
  </div>
</body>
</html>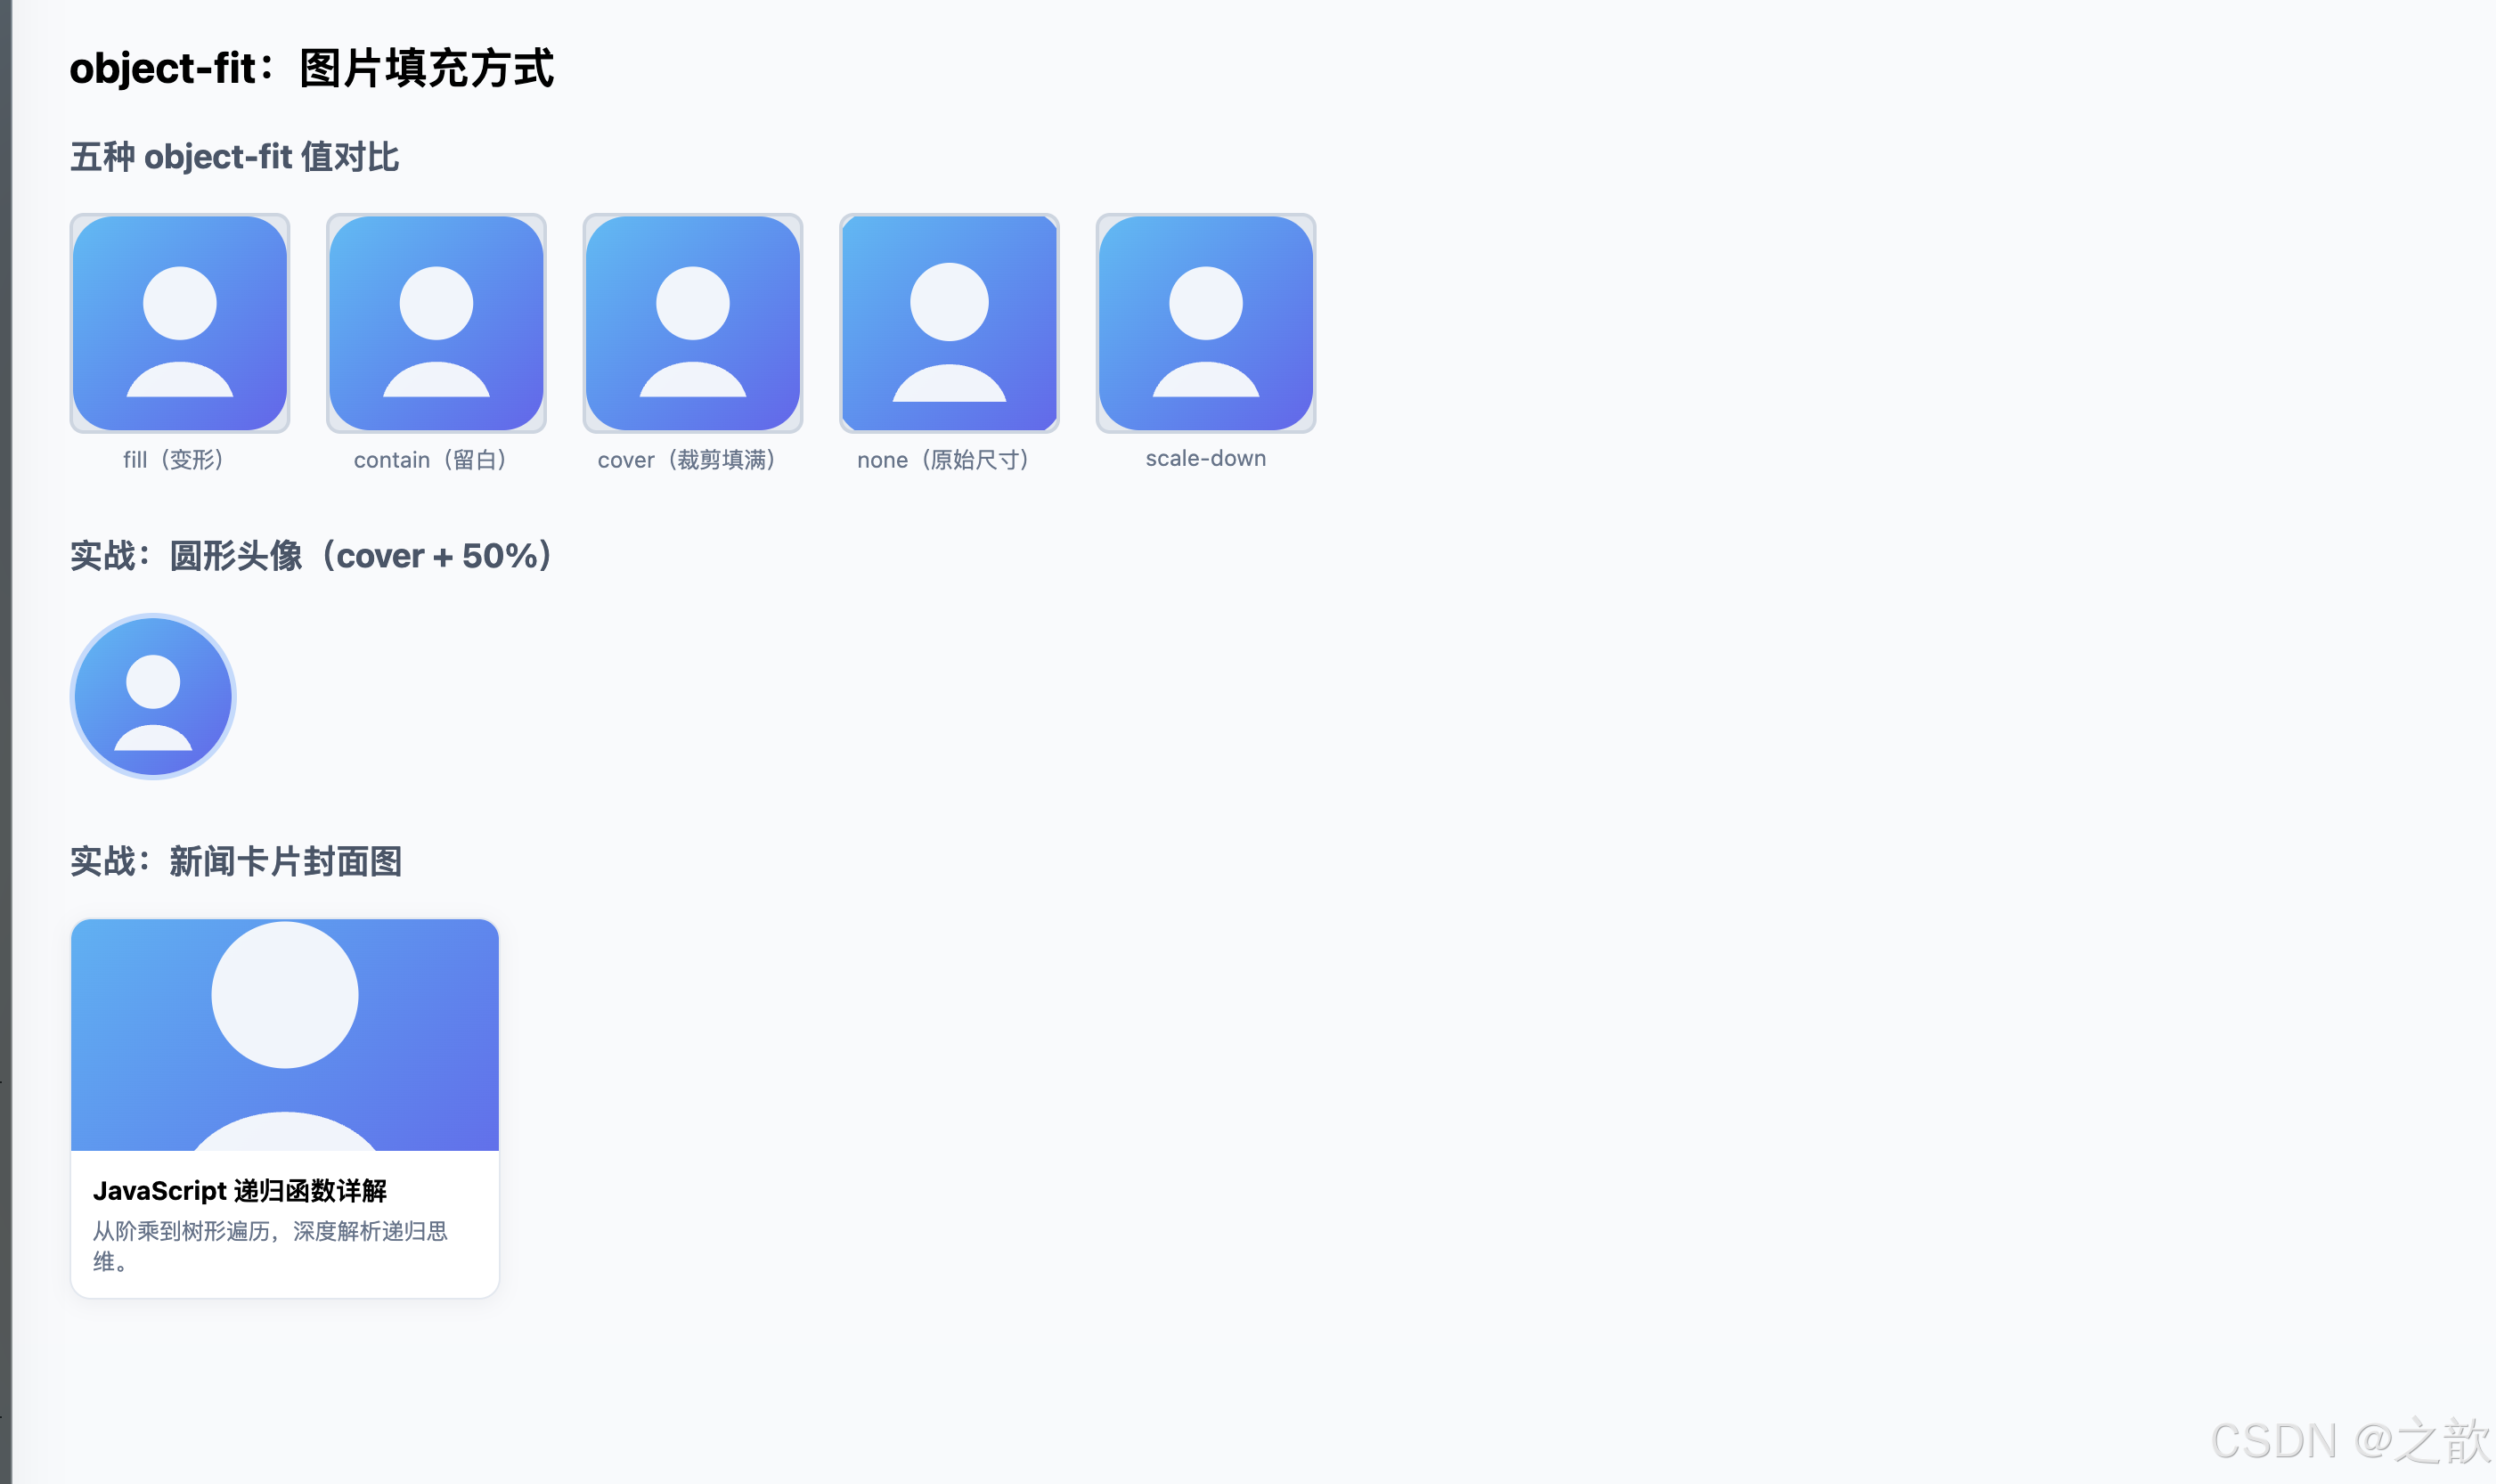
13.9 position / z-index
| position 值 | 是否脱离文档流 | 参照系 | 典型场景 |
|---|---|---|---|
static |
否 | 无 | 默认值 |
relative |
否(仍占空间) | 自身原位置 | 为子元素提供定位上下文 |
absolute |
是 | 最近的 positioned 祖先 | 角标、弹出层 |
fixed |
是 | 视口 | 固定导航栏、悬浮按钮 |
sticky |
否(触发后类似 fixed) | 滚动容器 | 表格固定表头、侧边目录 |
html
<!DOCTYPE html>
<html lang="zh-CN">
<head>
  <meta charset="UTF-8" />
  <title>position 定位演示</title>
  <style>
    body { font-family: system-ui, sans-serif; margin: 0; background: #f8fafc; }

    /* fixed 导航栏 */
    .topbar {
      position: fixed; top: 0; left: 0; right: 0; z-index: 100;
      height: 50px; background: #0f172a; color: #f8fafc;
      display: flex; align-items: center; padding: 0 1.5rem;
      box-shadow: 0 2px 8px rgba(0,0,0,0.3); font-weight: 600;
    }

    .content { margin-top: 70px; padding: 2rem; max-width: 700px; margin-left: auto; margin-right: auto; }
    h2 { color: #1e40af; }

    /* relative + absolute:角标徽标 */
    .badge-wrap { position: relative; display: inline-block; width: 60px; height: 60px; }
    .badge-wrap img { width: 60px; height: 60px; border-radius: 50%; }
    .badge-dot {
      position: absolute; top: 1px; right: 1px;   /* 相对父级右上角定位 */
      width: 14px; height: 14px; border-radius: 50%;
      background: #ef4444; border: 2px solid #fff;
    }

    /* sticky 目录 */
    .layout { display: flex; gap: 2rem; }
    .toc {
      position: sticky; top: 68px; align-self: flex-start;
      background: #fff; border: 1px solid #e2e8f0; border-radius: 10px;
      padding: 1rem; width: 160px; flex-shrink: 0; font-size: 0.85rem;
      box-shadow: 0 2px 8px rgba(15,23,42,0.06);
    }
    .toc h4 { margin: 0 0 0.5rem; color: #475569; font-size: 0.8rem; text-transform: uppercase; }
    .toc a  { display: block; color: #3b82f6; text-decoration: none; margin-bottom: 5px; }
    .main-text p { line-height: 1.75; color: #1e293b; margin-top: 0; }
  </style>
</head>
<body>
  <!-- fixed 定位顶栏 -->
  <header class="topbar">⚡ JavaScript 深度博客 --- position 演示</header>

  <div class="content">
    <h2>position 定位演示</h2>

    <h3 style="color:#475569;">relative + absolute:消息角标</h3>
    <div style="display:flex; gap:20px; align-items:center; margin-bottom:2rem;">
      <div class="badge-wrap">
        <img src="images/demo-avatar.svg" alt="头像" />
        <span class="badge-dot"></span>   <!-- absolute 定位在右上角 -->
      </div>
      <p style="margin:0; color:#475569; font-size:0.875rem;">
        红点使用 <code>position: absolute; top:1px; right:1px</code>
        相对 <code>position: relative</code> 的父容器定位。<br/>
        这是消息未读数、在线状态指示器的标准实现。
      </p>
    </div>

    <h3 style="color:#475569;">sticky:滚动粘附目录</h3>
    <div class="layout">
      <nav class="toc">
        <h4>目录</h4>
        <a href="#">作用域</a>
        <a href="#">变量提升</a>
        <a href="#">回调函数</a>
        <a href="#">递归</a>
        <a href="#">Object</a>
      </nav>
      <div class="main-text">
        <p>左侧目录使用 <code>position: sticky; top: 68px</code>,
          向下滚动时会「粘」在距顶部 68px(等于导航栏高度)的位置,
          始终可见。滚动出父容器后粘附效果自动解除。</p>
        <p>与 <code>fixed</code> 不同,<code>sticky</code> 仍然占据文档流空间,
          不会造成内容「塌陷」,是文档类站点侧边目录和表格固定表头的首选方案。</p>
      </div>
    </div>
  </div>
</body>
</html>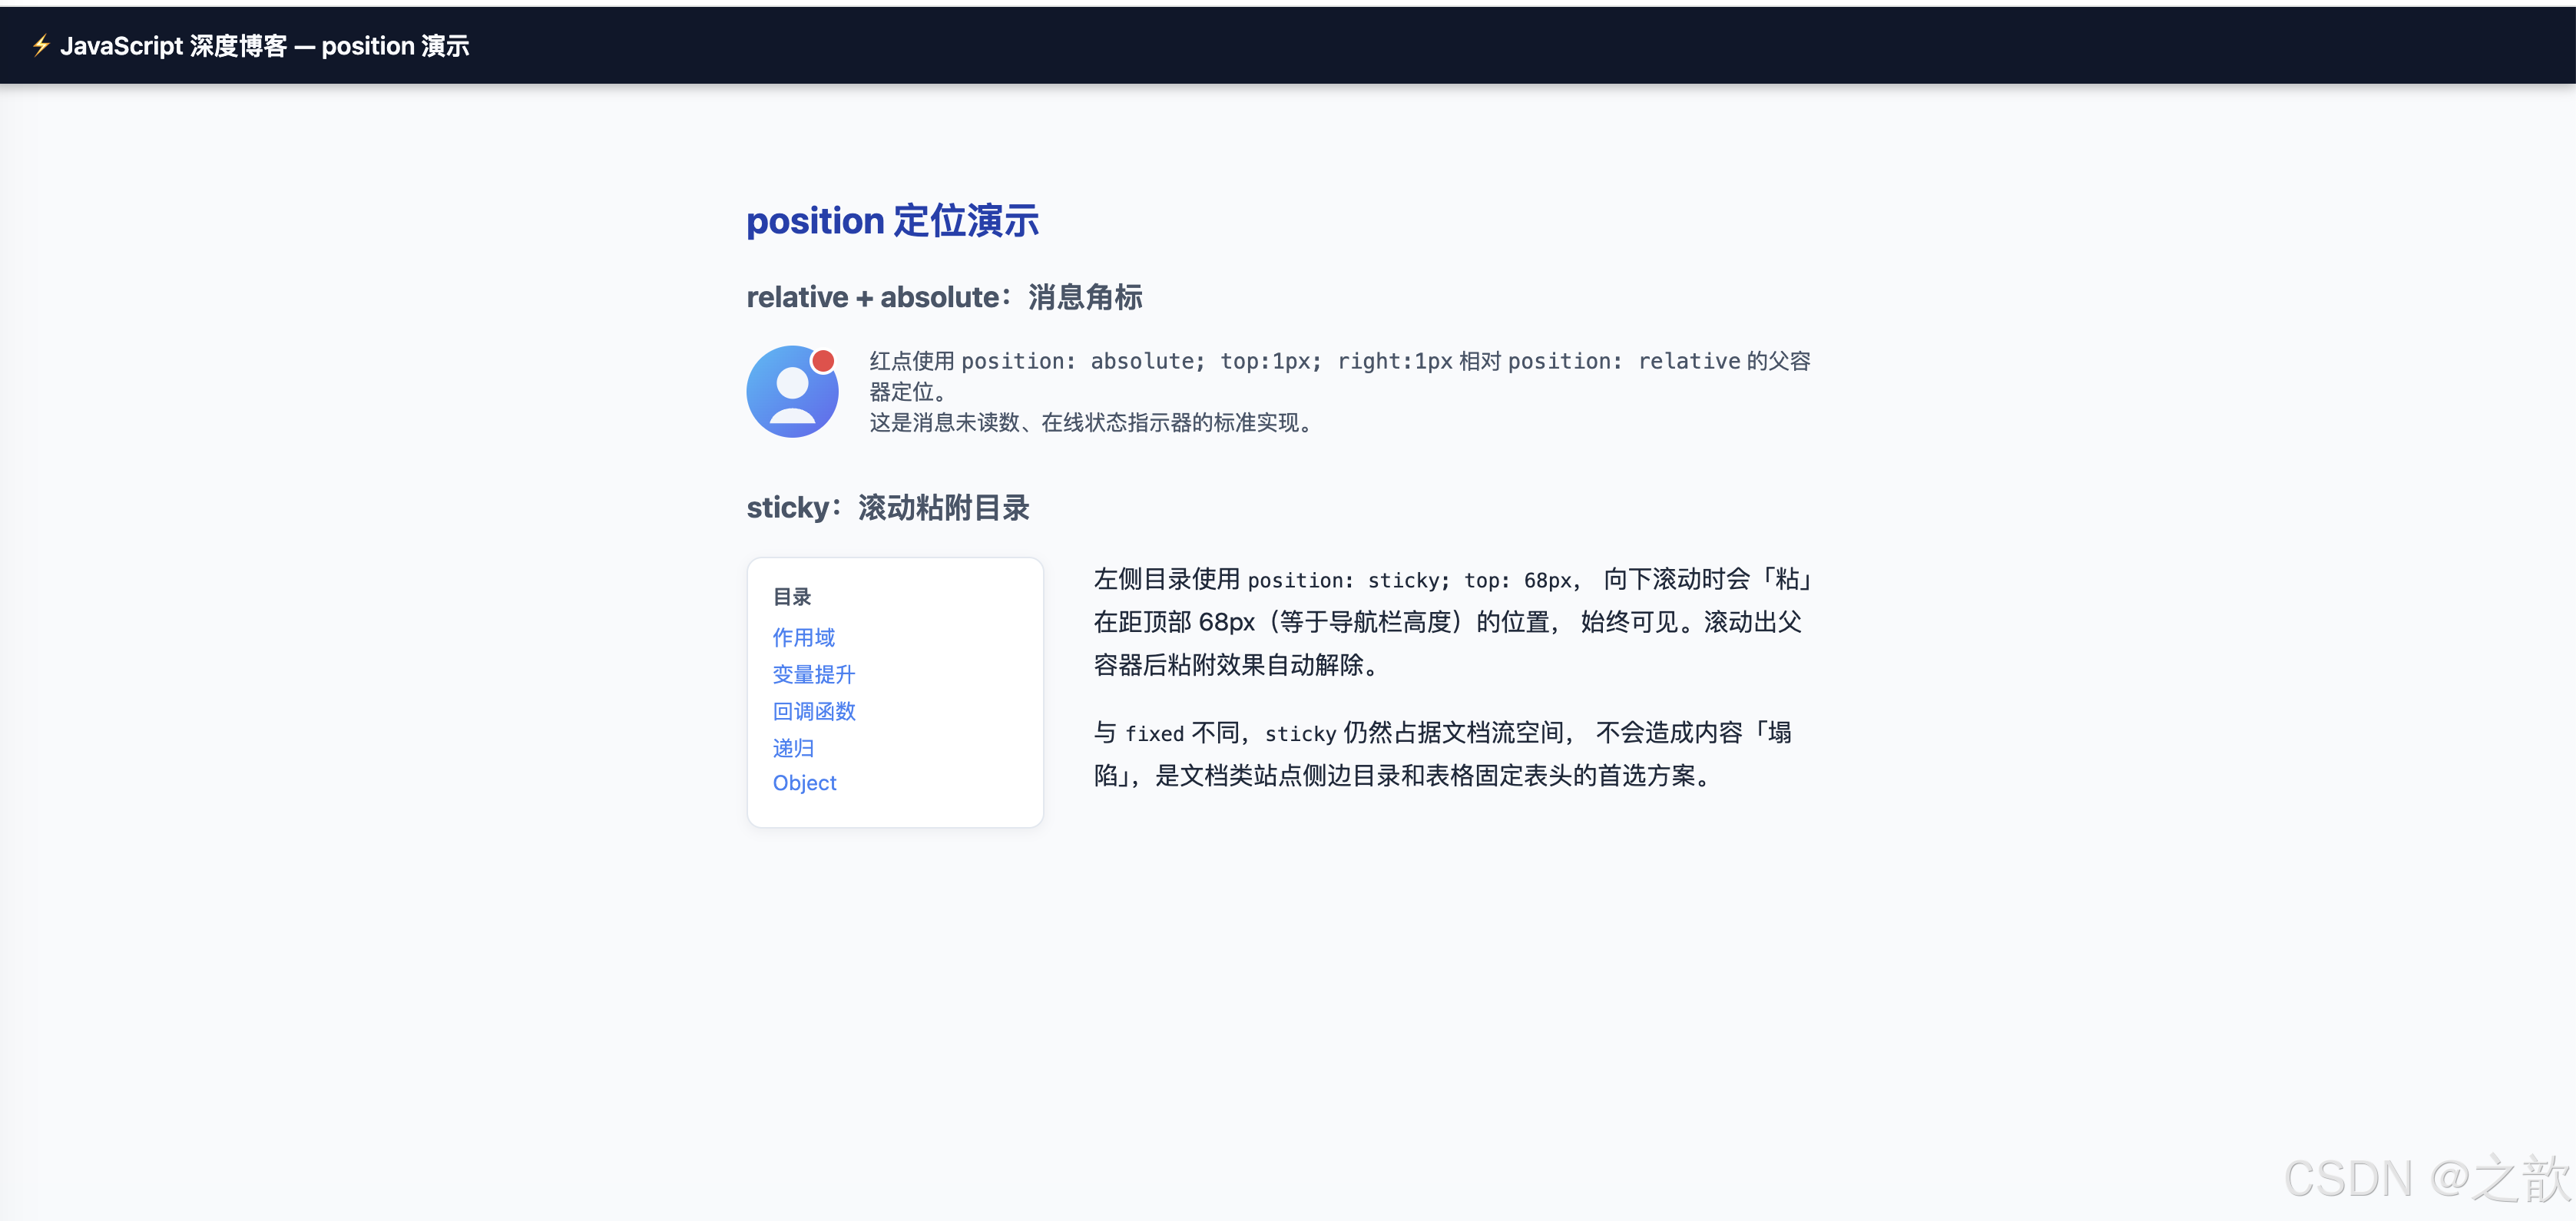
13.10 transition / transform
html
<!DOCTYPE html>
<html lang="zh-CN">
<head>
  <meta charset="UTF-8" />
  <title>transition + transform</title>
  <style>
    body { font-family: system-ui, sans-serif; margin: 2rem; background: #f1f5f9; }
    h3 { color: #1e40af; margin-top: 2rem; }
    .row { display: flex; gap: 14px; flex-wrap: wrap; align-items: center; }

    /* 按钮:颜色 + 轻缩放过渡 */
    .btn {
      padding: 10px 24px; border-radius: 8px; border: none;
      cursor: pointer; font-size: 0.95rem; font-weight: 500;
      background: #3b82f6; color: #fff;
      transition: background-color 0.2s ease, transform 0.15s ease;
    }
    .btn:hover { background: #1d4ed8; transform: scale(1.04); }

    /* 卡片:悬停浮起 */
    .lift-card {
      width: 180px; padding: 1.25rem; border-radius: 14px;
      background: #fff; border: 1px solid #e2e8f0;
      box-shadow: 0 2px 8px rgba(15,23,42,0.08);
      cursor: default; font-size: 0.875rem; color: #475569; text-align: center;
      transition: box-shadow 0.25s, transform 0.25s;
    }
    .lift-card:hover { box-shadow: 0 18px 45px rgba(15,23,42,0.16); transform: translateY(-6px); }

    /* 旋转图标 */
    .spin-box {
      width: 60px; height: 60px; background: #7c3aed; border-radius: 12px;
      display: flex; align-items: center; justify-content: center;
      color: #fff; font-size: 1.4rem; cursor: pointer;
      transition: transform 0.4s cubic-bezier(0.34,1.56,0.64,1);
    }
    .spin-box:hover { transform: rotate(180deg); }

    /* 下拉菜单:max-height 展开动画 */
    .menu-wrap { display: inline-block; position: relative; }
    .menu-btn { padding: 8px 18px; border-radius: 8px; border: 1px solid #cbd5e1; background: #fff; cursor: pointer; font-size: 0.875rem; }
    .menu-list { max-height: 0; overflow: hidden; transition: max-height 0.4s ease, opacity 0.3s ease; opacity: 0; }
    .menu-wrap:hover .menu-list { max-height: 200px; opacity: 1; }
    .menu-list li { padding: 8px 16px; list-style: none; border-bottom: 1px solid #f1f5f9; font-size: 0.875rem; color: #475569; }
  </style>
</head>
<body>
  <h2>transition + transform:过渡与变换</h2>

  <h3>① 按钮:颜色 + 缩放过渡</h3>
  <div class="row">
    <button class="btn">悬停我</button>
    <button class="btn" style="background:#10b981;">成功</button>
    <button class="btn" style="background:#ef4444;">危险</button>
  </div>

  <h3>② 卡片浮起(translateY + shadow)</h3>
  <div class="row">
    <div class="lift-card">悬停浮起效果</div>
    <div class="lift-card">鼠标移上来试试</div>
  </div>

  <h3>③ 旋转(rotate 180deg)</h3>
  <div class="row">
    <div class="spin-box">✦</div>
    <span style="color:#64748b; font-size:0.875rem;">hover → rotate(180deg)</span>
  </div>

  <h3>④ max-height 展开动画(下拉菜单原理)</h3>
  <div class="menu-wrap">
    <button class="menu-btn">鼠标悬停展开 ▼</button>
    <ul class="menu-list" style="background:#fff;border:1px solid #e2e8f0;border-radius:8px;margin:4px 0 0;padding:0;">
      <li>选项 Alpha</li>
      <li>选项 Beta</li>
      <li>选项 Gamma</li>
    </ul>
  </div>
</body>
</html>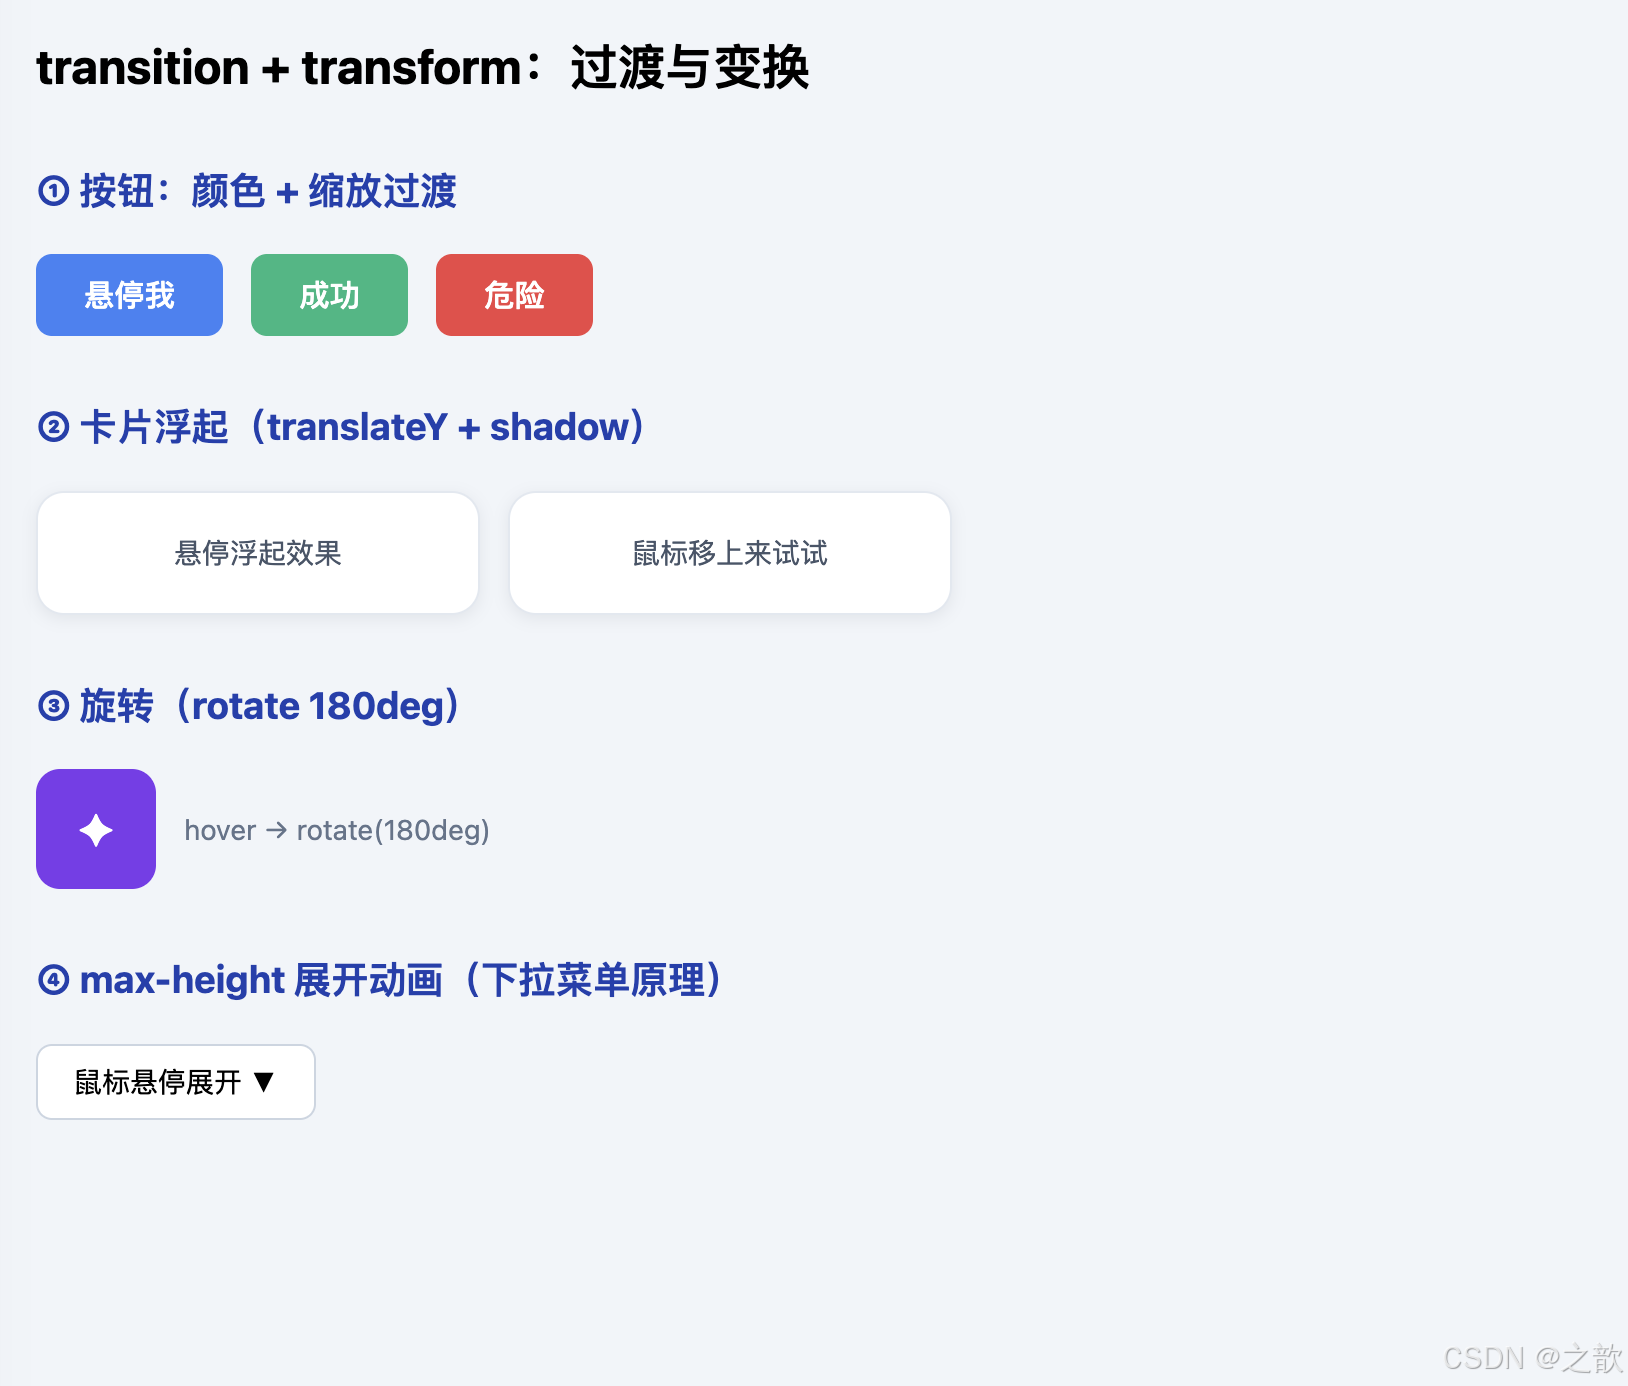
十四、综合实战:开发者卡片页
整合所有核心知识点------Object 建模、sort 比较器、forEach 回调、filter 搜索、动态 DOM、CSS Grid/Flex、过渡动画------构建完整的可运行开发者名录页。
html
<!DOCTYPE html>
<html lang="zh-CN">
<head>
  <meta charset="UTF-8" />
  <title>开发者卡片页 --- JavaScript 综合实战</title>
  <style>
    :root { --brand:#2563eb; --bg:#f1f5f9; --surface:#fff; --border:#e2e8f0; --text:#0f172a; --muted:#64748b; }
    *, *::before, *::after { box-sizing: border-box; margin: 0; padding: 0; }
    body { font-family: -apple-system, BlinkMacSystemFont, 'Segoe UI', system-ui, sans-serif; background: var(--bg); color: var(--text); }

    /* 顶部导航 */
    .navbar { position: sticky; top: 0; z-index: 50; display: flex; justify-content: space-between; align-items: center; background: #0f172a; color: #f8fafc; padding: 0 2rem; height: 54px; box-shadow: 0 2px 12px rgba(0,0,0,0.3); }
    .navbar .logo { font-weight: 700; }
    .navbar .controls { display: flex; gap: 8px; }
    .sort-btn { padding: 5px 14px; border-radius: 999px; border: 1px solid #334155; background: transparent; color: #cbd5e1; cursor: pointer; font-size: 0.82rem; transition: background 0.15s, color 0.15s; }
    .sort-btn:hover, .sort-btn.active { background: var(--brand); color: #fff; border-color: var(--brand); }

    /* 主区域 */
    .main { max-width: 1040px; margin: 0 auto; padding: 2rem 1.5rem; }
    .page-title { font-size: 1.7rem; font-weight: 700; margin-bottom: 0.35rem; }
    .page-sub { color: var(--muted); font-size: 0.9rem; margin-bottom: 1.5rem; }
    .search-input { width: 100%; max-width: 380px; padding: 9px 16px; border-radius: 10px; border: 1px solid var(--border); font-size: 0.9rem; background: var(--surface); outline: none; transition: border-color 0.2s, box-shadow 0.2s; margin-bottom: 1.5rem; }
    .search-input:focus { border-color: var(--brand); box-shadow: 0 0 0 3px rgba(37,99,235,0.15); }

    /* 统计条 */
    .stat-bar { display: flex; gap: 1rem; margin-bottom: 1.5rem; flex-wrap: wrap; }
    .stat { background: var(--surface); border: 1px solid var(--border); border-radius: 10px; padding: 0.75rem 1.25rem; flex: 1; min-width: 140px; }
    .stat-num { font-size: 1.5rem; font-weight: 700; color: var(--brand); }
    .stat-lbl { font-size: 0.75rem; color: var(--muted); margin-top: 2px; }

    /* 卡片网格 */
    .grid { display: grid; grid-template-columns: repeat(auto-fill, minmax(280px, 1fr)); gap: 1.25rem; }
    .dev-card { background: var(--surface); border: 1px solid var(--border); border-radius: 14px; padding: 1.25rem; box-shadow: 0 2px 10px rgba(15,23,42,0.06); transition: box-shadow 0.25s, transform 0.25s; }
    .dev-card:hover { box-shadow: 0 16px 40px rgba(15,23,42,0.14); transform: translateY(-4px); }
    .card-top { display: flex; gap: 1rem; align-items: center; margin-bottom: 0.75rem; }
    .card-top img { width: 52px; height: 52px; border-radius: 50%; object-fit: cover; border: 2px solid #bfdbfe; flex-shrink: 0; }
    .card-name { font-weight: 600; font-size: 0.95rem; }
    .card-role { font-size: 0.78rem; color: var(--muted); margin-top: 2px; }
    .card-bio  { font-size: 0.85rem; color: var(--muted); line-height: 1.6; margin-bottom: 0.9rem; }
    .tags { display: flex; gap: 5px; flex-wrap: wrap; margin-bottom: 0.75rem; }
    .tag { font-size: 0.7rem; padding: 2px 8px; border-radius: 999px; background: #f1f5f9; color: #475569; border: 1px solid var(--border); }
    .card-footer { display: flex; justify-content: space-between; align-items: center; }
    .age-badge { font-size: 0.75rem; background: #dbeafe; color: #1d4ed8; padding: 2px 10px; border-radius: 999px; }
    .exp-badge { font-size: 0.75rem; background: #dcfce7; color: #065f46; padding: 2px 10px; border-radius: 999px; }
    .empty { text-align: center; padding: 4rem; color: var(--muted); grid-column: 1 / -1; }
  </style>
</head>
<body>
  <nav class="navbar">
    <span class="logo">⚡ DevCards</span>
    <div class="controls">
      <button class="sort-btn active" onclick="sortBy('age','asc',this)">年龄↑</button>
      <button class="sort-btn" onclick="sortBy('age','desc',this)">年龄↓</button>
      <button class="sort-btn" onclick="sortBy('exp','desc',this)">经验最多</button>
      <button class="sort-btn" onclick="sortBy('name','asc',this)">名字A→Z</button>
    </div>
  </nav>

  <main class="main">
    <h1 class="page-title">开发者名录</h1>
    <p class="page-sub">综合演示:Object 建模 · sort 比较器 · forEach 回调 · filter 搜索 · 动态 DOM</p>
    <input class="search-input" type="text" placeholder="搜索姓名或技术标签..." oninput="handleSearch(this.value)" />
    <div class="stat-bar" id="stats"></div>
    <div class="grid" id="grid"></div>
  </main>

  <script>
    // ─── 数据:Object 对象数组 ────────────────────────────
    var developers = [
      { name: 'Alex Chen',  age: 28, exp: 6,  role: 'Frontend Engineer', bio: '专注 React 生态与性能优化,维护多个开源组件库。',  tags: ['JavaScript', 'React', 'TypeScript'] },
      { name: 'Blake Lee',  age: 34, exp: 12, role: 'Full Stack Dev',    bio: '后端 Node.js 专家,擅长系统架构设计与数据库调优。', tags: ['Node.js', 'PostgreSQL', 'Docker'] },
      { name: 'Casey Kim',  age: 25, exp: 3,  role: 'UI/UX Developer',   bio: '热爱将设计稿还原为像素级精准的交互组件。',         tags: ['CSS', 'Figma', 'Animation'] },
      { name: 'Drew Park',  age: 31, exp: 9,  role: 'DevOps Engineer',   bio: '负责 CI/CD 流水线与云基础设施的自动化运维。',     tags: ['Kubernetes', 'Terraform', 'AWS'] },
      { name: 'Evan Wu',    age: 27, exp: 5,  role: 'Frontend Engineer', bio: '对 Web 性能与无障碍有深入研究,WCAG 践行者。',    tags: ['Performance', 'a11y', 'Vue'] },
      { name: 'Fiona Su',   age: 29, exp: 7,  role: 'Backend Developer', bio: '构建高并发 API 服务,热衷于函数式编程范式。',      tags: ['Go', 'gRPC', 'Redis'] }
    ];

    var currentData = developers.slice();

    // ─── 渲染统计栏 ────────────────────────────────────────
    function renderStats(data) {
      var total  = data.length;
      var avgAge = total ? Math.round(data.reduce(function(s,d){ return s+d.age; }, 0) / total) : 0;
      var avgExp = total ? (data.reduce(function(s,d){ return s+d.exp; }, 0) / total).toFixed(1) : 0;
      document.getElementById('stats').innerHTML =
        '<div class="stat"><div class="stat-num">' + total + '</div><div class="stat-lbl">开发者总数</div></div>' +
        '<div class="stat"><div class="stat-num">' + avgAge + '</div><div class="stat-lbl">平均年龄</div></div>' +
        '<div class="stat"><div class="stat-num">' + avgExp + 'y</div><div class="stat-lbl">平均经验</div></div>';
    }

    // ─── 渲染卡片(forEach 回调 + 动态 DOM)───────────────
    function renderCards(data) {
      var grid = document.getElementById('grid');
      if (!data.length) {
        grid.innerHTML = '<div class="empty">没有找到匹配的开发者</div>';
        renderStats(data);
        return;
      }
      grid.innerHTML = '';
      data.forEach(function(dev) {
        var card = document.createElement('article');
        card.className = 'dev-card';
        card.innerHTML =
          '<div class="card-top">' +
            '<img src="images/demo-avatar.svg" alt="' + dev.name + '" />' +
            '<div><div class="card-name">' + dev.name + '</div>' +
            '<div class="card-role">' + dev.role + '</div></div>' +
          '</div>' +
          '<p class="card-bio">' + dev.bio + '</p>' +
          '<div class="tags">' + dev.tags.map(function(t){ return '<span class="tag">'+t+'</span>'; }).join('') + '</div>' +
          '<div class="card-footer"><span class="age-badge">年龄 ' + dev.age + '</span><span class="exp-badge">经验 ' + dev.exp + ' 年</span></div>';
        grid.appendChild(card);
      });
      renderStats(data);
    }

    // ─── 排序(sort 比较器)────────────────────────────────
    function sortBy(field, dir, btn) {
      document.querySelectorAll('.sort-btn').forEach(function(b){ b.classList.remove('active'); });
      btn.classList.add('active');
      currentData = currentData.slice().sort(function(a, b) {
        if (field === 'name') return dir === 'asc' ? a.name.localeCompare(b.name) : b.name.localeCompare(a.name);
        return dir === 'asc' ? a[field] - b[field] : b[field] - a[field];
      });
      renderCards(currentData);
    }

    // ─── 搜索(filter 回调)────────────────────────────────
    function handleSearch(query) {
      var q = query.trim().toLowerCase();
      currentData = developers.filter(function(dev) {
        return dev.name.toLowerCase().indexOf(q) !== -1 ||
               dev.tags.some(function(t){ return t.toLowerCase().indexOf(q) !== -1; });
      });
      renderCards(currentData);
    }

    // 初始渲染
    renderCards(developers);
  </script>
</body>
</html>
十五、经典使用场景对照表
| 真实工程场景 | 核心技术点 | 关键注意事项 |
|---|---|---|
| 表格排序(点击列头升降序) | sort 比较器 + 对象属性 |
必须传比较器;保护原数组用 .slice() |
| 列表渲染(评论区、商品卡) | forEach 回调 + 动态 DOM |
大列表应考虑虚拟滚动 |
| 按钮事件处理 | 回调函数 + DOM 事件 | 事件委托可减少监听器数量 |
| 页面初始化不污染全局 | IIFE / ES modules | 新项目优先模块机制 |
| 树形菜单、JSON 嵌套遍历 | 递归 + 终止条件 | 深度过大时改用显式栈 |
| 接口响应数据建模 | Object 字面量 + 动态键名 |
与 TypeScript 接口无缝对接 |
| 工具函数库(max/min/sum) | arguments / 剩余参数 |
优先 ES6 ...args |
| 配置对象传参 | Object 字面量 |
比位置参数更具可读性 |
| 数据处理管道 | filter + map + reduce 链式回调 |
避免过度链式,注意性能 |
| 异步初始化(顶层 await) | (async () => { await ... })() |
现代环境可用顶层 await |
十六、读程序写输出(强化训练)
16.1 作用域链(词法作用域经典题)
js
var age = 20;
function fn2() { console.log(age); }
function fn() {
  var age = 30;
  fn2();          // fn2 词法外层 = 全局,不是 fn
}
fn();
// ⬇ 输出:20(不是 30)
16.2 形参遮蔽外部变量
js
var age = 10;
function fn1(age) {   // 形参创建函数内部独立绑定
  age = 20;           // 修改内部绑定,全局 age 不受影响
}
fn1();
console.log(age);
// ⬇ 输出:10
16.3 变量提升 + 嵌套函数局部提升(核心考题)
js
alert(a);        // ⬇ ① undefined(全局 var a 提升)
var a = 0;
alert(a);        // ⬇ ② 0
function fn() {
  alert(a);      // ⬇ ③ undefined(fn 内 var a 提升,遮蔽全局 a)
  var a = 1;
  alert(a);      // ⬇ ④ 1
}
fn();
alert(a);        // ⬇ ⑤ 0(全局 a 未被修改)
16.4 var 与 function 同名 → TypeError 陷阱
js
var num = 100;
function num() { console.log(200); }
// 预处理:num → 函数对象
// 运行期:var num = 100 → 覆盖为数值
console.log(typeof num);  // ⬇ 'number'
// num();  // ❌ TypeError: num is not a function
16.5 递归对称输出
js
function func(n) {
  console.log(n);         // ← 递归前输出
  if (n > 1) func(n - 1);
  console.log(n);         // ← 递归后输出(返回时执行)
}
func(3);
// ⬇ 输出:3  2  1  1  2  3
16.6 高阶函数 + 词法作用域验证
js
var num = 10;
function fn01(fn) {
  var num = 20;
  fn();        // fn 的词法链不受 fn01 影响
}
function fn02() {
  console.log(num);
}
fn01(fn02);
// ⬇ 输出:10(fn02 的词法外层是全局)
十七、常见错误清单
| # | 错误描述 | 产生原因 | 正确做法 |
|---|---|---|---|
| 1 | 误以为「从哪调用」决定变量查找 | 混淆动态作用域 / 词法作用域 | 记住:作用域由书写位置决定 |
| 2 | sort 不传比较器,数值排序乱序 |
默认字符串排序 | 始终传 (a,b) => a-b 或 (a,b) => b-a |
| 3 | 递归无终止条件或条件不收敛 | 忘记 Base Case | 先写终止条件,再写递推公式 |
| 4 | 点语法访问动态键名 obj.prop(prop 是变量) |
误用语法 | 改为 obj[prop] |
| 5 | IIFE 漏括号,写成函数声明后立即调用 | 语法理解不足 | 整体用括号包裹 (function(){})() |
| 6 | arguments 在箭头函数中不存在 |
箭头函数无 arguments | 改用 ...args 剩余参数 |
| 7 | 提前访问 let/const 以为会得到 undefined |
混淆 var 与 let 提升行为 |
let/const TDZ → ReferenceError |
| 8 | sort 修改了原数组 |
忘记 sort 是原地修改 | 先 .slice() 复制再排序 |
| 9 | 以为外层函数可以访问内层变量 | 误解作用域链方向 | 作用域链单向向外,外层看不到内层 |
| 10 | 对象嵌套深读时报错(TypeError: Cannot read properties of undefined) |
中间层属性为 undefined | 先检查 obj.a && obj.a.b 再访问 |
十八、参考资料与延伸阅读
| 资源 | 简介 | 适合阶段 |
|---|---|---|
| ECMAScript 2024 规范(ECMA-262) | 所有语义的最终权威,词法环境、执行上下文、变量绑定的规范定义 | 进阶 |
| MDN:Functions | 函数全面指南,含箭头函数、默认参数、闭包等 | 基础/进阶 |
| MDN:Hoisting | 变量提升词条,有易读示例 | 基础 |
MDN:var |
var 完整语义说明 | 基础 |
MDN:Array.prototype.sort |
sort 稳定性(ES2019+)与比较器语义 | 基础/进阶 |
| MDN:IIFE | IIFE 词条与示例 | 基础 |
MDN:arguments |
arguments 对象完整说明 | 基础 |
| MDN:Object | 对象方法与原型链概述 | 基础/进阶 |
| MDN:Flexbox | Flexbox 完整指南 | CSS 基础 |
| MDN:Grid | CSS Grid 布局完整文档 | CSS 进阶 |
| Ben Alman:IIFE 原文 | IIFE 术语命名由来与语义辨析 | 拓展 |
| You Don't Know JS --- Scope & Closures | 深度解读 JS 作用域与闭包,入门必读 | 进阶 |
十九、总结:五条记忆口诀
JavaScript 函数与对象\n核心知识
① 作用域看写法\n不看调用位置
词法作用域
作用域链单向向外
嵌套调用≠嵌套作用域
② 提升登记声明\nvar先undefined\n函数整体提升
两阶段编译+执行
var_vs_let_const_TDZ
函数名与变量名冲突
③ 回调是交给别人敲钟\n高阶函数是函数当货
三个判定条件
宿主触发时机
词法作用域仍然生效
④ sort必传比较器\na-b升序_b-a降序
数值排序必须传比较器
对象数组按属性排序
保护原数组先slice
⑤ 对象用{}建模\n动态键用\[\]\n方法就是函数属性
三种创建方式
点语法vs括号语法
必须用括号的两种情况
五条口诀汇总
| 口诀 | 解决的核心问题 | 最易犯的错误 |
|---|---|---|
| ①作用域看写法,不看调用 | 变量在哪找 | 以为「从哪调用」决定作用域 |
②提升先登记,var 先 undefined,函数整体来 |
为什么能提前调用函数 / var 提前是 undefined |
let/const TDZ 与 var 混淆 |
| ③回调是「交给别人敲钟」,高阶函数是「函数当货传递」 | 理解异步、事件、sort 的本质 | 以为作用域随调用链传递 |
④sort 必传比较器,a-b 升序,b-a 降序 |
数组排序正确 | 不传比较器时字符串排序陷阱 |
⑤对象 {} 建模,动态键 [],方法是函数属性 |
正确读写 Object | 点语法访问动态键、含特殊字符的键 |
将这五条口诀对应到实际的控制台输出与断点调试,你获得的理解会比单纯背题更深刻、更持久。
本文基于 ECMAScript 语言规范语义撰写,所有示例均为技术演示,数据均为虚构占位符,与任何现实人物或机构无关。