目录
[MySQL 在 Centos 7环境安装](#MySQL 在 Centos 7环境安装)
[CentOS 7.6 安装 MySQL 5.7 完整流程](#CentOS 7.6 安装 MySQL 5.7 完整流程)
[第二步:获取并安装 MySQL 官方 YUM 仓库](#第二步:获取并安装 MySQL 官方 YUM 仓库)
[第三步:安装 MySQL 服务器](#第三步:安装 MySQL 服务器)
[第四步:启动并检查 MySQL 服务](#第四步:启动并检查 MySQL 服务)
MySQL 在 Centos 7环境安装
如果是其他环境下可以借助ai或者其他博客进行安装执行的操作
说明:
• 安装与卸载中,用户全部切换成为root,一旦安装,普通用户能使用的
• 初期练习,mysql不进行用户管理,全部使用root进行,尽快适应mysql语句,后面学了用户管 理,在考虑新建普通用户
CentOS 7.6 安装 MySQL 5.7 完整流程
第一步:环境准备(避免冲突)
CentOS 7 系统默认预装了 MariaDB 库,与 MySQL 直接冲突,必须先行卸载。
检查系统是否有 mariadb 相关的包
rpm -qa | grep mariadb
如果上一步有输出,则执行卸载;若无输出,可跳过此步
sudo yum remove mariadb-libs
这一步至关重要,可以避免在后续安装中出现文件冲突的错误
第二步:获取并安装 MySQL 官方 YUM 仓库
这是最关键的一步,需要下载正确的 RPM 包来添加 MySQL 源。
1. 下载 MySQL 5.7 的官方仓库 RPM 包
wget https://dev.mysql.com/get/mysql57-community-release-el7-11.noarch.rpm
2. 安装这个 RPM 包,将 MySQL 的官方 YUM 源添加到你的系统中
sudo rpm -ivh mysql57-community-release-el7-11.noarch.rpm
注意 :若 wget 命令提示未找到,请先运行 sudo yum install -y wget 进行安装
第三步:安装 MySQL 服务器
添加完源之后,就可以像安装普通软件一样,使用 yum 轻松安装了。
sudo yum install -y mysql-community-server
如果在安装过程中遇到 GPG 密钥验证失败 的错误,无需担心,这是因为 MySQL 官方在 2023 年更新了 GPG 密钥,按以下步骤导入新密钥后,重新执行安装命令即可
# 导入新的 MySQL GPG 密钥(2022 年之后的版本)
sudo rpm --import https://repo.mysql.com/RPM-GPG-KEY-mysql-2022

# 重新安装 MySQL 服务器
sudo yum install -y mysql-community-server
确实是否安装成功
[root@iZ5waahoxw3q2bZ ~]# ls /etc/my.cnf
/etc/my.cnf
[root@iZ5waahoxw3q2bZ ~]# which mysqld
/usr/sbin/mysqld
[root@iZ5waahoxw3q2bZ ~]# which mysql
/usr/bin/mysql
which mysqld要确保mysql服务端的程序要有
which mysql要确保有mysql这样的客户端
第四步:启动并检查 MySQL 服务
[root@iZ5waahoxw3q2bZ ~]# systemctl start mysqld
[root@iZ5waahoxw3q2bZ ~]# ps ajx | grep mysqld
    1 29678 29677 29677 ?           -1 Sl      27   0:00 /usr/sbin/mysqld --daemonize --pid-file=/var/run/mysqld/mysqld.pid
28738 29728 29727 28738 pts/1    29727 S+       0   0:00 grep --color=auto mysqld
查看mysql对应服务端口号
[root@iZ5waahoxw3q2bZ ~]# netstat -nltp
Active Internet connections (only servers)
Proto Recv-Q Send-Q Local Address           Foreign Address         State       PID/Program name
tcp        0      0 0.0.0.0:22              0.0.0.0:*               LISTEN      1149/sshd
tcp6       0      0 :::3306                 :::*                    LISTEN      29678/mysqld
登陆
登陆发现登陆不上去
[root@iZ5waahoxw3q2bZ ~]# mysql -uroot -p
Enter password:
ERROR 1045 (28000): Access denied for user 'root'@'localhost' (using password: YES)

[root@iZ5waahoxw3q2bZ ~]# systemctl start mysqld    # 打开mysql配置文件
[root@iZ5waahoxw3q2bZ ~]# vim /etc/my.cnf在mysqld最后一栏配置(不知道是什么,就放在配置文件最后) 加入: skip-grant-tables 选项, 并保存退出
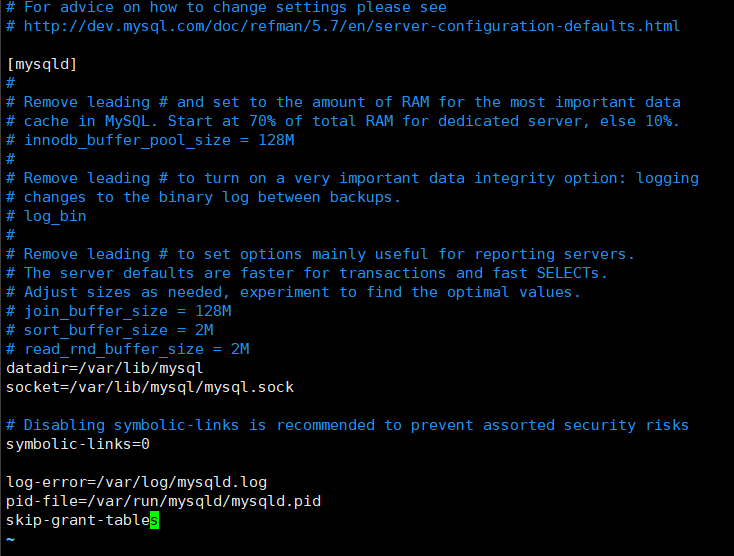
重启mysql服务
[root@iZ5waahoxw3q2bZ ~]# systemctl restart mysqld # 重启mysql服务

[root@iZ5waahoxw3q2bZ ~]# mysql -uroot
Welcome to the MySQL monitor.  Commands end with ; or \g.
Your MySQL connection id is 2
Server version: 5.7.44 MySQL Community Server (GPL)

Copyright (c) 2000, 2023, Oracle and/or its affiliates.

Oracle is a registered trademark of Oracle Corporation and/or its
affiliates. Other names may be trademarks of their respective
owners.

Type 'help;' or '\h' for help. Type '\c' to clear the current input statement.

mysql> 设置开机启动可以不设
[root@iZ5waahoxw3q2bZ ~]# systemctl enable mysqld
[root@iZ5waahoxw3q2bZ ~]# systemctl daemon-reload
配置my.cnf
配置一下my.conf,主要是数据库客户端和服务器的编码格式
port=3306;
character-set-server=utf8
default-storage-engine=innodb
[root@iZ5waahoxw3q2bZ ~]# vim /etc/my.cnf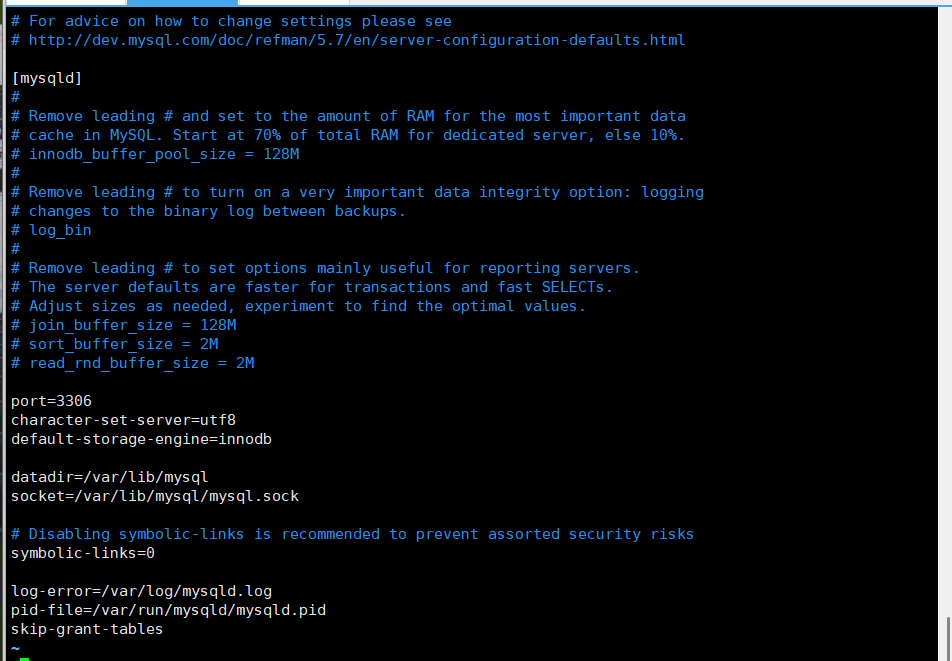 重启
重启
[root@iZ5waahoxw3q2bZ ~]# systemctl restart mysqld

[root@iZ5waahoxw3q2bZ ~]# netstat -nltp
Active Internet connections (only servers)
Proto Recv-Q Send-Q Local Address           Foreign Address         State       PID/Program name
tcp        0      0 0.0.0.0:22              0.0.0.0:*               LISTEN      1149/sshd
tcp6       0      0 :::3306                 :::*                    LISTEN      704/mysqld
感谢你的观看,启动我们下次再见!