AI 大模型飞速进化,不懂 AI、不会用 Agent 的程序员,正在慢慢被行业淘汰。现在 AI 新技术迭代快到离谱:RAG 还没学明白,MCP 接踵而来;工具刚上手,Skills、各类新 Agent 概念又轮番刷屏;Manus还没看懂,就出来OpenClaw,OpenClaw热度还没退,又出来Hermes。越追越乱、越学越焦虑,永远在被动跟风,陷入学不完、跟不上、用不上的内耗。其实焦虑的根本原因,不是新技术太多,而是不懂大模型 Agent 应用底层原理,只会零散跟风,没有通用方法论。
为此我专门推出Agent 应用实战专栏,采用Agent基础 + Agent设计模式 + 工程实践三位一体体系,帮你彻底摆脱 AI 焦虑。
专栏分为三大模块:
- Agent基础:深入浅出拆解AgentScope Java源码,掌握Agent应用基础的三驾马车(提示词、工具和记忆),夯实 Agent 开发底层根基;
- Agent设计模式:基于《agentic-design-patterns》精讲经典架构模式(提示词链、并行、路由、规划、反思、推理、人机协同等等),掌握高阶 AI 应用设计思路;
- 工程实践:手把手从零手搓简易版 OpenClaw,还原真实项目落地全流程。
学完本专栏,你将彻底吃透底层逻辑、掌握架构思维、并具备工程落地能力。未来无论再涌现 MCP、Skills 还是其他任何新技术,你都能一眼看透其本质、快速上手复用,不再盲目跟风,稳稳守住程序员的职业护城河。
注意 :由于框架的不同版本会有些使用的不同,因此本次系列中使用基本框架是agentscope-1.0.11,JDK版本使用的是open-jdk-21(agentscope-java最低要求java版本为17)。
本文章的代码地址: https://github.com/forever1986/agentscope-agent-pattern
目录
- [1 Spring Boot集成](#1 Spring Boot集成)
- [2 底层原理](#2 底层原理)
-
- [2.1 Bean注入](#2.1 Bean注入)
-
- [2.1.1 AgentscopeAutoConfiguration](#2.1.1 AgentscopeAutoConfiguration)
- [2.1.2 ModelProviderType](#2.1.2 ModelProviderType)
- [2.2 配置类](#2.2 配置类)
-
- [2.2.1 AgentscopeProperties](#2.2.1 AgentscopeProperties)
- [2.2.2 DashscopeProperties](#2.2.2 DashscopeProperties)
- [2.2.3 AgentscopeProperties](#2.2.3 AgentscopeProperties)
前两章讲解了AgentScope的入门和其ReActAgent底层源码,这一章来讲解AgentScope如何集成到Spring Boot以及底层原理。这里只涉及集成部分,关于Spring Boot的扩展点:@AutoConfiguration 这里就不做细讲。感兴趣的朋友可以去了解一下。
1 Spring Boot集成
Java的框架生态比较多,AgentScope为了适应各种框架,也做了多种开发框架集成支持,比如Spring Boot、Quarkus、Micronaut等。这里以使用比较多的Spring Boot来演示
代码参考 :lesson-quickstart子模块
1)在lesson-quickstart子模块下,其pom引入依赖:
xml
<dependencies>
    <!-- Spring Boot Web 包 -->
    <dependency>
        <groupId>org.springframework.boot</groupId>
        <artifactId>spring-boot-starter-web</artifactId>
        <version>3.3.0</version>
    </dependency>
    <!-- agentscope的 Spring Boot 集成包 -->
    <dependency>
        <groupId>io.agentscope</groupId>
        <artifactId>agentscope-spring-boot-starter</artifactId>
        <version>${agentscope.version}</version>
    </dependency>
</dependencies>
2)在lesson-quickstart子模块下的resources文件夹下面,新建application.yml配置文件:
yaml
agentscope:
  dashscope:
    api-key: ${DASHSCOPE_API_KEY}
    modelName: ${QWEN_MODEL}
    stream: false
  agent:
    enabled: true
    name: my-assistant
3)在lesson-quickstart子模块下,新建Controller访问类:
java
package com.lin.quickstart.springboot.controller;

import io.agentscope.core.ReActAgent;
import io.agentscope.core.message.Msg;
import org.springframework.beans.factory.annotation.Autowired;
import org.springframework.web.bind.annotation.GetMapping;
import org.springframework.web.bind.annotation.RequestParam;
import org.springframework.web.bind.annotation.RestController;

@RestController
public class Controller {

    // 自动注入ReActAgent
    @Autowired
    private ReActAgent reActAgent;

    // 开放一个call接口
    @GetMapping("/call")
    public String call(@RequestParam(name="msg") String msg){
        // 调用call方法返回数据
        Msg response = reActAgent.call(Msg.builder()
                .textContent(msg)
                .build()).block();

        return response==null?"":response.getTextContent();
    }
}
4)在lesson-quickstart子模块下,新建QuickStartApplication启动类:
java
package com.lin.quickstart.springboot;
import org.springframework.boot.SpringApplication;
import org.springframework.boot.autoconfigure.SpringBootApplication;
@SpringBootApplication
public class QuickStartApplication {
public static void main(String[] args) {
SpringApplication.run(QuickStartApplication.class, args);
}
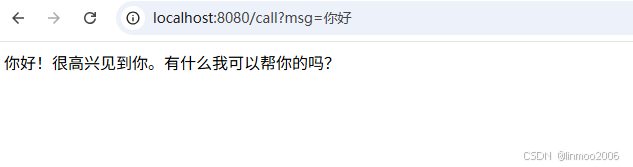
}5)启动QuickStartApplication 类,在浏览器访问:http://localhost:8080/call?msg=你好
2 底层原理
这里只讲解AgentScope如何集成到Spring Boot以及底层原理。而关于Spring Boot本身的扩展点:@AutoConfiguration 这里就不做细讲。感兴趣的朋友可以去了解一下。
你可以简单理解使用@AutoConfiguration注解的类,其底下的@Bean都会被自动注入的Spring的Bean中。下面通过几个关键类,基本上就能理解AgentScope如何集成到Spring Boot中。
2.1 Bean注入
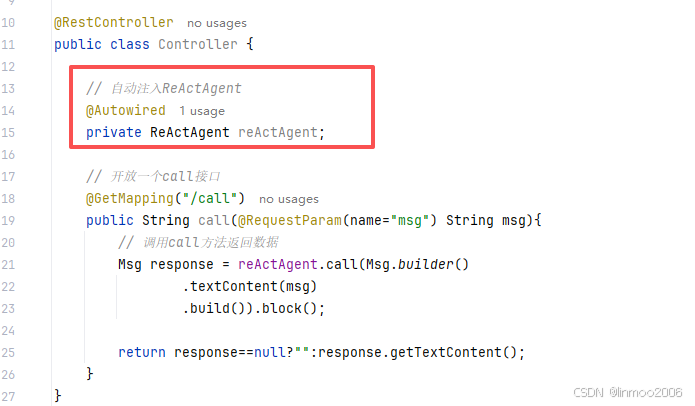
前面的示例中,Controller 通过 @Autowired 自动注入一个 ReActAgent 。那么这个 ReActAgent 什么时候被注入到Spring容器中?
Spring Boot的外部包自动注入Bean的方式之一就是 @AutoConfiguration 注解,可以看到前面示例中,引入了agentscope-spring-boot-starter的jar包,在该jar包下面,有一个 AgentscopeAutoConfiguration 类,这个类就是默认注入Bean。
2.1.1 AgentscopeAutoConfiguration
先来看看 AgentscopeAutoConfiguration 源码,其它不需要太关注,主要看注册两个Bean: Model 和 ReActAgent
java
@AutoConfiguration
@EnableConfigurationProperties(AgentscopeProperties.class)
@ConditionalOnClass(ReActAgent.class)
public class AgentscopeAutoConfiguration {

    /**
     * 创建一个大模型,根据配置创建不同厂商的大模型
     */
    @Bean
    @ConditionalOnProperty(prefix = "agentscope.agent", name = "enabled", havingValue = "true")
    @ConditionalOnMissingBean(Model.class)
    public Model agentscopeModel(AgentscopeProperties properties) {
        return ModelProviderType.fromProperties(properties).createModel(properties);
    }

    /**
     * 创建一个ReActAgent智能体
     */
    @Bean
    @ConditionalOnMissingBean
    @ConditionalOnProperty(prefix = "agentscope.agent", name = "enabled", havingValue = "true")
    @Scope(ConfigurableBeanFactory.SCOPE_PROTOTYPE)
    public ReActAgent agentscopeReActAgent(
            Model model, Memory memory, Toolkit toolkit, AgentscopeProperties properties) {
        AgentProperties config = properties.getAgent();
        return ReActAgent.builder()
                .name(config.getName())
                .sysPrompt(config.getSysPrompt())
                .model(model)
                .memory(memory)
                .toolkit(toolkit)
                .maxIters(config.getMaxIters())
                .build();
    }
}
说明:这里创建 Model 和 ReActAgent 两个类
- Model :根据AgentscopeProperties,使用ModelProviderType来创建Model
- ReActAgent :根据AgentProperties 创建一个ReActAgent
2.1.2 ModelProviderType
上面 AgentscopeAutoConfiguration 注册 Model 中,使用 ModelProviderType 来创建各类的模型, ModelProviderType 是一个枚举类,通过 AgentscopeProperties 里面配置的内容进行创建模型。AgentscopeProperties 类就是读取yaml文件的配置,下面会细讲 AgentscopeProperties 这部分。
2.2 配置类
上面在创建 Model 和 ReActAgent 时,提到了一个重要的配置文件 AgentscopeProperties 。下面来看看这个配置了哪些内容。
2.2.1 AgentscopeProperties
AgentscopeProperties 使用 @ConfigurationProperties 注解,就是用于读取application.yml文件,可以看到其里面针对不同模型、agent都定义了相关的配置类,这里重点关注 AgentProperties 和 DashscopeProperties
java
@ConfigurationProperties(prefix = "agentscope")
public class AgentscopeProperties {

		// Agent的配置
    private final AgentProperties agent = new AgentProperties();
    // Dashscope模型特有配置
    private final DashscopeProperties dashscope = new DashscopeProperties();
    // Model的配置
    private final ModelProperties model = new ModelProperties();
    // OpenAI模型特有配置
    private final OpenAIProperties openai = new OpenAIProperties();
    // Gemini模型特有配置
    private final GeminiProperties gemini = new GeminiProperties();
    // Anthropic模型特有配置
    private final AnthropicProperties anthropic = new AnthropicProperties();

}
2.2.2 DashscopeProperties
DashscopeProperties 配置类是专门用于阿里的Dashscope集成的大模型的配置类,也就是DashscopeModel,源码如下:
java
public class DashscopeProperties {

    /**
     * 是否创建一个Dashscope大模型
     */
    private boolean enabled = true;

    /**
     * 大模型的API KEY
     */
    private String apiKey;

    /**
     * 大模型的名称
     */
    private String modelName = "qwen-plus";

    /**
     * 是否使用stream方式访问
     */
    private boolean stream = true;

    /**
     * 是否启用思考模式
     */
    private Boolean enableThinking;
}
2.2.3 AgentscopeProperties
AgentscopeProperties 配置类是专门为 ReActAgent 配置设置的,源码如下:
java
public class AgentProperties {

    /**
     * 是否创建一个Agent
     */
    private boolean enabled = true;

    /**
     * Agent的名称
     */
    private String name = "Assistant";

    /**
     * Agent的系统提示词
     */
    private String sysPrompt = "You are a helpful AI assistant.";

    /**
     * 单个请求的最大 ReAct 迭代次数
     */
    private int maxIters = 10;
}
至此,关于AgentScope集成到Spring Boot的底层源码就已经比较清晰。通过 AgentscopeAutoConfiguration 注入各种需要的类,而yaml文件的配置,则通过各种配置类进行读取,提供给 AgentscopeAutoConfiguration 使用
总结:本章演示和解析了AgentScope如何与SpringBoot集成的方式,将Agent发布为一个web形式。从这里可以说明AgentScope是一个对java非常友好的框架。下一章将讲解AgentScope的模型集成,也就是匹配目前市面上哪些大语言模型。