文章目录
测试平台:Ubuntu 22.04
cocotb安装
参考:https://docs.cocotb.org/en/stable/install.html
shell
pip3 install "cocotb~=2.0"安装成功验证
shell
# 默认安装在 ~/.local/bin 路径下,需要添加到PATH中
cocotb-config --version 
仿真及波形查看工具安装
仿真器使用iverilog
波形查看使用gtkwave
shell
sudo apt-get install iverilog
sudo apt-get install gtkwave
安装成功验证
shell
which iverilog
which vvp
which gtkwave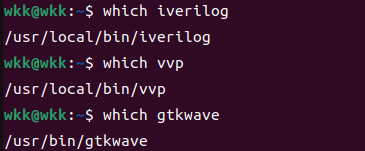
基本使用Makefile
shell
top  ?= top
file ?= ./file.f

.PHONY: cmp ncrun run gtkwave clean

cmp: clean
    @iverilog -o $(top) -c $(file)
ncrun:
    @vvp -n $(top) -fst
gtkwave:
    @gtkwave wave.vcd &
clean:
    rm -rf *.vcd $(top)

run: cmp ncrun
保存波形,文件中添加:
veirlog
initial begin
    $dumpfile("wave.vcd");        //生成的vcd文件名称
    $dumpvars(0, 顶层模块名字);    //保存的信号层次
end
基本例子
参考:https://docs.cocotb.org/en/stable/quickstart.html
my_design.sv
verilog
`timescale 1ns/1ns
module my_design(input clk);

  wire my_signal_1;
  wire my_signal_2;

  assign my_signal_1 = 1'bx;
  assign my_signal_2 = 0;

endmodul
test_my_design.py
python
# test_my_design.py (simple)

import cocotb
from cocotb.triggers import Timer


@cocotb.test()
async def my_first_test(dut):
    """Try accessing the design."""

    for _ in range(10):
        dut.clk.value = 0
        await Timer(1, unit="ns")
        dut.clk.value = 1
        await Timer(1, unit="ns")

    cocotb.log.info("my_signal_1 is %s", dut.my_signal_1.value)
    assert dut.my_signal_2.value == 0
Makefile
makefile
# Makefile

# defaults
SIM ?= icarus
TOPLEVEL_LANG ?= verilog

VERILOG_SOURCES += $(PWD)/my_design.sv
# use VHDL_SOURCES for VHDL files

# COCOTB_TOPLEVEL is the name of the toplevel module in your Verilog or VHDL file
COCOTB_TOPLEVEL = my_design

# COCOTB_TEST_MODULES is the basename of the Python test file(s)
COCOTB_TEST_MODULES = test_my_design

# include cocotb's make rules to take care of the simulator setup
include $(shell cocotb-config --makefiles)/Makefile.sim
运行
shell
# 不保存波形
make
# 保存波形
make WAVES=1