目录
一、认识Transformer架构
1、Transformer模型的作用
基于seq2seq架构的transformer模型可以完成NLP领域研究的典型任务, 如机器翻译, 文本生成等,同时又可以构建预训练语言模型,用于不同任务的迁移学习。
2、Transformer的架构图
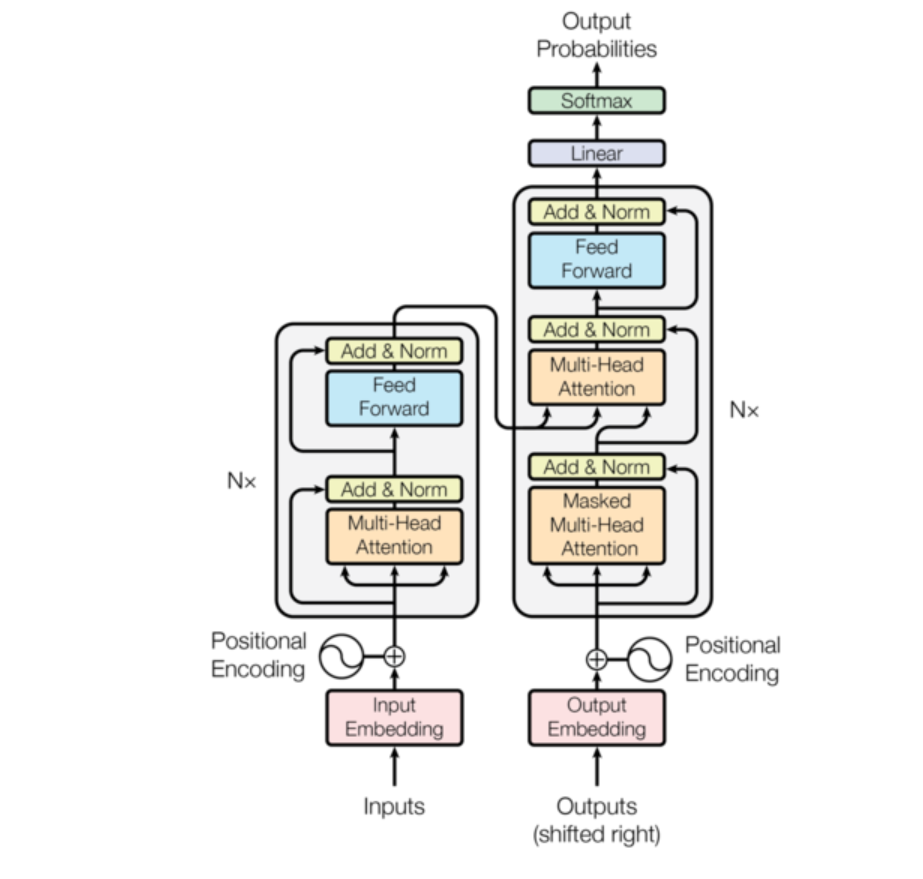
3、Transformer的组成部分
✅ 输入部分
✅ 输出部分
✅ 编码器
✅ 解码器
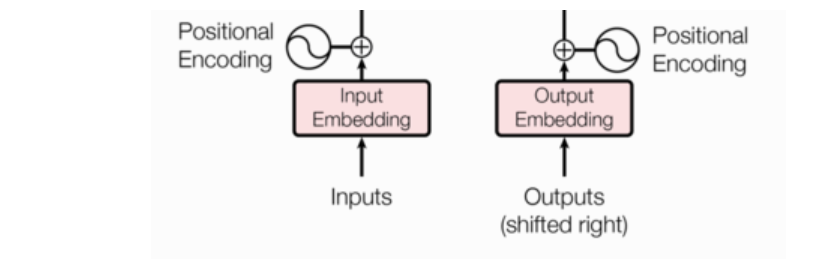
(1) 输入部分包括
- 源文本嵌入层及其位置编码器
- 目标文本嵌入层及其位置编码器
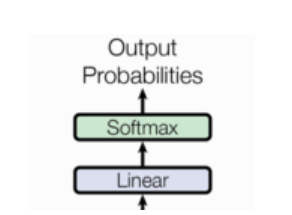
(2)输出部分包括
- 线性层
- softmax层
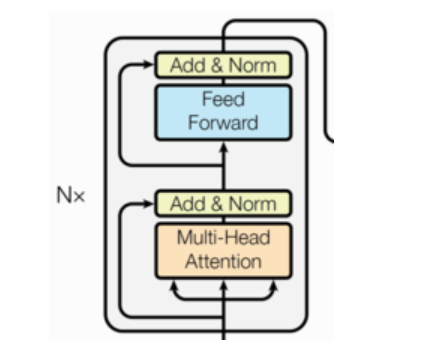
(3)编码器
- 由N个编码器层堆叠而成
- 每个编码器层由两个子层连接结构组成
- 第一个子层连接结构包括一个多头自注意力子层和规范化层以及一个残差连接
- 第二个子层连接结构包括一个前馈全连接子层和规范化层以及一个残差连接
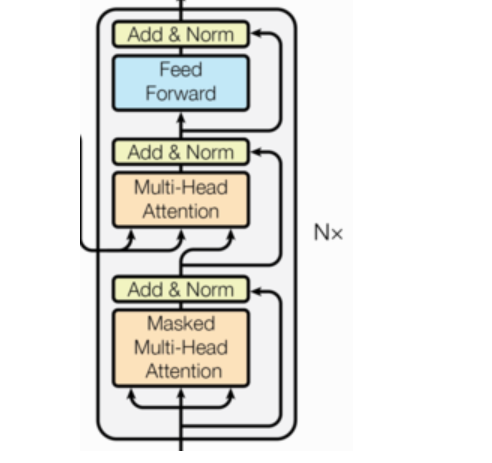
(4) 解码器
- 由N个解码器层堆叠而成
- 每个解码器层由三个子层连接结构组成
- 第一个子层连接结构包括一个多头自注意力子层和规范化层以及一个残差连接
- 第二个子层连接结构包括一个多头注意力子层和规范化层以及一个残差连接
- 第三个子层连接结构包括一个前馈全连接子层和规范化层以及一个残差连接
二、输入部分实现
1、文本嵌入层的作用
-
无论是源文本嵌入还是目标文本嵌入,都是为了将文本中词汇的数字表示转变为向量表示, 希望在这样的高维空间捕捉词汇间的关系。
-
文本嵌入层代码实现
python
# 导入必备的工具包
import torch

# 预定义的网络层torch.nn, 工具开发者已经帮助我们开发好的一些常用层,
# 比如,卷积层, lstm层, embedding层等, 不需要我们再重新造轮子.
import torch.nn as nn

# 数学计算工具包
import math

# torch中变量封装函数Variable.
from torch.autograd import Variable


# Embeddings类 实现思路分析
# 1 init函数 (self, d_model, vocab)
    # 设置类属性 定义词嵌入层 self.lut层
# 2 forward(x)函数
    # self.lut(x) * math.sqrt(self.d_model)
class Embeddings(nn.Module):
    def __init__(self, d_model, vocab):
        # 参数d_model 每个词汇的特征尺寸 词嵌入维度
        # 参数vocab   词汇表大小
        super(Embeddings, self).__init__()
        self.d_model = d_model
        self.vocab = vocab

        # 定义词嵌入层
        self.lut = nn.Embedding(self.vocab, self.d_model)

    def forward(self, x):
        # 将x传给self.lut并与根号下self.d_model相乘作为结果返回
        # x经过词嵌入后 增大x的值, 词嵌入后的embedding_vector+位置编码信息,值量纲差差不多
        return self.lut(x) * math.sqrt(self.d_model)
运行结果;
python
>>> embedding = nn.Embedding(10, 3)
>>> input = torch.LongTensor([[1,2,4,5],[4,3,2,9]])
>>> embedding(input)
tensor([[[-0.0251, -1.6902,  0.7172],
         [-0.6431,  0.0748,  0.6969],
         [ 1.4970,  1.3448, -0.9685],
         [-0.3677, -2.7265, -0.1685]],

        [[ 1.4970,  1.3448, -0.9685],
         [ 0.4362, -0.4004,  0.9400],
         [-0.6431,  0.0748,  0.6969],
         [ 0.9124, -2.3616,  1.1151]]])


>>> embedding = nn.Embedding(10, 3, padding_idx=0)
>>> input = torch.LongTensor([[0,2,0,5]])
>>> embedding(input)
tensor([[[ 0.0000,  0.0000,  0.0000],
         [ 0.1535, -2.0309,  0.9315],
         [ 0.0000,  0.0000,  0.0000],
         [-0.1655,  0.9897,  0.0635]]])
调用:
python
def dm_test_Embeddings():
    d_model = 512   # 词嵌入维度是512维
    vocab = 1000    # 词表大小是1000
    # 实例化词嵌入层
    my_embeddings = Embeddings(d_model, vocab)
    x = Variable(torch.LongTensor([[100,2,421,508],[491,998,1,221]]))
    embed = my_embeddings(x)
    print('embed.shape', embed.shape, '\nembed--->\n',embed)
运行结果:
python
embed.shape torch.Size([2, 4, 512])
embed--->
 tensor([[[-19.0429, -44.2167,   2.6662,  ..., -21.1199, -36.5275, -15.6872],
         [-25.4621,  25.6046, -45.5382,  ...,  43.7159,   0.9437,  -3.1733],
         [-15.7487,   8.1787, -20.6409,  ...,  -8.7201,  -3.2585, -22.1298],
         [ 21.5044,   2.0660,  -1.4059,  ...,  -6.3673,   3.4387, -22.4600]],

        [[ 15.7010,   2.6187,  14.1192,  ..., -19.1751,  10.5954,   9.1155],
         [-21.5745,   9.6403,  17.9778,  ...,   2.3668,  30.1526, -30.3724],
         [-17.6655,  33.6687,  19.3059,  ..., -10.6276,  -0.8653,  10.0715],
         [ 12.9400, -23.6355,  -2.4750,  ...,  19.1028,   6.6492, -45.1315]]],
       grad_fn=<MulBackward0>)
2、位置编码的作用
因为在Transformer的编码器结构中, 并没有针对词汇位置信息的处理,因此需要在Embedding层后加入位置编码器,将词汇位置不同可能会产生不同语义的信息加入到词嵌入张量中, 以弥补位置信息的缺失.
代码如下:
python
# 位置编码器类PositionalEncoding 实现思路分析
# 1 init函数  (self, d_model, dropout, max_len=5000)
#   super()函数 定义层self.dropout
#   定义位置编码矩阵pe  定义位置列-矩阵position 定义变化矩阵div_term
#   套公式div_term = torch.exp(torch.arange(0, d_model, 2) * -(math.log(10000.0)/d_model))
#   位置列-矩阵 * 变化矩阵 阿达码积my_matmulres
#   给pe矩阵偶数列奇数列赋值 pe[:, 0::2] pe[:, 1::2]
#   pe矩阵注册到模型缓冲区 pe.unsqueeze(0)三维 self.register_buffer('pe', pe)
# 2 forward(self, x) 返回self.dropout(x)
#   给x数据添加位置特征信息 x = x + Variable( self.pe[:,:x.size()[1]], requires_grad=False)

class PositionalEncoding(nn.Module):
    def __init__(self, d_model, dropout, max_len=5000):
        # 参数d_model 词嵌入维度 eg: 512个特征
        # 参数max_len 单词token个数 eg: 60个单词
        super(PositionalEncoding, self).__init__()

        # 定义dropout层
        self.dropout = nn.Dropout(p=dropout)

        # 思路:位置编码矩阵 + 特征矩阵 相当于给特征增加了位置信息
        # 定义位置编码矩阵PE eg pe[60, 512], 位置编码矩阵和特征矩阵形状是一样的
        pe = torch.zeros(max_len, d_model)

        # 定义位置列-矩阵position  数据形状[max_len,1] eg: [0,1,2,3,4...60]^T
        position = torch.arange(0, max_len).unsqueeze(1)
        # print('position--->', position.shape, position)

        # 定义变化矩阵div_term [1,256]
        # torch.arange(start=1, end=512, 2)结果并不包含end。在start和end之间做一个等差数组 [0, 2, 4, 6 ... 510]
        div_term = torch.exp(torch.arange(0, d_model, 2) * -(math.log(10000.0) / d_model))

        # 位置列-矩阵 @ 变化矩阵 做矩阵运算 [60*1]@ [1*256] ==> 60 *256
        # 矩阵相乘也就是行列对应位置相乘再相加,其含义,给每一个列属性(列特征)增加位置编码信息
        my_matmulres = position * div_term
        # print('my_matmulres--->', my_matmulres.shape, my_matmulres)

        # 给位置编码矩阵奇数列,赋值sin曲线特征
        pe[:, 0::2] = torch.sin(my_matmulres)
        # 给位置编码矩阵偶数列,赋值cos曲线特征
        pe[:, 1::2] = torch.cos(my_matmulres)

        # 形状变化 [60,512]-->[1,60,512]
        pe = pe.unsqueeze(0)

        # 把pe位置编码矩阵 注册成模型的持久缓冲区buffer; 模型保存再加载时,可以根模型参数一样,一同被加载
        # 什么是buffer: 对模型效果有帮助的,但是却不是模型结构中超参数或者参数,不参与模型训练
        self.register_buffer('pe', pe)

    def forward(self, x):
        # 注意:输入的x形状2*4*512  pe是1*60*512 形状 如何进行相加
        # 只需按照x的单词个数 给特征增加位置信息
        x = x + Variable( self.pe[:,:x.size()[1]], requires_grad=False)
        return self.dropout(x)
调用:
python
def dm_test_PositionalEncoding():

    d_model = 512  # 词嵌入维度是512维
    vocab = 1000  # 词表大小是1000

    # 1 实例化词嵌入层
    my_embeddings = Embeddings(d_model, vocab)

    # 2 让数据经过词嵌入层 [2,4] --->[2,4,512]
    x = Variable(torch.LongTensor([[100, 2, 421, 508], [491, 998, 1, 221]]))
    embed = my_embeddings(x)
    # print('embed--->', embed.shape)

    # 3 创建pe位置矩阵 生成位置特征数据[1,60,512]
    my_pe = PositionalEncoding(d_model=d_model, dropout=0.1, max_len=60)

    # 4 给词嵌入数据embed 添加位置特征 [2,4,512] ---> [2,4,512]
    pe_result = my_pe(embed)
    print('pe_result.shape--->', pe_result.shape)
    print('pe_result--->', pe_result)
三、编码器部分实现
1、生成掩码张量
python
# 上三角矩阵:下面矩阵中0组成的形状为上三角矩阵
'''
[[[0. 1. 1. 1. 1.]
  [0. 0. 1. 1. 1.]
  [0. 0. 0. 1. 1.]
  [0. 0. 0. 0. 1.]
  [0. 0. 0. 0. 0.]]]

# nn.triu()函数功能介绍
# def triu(m, k)
    # m:表示一个矩阵
    # K:表示对角线的起始位置(k取值默认为0)
    # return: 返回函数的上三角矩阵
'''

def dm_test_nptriu():
    # 测试产生上三角矩阵
    print(np.triu([[1, 1, 1, 1, 1],
                   [2, 2, 2, 2, 2],
                   [3, 3, 3, 3, 3],
                   [4, 4, 4, 4, 4],
                   [5, 5, 5, 5, 5]], k=1))
    print(np.triu([[1, 1, 1, 1, 1],
                   [2, 2, 2, 2, 2],
                   [3, 3, 3, 3, 3],
                   [4, 4, 4, 4, 4],
                   [5, 5, 5, 5, 5]], k=0))
    print(np.triu([[1, 1, 1, 1, 1],
                   [2, 2, 2, 2, 2],
                   [3, 3, 3, 3, 3],
                   [4, 4, 4, 4, 4],
                   [5, 5, 5, 5, 5]], k=-1))

# 结果输出:
[[0 1 1 1 1]
 [0 0 2 2 2]
 [0 0 0 3 3]
 [0 0 0 0 4]
 [0 0 0 0 0]]

[[1 1 1 1 1]
 [0 2 2 2 2]
 [0 0 3 3 3]
 [0 0 0 4 4]
 [0 0 0 0 5]]

[[1 1 1 1 1]
 [2 2 2 2 2]
 [0 3 3 3 3]
 [0 0 4 4 4]
 [0 0 0 5 5]]
2、注意力机制
python
# 自注意力机制函数attention 实现思路分析
# attention(query, key, value, mask=None, dropout=None)
# 1 求查询张量特征尺寸大小 d_k
# 2 求查询张量q的权重分布socres  q@k^T /math.sqrt(d_k)
# 形状[2,4,512] @ [2,512,4] --->[2,4,4]
# 3 是否对权重分布scores进行 scores.masked_fill(mask == 0, -1e9)
# 4 求查询张量q的权重分布 p_attn F.softmax()
# 5 是否对p_attn进行dropout if dropout is not None:
# 6 求查询张量q的注意力结果表示 [2,4,4]@[2,4,512] --->[2,4,512]
# 7 返回q的注意力结果表示 q的权重分布

def attention(query, key, value, mask=None, dropout=None):
    # query, key, value:代表注意力的三个输入张量
    # mask:代表掩码张量
    # dropout:传入的dropout实例化对象

    # 1 求查询张量特征尺寸大小
    d_k = query.size()[-1]

    # 2 求查询张量q的权重分布socres  q@k^T /math.sqrt(d_k)
    # [2,4,512] @ [2,512,4] --->[2,4,4]
    scores =  torch.matmul(query, key.transpose(-2, -1) ) / math.sqrt(d_k)

   # 3 是否对权重分布scores 进行 masked_fill
    if mask is not None:
        # 根据mask矩阵0的位置 对sorces矩阵对应位置进行掩码
        scores = scores.masked_fill(mask == 0, -1e9)

    # 4 求查询张量q的权重分布 softmax
    p_attn = F.softmax(scores, dim=-1)

    # 5 是否对p_attn进行dropout
    if dropout is not None:
        p_attn = dropout(p_attn)

    # 返回 查询张量q的注意力结果表示 bmm-matmul运算, 注意力查询张量q的权重分布p_attn
    # [2,4,4]*[2,4,512] --->[2,4,512]
    return torch.matmul(p_attn, value), p_attn
四、解码器部分实现
1、解码器层实现
python
# 解码器层类 DecoderLayer 实现思路分析
# init函数 (self, size, self_attn, src_attn, feed_forward, dropout)
    # 词嵌入维度尺寸大小size 自注意力机制层对象self_attn 一般注意力机制层对象src_attn 前馈全连接层对象feed_forward
    # clones3子层连接结构 self.sublayer = clones(SublayerConnection(size,dropout),3)
# forward函数 (self, x, memory, source_mask, target_mask)
    # 数据经过子层连接结构1 self.sublayer[0](x, lambda x:self.self_attn(x, x, x, target_mask))
    # 数据经过子层连接结构2 self.sublayer[1](x, lambda x:self.src_attn(x, m, m, source_mask))
    # 数据经过子层连接结构3 self.sublayer[2](x, self.feed_forward)

class DecoderLayer(nn.Module):
    def __init__(self, size, self_attn, src_attn, feed_forward, dropout):
        super(DecoderLayer, self).__init__()
        # 词嵌入维度尺寸大小
        self.size = size
        # 自注意力机制层对象 q=k=v
        self.self_attn = self_attn
        # 一遍注意力机制对象 q!=k=v
        self.src_attn = src_attn
        # 前馈全连接层对象
        self.feed_forward = feed_forward
        # clones3子层连接结构
        self.sublayer = clones(SublayerConnection(size, dropout), 3)

    def forward(self, x, memory, source_mask, target_mask):
        m = memory
        # 数据经过子层连接结构1
        x = self.sublayer[0](x, lambda x:self.self_attn(x, x, x, target_mask))
        # 数据经过子层连接结构2
        x = self.sublayer[1](x, lambda x:self.src_attn (x, m, m, source_mask))
        # 数据经过子层连接结构3
        x = self.sublayer[2](x, self.feed_forward)
        return  x
2、函数调用
python
def dm_test_DecoderLayer():
    d_model = 512
    vocab = 1000  # 词表大小是1000
    # 输入x 是一个使用Variable封装的长整型张量, 形状是2 x 4
    x = Variable(torch.LongTensor([[100, 2, 421, 508], [491, 998, 1, 221]]))

    emb = Embeddings(d_model, vocab)
    embr = emb(x)

    dropout = 0.2
    max_len = 60  # 句子最大长度
    x = embr  # [2, 4, 512]
    pe = PositionalEncoding(d_model, dropout, max_len)
    pe_result = pe(x)
    x = pe_result  # 获取位置编码器层 编码以后的结果


    # 类的实例化参数与解码器层类似, 相比多出了src_attn, 但是和self_attn是同一个类.
    head = 8
    d_ff = 64
    size = 512
    self_attn = src_attn = MultiHeadedAttention(head, d_model, dropout)

    # 前馈全连接层也和之前相同
    ff = PositionwiseFeedForward(d_model, d_ff, dropout)
    x = pe_result

    # 产生编码器结果 # 注意此函数返回编码以后的结果 要有返回值
    en_result = dm_test_Encoder()
    memory = en_result
    mask = Variable(torch.zeros(8, 4, 4))
    source_mask = target_mask = mask

    # 实例化解码器层 对象
    dl = DecoderLayer(size, self_attn, src_attn, ff, dropout)

    # 对象调用
    dl_result = dl(x, memory, source_mask, target_mask)

    print(dl_result.shape)
    print(dl_result)
3、代码分析
python
# 解码器类 Decoder 实现思路分析
# init函数 (self, layer, N):
    # self.layers clones N个解码器层clones(layer, N)
    # self.norm 定义规范化层 LayerNorm(layer.size)
# forward函数 (self, x, memory, source_mask, target_mask)
    # 数据以此经过各个子层  x = layer(x, memory, source_mask, target_mask)
    # 数据最后经过规范化层  return self.norm(x)
    # 返回处理好的数据

class Decoder(nn.Module):

    def __init__(self, layer, N):
        # 参数layer 解码器层对象
        # 参数N 解码器层对象的个数

        super(Decoder, self).__init__()

        # clones N个解码器层
        self.layers = clones(layer, N)

        # 定义规范化层
        self.norm = LayerNorm(layer.size)

    def forward(self, x, memory, source_mask, target_mask):

        # 数据以此经过各个子层
        for layer in self.layers:
            x = layer(x, memory, source_mask, target_mask)

        # 数据最后经过规范化层
        return self.norm(x)
4、调用
python
# 测试 解码器
def dm_test_Decoder():
    d_model = 512
    vocab = 1000  # 词表大小是1000
    # 输入x 是一个使用Variable封装的长整型张量, 形状是2 x 4
    x = Variable(torch.LongTensor([[100, 2, 421, 508], [491, 998, 1, 221]]))

    emb = Embeddings(d_model, vocab)
    embr = emb(x)

    dropout = 0.2
    max_len = 60  # 句子最大长度
    x = embr  # [2, 4, 512]
    pe = PositionalEncoding(d_model, dropout, max_len)
    pe_result = pe(x)
    x = pe_result  # 获取位置编码器层 编码以后的结果


    # 分别是解码器层layer和解码器层的个数N
    size = 512
    d_model = 512
    head = 8
    d_ff = 64
    dropout = 0.2
    c = copy.deepcopy

    # 多头注意力对象
    attn = MultiHeadedAttention(head, d_model)

    # 前馈全连接层
    ff = PositionwiseFeedForward(d_model, d_ff, dropout)

    # 解码器层
    layer = DecoderLayer(d_model, c(attn), c(attn), c(ff), dropout)
    N = 6
    # 输入参数与解码器层的输入参数相同
    x = pe_result

    # 产生编码器结果
    en_result = demo238_test_Encoder()
    memory = en_result

    # 掩码对象
    mask = Variable(torch.zeros(8, 4, 4))

    # sorce掩码 target掩码
    source_mask = target_mask = mask

    # 创建 解码器 对象
    de = Decoder(layer, N)

    # 解码器对象 解码
    de_result = de(x, memory, source_mask, target_mask)
    print(de_result)
    print(de_result.shape)
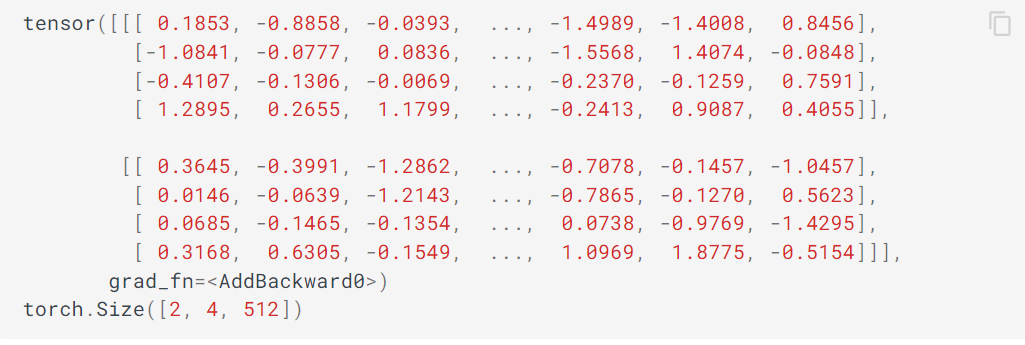
结果如下:
五、输出部分实现
1、代码分析
python
# 解码器类 Generator 实现思路分析
# init函数 (self, d_model, vocab_size)
    # 定义线性层self.project
# forward函数 (self, x)
    # 数据 F.log_softmax(self.project(x), dim=-1)

class Generator(nn.Module):
    def __init__(self, d_model, vocab_size):
        # 参数d_model 线性层输入特征尺寸大小
        # 参数vocab_size 线层输出尺寸大小
        super(Generator, self).__init__()
        # 定义线性层
        self.project = nn.Linear(d_model, vocab_size)

    def forward(self, x):
        # 数据经过线性层 最后一个维度归一化 log方式
        x = F.log_softmax(self.project(x), dim=-1)
        return x
2、函数调用
python
if __name__ == '__main__':

    # 实例化output层对象
    d_model = 512
    vocab_size = 1000
    my_generator = Generator(d_model, vocab_size )

    # 准备模型数据
    x = torch.randn(2, 4, 512)

    # 数据经过out层
    gen_result = my_generator(x)
    print('gen_result--->', gen_result.shape, '\n', gen_result)
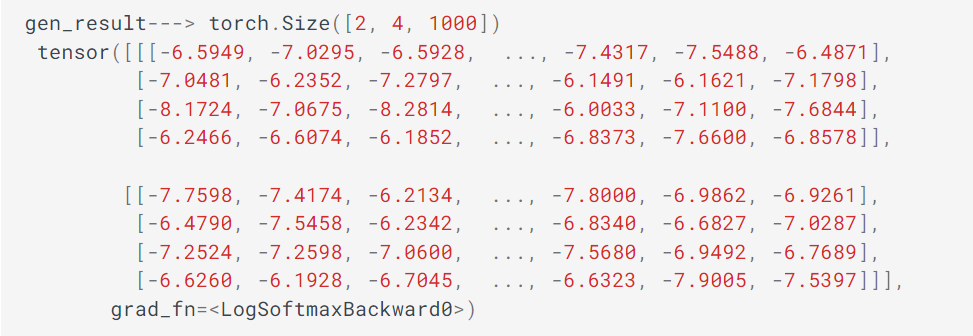
3、输出效果
六、模型构建
1、编码器
python
# 编码解码内部函数类 EncoderDecoder 实现分析
# init函数 (self, encoder, decoder, source_embed, target_embed, generator)
    # 5个成员属性赋值 encoder 编码器对象 decoder 解码器对象 source_embed source端词嵌入层对象
    # target_embed target端词嵌入层对象 generator 输出层对象
# forward函数 (self, source,  target, source_mask, target_mask)
    # 1 编码 s.encoder(self.src_embed(source), source_mask)
    # 2 解码 s.decoder(self.tgt_embed(target), memory, source_mask, target_mask)
    # 3 输出 s.generator()

# 使用EncoderDecoder类来实现编码器-解码器结构
class EncoderDecoder(nn.Module):
    def __init__(self, encoder, decoder, source_embed, target_embed, generator):
        """初始化函数中有5个参数, 分别是编码器对象, 解码器对象,
           源数据嵌入函数, 目标数据嵌入函数,  以及输出部分的类别生成器对象
        """
        super(EncoderDecoder, self).__init__()
        # 将参数传入到类中
        self.encoder = encoder
        self.decoder = decoder
        self.src_embed = source_embed
        self.tgt_embed = target_embed
        self.generator = generator

    def forward(self, source, target, source_mask, target_mask):
        """在forward函数中,有四个参数, source代表源数据, target代表目标数据,
           source_mask和target_mask代表对应的掩码张量"""

        # 在函数中, 将source, source_mask传入编码函数, 得到结果后,
        # 与source_mask,target,和target_mask一同传给解码函数
        return self.generator(self.decode(self.encode(source, source_mask),
                                          source_mask, target, target_mask))

    def encode(self, source, source_mask):
        """编码函数, 以source和source_mask为参数"""
        # 使用src_embed对source做处理, 然后和source_mask一起传给self.encoder
        return self.encoder(self.src_embed(source), source_mask)

    def decode(self, memory, source_mask, target, target_mask):
        """解码函数, 以memory即编码器的输出, source_mask, target, target_mask为参数"""
        # 使用tgt_embed对target做处理, 然后和source_mask, target_mask, memory一起传给self.decoder
        return self.decoder(self.tgt_embed(target), memory, source_mask, target_mask)
2、实例化参数
python
vocab_size = 1000
d_model = 512
encoder = en
decoder = de
source_embed = nn.Embedding(vocab_size, d_model)
target_embed = nn.Embedding(vocab_size, d_model)
generator = gen
3、输入参数
python
# 假设源数据与目标数据相同, 实际中并不相同
source = target = Variable(torch.LongTensor([[100, 2, 421, 508], [491, 998, 1, 221]]))

# 假设src_mask与tgt_mask相同,实际中并不相同
source_mask = target_mask = Variable(torch.zeros(8, 4, 4))
4、调用
python
ed = EncoderDecoder(encoder, decoder, source_embed, target_embed, generator)
ed_result = ed(source, target, source_mask, target_mask)
print(ed_result)
print(ed_result.shape)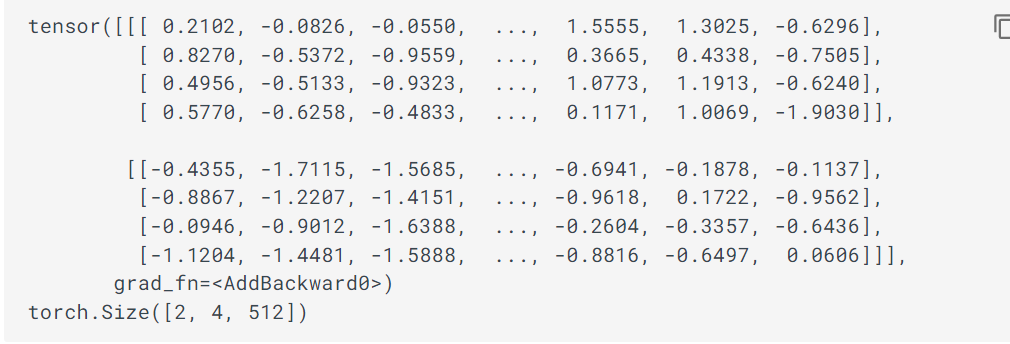
5、Transformer构建过程
python
# make_model函数实现思路分析
# 函数原型 (source_vocab, target_vocab, N=6, d_model=512, d_ff=2048, head=8, dropout=0.1)
# 实例化多头注意力层对象 attn
# 实例化前馈全连接对象ff
# 实例化位置编码器对象position
# 构建 EncoderDecoder对象(Encoder对象, Decoder对象,
    # source端输入部分nn.Sequential(),
    # target端输入部分nn.Sequential(),
    # 线性层输出Generator)
# 对模型参数初始化 nn.init.xavier_uniform_(p)
# 注意使用 c = copy.deepcopy
# 返回model

def make_model(source_vocab, target_vocab, N=6,
               d_model=512, d_ff=2048, head=8, dropout=0.1):
    c = copy.deepcopy
    # 实例化多头注意力层对象
    attn = MultiHeadedAttention(head=8, embedding_dim= 512, dropout=dropout)

    # 实例化前馈全连接对象ff
    ff = PositionwiseFeedForward(d_model=d_model, d_ff=d_ff, dropout=dropout)

    # 实例化 位置编码器对象position
    position = PositionalEncoding(d_model=d_model, dropout=dropout)

    # 构建 EncoderDecoder对象
    model = EncoderDecoder(
        # 编码器对象
        Encoder( EncoderLayer(d_model, c(attn), c(ff), dropout), N),
        # 解码器对象
        Decoder(DecoderLayer(d_model, c(attn), c(attn), c(ff),dropout), N),
        # 词嵌入层 位置编码器层容器
        nn.Sequential(Embeddings(d_model, source_vocab), c(position)),
        # 词嵌入层 位置编码器层容器
        nn.Sequential(Embeddings(d_model, target_vocab), c(position)),
        # 输出层对象
        Generator(d_model, target_vocab))

    for p in model.parameters():
        if p.dim() > 1:
            nn.init.xavier_uniform_(p)

return model- nn.init.xavier_uniform演示:
python
# 结果服从均匀分布U(-a, a)
>>> w = torch.empty(3, 5)
>>> w = nn.init.xavier_uniform_(w, gain=nn.init.calculate_gain('relu'))
>>> w
tensor([[-0.7742,  0.5413,  0.5478, -0.4806, -0.2555],
        [-0.8358,  0.4673,  0.3012,  0.3882, -0.6375],
        [ 0.4622, -0.0794,  0.1851,  0.8462, -0.3591]])
函数调用
python
def dm_test_make_model():
    source_vocab = 500
    target_vocab = 1000
    N = 6

    my_transform_modelobj = make_model(source_vocab, target_vocab,
                                       N=6, d_model=512, d_ff=2048, head=8, dropout=0.1)
    print(my_transform_modelobj)

    # 假设源数据与目标数据相同, 实际中并不相同
    source = target = Variable(torch.LongTensor([[1, 2, 3, 8], [3, 4, 1, 8]]))

    # 假设src_mask与tgt_mask相同,实际中并不相同
    source_mask = target_mask = Variable(torch.zeros(8, 4, 4))  #
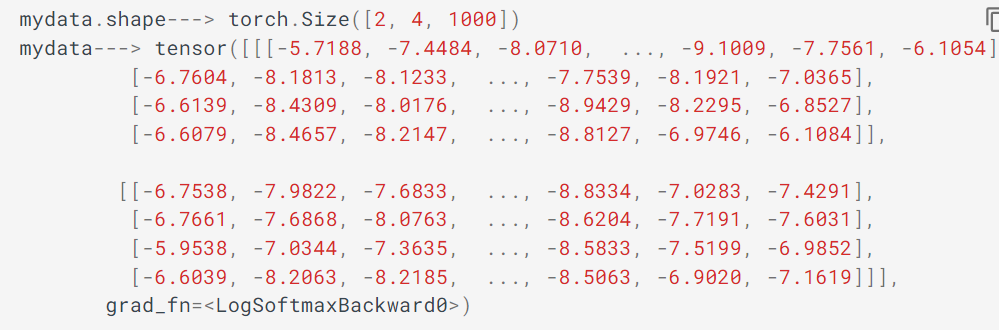
    mydata = my_transform_modelobj(source, target, source_mask, target_mask)
    print('mydata.shape--->', mydata.shape)
    print('mydata--->', mydata)
输出效果一:
输出效果二;
python
# 根据Transformer结构图构建的最终模型结构
EncoderDecoder(
  (encoder): Encoder(
    (layers): ModuleList(
      (0): EncoderLayer(
        (self_attn): MultiHeadedAttention(
          (linears): ModuleList(
            (0): Linear(in_features=512, out_features=512)
            (1): Linear(in_features=512, out_features=512)
            (2): Linear(in_features=512, out_features=512)
            (3): Linear(in_features=512, out_features=512)
          )
          (dropout): Dropout(p=0.1)
        )
        (feed_forward): PositionwiseFeedForward(
          (w_1): Linear(in_features=512, out_features=2048)
          (w_2): Linear(in_features=2048, out_features=512)
          (dropout): Dropout(p=0.1)
        )
        (sublayer): ModuleList(
          (0): SublayerConnection(
            (norm): LayerNorm(
            )
            (dropout): Dropout(p=0.1)
          )
          (1): SublayerConnection(
            (norm): LayerNorm(
            )
            (dropout): Dropout(p=0.1)
          )
        )
      )
      (1): EncoderLayer(
        (self_attn): MultiHeadedAttention(
          (linears): ModuleList(
            (0): Linear(in_features=512, out_features=512)
            (1): Linear(in_features=512, out_features=512)
            (2): Linear(in_features=512, out_features=512)
            (3): Linear(in_features=512, out_features=512)
          )
          (dropout): Dropout(p=0.1)
        )
        (feed_forward): PositionwiseFeedForward(
          (w_1): Linear(in_features=512, out_features=2048)
          (w_2): Linear(in_features=2048, out_features=512)
          (dropout): Dropout(p=0.1)
        )
        (sublayer): ModuleList(
          (0): SublayerConnection(
            (norm): LayerNorm(
            )
            (dropout): Dropout(p=0.1)
          )
          (1): SublayerConnection(
            (norm): LayerNorm(
            )
            (dropout): Dropout(p=0.1)
          )
        )
      )
    )
    (norm): LayerNorm(
    )
  )
  (decoder): Decoder(
    (layers): ModuleList(
      (0): DecoderLayer(
        (self_attn): MultiHeadedAttention(
          (linears): ModuleList(
            (0): Linear(in_features=512, out_features=512)
            (1): Linear(in_features=512, out_features=512)
            (2): Linear(in_features=512, out_features=512)
            (3): Linear(in_features=512, out_features=512)
          )
          (dropout): Dropout(p=0.1)
        )
        (src_attn): MultiHeadedAttention(
          (linears): ModuleList(
            (0): Linear(in_features=512, out_features=512)
            (1): Linear(in_features=512, out_features=512)
            (2): Linear(in_features=512, out_features=512)
            (3): Linear(in_features=512, out_features=512)
          )
          (dropout): Dropout(p=0.1)
        )
        (feed_forward): PositionwiseFeedForward(
          (w_1): Linear(in_features=512, out_features=2048)
          (w_2): Linear(in_features=2048, out_features=512)
          (dropout): Dropout(p=0.1)
        )
        (sublayer): ModuleList(
          (0): SublayerConnection(
            (norm): LayerNorm(
            )
            (dropout): Dropout(p=0.1)
          )
          (1): SublayerConnection(
            (norm): LayerNorm(
            )
            (dropout): Dropout(p=0.1)
          )
          (2): SublayerConnection(
            (norm): LayerNorm(
            )
            (dropout): Dropout(p=0.1)
          )
        )
      )
      (1): DecoderLayer(
        (self_attn): MultiHeadedAttention(
          (linears): ModuleList(
            (0): Linear(in_features=512, out_features=512)
            (1): Linear(in_features=512, out_features=512)
            (2): Linear(in_features=512, out_features=512)
            (3): Linear(in_features=512, out_features=512)
          )
          (dropout): Dropout(p=0.1)
        )
        (src_attn): MultiHeadedAttention(
          (linears): ModuleList(
            (0): Linear(in_features=512, out_features=512)
            (1): Linear(in_features=512, out_features=512)
            (2): Linear(in_features=512, out_features=512)
            (3): Linear(in_features=512, out_features=512)
          )
          (dropout): Dropout(p=0.1)
        )
        (feed_forward): PositionwiseFeedForward(
          (w_1): Linear(in_features=512, out_features=2048)
          (w_2): Linear(in_features=2048, out_features=512)
          (dropout): Dropout(p=0.1)
        )
        (sublayer): ModuleList(
          (0): SublayerConnection(
            (norm): LayerNorm(
            )
            (dropout): Dropout(p=0.1)
          )
          (1): SublayerConnection(
            (norm): LayerNorm(
            )
            (dropout): Dropout(p=0.1)
          )
          (2): SublayerConnection(
            (norm): LayerNorm(
            )
            (dropout): Dropout(p=0.1)
          )
        )
      )
    )
    (norm): LayerNorm(
    )
  )
  (src_embed): Sequential(
    (0): Embeddings(
      (lut): Embedding(11, 512)
    )
    (1): PositionalEncoding(
      (dropout): Dropout(p=0.1)
    )
  )
  (tgt_embed): Sequential(
    (0): Embeddings(
      (lut): Embedding(11, 512)
    )
    (1): PositionalEncoding(
      (dropout): Dropout(p=0.1)
    )
  )
  (generator): Generator(
    (proj): Linear(in_features=512, out_features=11)
  )
)