第39篇|拍摄模式切换:单拍、双拍、顺序拍的 UI 逻辑
从这一篇开始,我们进入拍摄体验的"用户选择层"。相机能力检测、双预览、单拍和顺序双拍前面都已经拆过,但真正交给用户时,界面不能把所有工程分支都摊开。用户只需要知道当前是在单拍还是双拍,至于设备是否支持前后摄并发、是否需要降级到顺序拍,应该由工程内部完成。
双镜记忆相机里的模式切换有两个核心目标:第一,按钮选中态必须和真实会话一致;第二,拍摄按钮被点击时必须进入正确链路。否则用户以为自己在双拍,最后却只得到一张单拍照片,或者旧的双摄会话没有释放,导致切回单拍后预览异常。
这一篇继续围绕 21 天「智能相机开发实战」训练营展开。内容只使用当前项目里的 ArkTS、服务层代码和真实页面截图来讲,不把封面图放进正文。阅读时可以先看截图理解用户侧效果,再顺着函数名回到工程定位实现。
本篇目标
- 理解 UI 模式和内部拍摄路径的区别。
- 掌握 selectCaptureMode 如何切换状态并重新准备预览。
- 读懂 triggerCameraCapture 如何集中路由单拍、双拍和顺序拍。
- 把模式按钮、确认按钮和最终入库流程串成闭环。
对应源码位置
entry/src/main/ets/pages/Index.ets
一、用户只选模式,工程负责选择路径
页面上展示的是"单拍"和"双拍",但工程内部还存在 sequence 这个 pending 状态。它不是给用户选择的第三种模式,而是在双摄并发不可用时,用两次单摄完成双镜作品的降级路径。这样做能保持产品表达简单,同时保留设备适配弹性。
模式切换时要避免只改一个字符串。真正可靠的切换需要刷新预览会话、重置提示文本、清理浮层,并让后续拍摄入口读取最新状态。

图1 拍摄模式切换在真实相机页上的效果和内部流向
二、selectCaptureMode:切换状态后立刻准备对应预览
selectCaptureMode 首先处理重复点击:如果用户点击的是当前模式,并且预览已经 live,就不重复准备会话。否则它会隐藏刚拍预览、更新 selectedCaptureMode,再根据单拍或双拍模式进入对应的预览准备函数。
这一步的价值在于让模式状态和相机资源保持同步。相机类项目最怕"UI 已切换、底层还停留在旧会话",后面任何拍照回调都可能落到错误路径。
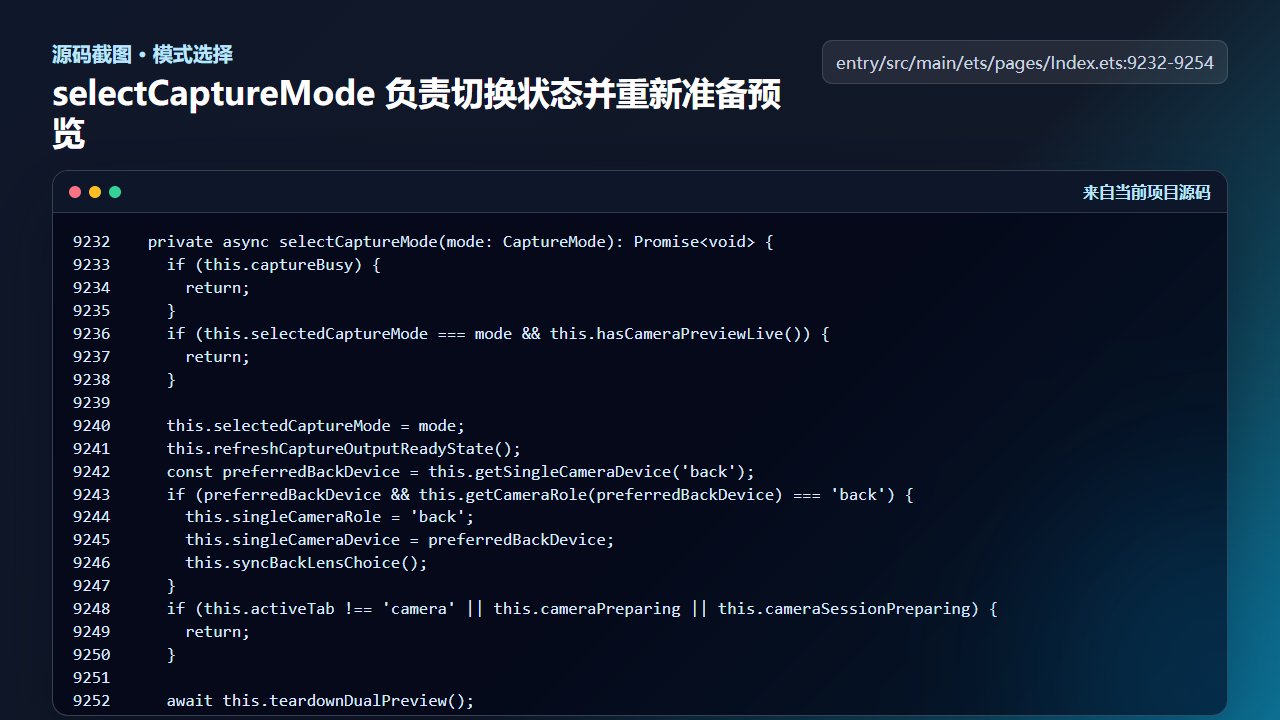
图2 selectCaptureMode 切换模式并重新准备预览
ts
  private async selectCaptureMode(mode: CaptureMode): Promise<void> {
    if (this.captureBusy) {
      return;
    }
    if (this.selectedCaptureMode === mode && this.hasCameraPreviewLive()) {
      return;
    }

    this.selectedCaptureMode = mode;
    this.refreshCaptureOutputReadyState();
    const preferredBackDevice = this.getSingleCameraDevice('back');
    if (preferredBackDevice && this.getCameraRole(preferredBackDevice) === 'back') {
      this.singleCameraRole = 'back';
      this.singleCameraDevice = preferredBackDevice;
      this.syncBackLensChoice();
    }
    if (this.activeTab !== 'camera' || this.cameraPreparing || this.cameraSessionPreparing) {
      return;
    }

    await this.teardownDualPreview();
    await this.ensureCameraPreview();
  }
这里没有把双拍是否可用的判断散落到每个按钮里,而是在模式切换和拍摄入口集中处理。页面组件只负责表达用户意图,能力细节交给函数内部。
三、triggerCameraCapture:把一次点击路由到正确链路
拍摄按钮最终调用 triggerCameraCapture。它先处理确认逻辑和忙碌状态,再根据 selectedCaptureMode、dualCameraSupported、预览 live 状态,决定触发单拍、双拍,还是顺序双拍。
这个函数是拍摄链路的交通枢纽。新能力不要随意绕过它,例如以后加入"连拍"或"定时拍",也应该从这里统一分派,否则状态判断会分裂。
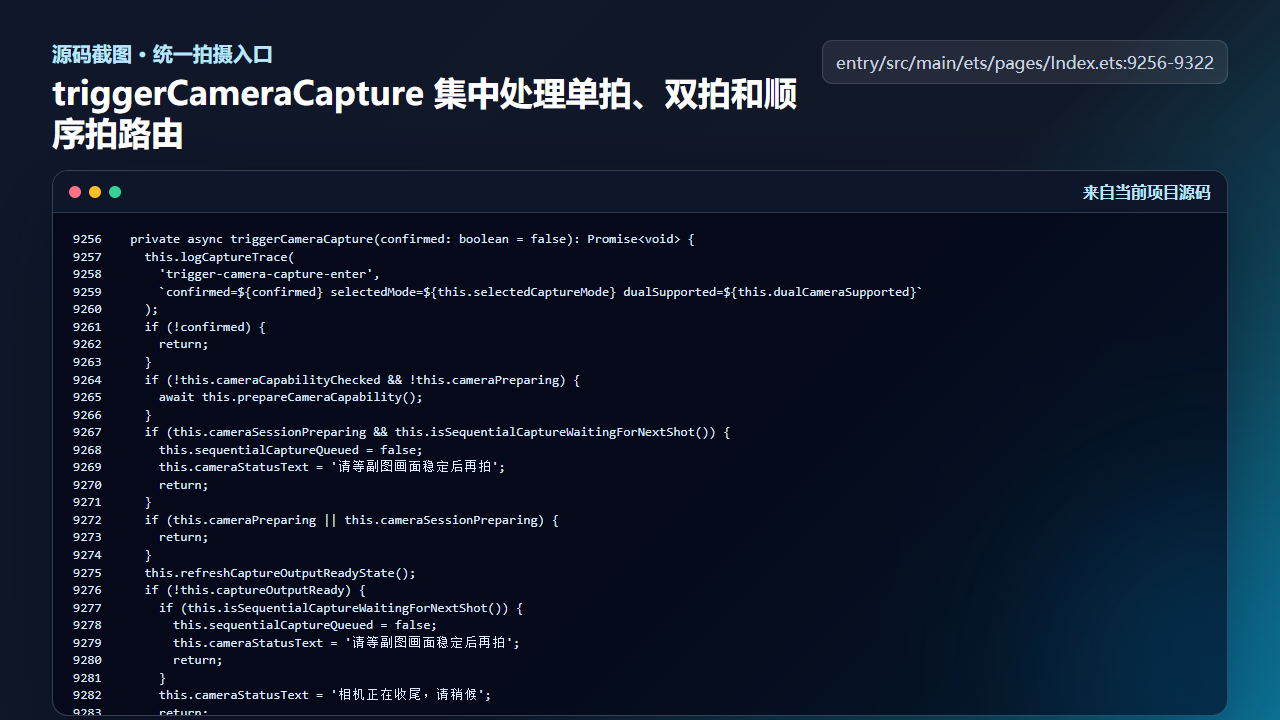
图3 triggerCameraCapture 集中处理单拍、双拍和顺序拍路由
ts
  private async triggerCameraCapture(confirmed: boolean = false): Promise<void> {
    this.logCaptureTrace(
      'trigger-camera-capture-enter',
      `confirmed=${confirmed} selectedMode=${this.selectedCaptureMode} dualSupported=${this.dualCameraSupported}`
    );
    if (!confirmed) {
      return;
    }
    if (!this.cameraCapabilityChecked && !this.cameraPreparing) {
      await this.prepareCameraCapability();
    }
    if (this.cameraSessionPreparing && this.isSequentialCaptureWaitingForNextShot()) {
      this.sequentialCaptureQueued = false;
      this.cameraStatusText = '请等副图画面稳定后再拍';
      return;
    }
    if (this.cameraPreparing || this.cameraSessionPreparing) {
      return;
    }
    this.refreshCaptureOutputReadyState();
    if (!this.captureOutputReady) {
      if (this.isSequentialCaptureWaitingForNextShot()) {
        this.sequentialCaptureQueued = false;
        this.cameraStatusText = '请等副图画面稳定后再拍';
        return;
      }
      this.cameraStatusText = '相机正在收尾,请稍候';
      return;
    }
    this.hideCameraCapturePreview();

    if (this.selectedCaptureMode === 'single') {
      if (!this.singlePhotoOutput || !this.singlePreviewLive) {
        await this.switchSingleCameraTo(this.singleCameraRole);
      }
      this.logCaptureTrace('trigger-camera-capture-branch-single');
      await this.triggerSingleCapture();
      return;
    }

    if (this.shouldUseDualCapture()) {
      this.logCaptureTrace('trigger-camera-capture-branch-dual');
      await this.triggerDualCapture();
      return;
    }

    if (this.dualCameraSupported) {
      const fallbackRole: CameraLensRole = this.backPreviewLive
        ? 'back'
        : (this.frontPreviewLive ? 'front' : 'back');
      const singleFallbackReady = this.singleCameraSupported &&
        ((this.singlePhotoOutput !== undefined && this.singlePreviewLive && this.singleCameraRole === fallbackRole) ||
          await this.switchSingleCameraTo(fallbackRole));
      if (singleFallbackReady) {
        this.logCaptureTrace('trigger-camera-capture-branch-dual-fallback-single', `fallbackRole=${fallbackRole}`);
        this.cameraStatusText = '';
        this.lastCaptureSummary = this.cameraStatusText;
        await this.triggerSingleCapture();
        return;
      }
      this.cameraStatusText = '';
      this.lastCaptureSummary = this.cameraStatusText;
      return;
    }
    this.logCaptureTrace('trigger-camera-capture-branch-sequence');
    await this.triggerSequentialCapture();
  }
注意 triggerSequentialCapture 出现在双拍不可直接完成的分支里。用户选择的是双拍,工程实际执行顺序拍,这是典型的体验目标和设备能力分离。
四、模式 UI:按钮只读 selectedCaptureMode
按钮层不要做复杂业务判断,只根据 selectedCaptureMode 显示选中态,并把点击交回 selectCaptureMode。这样 UI 的职责非常清楚:显示当前状态、接收用户动作、把动作交给业务函数。
如果你在按钮里直接调用 ensureDualPreview 或 triggerDualCapture,后续维护会非常痛苦,因为 UI 层开始同时掌握模式状态、相机资源、降级策略和错误恢复。
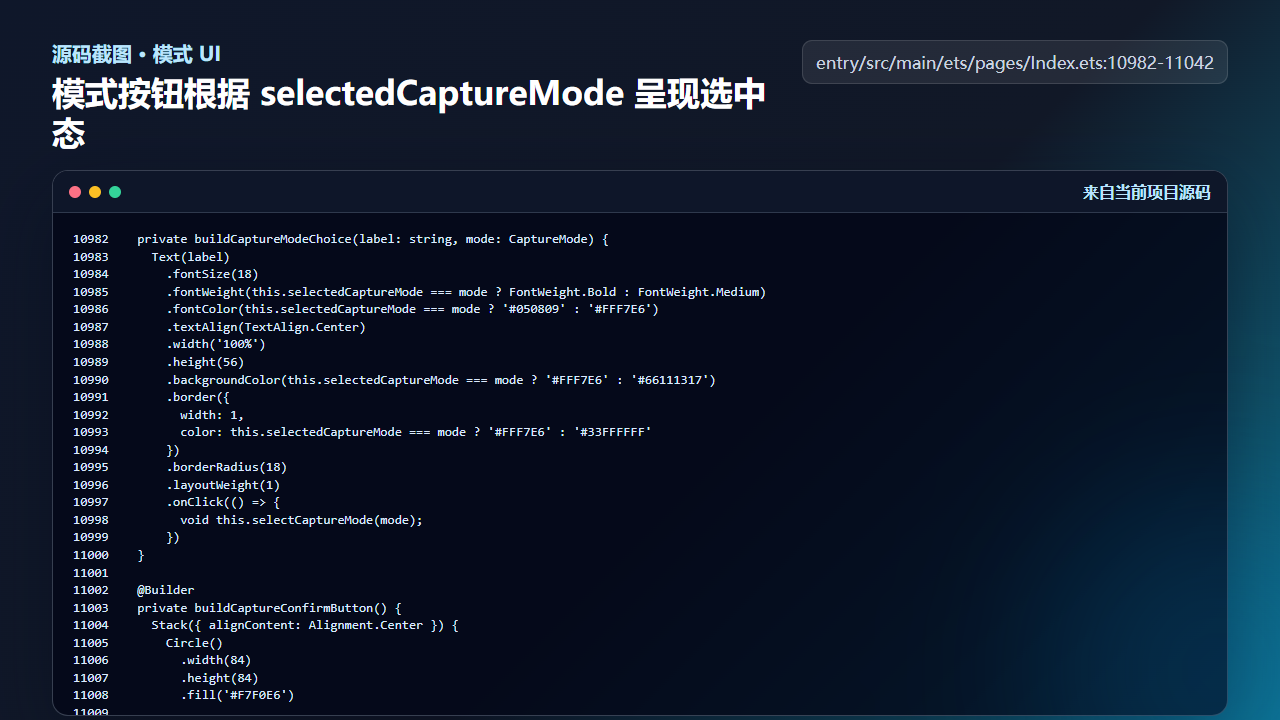
图4 模式按钮根据 selectedCaptureMode 呈现选中态
ts
  private buildCaptureModeChoice(label: string, mode: CaptureMode) {
    Text(label)
      .fontSize(18)
      .fontWeight(this.selectedCaptureMode === mode ? FontWeight.Bold : FontWeight.Medium)
      .fontColor(this.selectedCaptureMode === mode ? '#050809' : '#FFF7E6')
      .textAlign(TextAlign.Center)
      .width('100%')
      .height(56)
      .backgroundColor(this.selectedCaptureMode === mode ? '#FFF7E6' : '#66111317')
      .border({
        width: 1,
        color: this.selectedCaptureMode === mode ? '#FFF7E6' : '#33FFFFFF'
      })
      .borderRadius(18)
      .layoutWeight(1)
      .onClick(() => {
        void this.selectCaptureMode(mode);
      })
  }

  @Builder
  private buildCaptureConfirmButton() {
    Stack({ alignContent: Alignment.Center }) {
      Circle()
        .width(84)
        .height(84)
        .fill('#F7F0E6')

      Circle()
        .width(98)
        .height(98)
        .stroke(this.canTapCaptureButton() ? '#FFF1D2' : '#FFB86B')
        .strokeWidth(4)
        .fillOpacity(0)
    }
      .width(104)
      .height(104)
      .enabled(this.canTapCaptureButton())
      .onClick(() => {
        void this.triggerCameraCapture(true);
      })
  }

  @Builder
  private buildCameraModeStripItem(label: string, mode: CaptureMode) {
    Column({ space: 6 }) {
      Text(label)
        .fontSize(18)
        .fontWeight(this.selectedCaptureMode === mode ? FontWeight.Bold : FontWeight.Regular)
        .fontColor(this.selectedCaptureMode === mode ? '#FFF1D2' : '#66F6F8FF')

      Circle()
        .width(12)
        .height(12)
        .fill(this.selectedCaptureMode === mode ? '#FFB86B' : '#00000000')
    }
    .width(88)
    .alignItems(HorizontalAlign.Center)
    .onClick(() => {
      void this.selectCaptureMode(mode);
    })
这一层的代码越薄,越容易保证页面样式修改不会影响拍摄行为。前端控件和相机链路之间应该隔着清晰的业务入口。
工程检查清单
- 模式按钮只改变用户选择,不直接操作底层相机会话。
- 切换模式后要隐藏旧的拍摄预览浮层。
- 单拍和双拍都从 triggerCameraCapture 进入,不绕过统一入口。
- 双拍不可用时允许进入顺序拍,但不要把顺序拍暴露成第三个用户模式。
- 按钮选中态必须只依赖 selectedCaptureMode。
今日练习
- 在工程中搜索
selectedCaptureMode,标出哪些代码属于 UI 展示,哪些属于业务分派。 - 真机上从双拍切到单拍,再切回双拍,观察预览是否重新准备。
- 尝试把 triggerCameraCapture 的三个路径画成时序图,确认每条路径最终都能进入相册记录。
训练营后面的内容会继续按"真实页面效果 → 源码定位 → 状态闭环 → 可验证结果"的节奏推进。每一篇都尽量让你能拿着代码直接回到项目里复现,而不是只停留在概念说明。