面向自动驾驶 / 移动机器人 / LiDAR 感知部署场景,本文系统介绍 CenterPoint 的核心思想、网络结构、输入输出接口、训练监督、后处理解码、跟踪逻辑以及与 PointPillars 的部署差异。
1. CenterPoint 是什么?
CenterPoint 是一种基于中心点的 3D 目标检测与跟踪方法。它的核心思想是:
将 3D 目标在 BEV 平面中表示为一个中心点,然后从该中心点回归目标的尺寸、高度、朝向和速度。
也就是说,CenterPoint 不再像传统 anchor-based 方法那样枚举大量 3D anchor,而是把目标检测问题转化为 BEV 中心点检测 + 属性回归 问题。
简化表示如下:
text
3D Object = Center Point + Size + Height + Yaw + Velocity其中:
text
center point : 目标在 BEV 平面的中心
size         : length / width / height
height       : 目标中心 z 或底部高度
yaw          : 目标朝向角
velocity     : BEV 平面速度 vx / vy,可用于跟踪
2. 动态流程展示
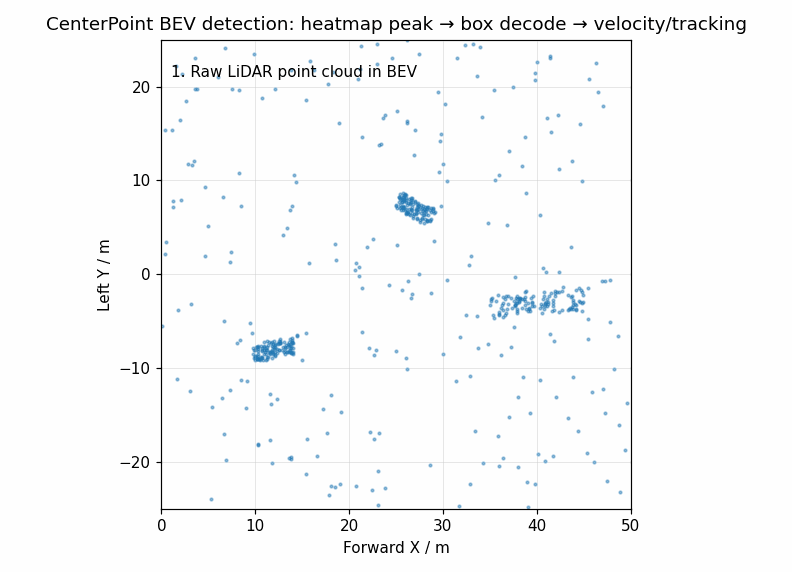
下面的动态图展示了 CenterPoint 的简化 BEV 检测流程:
- 原始 LiDAR 点云投影到 BEV;
- Backbone 生成 BEV 特征;
- Center Head 输出类别热力图;
- 在 heatmap 中寻找局部峰值作为目标中心;
- 从中心点位置回归 3D box 的尺寸、朝向、高度;
- 使用速度分支辅助多帧目标跟踪。
3. 整体算法流程
CenterPoint 的整体流程可以分为 8 个阶段:
text
LiDAR 点云
   ↓
点云范围过滤 / 坐标变换
   ↓
Voxelization / Pillarization
   ↓
Voxel Feature Encoder / Pillar Feature Encoder
   ↓
Sparse 3D Backbone 或 2D BEV Backbone
   ↓
Center Head 多任务预测
   ├── heatmap:类别中心点概率
   ├── offset :中心点亚像素偏移
   ├── height :目标中心高度
   ├── dim    :目标长宽高
   ├── rot    :目标朝向
   └── vel    :目标速度,可选
   ↓
Top-K 中心点解码
   ↓
Circle NMS / BEV NMS
   ↓
最终 3D 检测框与跟踪结果
4. 输入接口设计
4.1 点云输入
CenterPoint 常见输入是单帧或多帧 LiDAR 点云:
text
points: [N, C]常见字段为:
text
x, y, z, intensity在 nuScenes / Waymo 等数据集中,也可能包含 timestamp、elongation、ring index 等额外字段。
C++ 中可统一定义为:
cpp
struct PointXYZI {
    float x;
    float y;
    float z;
    float intensity;
};
对于机器人或自动驾驶部署,建议统一输入结构:
cpp
struct PointCloudFrame {
    std::vector<PointXYZI> points;
    double timestamp;
    std::string frame_id;   // lidar_link / base_link / map 等
};
5. 体素化 / Pillar 化
CenterPoint 不强依赖某一种点云编码方式,常见前端包括:
| 前端方式 | 说明 | 典型代表 |
|---|---|---|
| Pillarization | 将点云压缩为垂直柱体,不划分 z 方向体素 | PointPillars |
| Voxelization | 在 x/y/z 三维空间划分稀疏体素 | SECOND / VoxelNet |
| Multi-sweep Fusion | 多帧点云融合,提升远距离和稀疏区域稳定性 | nuScenes 常用 |
常见配置:
yaml
point_cloud_range: [0.0, -40.0, -3.0, 70.4, 40.0, 1.0]
voxel_size: [0.05, 0.05, 0.1]
max_points_per_voxel: 10
max_voxels:
  train: 60000
  test: 80000
BEV 特征图尺寸大致由以下公式决定:
text
W = (x_max - x_min) / voxel_size_x / out_stride
H = (y_max - y_min) / voxel_size_y / out_stride
其中 out_stride 是 backbone 下采样倍数,常见为 4 或 8。
6. 网络结构详解
CenterPoint 的网络结构通常由以下部分组成:
text
Voxel / Pillar Encoder
        ↓
Backbone
        ↓
Neck / FPN
        ↓
Center Head
6.1 Voxel / Pillar Encoder
该模块负责把不规则点云转换为规则或稀疏张量特征。
对于 pillar 特征,常见输入为:
text
pillar_features: [num_pillars, max_points, feature_dim]
pillar_coords  : [num_pillars, 4]  # batch, z, y, x
num_points     : [num_pillars]
对于 voxel 特征,常见输入为:
text
voxel_features: [num_voxels, max_points, feature_dim]
voxel_coords  : [num_voxels, 4]
6.2 Backbone
CenterPoint 可以使用两类 backbone:
方案一:Sparse 3D Backbone
text
Voxel Features
   ↓
SparseConv3D
   ↓
BEV Compression
   ↓
2D BEV Feature Map
优点:
text
- 3D 空间建模能力更强
- 对高度结构更敏感
- 检测精度通常更高
缺点:
text
- 依赖稀疏卷积库
- C++/TensorRT/嵌入式部署复杂度较高
方案二:Pillar + 2D Backbone
text
Pillar Features
   ↓
Scatter to BEV
   ↓
2D CNN Backbone
   ↓
BEV Feature Map
优点:
text
- 部署简单
- ONNX / TensorRT 适配更容易
- 与 PointPillars 前处理可复用
缺点:
text
- z 方向建模能力相对弱
- 对复杂高度结构不如 Sparse 3D Backbone
7. Center Head 输出接口
CenterPoint 的核心是 Center Head,多任务输出如下:
text
heatmap: [B, num_classes, H, W]
offset : [B, 2, H, W]
height : [B, 1, H, W]
dim    : [B, 3, H, W]
rot    : [B, 2, H, W]
vel    : [B, 2, H, W]   # 可选
其中:
| 分支 | 含义 | 说明 |
|---|---|---|
| heatmap | 类别中心点热力图 | 预测每个 BEV 网格是否为目标中心 |
| offset | 中心点偏移 | 修正特征图量化误差 |
| height | 高度 | 回归目标中心 z 或底部 z |
| dim | 尺寸 | length / width / height |
| rot | 朝向 | 常用 sin / cos 表达 |
| vel | 速度 | 用于目标跟踪,常见于 nuScenes |
推荐 C++ 输出结构:
cpp
struct CenterPointHeadOutput {
    std::vector<float> heatmap;   // [B, C, H, W]
    std::vector<float> offset;    // [B, 2, H, W]
    std::vector<float> height;    // [B, 1, H, W]
    std::vector<float> dim;       // [B, 3, H, W]
    std::vector<float> rot;       // [B, 2, H, W]
    std::vector<float> vel;       // [B, 2, H, W], optional

    int batch = 1;
    int num_classes = 0;
    int height_map = 0;
    int width_map = 0;
};
8. Heatmap 监督机制
CenterPoint 使用高斯热力图监督目标中心点。
对于真实目标中心:
text
(cx, cy)在 BEV 特征图上生成一个 2D Gaussian:
text
Y(x, y) = exp(-((x - cx)^2 + (y - cy)^2) / (2 * sigma^2))中心位置接近 1,周围逐渐衰减。
这种设计的好处是:
text
1. 不需要大量 anchor
2. 目标中心监督更直接
3. 小目标和密集目标可以通过 Gaussian 半径控制正样本范围
4. 与 2D CenterNet 思想一致,便于理解和部署
9. 损失函数
CenterPoint 的损失主要包括两部分:
text
L = L_heatmap + L_box9.1 Heatmap Focal Loss
text
L_heatmap = FocalLoss(pred_heatmap, gt_heatmap)该损失主要解决正负样本极度不均衡问题。
9.2 Box 回归损失
text
L_box = λ_offset * L_offset
      + λ_height * L_height
      + λ_dim    * L_dim
      + λ_rot    * L_rot
      + λ_vel    * L_vel
常用 L1 loss 或 Smooth L1 loss。
其中:
text
offset:中心点亚像素偏移
height:中心高度
dim   :3D 尺寸
rot   :朝向角
vel   :速度
10. 3D Box 解码
假设 heatmap 上的某个峰值位置为:
text
grid_x, grid_y对应预测值为:
text
offset_x, offset_y
z_pred
dim_l, dim_w, dim_h
rot_sin, rot_cos
vx, vy
则真实 BEV 中心坐标为:
text
x = (grid_x + offset_x) * voxel_size_x * out_stride + x_min
y = (grid_y + offset_y) * voxel_size_y * out_stride + y_min
高度为:
text
z = z_pred尺寸为:
text
length = dim_l
width  = dim_w
height = dim_h
朝向为:
text
yaw = atan2(rot_sin, rot_cos)最终检测框:
text
box = [x, y, z, length, width, height, yaw, score, class_id]如果启用速度分支:
text
box = [x, y, z, length, width, height, yaw, vx, vy, score, class_id]推荐统一检测结果结构:
cpp
struct Det3DBox {
    float x;
    float y;
    float z;
    float length;
    float width;
    float height;
    float yaw;

    float vx = 0.0f;
    float vy = 0.0f;

    float score = 0.0f;
    int class_id = -1;
};
11. 后处理流程
CenterPoint 后处理主要包括:
text
1. 对 heatmap 做 sigmoid
2. 做局部最大值筛选
3. 每个类别取 Top-K 峰值点
4. 根据峰值位置 gather offset / height / dim / rot / vel
5. 解码 3D box
6. 根据 score threshold 过滤
7. 使用 Circle NMS 或 BEV Rotated NMS
8. 输出最终检测框
伪代码如下:
python
heatmap = sigmoid(pred_heatmap)

peaks = local_maximum(heatmap)
topk_scores, topk_indices = topk(peaks, K)

for each selected center:
    cls_id = get_class_id(index)
    grid_x, grid_y = get_grid_xy(index)

    dx, dy = gather(offset, grid_x, grid_y)
    z      = gather(height, grid_x, grid_y)
    l,w,h  = gather(dim, grid_x, grid_y)
    rs, rc = gather(rot, grid_x, grid_y)

    x = (grid_x + dx) * voxel_size_x * out_stride + x_min
    y = (grid_y + dy) * voxel_size_y * out_stride + y_min
    yaw = atan2(rs, rc)

    boxes.append([x, y, z, l, w, h, yaw, score, cls_id])

boxes = nms(boxes)
12. Circle NMS
CenterPoint 常用 Circle NMS,核心思想是:
如果两个预测中心点距离过近,则认为它们可能对应同一个目标,只保留分数更高的框。
伪代码:
python
boxes = sort_by_score_desc(boxes)
keep = []

for box in boxes:
    should_keep = True

    for kept_box in keep:
        dist = sqrt((box.x - kept_box.x)^2 + (box.y - kept_box.y)^2)

        if dist < class_specific_radius:
            should_keep = False
            break

    if should_keep:
        keep.append(box)
Circle NMS 优点:
text
- 速度快
- 适合中心点表示
- 对车辆、行人、骑行者等 BEV 中心分离场景有效
但在目标极度拥挤、长条目标重叠明显时,仍可能需要 Rotated IoU NMS。
13. Tracking 跟踪逻辑
CenterPoint 的一个重要优势是检测和跟踪结构天然统一。
如果网络输出速度:
text
vx, vy则可以用当前帧检测框反推上一帧中心位置:
text
prev_x = curr_x - vx * Δt
prev_y = curr_y - vy * Δt
然后与上一帧 track 中心做距离匹配。
简化流程:
text
当前帧检测框
   ↓
根据速度回推上一帧中心
   ↓
和历史 track 中心做距离匹配
   ↓
匹配成功:更新 track
匹配失败:新建 track
历史 track 未匹配:age + 1,超过阈值删除
伪代码:
python
for det in detections:
    pred_prev_center = [
        det.x - det.vx * delta_t,
        det.y - det.vy * delta_t
    ]

    matched_track = nearest_track(pred_prev_center, tracks)

    if distance < threshold:
        update_track(matched_track, det)
    else:
        create_new_track(det)
这种方式比复杂的多传感器 MOT 框架简单很多,非常适合 CenterPoint 的中心点检测范式。
14. CenterPoint 与 PointPillars 对比
14.1 核心差异
| 项目 | PointPillars | CenterPoint |
|---|---|---|
| 检测范式 | Anchor-based | Anchor-free / Center-based |
| 正样本定义 | Anchor 与 GT IoU 匹配 | GT 中心点高斯热力图 |
| 输出方式 | cls / box / dir per anchor | heatmap / offset / dim / rot |
| 解码方式 | anchor decode | center decode |
| NMS | Rotated NMS | Circle NMS / Rotated NMS |
| 速度预测 | 通常无 | 可选 vel head |
| 跟踪扩展 | 需额外 tracker | 可直接用 center + velocity |
| 部署复杂度 | anchor decode 较复杂 | head 多但解码直观 |
14.2 网络输入输出差异
PointPillars 常见输出:
text
cls_preds: [B, H, W, num_anchors * num_classes]
box_preds: [B, H, W, num_anchors * box_code_size]
dir_preds: [B, H, W, num_anchors * 2]
CenterPoint 常见输出:
text
heatmap: [B, C, H, W]
offset : [B, 2, H, W]
height : [B, 1, H, W]
dim    : [B, 3, H, W]
rot    : [B, 2, H, W]
vel    : [B, 2, H, W]
14.3 部署复用关系
CenterPoint 和 PointPillars 可以复用:
text
1. 点云读取模块
2. 坐标系转换模块
3. 点云范围过滤模块
4. Pillar / Voxel 前处理部分,取决于模型前端
5. BEV 可视化模块
6. 3D Box 结构体
7. 结果保存接口
8. ROS2 / Cyber / 自研感知框架输出接口
两者主要差异在:
text
1. 网络 head 输出结构
2. 后处理 decode 方式
3. NMS 类型
4. 训练标签生成方式
5. 是否输出速度用于 tracking
15. 工程部署建议
15.1 推荐模块划分
text
centerpoint_deploy/
├── configs/
│   └── centerpoint.yaml
├── include/
│   ├── point_types.hpp
│   ├── centerpoint_output.hpp
│   ├── det3d_box.hpp
│   └── centerpoint_postprocess.hpp
├── src/
│   ├── voxelization.cpp
│   ├── centerpoint_runner.cpp
│   ├── centerpoint_postprocess.cpp
│   ├── circle_nms.cpp
│   └── bev_visualizer.cpp
├── tools/
│   ├── infer_centerpoint.cpp
│   └── visualize_result.cpp
└── README.md
15.2 配置文件示例
yaml
model:
  backend: onnxruntime
  model_path: models/centerpoint.onnx
  input_name: points
  output_names:
    - heatmap
    - offset
    - height
    - dim
    - rot
    - vel

point_cloud:
  range: [0.0, -40.0, -3.0, 70.4, 40.0, 1.0]
  voxel_size: [0.05, 0.05, 0.1]
  max_points_per_voxel: 10
  max_voxels: 60000

postprocess:
  out_stride: 4
  score_threshold: 0.1
  topk: 500
  use_circle_nms: true
  nms_radius:
    car: 4.0
    pedestrian: 0.8
    cyclist: 1.2

visualization:
  save_bev: true
  save_dir: outputs/vis
16. ONNX / TensorRT 部署注意事项
16.1 前处理是否放进 ONNX
部署时有两种方案:
方案 A:前处理在 C++ 外部完成
text
C++ 点云读取
   ↓
C++ voxelization / pillarization
   ↓
ONNX 推理 backbone + head
   ↓
C++ postprocess
优点:
text
- 易调试
- 易对齐 Python
- 适合早期部署验证
缺点:
text
- 前处理 CPU 开销可能较大
- TensorRT 端到端优化不足
方案 B:前处理融合进 TensorRT Plugin
text
raw points
   ↓
TensorRT voxelization plugin
   ↓
TensorRT backbone + head
   ↓
TensorRT decode / NMS plugin
优点:
text
- 速度更快
- 端到端 GPU 化
- 更适合量产部署
缺点:
text
- 插件开发复杂
- Debug 难度较高
- 与训练框架对齐成本更高
16.2 输出 layout 对齐
部署时最容易出错的是输出 layout:
text
NCHW: [B, C, H, W]
NHWC: [B, H, W, C]
CenterPoint 多个 head 输出都需要正确索引。如果输出维度理解错误,会出现:
text
1. 框位置整体偏移
2. x/y 方向镜像
3. yaw 角相反
4. 尺寸异常
5. 不同类别 score 错乱
建议在 C++ 中显式封装索引函数:
cpp
inline int idx_nchw(int c, int y, int x, int H, int W) {
    return c * H * W + y * W + x;
}
17. 常见问题与排查
17.1 检测框整体镜像
可能原因:
text
1. x/y 坐标轴方向与训练配置不一致
2. BEV 图像可视化坐标和模型坐标混淆
3. voxel coord 的 x/y 顺序写反
4. feature map H/W 与 x/y 映射关系反了
排查建议:
text
1. 先可视化原始点云 BEV
2. 再可视化 GT box
3. 再可视化预测中心点
4. 最后可视化解码后的 3D box
17.2 yaw 角方向相反
可能原因:
text
1. 坐标系右手系 / 左手系混淆
2. yaw 定义方向不同
3. atan2 输入顺序错误
4. rot_sin / rot_cos 通道顺序反了
5. box length / width 定义交换
建议验证:
text
yaw = atan2(rot_sin, rot_cos)同时检查训练框架中 yaw 的定义。
17.3 框尺寸异常
可能原因:
text
1. dim 是否经过 exp
2. 模型输出的是 log-dim 还是 real-dim
3. length / width / height 通道顺序错误
4. 类别尺寸均值是否参与 decode
17.4 分数过低
可能原因:
text
1. heatmap 未做 sigmoid
2. score threshold 设置过高
3. 类别通道顺序不一致
4. 模型导出时后处理重复或缺失
18. 适合机器人场景的改造建议
如果用于低速机器人 / 室内外移动平台,可做如下调整:
text
1. 缩小 point_cloud_range,降低算力需求
2. 减小类别数量,只保留 person / vehicle / obstacle / cone 等
3. 使用 pillar 前端,降低部署复杂度
4. 若需要动态障碍物预测,保留 velocity head
5. 若只做静态避障,可去掉 velocity head
6. 输出结果统一转换到 base_link 或 map 坐标系
7. 与 grid_map / costmap / STVL / semantic map 对接
典型机器人感知链路:
text
LiDAR
  ↓
CenterPoint 3D Detection
  ↓
3D Box / Dynamic Object
  ↓
Tracking
  ↓
Semantic Obstacle Layer
  ↓
Costmap / Local Planner
19. 与 ROS2 感知系统集成
推荐输出消息:
text
vision_msgs/Detection3DArray或自定义消息:
text
DetectedObject3DArray每个目标包含:
text
header
class_id
class_name
score
pose
size
velocity
tracking_id
ROS2 节点结构:
text
/lidar_points
    ↓
centerpoint_node
    ↓
/centerpoint/detections_3d
/centerpoint/markers
/centerpoint/debug_bev
可视化:
text
RViz2 MarkerArray
BEV debug image
rosbag replay validation
20. 总结
CenterPoint 的优势可以概括为:
text
1. Anchor-free,省去复杂 anchor 设计
2. 中心点 heatmap 监督直观
3. 3D box 解码流程清晰
4. 可以自然扩展速度预测和目标跟踪
5. 与 BEV 感知、自动驾驶、机器人动态障碍物检测高度契合
它的核心公式可以浓缩为:
text
目标中心 = heatmap peak + offset
目标属性 = dim + height + yaw + velocity
最终检测 = center decode + NMS
一句话总结:
CenterPoint 将 3D 目标检测问题转化为 BEV 平面上的中心点检测问题,通过中心点回归目标尺寸、高度、朝向和速度,从而实现高效、简洁、易部署的 3D 目标检测与跟踪。
21. 参考资料
-
CenterPoint Paper: Center-based 3D Object Detection and Tracking, arXiv:2006.11275
-
CenterPoint Official GitHub
-
OpenPCDet
-
MMDetection3D