文章目录
- 1.下载工具链
- 2.安装
- 3.新建cuda运行时控制台程序
- 4.默认代码分析
-
- 4.1.代码整体功能
- 4.2.核心组件分析
-
- [a. Kernel函数(第8-11行)](#a. Kernel函数(第8-11行))
- [b. 主函数流程](#b. 主函数流程)
- [c. 辅助函数 addWithCuda (第51-121行)](#c. 辅助函数 addWithCuda (第51-121行))
- 4.4.关键问题与改进建议
-
- [⚠️ 主要缺陷](#⚠️ 主要缺陷)
- [✅ 改进版本](#✅ 改进版本)
- 4.5.错误处理机制
- 4.6.性能观察点
- 4.7.代码规范
1.下载工具链
下载cuda_11.0.2_451.48_win10,如下图所示:

2.安装
按默认指引安装。
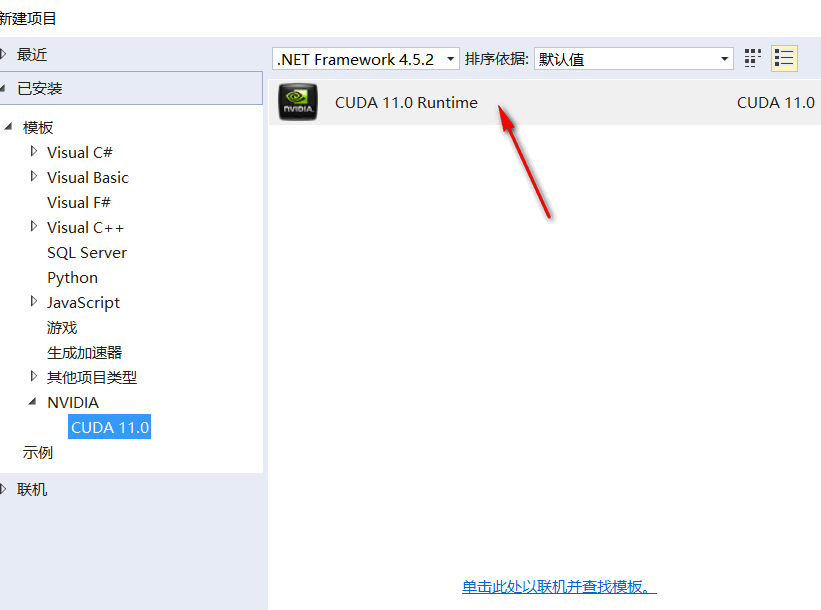
3.新建cuda运行时控制台程序
4.默认代码分析
cpp
#include "cuda_runtime.h"
#include "device_launch_parameters.h"

#include <stdio.h>

cudaError_t addWithCuda(int *c, const int *a, const int *b, unsigned int size);

__global__ void addKernel(int *c, const int *a, const int *b)
{
    int i = threadIdx.x;
    c[i] = a[i] + b[i];
}

int main()
{
    const int arraySize = 5;
    const int a[arraySize] = { 1, 2, 3, 4, 5 };
    const int b[arraySize] = { 10, 20, 30, 40, 50 };
    int c[arraySize] = { 0 };

    // Add vectors in parallel.
    cudaError_t cudaStatus = addWithCuda(c, a, b, arraySize);
    if (cudaStatus != cudaSuccess) {
        fprintf(stderr, "addWithCuda failed!");
        return 1;
    }

    printf("{1,2,3,4,5} + {10,20,30,40,50} = {%d,%d,%d,%d,%d}\n",
        c[0], c[1], c[2], c[3], c[4]);

    // cudaDeviceReset must be called before exiting in order for profiling and
    // tracing tools such as Nsight and Visual Profiler to show complete traces.
    cudaStatus = cudaDeviceReset();
    if (cudaStatus != cudaSuccess) {
        fprintf(stderr, "cudaDeviceReset failed!");
        return 1;
    }

    return 0;
}

// Helper function for using CUDA to add vectors in parallel.
cudaError_t addWithCuda(int *c, const int *a, const int *b, unsigned int size)
{
    int *dev_a = 0;
    int *dev_b = 0;
    int *dev_c = 0;
    cudaError_t cudaStatus;

    // Choose which GPU to run on, change this on a multi-GPU system.
    cudaStatus = cudaSetDevice(0);
    if (cudaStatus != cudaSuccess) {
        fprintf(stderr, "cudaSetDevice failed!  Do you have a CUDA-capable GPU installed?");
        goto Error;
    }

    // Allocate GPU buffers for three vectors (two input, one output)    .
    cudaStatus = cudaMalloc((void**)&dev_c, size * sizeof(int));
    if (cudaStatus != cudaSuccess) {
        fprintf(stderr, "cudaMalloc failed!");
        goto Error;
    }

    cudaStatus = cudaMalloc((void**)&dev_a, size * sizeof(int));
    if (cudaStatus != cudaSuccess) {
        fprintf(stderr, "cudaMalloc failed!");
        goto Error;
    }

    cudaStatus = cudaMalloc((void**)&dev_b, size * sizeof(int));
    if (cudaStatus != cudaSuccess) {
        fprintf(stderr, "cudaMalloc failed!");
        goto Error;
    }

    // Copy input vectors from host memory to GPU buffers.
    cudaStatus = cudaMemcpy(dev_a, a, size * sizeof(int), cudaMemcpyHostToDevice);
    if (cudaStatus != cudaSuccess) {
        fprintf(stderr, "cudaMemcpy failed!");
        goto Error;
    }

    cudaStatus = cudaMemcpy(dev_b, b, size * sizeof(int), cudaMemcpyHostToDevice);
    if (cudaStatus != cudaSuccess) {
        fprintf(stderr, "cudaMemcpy failed!");
        goto Error;
    }

    // Launch a kernel on the GPU with one thread for each element.
    addKernel<<<1, size>>>(dev_c, dev_a, dev_b);

    // Check for any errors launching the kernel
    cudaStatus = cudaGetLastError();
    if (cudaStatus != cudaSuccess) {
        fprintf(stderr, "addKernel launch failed: %s\n", cudaGetErrorString(cudaStatus));
        goto Error;
    }

    // cudaDeviceSynchronize waits for the kernel to finish, and returns
    // any errors encountered during the launch.
    cudaStatus = cudaDeviceSynchronize();
    if (cudaStatus != cudaSuccess) {
        fprintf(stderr, "cudaDeviceSynchronize returned error code %d after launching addKernel!\n", cudaStatus);
        goto Error;
    }

    // Copy output vector from GPU buffer to host memory.
    cudaStatus = cudaMemcpy(c, dev_c, size * sizeof(int), cudaMemcpyDeviceToHost);
    if (cudaStatus != cudaSuccess) {
        fprintf(stderr, "cudaMemcpy failed!");
        goto Error;
    }

Error:
    cudaFree(dev_c);
    cudaFree(dev_a);
    cudaFree(dev_b);

    return cudaStatus;
}
这是一个标准的CUDA向量加法示例代码。我来详细分析其结构和关键点:
4.1.代码整体功能
实现两个整型向量的并行加法:c[i] = a[i] + b[i]
4.2.核心组件分析
a. Kernel函数(第8-11行)
cuda
__global__ void addKernel(int *c, const int *a, const int *b)
{
    int i = threadIdx.x;  // 获取线程在block中的索引
    c[i] = a[i] + b[i];
}__global__:表示在GPU上执行,从CPU调用- 使用
threadIdx.x作为数组索引,限制:只能处理单个block内的线程数(通常≤1024)
b. 主函数流程
- 定义输入数组a、b和输出数组c(大小5)
- 调用
addWithCuda执行GPU计算 - 打印结果
- 重置设备
c. 辅助函数 addWithCuda (第51-121行)
主要步骤:
- 设备选择 :
cudaSetDevice(0) - 内存分配 :
cudaMalloc分配GPU显存 - 数据传输 :
cudaMemcpy将数据从主机复制到设备 - 内核启动 :
addKernel<<<1, size>>>1个blocksize个线程(这里是5)
- 同步等待 :
cudaDeviceSynchronize() - 结果回传 :
cudaMemcpy将结果从设备复制回主机 - 资源释放 :
cudaFree
4.4.关键问题与改进建议
⚠️ 主要缺陷
cuda
int i = threadIdx.x; // 仅适用于小数据量问题 :当arraySize > 1024时会失败(单个block线程数限制)
✅ 改进版本
cuda
__global__ void addKernel(int *c, const int *a, const int *b, int size)
{
    int i = blockIdx.x * blockDim.x + threadIdx.x;
    if (i < size) {
        c[i] = a[i] + b[i];
    }
}

// 调用方式
int blockSize = 256;
int gridSize = (size + blockSize - 1) / blockSize;
addKernel<<<gridSize, blockSize>>>(dev_c, dev_a, dev_b, size);
4.5.错误处理机制
- 使用
goto Error统一错误处理 - 每个CUDA API调用都检查返回值
- 内核启动后检查
cudaGetLastError() - 使用
cudaDeviceSynchronize()捕获执行错误
4.6.性能观察点
- 数据传输开销:小数据量(5个整数)时,GPU并行优势不明显
- 未使用流:所有操作在默认流中顺序执行
- 内存访问模式:合并访问良好(连续线程访问连续地址)
4.7.代码规范
- 使用
cudaError_t类型检查错误 - 资源清理使用
goto集中处理 - 包含必要的头文件和注释
这个代码是学习CUDA编程的良好起点,完整展示了GPU编程的典型流程:分配内存 → 传输数据 → 启动内核 → 同步 → 回传结果 → 释放资源。