背景
在 Python 体验用欧几里得算法计算最大公约数的过程 一文中,我们用 Python 实现了可以高效计算最大公约数的欧几里得算法( Euclidean Algorithm)。在本文中,我们会探索扩展欧几里得算法( Extended Euclidean Algorithm)。
正文
观察线性组合的值
说明:本小节参考了 A Friendly Introduction to Number Theory 中的第 6 章(在 Chapter 1~6 里可以看到第 1 章到第 6 章的内容)
借助图形化界面来进行观察
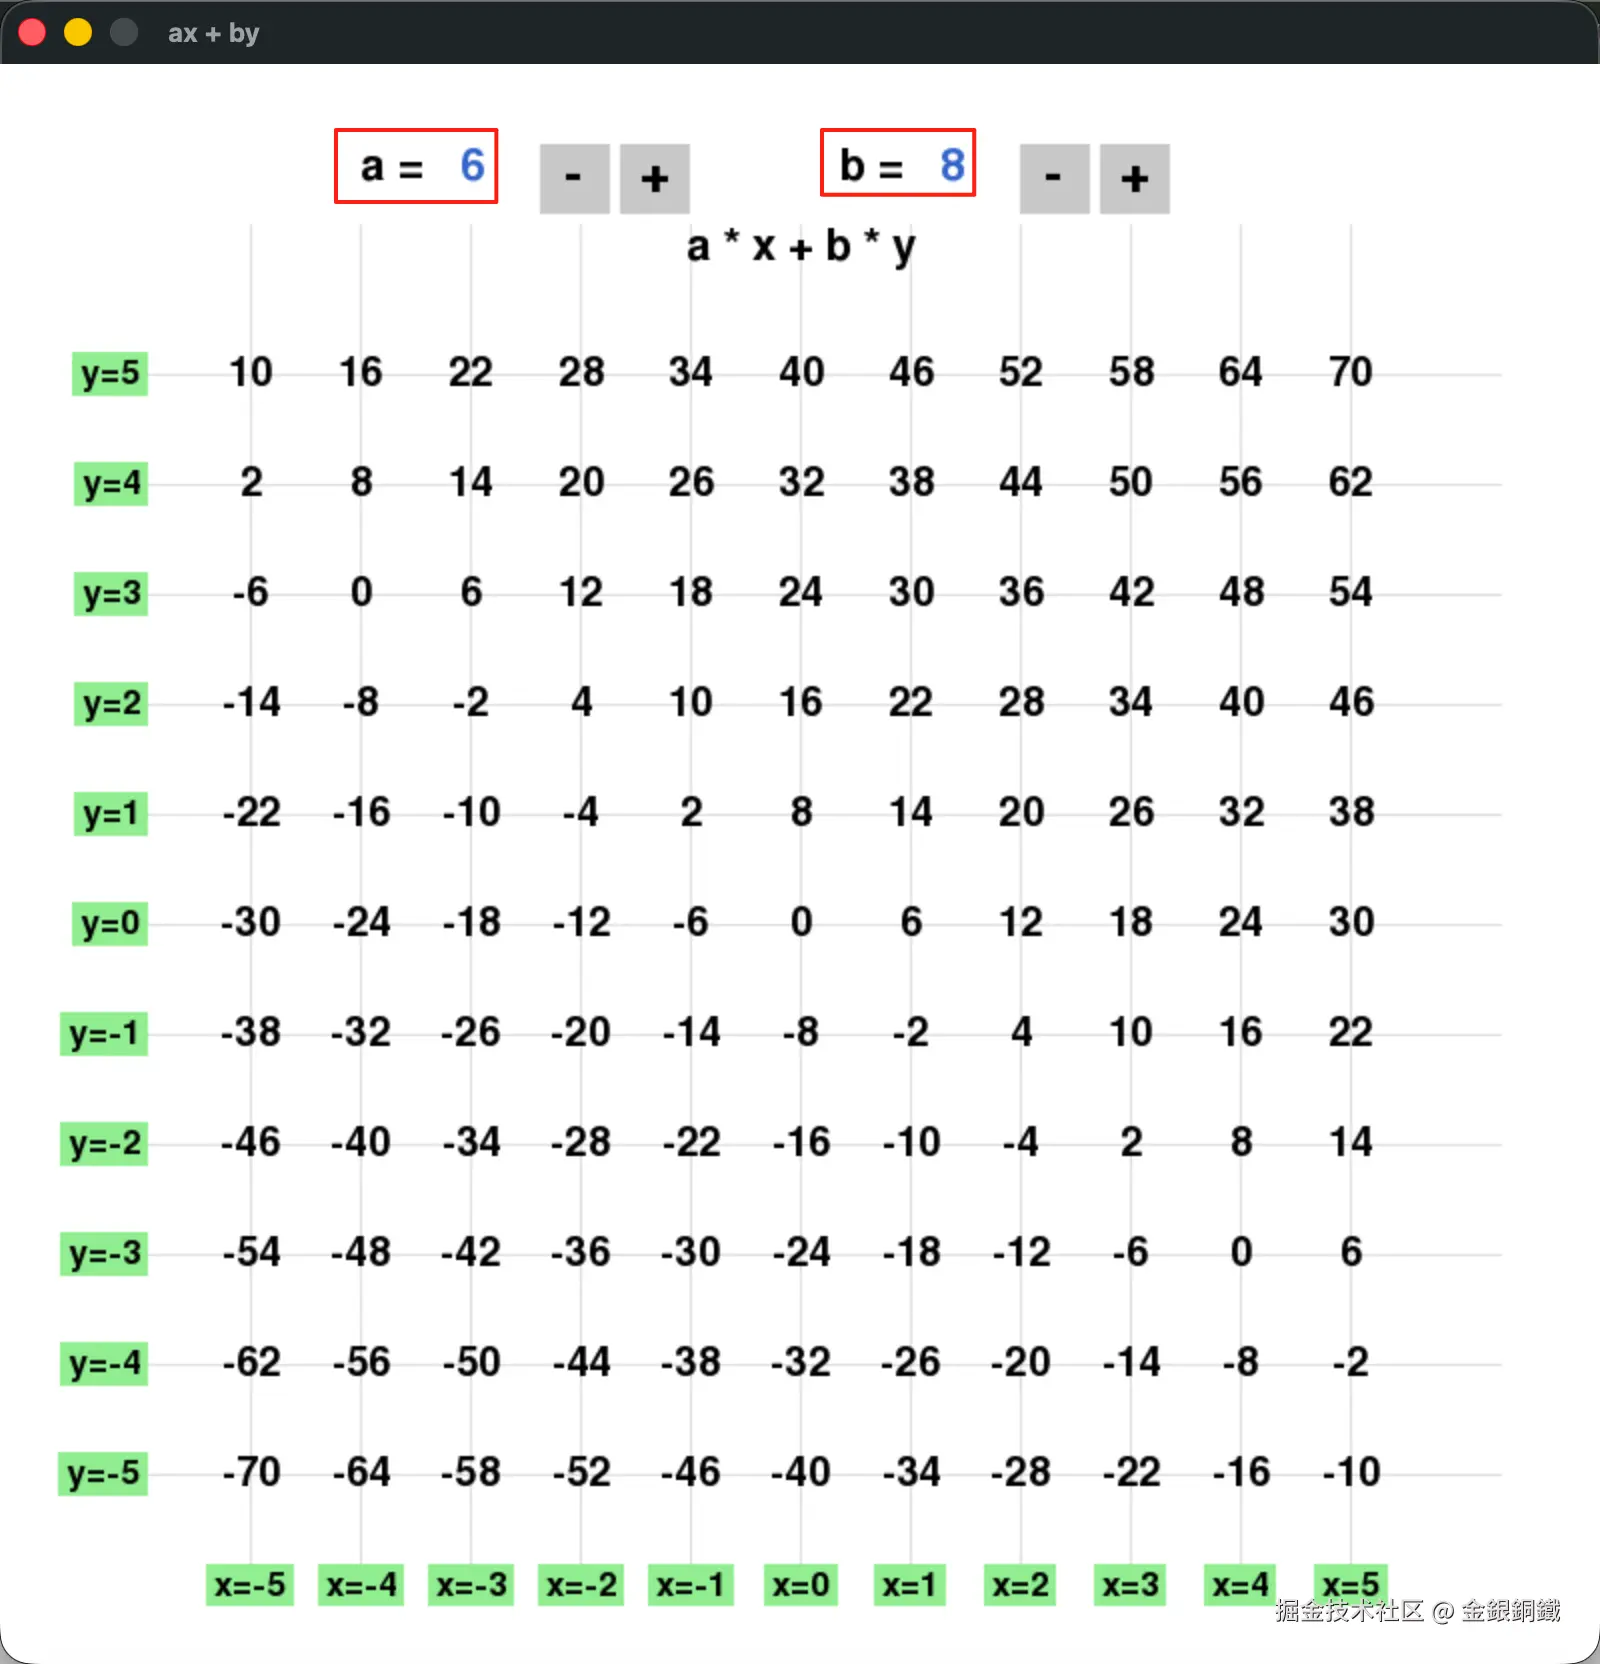
对正整数 a,b,我们可以构造出它们的线性组合 ax+by 。我用 豆包 写了如下的 Python 程序,借助它我们可以看到小范围的 ax+by 的值(整数 a 和 b 满足 1≤a,b≤50, x 和 y 的范围满足 −5≤x,y≤5)。
python
import pygame

# ===================== 基础配置 =====================
pygame.init()

# 【关键1】大幅扩大窗口,给-5~5网格留足宽松空间
WINDOW_WIDTH = 800
WINDOW_HEIGHT = 800
screen = pygame.display.set_mode((WINDOW_WIDTH, WINDOW_HEIGHT))
pygame.display.set_caption("ax + by")

# 颜色定义
WHITE = (255, 255, 255)
BLACK = (0, 0, 0)
LIGHT_GRAY = (220, 220, 220)
LIGHT_GREEN = (144, 238, 144)
GRAY = (200, 200, 200)
BLUE = (50, 100, 200)

# 数学坐标配置:x、y 范围 -5 到 5
x_vals = range(-5, 6)
y_vals = range(-5, 6)
a = 6
b = 8
MIN_VAL = 1
MAX_VAL = 50

# 【关键2】缩小格子大小,彻底解决拥挤
CELL_SIZE = 55
CENTER_X = WINDOW_WIDTH // 2
CENTER_Y = WINDOW_HEIGHT // 2 + 30  # 微调中心位置,布局更均衡

# 字体设置(保持清晰,不偏大)
font_num = pygame.font.SysFont(None, 30)    # 格点数值
font_scale = pygame.font.SysFont(None, 26)  # 刻度文字
font_ctrl = pygame.font.SysFont(None, 32)  # 控件文字
font_btn = pygame.font.SysFont(None, 40)   # 按钮文字

# ===================== 按钮控件定义(顶部宽松布局)=====================
a_label_x, a_val_x, a_sub_x, a_add_x = 180, 230, 270, 310
b_label_x, b_val_x, b_sub_x, b_add_x = 420, 470, 510, 550
ctrl_y = 40
btn_size = 35

# ===================== 坐标转换函数 =====================
def math_to_pixel(x, y):
    px = CENTER_X + x * CELL_SIZE
    py = CENTER_Y - y * CELL_SIZE
    return px, py

# ===================== 绘制控件函数 =====================
def draw_controls():
    # 绘制a选择区
    screen.blit(font_ctrl.render("a =", True, BLACK), (a_label_x, ctrl_y))
    screen.blit(font_ctrl.render(f"{a}", True, BLUE), (a_val_x, ctrl_y))
    pygame.draw.rect(screen, GRAY, (a_sub_x, ctrl_y, btn_size, btn_size))
    screen.blit(font_btn.render("-", True, BLACK), (a_sub_x+12, ctrl_y+2))
    pygame.draw.rect(screen, GRAY, (a_add_x, ctrl_y, btn_size, btn_size))
    screen.blit(font_btn.render("+", True, BLACK), (a_add_x+10, ctrl_y+2))

    # 绘制b选择区
    screen.blit(font_ctrl.render("b =", True, BLACK), (b_label_x, ctrl_y))
    screen.blit(font_ctrl.render(f"{b}", True, BLUE), (b_val_x, ctrl_y))
    pygame.draw.rect(screen, GRAY, (b_sub_x, ctrl_y, btn_size, btn_size))
    screen.blit(font_btn.render("-", True, BLACK), (b_sub_x+12, ctrl_y+2))
    pygame.draw.rect(screen, GRAY, (b_add_x, ctrl_y, btn_size, btn_size))
    screen.blit(font_btn.render("+", True, BLACK), (b_add_x+10, ctrl_y+2))

# ===================== 主循环 =====================
running = True
while running:
    screen.fill(WHITE)

    # 1. 绘制浅网格线(底部留足空间给x轴刻度,不覆盖)
    for x in x_vals:
        px, _ = math_to_pixel(x, 0)
        # 竖线底部缩短,不遮挡x轴刻度
        pygame.draw.line(screen, LIGHT_GRAY, (px, 80), (px, WINDOW_HEIGHT-50), 1)
    for y in y_vals:
        _, py = math_to_pixel(0, y)
        # 横线左侧缩短,不遮挡y轴刻度
        pygame.draw.line(screen, LIGHT_GRAY, (50, py), (WINDOW_WIDTH-50, py), 1)

    # 2. 绘制格点数值(宽松间距,无拥挤)
    for y in y_vals:
        for x in x_vals:
            val = a * x + b * y
            px, py = math_to_pixel(x, y)
            text = font_num.render(f"{val}", True, BLACK)
            text_rect = text.get_rect(center=(px, py))
            screen.blit(text, text_rect)

    # 3. 【关键3】修复x轴刻度:位置调至可见区域,彻底显示
    for x in x_vals:
        px, py = math_to_pixel(x, -6)  # 精准定位,不超出窗口
        text = font_scale.render(f"x={x}", True, BLACK)
        text_rect = text.get_rect(center=(px, py))
        bg_rect = pygame.Rect(text_rect.left - 4, text_rect.top - 2,
                             text_rect.width + 8, text_rect.height + 4)
        pygame.draw.rect(screen, LIGHT_GREEN, bg_rect)
        screen.blit(text, text_rect)

    # 4. 【关键4】优化y轴刻度:位置宽松,不拥挤
    for y in y_vals:
        px, py = math_to_pixel(-6, y)  # 精准定位,完全可见
        text = font_scale.render(f"y={y}", True, BLACK)
        text_rect = text.get_rect(right=px, centery=py)
        bg_rect = pygame.Rect(text_rect.left - 4, text_rect.top - 2,
                             text_rect.width + 8, text_rect.height + 4)
        pygame.draw.rect(screen, LIGHT_GREEN, bg_rect)
        screen.blit(text, text_rect)

    # 5. 绘制标题
    title = font_ctrl.render("a * x + b * y", True, BLACK)
    screen.blit(title, (WINDOW_WIDTH//2 - title.get_width()//2, 80))

    # 6. 绘制a、b选择控件
    draw_controls()

    # 7. 刷新屏幕
    pygame.display.flip()

    # ===================== 事件处理 =====================
    for event in pygame.event.get():
        if event.type == pygame.QUIT:
            running = False

        # 鼠标点击控制a/b数值
        if event.type == pygame.MOUSEBUTTONDOWN:
            mx, my = event.pos
            if a_sub_x <= mx <= a_sub_x+btn_size and ctrl_y <= my <= ctrl_y+btn_size:
                a = max(MIN_VAL, a - 1)
            elif a_add_x <= mx <= a_add_x+btn_size and ctrl_y <= my <= ctrl_y+btn_size:
                a = min(MAX_VAL, a + 1)
            elif b_sub_x <= mx <= b_sub_x+btn_size and ctrl_y <= my <= ctrl_y+btn_size:
                b = max(MIN_VAL, b - 1)
            elif b_add_x <= mx <= b_add_x+btn_size and ctrl_y <= my <= ctrl_y+btn_size:
                b = min(MAX_VAL, b + 1)

pygame.quit()
请将上述代码保存为 show.py,用如下的命令可以运行 show.py
bash
python3 show.py a 和 b 的初始值分别是 6 和 8 ⬇️ 我们可以通过点击 - 按钮和 + 按钮来调整它们的值。
可能注意到的结果
调整 a 和 b 的值若干次之后,您也许会注意到,格点处的值似乎总是 gcd(a,b) 的倍数。我们可以证明它。位于 (x,y) 处的值是 ax+by 由于 gcd(a,b) 是 a 和 b 的最大公约数(所以也是它们的公约数),那么
- gcd(a,b)∣a
- gcd(a,b)∣b
所以 gcd(a,b)∣(ax+by),也就是说任意格点处的值都是 gcd(a,b) 的倍数。
另一个观察是,似乎总能找到某个格点,那个格点的值 v 满足 v=gcd(a,b)。这一点可以通过扩展欧几里得算法来证明。
我们先看看简单的情况。如果 b=0,那么 gcd(a,b)=a (注意: b=0 时, a=0)。此时容易验证 1×a+0×b=a=gcd(a,b),也就是说,格点 (1,0) 处的值,一定是 gcd(a,b)。之后我们再看看一般的情形。
对 a,b,我们想找到整数 x,y 使得 ax+by=gcd(a,b) 成立。假设我们已经为 b,amodb 找到了对应的整数 x′,y′ 使得 bx′+(amodb)y′=gcd(a,b)。我们从这个等式出发,做些处理。
bx′+(amodb)y′=gcd(a,b)
其实就是
bx′+(a−⌊a/b⌋b)y′=gcd(a,b)
整理一下,可以变为
ay′+b(x′−⌊a/b⌋y′)=gcd(a,b)
所以可以这样选择 x 和 y ⬇️
- x=y′
- y=x′−⌊a/b⌋y′
这个过程展示了扩展欧几里得算法的核心思想。
用 Python 代码来实现扩展欧几里得算法
我们可以用 Python 代码来实现上述逻辑。我写了以下 Python 代码来实现欧几里得算法,并进行了对应的测试 ⬇️
python
def extended_euclidean(a, b):
    if (a, b) == (0, 0):
        raise ValueError("a and b cannot be both 0")
    if b == 0:
        return (1, 0, a)
    x, y, g = extended_euclidean(b, a % b)
    return (y, x - a // b * y, g)

for a in range(100):
    for b in range(100):
        if (a, b) == (0, 0):
            continue
        (x, y, g) = extended_euclidean(a, b)
        if a * x + b * y != g:
            raise ValueError("extend_euclidean failed")
        else:
            print(f"{a} * {x} + {b} * {y} = {g}")
请将以上代码保存为 extended_euclidean_algorithm.py。使用以下命令可以运行 extended_euclidean_algorithm.py
bash
python3 extended_euclidean_algorithm.py 运行结果有 9999 行,这里就不展示完整结果了 😂
参考资料
- A Friendly Introduction to Number Theory 中的
- 第 6 章(在 Chapter 1~6 里可以看到第 1 章到第 6 章的内容)