HarmonyOS APP实战-基于Image Kit的图像处理APP - 第8篇:图片编码导出至相册
1. 开篇
在上一篇中,我们实现了亮度、对比度、饱和度的调整功能。通过setColorMatrix方法,用户可以在界面拖动滑块,实时调整当前PixelMap的亮度(增加或减少[4]位置值)、对比度(缩放[0][0]等对角元素)和饱和度(通过修改RGB通道权重)。至此,我们的图片处理APP已经具备了选择图片、缩放裁剪、旋转翻转、滤镜应用以及色彩参数调整等完整处理链路。但处理后的PixelMap始终停留在内存中,一旦应用退出或页面关闭,所有编辑成果都将丢失。本篇将实现图片编码与导出功能------使用image.createImagePacker将PixelMap编码为JPEG/PNG格式,通过Media Library Kit写入系统相册,让用户能够持久保存编辑后的图像。
2. 核心实现
2.1 基础配置
首先需要在module.json5中声明存储权限,并导入所需模块。从API 11开始,媒体文件写入需要使用ohos.permission.WRITE_IMAGEVIDEO权限。
typescript
// module.json5 权限配置片段
{
  "module": {
    "requestPermissions": [
      {
        "name": "ohos.permission.WRITE_IMAGEVIDEO",  // 写入图片/视频到相册
        "reason": "$string:permission_reason_save_image"
      },
      {
        "name": "ohos.permission.READ_IMAGEVIDEO",   // 读取相册中的图片
        "reason": "$string:permission_reason_read_image"
      }
    ]
  }
}
同时在页面顶部导入图像编码和文件操作所需模块:
typescript
import { image } from '@kit.ImageKit';          // Image Kit 图片处理能力
import { fileIo } from '@kit.CoreFileKit';       // 文件读写操作
import { common } from '@kit.AbilityKit';        // UIAbilityContext 用于获取上下文
import { photoAccessHelper } from '@kit.MediaLibraryKit'; // 媒体库操作(API 12+)
import { BusinessError } from '@kit.BasicServicesKit'; // 错误类型定义关键点说明:
ohos.permission.WRITE_IMAGEVIDEO是写入媒体文件的必要权限,需要在用户使用时动态授权photoAccessHelper在API 12后取代了旧的medialibrary接口,提供更简洁的媒体文件创建方式- 使用
@kit.MediaLibraryKit导入时需要确保SDK版本不低于API 12
2.2 核心逻辑:ImagePackerUtils
创建一个工具类,封装图片编码和文件保存的核心逻辑。这里使用image.createImagePacker进行编码,并使用photoAccessHelper创建媒体资源。
typescript
// utils/ImagePackerUtils.ets
import { image, fileIo, photoAccessHelper, common, BusinessError } from '../utils/ImportManager';

export class ImagePackerUtils {
  private packer: image.ImagePacker = image.createImagePacker();

  /**
   * 将 PixelMap 编码为 JPEG 二进制数据
   * @param pixelMap 待编码的 PixelMap
   * @param quality 编码质量(0-100),默认80
   * @returns 编码后的 ArrayBuffer
   */
  public async encodeToJpeg(pixelMap: image.PixelMap, quality: number = 80): Promise<ArrayBuffer> {
    // 配置编码参数
    const packOptions: image.PackingOption = {
      format: "image/jpeg",                // 输出格式,支持 image/jpeg 和 image/png
      quality: quality                     // 编码质量,数值越高画质越好
    };
    // 执行编码,返回 ArrayBuffer
    const encodedData: ArrayBuffer = await this.packer.packing(pixelMap, packOptions);
    return encodedData;
  }

  /**
   * 编码并保存到系统相册
   * @param context UIAbilityContext 实例
   * @param pixelMap 待保存的 PixelMap
   * @param fileName 文件名(不含扩展名),如 "processed_20240101"
   * @returns 保存成功后的文件 URI
   */
  public async saveToAlbum(
    context: common.UIAbilityContext,
    pixelMap: image.PixelMap,
    fileName: string = `IMG_${Date.now()}`
  ): Promise<string> {
    // 1. 编码为 JPEG 二进制数据
    const buffer: ArrayBuffer = await this.encodeToJpeg(pixelMap);

    // 2. 创建媒体库辅助对象
    const phAccessHelper = photoAccessHelper.getPhotoAccessHelper(context);

    // 3. 创建媒体文件 URI(在相册中创建一个新图片文件)
    const uri = await phAccessHelper.createAsset(photoAccessHelper.PhotoType.IMAGE, ".jpg");

    // 4. 打开文件并写入数据
    const file = fileIo.openSync(uri, fileIo.OpenMode.WRITE_ONLY);
    try {
      // 写入编码后的二进制数据
      fileIo.writeSync(file.fd, buffer);
    } finally {
      // 确保文件关闭
      fileIo.closeSync(file.fd);
    }

    return uri;
  }

  /**
   * 释放编码器资源
   */
  public release(): void {
    this.packer.release();
  }
}关键点说明:
image.createImagePacker()创建一个图片打包器,用于将PixelMap编码为压缩格式packing(pixelMap, packOptions)异步执行编码,format支持"image/jpeg"和"image/png"quality参数仅对JPEG格式有效,PNG格式会忽略此参数photoAccessHelper.createAsset()在相册中创建一个新的空媒体资源,返回可写入的文件URI- 使用
fileIo.writeSync写入二进制数据,务必在finally块中关闭文件描述符
2.3 完整页面:ImageExportPage
创建导出页面,用户可以在处理完成后点击保存按钮,触发编码与导出流程,并显示结果提示。
typescript
// pages/ImageExportPage.ets
import { image } from '@kit.ImageKit';
import { common, router, BusinessError } from '@kit.AbilityKit';
import { promptAction } from '@kit.ArkUI';
import { ImagePackerUtils } from '../utils/ImagePackerUtils';
import { EditHistoryManager } from '../utils/EditHistoryManager'; // 历史记录管理,后续篇实现

@Entry
@Component
struct ImageExportPage {
  // 接收来自上一页的编辑后图片数据
  @State private currentPixelMap: image.PixelMap | null = null;
  @State private isExporting: boolean = false;
  @State private savedUri: string = '';
  private packerUtils: ImagePackerUtils = new ImagePackerUtils();
  private context: common.UIAbilityContext = getContext(this) as common.UIAbilityContext;

  aboutToAppear(): void {
    // 从路由参数获取 PixelMap(通常通过 AppStorage或本地文件传递)
    const params = router.getParams() as Record<string, Object>;
    const pixelMapIndex = params?.['pixelMapKey'] as number;
    if (pixelMapIndex !== undefined) {
      // 假设通过 AppStorage 或全局变量获取 PixelMap
      this.currentPixelMap = AppStorage.get<image.PixelMap>('editingPixelMap');
    }
  }

  /**
   * 导出图片到相册
   */
  async onSaveToAlbum(): Promise<void> {
    if (!this.currentPixelMap) {
      promptAction.showToast({ message: '没有待保存的图片', duration: 2000 });
      return;
    }

    this.isExporting = true;
    try {
      // 1. 编码并保存
      const uri = await this.packerUtils.saveToAlbum(
        this.context,
        this.currentPixelMap,
        `PhotoEdit_${Date.now()}`
      );

      // 2. 保存成功后更新状态
      this.savedUri = uri;
      this.isExporting = false;

      // 3. 显示成功提示
      promptAction.showToast({
        message: '图片已保存到相册',
        duration: 2000
      });

      // 4. 记录本次导出到历史(后续篇实现)
      // EditHistoryManager.getInstance().addRecord({ type: 'export', pixelMap: this.currentPixelMap });

    } catch (error) {
      this.isExporting = false;
      const err = error as BusinessError;
      promptAction.showToast({
        message: `保存失败: ${err.message}`,
        duration: 3000
      });
      console.error('ImageExport failed:', JSON.stringify(err));
    }
  }

  build() {
    Column() {
      // 显示当前编辑后的图片预览
      if (this.currentPixelMap) {
        Image(this.currentPixelMap)
          .width('100%')
          .height('70%')
          .objectFit(ImageFit.Contain)
          .margin({ bottom: 10 })
      } else {
        Text('暂无图片,请先编辑')
          .fontSize(18)
          .fontColor('#666')
          .textAlign(TextAlign.Center)
          .margin({ top: 100 })
      }

      // 保存按钮
      Button('保存到相册')
        .width('80%')
        .height(50)
        .fontSize(18)
        .fontWeight(FontWeight.Bold)
        .backgroundColor('#007AFF')
        .borderRadius(25)
        .enabled(!this.isExporting && this.currentPixelMap !== null)
        .onClick(() => this.onSaveToAlbum())

      // 导出状态提示
      if (this.isExporting) {
        LoadingProgress()
          .width(30)
          .height(30)
          .margin({ top: 10 })
        Text('正在导出...')
          .fontSize(14)
          .fontColor('#999')
      }

      // 保存成功后的信息
      if (this.savedUri) {
        Text(`文件路径: ${this.savedUri}`)
          .fontSize(12)
          .fontColor('#666')
          .margin({ top: 10 })
          .textAlign(TextAlign.Center)
      }
    }
    .width('100%')
    .height('100%')
    .padding(20)
    .backgroundColor('#F5F5F5')
  }
}关键点说明:
router.getParams()用于获取前一个页面传递的参数,这里假设通过key获取PixelMap索引AppStorage.get<image.PixelMap>('editingPixelMap')从应用全局存储中获取当前编辑的PixelMappromptAction.showToast显示轻量级提示,用于反馈保存成功或失败结果- 在
onSaveToAlbum中,先编码再保存,并更新UI元素状态(如按钮禁用、进度显示) - 错误处理中使用
BusinessError类型捕获,避免应用崩溃
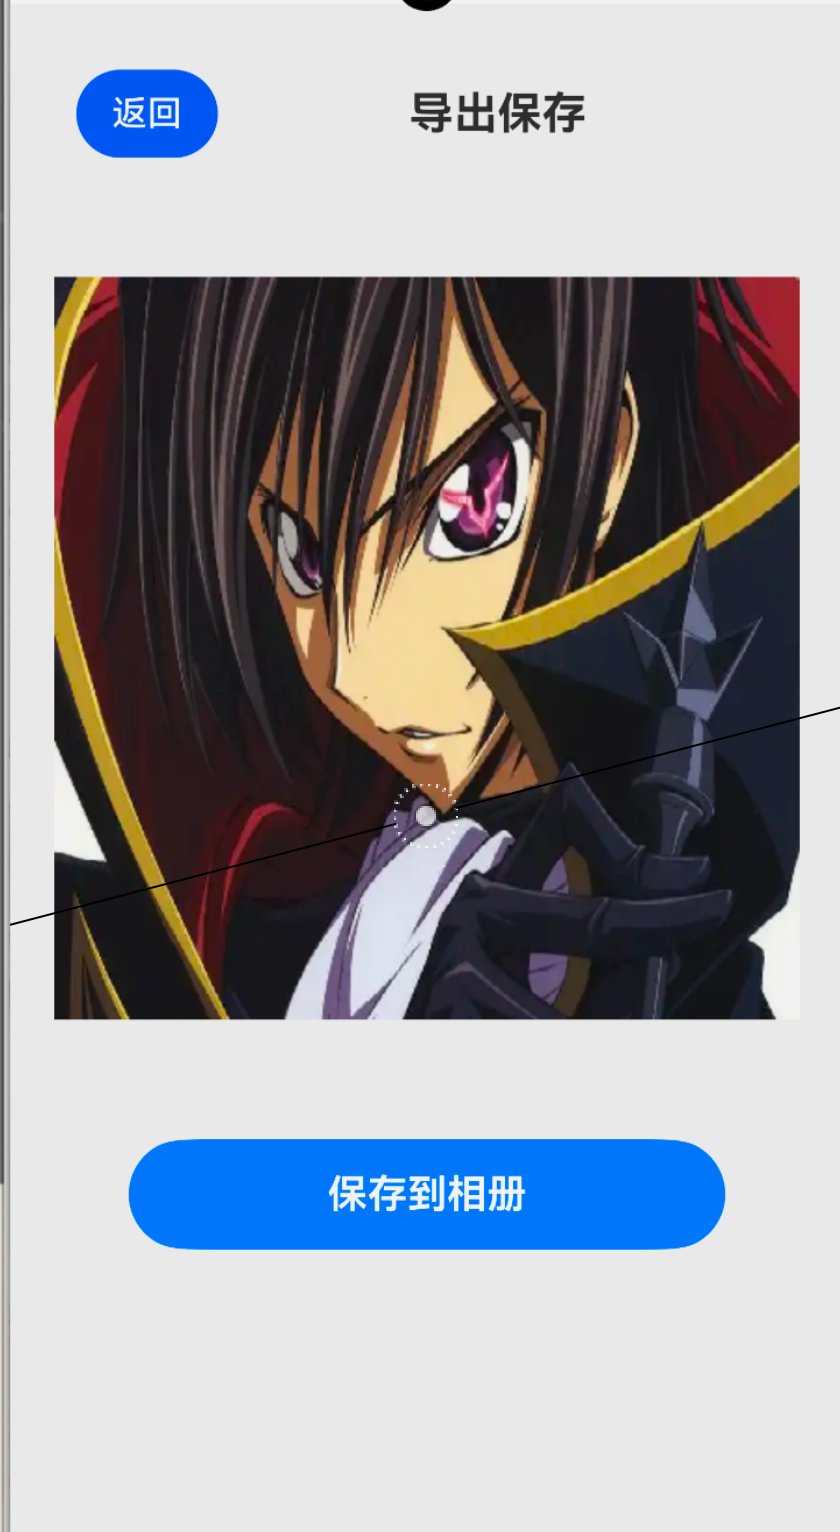
3. 运行验证
在应用中完成以下操作来验证导出功能:
- 打开APP,选择一张图片进行任意编辑(如调整亮度、应用滤镜、旋转等)
- 点击页面中的「保存到相册」按钮
- 观察页面状态变化:按钮变为禁用,加载图标出现,提示"正在导出..."
- 等待片刻,页面弹出Toast提示"图片已保存到相册"
- 切换到系统相册应用,检查最新图片是否出现在相册中,图片内容与当前编辑效果一致
- 如果权限未授权,应用会弹出系统权限弹窗,需用户点击允许
- 若保存失败,页面会显示错误提示(如存储空间不足、权限拒绝等)
预期效果:每次保存都会在相册生成一个新的JPEG文件,文件名基于时间戳生成,不会覆盖已有文件。
4. 小结与预告
本篇我们实现了图片编码导出功能。通过image.createImagePacker将PixelMap编码为JPEG格式,利用photoAccessHelper.createAsset在系统相册创建媒体资源,最后用fileIo.writeSync写入文件。这个功能使APP形成了完整的"编辑→导出"闭环,用户的所有创意处理成果都能永久保存。同时,我们在代码中为该页面后续集成历史记录功能预留了调用点,保持代码的可扩展性。
下一篇「批量处理与历史记录」将实现两个核心功能:一是支持多图选择,对每张图片应用相同的裁切或滤镜操作;二是使用栈结构记录每次编辑操作,支持撤销/重做。这两项功能将把我们的图片处理APP推向更专业的水平,真正实现类Photoshop的编辑体验。敬请期待。