一、什么是孔洞检测
孔洞(Hole)是目标内部被背景包围的区域。在工业视觉中,孔洞通常代表产品结构特征或缺陷。
典型应用:
- 通孔检测
- 铸件气孔检测
- 注塑件缺料检测
- 密封圈破损检测
- 锂电极片缺陷检测
二、孔洞检测原理
常见方法:
- 轮廓层级(Hierarchy)
- FloodFill 填充法
- 连通域分析
- 形态学填充
- 面积差法
推荐:
- 已知外轮廓:Hierarchy
- 二值图检测:FloodFill
- 统计:ConnectedComponents
三、方法一:FloodFill孔洞检测
思路:
text
二值图
 ↓
边界FloodFill
 ↓
反色
 ↓
与原图OR
 ↓
孔洞位置
python
import cv2
import numpy as np


def detect_holes(image_path):
    # 1. 读取图像并转为灰度图
    img = cv2.imread(image_path)
    if img is None:
        print("错误:无法读取图像,请检查路径。")
        return
    gray = cv2.cvtColor(img, cv2.COLOR_BGR2GRAY)

    # 2. Otsu 自动二值化
    _, binary = cv2.threshold(gray, 0, 255, cv2.THRESH_BINARY + cv2.THRESH_OTSU)

    # 【关键】确保背景是黑色(0),目标前景是白色(255)
    # 如果图像左上角(0,0)是白色,说明前景背景反了,需要反转
    if binary[0, 0] == 255:
        binary = cv2.bitwise_not(binary)

    # ==========================================
    # 方法一:FloodFill (漫水填充法) 提取孔洞
    # ==========================================
    fill = binary.copy()
    # mask 的长宽必须比原图各多 2 个像素
    mask = np.zeros((fill.shape[0] + 2, fill.shape[1] + 2), np.uint8)

    # 从 (0,0) 开始填充外部背景为白色
    cv2.floodFill(fill, mask, (0, 0), 255)

    # 反色后与原图合并,得到"实心目标"
    holes_filled = cv2.bitwise_or(binary, cv2.bitwise_not(fill))

    # 用"实心目标"减去"原图",剩下的就是纯粹的孔洞
    real_holes_flood = cv2.subtract(holes_filled, binary)

    # ==========================================
    # 方法二:轮廓层级法 (Hierarchy) 提取孔洞 (工业推荐)
    # 优点:不受孔洞是否连通边缘的影响,更精准
    # ==========================================
    # RETR_CCOMP 会建立两层层级:外层轮廓和内层孔洞
    contours, hierarchy = cv2.findContours(binary, cv2.RETR_CCOMP, cv2.CHAIN_APPROX_SIMPLE)

    real_holes_hierarchy = np.zeros_like(binary)
    if hierarchy is not None:
        for i, h in enumerate(hierarchy[0]):
            # h[3] 代表父轮廓索引。如果不为 -1,说明它是被包围的内部孔洞
            if h[3] != -1:
                cv2.drawContours(real_holes_hierarchy, contours, i, 255, -1)

    # ==========================================
    # 3. 在原图上绘制检测结果 (以轮廓层级法为例)
    # ==========================================
    result_img = img.copy()
    defect_count = 0

    # 在孔洞掩膜上寻找轮廓,方便计算面积并过滤噪声
    hole_cnts, _ = cv2.findContours(real_holes_hierarchy, cv2.RETR_EXTERNAL, cv2.CHAIN_APPROX_SIMPLE)

    for cnt in hole_cnts:
        area = cv2.contourArea(cnt)
        # 过滤掉面积小于 20 像素的微小噪点
        if area < 20:
            continue

        defect_count += 1
        x, y, w, h = cv2.boundingRect(cnt)
        # 绘制红色矩形框
        cv2.rectangle(result_img, (x, y), (x + w, y + h), (0, 0, 255), 2)
        # 标注面积
        cv2.putText(result_img, f"Area:{area:.0f}", (x, y - 5),
                    cv2.FONT_HERSHEY_SIMPLEX, 0.5, (0, 0, 255), 1)

    print(f"检测到的孔洞/缺陷数量: {defect_count}")

    # 4. 可视化展示
    cv2.imshow("1. Original Binary", binary)
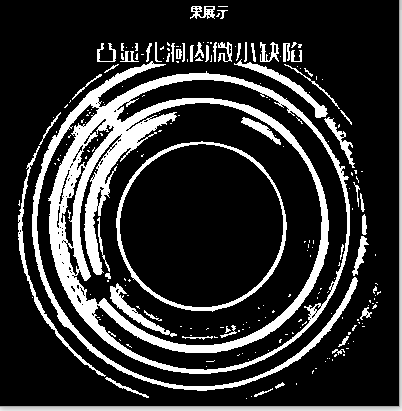
    cv2.imshow("2. FloodFill Holes", real_holes_flood)
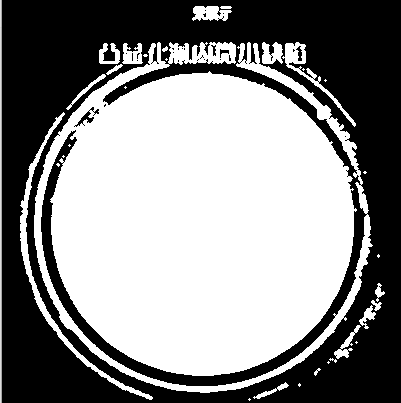
    cv2.imshow("3. Hierarchy Holes (Recommended)", real_holes_hierarchy)
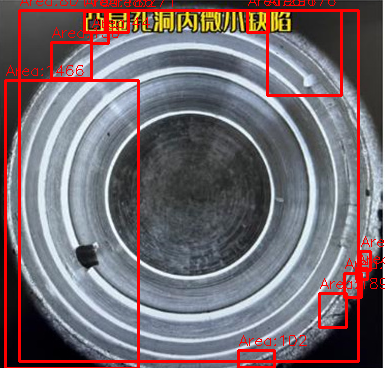
    cv2.imshow("4. Final Detection Result", result_img)
    cv2.waitKey(0)
    cv2.destroyAllWindows()

if __name__ == "__main__":
    detect_holes("test.png")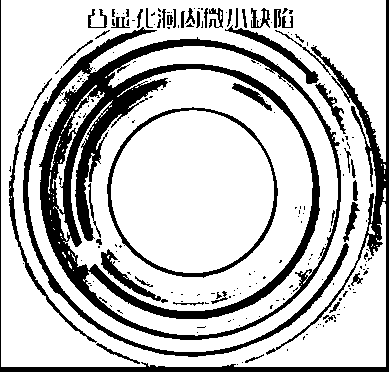
优点:
- 简单
- 速度快
- 不依赖轮廓
四、方法二:轮廓层级检测孔洞
python
contours, hierarchy = cv2.findContours(
    binary,
    cv2.RETR_TREE,
    cv2.CHAIN_APPROX_SIMPLE
)

for i, h in enumerate(hierarchy[0]):
    parent = h[3]
    if parent != -1:
        cv2.drawContours(img, contours, i, (0, 0, 255), 2)
说明:
parent = -1:外轮廓parent >= 0:孔洞
适合孔检测。
五、方法三:连通域分析
python
num, labels, stats, centers = cv2.connectedComponentsWithStats(binary)

for i in range(1, num):
    area = stats[i, cv2.CC_STAT_AREA]
    if area < 100:
        continue
可用于:
- 缺陷数量统计
- Blob分析
- 异物检测
六、方法四:形态学检测
利用闭运算填充孔洞。
python
kernel = cv2.getStructuringElement(
    cv2.MORPH_ELLIPSE,
    (9, 9)
)

close = cv2.morphologyEx(
    binary,
    cv2.MORPH_CLOSE,
    kernel
)

holes = cv2.subtract(close, binary)
适合小孔检测。
七、缺陷分析
检测完成后可分析:
python
area = cv2.contourArea(cnt)
length = cv2.arcLength(cnt, True)

x, y, w, h = cv2.boundingRect(cnt)

ratio = w / h
常用指标:
- 面积
- 长宽比
- 圆度
- 外接矩形
- 数量
八、工业案例
- 孔检测: 统计所有孔数量。
- 铸件气孔: 过滤面积小于20像素噪声。
- 密封圈: 检测内部是否断裂。
- Connector: 检测定位孔是否存在。
九、完整案例
python
import cv2
import numpy as np

img = cv2.imread("part.png")
gray = cv2.cvtColor(img, cv2.COLOR_BGR2GRAY)

_, binary = cv2.threshold(gray, 0, 255, cv2.THRESH_BINARY + cv2.THRESH_OTSU)

fill = binary.copy()
mask = np.zeros((fill.shape[0] + 2, fill.shape[1] + 2), np.uint8)
cv2.floodFill(fill, mask, (0, 0), 255)

holes = cv2.bitwise_not(fill)

cnts, _ = cv2.findContours(
    holes,
    cv2.RETR_EXTERNAL,
    cv2.CHAIN_APPROX_SIMPLE
)

for c in cnts:
    if cv2.contourArea(c) < 30:
        continue
    x, y, w, h = cv2.boundingRect(c)
    cv2.rectangle(img, (x, y), (x + w, y + h), (0, 0, 255), 2)

cv2.imshow("result", img)
cv2.waitKey()
十、常见问题
Q:为什么检测不到孔洞?
- 二值化错误
- 前景背景反色
- 孔洞与边界连通
Q:为什么孔洞很多?
- 噪声未去除
- 阈值不合理
建议: 增加开运算、面积过滤。
十一、总结
| 方法 | 优点 | 场景 |
|---|---|---|
| FloodFill | 简单快速 | 通用 |
| Hierarchy | 最准确 | Connector |
| 连通域 | 统计方便 | 空洞检测 |
| 形态学 | 小孔检测 | 缺陷检测 |
建议: 工业视觉中采用 二值化 + 形态学 + FloodFill/Hierarchy + 面积过滤 组合,可获得稳定的孔洞检测效果。