文章目录
添加私有网络
之前的操作只是添加了共有网络,现在再为其添加上私有网络(在之前的基础上进行配置)
添加全局变量
bash
[root@controller ~]# vim .bashrc
source <(openstack complete)
[root@controller ~]# source .bashrc
配置控制节点私有网络
配置服务组件
bash
[root@controller ~]# vim /etc/neutron/neutron.conf
#在[DEFAULT]部分,启用Modular Layer 2 (ML2)插件,路由服务和重叠的IP地址
[DEFAULT]
core_plugin = ml2
service_plugins = router
allow_overlapping_ips = True
配置 Modular Layer 2 (ML2) 插件
bash
[root@controller ~]# vim /etc/neutron/plugins/ml2/ml2_conf.ini
#在[ml2]部分,启用flat,VLAN以及VXLAN网络:
[ml2]
type_drivers = flat,vlan,vxlan
#在[ml2]部分,启用VXLAN私有网络:
[ml2]
tenant_network_types = vxlan
#在[ml2]部分,启用Linuxbridge和layer-2机制:
[ml2]
mechanism_drivers = linuxbridge,l2population
#在[ml2]部分,启用端口安全扩展驱动:
[ml2]
extension_drivers = port_security
#在[ml2_type_flat]部分,配置公共虚拟网络为flat网络
[ml2_type_flat]
flat_networks = provider
#在[ml2_type_vxlan]部分,为私有网络配置VXLAN网络识别的网络范围:
[ml2_type_vxlan]
vni_ranges = 1:1000
#在[securitygroup]部分,启用 ipset 增加安全组规则的高效性:
[securitygroup]
enable_ipset = True
配置Linuxbridge代理
bash
[root@controller ~]# vim /etc/neutron/plugins/ml2/linuxbridge_agent.ini
#在[vxlan]部分,启用VXLAN覆盖网络,配置覆盖网络的物理网络接口的IP地址,启用layer-2 population:
[vxlan]
enable_vxlan = True
local_ip = 192.168.117.131
l2_population = True
配置layer-3代理
bash
[root@controller ~]# vim /etc/neutron/l3_agent.ini
#在[DEFAULT]部分,配置Linuxbridge接口驱动和外部网络网桥:
[DEFAULT]
interface_driver = neutron.agent.linux.interface.BridgeInterfaceDriver
external_network_bridge =
重启网络选项
bash
[root@controller ~]# systemctl restart neutron-server.service neutron-linuxbridge-agent.service启用layer-3服务并设置其随系统自启动
bash
[root@controller ~]# systemctl enable --now neutron-l3-agent.service配置计算节点私有网络
配置Linuxbridge代理
bash
[root@compute1 ~]# vim /etc/neutron/plugins/ml2/linuxbridge_agent.ini
#在[vxlan]部分,启用VXLAN覆盖网络,配置覆盖网络的物理网络接口的IP地址,启用layer-2 population
[vxlan]
enable_vxlan = True
local_ip = OVERLAY_INTERFACE_IP_ADDRESS
l2_population = True
重启Linuxbridge代理服务
bash
[root@compute1 ~]# systemctl restart neutron-linuxbridge-agent.service查看服务配置是否成功
bash
[root@controller ~]# openstack compute service list
+----+--------------+------------+----------+---------+-------+--------------+
| Id | Binary       | Host       | Zone     | Status  | State | Updated At   |
+----+--------------+------------+----------+---------+-------+--------------+
|  1 | nova-        | controller | internal | enabled | up    | 2026-08-27T0 |
|    | scheduler    |            |          |         |       | 1:52:17.0000 |
|    |              |            |          |         |       | 00           |
|  2 | nova-        | controller | internal | enabled | up    | 2026-08-27T0 |
|    | consoleauth  |            |          |         |       | 1:52:18.0000 |
|    |              |            |          |         |       | 00           |
|  3 | nova-        | controller | internal | enabled | up    | 2026-08-27T0 |
|    | conductor    |            |          |         |       | 1:52:14.0000 |
|    |              |            |          |         |       | 00           |
|  6 | nova-compute | compute1   | nova     | enabled | up    | 2026-08-27T0 |
|    |              |            |          |         |       | 1:52:17.0000 |
|    |              |            |          |         |       | 00           |
+----+--------------+------------+----------+---------+-------+--------------+
修改Dashboard配置文件
将所有False改为True
bash
[root@controller ~]# vim /etc/openstack-dashboard/local_settings
OPENSTACK_NEUTRON_NETWORK = {
    ...
    'enable_router': True,
    'enable_quotas': True,
    'enable_distributed_router': True,
    'enable_ha_router': True,
    'enable_lb': True,
    'enable_firewall': True,
    'enable_vpn': True,
    'enable_fip_topology_check': True,
}
重启服务
bash
[root@controller ~]# systemctl restart httpd.service memcached.service图形界面操作
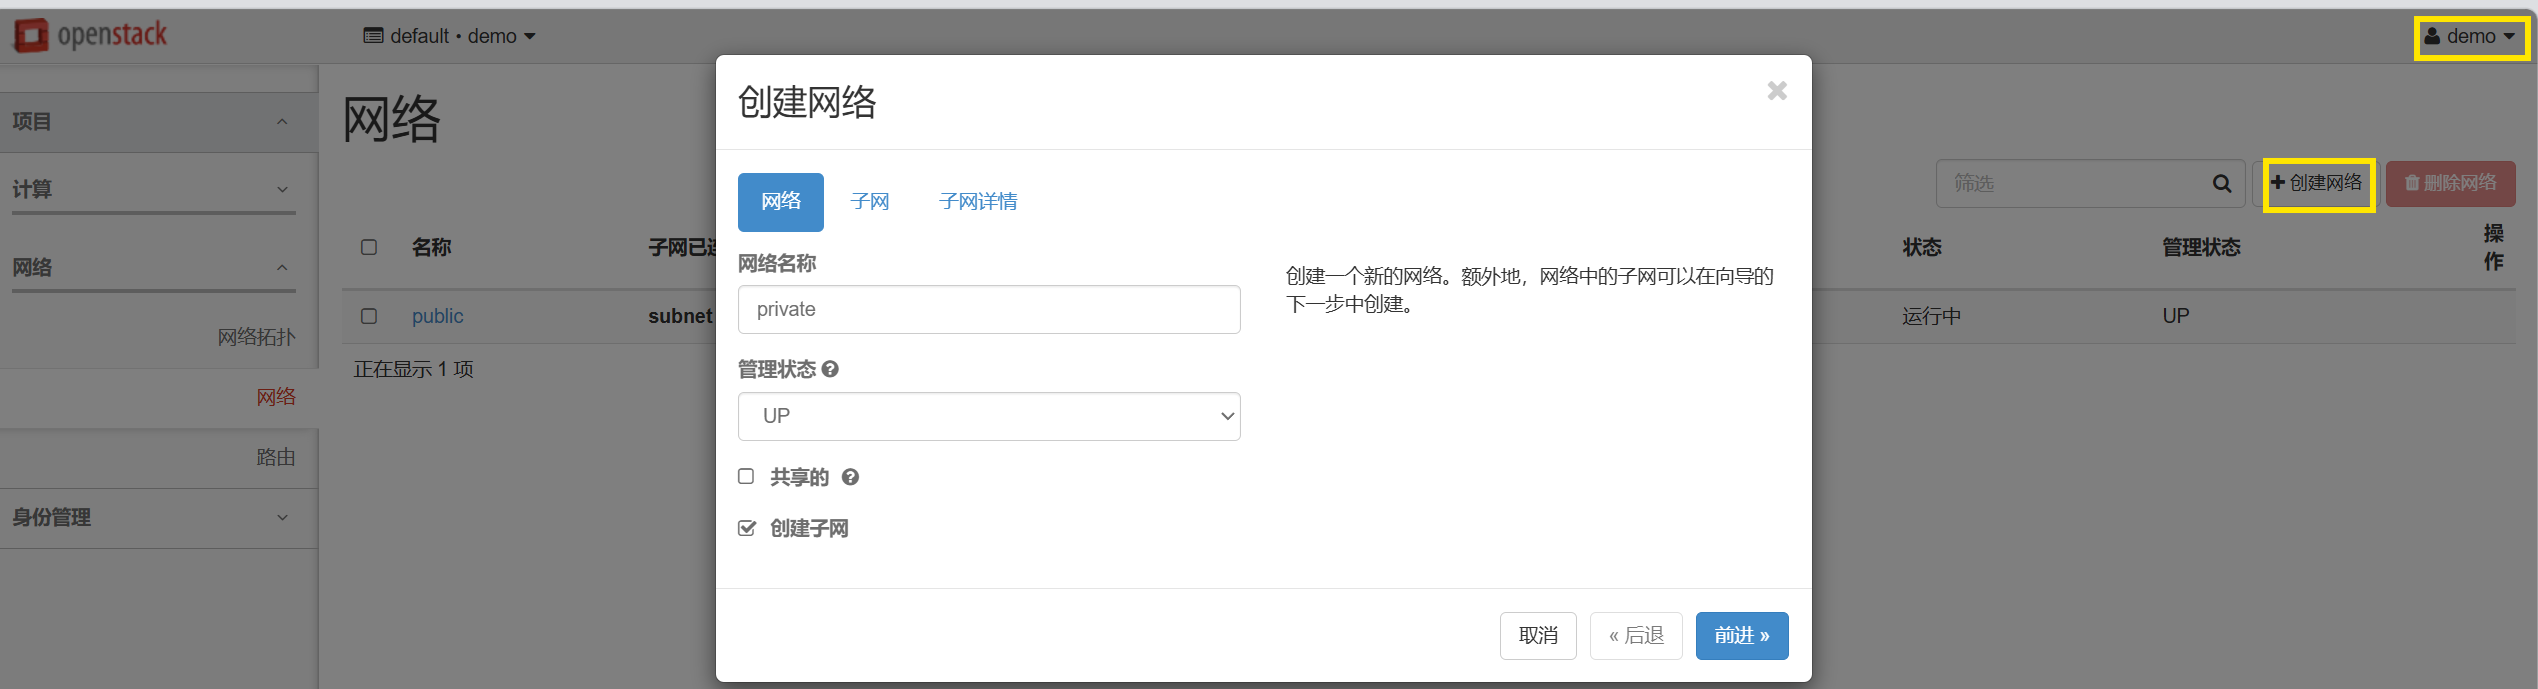
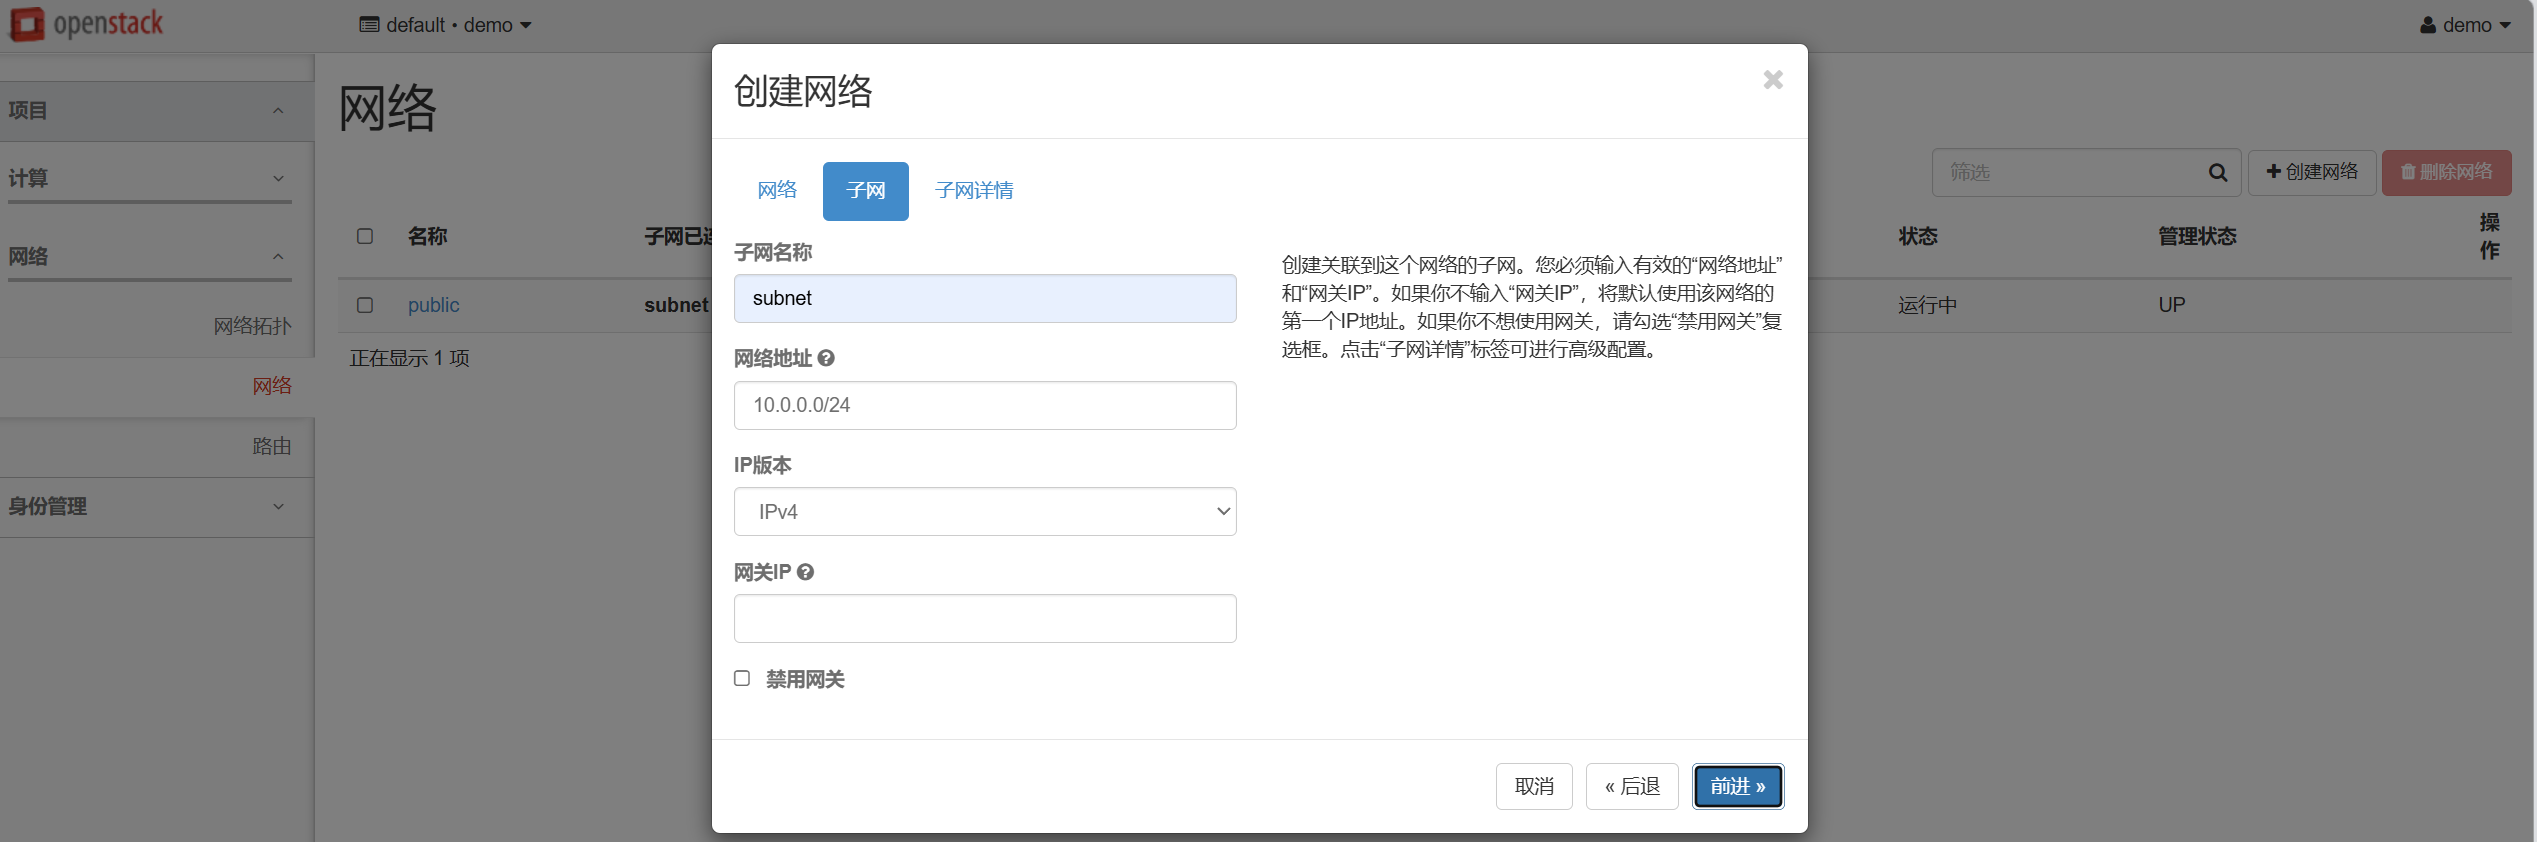
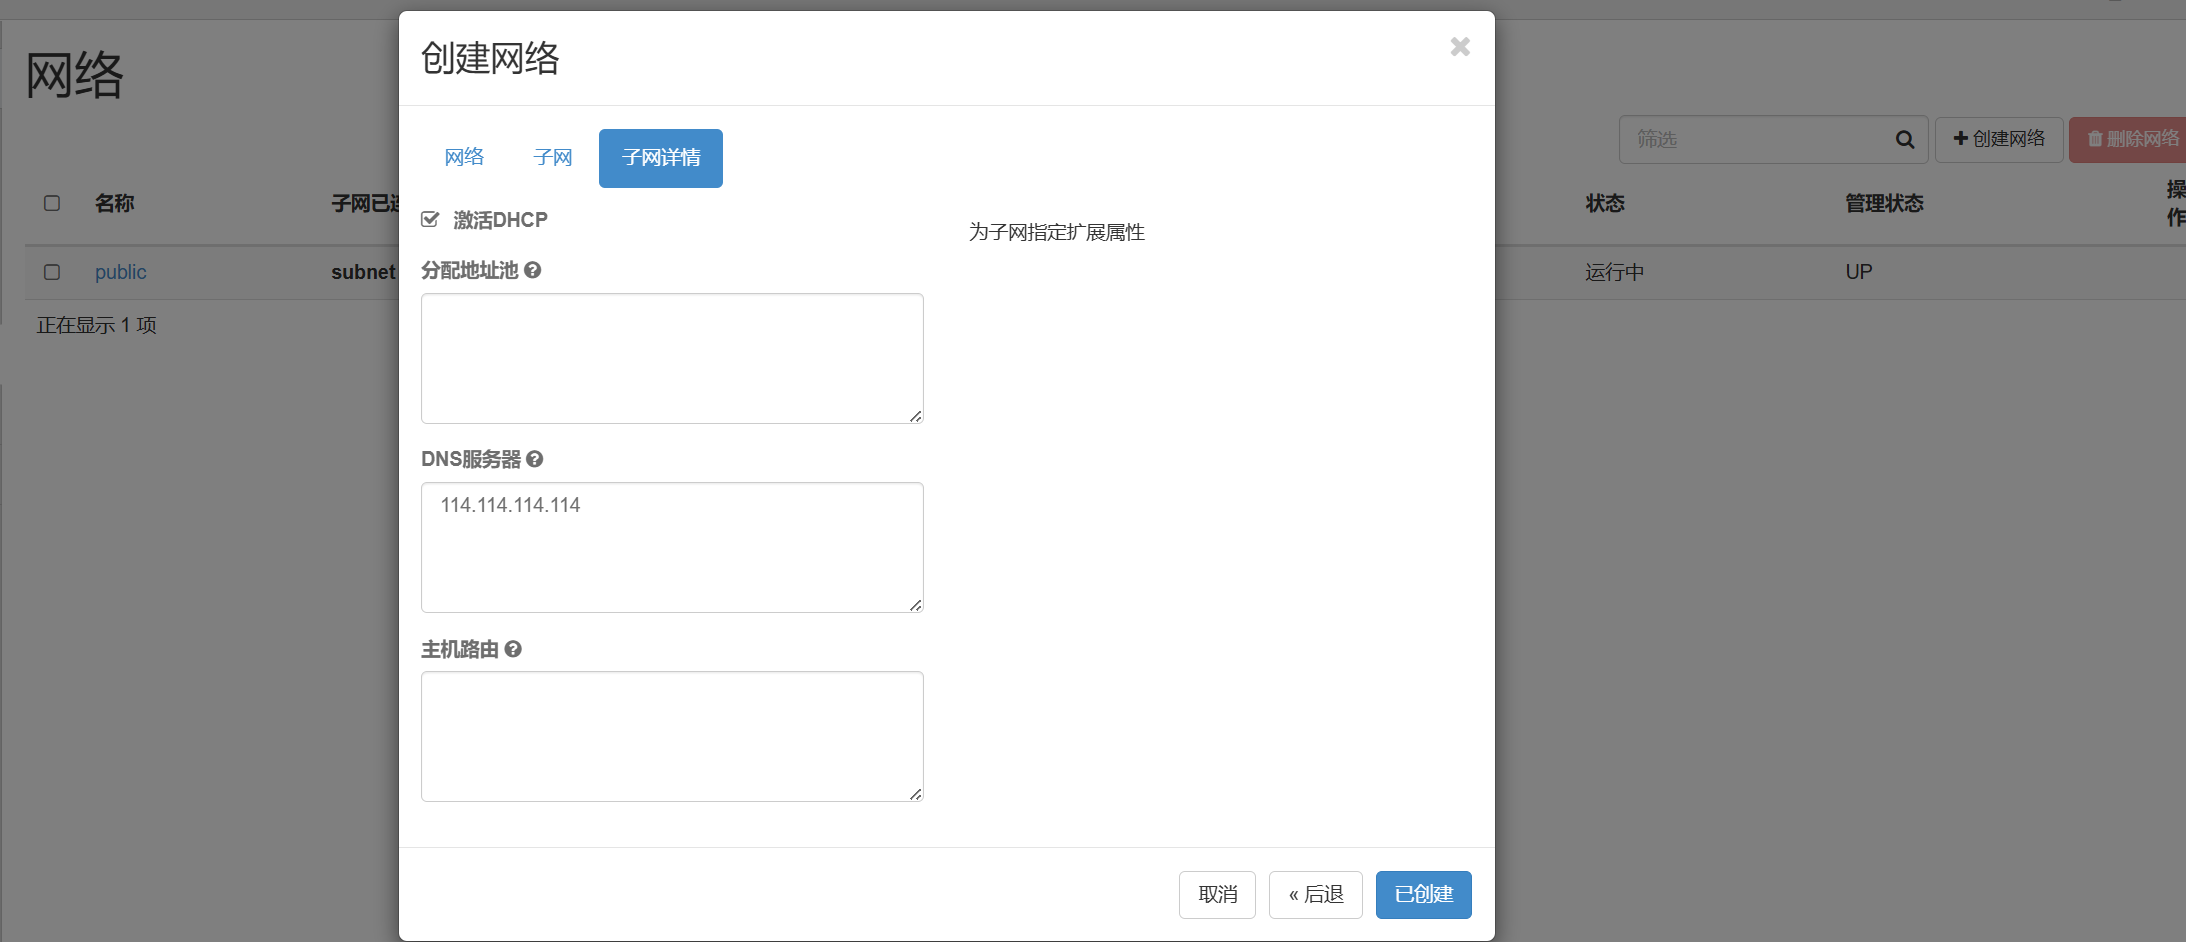
创建private网络
用demo用户创建一个private网络
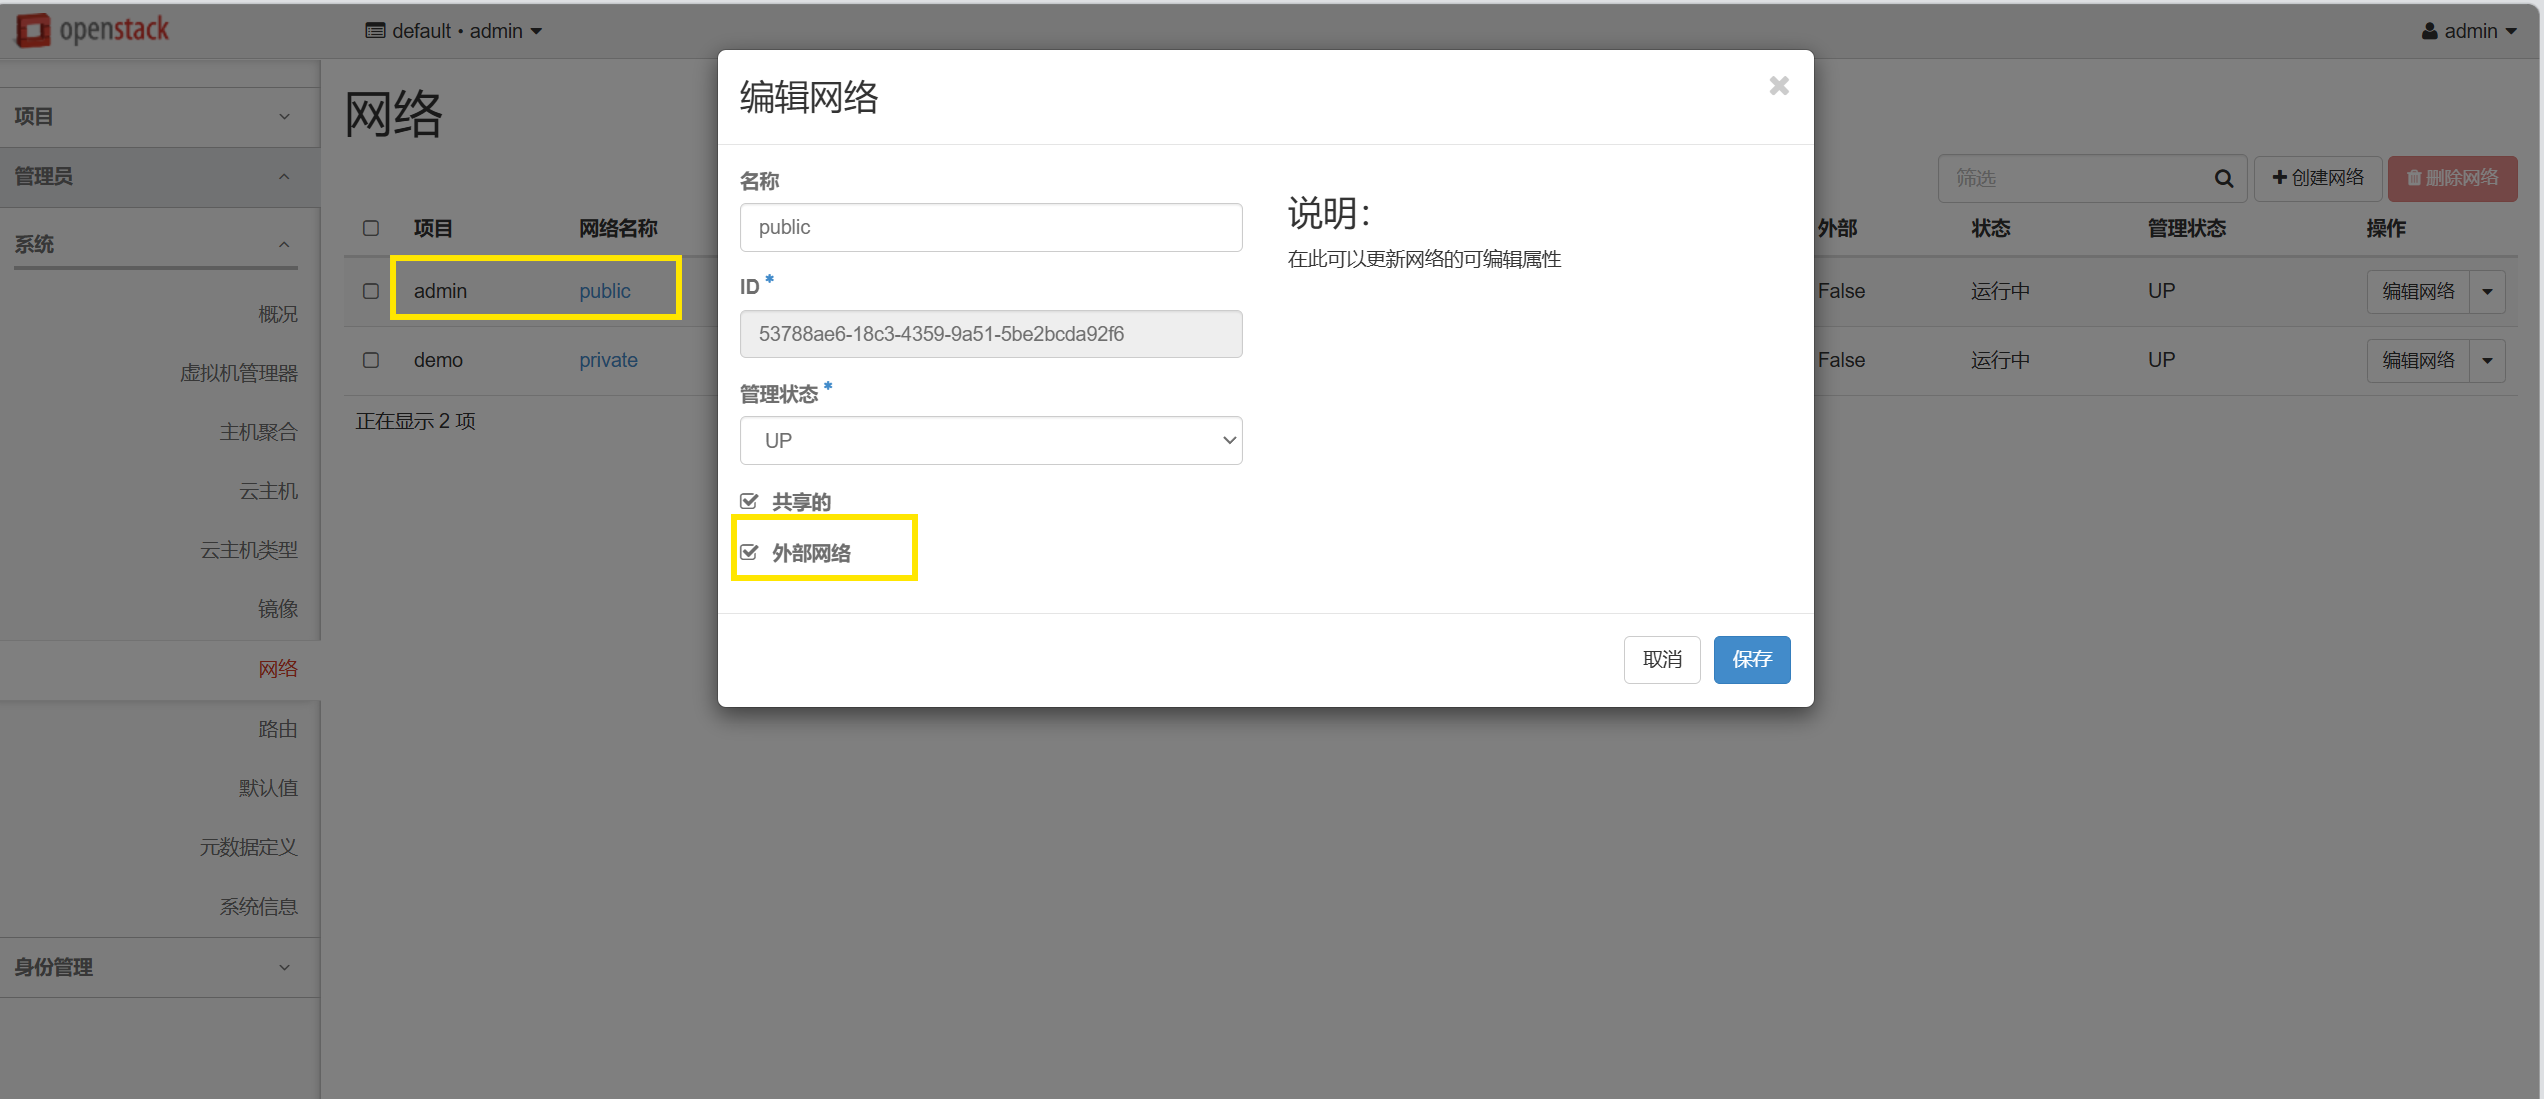
切换admin用户,打开public里的外部网络
登录demo用户查看拓扑
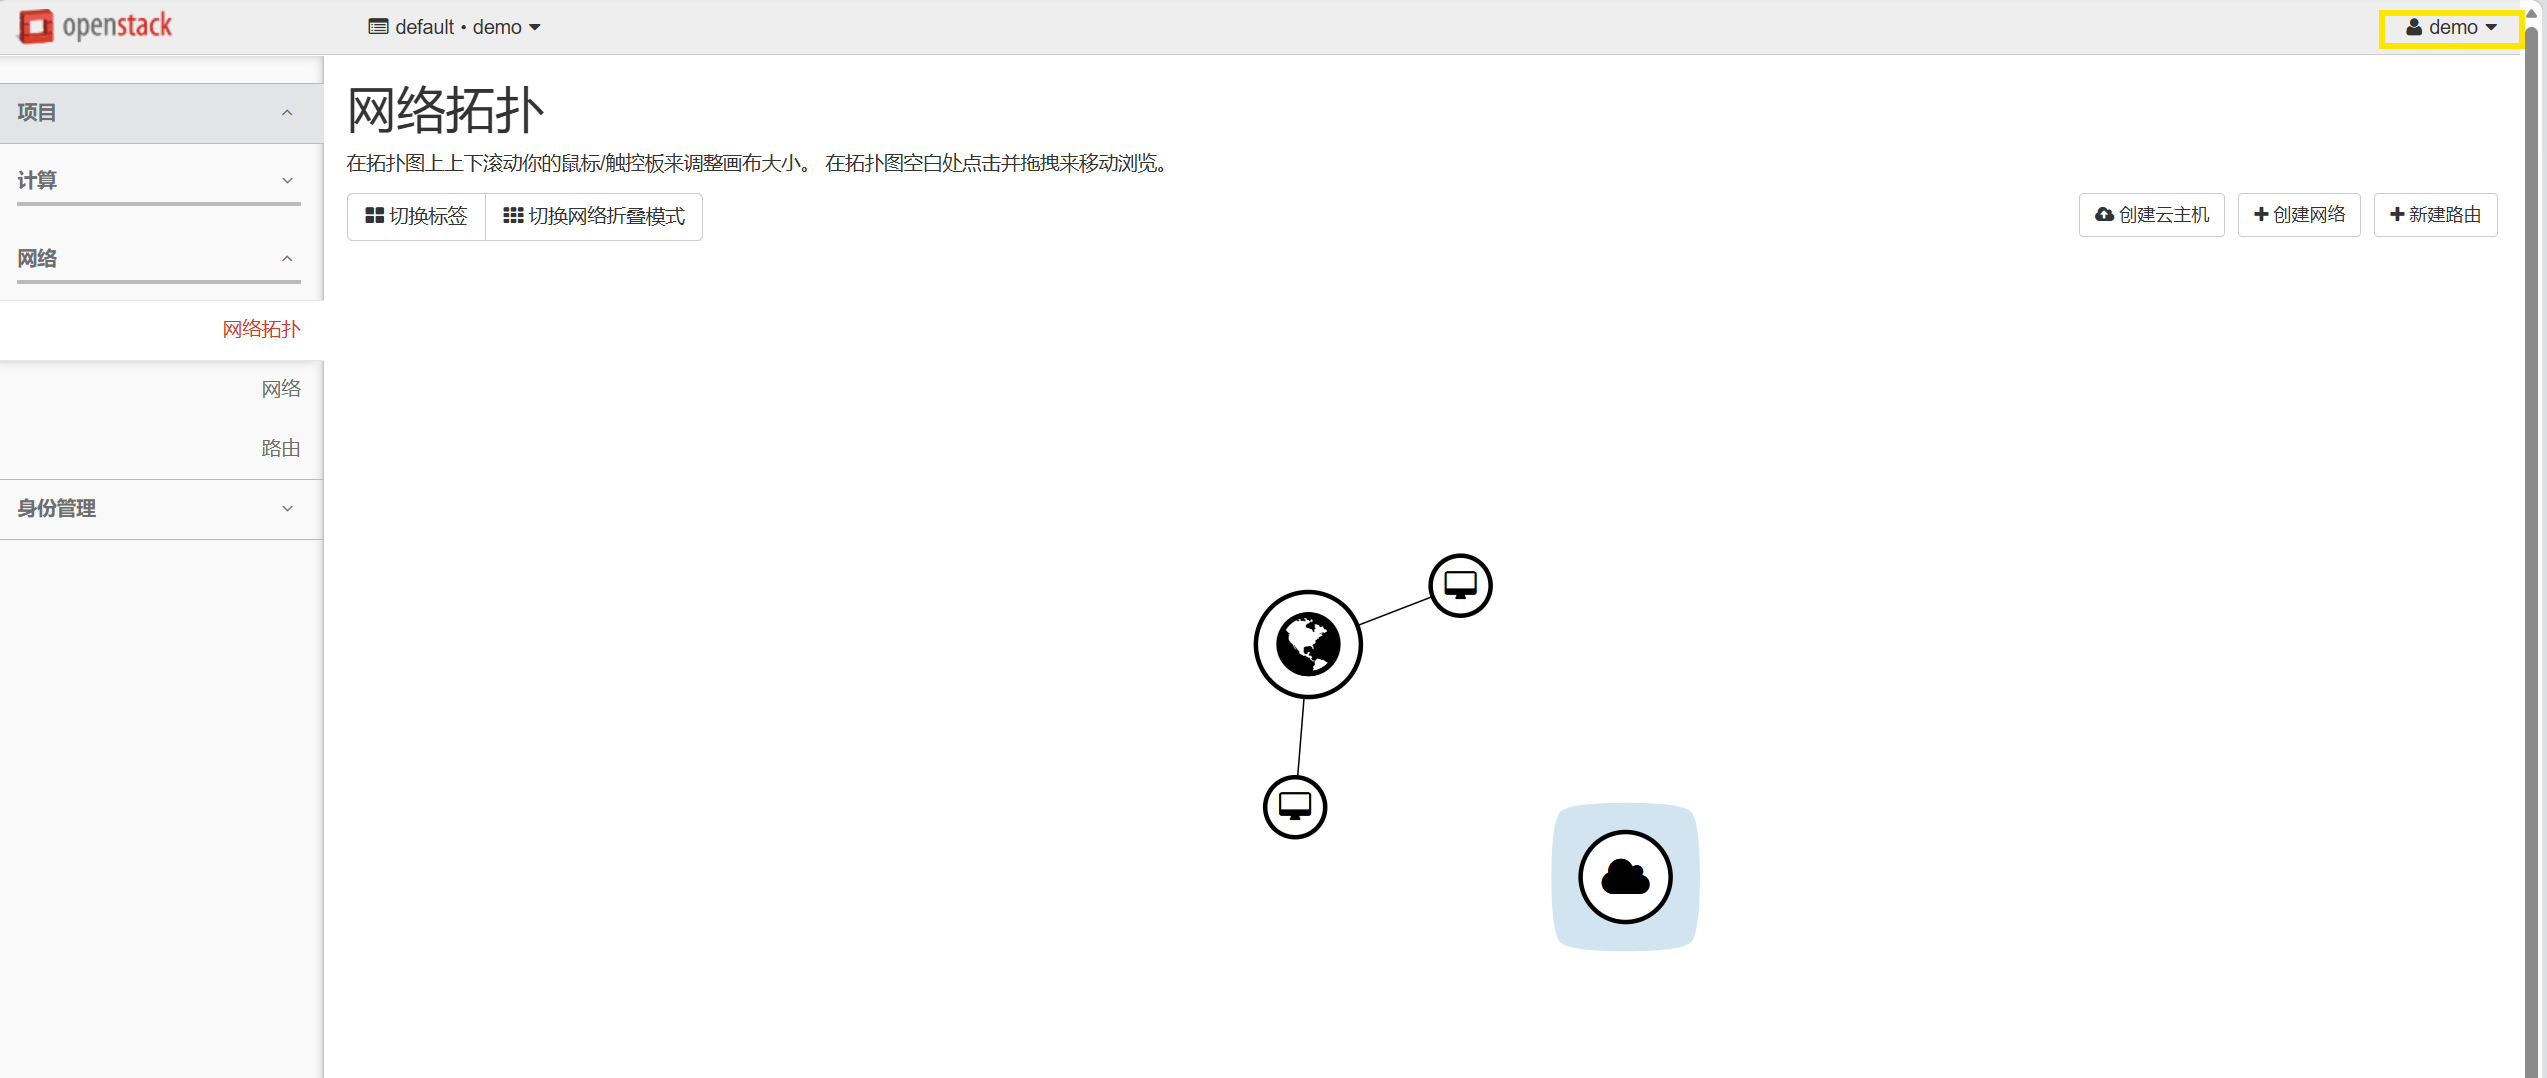
新建路由
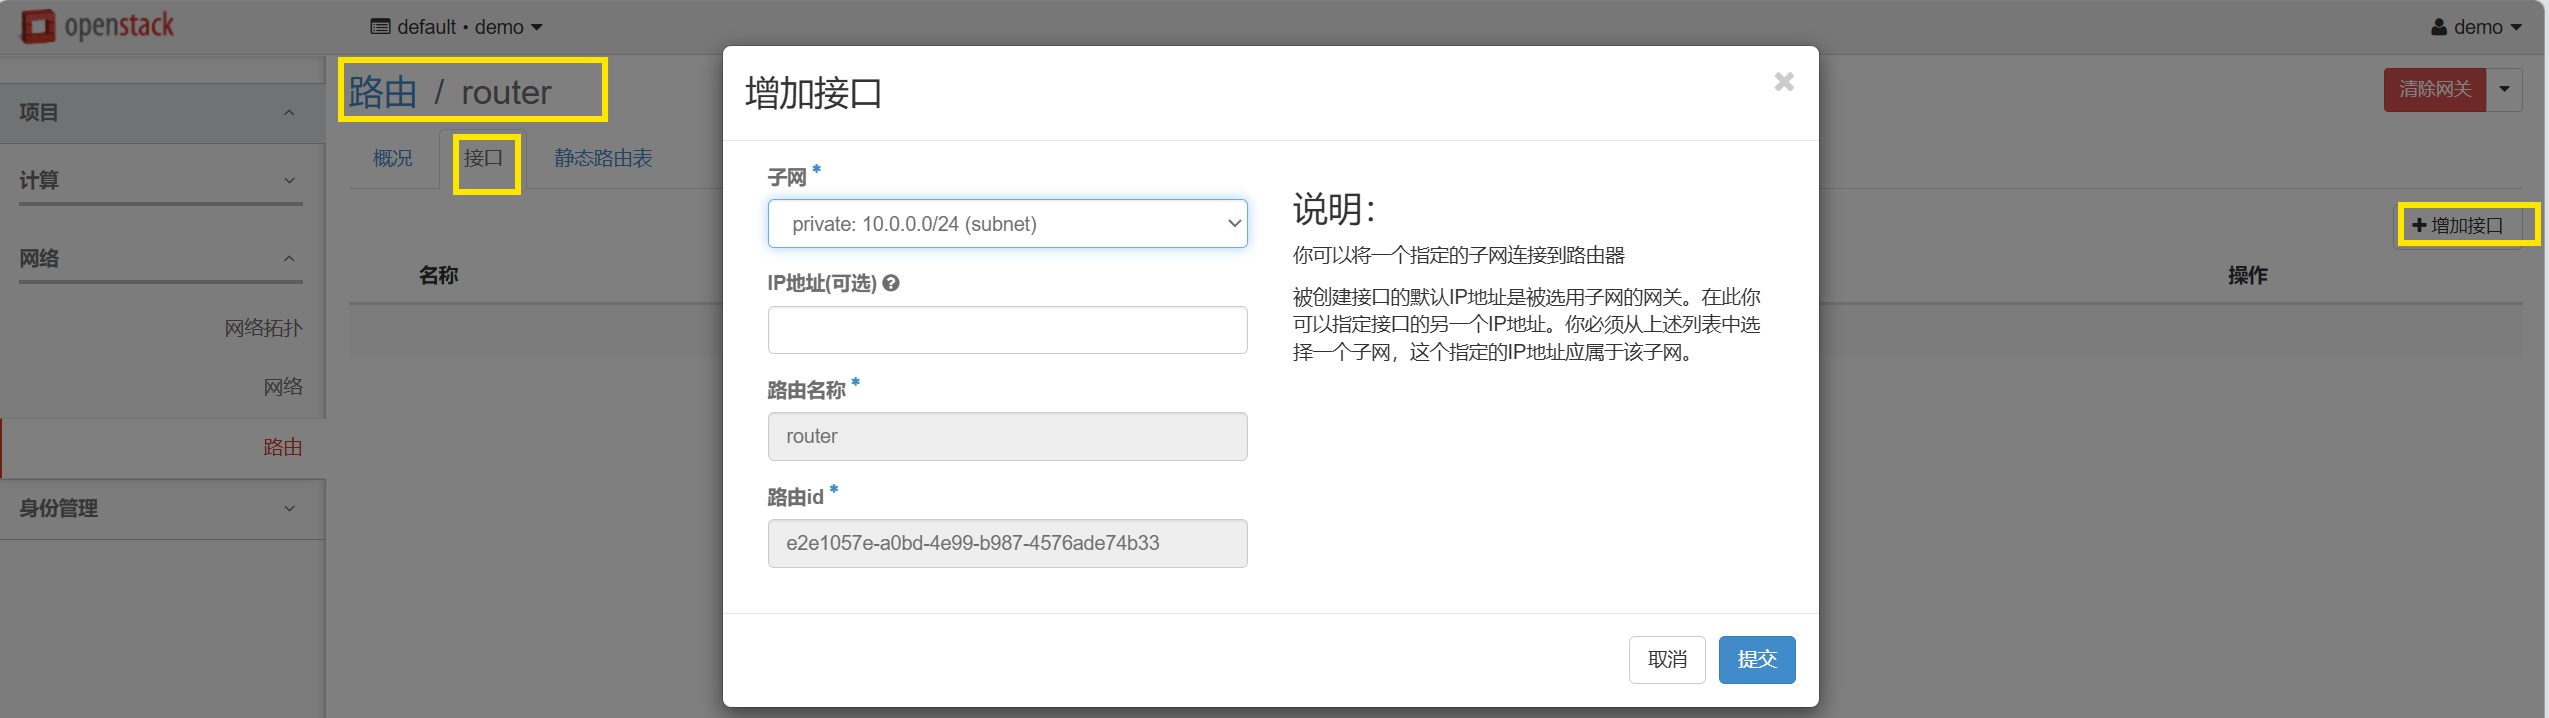
将private与public连接需要路由
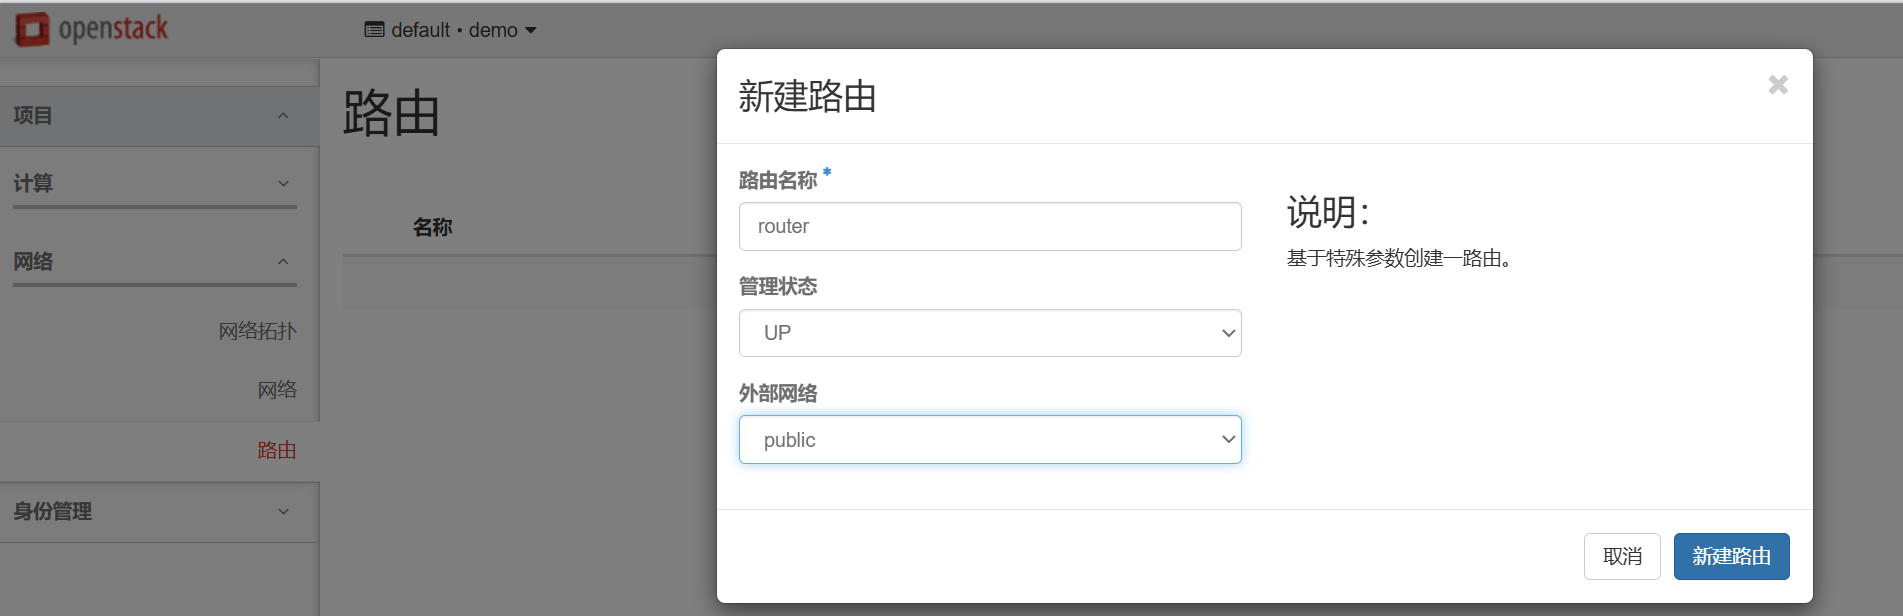
查看
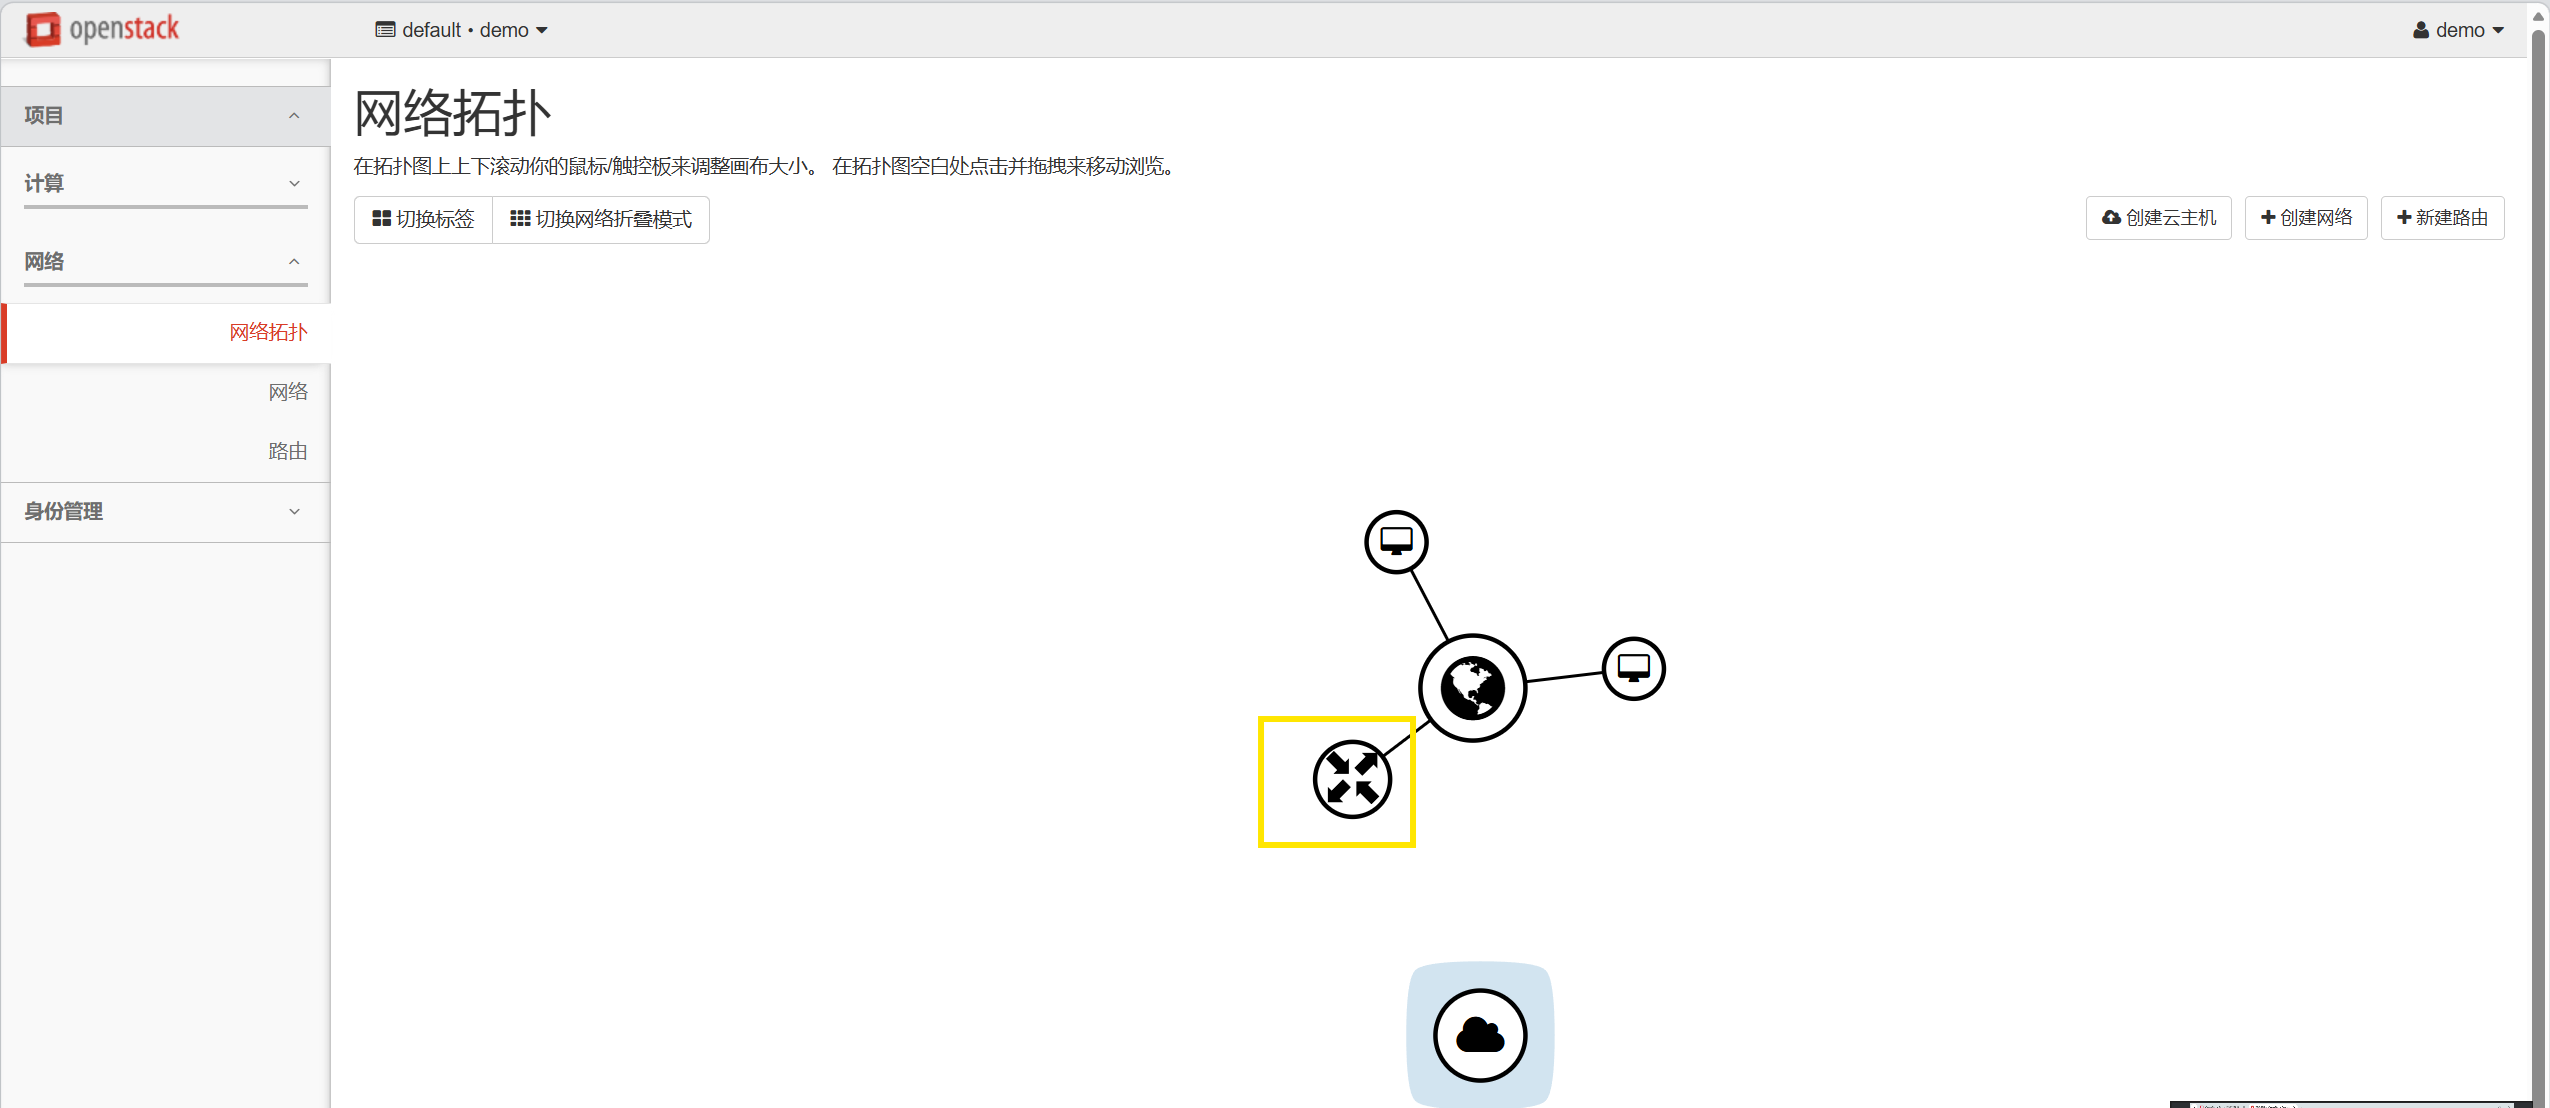
在网络里点进去路由,在接口选项里增加private接口
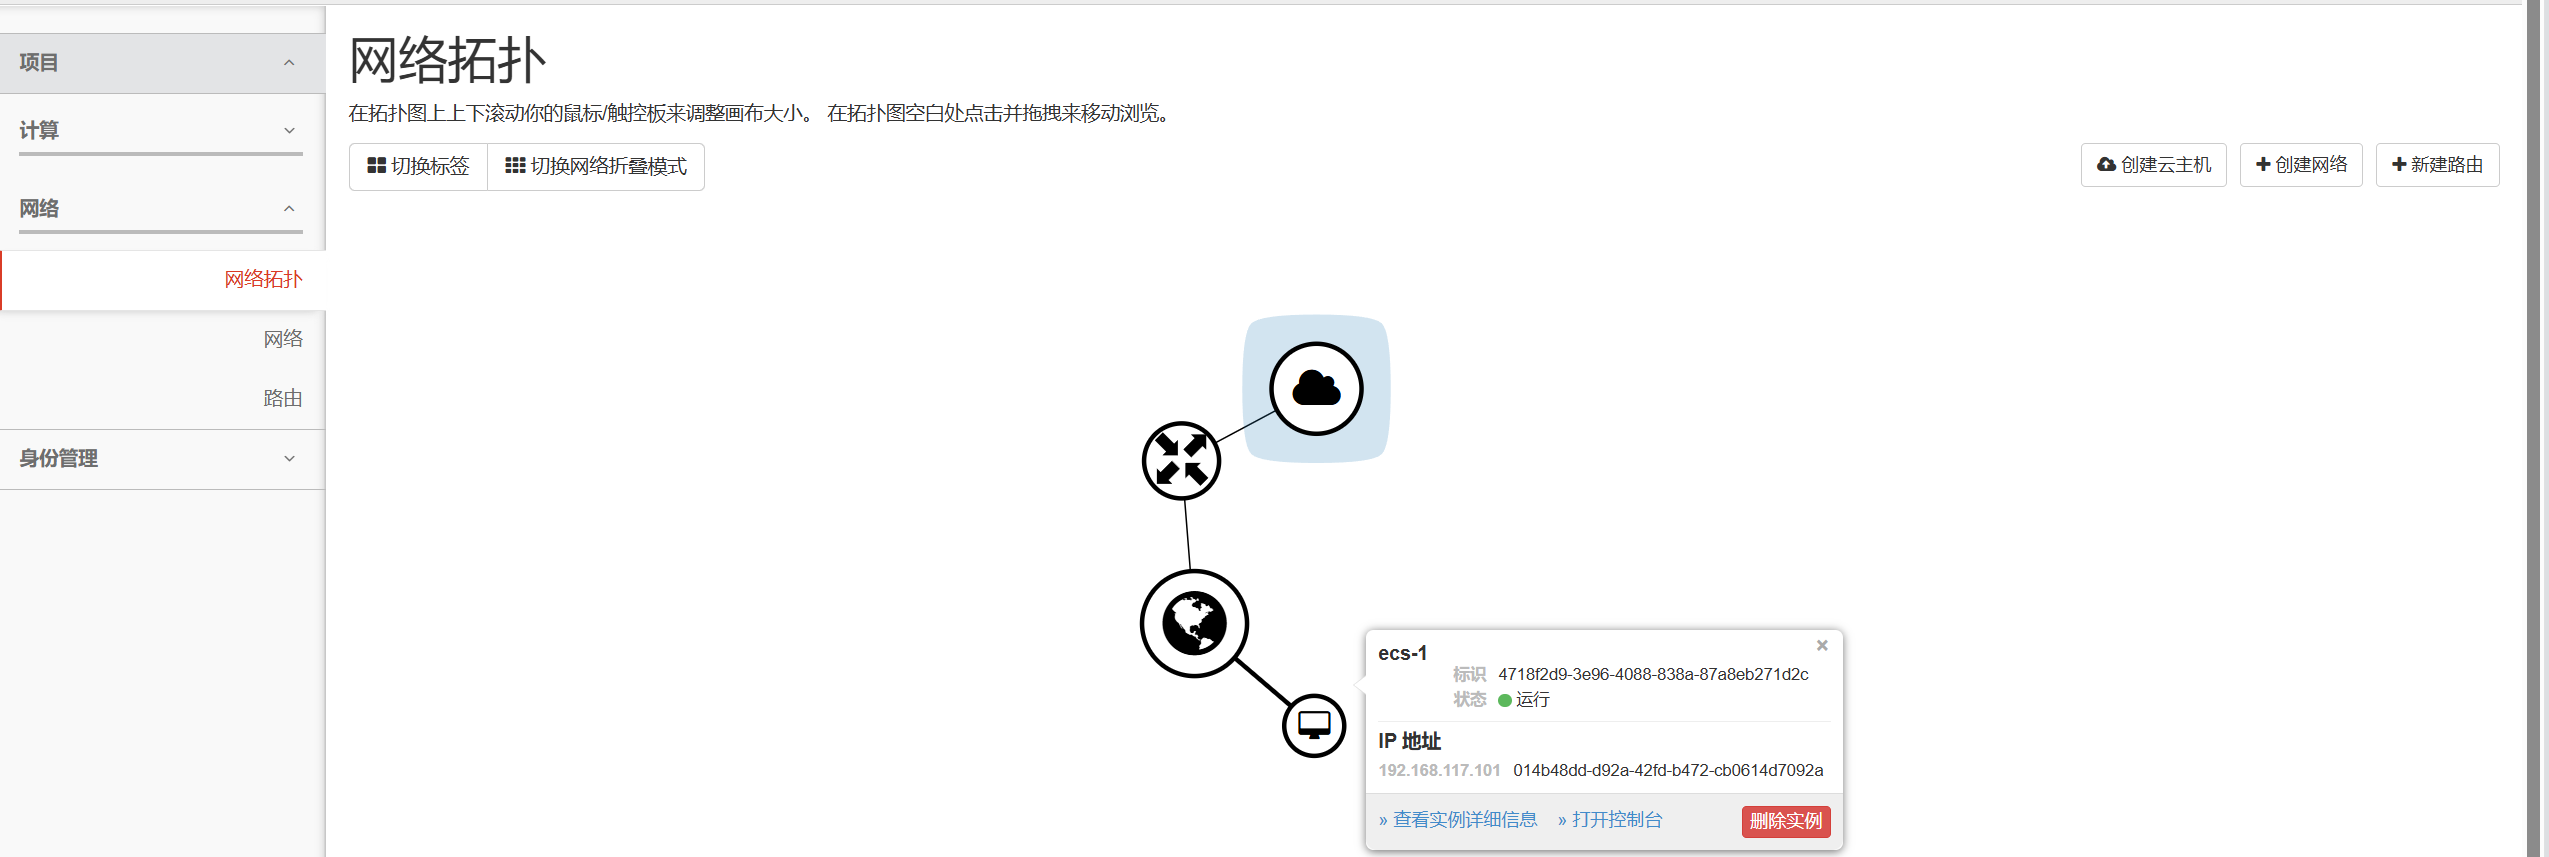
查看网络拓扑

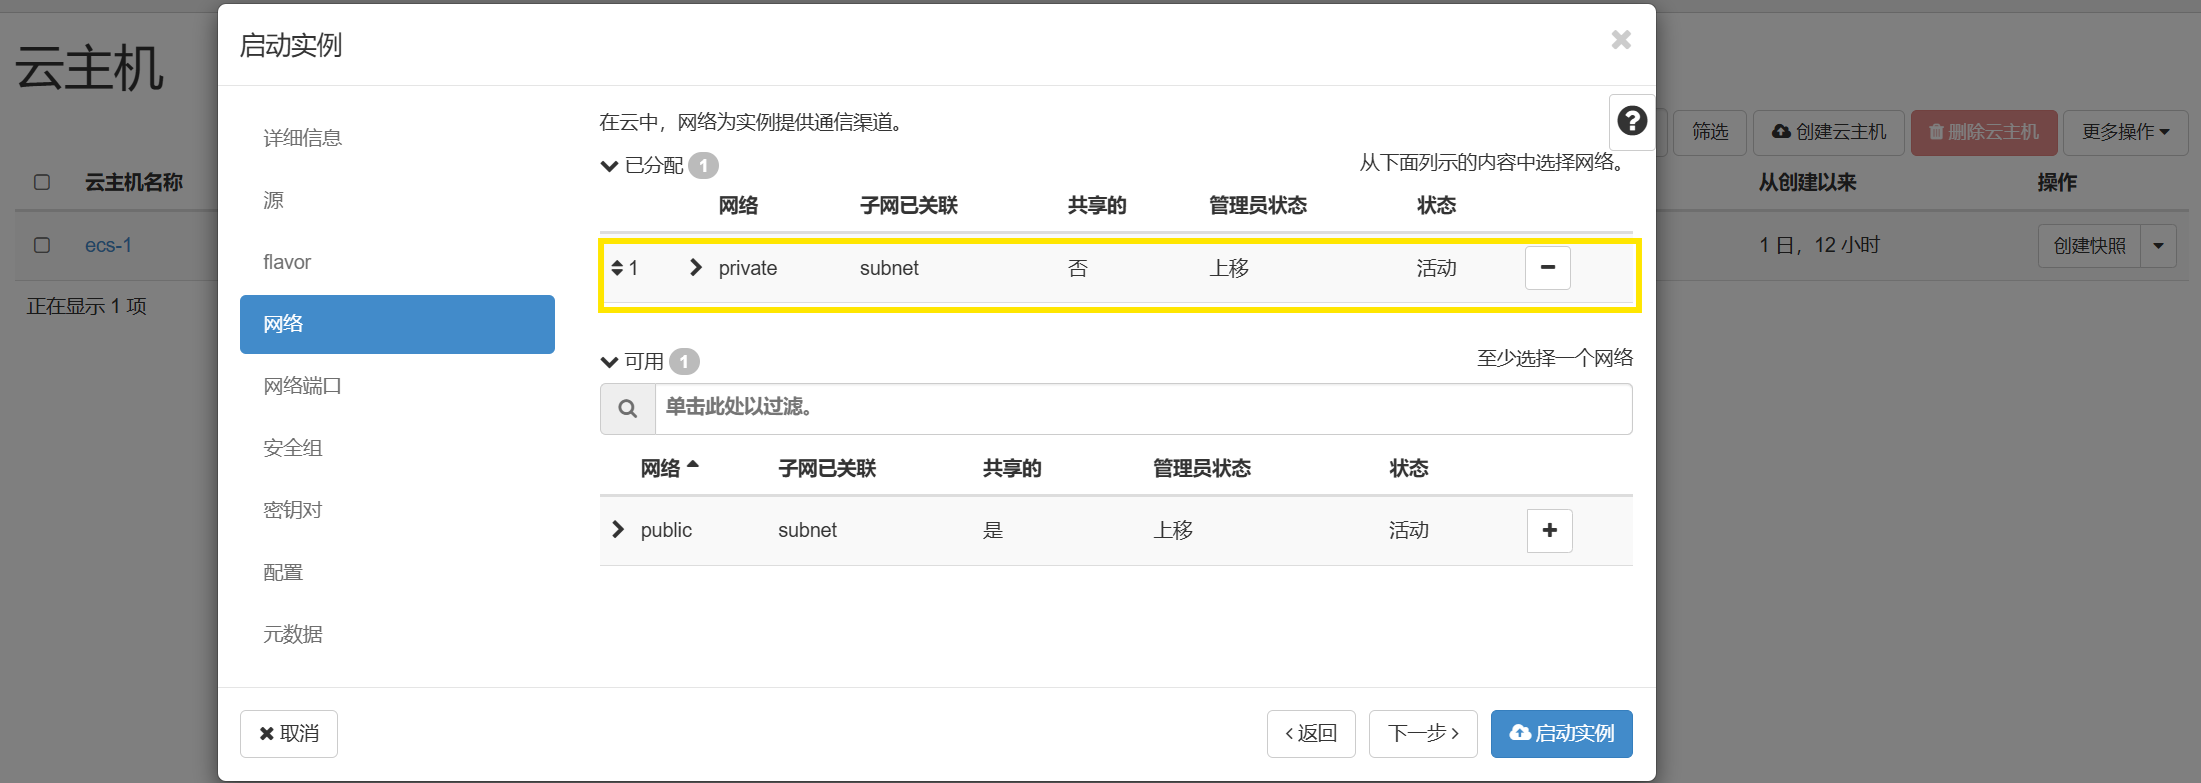
创建private云主机
删除与public相连的ecs-2云主机
新建云主机,网络选择private
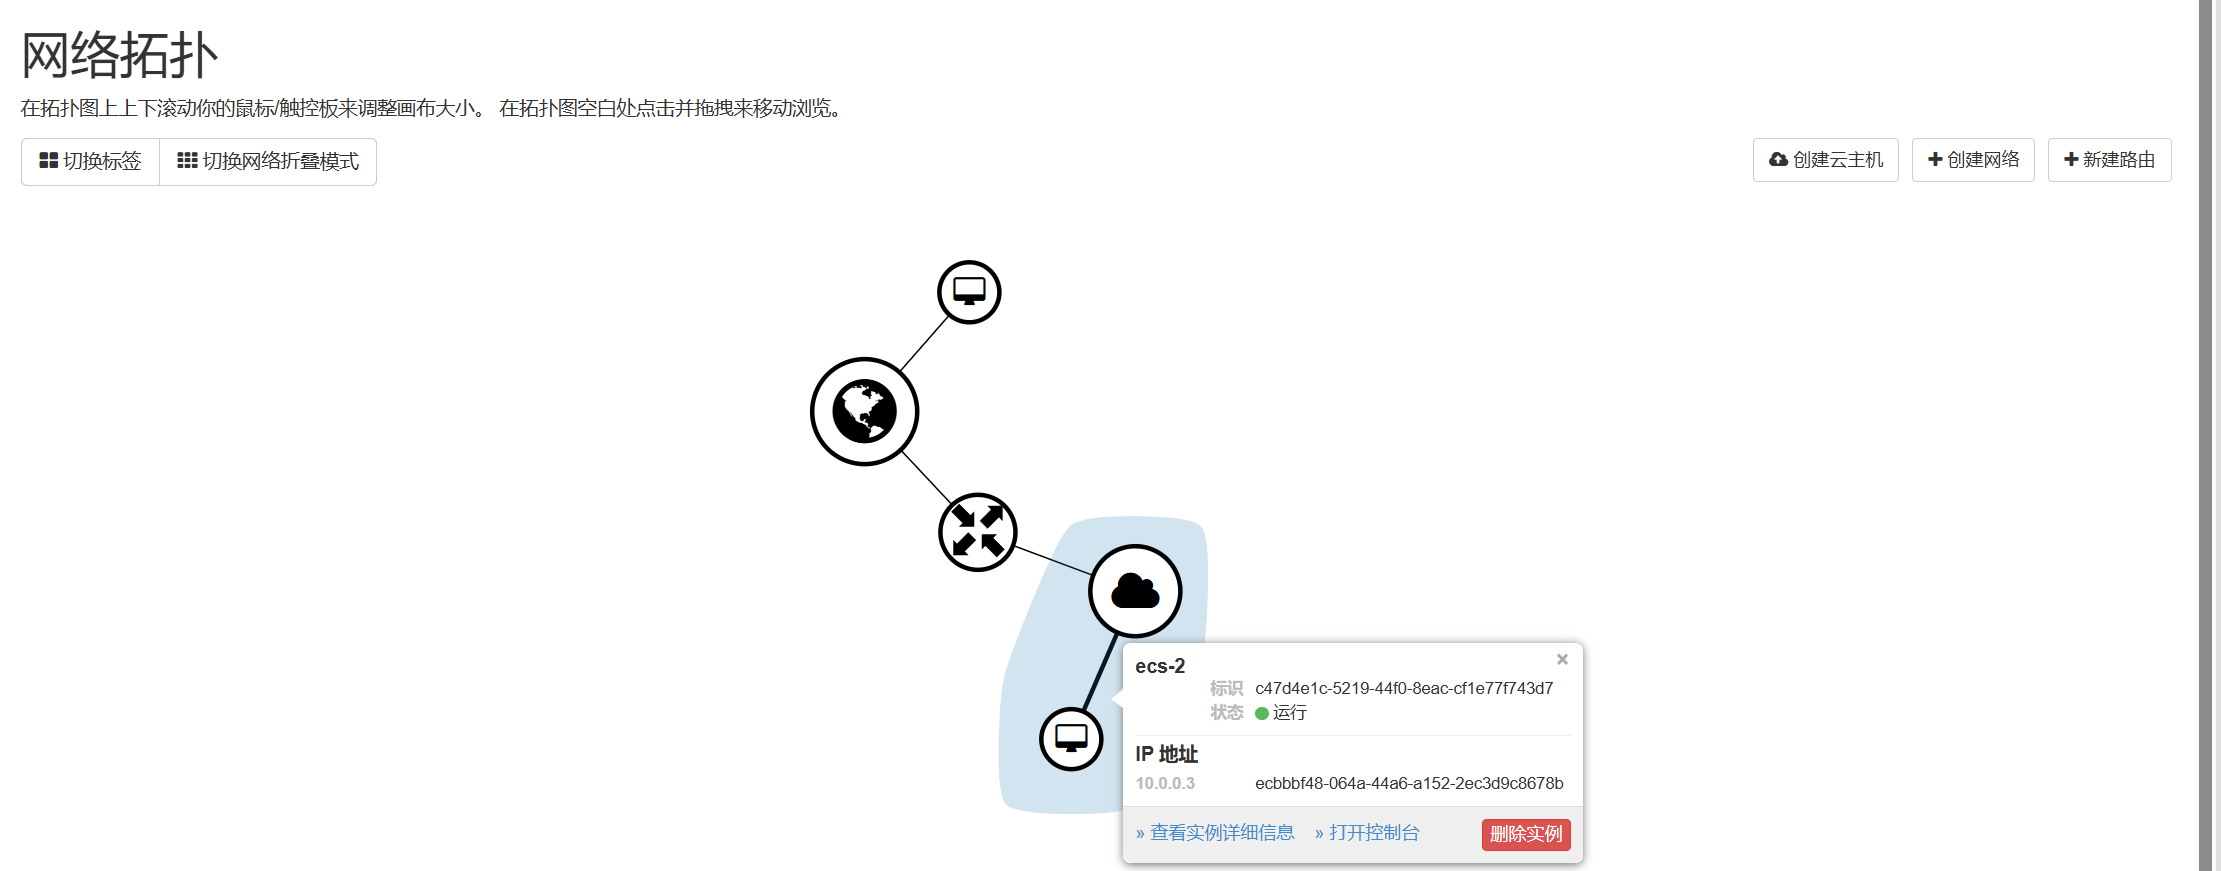
查看主机

查看网络拓扑
添加解析
在Windows命令提示符界面进入记事本,为controller主机添加解析,并进行测试
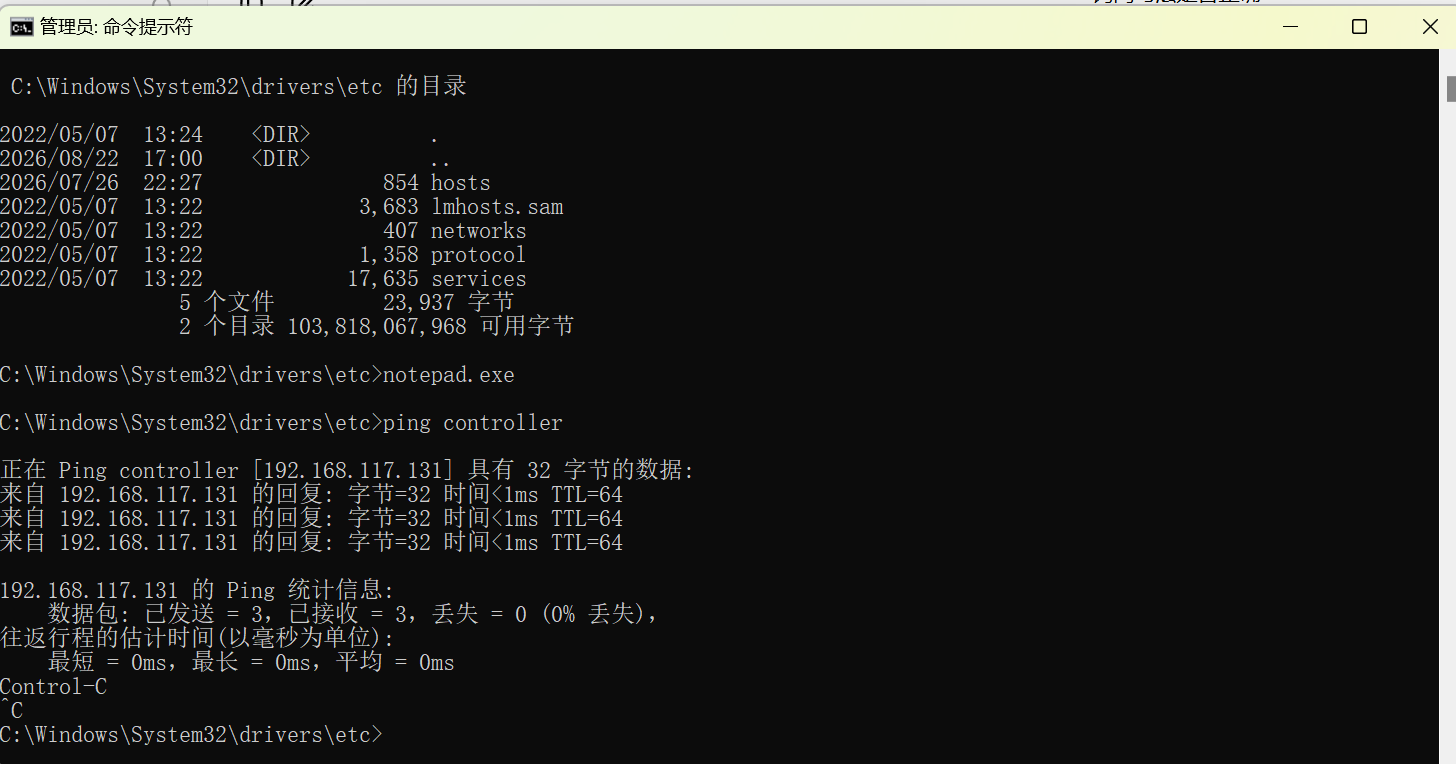
解析界面如图
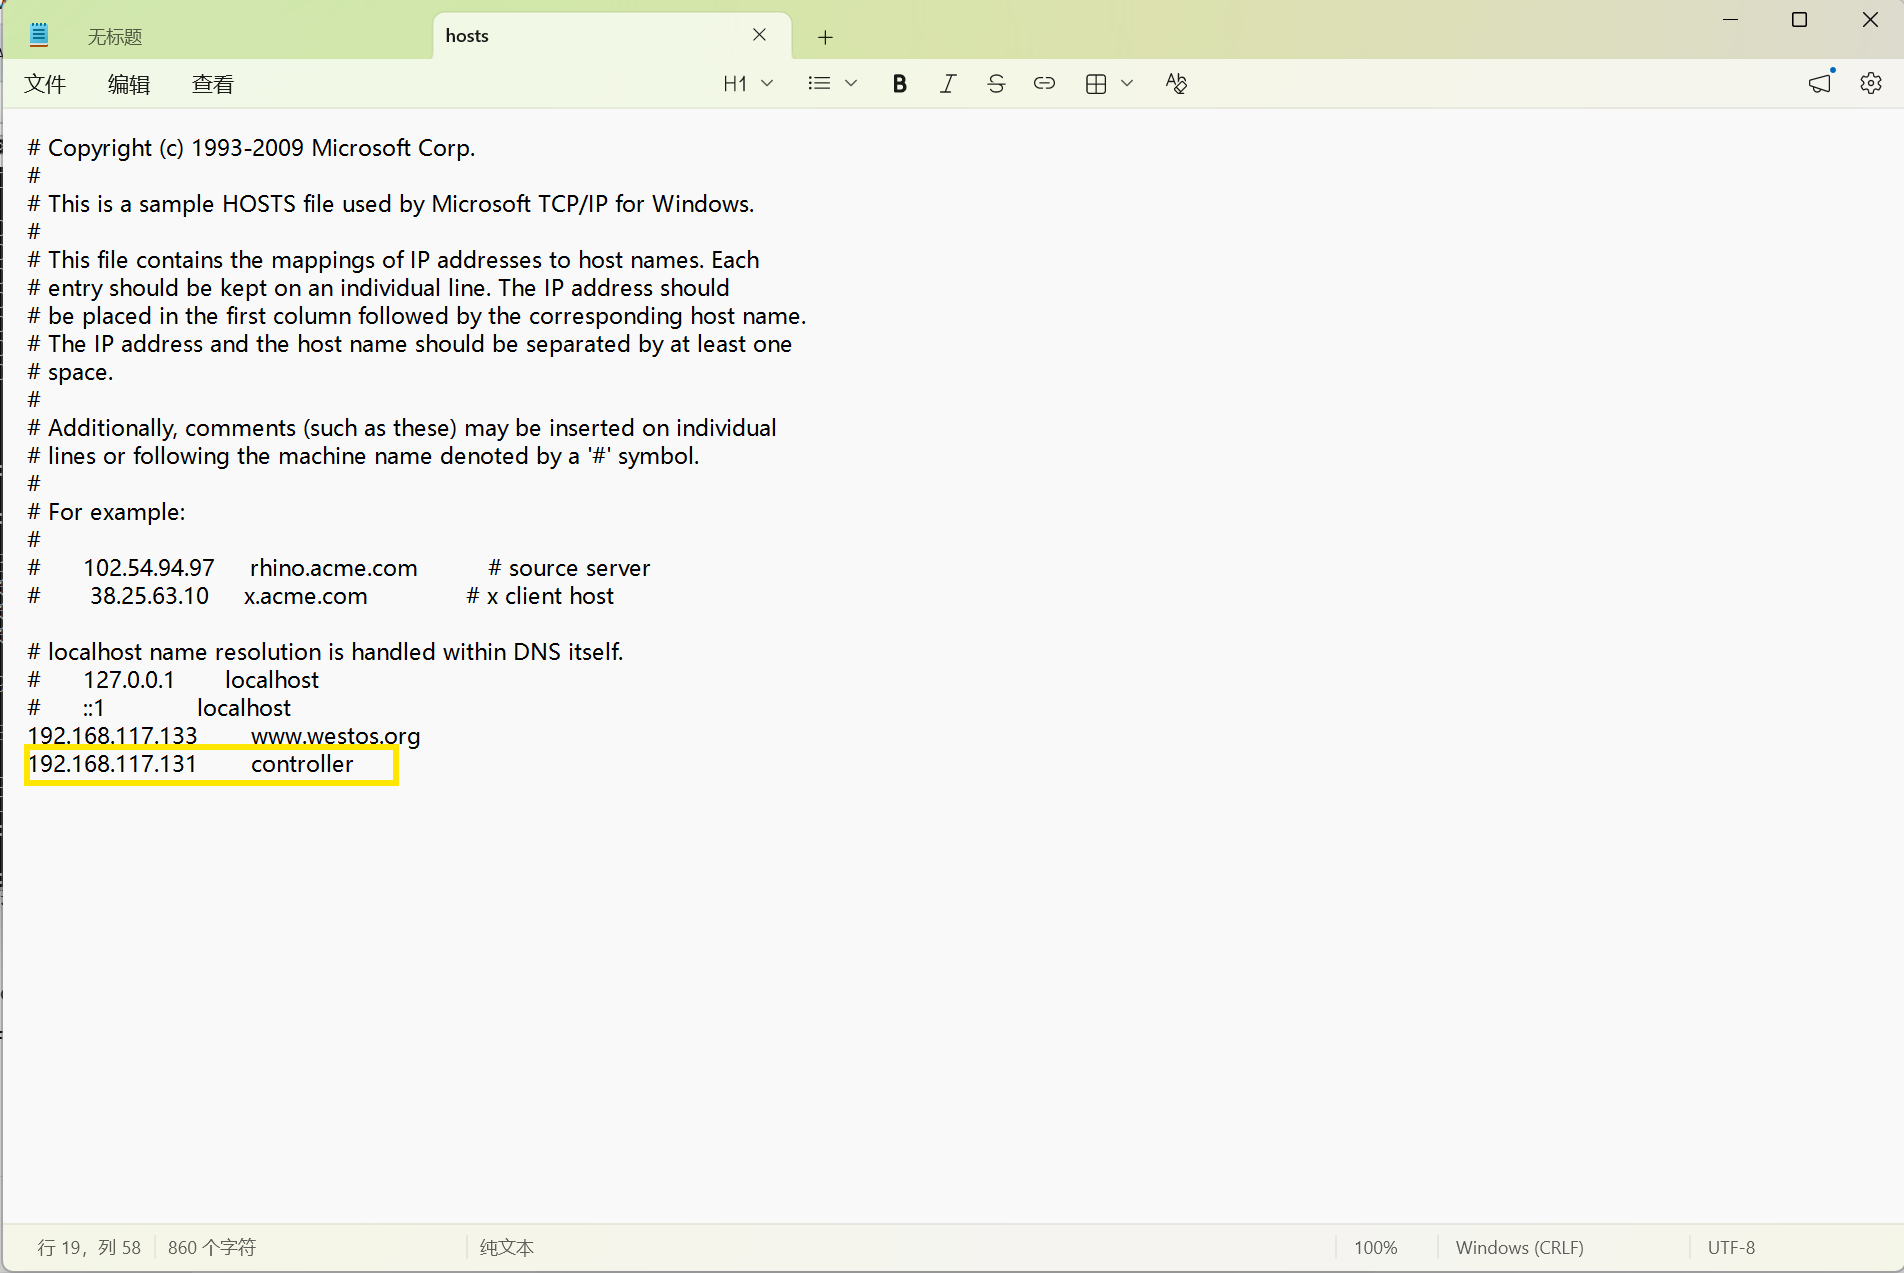
打开控制台,就可以操作云主机了
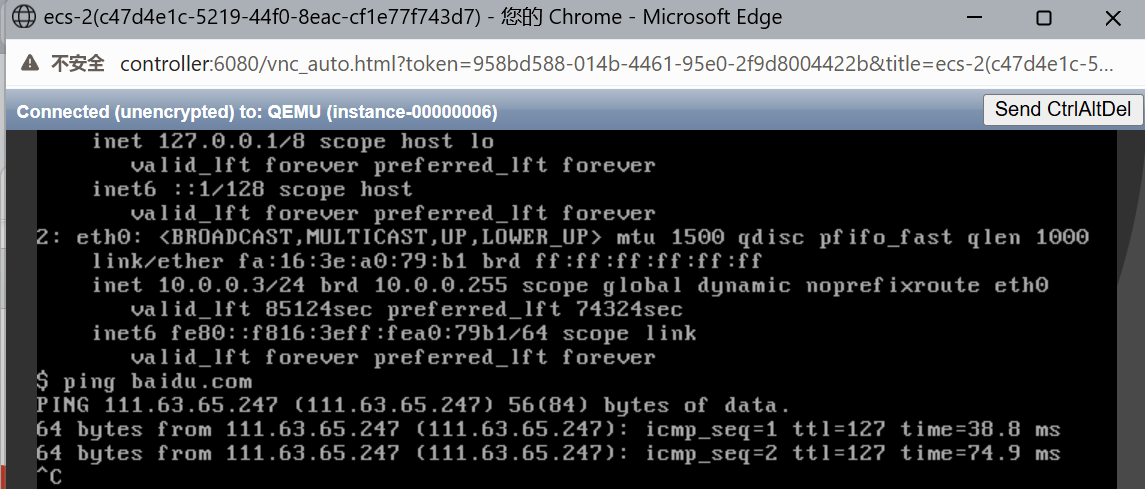
添加浮动IP
先前的工作只能让创建的云主机访问外网,不能让外部访问云主机,而添加浮动IP可以解决这个问题。浮动 IP 是云平台的公网弹性 IP ,可以在不同云主机之间迁移绑定,IP 地址本身不变,只是后端切换到另一台服务器,常见于 OpenStack、公有云、K8s、高可用集群。
添加public浮动IP
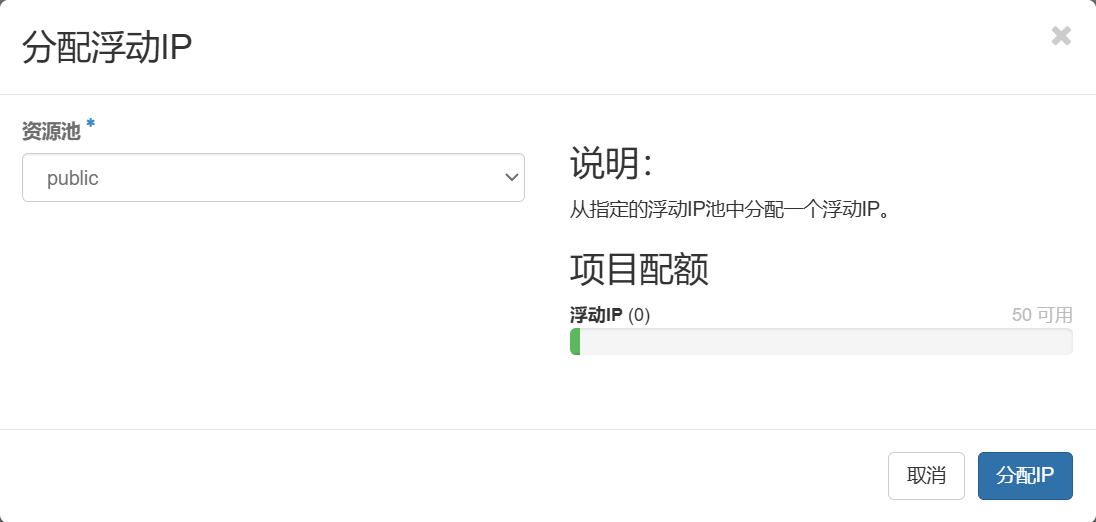
选择添加的浮动IP
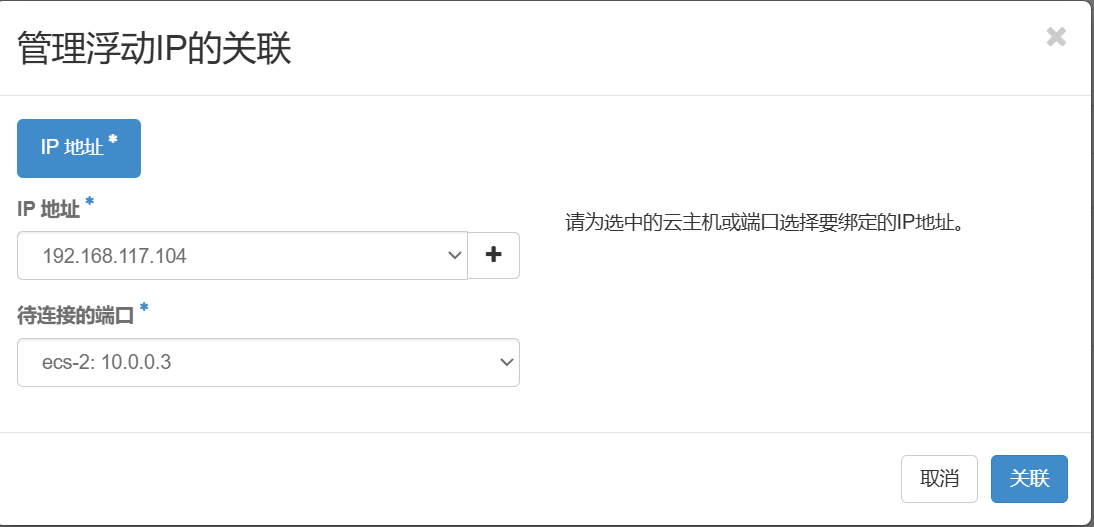
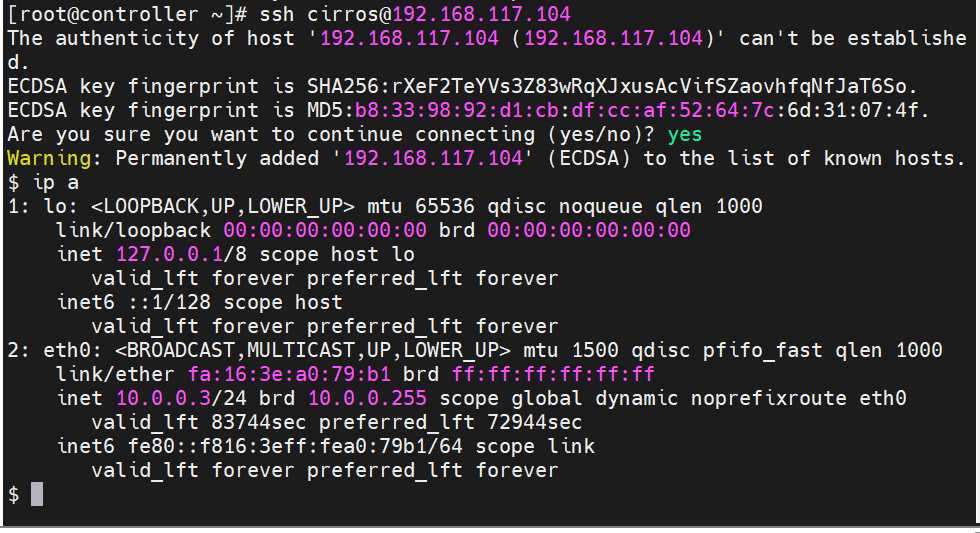
验证申请的浮动IP是否成功启用
块存储服务
安装并配置控制节点
先决条件
创建数据库
bash
[root@controller ~]# mysql -u root -pwestos
MariaDB [(none)]> CREATE DATABASE cinder;		#创建 cinder 数据库
MariaDB [(none)]> GRANT ALL PRIVILEGES ON cinder.* TO 'cinder'@'localhost' IDENTIFIED BY 'Cinder';
MariaDB [(none)]> GRANT ALL PRIVILEGES ON cinder.* TO 'cinder'@'%' IDENTIFIED BY 'cinder';
获得 admin 凭证来获取只有管理员能执行的命令的访问权限
bash
[root@controller ~]# . admin-openrc创建服务证书
bash
#创建一个 cinder 用户
[root@controller ~]# openstack user create --domain default --password cinder cinder
+-----------+----------------------------------+
| Field     | Value                            |
+-----------+----------------------------------+
| domain_id | e0353a670a9e496da891347c589539e9 |
| enabled   | True                             |
| id        | bb279f8ffc444637af38811a5e1f0562 |
| name      | cinder                           |
+-----------+----------------------------------+

#添加 admin 角色到 cinder 用户上
[root@controller ~]# openstack role add --project service --user cinder admin

#创建 cinder 和 cinderv2 服务实体

[root@controller ~]# openstack service create --name cinder --description "OpenStack Block Storage" volume
+-------------+----------------------------------+
| Field       | Value                            |
+-------------+----------------------------------+
| description | OpenStack Block Storage          |
| enabled     | True                             |
| id          | ab3bbbef780845a1a283490d281e7fda |
| name        | cinder                           |
| type        | volume                           |
+-------------+----------------------------------+
[root@controller ~]# openstack service create --name cinderv2 --description "OpenStack Block Storage" volumev2
+-------------+----------------------------------+
| Field       | Value                            |
+-------------+----------------------------------+
| description | OpenStack Block Storage          |
| enabled     | True                             |
| id          | eb9fd245bdbc414695952e93f29fe3ac |
| name        | cinderv2                         |
| type        | volumev2                         |
+-------------+----------------------------------+
创建块设备存储服务的 API 入口点
bash
[root@controller ~]# openstack endpoint create --region RegionOne volume public http://controller:8776/v1/%\(tenant_id\)s
  +--------------+-----------------------------------------+
  | Field        | Value                                   |
  +--------------+-----------------------------------------+
  | enabled      | True                                    |
  | id           | 03fa2c90153546c295bf30ca86b1344b        |
  | interface    | public                                  |
  | region       | RegionOne                               |
  | region_id    | RegionOne                               |
  | service_id   | ab3bbbef780845a1a283490d281e7fda        |
  | service_name | cinder                                  |
  | service_type | volume                                  |
  | url          | http://controller:8776/v1/%(tenant_id)s |
  +--------------+-----------------------------------------+

[root@controller ~]# openstack endpoint create --region RegionOne volume internal http://controller:8776/v1/%\(tenant_id\)s
  +--------------+-----------------------------------------+
  | Field        | Value                                   |
  +--------------+-----------------------------------------+
  | enabled      | True                                    |
  | id           | 94f684395d1b41068c70e4ecb11364b2        |
  | interface    | internal                                |
  | region       | RegionOne                               |
  | region_id    | RegionOne                               |
  | service_id   | ab3bbbef780845a1a283490d281e7fda        |
  | service_name | cinder                                  |
  | service_type | volume                                  |
  | url          | http://controller:8776/v1/%(tenant_id)s |
  +--------------+-----------------------------------------+

[root@controller ~]# openstack endpoint create --region RegionOne volume admin http://controller:8776/v1/%\(tenant_id\)s
  +--------------+-----------------------------------------+
  | Field        | Value                                   |
  +--------------+-----------------------------------------+
  | enabled      | True                                    |
  | id           | 4511c28a0f9840c78bacb25f10f62c98        |
  | interface    | admin                                   |
  | region       | RegionOne                               |
  | region_id    | RegionOne                               |
  | service_id   | ab3bbbef780845a1a283490d281e7fda        |
  | service_name | cinder                                  |
  | service_type | volume                                  |
  | url          | http://controller:8776/v1/%(tenant_id)s |
  +--------------+-----------------------------------------+
[root@controller ~]# openstack endpoint create --region RegionOne volumev2 public http://controller:8776/v2/%\(tenant_id\)s
+--------------+-----------------------------------------+
| Field        | Value                                   |
+--------------+-----------------------------------------+
| enabled      | True                                    |
| id           | 513e73819e14460fb904163f41ef3759        |
| interface    | public                                  |
| region       | RegionOne                               |
| region_id    | RegionOne                               |
| service_id   | eb9fd245bdbc414695952e93f29fe3ac        |
| service_name | cinderv2                                |
| service_type | volumev2                                |
| url          | http://controller:8776/v2/%(tenant_id)s |
+--------------+-----------------------------------------+

[root@controller ~]# openstack endpoint create --region RegionOne volumev2 internal http://controller:8776/v2/%\(tenant_id\)s
+--------------+-----------------------------------------+
| Field        | Value                                   |
+--------------+-----------------------------------------+
| enabled      | True                                    |
| id           | 6436a8a23d014cfdb69c586eff146a32        |
| interface    | internal                                |
| region       | RegionOne                               |
| region_id    | RegionOne                               |
| service_id   | eb9fd245bdbc414695952e93f29fe3ac        |
| service_name | cinderv2                                |
| service_type | volumev2                                |
| url          | http://controller:8776/v2/%(tenant_id)s |
+--------------+-----------------------------------------+

[root@controller ~]# openstack endpoint create --region RegionOne volumev2 admin http://controller:8776/v2/%\(tenant_id\)s
+--------------+-----------------------------------------+
| Field        | Value                                   |
+--------------+-----------------------------------------+
| enabled      | True                                    |
| id           | e652cf84dd334f359ae9b045a2c91d96        |
| interface    | admin                                   |
| region       | RegionOne                               |
| region_id    | RegionOne                               |
| service_id   | eb9fd245bdbc414695952e93f29fe3ac        |
| service_name | cinderv2                                |
| service_type | volumev2                                |
| url          | http://controller:8776/v2/%(tenant_id)s |
+--------------+-----------------------------------------+
安全并配置组件
安装软件包
bash
[root@controller ~]# yum install openstack-cinder编辑 /etc/cinder/cinder.conf
bash
[root@controller ~]# vim /etc/cinder/cinder.conf
#在 [database] 部分,配置数据库访问
[database]
connection = mysql+pymysql://cinder:cinder@controller/cinder

#在[DEFAULT]和[oslo_messaging_rabbit]部分,配置RabbitMQ消息队列访问
[DEFAULT]
rpc_backend = rabbit
[oslo_messaging_rabbit]
rabbit_host = controller
rabbit_userid = openstack
rabbit_password = openstack

#在[DEFAULT]和[keystone_authtoken]部分,配置认证服务访问
[DEFAULT]
auth_strategy = keystone
[keystone_authtoken]
auth_uri = http://controller:5000
auth_url = http://controller:35357
memcached_servers = controller:11211
auth_type = password
project_domain_name = default
user_domain_name = default
project_name = service
username = cinder
password = cinder

#在 [DEFAULT 部分,配置my_ip来使用控制节点的管理接口的IP 地址
[DEFAULT]
my_ip = 192.168.117.131
#在 [oslo_concurrency] 部分,配置锁路径
[oslo_concurrency]
lock_path = /var/lib/cinder/tmp
初始化块设备服务的数据库
bash
[root@controller ~]# su -s /bin/sh -c "cinder-manage db sync" cinder配置计算节点以使用块设备存储
安装软件包
bash
[root@controller ~]# yum install openstack-cinder编辑 /etc/cinder/cinder.conf
bash
[root@controller ~]# vim /etc/cinder/cinder.conf
#在 [database] 部分,配置数据库访问
[database]
connection = mysql+pymysql://cinder:cinder@controller/cinder

#在[DEFAULT]和[oslo_messaging_rabbit]部分,配置RabbitMQ消息队列访问
[DEFAULT]
rpc_backend = rabbit
[oslo_messaging_rabbit]
rabbit_host = controller
rabbit_userid = openstack
rabbit_password = openstack

#在[DEFAULT]和[keystone_authtoken]部分,配置认证服务访问
[DEFAULT]
auth_strategy = keystone
[keystone_authtoken]
auth_uri = http://controller:5000
auth_url = http://controller:35357
memcached_servers = controller:11211
auth_type = password
project_domain_name = default
user_domain_name = default
project_name = service
username = cinder
password = cinder

#在[DEFAULT]部分,配置my_ip来使用控制节点的管理接口的IP 地址
[DEFAULT]
my_ip = 192.168.117.131

#在[oslo_concurrency]部分,配置锁路径
[oslo_concurrency]
lock_path = /var/lib/cinder/tmp
初始化块设备服务的数据库
bash
[root@controller ~]# su -s /bin/sh -c "cinder-manage db sync" cinder配置计算节点以使用块设备存储
编辑文件 /etc/nova/nova.conf 并添加如下到其中
bash
[root@controller ~]# vim /etc/nova/nova.conf
[cinder]
os_region_name = RegionOne
完成安装
重启计算API 服务
bash
[root@controller ~]# systemctl restart openstack-nova-api.service启动块设备存储服务,并将其配置为开机自启
bash
[root@controller ~]# systemctl enable --now openstack-cinder-api.service openstack-cinder-scheduler.service安装并配置一个存储节点
新增一台主机block1,为其添加50G的硬盘,关闭NetworkManager服务,做好初始化(修改主机名、添加解析、安装mitaka、配置openstack.repo源)。
先决条件
安装支持的工具包:LVM 包
bash
[root@block1 ~]# yum install lvm2启动LVM的metadata服务并且设置该服务随系统启动
bash
[root@block1 ~]# systemctl enable --now lvm2-lvmetad.service创建LVM 物理卷 /dev/sdb
bash
[root@block1 ~]# pvcreate /dev/sdb
Physical volume "/dev/sdb" successfully created
创建 LVM 卷组 cinder-volumes
bash
[root@block1 ~]# vgcreate cinder-volumes /dev/sdb
Volume group "cinder-volumes" successfully created 只有实例可以访问块存储卷组。不过,底层的操作系统管理这些设备并将其与卷关联。默认情况下,LVM卷扫描工具会扫描/dev 目录,查找包含卷的块存储设备。如果项目在他们的卷上使用LVM,扫描工具检测到这些卷时会尝试缓存它们,可能会在底层操作系统和项目卷上产生各种问题。您必须重新配置LVM,让它只扫描包含cinder-volume卷组的设备。如果存储节点在操作系统磁盘上使用了 LVM,您还必需添加相关的设备到过滤器中。
编辑/etc/lvm/lvm.conf文件并完成下面的操作
bash
[root@block1 ~]# vim /etc/lvm/lvm.conf
#在devices部分,添加一个过滤器,只接受/dev/sdb设备,还包含操作系统上的LVM,拒绝其他所有设备
filter = [ "a/sda/", "a/sdb/", "r/.*/"]
安全并配置组件
安装软件包
bash
[root@block1 ~]# yum install openstack-cinder targetcli python-keystone编辑 /etc/cinder/cinder.conf
bash
[root@block1 ~]# vim /etc/cinder/cinder.conf
#在[database]部分,配置数据库访问
[database]
connection = mysql+pymysql://cinder:cinder@controller/cinder

#在[DEFAULT]和[oslo_messaging_rabbit]部分,配置RabbitMQ消息队列访问
[DEFAULT]
rpc_backend = rabbit
[oslo_messaging_rabbit]
rabbit_host = controller
rabbit_userid = openstack
rabbit_password = openstack

#在[DEFAULT]和[keystone_authtoken]部分,配置认证服务访问
[DEFAULT]
auth_strategy = keystone
[keystone_authtoken]
auth_uri = http://controller:5000
auth_url = http://controller:35357
memcached_servers = controller:11211
auth_type = password
project_domain_name = default
user_domain_name = default
project_name = service
username = cinder
password = cinder

#在[DEFAULT]部分,配置 my_ip 选项
[DEFAULT]
my_ip = 192.168.117.133

#在[lvm]部分,配置LVM后端以LVM驱动结束,卷组cinder-volumes,iSCSI协议和正确的iSCSI服务
[lvm]
volume_driver = cinder.volume.drivers.lvm.LVMVolumeDriver
volume_group = cinder-volumes
iscsi_protocol = iscsi
iscsi_helper = lioadm

#在[DEFAULT]部分,启用 LVM 后端
[DEFAULT]
enabled_backends = lvm

#在 [DEFAULT] 区域,配置镜像服务 API 的位置
[DEFAULT]
glance_api_servers = http://controller:9292

#在 [oslo_concurrency] 部分,配置锁路径
[oslo_concurrency]
lock_path = /var/lib/cinder/tmp
完成安装
启动块存储卷服务及其依赖的服务,并将其配置为随系统启动
bash
[root@block1 ~]# systemctl enable --now openstack-cinder-volume.service target.service验证操作
列出服务组件以验证是否每个进程都成功启动
bash
[root@controller ~]# cinder service-list
+------------------+------------+------+---------+-------+----------------------------+-----------------+
|      Binary      |    Host    | Zone |  Status | State |         Updated_at         | Disabled Reason |
+------------------+------------+------+---------+-------+----------------------------+-----------------+
| cinder-scheduler | controller | nova | enabled |   up  | 2014-10-18T01:30:54.000000 |       None      |
| cinder-volume    | block1@lvm | nova | enabled |   up  | 2014-10-18T01:30:57.000000 |       None      |
+------------------+------------+------+---------+-------+----------------------------+-----------------+
添加云硬盘
此时登录demo用户可以看到新增加的卷,在本界面创建云硬盘
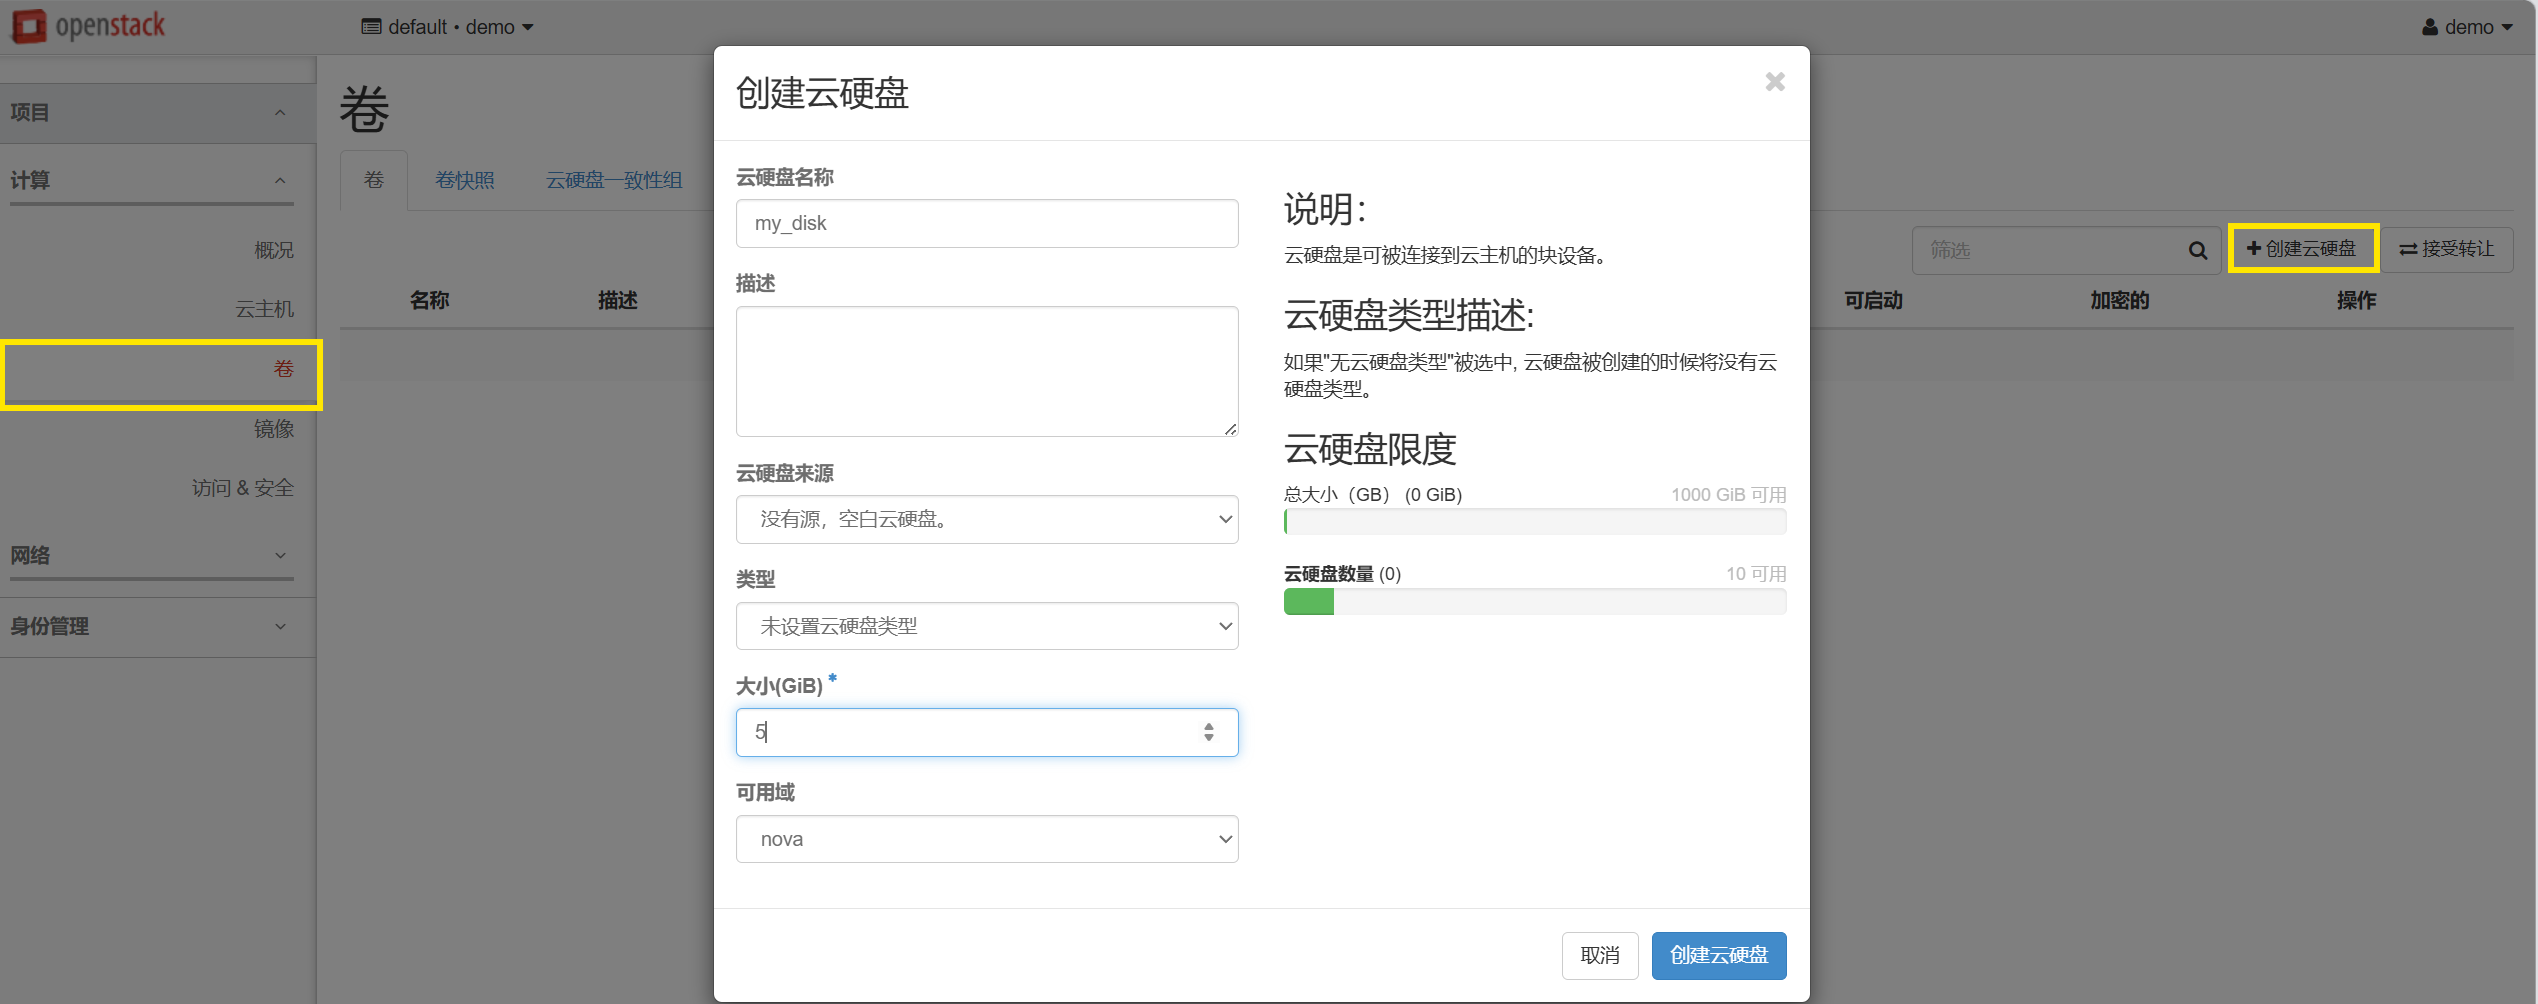
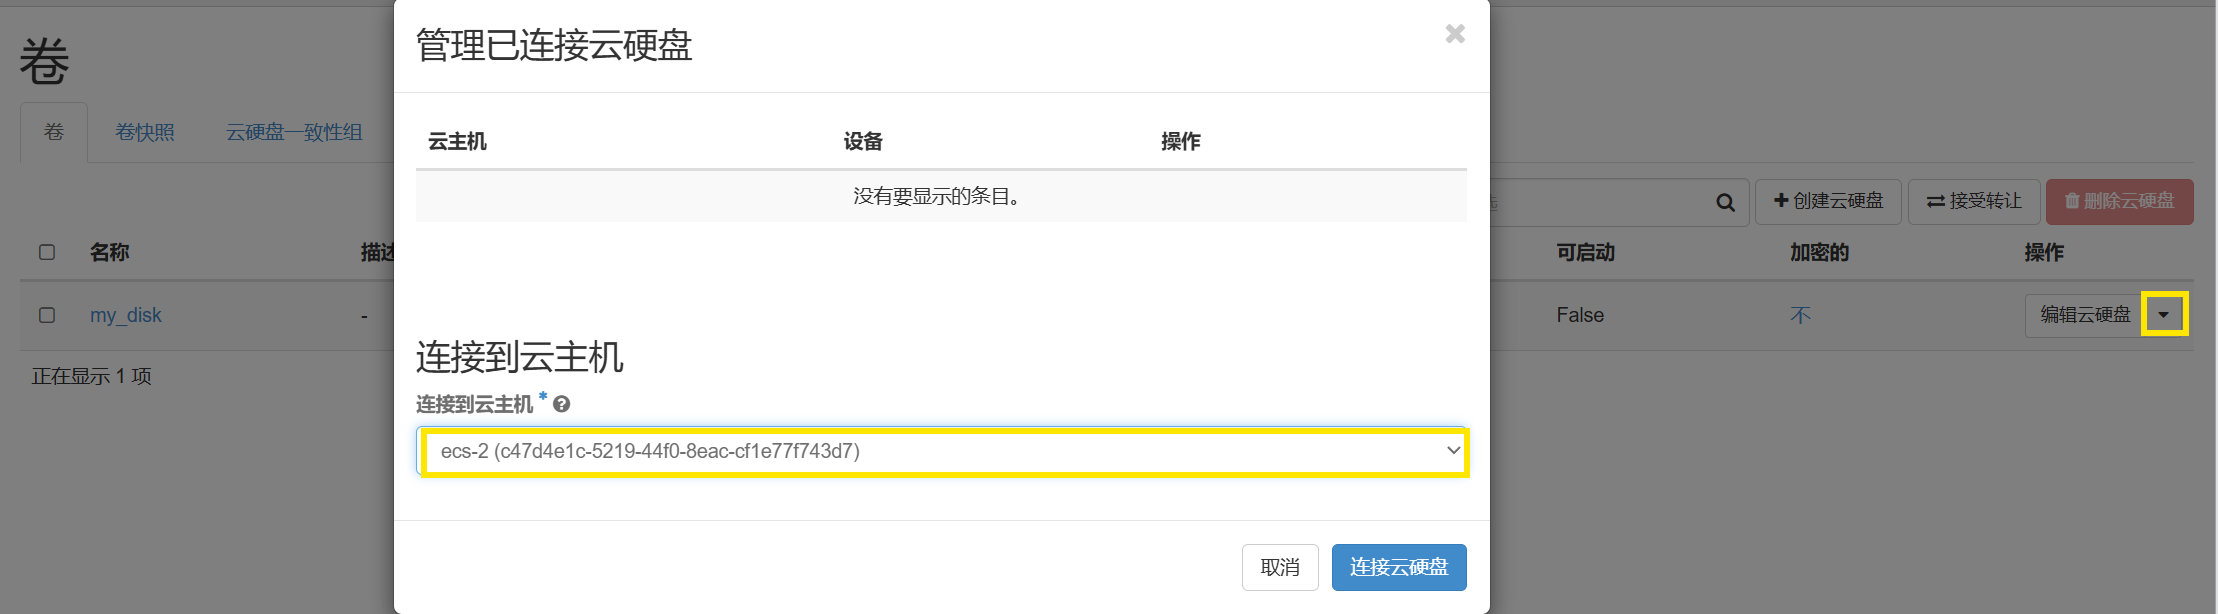
将该云硬盘连接到ecs-2云主机上
远程登录查看
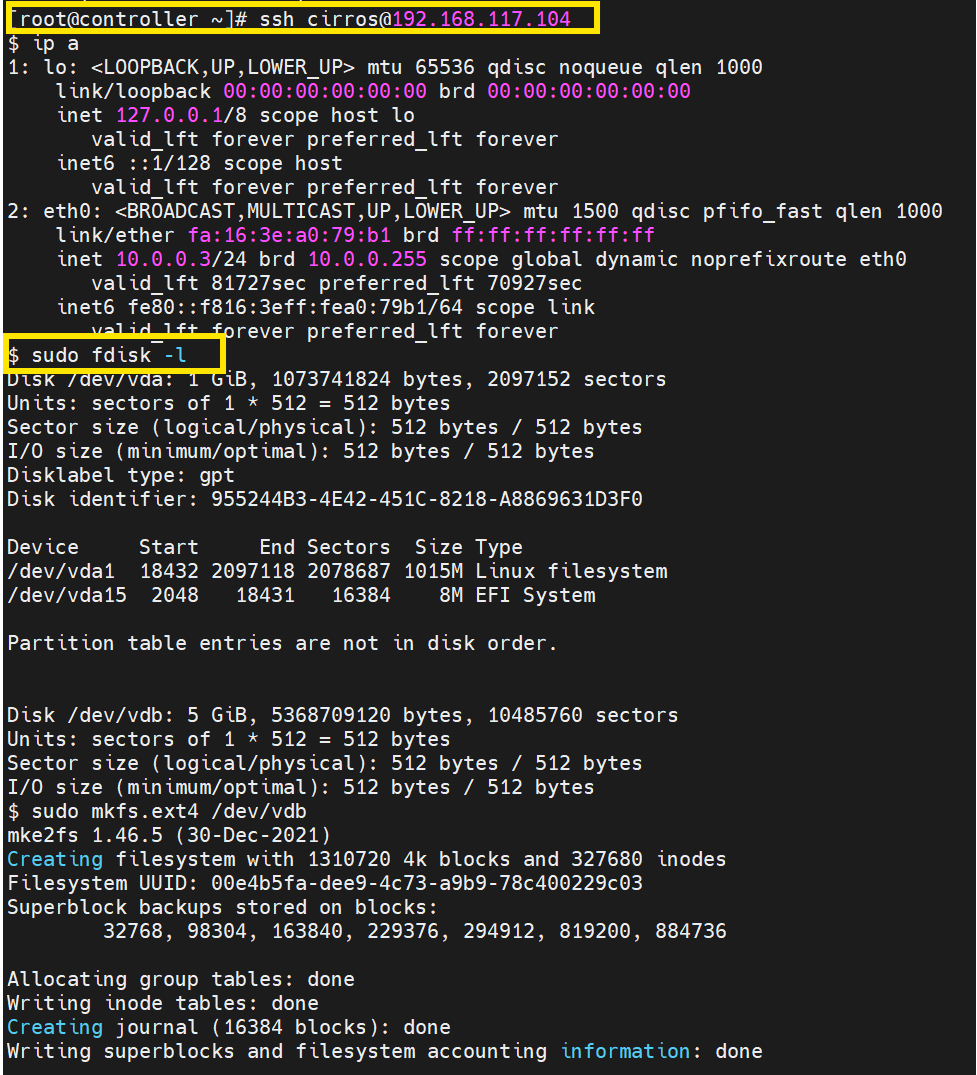
其余操作
bash
$ sudo mkfs.ext4 /dev/vdb
$ sudo mkdir /data
$ sudo mount /dev/vdb /data/
$ cd /data/
$ ls
lost+found
$ sudo cp /etc/* /data/
$ sudo umount /data/
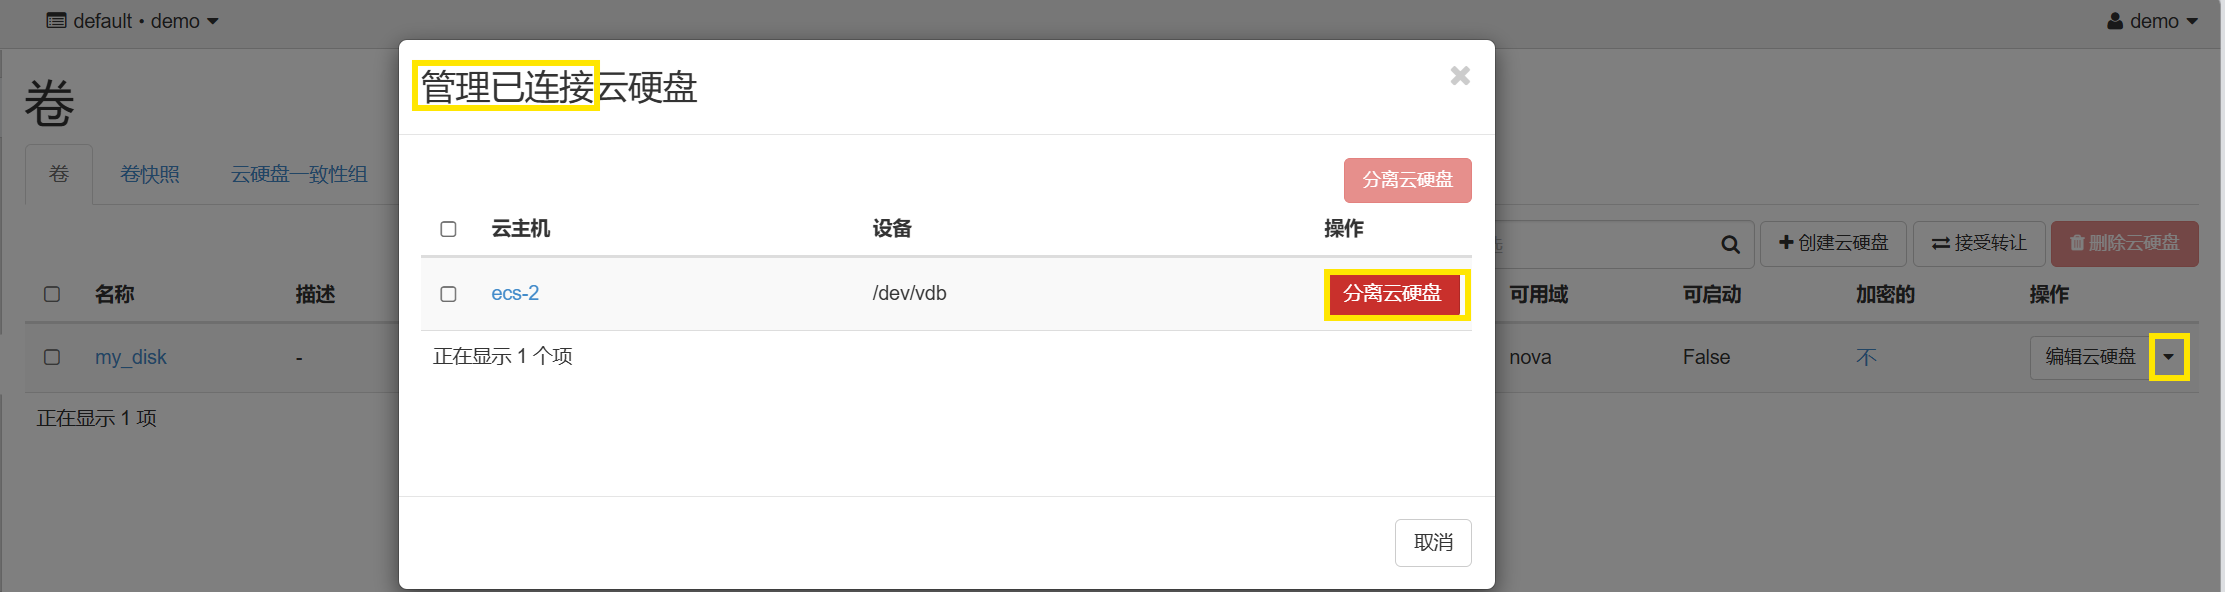
卸载云硬盘
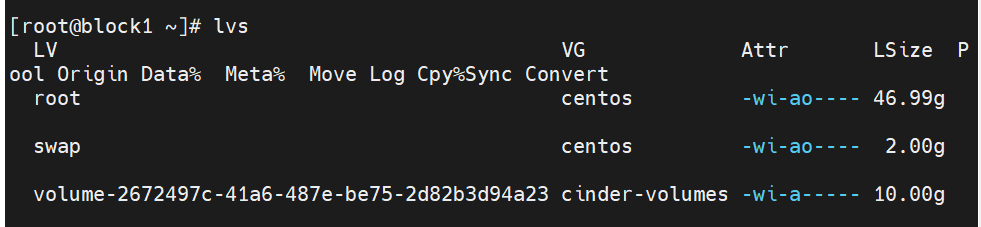
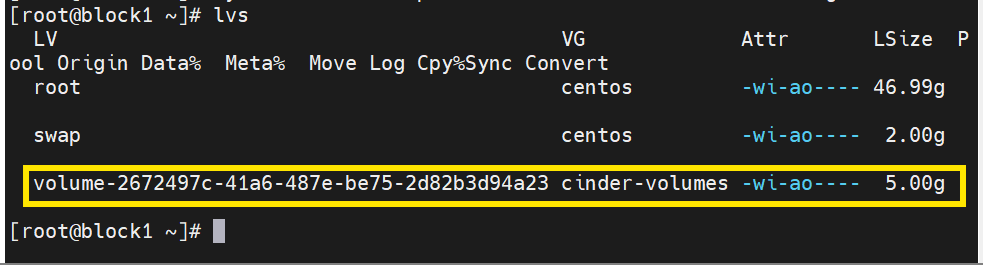
在存储节点查看我们创建的云硬盘
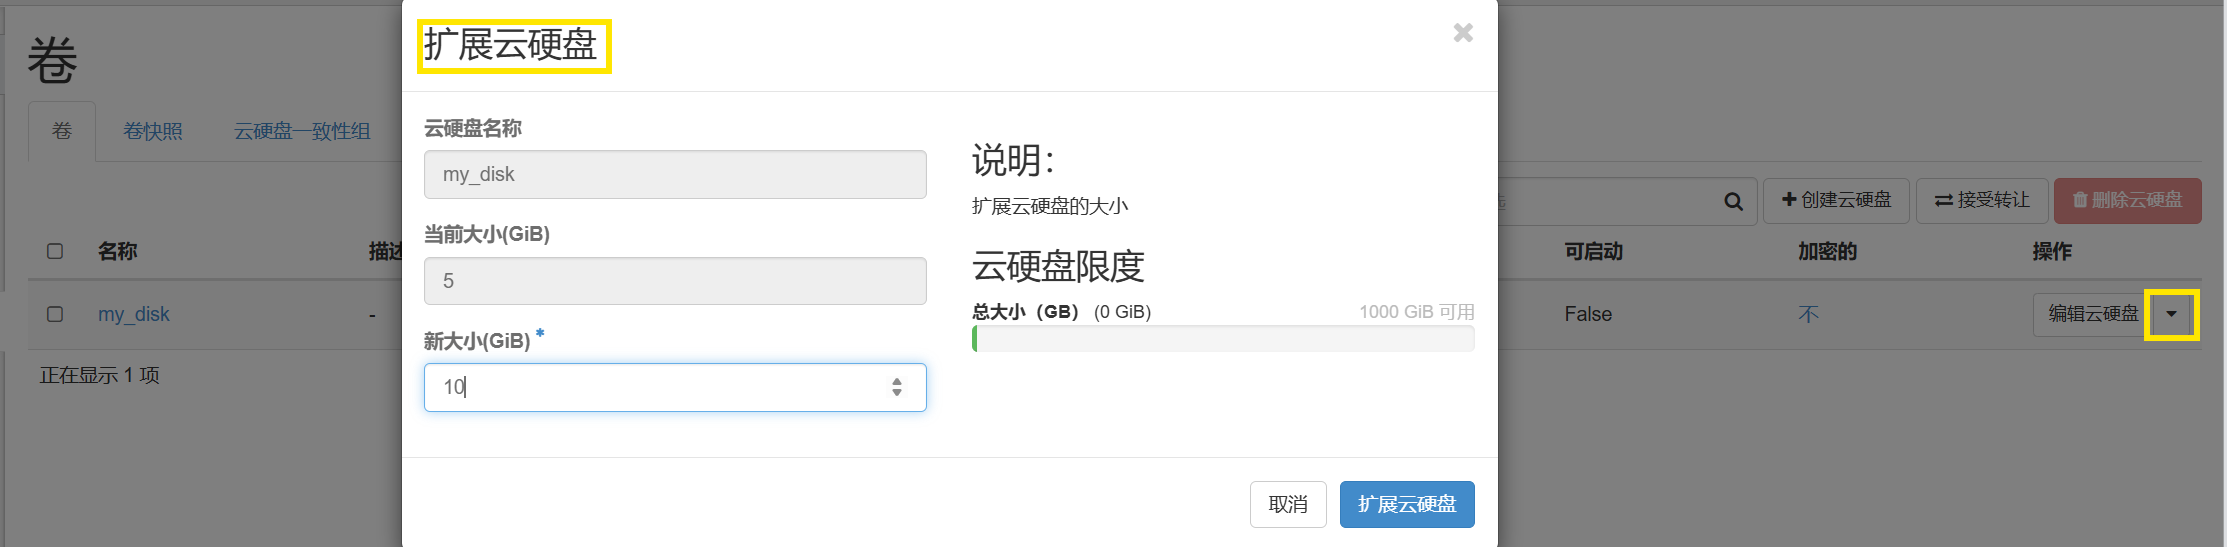
扩展云硬盘
在根目录卸载,且云硬盘卸载的情况下扩展
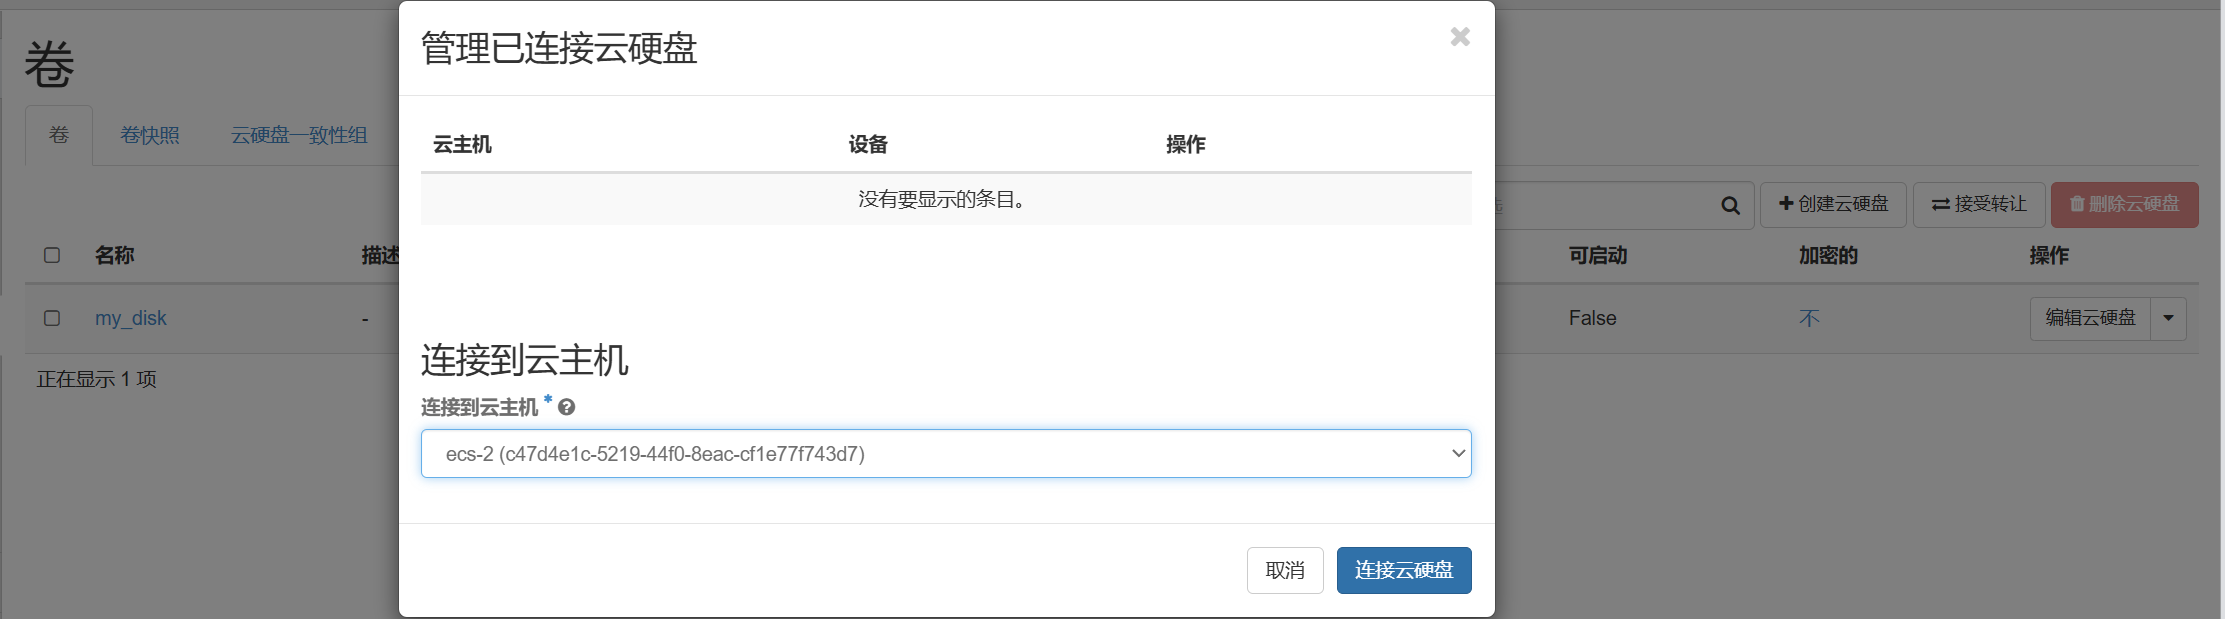
将扩展后的云硬盘再次连接上ecs-2云主机
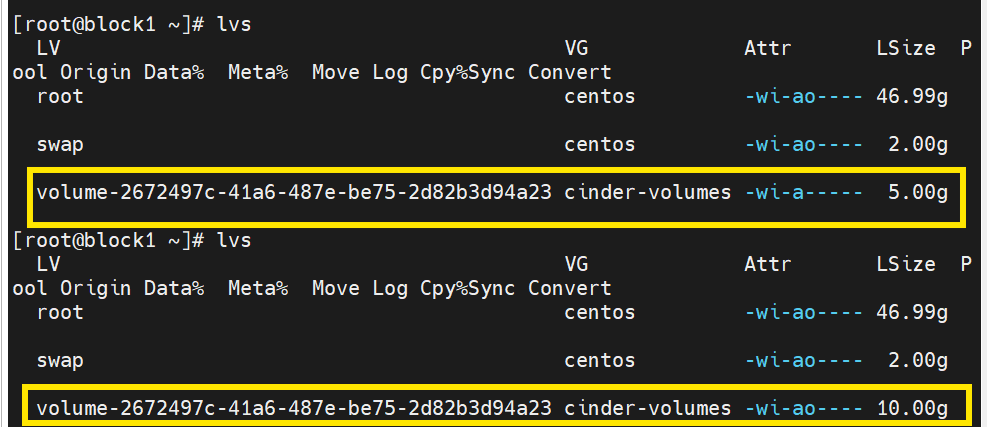
在存储节点上查看对比,现在已经扩展到了10G
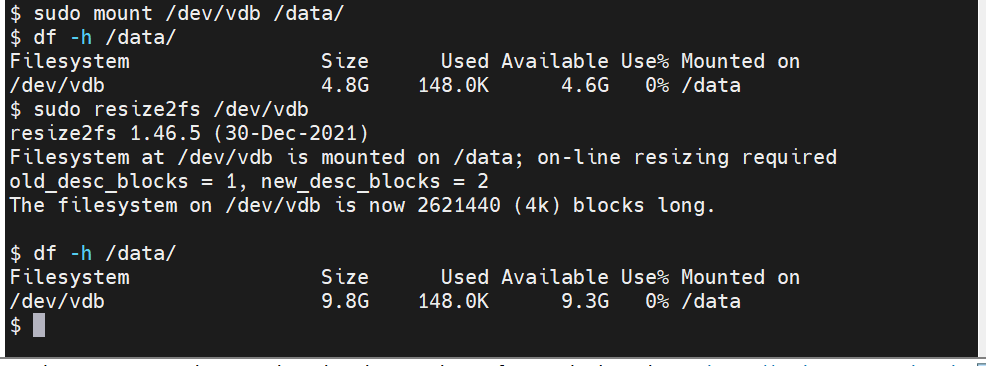
再次挂载云硬盘并用sudo resize2fs /dev/vdb命令对云硬盘进行拉伸
快照
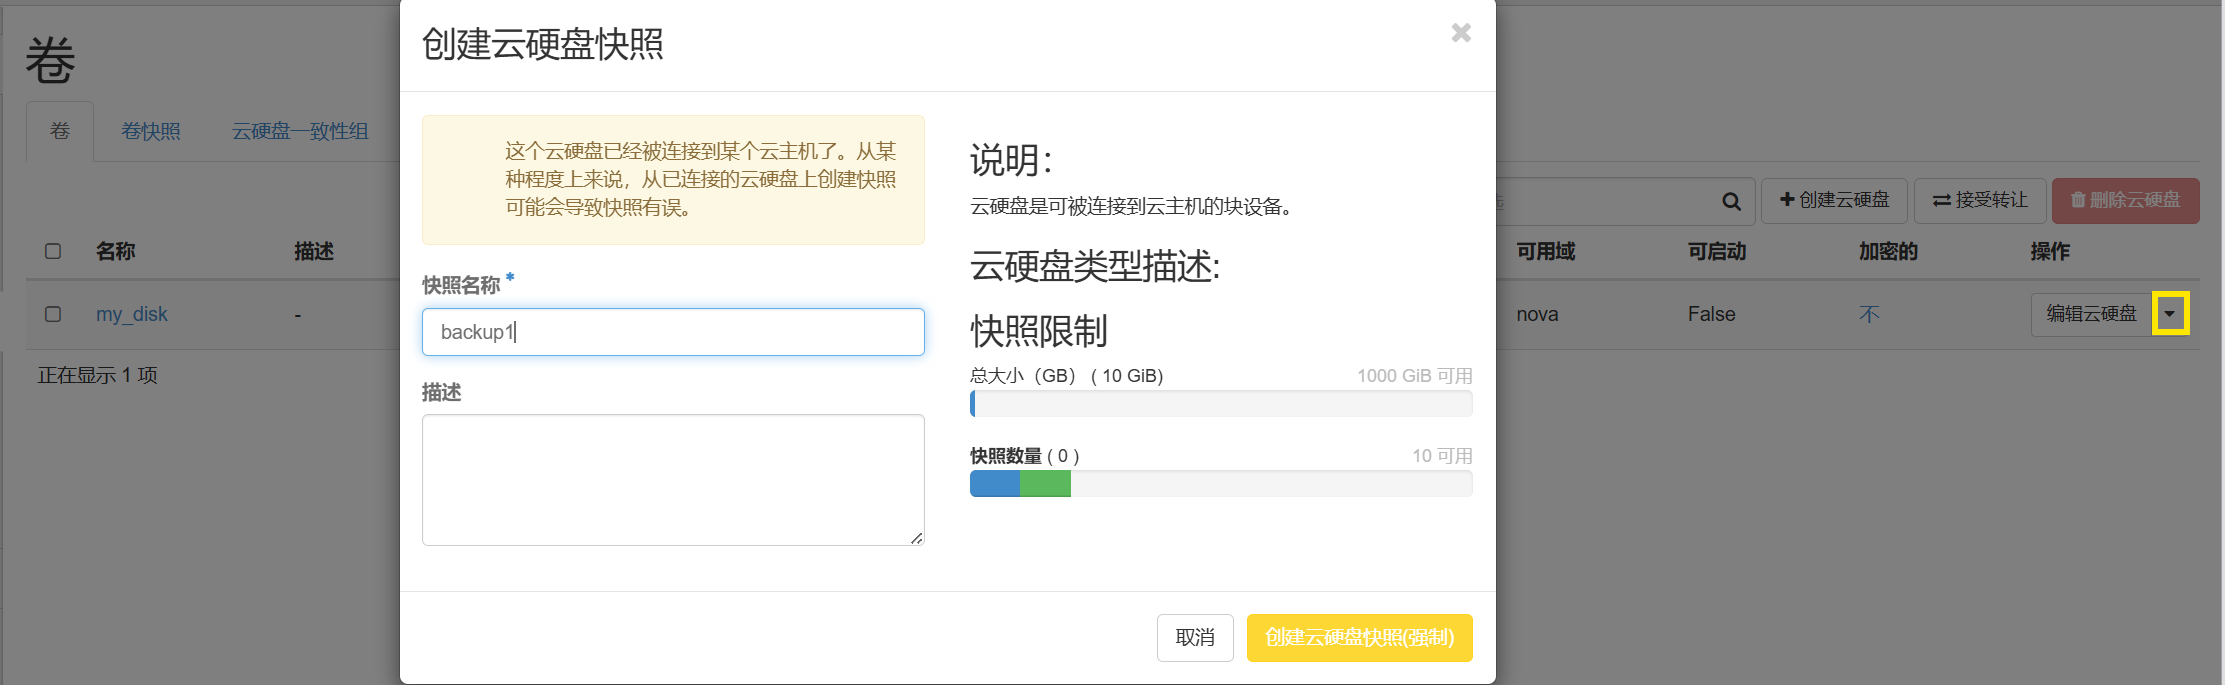
此时拍摄快照,因为此时的云硬盘还在使用状态,所以需要强制,实验环境可以如此,真实生产环境等硬盘空闲时拍摄快照更安全
删除云硬盘里的数据,并卸载
bash
$ sudo rm -f /data/*
rm: '/data/lost+found' is a directory
$ ls
lost+found
$ sudo umount /data
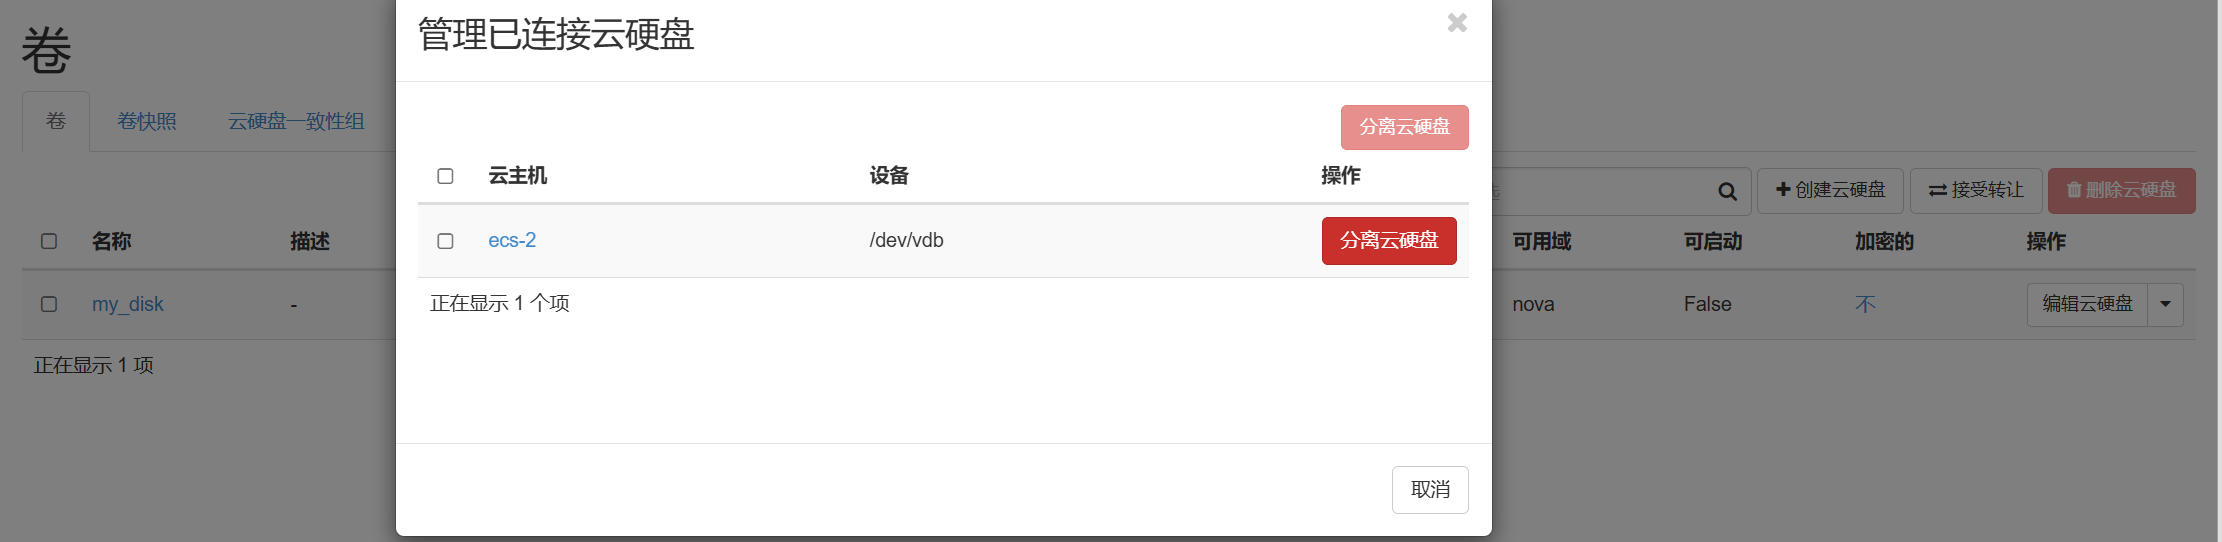
分离云硬盘
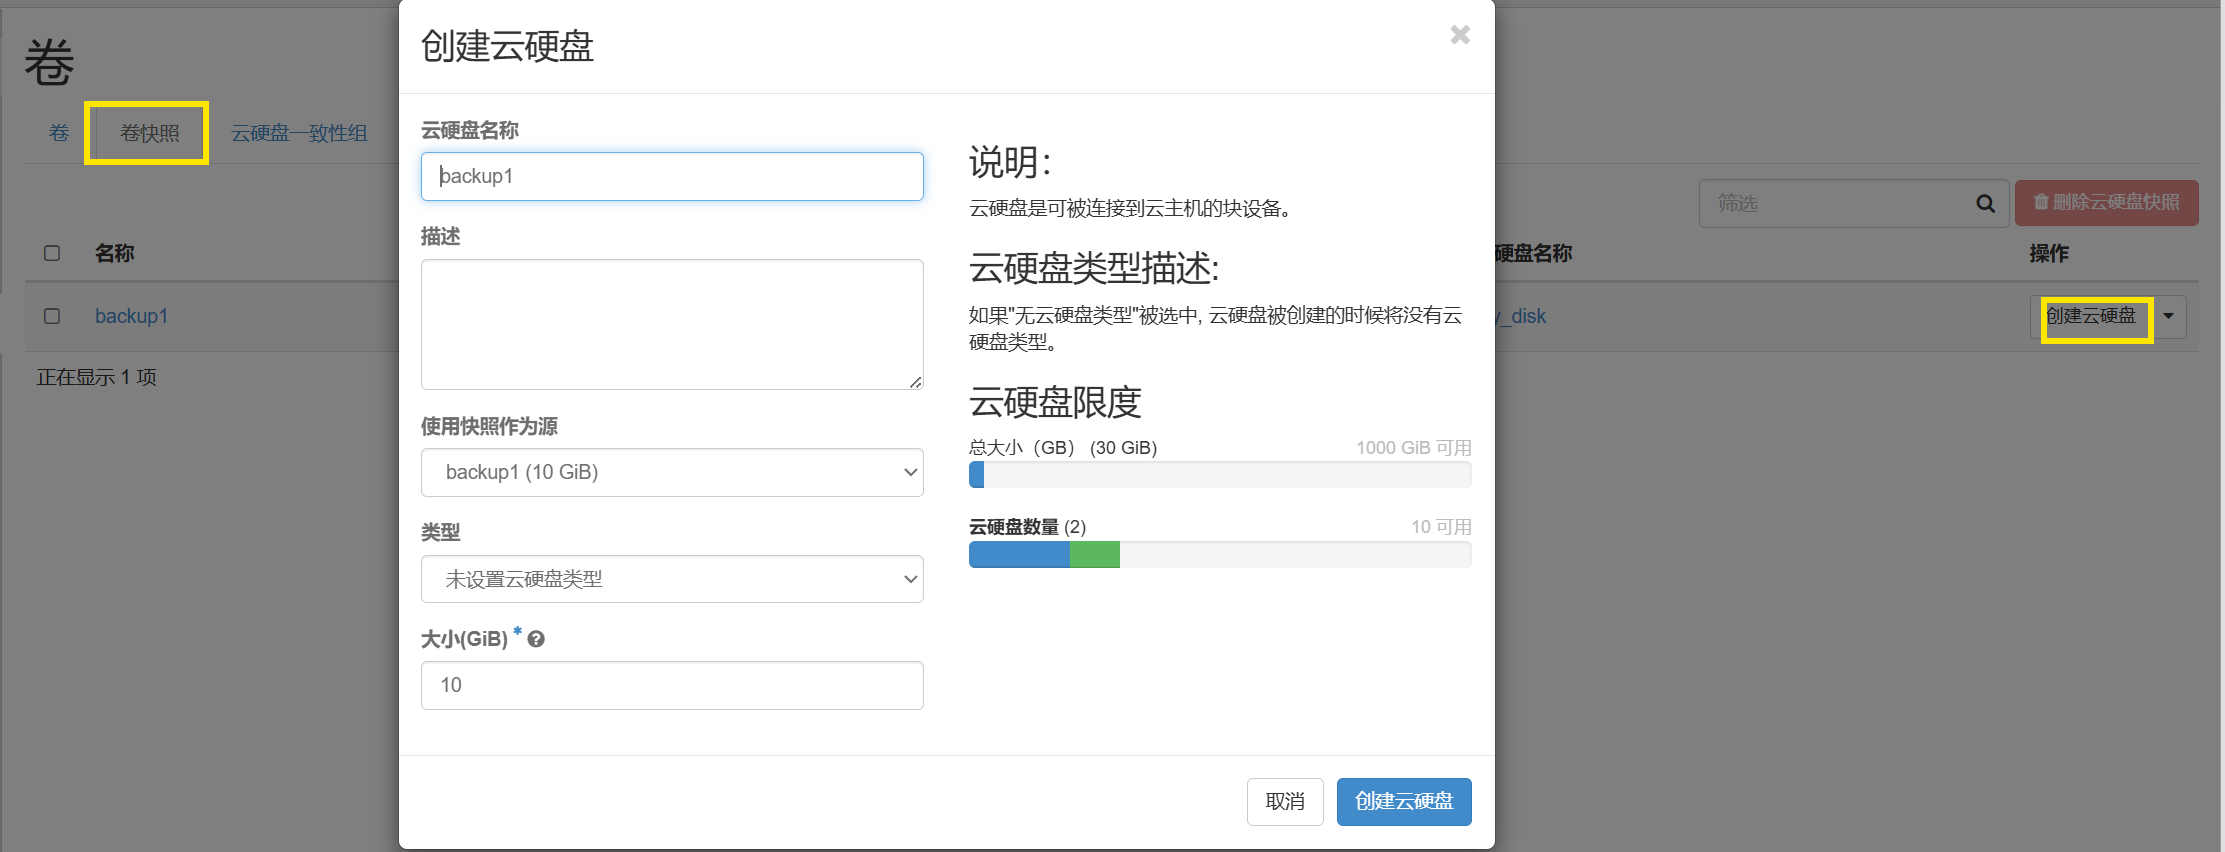
从快照恢复云硬盘
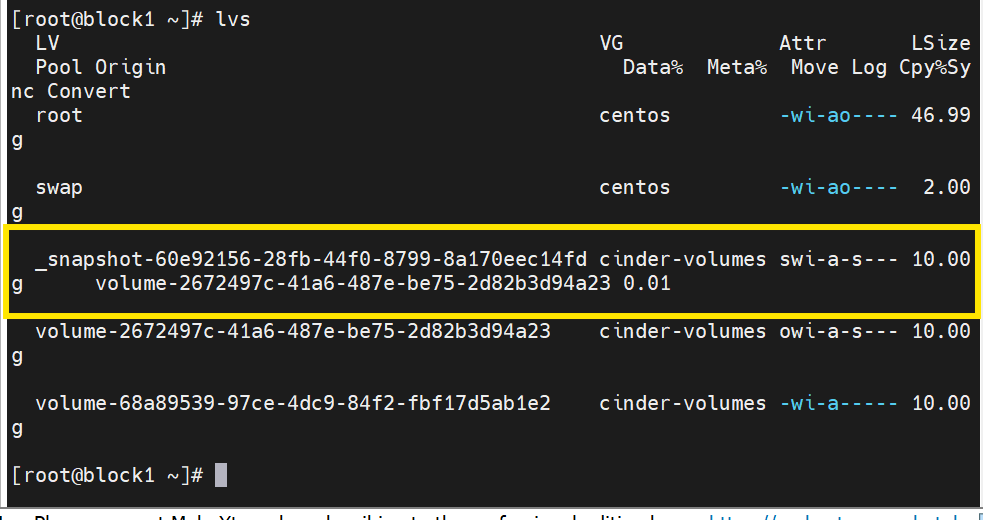
存储节点查看
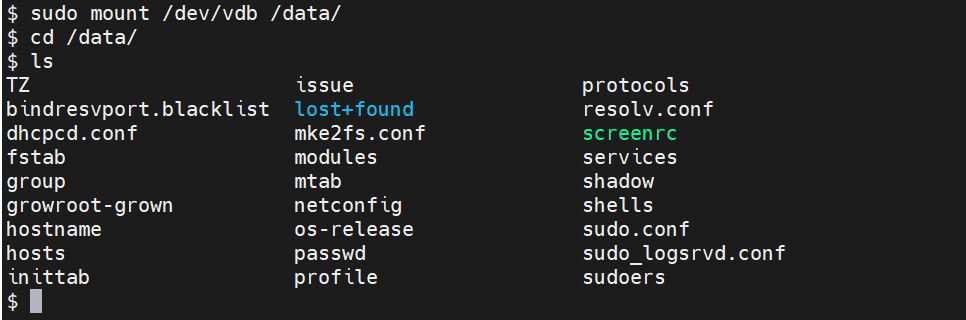
挂载快照的云硬盘,可以看到快照的数据
实验完成后删除快照

取消挂载
bash
$ sudo umount /data分离云硬盘
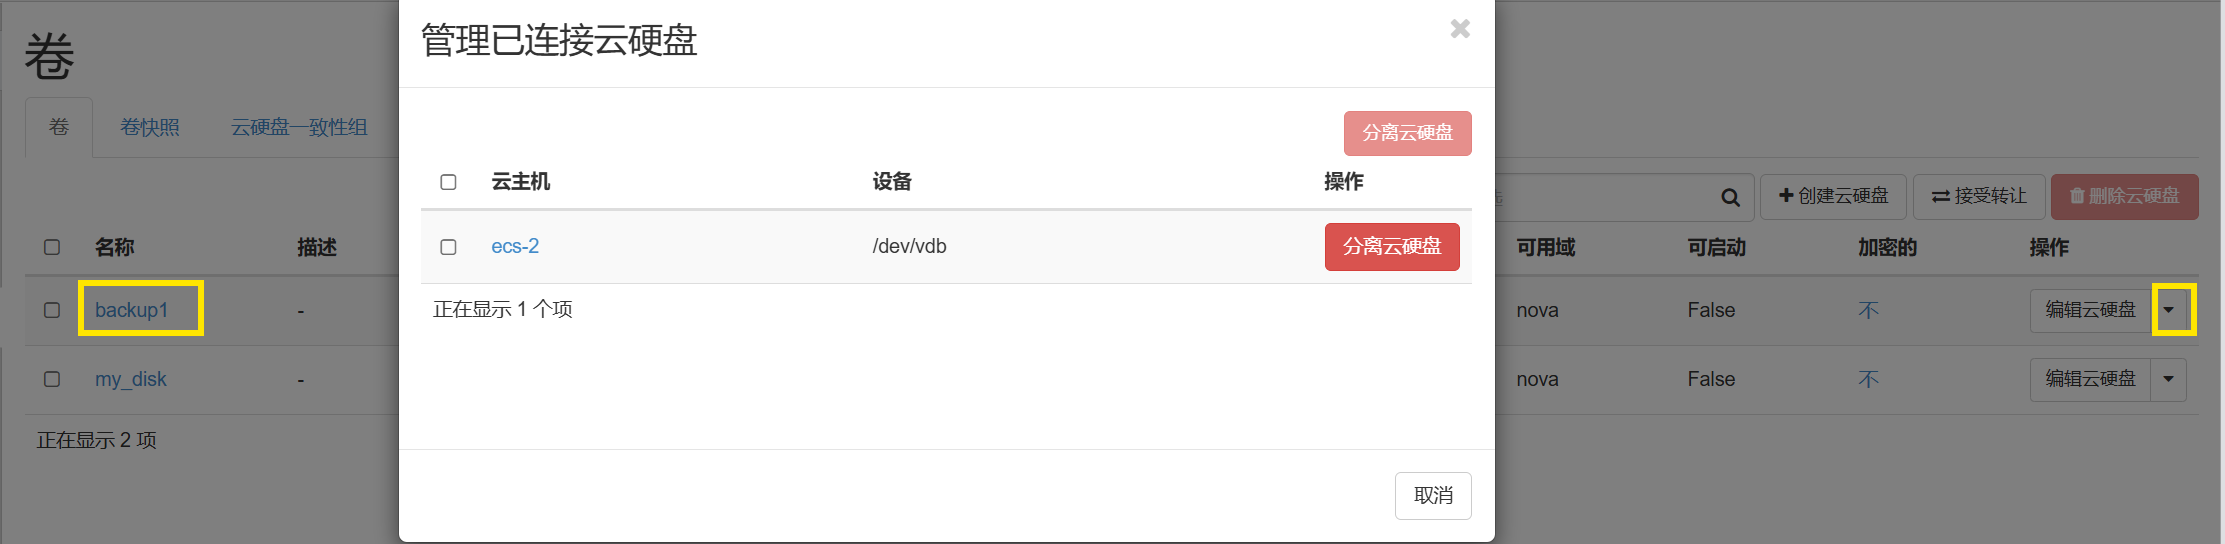
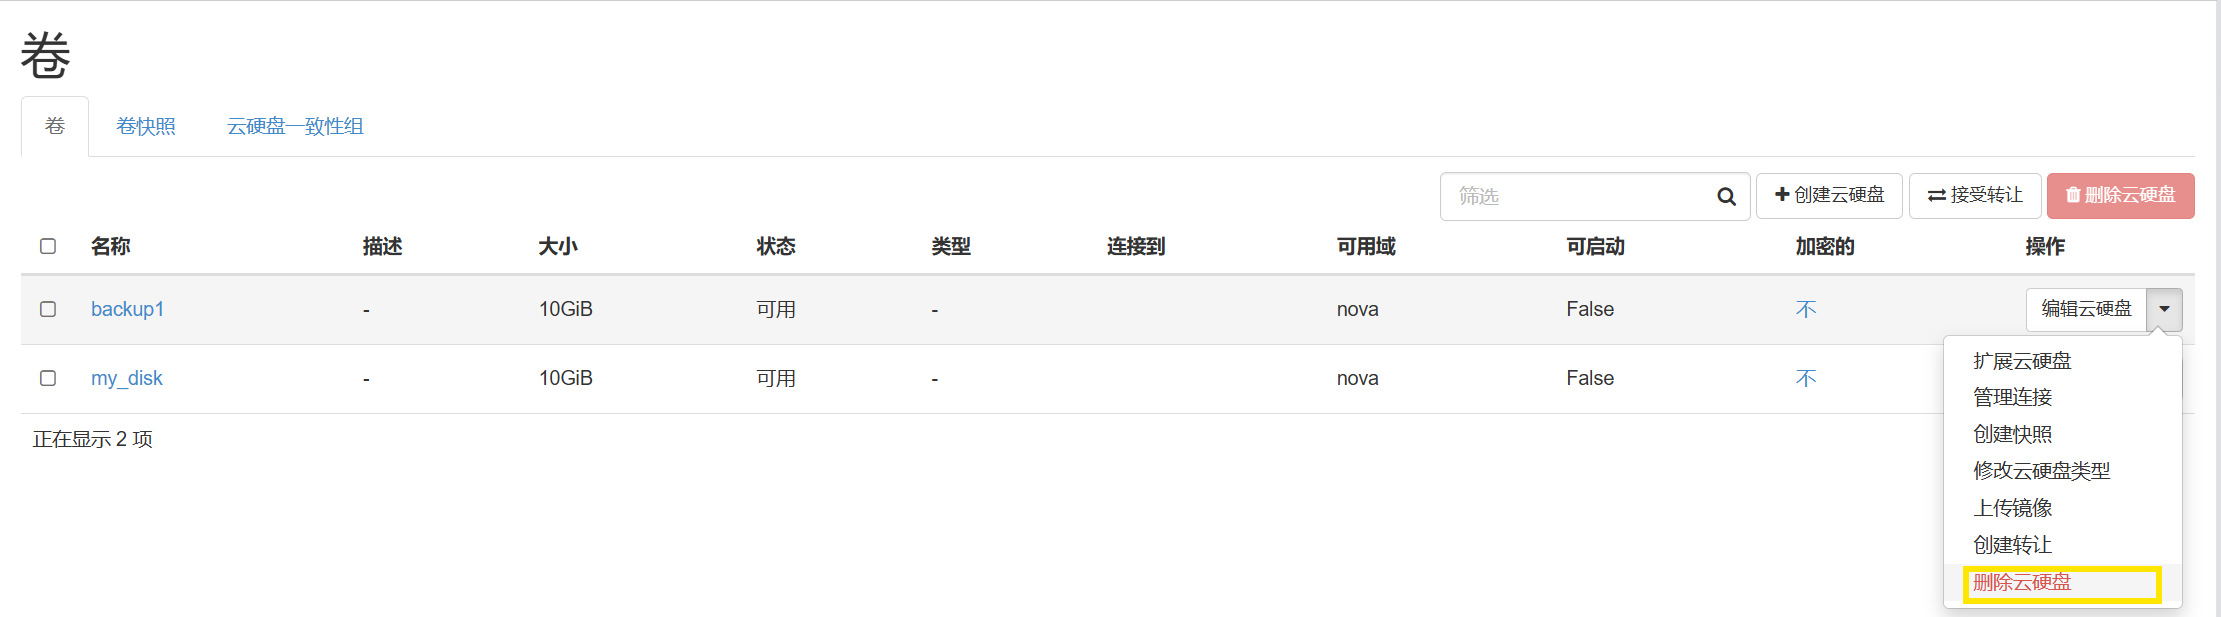
不用时也可以删除该快照创建的backup1云硬盘
再次在存储节点查看,快照云硬盘已经删除