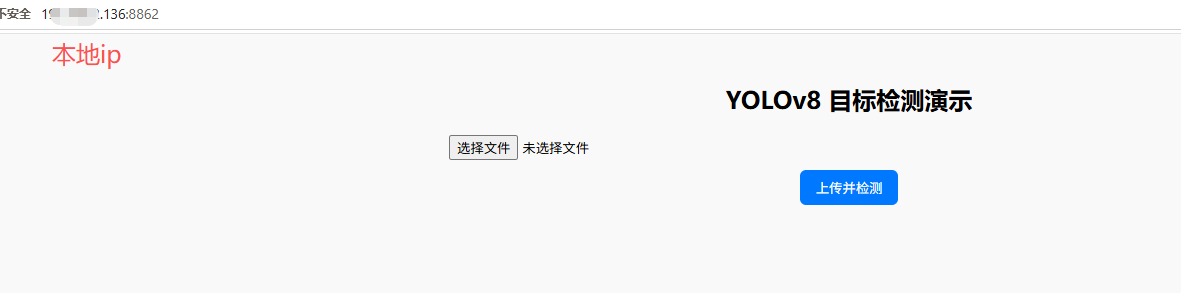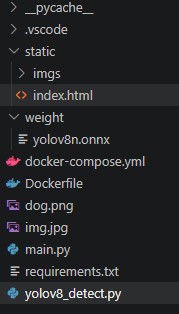
yolov8_detect.py
python
import onnxruntime as ort
import numpy as np
import cv2
import os

radio = 1
import time


def decorator(func):
    def wrapper(*args, **kwargs):
        st_time = time.time()
        result = func(*args, **kwargs)
        end_time = time.time()
        print(f"{func.__name__}:cost_time", end_time - st_time)
        return result

    return wrapper


class Yolov8_Infer:
    def __init__(self):
        # 模型路径优先读环境变量 ONNX_MODEL_PATH, 否则用脚本所在目录下的 weight/yolov8n.onnx
        # 注意: Linux 容器里路径分隔符必须用 "/" 或 os.path.join,
        self.model_path = os.environ.get(
            "ONNX_MODEL_PATH",
            os.path.join(os.path.dirname(os.path.abspath(__file__)), "weight", "yolov8n.onnx"),
        )
        self.session = ort.InferenceSession(
            self.model_path,
            providers=[
                "CPUExecutionProvider"
            ],
        )

    # @decorator
    def preprocess(self, img_data):
        h, w, _ = img_data.shape
        max_slide = max(h, w)
        img_zero = np.zeros((max_slide, max_slide, 3), dtype=np.uint8)
        img_zero[:h, :w] = img_data
        global radio
        radio = max_slide / 640
        img_data_re = cv2.resize(img_zero, (640, 640)) / 255.0
        img_data_re = img_data_re.astype(np.float32)
        img_pre = np.expand_dims(np.transpose(img_data_re, (2, 0, 1)), axis=0)
        return img_pre

    # @decorator
    def inference(self, input):
        return self.session.run(["output0"], {"images": input})

    # @decorator
    def postprocess(self, out_results):
        filuter_bbox = []
        # (1, 84, 8400)
        # 置信度过滤-nms去重
        out_result = out_results[0]
        out_result = np.transpose(out_result, (0, 2, 1))[0]

        for bbox in out_result:
            class_scores = bbox[4:]  #
            class_id = np.argmax(class_scores)  #
            conf = class_scores[class_id]  #
            if conf > 0.25:
                cx, cy, w, h = bbox[:4]

                x = int((cx - w / 2) * radio)
                y = int((cy - h / 2) * radio)
                bw = int(w * radio)
                bh = int(h * radio)
                filuter_bbox.append([x, y, bw, bh, conf, class_id])

        # nms去重
        np_filuter_bbox = np.array(filuter_bbox)
        bboxes = np_filuter_bbox[:, :4]
        confs = np_filuter_bbox[:, 4]
        filter_idx = cv2.dnn.NMSBoxes(bboxes, confs, 0.5, 0.45)
        return np_filuter_bbox[filter_idx]

    @decorator
    def forward(self, img):
        # 获取归一化之后的图片
        img0 = self.preprocess(img)
        pred = self.inference(img0)
        filter_bbox = self.postprocess(pred)
        self.show_imgs(filter_bbox, img)
        return filter_bbox, img  #

    # @decorator
    def show_imgs(self, outlines, img):
        for line in outlines:
            x, y, w, h, conf, cls = line.astype(np.int32)
            cv2.rectangle(img, (x, y), (x + w, y + h), color=(0, 0, 255), thickness=2)
            cv2.putText(
                img,
                str(conf),
                (x, y + 20),
                fontFace=cv2.FONT_HERSHEY_SIMPLEX,
                fontScale=1,
                thickness=1,
                color=(0, 255, 0),
            )
        cv2.imwrite("img.jpg", cv2.cvtColor(img, cv2.COLOR_RGB2BGR))
        # cv2.imshow("img",img0)
        # cv2.waitKey(0)


if __name__ == "__main__":
    img_data = cv2.imread("dog.png")
    img_rgb = cv2.cvtColor(img_data, cv2.COLOR_BGR2RGB)
    yolov5_infer = Yolov8_Infer()
    yolov5_infer.forward(img_rgb)
python
"""
pip install python-multipart==0.0.32
"""

import os

import cv2
import numpy as np
import uvicorn
from fastapi import FastAPI, File, Request, UploadFile
from fastapi.responses import FileResponse, JSONResponse
from fastapi.staticfiles import StaticFiles
from fastapi.middleware.cors import CORSMiddleware
import yolov8_detect

inference = yolov8_detect.Yolov8_Infer()
# 创建 FastAPI 应用
app = FastAPI(
    title="YOLOv8 目标检测 API 服务",
    description="使用 YOLOv8 + FastAPI 实现目标检测",
    version="1.0",
)
"""
跨域不是服务器限制的,而是浏览器为了安全,主动加的限制。
| 协议 | http / https |
| 域名 | example.com  |
| 端口 | 80 / 3000    |
只要浏览器发现:当前网页的"协议 / 域名 / 端口"中,有任意一个不同,就会产生跨域。
app.add_middleware(
    CORSMiddleware,
    allow_origins=["*"],
    allow_credentials=True,
    allow_methods=["*"],
    allow_headers=["*"],
)
"""


# 上传和保存目录
UPLOAD_DIR = "static/imgs"
os.makedirs(UPLOAD_DIR, exist_ok=True)

# 挂载静态目录,让前端可以通过 URL 访问
app.mount("/static", StaticFiles(directory="static"))


# 访问前端页面
@app.get("/")
def read_index():
    return FileResponse("static/index.html")


@app.post("/detect")
async def detect(request: Request, file: UploadFile = File(...)):
    """上传图片并进行检测,返回 URL + 检测信息"""

    if file.filename == "":
        return JSONResponse({"error": "未上传文件"}, status_code=400)

    # 读取上传的文件字节
    img_bytes = await file.read()

    # 使用 OpenCV 解码字节为图像
    np_arr = np.frombuffer(img_bytes, dtype=np.uint8)
    image = cv2.imdecode(np_arr, cv2.IMREAD_COLOR)

    file_name = file.filename
    boxes, draw_img = inference.forward(image)
    cv2.imwrite(f"static/imgs/{file_name}", draw_img)
    # 在 image 上绘制检测框或标注
    # 构建前端可访问 URL
    base = str(request.base_url).rstrip("/")
    image_url = f"{base}/static/imgs/{file_name}"
    print(image_url)
    response = {"image_url": image_url, "boxes": boxes.tolist()}
    return JSONResponse({"result": response})


# 服务启动入口
if __name__ == "__main__":
    # 使用 uvicorn 启动 FastAPI 服务
    # 异步服务器接口,可以同时处理很多请求,不会被慢操作阻塞
    host = os.environ.get("API_HOST", "127.0.0.1")
    port = int(os.environ.get("API_PORT", "8800"))
    uvicorn.run("main:app", host=host, port=port)
    # uvicorn.run(app, host="127.0.0.1", port=8857)
index.html
html
<!DOCTYPE html>
<html lang="zh">
<head>
    <meta charset="UTF-8" />
    <title>YOLOv8 目标检测</title>
    <style>
        body {
            font-family: "Microsoft YaHei", sans-serif;
            text-align: center;
            margin: 50px auto;
            max-width: 800px;
            background-color: #f9f9f9;
        }

        form {
            margin: 20px 0;
        }

        input[type="file"] {
            width: 100%;
            margin-bottom: 10px;
        }

        button {
            padding: 8px 16px;
            background: #0078ff;
            color: white;
            border: none;
            border-radius: 6px;
            cursor: pointer;
        }

        button:hover {
            background: #005ecc;
        }

        #result img {
            max-width: 100%;
            margin-top: 20px;
            border: 2px solid #0078ff;
            border-radius: 8px;
        }

        #detection-info {
            margin-top: 15px;
            font-size: 14px;
            color: green;
        }
    </style>
</head>
<body>
    <h2>YOLOv8 目标检测演示</h2>

    <form id="uploadForm" enctype="multipart/form-data">
        <input type="file" id="fileInput" name="file" accept="image/*" required />
        <br />
        <button type="submit">上传并检测</button>
    </form>

    <div id="result">
        <img id="annotatedImage" src="" alt="检测结果" style="display:none;" />
    </div>

    <div id="detection-info"></div>

    <script>
        const form = document.getElementById('uploadForm');
        const fileInput = document.getElementById('fileInput');
        const img = document.getElementById('annotatedImage');
        const infoDiv = document.getElementById('detection-info');

        form.addEventListener('submit', async (e) => {
            e.preventDefault();

            if (!fileInput.files.length) {
                alert("请先选择图片!");
                return;
            }

            const formData = new FormData();
            formData.append('file', fileInput.files[0]);

            infoDiv.innerHTML = "正在上传和检测,请稍等...";
            img.style.display = "none";

            try {
                const res = await fetch("/detect", {
                    method: "POST",
                    body: formData
                });

                const data = await res.json();

                if (data.result && data.result.image_url) {
                    img.src = data.result.image_url;
                    img.style.display = "block";
                    console.log("1111", data.result.image_url)
                    // 这里显示固定的检测信息(后端可以返回更详细的 info)
                    infoDiv.innerHTML = `
                        <p>检测结果返回信息:</p>
                        <p>${JSON.stringify(data.result)}</p>
                    `;
                } else {
                    infoDiv.innerHTML = "检测失败或返回数据错误";
                }
            } catch (err) {
                infoDiv.innerHTML = "请求出错:" + err.message;
            }
        });
    </script>
</body>
</html>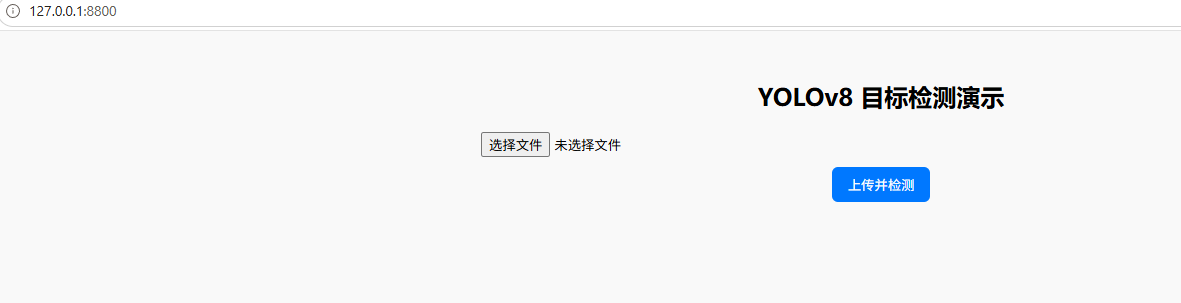
容器化部署
requirements.txt
python
fastapi>=0.110,<1
uvicorn[standard]>=0.27,<1
python-multipart>=0.0.9
numpy>=1.24,<3
opencv-python-headless>=4.8,<5
onnxruntime>=1.16,<2
Dockerfile
python
# ================================
# 1. 基础镜像
# ================================
FROM python:3.10
# 使用官方 Python 3.10 镜像
# 提供 Python 运行环境 + 基础系统库


# ================================
# 2. 环境变量(全局配置)
# ================================
ENV PYTHONDONTWRITEBYTECODE=1 \
    # 不生成 .pyc 文件(减少容器垃圾文件)

    PYTHONUNBUFFERED=1 \
    # 关闭缓冲,日志实时输出(docker logs 能立即看到)

    PIP_NO_CACHE_DIR=1 \
    # pip 安装不缓存(减小镜像体积)

    PIP_DEFAULT_TIMEOUT=100 \
    # pip 下载超时时间(防止网络慢导致失败)

    API_HOST=0.0.0.0 \
    # FastAPI 监听地址(必须 0.0.0.0 才能外部访问)

    API_PORT=8856 \
    # FastAPI 端口

    ONNX_MODEL_PATH=/app/weight/yolov8n.onnx \
    # ONNX 模型路径(容器内部路径)

    ONNX_EP=cpu
    # ONNX 推理设备(cpu / cuda)


# ================================
# 3. 工作目录
# ================================
WORKDIR /app
# 后续所有操作都在 /app 目录执行
# 类似于 cd /app


# ================================
# 4. 更换 apt 软件源
# ================================
RUN echo "deb https://mirrors.aliyun.com/debian/ trixie main contrib non-free non-free-firmware\n\
deb https://mirrors.aliyun.com/debian-security trixie-security main contrib non-free non-free-firmware\n\
deb https://mirrors.aliyun.com/debian/ trixie-updates main contrib non-free non-free-firmware" \
> /etc/apt/sources.list


# ================================
# 5. 安装系统依赖
# ================================
RUN apt-get update && apt-get install -y --no-install-recommends \
    libglib2.0-0 \
    # OpenCV 依赖

    libgomp1 \
    # OpenMP 支持(onnxruntime / numpy 需要)

    libgl1 \
    # 解决 OpenCV 报错:libGL.so.1 not found

    && rm -rf /var/lib/apt/lists/*
    # 清理 apt 缓存(减小镜像体积)


# ================================
# 6. 复制依赖文件(关键优化)
# ================================
COPY requirements.txt .

# 只复制依赖文件(不是全部代码)
# 目的:利用 Docker 缓存
#    - requirements.txt 不变 → 不重新安装依赖
#    - 构建速度提升非常大


# ================================
# 7. 安装 Python 依赖
# ================================
RUN pip install --upgrade pip -i https://mirrors.aliyun.com/pypi/simple \
    && pip install -r requirements.txt -i https://mirrors.aliyun.com/pypi/simple


# ================================
# 8. 复制业务代码
# ================================
COPY main.py yolov8_detect.py ./
COPY static ./static/
#添加一行
COPY weight/ /app/weight/

# ================================
# 9. 创建目录
# ================================
RUN mkdir -p static/imgs weight

# 创建:
#    /app/static/imgs  (存放推理结果)
#    /app/weight       (模型目录)

# 注意:
# 这里只是创建目录,不包含模型文件!


# ================================
# 10. 暴露端口
# ================================
EXPOSE 8856


# ================================
# 11. 启动命令
# ================================
CMD ["sh", "-c", "uvicorn main:app --host ${API_HOST} --port ${API_PORT}"]

# 启动 FastAPI:
# main.py 中的 app 对象
# 使用环境变量控制:
#    host / port

# 等价于:
# uvicorn main:app --host 0.0.0.0 --port 8856
docker-compose.yml
python
services:
  api:  # 定义一个服务,名字叫 api(容器名称的一部分)

    build: .  # 使用当前目录下的 Dockerfile 构建镜像
    image: fastapi-obj-detect:v4  # 构建后的镜像名称:标签

    ports:
      - "8856:8856"  # 端口映射:宿主机8856 -> 容器8856(浏览器访问 localhost:8856)

    environment:
      API_HOST: "0.0.0.0"  # 服务监听地址(必须是0.0.0.0,外部才能访问)
      API_PORT: "8856"     # FastAPI运行端口
      ONNX_MODEL_PATH: "/app/weight/yolov8n.onnx"  # 容器内模型路径(非常关键)
      ONNX_EP: "cpu"       # ONNX推理设备(cpu / cuda)

    volumes:
      # 挂载模型目录(本地 -> 容器)
      # ./weight 是当前项目目录下的 weight 文件夹
      # /app/weight 是容器内路径
      # :ro 表示只读(防止容器修改模型)
      - ./weight:/app/weight:ro
      # - D:/vscodefile/20260824-2/weight:/app/weight:ro

      # 挂载输出目录(用于保存推理结果图片)
      # 容器生成的图片会同步到本地 static/imgs
      - ./static/imgs:/app/static/imgs
python
进⼊项⽬⽬录:cd
通过Dockerfile构建镜像:docker compose build
查看镜像:docker images
docker run -d --name <容器名> -p <宿主机端口>:8855 fastapi-obj-detect:v4
docker run -p 8855:8855 -d fastapi-obj-detect:v4
docker run -d --name obj_v4_2 -p 8862:8855 fastapi-obj-detect:v4
docker ps