完成最精简的Python环境配置,配置阿里云百炼API Key,编写第一个Agent
-
访问阿里云百炼控制台首页,获取API Key
-
环境准备
-
Python:3.10或更高版本,我这里使用3.12
csspython --version
-
-
配置API Key环境变量:DASHSCOPE_API_KEY
-
macOS/Linux
bashecho "export DASHSCOPE_API_KEY='你的API Key'" >> ~/.zshrc source ~/.zshrc -
Windows
- 环境变量,变量名填入
DASHSCOPE_API_KEY,变量值填入你的API Key,确定,重启终端
- 环境变量,变量名填入
-
验证环境变量配置成功
- macOS/Linux:
echo $DASHSCOPE_API_KEY - Windows PowerShell:
echo $env:DASHSCOPE_API_KEY
- macOS/Linux:
-
虚拟环境设置环境变量
ini$env:DASHSCOPE_API_KEY = '你的API Key'
-
-
依赖安装
-
pip加速镜像配置
csharp# 临时使用阿里云镜像加速 pip install -i https://mirrors.aliyun.com/pypi/simple/ 包名 # 或者永久配置 pip config set global.index-url https://mirrors.aliyun.com/pypi/simple/ -
核心包
inipip install langchain==1.0.3 langchain-core==1.2.26 langchain-community==0.3.29 langchain-openai==1.1.12 langgraph==1.0.2 langgraph-prebuilt==1.0.2 -
HTTP服务依赖
pip install fastapi uvicorn sse-starlette -
模型选择:我这里使用通义千问
qwen3.5-plus模型 -
agent_api.py
pythonimport os import json import uvicorn from fastapi import FastAPI, Query from langchain_openai import ChatOpenAI from langchain.agents import create_agent from starlette.responses import StreamingResponse from starlette.middleware.cors import CORSMiddleware # 初始化模型 model = ChatOpenAI( model="qwen3.5-plus", api_key=os.getenv("DASHSCOPE_API_KEY"), base_url="https://dashscope.aliyuncs.com/compatible-mode/v1" ) # 创建智能体 agent = create_agent( model=model, tools=[], system_prompt="你是一个乐于助人的助手 请始终使用中文回答 如果不知道答案,请直接说"我不知道",不要编造" ) # 创建FastAPI应用 app = FastAPI(title="LangChain Agent API", description="基于 LangChain 和 FastAPI 构建的智能 Agent 对话服务") app.add_middleware(CORSMiddleware, allow_origins=["*"], allow_headers=["*"], allow_methods=["*"]) @app.get("/") async def root(): return { "usage": "GET /chat?message=<你的消息内容> (JSON 一次性响应)", "stream": "GET /stream?message=<你的消息内容> (SSE 流式响应)", "example": "http://localhost:8000/chat?message=你好" } # JSON 一次性响应 @app.get("/chat") async def chat(message: str = Query(..., description="用户输入的消息内容")): response = agent.invoke({"messages": [("user", message)]}) reply = response["messages"][-1].content return {"reply": reply} # SSE 流式响应 @app.get("/stream") async def stream(message: str = Query(..., description="用户输入的消息内容")): async def event_generator(): for chuck in model.stream([{"role": "user", "content": message}]): if hasattr(chuck, "content") and chuck.content: yield f"data: {json.dumps({"content": chuck.content})}\n\n" yield "data: [DONE]\n\n" return StreamingResponse(event_generator(), media_type="text/event-stream; charset=utf-8") if __name__ == "__main__": uvicorn.run(app, host="0.0.0.0", port=8000) -
启动服务
python agent_api.py -
浏览器测试一次性响应接口
浏览器直接访问http://localhost:8000/chat?message=你好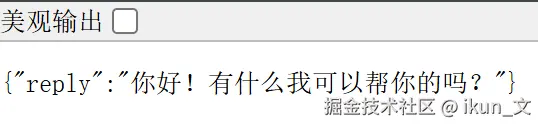
-
测试流式响应接口
浏览器访问test.html<!DOCTYPE html> <html> <head> <meta charset="UTF-8"> <title>流式测试</title> </head> <body> <input id="msg" placeholder="输入问题" size="50" /> <button onclick="startStream()">发送</button> <div id="output" style="margin-top:20px; border:1px solid #ccc; padding:10px;"></div> <script> let currentText = ""; let currentIndex = 0; let typingTimeout = null; function startStream() { const msg = document.getElementById('msg').value; const outputDiv = document.getElementById('output'); outputDiv.innerHTML = ''; currentText = ""; currentIndex = 0; if (typingTimeout) { clearTimeout(typingTimeout); typingTimeout = null; } const eventSource = new EventSource(`http://localhost:8000/stream?message=${encodeURIComponent(msg)}`); eventSource.onmessage = (event) => { if (event.data === '[DONE]') { eventSource.close(); } else { const data = JSON.parse(event.data); // 追加内容 currentText += data.content; // 开始或继续打字机效果 startTyping(outputDiv, 100); } }; } // 打字机效果函数 function startTyping(element, speed) { if (currentIndex < currentText.length) { element.innerHTML += currentText.charAt(currentIndex); currentIndex++; typingTimeout = setTimeout(() => startTyping(element, speed), speed); } } </script> </body> </html>
-