目录
[1、启动服务时报错 Failed to start mysql.service: Unit not found. 的解决方法。](#1、启动服务时报错 Failed to start mysql.service: Unit not found. 的解决方法。)
[2、登录过程出现:access denied for user'root'@'localhost'(using password:Yes) 的解决方法。](#2、登录过程出现:access denied for user’root’@‘localhost’(using password:Yes) 的解决方法。)
一、下载mysql
1、获取下载链接
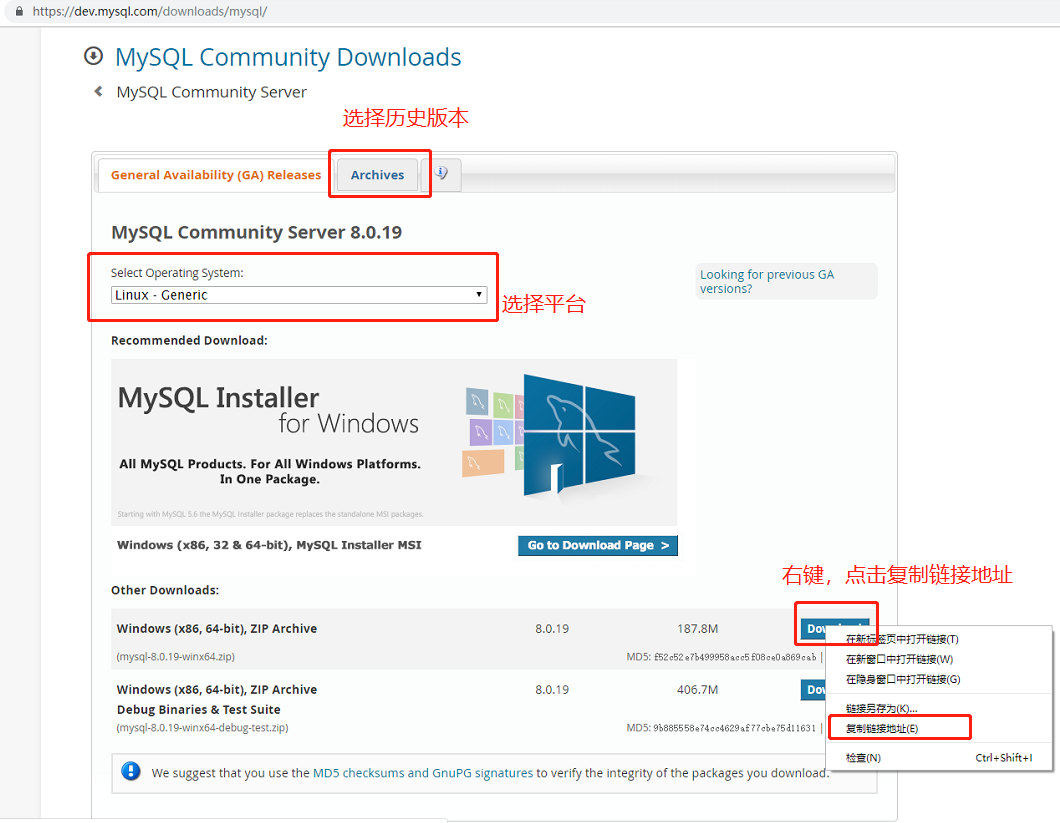
点击downloads --> MySQL Community (GPL) Downloads --> MySQL Community Server 可进入下载界面,选择linux系统,找到自己想要版本右键复制链接地址即可。
比如我获取5.7.28版本的下载链接:https://downloads.mysql.com/archives/get/p/23/file/mysql-5.7.28-linux-glibc2.12-x86_64.tar.gz
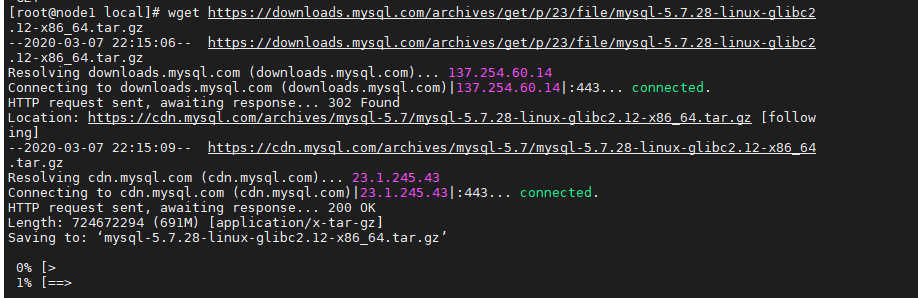
2、在linux中使用wget下载
二、安装mysql
解压改名
python
tar -xvf mysql-5.7.28-linux-glibc2.12-i686.tar.gz
mv mysql-5.7.28-linux-glibc2.12-i686 mysql
添加用户和组
python
groupadd mysql
useradd -r -g mysql mysql
创建初始化目录和修改目录权限
python
mkdir - p /data/mysql
chown mysql:mysql -R /data/mysql
修改配置文件 /etc/my.cnf
python
[mysqld]
bind-address=0.0.0.0
user=mysql
basedir=/usr/local/mysql
datadir=/data/mysql
log-error=/data/mysql/mysql.err
pid-file=/data/mysql/mysql.pid
character_set_server=utf8mb4  # 设置创建数据库时的默认字符类型
symbolic-links=0

[client]
port=3306
socket=/tmp/mysql.sock
初始化mysql
python
cd /usr/local/mysql/bin/
./mysqld --defaults-file=/etc/my.cnf --basedir=/usr/local/mysql --datadir=/data/mysql/ --user=mysql --initialize
设置mysql命令为全局命令:将mysql.server复制到init.d
python
[root@localhost support-files]# pwd
/usr/local/mysql/support-files
[root@localhost support-files]# cp mysql.server /etc/init.d/mysql
启动服务
python
service mysql start设置为开机自动启动
python
chkconfig mysql on登录mysql
python
mysql -u root -p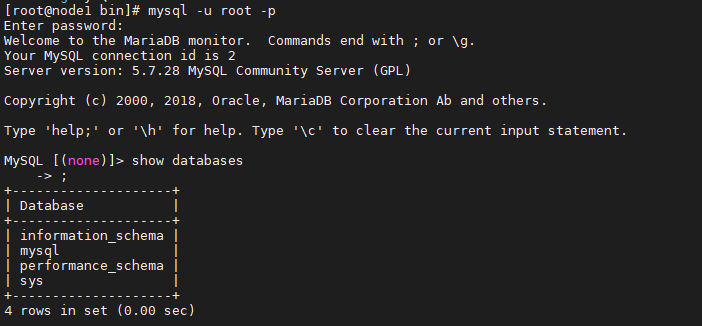
到此,mysql安装完毕,并成功登录使用
三、使用Navicat连接MySQL
1、linux防火墙开放3306端口
python
[root@node1 ~]# firewall-cmd --add-port=3306/tcp --permanent
[root@node1 ~]# firewall-cmd --reload
如果未开放端口会报错 10060 "Unknown error":

2、开放mysql root用户远端访问权限
在linux中登录mysql,进入mysql库
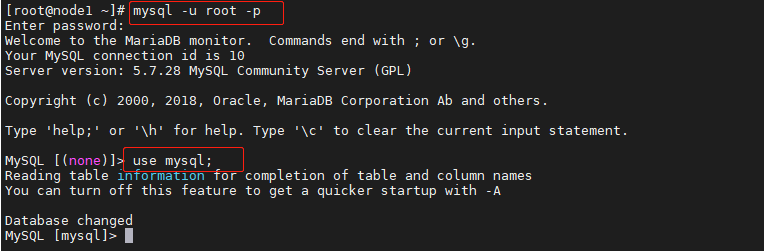
查看user表中数据,修改root用户host字段值为"%"
python
MySQL [mysql]> select host,user from user;
MySQL [mysql]> update user set host="%" where user="root";
MySQL [mysql]> flush privileges;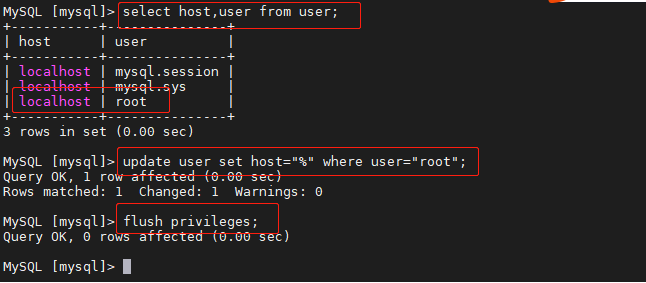
使用Navicat连接数据库
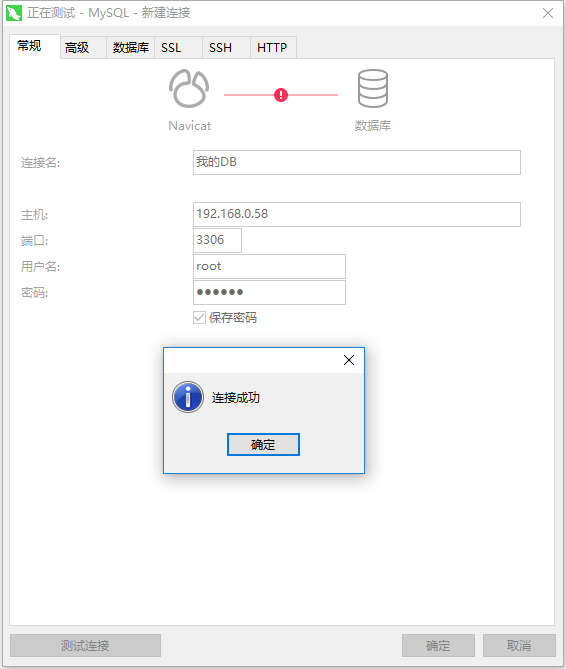
如果不开放root用户访问权限会报错 not allowed to connect:

四、常见问题
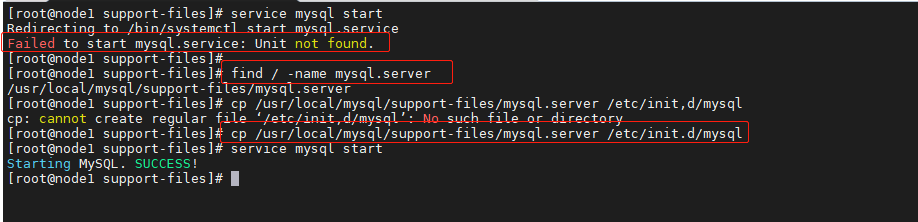
1、启动服务时报错 Failed to start mysql.service: Unit not found. 的解决方法。
2、登录过程出现:access denied for user'root'@'localhost'(using password:Yes) 的解决方法。
1.停止mysql服务:
service mysql stop
2后台安全模式登录mysql;
find / -name mysqld_safe
cd 到文件所在目录
./mysqld_safe --user=mysql --skip-grant-tables --skip-networking

3.新开一个窗口,直接在命令行输入 mysql,登录

4.修改root用户密码:
use mysql
update user set authentication_string=password('123456') where user="root";
注:5.7以上的存储密码的字段变为authentication_string,若上面语句没执行成功执行下面的语句
update mysql.user set password=PASSWORD('123456')where user='root';

5.将密码过期设置为否
update user set password_expired='N' where user="root"

6.刷新、退出:
flush privileges;
quit;

7.重启mysql服务
service mysql restart;
- 登录时,提示 -bash:mysql:未找到命令

使用yum install -y mysql 安装即可
源码等资料获取方法


各位想获取源码等教程资料的朋友请 点赞 + 评论 + 收藏 ,三连!
三连之后我会在评论区挨个私信发给你们~