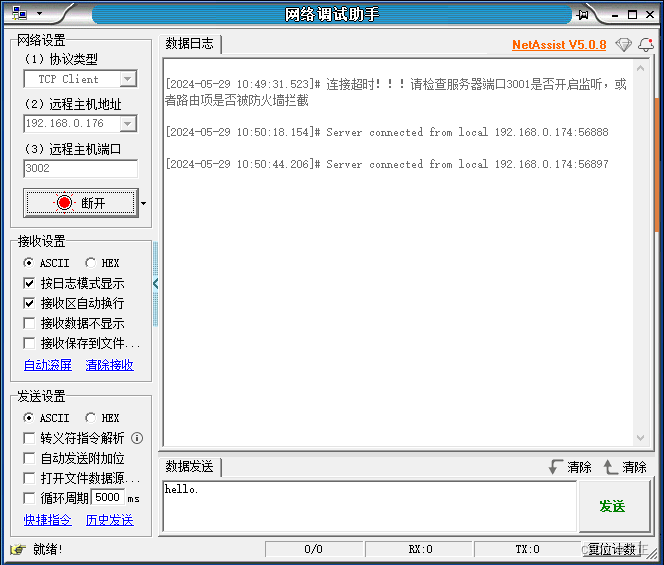
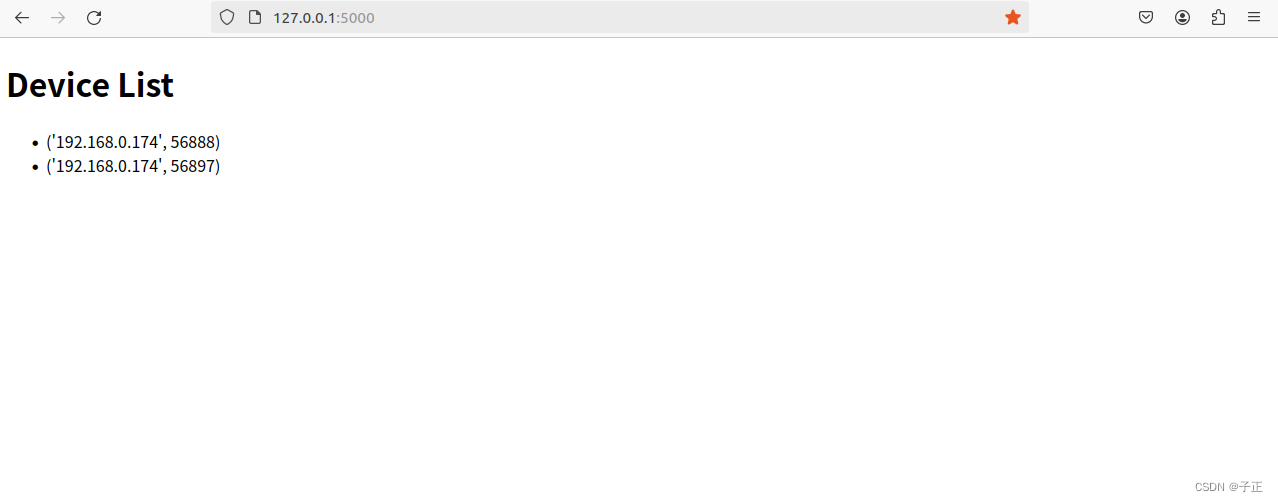
这里有一份展示Flask与Python的协同代码,Flask的web页面展示了系统的一个暴露的公共tcp port连接的所有用户ip:port列表。
做完才发现没有什么用处,我的本意是做一个reverse的ssh或者telnet终端。看点有几个:
- 我原本是打算用multiprocessing.queue在python和Flask的web代码间交互,后来发现不必要。
- web客户处理的 app级变量最简单的方法是放在:app.config["<strkey>"]这个字典里。app变量如果更新记得要回写回去。
- python程序最好通过post方法,与Flask交互,更新app变量,例子中包含一个完整的示例:python post, flask response
- web页面为了自动更新一些服务器变量,有一个自刷新的代码。
- 命令行可以主动切换web port和那个tcp port.
1.python: reverse_ssh_server.sh
python
import socket
import threading
from flask import Flask, render_template, jsonify, request
import requests
from sys import argv
import multiprocessing

TCP_PORT = 8888
WEB_PORT = 5000
CLIENT_MAX_LEN = 15

app= Flask(__name__, template_folder="./web") #, static_folder="./web"
connected_devices = []

# TCP服务器
def tcp_server():
    host = '0.0.0.0'
    port = TCP_PORT

    server_socket = socket.socket(socket.AF_INET, socket.SOCK_STREAM)
    try:
        server_socket.bind((host, port))
        server_socket.listen(15)
    except Exception as e:
        print(f"app port {port} bind error", e)
        return;

    print(f"TCP服务器已启动,监听端口 {port}...")

    while True:
        try:
            if(app is None):
                continue;
            client_socket, addr = server_socket.accept()
            #print(f"连接来自 {addr}")
            if(len(connected_devices)>CLIENT_MAX_LEN):
                client_socket.close()
                continue
            json = {}
            json["dev"] = f"{addr}"
            dev_login(json)
            print(connected_devices)
        except Exception as e:
            print("client accept error.", e);
            server_socket.close();
            return;

def dev_login(dev_addr):
    url = f'http://localhost:{WEB_PORT}/api/devices/dev_login'
    headers = {'Content-Type': 'application/json'}
    response = requests.post(url, json=dev_addr, headers=headers)
    print("dev_login", response.json())  # 打印服务器返回的 JSON 响应

# Web页面
@app.route('/')
def index():
    connected_devices = app.config['connected_devices']
    return render_template('index.html', devices=connected_devices)

@app.route('/api/devices')
def get_device_list():
    connected_devices = app.config['connected_devices']
    # 这里应该是获取设备列表的逻辑,暂时用一个简单的列表代替
    # Assuming connected_devices is a multiprocessing.Queue
    ret = jsonify(connected_devices)
    print(ret)
    return ret

@app.route('/api/devices/dev_login', methods=['POST'])
def handle_post():
    # 获取 POST 请求中的 JSON 数据
    json_data = request.json["dev"]
    connected_devices = app.config['connected_devices']
    connected_devices.append(json_data);
    app.config['connected_devices'] = connected_devices
    # 在这里处理 JSON 数据,这里只是简单地返回接收到的 JSON 数据
    print("on_handle_post:", json_data, connected_devices)
    return jsonify(json_data)

if __name__ == '__main__':
    if len(argv)>=2:
        WEB_PORT = int(argv[1])
    if len(argv)>=3:
        TCP_PORT = int(argv[2])
    print(f"web port:{WEB_PORT}, tcp port:{TCP_PORT}")
    # 启动TCP服务器和Web应用
    app.config['connected_devices'] = connected_devices
    tcp_thread = threading.Thread(target=tcp_server)
    tcp_thread.start()
    app.run(debug=True, port=WEB_PORT)
2.web Flask使用的index.html
html
<!DOCTYPE html>
<html>
<head>
    <title>Device List</title>
</head>
<body>
    <h1>Device List</h1>
    <ul id="device-list">
        <!-- 设备列表将会动态添加到这里 -->
        <li>ip:port</li>
    </ul>

    <script>
        function updateDeviceList() {
            // 发送 AJAX 请求获取设备列表
            var xhr = new XMLHttpRequest();
            xhr.onreadystatechange = function() {
                if (xhr.readyState == XMLHttpRequest.DONE) {
                    if (xhr.status == 200) {
                        // 解析 JSON 响应
                        var devices = JSzeON.parse(xhr.responseText);
                        // 清空设备列表
                        document.getElementById("device-list").innerHTML = "";
                        // 遍历设备列表并添加到页面中
                        devices.forEach(function(device) {
                            var li = document.createElement("li");
                            li.textContent = device; //device.name
                            document.getElementById("device-list").appendChild(li);
                        });
                    }
                }
            };
            xhr.open("GET", "/api/devices", true);
            xhr.send();
        }

        // 页面加载时立即执行一次更新
        updateDeviceList();

        // 定时刷新,1秒执行一次
        setInterval(updateDeviceList, 1000);
    </script>
</body>
</html>
3.执行效果:
sudo -E python3.9 reverse_ssh_server.py 5000 3002
sudo\] root 的密码: web port:5000, tcp port:3002 TCP服务器已启动,监听端口 3002... \* Serving Flask app 'reverse_ssh_server' \* Debug mode: on WARNING: This is a development server. Do not use it in a production deployment. Use a production WSGI server instead. \* Running on http://127.0.0.1:5000 Press CTRL+C to quit


4.进阶
4.1 Post 图片及其他参数给Flask
#!/usr/bin/env python3
# -*- coding: utf-8 -*-
# 获取当前脚本文件所在目录的父目录,并构建相对路径
import os
import sys
current_dir = os.path.dirname(os.path.abspath(__file__))
project_path = os.path.join(current_dir, '..')
sys.path.append(project_path)
sys.path.append(current_dir)
import gpLog
import paho.mqtt.client as mqtt
from datetime import datetime
import cv2
import requests
import numpy as np

def gpWebPost_PostImage(url:str, cv2Image, ai_class:int):
    if not url.startswith("http://"):
        # 设置 POST 请求的 URL
        url = f'http://{url}'

    # 设置要发送的文件
    files = {
        'ai_snapshot': cv2Image  # 将文件打开为二进制模式
    }
    data = {
    'ai_class': 1,
    }

    jsonArg ={}
    jsonArg["ai_class"]=ai_class
    # 发送 POST 请求
    response = requests.post(url, files=files, json=jsonArg, data=data)

    # 检查响应
    if response.status_code == 200:
        return True
    else:
        return False

def gpWebPost_TestPostImage():
    # 读取图像
    url = "http://192.168.0.1:8080/aiimage/dev_0001/ch01"
    image = cv2.imread(r'/home/lubancat/图片/Rumelhart_rect.jpg')


    # 将图像转换为字节流
    _, img_encoded = cv2.imencode('.jpg', image)
    image_data = img_encoded.tobytes()
    gpWebPost_PostImage(url, image_data, 1)