前言
上一次我们介绍了深度相机D455的使用:intel深度相机D455的使用-CSDN博客,我们也看到了相机检测到的无效区域。
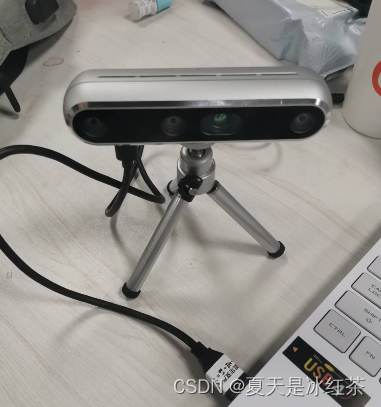
在使用Intel深度相机D455时,我们经常会遇到深度图中的无效区域。这些无效区域可能由于黑色物体、光滑表面、透明物体以及视差效应等原因引起。为了解决这些问题,我们可以采用图像修复与滤波结合的方法。具体步骤包括创建掩模图、使用插值方法填补缺失值,以及利用OpenCV的inpaint函数进行修复。本文详细介绍了如何根据不同的对齐方式(深度对齐到彩色或彩色对齐到深度)来处理无效区域,并展示了图像修复的实际代码和效果。这些方法能有效提升深度图质量,特别适用于深度加雾任务。
请注意本文中图像修复与滤波结合的方法处理无效区域的部分,仅仅只适用于我的需求,即根据深度图进行深度加雾的任务。
深度相机的缺点
D455原理
双目立体视觉系统通过视差计算来获得深度信息。相机系统捕捉到的两幅红外图像会有一个视差,即相同物体在两幅图像中的位置差异。通过视差计算,可以推算出物体到相机的距离(深度)。
缺点
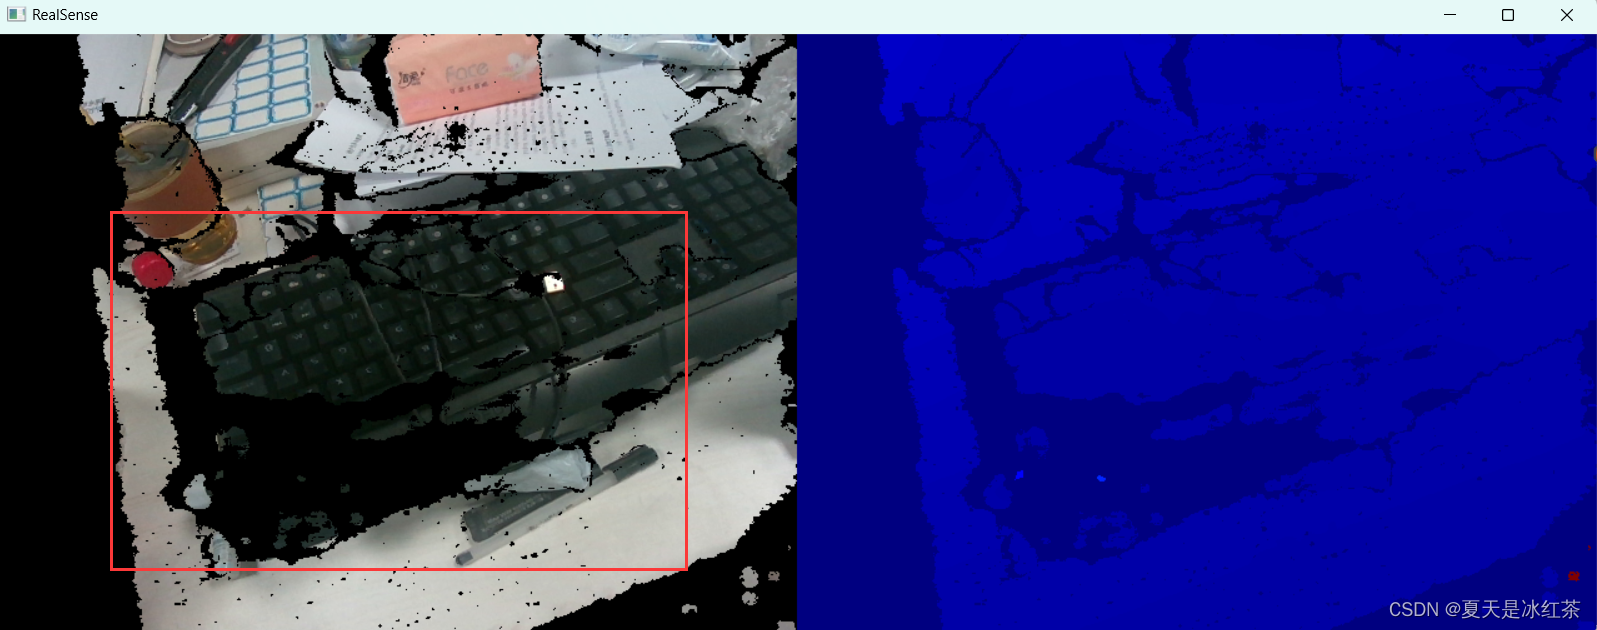
黑色物体的影响
黑色物体对光线的反射率非常低,意味着它们吸收大部分入射光线,而不是反射回去。对于依赖反射光线来计算深度的双目立体视觉系统,这会导致反射信号不足,从而影响深度计算的精度和可靠性。并且黑色物体通常与背景之间的对比度较低,这使得双目相机难以在图像中识别和匹配这些物体的特征点,从而影响视差计算。
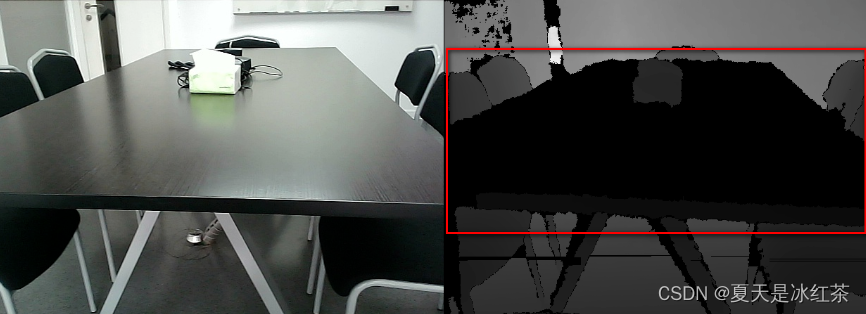
光滑物体表面反射的影响
光滑表面会产生镜面反射,这意味着光线会按照入射角以相同的角度反射出去。这种反射模式不同于漫反射,深度相机会因为接收到的光线方向不一致而无法准确计算深度信息。
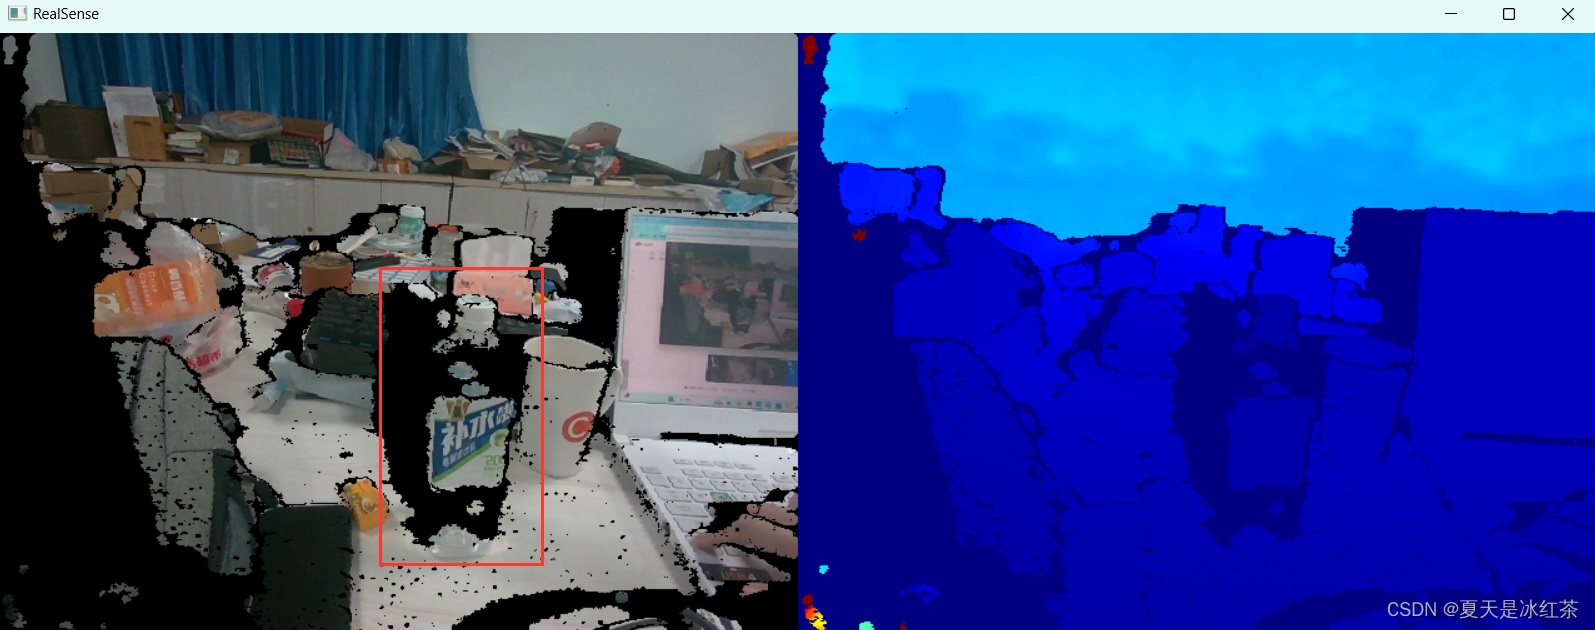
透明物体透射的影响
玻璃等透明物体对基于结构光的深度相机造成的问题尤其明显。因为这些相机依赖红外光的反射来测量深度,当光线穿过或在玻璃表面反射时,会导致深度信息不准确或完全丢失。这种情况会导致深度图像中出现大量的零值或无效值。
视差的影响
在物体边缘或细小结构上,视差效应会导致深度信息的不连续和噪声。由于深度相机的发射端和接收端之间存在间距,物体边缘会有视觉盲区。远处物体边缘受影响较小,但近距离物体边缘会显著受影响,产生无效深度值的阴影区域,导致深度图在这些区域中缺失和不准确。
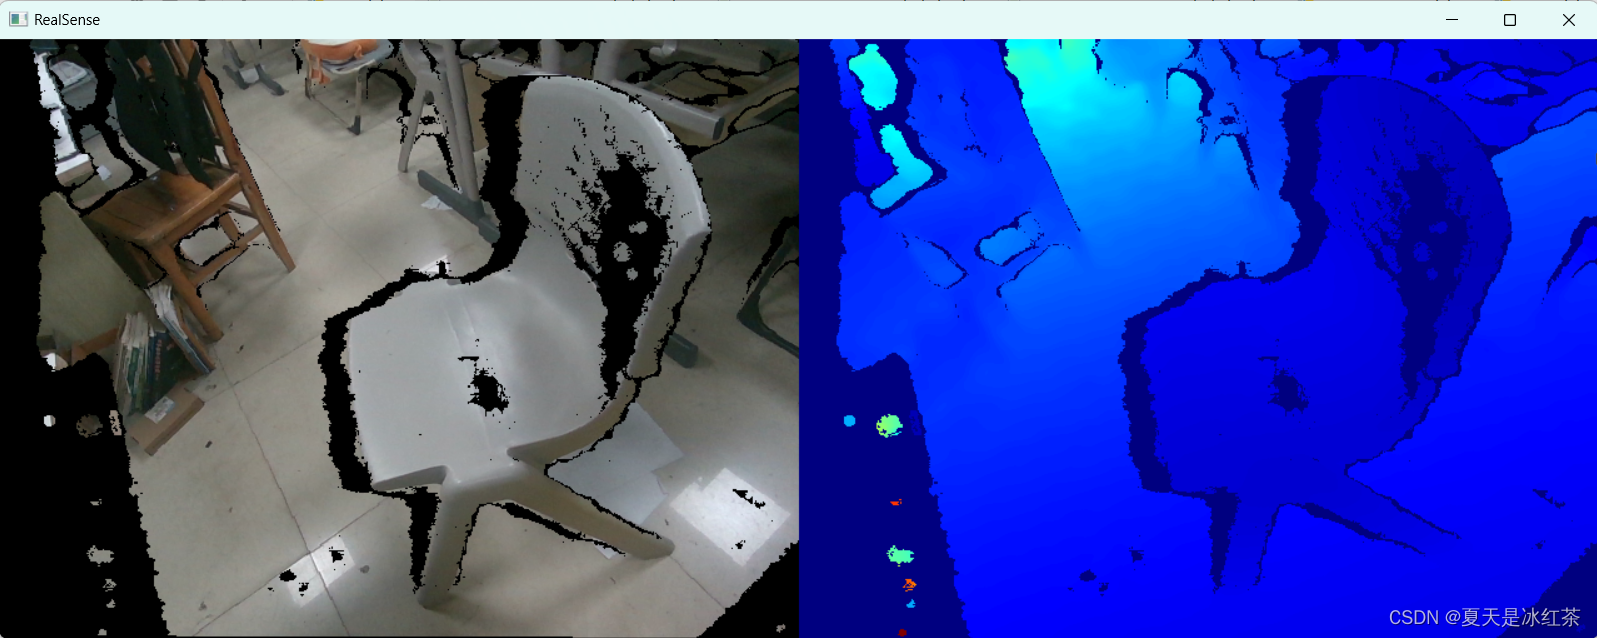
RGB与深度图像对齐
深度对齐到彩色(ALIGN_WAY = 1): 这种方式通常用于彩色图像具有更高分辨率或更高精度的情况,将深度图像的像素对齐到彩色图像的像素上,便于在彩色图像中进行对象检测或其他处理。
彩色对齐到深度(ALIGN_WAY = 0): 这种方式通常用于深度图像的分辨率更高的情况,将彩色图像的像素对齐到深度图像的像素上,便于在深度图像中进行精确的距离测量。
python
import pyrealsense2 as rs
import os
import cv2
import numpy as np
from Depth_camera.utils import get_depth_camera_info, create_camera_save_path

saved_count = 0
extend_num = 3
width = 640
height = 480
fps = 30

# 0:彩色图像对齐到深度图;
# 1:深度图对齐到彩色图像
ALIGN_WAY = 1

color_path, depth_path = create_camera_save_path()
pipeline = rs.pipeline()
config = rs.config()
config.enable_stream(rs.stream.depth, width, height, rs.format.z16, fps)
config.enable_stream(rs.stream.color, width, height, rs.format.bgr8, fps)

profile = pipeline.start(config)
get_depth_camera_info(profile)

# 设置对齐方式
align_to = rs.stream.color if ALIGN_WAY == 1 else rs.stream.depth
align = rs.align(align_to)
color_image2 = None
try:
    while True:
        frames = pipeline.wait_for_frames()

        # 对齐图像
        aligned_frames = align.process(frames)
        depth_frame = aligned_frames.get_depth_frame()
        color_frame = aligned_frames.get_color_frame()

        depth_image = np.asanyarray(depth_frame.get_data())

        if ALIGN_WAY == 0:
            color_frame2 = frames.get_color_frame()
            color_image2 = np.asanyarray(color_frame2.get_data())
            cv2.imshow("color_image2", color_image2)

        color_image = np.asanyarray(color_frame.get_data())

        # 获取深度信息,以米为单位
        depth_scale = profile.get_device().first_depth_sensor().get_depth_scale()
        depth_image_in_meters = depth_image * depth_scale

        depth_colormap = cv2.applyColorMap(cv2.convertScaleAbs(depth_image, alpha=0.03), cv2.COLORMAP_JET)
        images = np.hstack((color_image, depth_colormap))
        cv2.namedWindow('RealSense', cv2.WINDOW_AUTOSIZE)
        cv2.imshow('RealSense', images)
        cv2.imshow("depth_image_in_meters", depth_image_in_meters)
        key = cv2.waitKey(1)

        if key & 0xFF == ord('s'):
            saved_count += 1
            print(f"{saved_count} 已保存图像至 {color_path} 和 {depth_path}")
            if color_image2 is None:
                cv2.imwrite(os.path.join(color_path, "{}.png".format(saved_count)), color_image)
            else:
                cv2.imwrite(os.path.join(color_path, "{}.png".format(saved_count)), color_image2)
            # 深度信息保存为 .npy 格式,单位为米
            np.save(os.path.join(depth_path, "{}.npy".format(saved_count)), depth_image_in_meters)
        elif key & 0xFF == ord('q') or key == 27:
            cv2.destroyAllWindows()
            break

finally:
    pipeline.stop()
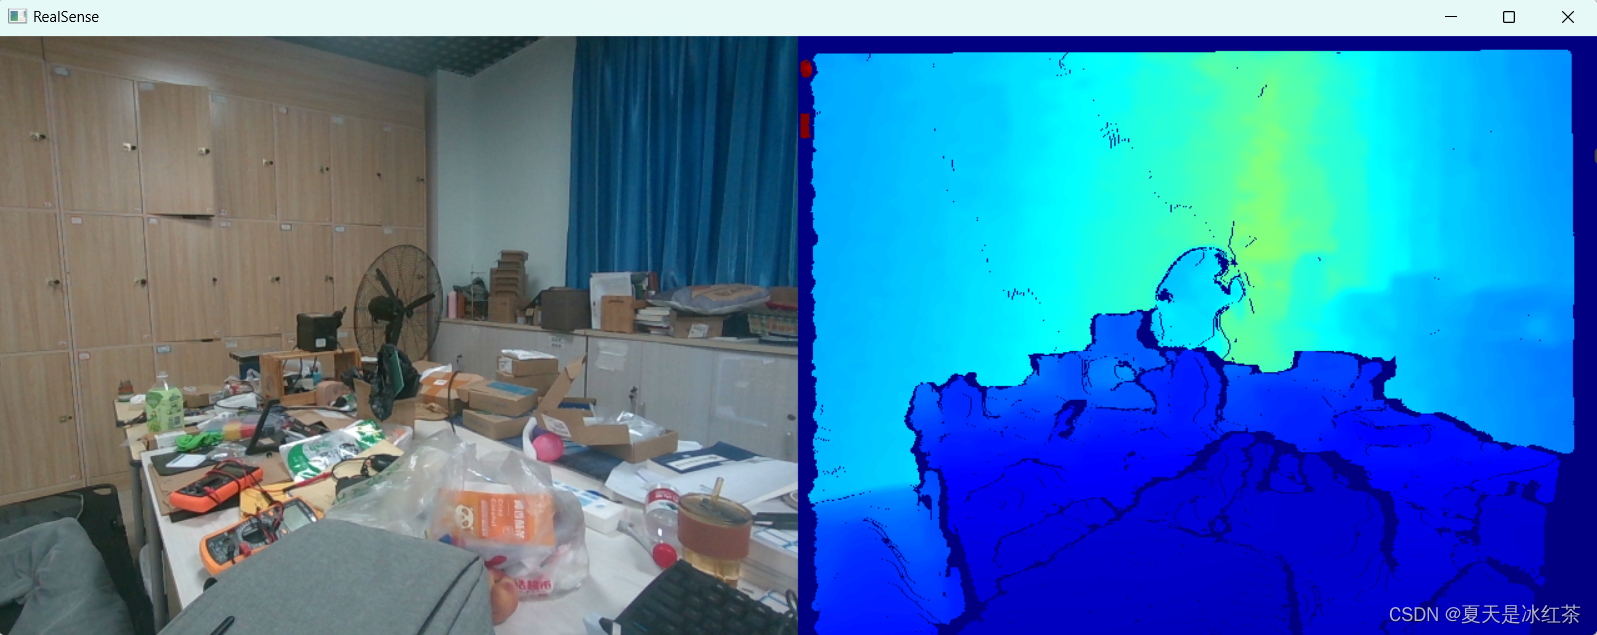
当ALIGN_WAY = 1 的效果:
当ALIGN_WAY = 0 的效果:
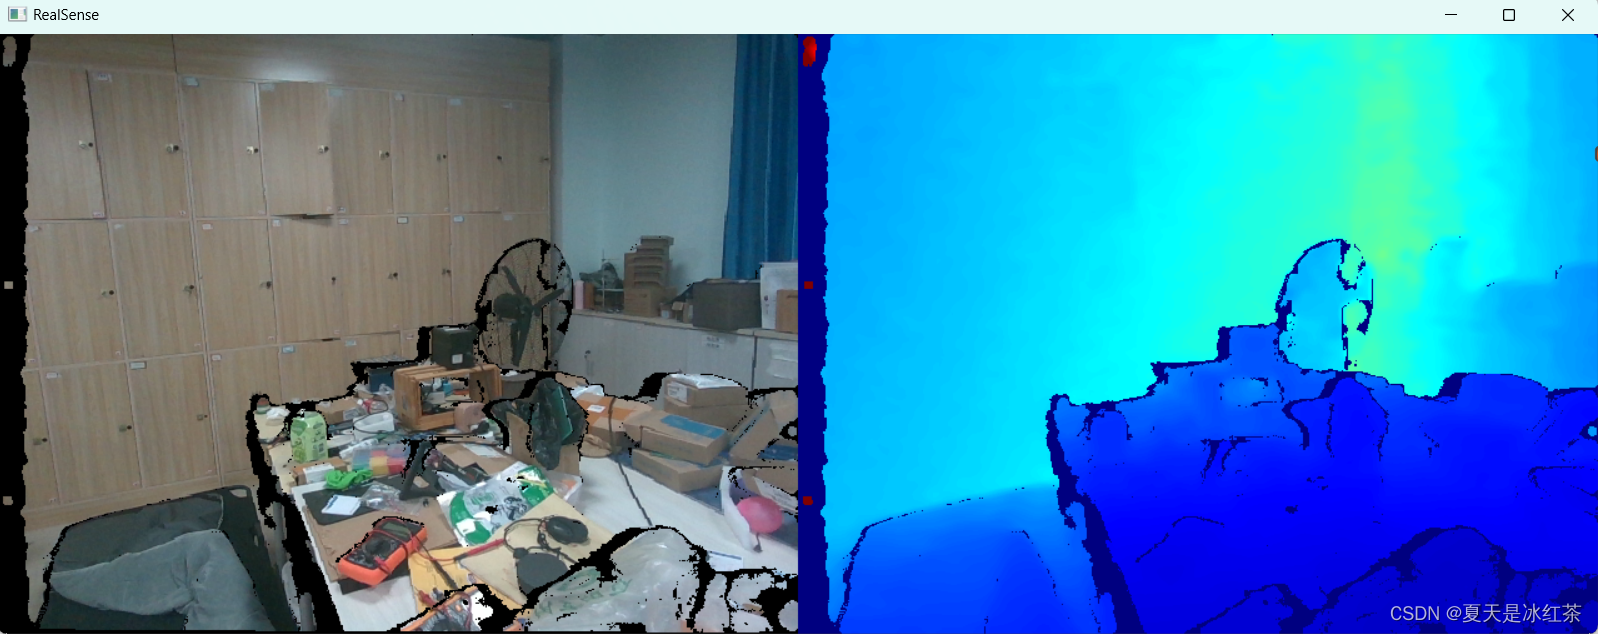
这样拍摄的图片能缓解无效区域。
图像修复与滤波结合处理无效区域
采用图像修复来处理深度图像中的缺失值(深度值为0的像素)。具体而言,按照以下步骤:
- 创建一个掩模图,将深度图像中值为0的像素标记为需要修补的区域。
- 将深度图像中的值为0的像素替换为NaN,这样做是为了在后续处理中标记需要填充的区域。
- 使用最近邻插值方法填充NaN值,将其替换为周围已知深度值的平均值。
- 使用OpenCV中的cv2.inpaint函数进行修补,根据掩模图进行修复。
python
import cv2
import numpy as np
import os

def inpaint_depth_image(depth_image, inpaintRadius=3):
    mask = (depth_image == 0).astype(np.uint8)
    depth_image_fixed = np.where(depth_image == 0, np.nan, depth_image)
    nan_mask = np.isnan(depth_image_fixed)
    depth_image_fixed[nan_mask] = np.interp(np.flatnonzero(nan_mask), np.flatnonzero(~nan_mask),
                                            depth_image_fixed[~nan_mask])
    inpainted_depth_image = cv2.inpaint(depth_image_fixed.astype(np.float32), mask, inpaintRadius=inpaintRadius,
                                        flags=cv2.INPAINT_TELEA)
    return inpainted_depth_image


def read_one_npy(path):
    depth_image = np.load(path)

    print(depth_image.shape)
    x = 1
    y = 1

    # 修补深度图像
    inpainted_depth_image = inpaint_depth_image(depth_image)
    print(np.unique(inpainted_depth_image))
    inpainted_depth_image = np.where(inpainted_depth_image <= 0, inpainted_depth_image + 1, inpainted_depth_image)
    print(np.unique(inpainted_depth_image))

    median_filtered_image = cv2.medianBlur(inpainted_depth_image, 3)
    truth_depth = median_filtered_image[x, y]
    print(truth_depth)

    cv2.imshow("depth", depth_image)
    cv2.imshow("inpainted_depth", median_filtered_image)
    cv2.waitKey(0)
    cv2.destroyAllWindows()


def process_and_save_depth_images(input_folder, output_folder):
    os.makedirs(output_folder, exist_ok=True)
    for filename in os.listdir(input_folder):
        if filename.endswith(".npy"):
            file_path = os.path.join(input_folder, filename)
            depth_image = np.load(file_path)
            inpainted_depth_image = inpaint_depth_image(depth_image)
            inpainted_depth_image = np.where(inpainted_depth_image <= 0.5, inpainted_depth_image + 1,
                                             inpainted_depth_image)
            filtered_image = cv2.medianBlur(inpainted_depth_image, 5)
            #
            # filtered_image = cv2.GaussianBlur(inpainted_depth_image, (5, 5), 0)

            filtered_image = cv2.bilateralFilter(filtered_image, 5, 75, 75)
            output_file_path = os.path.join(output_folder, filename)
            np.save(output_file_path, filtered_image)

            print(f"Processed and saved: {output_file_path}")

if __name__ == "__main__":
    input_folder = r"D:\PythonProject\Githubproject\Depth_camera\2024_06_07_20_01_47\depth"
    output_folder = r"D:\PythonProject\Githubproject\Depth_camera\result\depth"
    im_path = r"D:\PythonProject\Githubproject\Depth_camera\2024_06_07_20_01_47\depth\1.npy"
    # process_and_save_depth_images(input_folder, output_folder)
    read_one_npy(im_path)
滤波处理能够有效的去除图像中的孤立噪点,平滑图像,这块使用何种滤波方式没有什么讲究,一般来说双边滤波能够边缘清晰的同时平滑图像,适用于保留图像细节的情况,但其实在仅使用中值滤波的效果也不错。可以根据个人任务需求组合。
可以增加修补函数的半径或者组合滤波,修改核的大小等进行改善
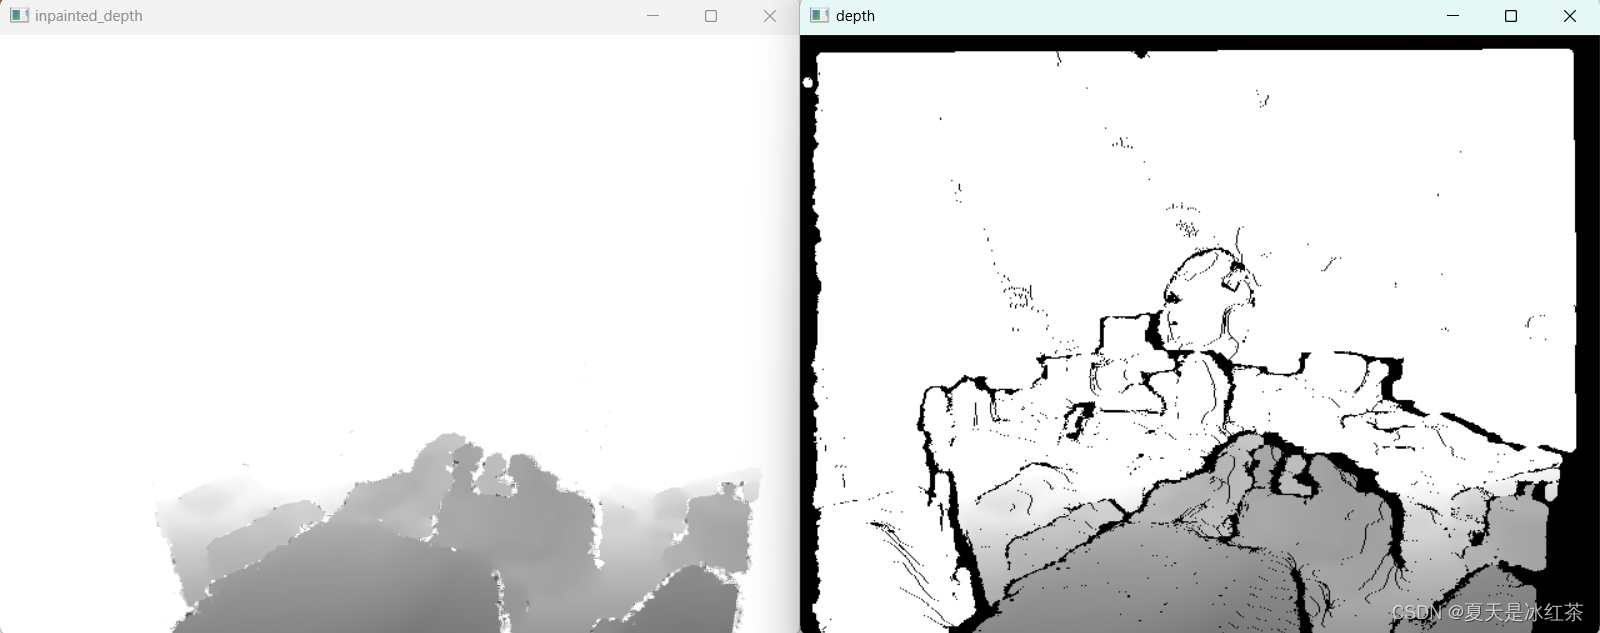
白色区域部分并不是没有信息,可以使用np.unique打印出来看看,此图经过处理后有15712个不同的值,相对来说比较合理
参考文章
Intel Realsense D435 深度图为什么会出现残影?(Invalid Depth Band 无效深度带)(黑洞)_realsense 深度图无效值-CSDN博客