
系列文章目录
以下几篇侧重点为JavaScript内容0.0
- JavaScript入门宝典:核心知识全攻略(上)
- JavaScript入门宝典:核心知识全攻略(下)
- Django框架中Ajax GET与POST请求的实战应用
- VSCode调试揭秘:Live Server助力完美测试Cookie与Session,远超"Open in Browser"!
文章目录
前言
在本博客中,我们将通过登录注册两个实战案例 ,深入探讨如何在Django项目中使用Ajax进行网络请求以实现数据交互 。同时,我们还将详细解析如何利用Cookie和Session来管理用户状态,确保用户信息的安全性和一致性。
一、跨域
跨域问题参考下面这篇文章:
跨域问题与Django解决方案:深入解析跨域原理、请求处理与CSRF防护
二、登录
1.前端html
html
<!DOCTYPE html>
<html lang="en">

<head>
    <meta charset="UTF-8">
    <meta name="viewport" content="width=device-width, initial-scale=1.0">
    <title>Login</title>
    <script src="./js/jquery-2.2.0.min.js"></script>
    <script>
        function fnLogin() {
            var username_label = document.getElementById('username');
            var password_label = document.getElementById('password');
            var user = {
                username: null,
                password: null,
            }
            user.username = username_label.value;
            user.password = password_label.value;

            $.ajax({
                url: "http://127.0.0.1:8000/app/login/",
                type: "POST",
                dataType: "json",
                data: user,
                xhrFields: { withCredentials: true }, //设置支持携带cookie
                success: function (response) {
                    if (response.code == '200') {
                        alert(response.message)
                        window.location.href = 'exd8_news.html';
                    } else {
                        alert(response.message)
                    }
                },
                error: function () {
                    alert("请求失败!")
                }, async: true
            })
        }

    </script>
</head>

<body>
    <input type="text" id="username" placeholder="请输入用户名:"><br>
    <input type="text" id="password" placeholder="请输入密码:"><br>
    <input type="button" value="Login" onclick="fnLogin();">


</body>

</html>
2.后端逻辑
python
# app/views.py
class LoginView(View):
    def post(self,request):
        username = request.POST.get('username')
        password = request.POST.get('password')

        try:
            user = UserModel.objects.get(username=username)
            if user.password == password:
                request.session['userid'] = user.id #
                print("-------------------")
                print(request.session['userid'])
                return JsonResponse({"message": "登录成功!", "code": "200"})
            else:
                return JsonResponse({"message": "密码错误!登录失败!", "code": "201"})
        except Exception as e:
            print(e)
            return JsonResponse({"message": "用户不存在!登录失败!", "code": "202"})
三、注册
1.前端html
html
<!DOCTYPE html>
<html lang="en">

<head>
    <meta charset="UTF-8">
    <meta name="viewport" content="width=device-width, initial-scale=1.0">
    <title>Register</title>
    <script src="./js/jquery-2.2.0.min.js"></script>
    <script>
        function fnRegister() {
            var username_label = document.getElementById('username');
            var phone_label = document.getElementById('phone');
            var password_label = document.getElementById('password');
            var cpassword_label = document.getElementById('cpassword');

            var user = {
                username: null,
                phone: null,
                password: null,
                cpassword: null,
            }

            user.username = username_label.value;
            user.phone = phone_label.value;
            user.password = password_label.value;
            user.cpassword = cpassword_label.value;

            $.ajax({
                url: "http://127.0.0.1:8000/app/register/",
                type: "POST",
                dataType: "json",
                data: user,
                success: function (response) {
                    if (response.code == '200') {
                        alert(response.message + "跳转到登录页面!")
                        console.log(response);
                        window.location.href = 'login.html';
                    } else {
                        alert(response.message)

                    }
                },
                error: function () {
                    console.log("请求失败!!!");
                }
            })

        }
    </script>
</head>

<body>
    用户名:<input type="text" id="username"><br>
    手机号:<input type="text" id="phone"><br>
    密码:<input type="password" id="password"><br>
    确认密码:<input type="password" id="cpassword"><br>
    <button onclick="fnRegister()">注册</button>
</body>

</html>
2.后端逻辑
python
# app/views.py
class RegisterView(View):
def post(self, request):
# 用户名username,手机号phone,密码password
# put delete
# postman 测试:
# 1.传参为raw格式时
# 2.传参为x-www-form-urlencoded时
print(request.POST)
print("-------------------")
print(request.body)
# -------------------------------------------------
# 1.传参为raw格式时
# 字符串转成字典 通过decode解码
# 使用put delete时:
# data = request.body.decode()
# print("data:" + data)
# # #***使用raw 传参数时***
# import json
# res_dict = json.loads(data)
# print("username:" + res_dict.get('username'))
#
# username = res_dict.get('username')
# password = res_dict.get('password')
# phone = res_dict.get('phone')
# cpassword = res_dict.get('cpassword')
# -----------------------------------------------------------------
# 2.传参为x-www-form-urlencoded时
username = request.POST.get('username')
password = request.POST.get('password')
phone = request.POST.get('phone')
cpassword = request.POST.get('cpassword')
import re
if re.match(r'^1[3-9]\d{9}$', phone):
try:
UserModel.objects.get(phone__exact=phone)
return JsonResponse({'message': '用户已存在,请登录'})
except:
# 两次密码是否一致
if password == cpassword:
user = UserModel()
user.name = username
user.password = password
user.phone = phone
user.save()
# 取决于逻辑
# request.session['']
return JsonResponse({'message': '注册成功'})
else:
return JsonResponse({'message': '两次输入密码不一致'})
else:
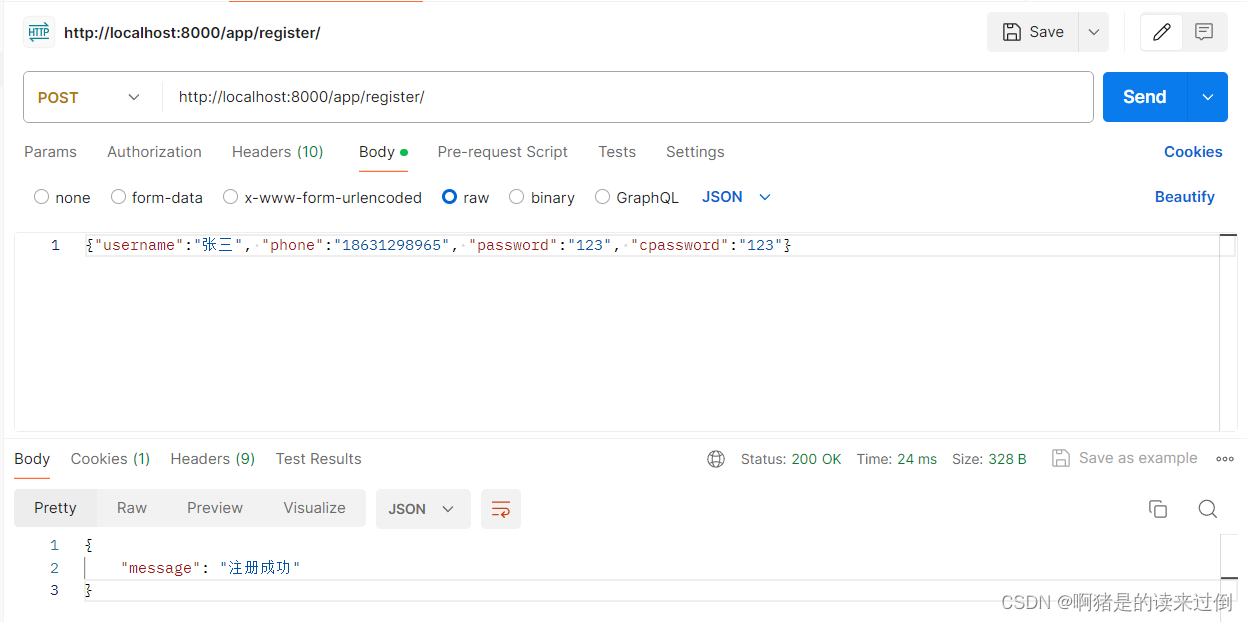
return JsonResponse({'message': '手机号不满足规则'})1.使用postman测试POST传参为raw格式时:
控制台输出:
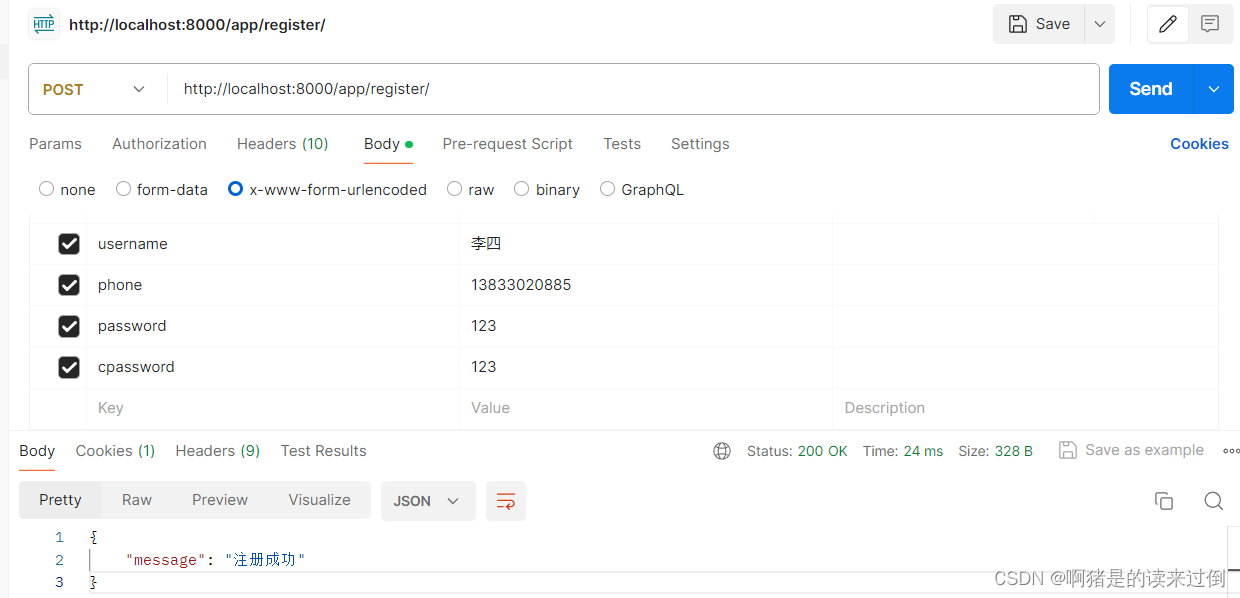
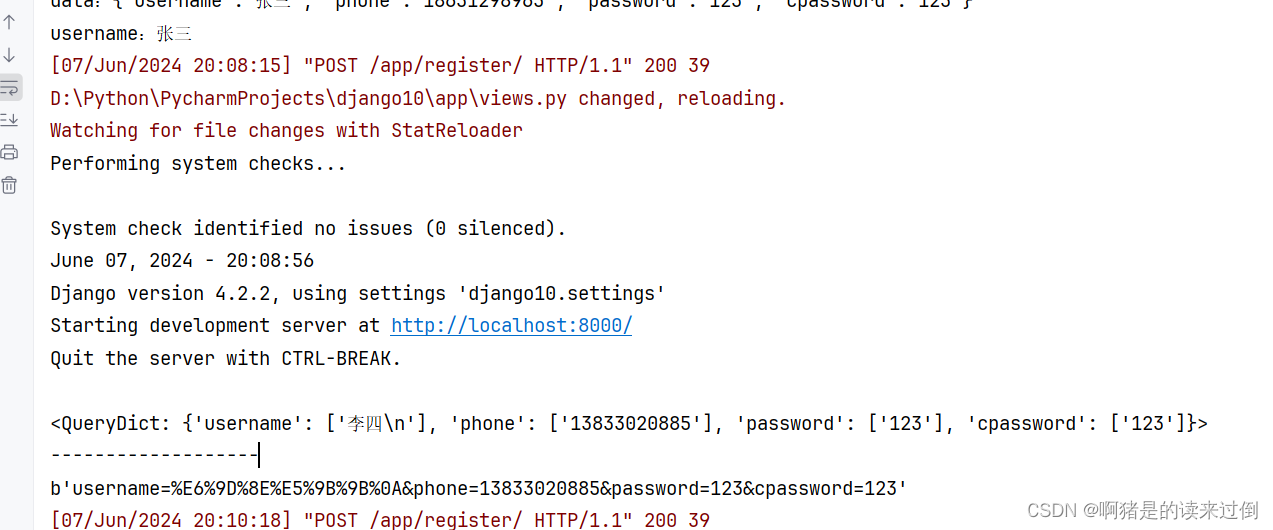
2.使用postman测试POST传参为x-www-form-urlencoded时:
控制台输出:

最后遇到的一个小问题:
使用vscode测试前端页面时使用open in browser和open with live server,可能给会导致不同的结果,详情见下篇文章:VSCode调试揭秘:Live Server助力完美测试Cookie与Session,远超"Open in Browser"!
