目录
[4.Tile Palette](#4.Tile Palette)
Unity Tilemap系统为2D游戏开发提供了一个直观且功能强大的平台,使得创建复杂且美观的游戏世界变得更加容易,Unity的Tilemap系统经过优化,能够高效地处理大量Tiles,确保游戏在各种设备上都能流畅运行。
一、准备工作
1.插件导入
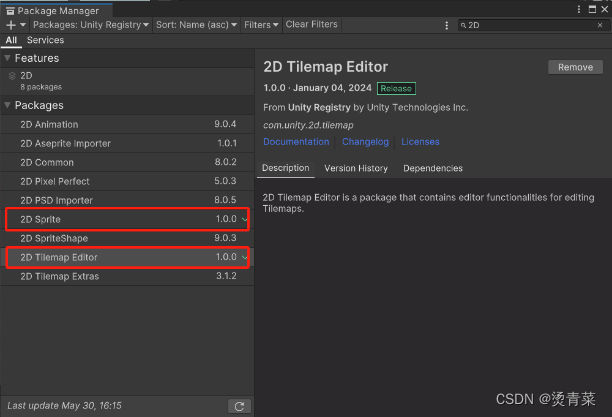
2.资源导入
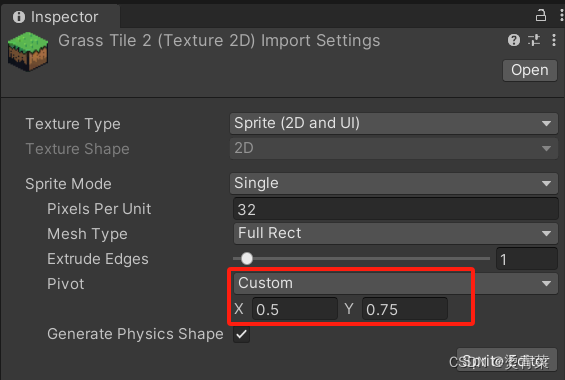
提供一个我找了半天才找到的tile图像资源。因为我要做等距透视地图,所以需要是菱形,并且图片长=宽。

当最终绘制的地图不合适时,可以调整图像的Pivot:
二、相关组件介绍
1.Grid组件
Grid组件是Unity中用于创建和管理网格(Grid)的基础组件,特别适用于2D游戏开发中的Tilemap系统。网格布局可以是矩形、六边形等。

- Cell Size
开发者可以定义每个网格单元的大小。这对于确保Tiles和其他元素在正确的位置上显示非常重要。
- Cell Gap
允许开发者在网格单元之间设置间隙,从而调整元素之间的距离。这样可以创建更复杂的布局效果。
- CellLayout
枚举包括以下几种布局类型:
- Rectangle:矩形布局。单元格以矩形的形式排列,这是最常见的一种布局方式。
- Hexagon:六边形布局。单元格以六边形的形式排列,通常用于需要六边形网格的游戏或应用。
- Isometric:等距菱形布局。单元格以等距(菱形)的形式排列,常用于等距视角的游戏,例如模拟类游戏。
- IsometricZAsY:等距Z轴作为Y轴布局。这种布局类似于等距布局,但Z轴值将被添加为Y值。这种布局通常用于需要特殊等距视角效果的场景。
- cellSwizzle
用于重新排列网格单元格的坐标。具体来说, 允许将默认的 XYZ 单元格坐标重新排序为不同的排列方式。以下是一些可能的重排选项:
- XYZ:保持单元格位置不变。
- XZY:将单元格位置从 XYZ 重排为 XZY。
- YXZ:将单元格位置从 XYZ 重排为 YXZ。
- YZX:将单元格位置从 XYZ 重排为 YZX。
- ZXY:将单元格位置从 XYZ 重排为 ZXY。
- ZYX:将单元格位置从 XYZ 重排为 ZYX。
Grid组件通常与Tilemap组件一起使用,以实现复杂的2D场景设计。Tilemap会自动对齐到Grid定义的网格上,使得绘制和管理Tiles变得更加容易。Grid组件提供了一些方便的方法,用于在世界坐标、局部坐标和网格坐标之间进行转换。这使得在网格上定位对象变得更加简单和直观。
总结来说,Grid组件为Unity中的2D游戏开发提供了一个强大且灵活的基础结构,使得创建和管理基于网格的场景变得更加简单和高效。
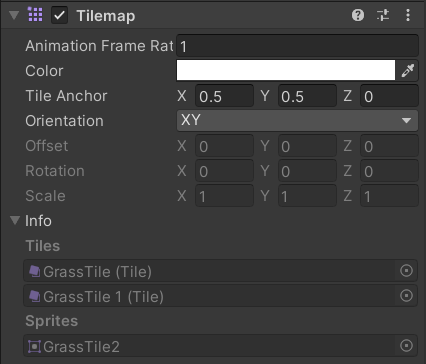
2.Tilemap组件
Unity的Tilemap系统是一个强大的工具,用于在2D游戏开发中创建和管理网格化的游戏世界。Tilemap组件是用于在场景中绘制瓦片(Tiles)的基础组件。它可以与Grid组件一起使用,以定义网格的大小和形状。
3.Tile
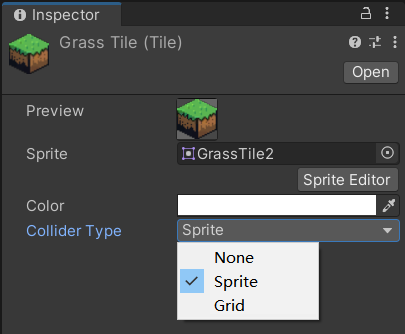
Tilemap系统中的基本构建块。每个Tile代表一个小的图像或动画,可以重复使用来创建更大的图案或场景。Tiles可以包含碰撞信息、颜色等属性。
4.Tile Palette
一个用户界面工具,允许开发者创建、编辑和管理Tiles。开发者可以将Tiles拖放到Tile Palette中,然后使用画笔工具将它们绘制到Tilemap上。
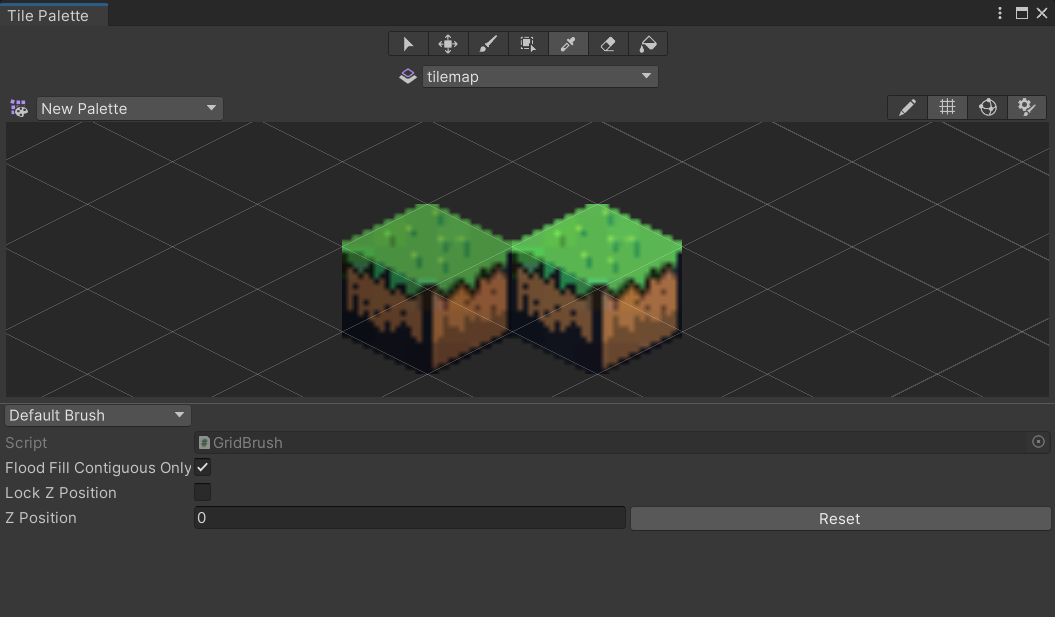
5.Brushes
Brushes是用于在Tilemap上绘制Tiles的工具。Unity提供了多种预定义的Brushes,例如普通画笔、随机画笔等,开发者也可以创建自定义Brushes以满足特定需求。
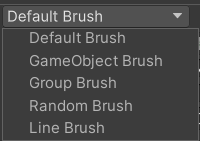
- **Default Brush:**默认的绘画刷,用于基本的Tile绘制操作。
- **GameObject Brush:**用于在Tilemap上绘制GameObjects,而不仅仅是Tiles。
- **Group Brush:**允许用户将多个Tiles组合在一起,并作为一个整体进行绘制。
- **Random Brush:**可以随机选择预定义的Tiles进行绘制,适合创建更自然和多样化的Tilemap。
- **Line Brush:**用于绘制直线形状的Tiles,方便创建路径或直线结构。
总之,Unity Tilemap系统为2D游戏开发提供了一个直观且功能强大的平台,使得创建复杂且美观的游戏世界变得更加容易,Unity的Tilemap系统经过优化,能够高效地处理大量Tiles,确保游戏在各种设备上都能流畅运行。
三、动态创建地图
1.创建空物体Grid,添加Grid组件。

2.创建Grid的子物体Tilemap,添加Tilemap及Tilemap Renderer组件。
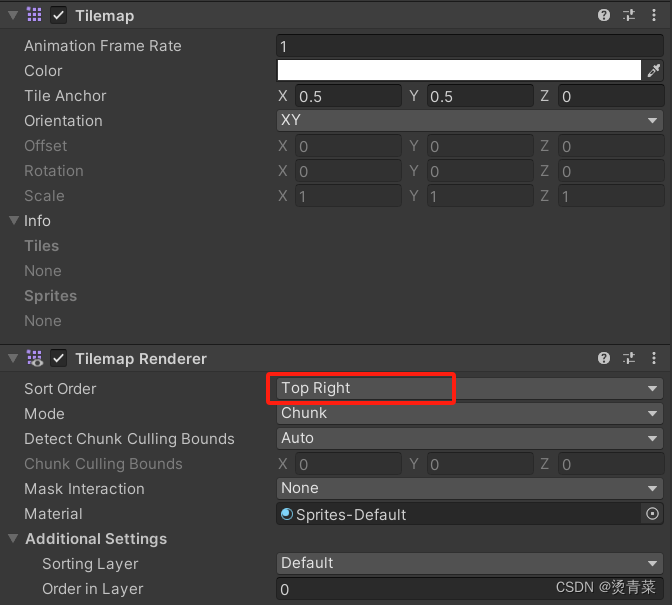
3.代码展示。
cs
using System.Collections;
using System.Collections.Generic;
using UnityEngine;
using UnityEngine.Tilemaps;

public class CreatTail : MonoBehaviour
{
    public Tilemap tilemap;
    public TileBase[] tiles; // 一个包含多个不同类型瓦片的数组
    int tileIndex = 0;

    private void Start()
    {
        GenerateMap();
    }

    void GenerateMap()
    {
        for (int x = 0; x < 20; x++)
        {
            for (int y = 0; y < 21; y++)
            {
                tileIndex = tileIndex == 0 ? 1 : 0;

                SetTile(new Vector3Int(x - 10, -y + 10, 0), tiles[tileIndex]);

            }
        }

#if UNITY_EDITOR
        string prefabPath = "Assets/Prefabs/Tilemap.prefab";
        //动态制作预制体
        UnityEditor.PrefabUtility.SaveAsPrefabAsset(tilemap.gameObject, prefabPath);

#endif
    }
    void SetTile(Vector3Int position, TileBase tile)
    {
        tilemap.SetTile(position, tile);
    }
}
4.效果展示

四、其他功能
1.移动网格上物体
可移动的物体设置layer为第7层,并将下方代码拖到该物体身上。当移动物体时,如果目标格子有物体,则不能放置。
cs
using UnityEngine;
using UnityEngine.Tilemaps;

public class DragManager : MonoBehaviour
{
    private bool isDragging = false;
    private Vector3 offset;
    private Camera mainCamera;
    private Vector3 lastPos;

    void Start()
    {
        mainCamera = Camera.main;

    }

    void OnMouseDown()
    {
        isDragging = true;
        offset = transform.position - GetMouseWorldPosition();
        lastPos=transform.position;

    }

    void OnMouseUp()
    {
        isDragging = false;

        // 获取鼠标位置对应的Tilemap位置
        Tilemap tilemap = FindObjectOfType<Tilemap>();
        Vector3Int cellPosition = tilemap.WorldToCell(GetMouseWorldPosition());

        // 将物体放置到格子中心
        //transform.position = tilemap.GetCellCenterWorld(cellPosition);
        //transform.position=new Vector3 (transform.position.x,transform.position.y,0);

        Vector3 targetPosition = tilemap.GetCellCenterWorld(cellPosition);
        targetPosition.z = 0;
        Collider2D[] hitCollider = Physics2D.OverlapPointAll((Vector2)targetPosition);
        if (hitCollider.Length<=0)
        {
            transform.position = targetPosition;
        }
        else
        {
            Debug.Log("Target position already occupied by another object.");
            foreach (var item in hitCollider)
            {
                Debug.Log(item.name);
            }
            if (hitCollider.Length==1&& hitCollider[0].name==transform.name)
            {
                transform.position = targetPosition;
            }
            else
            {
                transform.position = lastPos;
            }
        }
    }

    void Update()
    {
        if (isDragging)
        {
            Vector3 targetPosition = GetMouseWorldPosition() + offset;
            targetPosition.z = -1;
            transform.position = targetPosition;
        }
    }

    private Vector3 GetMouseWorldPosition()
    {
        Vector3 mouseScreenPosition = Input.mousePosition;
        mouseScreenPosition.z = -9;// mainCamera.nearClipPlane; // 确保z轴值正确
        return mainCamera.ScreenToWorldPoint(mouseScreenPosition);
    }
}
2.拖拽缩放地图
拖拽地图时,如果焦点在物体身上,则不拖拽。
cs
using System.Collections;
using System.Collections.Generic;
using UnityEngine;

public class GameController : MonoBehaviour
{
    public float zoomSpeed = 0.1f;  // 缩放速度
    public float minZoom = 1f;    // 最小缩放值
    public float maxZoom = 3f;      // 最大缩放值

    private Vector2 dragOrigin;
    private Camera mainCamera;

    public bool drag;
    public float mapLength = 10f;
    public float mapWidth = 10f;

    private void Start()
    {
        mainCamera = Camera.main;
        maxZoom = mainCamera.orthographicSize;
    }
    void Update()
    {
#if UNITY_EDITOR || UNITY_STANDALONE
        HandleMouseInput();
#elif UNITY_ANDROID || UNITY_IOS
        HandleTouchInput();
#endif
    }

#if UNITY_EDITOR || UNITY_STANDALONE
    private void HandleMouseInput()
    {
        // 放大/缩小
        if (Input.mouseScrollDelta.y != 0)
        {
            //Debug.Log(Input.mouseScrollDelta.y);
            Zoom(Input.mouseScrollDelta.y * zoomSpeed);
        }

        // 拖拽屏幕

        if (Input.GetMouseButtonDown(0))
        {
            Vector3 ray = Camera.main.ScreenToWorldPoint(Input.mousePosition);

            RaycastHit2D hit = Physics2D.Raycast(ray, Vector2.zero, 100, 1 << 7);

            // 检查是否有物体被射线击中
            if (hit.collider != null)
            {
                Debug.Log("Hit " + hit.collider.gameObject.name);
            }
            else
            {
                dragOrigin = Input.mousePosition;
                drag = true;
            }
            return;
        }
        //if (Input.GetMouseButtonDown(0))
        //{
        //    dragOrigin = Input.mousePosition;
        //    return;
        //}

        if (!Input.GetMouseButton(0)) {
            drag = false;
            return;
        }
        if (drag)
        {
            Vector3 difference = mainCamera.ScreenToViewportPoint((Vector2)Input.mousePosition - dragOrigin);
            Vector3 move = new Vector3(difference.x * mainCamera.orthographicSize, difference.y * mainCamera.orthographicSize, 0);

            mainCamera.transform.Translate(-move, Space.World);

            dragOrigin = Input.mousePosition;
        }
    }
#endif

#if UNITY_ANDROID || UNITY_IOS
    private void HandleTouchInput()
    {
        if (Input.touchCount == 2)
        {
            Touch touchZero = Input.GetTouch(0);
            Touch touchOne = Input.GetTouch(1);

            Vector2 touchZeroPrevPos = touchZero.position - touchZero.deltaPosition;
            Vector2 touchOnePrevPos = touchOne.position - touchOne.deltaPosition;

            float prevMagnitude = (touchZeroPrevPos - touchOnePrevPos).magnitude;
            float currentMagnitude = (touchZero.position - touchOne.position).magnitude;

            float difference = currentMagnitude - prevMagnitude;

            Zoom(difference * zoomSpeed);
        }

        if (Input.touchCount == 1)
        {
            Touch touch = Input.GetTouch(0);

            if (touch.phase == TouchPhase.Began)
            {

                Vector3 ray = Camera.main.ScreenToWorldPoint(Input.mousePosition);

                RaycastHit2D hit = Physics2D.Raycast(ray, Vector2.zero, 100, 1 << 7);//只检测可拖拽的物体层
                if (hit.collider != null)
                {
                    Debug.Log("Hit " + hit.collider.gameObject.name);
                }
                else //没有点击到物体,则拖拽屏幕
                {
                    dragOrigin = touch.position;
                    drag = true;
                }
                return;
            }

            if (touch.phase != TouchPhase.Moved)
            {
                drag = false;
                return;
            }
            if (drag)
            {
                Vector3 difference = mainCamera.ScreenToViewportPoint(touch.position - dragOrigin);
                Vector3 move = new Vector3(difference.x * mainCamera.orthographicSize, difference.y * Camera.main.orthographicSize, 0);

                mainCamera.transform.Translate(-move, Space.World);

                dragOrigin = touch.position;
            }
        }
    }
#endif

    private void Zoom(float increment)
    {
#if UNITY_EDITOR || UNITY_STANDALONE || UNITY_ANDROID || UNITY_IOS
        Camera.main.orthographicSize = Mathf.Clamp(mainCamera.orthographicSize - increment, minZoom, maxZoom);
#endif
    }
}