「OC」UI练习------照片墙
文章目录
UITapGestureRecognizer介绍
UITapGestureRecognizer是UIKit框架中的一个手势识别器类,用于检测用户在视图上的轻击手势。它是UIGestureRecognizer的一个子类,可以通过将它添加到视图上来监听并响应用户的轻击手势。
使用UITapGestureRecognizer,你可以指定轻击手势的触发条件,例如点击次数和触摸点数量。当用户触发了指定条件的轻击手势时,你可以在相应的处理方法中执行自定义的操作。
以下为UITapGestureRecognizer的实际用法
objc
#import <UIKit/UIKit.h>
#import "ViewController.h"
#import "JCViewViewController.h"
#import "JCSuperView.h"

@interface ViewController ()

@end

@implementation ViewController

//在第一次加载被使用
- (void)viewDidLoad {
    [super viewDidLoad];
    [self useGesture];
}


-(void)useGesture {
    UIImage *image = [UIImage imageNamed:@"1.jpg"];

    UIImageView *iview = [[UIImageView alloc] initWithFrame:CGRectMake(20, 20, 300, 400)];
    iview.image = image;
    //是否接受交互,若不开启则无法使用手势
    iview.userInteractionEnabled = YES;

    [self.view addSubview:iview];
    UITapGestureRecognizer *tap = [[UITapGestureRecognizer alloc] initWithTarget:self action:@selector(tapToAct:)];

    //表示手势识别事件类型:点几次进行触发 ------ 默认值:1
    tap.numberOfTapsRequired = 1;

    //表示几个手指同时点击进行触发 ------ 默认值:1
    tap.numberOfTouchesRequired = 1;

    [iview addGestureRecognizer:tap];


    //实现双击缩小
    UITapGestureRecognizer *tap2 = [[UITapGestureRecognizer alloc]initWithTarget:self action:@selector(tapToact2:)];
    tap2.numberOfTapsRequired = 2;
    tap2.numberOfTouchesRequired = 1;
    [iview addGestureRecognizer:tap2];

    //单击操作与双击操作冲突时,单击操作失效
    [tap requireGestureRecognizerToFail:tap2];
}

//双击缩小
-(void)tapToact2:(UITapGestureRecognizer*)tap {
    UIImageView *iview = (UIImageView*)tap.view;


    //在这中间做的改变都会通过动画的形式进行演示
    [UIView beginAnimations:nil context:nil];
    [UIView setAnimationDuration:1];
    iview.frame = CGRectMake(20, 20, 300, 400);

    [UIView commitAnimations];
}

//单击放大
-(void)tapToAct : (UITapGestureRecognizer*) tap {
    //获取手势的监控对象
    NSLog(@"点击");
    UIImageView *iview = (UIImageView*)tap.view;


    //在这中间做的改变都会通过动画的形式进行演示
    [UIView beginAnimations:nil context:nil];
    [UIView setAnimationDuration:1];
    iview.frame = [UIScreen mainScreen].bounds;

    [UIView commitAnimations];
}
照片墙实现
objc
#import "SceneDelegate.h"
#import "JCRoot.h"
@interface SceneDelegate ()
@end
@implementation SceneDelegate
- (void)scene:(UIScene *)scene willConnectToSession:(UISceneSession *)session options:(UISceneConnectionOptions *)connectionOptions {
//导航控制器框架
self.window.frame = [UIScreen mainScreen].bounds;
//设置导航器
UINavigationController *nav = [[UINavigationController alloc] initWithRootViewController:[[JCRoot alloc] init]];
self.window.backgroundColor = [UIColor whiteColor];
self.window.rootViewController = nav;
[self.window makeKeyAndVisible];
}
---------------------------------------------------------------------------------------------------------------------------------------------------------------------------------------------------------------------------------------------------------------------------------------------------------------------------
//根视图的.m文件
#import "JCRoot.h"
#import "JCShowPicture.h"
@interface JCRoot ()
@end
@implementation JCRoot
- (void)viewDidLoad {
[super viewDidLoad];
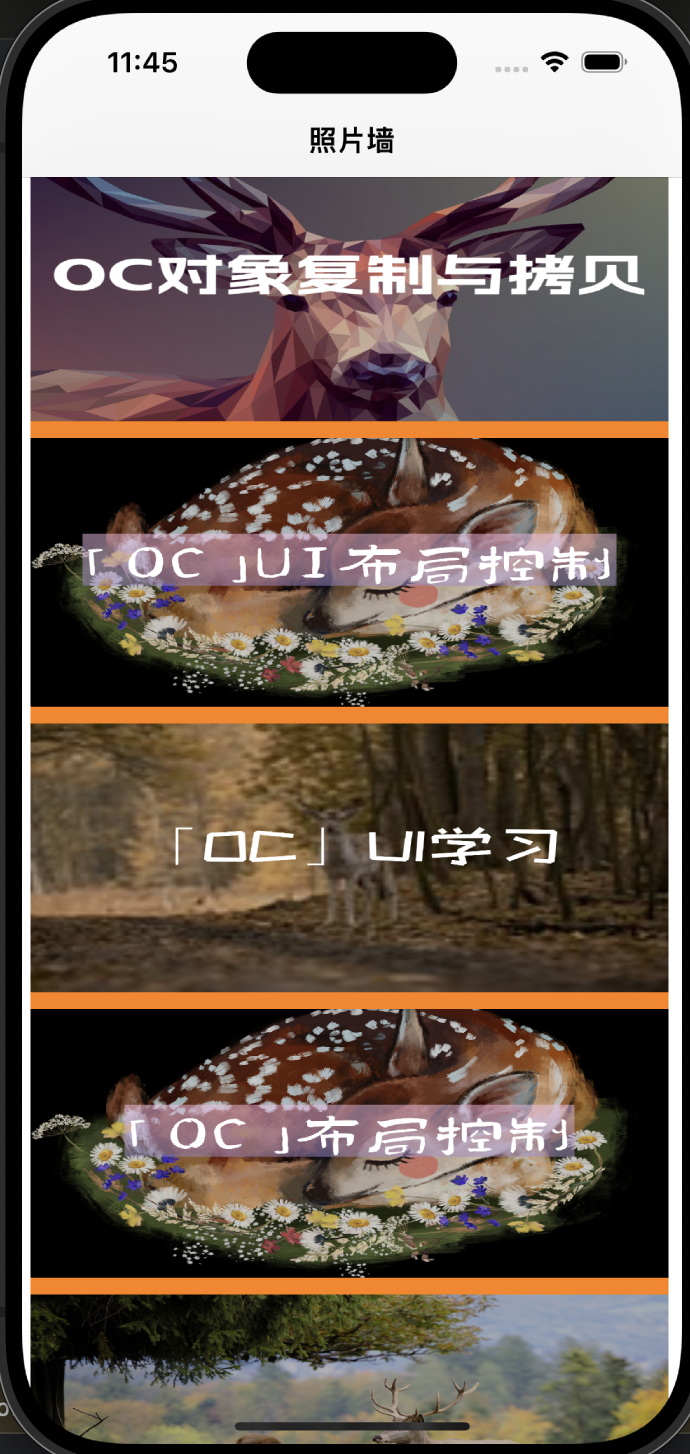
self.title = @"照片墙";
UIScrollView *sv = [[UIScrollView alloc] initWithFrame:CGRectMake(5, 10, 380, 852)];
sv.backgroundColor = [UIColor orangeColor];
//导航栏不透明
self.navigationController.navigationBar.translucent = YES;
//画布大小
sv.contentSize = CGSizeMake(380, 852 * 1.5);
sv.userInteractionEnabled = YES;
//修改背景颜色
self.navigationController.navigationBar.barTintColor = [UIColor whiteColor];
for (int i = 0; i < 5; i++) {
NSString *name = [NSString stringWithFormat:@"%d.png", i + 1];
UIImage *image = [UIImage imageNamed:name];
UIImageView *iv = [[UIImageView alloc] initWithImage:image];
iv.frame = CGRectMake(0, i * 170, 380, 160);
iv.userInteractionEnabled = YES;
[sv addSubview:iv];
UITapGestureRecognizer *tap = [[UITapGestureRecognizer alloc] initWithTarget:self action:@selector(pressTap:)];
//单次点击
tap.numberOfTapsRequired = 1;
//单个手指
tap.numberOfTouchesRequired = 1;
//
[iv addGestureRecognizer:tap];
}
[self.view addSubview: sv];
}
-(void) pressTap :(UITapGestureRecognizer *)tap {
NSLog(@"点击触发!");
UIImageView *iview = [[UIImageView alloc]init];
iview = (UIImageView*)tap.view;
//创建视图控制器
JCShowPicture *show = [[JCShowPicture alloc] init];
show.image = iview.image;
[self.navigationController pushViewController:show animated:YES];
}
/*
#pragma mark - Navigation
// In a storyboard-based application, you will often want to do a little preparation before navigation
- (void)prepareForSegue:(UIStoryboardSegue *)segue sender:(id)sender {
// Get the new view controller using [segue destinationViewController].
// Pass the selected object to the new view controller.
}
*/
@end
----------------------------------------------------------------------------------------------------------------------------------------------------------------------------------------------------------------------------------------------------------------------------------------------------------------------------
//展示栏的相关内容
#import "JCShowPicture.h"
@interface JCShowPicture ()
@end
@implementation JCShowPicture
- (void)viewDidLoad {
[super viewDidLoad];
self.title = @"照片";
_imageView = [[UIImageView alloc] initWithFrame:CGRectMake(5, 10, 380, 852)];
_imageView.image = _image;
//视图对象只有一个根视图
//当我们将视图对象添加至新的父视图上
//会将该视图对象会从原来的父视图删除
[self.view addSubview: _imageView];
}得到的界面如下所示