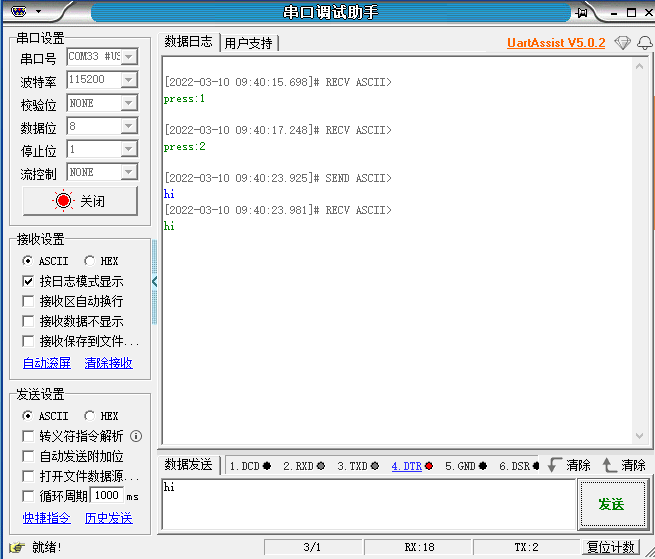
使用STM32的串口通讯,接收串口助手的数据,并且将接收到的数据返回串口,重定义printf功能。
配置引脚信息
由于每次新建工程都需要配置信息,比较麻烦,好在STM32CubeIDE提供了导入.ioc文件的功能,可以帮我们节省时间。
1.从BEEP的项目里导入ioc文件,并命名为Serial。
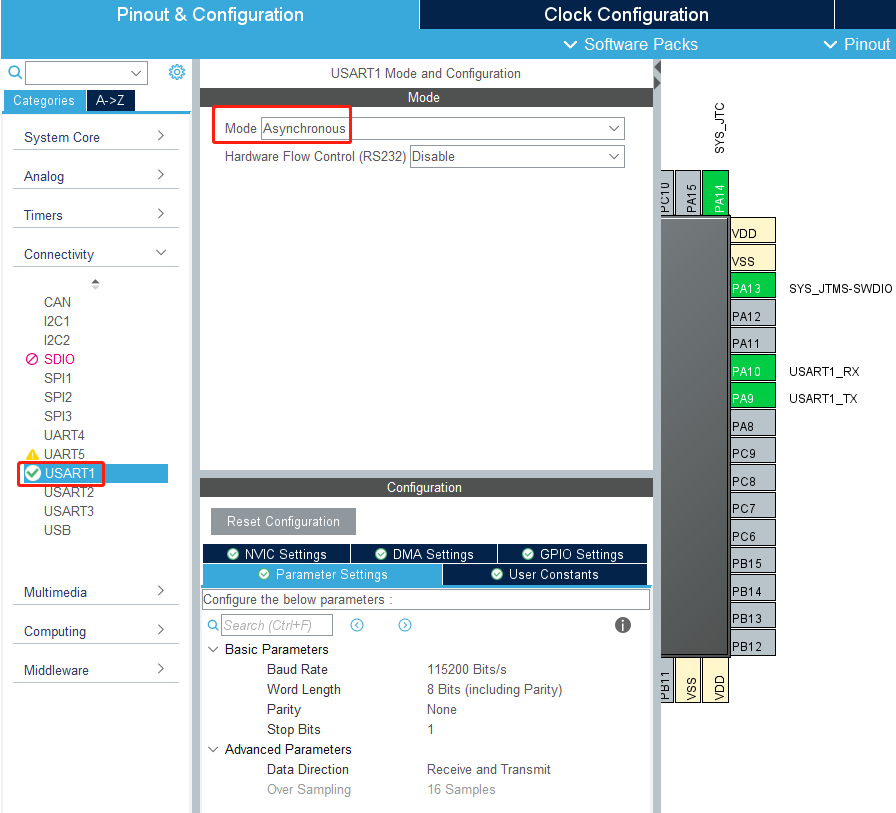
将串口1的mode修改为Asynchronous同步通讯,波特率为115200,数据宽度:8位,检验:None,停止位:1位。
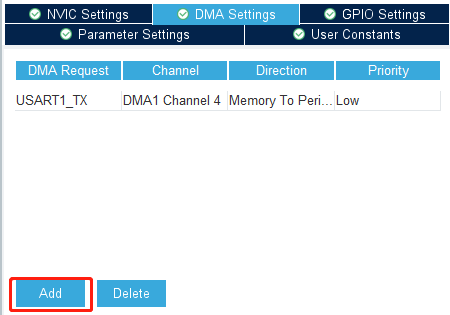
2.添加DMA发送通道
3.打开串口1中断设置。

核心代码解释
1.在BSP中新建蜂鸣器的驱动库bsp_uart.h和bsp_uart.c文件。在bsp_uart.h中增加以下内容:
cpp
/*
 * bsp_uart.h
 *
 *  Created on: Mar 4, 2022
 *      Author: Administrator
 */

#ifndef BSP_UART_H_
#define BSP_UART_H_

#include "stdint.h"


void USART1_Init(void);
void USART1_Send_U8(uint8_t ch);
void USART1_Send_ArrayU8(uint8_t *BufferPtr, uint16_t Length);


#endif /* BSP_UART_H_ */
2.在bsp_uart.c中添加以下内容:
cpp
/*
 * bsp_uart.c
 *
 *  Created on: Mar 4, 2022
 *      Author: Administrator
 */

#include "bsp_uart.h"
#include "bsp.h"

#define ENABLE_UART_DMA    1

uint8_t RxTemp = 0;

// Initialize USART1  初始化串口1
void USART1_Init(void)
{
    HAL_UART_Receive_IT(&huart1, (uint8_t *)&RxTemp, 1);
}

// The serial port sends one byte  串口发送一个字节
void USART1_Send_U8(uint8_t ch)
{
    HAL_UART_Transmit(&huart1, (uint8_t *)&ch, 1, 0xFFFF);
}

// The serial port sends a string of data  串口发送一串数据
void USART1_Send_ArrayU8(uint8_t *BufferPtr, uint16_t Length)
{
    #if ENABLE_UART_DMA
    HAL_UART_Transmit_DMA(&huart1, BufferPtr, Length);
    #else
    while (Length--)
    {
        USART1_Send_U8(*BufferPtr);
        BufferPtr++;
    }
    #endif
}

// The serial port receiving is interrupted. Procedure  串口接收完成中断
void HAL_UART_RxCpltCallback(UART_HandleTypeDef *huart)
{
    /* Prevent unused argument(s) compilation warning */
    UNUSED(huart);
    /* NOTE : This function should not be modified, when the callback is needed,
              the HAL_UART_RxCpltCallback can be implemented in the user file
     */
    // 测试发送数据,实际应用中不应该在中断中发送数据
    // Test sending data. In practice, data should not be sent during interrupts
    USART1_Send_U8(RxTemp);

    // Continue receiving data  继续接收数据
    HAL_UART_Receive_IT(&huart1, (uint8_t *)&RxTemp, 1);
}


#ifdef __GNUC__
#define PUTCHAR_PROTOTYPE int __io_putchar(int ch)
#else
#define PUTCHAR_PROTOTYPE int fputc(int ch, FILE *f)
#endif /* __GNUC__ */
PUTCHAR_PROTOTYPE
{
    /* Place your implementation of fputc here */
    /* e.g. write a character to the EVAL_COM1 and Loop until the end of transmission */
    HAL_UART_Transmit(&huart1, (uint8_t *)&ch, 1, 0xFFFF);
    return ch;
}
USART1_Init():初始化串口相关内容,开启串口接收1个数据。

USART1_Send_U8(ch):串口1发送一个字节。

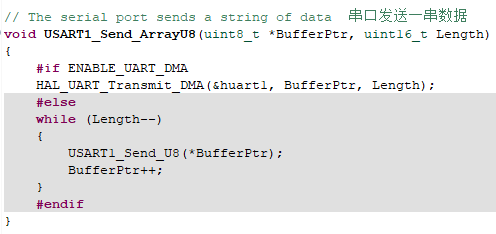
USART1_Send_ArrayU8(BufferPtr,Length):串口1发送一串数据,BufferPtr是数据的首地址,Length是数据的长度。ENABLE_UART_DMA是串口1 DMA的开关。
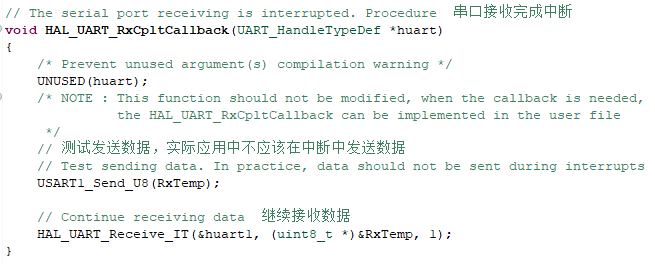
3.由于串口1接收中断只进行一次,所以接收数据后需要再次调用接收数据。这里为了方便测试,所以在中断调用串口发送数据,实际应用中不应该在中断中发送数据,串口发送数据比较耗时,可能导致丢包甚至串口出错等问题。
4.重新定义printf使用串口1发送数据。

5.在BSP初始化中,调用USART1_Init()函数,请求接收数据。

cpp
//bsp.c
#include "bsp.h"

// LED显示当前运行状态,每10毫秒调用一次,LED灯每200毫秒闪烁一次。
// The LED displays the current operating status, which is invoked every 10 milliseconds, and the LED blinks every 200 milliseconds.
static void Bsp_Led_Show_State_Handle(void)
{
	static uint8_t led_count = 0;
	led_count++;
	if (led_count > 20)
	{
		led_count = 0;
		LED_TOGGLE();
	}
}


// The peripheral device is initialized  外设设备初始化
void Bsp_Init(void)
{
	Beep_On_Time(50);
	USART1_Init();
}


// main.c中循环调用此函数,避免多次修改main.c文件。
// This function is called in a loop in main.c to avoid multiple modifications to the main.c file
void Bsp_Loop(void)
{
	// Detect button down events   检测按键按下事件
	if (Key1_State(KEY_MODE_ONE_TIME))
	{
		Beep_On_Time(50);
		static int press = 0;
		press++;
		printf("press:%d\n", press);
	}

	Bsp_Led_Show_State_Handle();
	// The buzzer automatically shuts down when times out   蜂鸣器超时自动关闭
	Beep_Timeout_Close_Handle();
	HAL_Delay(10);
}
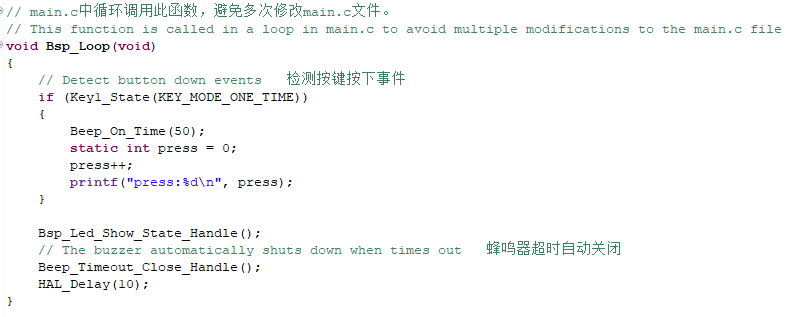
6.在按键按下后,增加printf()函数,通过串口1打印信息。
cpp
/* USER CODE BEGIN Header */
/**
  ******************************************************************************
  * @file           : main.c
  * @brief          : Main program body
  ******************************************************************************
  * @attention
  *
  * Copyright (c) 2022 STMicroelectronics.
  * All rights reserved.
  *
  * This software is licensed under terms that can be found in the LICENSE file
  * in the root directory of this software component.
  * If no LICENSE file comes with this software, it is provided AS-IS.
  *
  ******************************************************************************
  */
/* USER CODE END Header */
/* Includes ------------------------------------------------------------------*/
#include "main.h"
#include "dma.h"
#include "usart.h"
#include "gpio.h"

/* Private includes ----------------------------------------------------------*/
/* USER CODE BEGIN Includes */
#include "bsp.h"
/* USER CODE END Includes */

/* Private typedef -----------------------------------------------------------*/
/* USER CODE BEGIN PTD */

/* USER CODE END PTD */

/* Private define ------------------------------------------------------------*/
/* USER CODE BEGIN PD */
/* USER CODE END PD */

/* Private macro -------------------------------------------------------------*/
/* USER CODE BEGIN PM */

/* USER CODE END PM */

/* Private variables ---------------------------------------------------------*/

/* USER CODE BEGIN PV */

/* USER CODE END PV */

/* Private function prototypes -----------------------------------------------*/
void SystemClock_Config(void);
/* USER CODE BEGIN PFP */

/* USER CODE END PFP */

/* Private user code ---------------------------------------------------------*/
/* USER CODE BEGIN 0 */

/* USER CODE END 0 */

/**
  * @brief  The application entry point.
  * @retval int
  */
int main(void)
{
  /* USER CODE BEGIN 1 */

  /* USER CODE END 1 */

  /* MCU Configuration--------------------------------------------------------*/

  /* Reset of all peripherals, Initializes the Flash interface and the Systick. */
  HAL_Init();

  /* USER CODE BEGIN Init */

  /* USER CODE END Init */

  /* Configure the system clock */
  SystemClock_Config();

  /* USER CODE BEGIN SysInit */

  /* USER CODE END SysInit */

  /* Initialize all configured peripherals */
  MX_GPIO_Init();
  MX_DMA_Init();
  MX_USART1_UART_Init();
  /* USER CODE BEGIN 2 */
  Bsp_Init();
  /* USER CODE END 2 */

  /* Infinite loop */
  /* USER CODE BEGIN WHILE */
  while (1)
  {
    Bsp_Loop();
    /* USER CODE END WHILE */

    /* USER CODE BEGIN 3 */
  }
  /* USER CODE END 3 */
}

/**
  * @brief System Clock Configuration
  * @retval None
  */
void SystemClock_Config(void)
{
  RCC_OscInitTypeDef RCC_OscInitStruct = {0};
  RCC_ClkInitTypeDef RCC_ClkInitStruct = {0};

  /** Initializes the RCC Oscillators according to the specified parameters
  * in the RCC_OscInitTypeDef structure.
  */
  RCC_OscInitStruct.OscillatorType = RCC_OSCILLATORTYPE_HSE;
  RCC_OscInitStruct.HSEState = RCC_HSE_ON;
  RCC_OscInitStruct.HSEPredivValue = RCC_HSE_PREDIV_DIV1;
  RCC_OscInitStruct.HSIState = RCC_HSI_ON;
  RCC_OscInitStruct.PLL.PLLState = RCC_PLL_ON;
  RCC_OscInitStruct.PLL.PLLSource = RCC_PLLSOURCE_HSE;
  RCC_OscInitStruct.PLL.PLLMUL = RCC_PLL_MUL9;
  if (HAL_RCC_OscConfig(&RCC_OscInitStruct) != HAL_OK)
  {
    Error_Handler();
  }

  /** Initializes the CPU, AHB and APB buses clocks
  */
  RCC_ClkInitStruct.ClockType = RCC_CLOCKTYPE_HCLK|RCC_CLOCKTYPE_SYSCLK
                              |RCC_CLOCKTYPE_PCLK1|RCC_CLOCKTYPE_PCLK2;
  RCC_ClkInitStruct.SYSCLKSource = RCC_SYSCLKSOURCE_PLLCLK;
  RCC_ClkInitStruct.AHBCLKDivider = RCC_SYSCLK_DIV1;
  RCC_ClkInitStruct.APB1CLKDivider = RCC_HCLK_DIV2;
  RCC_ClkInitStruct.APB2CLKDivider = RCC_HCLK_DIV1;

  if (HAL_RCC_ClockConfig(&RCC_ClkInitStruct, FLASH_LATENCY_2) != HAL_OK)
  {
    Error_Handler();
  }
}

/* USER CODE BEGIN 4 */

/* USER CODE END 4 */

/**
  * @brief  This function is executed in case of error occurrence.
  * @retval None
  */
void Error_Handler(void)
{
  /* USER CODE BEGIN Error_Handler_Debug */
  /* User can add his own implementation to report the HAL error return state */
  __disable_irq();
  while (1)
  {
  }
  /* USER CODE END Error_Handler_Debug */
}

#ifdef  USE_FULL_ASSERT
/**
  * @brief  Reports the name of the source file and the source line number
  *         where the assert_param error has occurred.
  * @param  file: pointer to the source file name
  * @param  line: assert_param error line source number
  * @retval None
  */
void assert_failed(uint8_t *file, uint32_t line)
{
  /* USER CODE BEGIN 6 */
  /* User can add his own implementation to report the file name and line number,
     ex: printf("Wrong parameters value: file %s on line %d\r\n", file, line) */
  /* USER CODE END 6 */
}
#endif /* USE_FULL_ASSERT */
实验效果
烧录程序后,LED灯每隔200毫秒闪一次,将扩展板通过micro-USB数据线与电脑连接后并打开串口助手(具体参数如下图所示),每按一次按键,蜂鸣器都会响50毫秒,可以看到串口助手会显示press:xx,每按一次按键xx自动加1。串口助手发送字符a,扩展板会自动将字符a返回。由于上面使用在中断中发送数据,所以不能一次发送太多个字符,否则会出现字符丢失甚至串口错误。
