先准备个简单的系统,配置和代码如下
yml
# 服务器配置
server:
  # 服务器端口
  port: 8001

# Spring Boot 配置
spring:
  # MVC 配置
  mvc:
    # Servlet 配置
    servlet:
      # Servlet 的访问路径
      path: /sbd

  # 应用程序配置
  application:
    # 应用程序名称
    name: SpringBootDeployment
  # 配置数据源
  datasource:
    hikari:
      transaction-isolation: 2
    # 驱动类
    driver-class-name: com.mysql.jdbc.Driver
    # 数据库连接
    url: jdbc:mysql://localhost:3306/ssm?characterEncoding=utf8&useSSL=false
    # 用户名
    username: root
    # 密码
    password: Ms123!@#
java
package com.sbd;

import jakarta.servlet.http.HttpServletRequest;
import org.springframework.boot.SpringApplication;
import org.springframework.boot.autoconfigure.SpringBootApplication;
import org.springframework.web.bind.annotation.GetMapping;
import org.springframework.web.bind.annotation.RestController;

/**
 * Spring Boot 应用程序的主类。
 * 使用@SpringBootApplication 注解标记这个类是一个 Spring Boot 的启动类。
 * scanBasePackages 属性指定了 Spring Boot 自动扫描组件的包路径。
 * @RestController 注解表示这个类是一个 REST 风格的控制器,用于处理 HTTP 请求。
 */
@SpringBootApplication(scanBasePackages = {"com.sbd"})
@RestController
public class SpringBootDeploymentApplication {

    /**
     * 处理 GET 请求的测试方法。
     * 该方法使用 @GetMapping 注解来指定处理所有的 GET 请求。
     * 方法返回一个字符串 "Hello World!",这个字符串将作为 HTTP 响应的内容返回给客户端。
     * @param request HttpServletRequest 对象,代表当前的 HTTP 请求。虽然在这个方法中没有使用,但它可以用于访问请求的相关信息。
     * @return 字符串 "Hello World!",作为 HTTP 响应的内容。
     */
    @GetMapping("/test")
    public String test(HttpServletRequest request){
        return "Hello World!";
    }

    /**
     * 应用程序的入口点。
     * 这个方法使用 SpringApplication.run() 来启动 Spring Boot 应用程序。
     * @param args 命令行参数,这些参数在启动应用程序时可以提供。
     */
    public static void main(String[] args) {
        SpringApplication.run(SpringBootDeploymentApplication.class, args);
    }
}
打包部署和运行SpringBoot项目
打包SpringBoot项目
假设MVN的系统环境已经配置好了,在命令行执行命令mvn clean package即可打包
bash
PS D:\Programs\SpringBootDeployment\SpringBootDeployment> mvn clean package
[INFO] Scanning for projects...
[INFO]
[INFO] ----------------------------< com.sbd:sdd >-----------------------------
[INFO] Building SpringBootDeployment 0.0.1-SNAPSHOT
[INFO] from pom.xml
[INFO] --------------------------------[ war ]---------------------------------
[WARNING] The artifact mysql:mysql-connector-java:jar:8.0.33 has been relocated to com.mysql:mysql-connector-j:jar:8.0.33: MySQL Connector/J artifacts moved to reverse-DNS compliant Maven 2+ coordinates.
[INFO]
[INFO] --- clean:3.3.2:clean (default-clean) @ sdd ---
[INFO] Deleting D:\Programs\SpringBootDeployment\SpringBootDeployment\target
[INFO]
[INFO] --- resources:3.3.1:resources (default-resources) @ sdd ---
[INFO] Copying 1 resource from src\main\resources to target\classes
[INFO] Copying 0 resource from src\main\resources to target\classes
[INFO]
[INFO] --- compiler:3.13.0:compile (default-compile) @ sdd ---
[INFO] Recompiling the module because of changed source code.
[INFO] Compiling 2 source files with javac [debug parameters release 17] to target\classes
[INFO]
[INFO] --- resources:3.3.1:testResources (default-testResources) @ sdd ---
[INFO] skip non existing resourceDirectory D:\Programs\SpringBootDeployment\SpringBootDeployment\src\test\resources
[INFO]
[INFO] Using auto detected provider org.apache.maven.surefire.junitplatform.JUnitPlatformProvider
[INFO]
[INFO] -------------------------------------------------------
[INFO] T E S T S
[INFO] -------------------------------------------------------
[INFO] Running com.sbd.SpringBootDeploymentApplicationTests
15:08:00.704 [main] INFO org.springframework.test.context.support.AnnotationConfigContextLoaderUtils -- Could not detect default configuration classes for test class [com.sbd.SpringBootDeploymentApplicationTests]: SpringBootDeploymentApplicationTests does not declare any static, non-private, non-final, nested classes annotated with @Configuration.
15:08:00.785 [main] INFO org.springframework.boot.test.context.SpringBootTestContextBootstrapper -- Found @SpringBootConfiguration com.sbd.SpringBootDeploymentApplication for test class com.sbd.SpringBootDeploymentApplicationTests
. ____ _ __ _ _
/\\ / ___'_ __ _ _(_)_ __ __ _ \ \ \ \
( ( )\___ | '_ | '_| | '_ \/ _` | \ \ \ \
\\/ ___)| |_)| | | | | || (_| | ) ) ) )
' |____| .__|_| |_|_| |_\__, | / / / /
=========|_|==============|___/=/_/_/_/
:: Spring Boot :: (v3.3.1)
2024-06-25T15:08:01.083+08:00 INFO 15232 --- [SpringBootDeployment] [ main] c.s.SpringBootDeploymentApplicationTests : Starting SpringBootDeploymentApplicationTests using Java 17.0.1 with PID 15232 (started by EDY in D:\Programs\SpringBootDeployment\SpringBootDeployment)
2024-06-25T15:08:01.084+08:00 INFO 15232 --- [SpringBootDeployment] [ main] c.s.SpringBootDeploymentApplicationTests : No active profile set, falling back to 1 default profile: "default"
2024-06-25T15:08:01.843+08:00 ERROR 15232 --- [SpringBootDeployment] [ main] o.a.catalina.core.AprLifecycleListener : An incompatible version [1.2.14] of the Apache Tomcat Native library is installed, while Tomcat requires version [1.2.34]
Loading class `com.mysql.jdbc.Driver'. This is deprecated. The new driver class is `com.mysql.cj.jdbc.Driver'. The driver is automatically registered via the SPI and manual loading of the driver class is generally unnecessary.
2024-06-25T15:08:02.821+08:00 WARN 15232 --- [SpringBootDeployment] [ main] .s.s.UserDetailsServiceAutoConfiguration :
Using generated security password: f87a8981-a777-4a00-9f08-5b1cdd3ba15e
This generated password is for development use only. Your security configuration must be updated before running your application in production.
2024-06-25T15:08:02.834+08:00 INFO 15232 --- [SpringBootDeployment] [ main] r$InitializeUserDetailsManagerConfigurer : Global AuthenticationManager configured with UserDetailsService bean with name inMemoryUserDetailsManager
2024-06-25T15:08:02.903+08:00 INFO 15232 --- [SpringBootDeployment] [ main] o.s.b.a.e.web.EndpointLinksResolver : Exposing 1 endpoint beneath base path '/actuator'
2024-06-25T15:08:03.041+08:00 INFO 15232 --- [SpringBootDeployment] [ main] c.s.SpringBootDeploymentApplicationTests : Started SpringBootDeploymentApplicationTests in 2.147 seconds (process running for 2.859)
Java HotSpot(TM) 64-Bit Server VM warning: Sharing is only supported for boot loader classes because bootstrap classpath has been appended
[INFO] Tests run: 1, Failures: 0, Errors: 0, Skipped: 0, Time elapsed: 2.977 s -- in com.sbd.SpringBootDeploymentApplicationTests
[INFO]
[INFO] Results:
[INFO]
[INFO] Tests run: 1, Failures: 0, Errors: 0, Skipped: 0
[INFO]
[INFO]
[INFO] --- war:3.4.0:war (default-war) @ sdd ---
[INFO] Packaging webapp
[INFO] Assembling webapp [sdd] in [D:\Programs\SpringBootDeployment\SpringBootDeployment\target\sdd-0.0.1-SNAPSHOT]
[INFO] Processing war project
[INFO] Building war: D:\Programs\SpringBootDeployment\SpringBootDeployment\target\sdd-0.0.1-SNAPSHOT.war
[INFO]
[INFO] --- spring-boot:3.3.1:repackage (repackage) @ sdd ---
[INFO] Replacing main artifact D:\Programs\SpringBootDeployment\SpringBootDeployment\target\sdd-0.0.1-SNAPSHOT.war with repackaged archive, adding nested dependencies in BOOT-INF/.
[INFO] The original artifact has been renamed to D:\Programs\SpringBootDeployment\SpringBootDeployment\target\sdd-0.0.1-SNAPSHOT.war.original
[INFO] ------------------------------------------------------------------------
[INFO] BUILD SUCCESS
[INFO] ------------------------------------------------------------------------
[INFO] Total time: 38.456 s
[INFO] Finished at: 2024-06-25T15:08:36+08:00
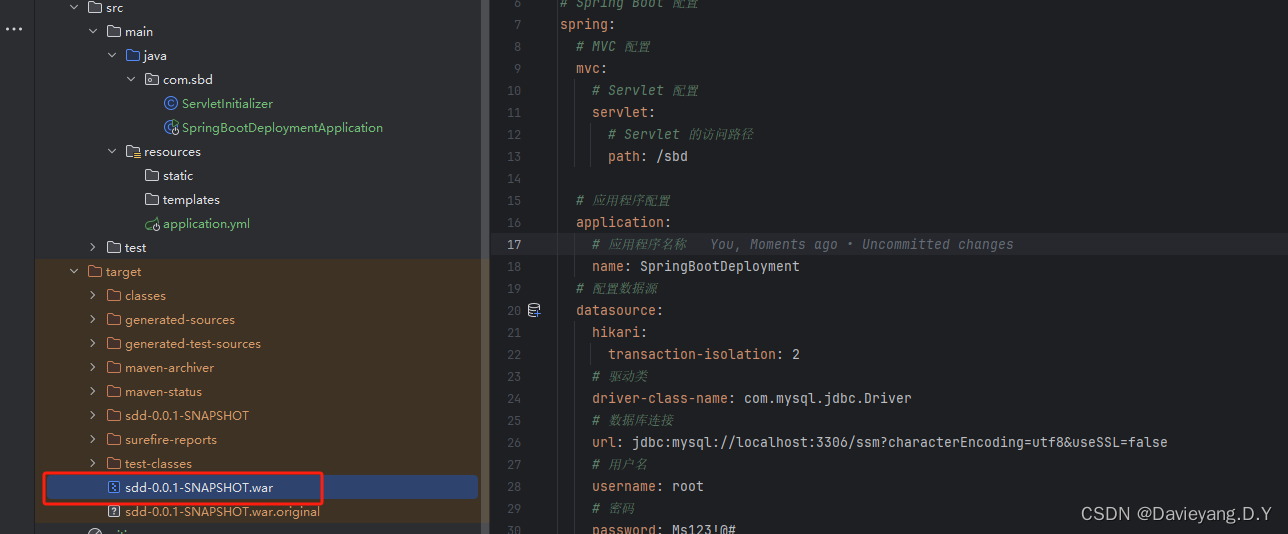
[INFO] ------------------------------------------------------------------------然后在target路径下就能看到打好的包
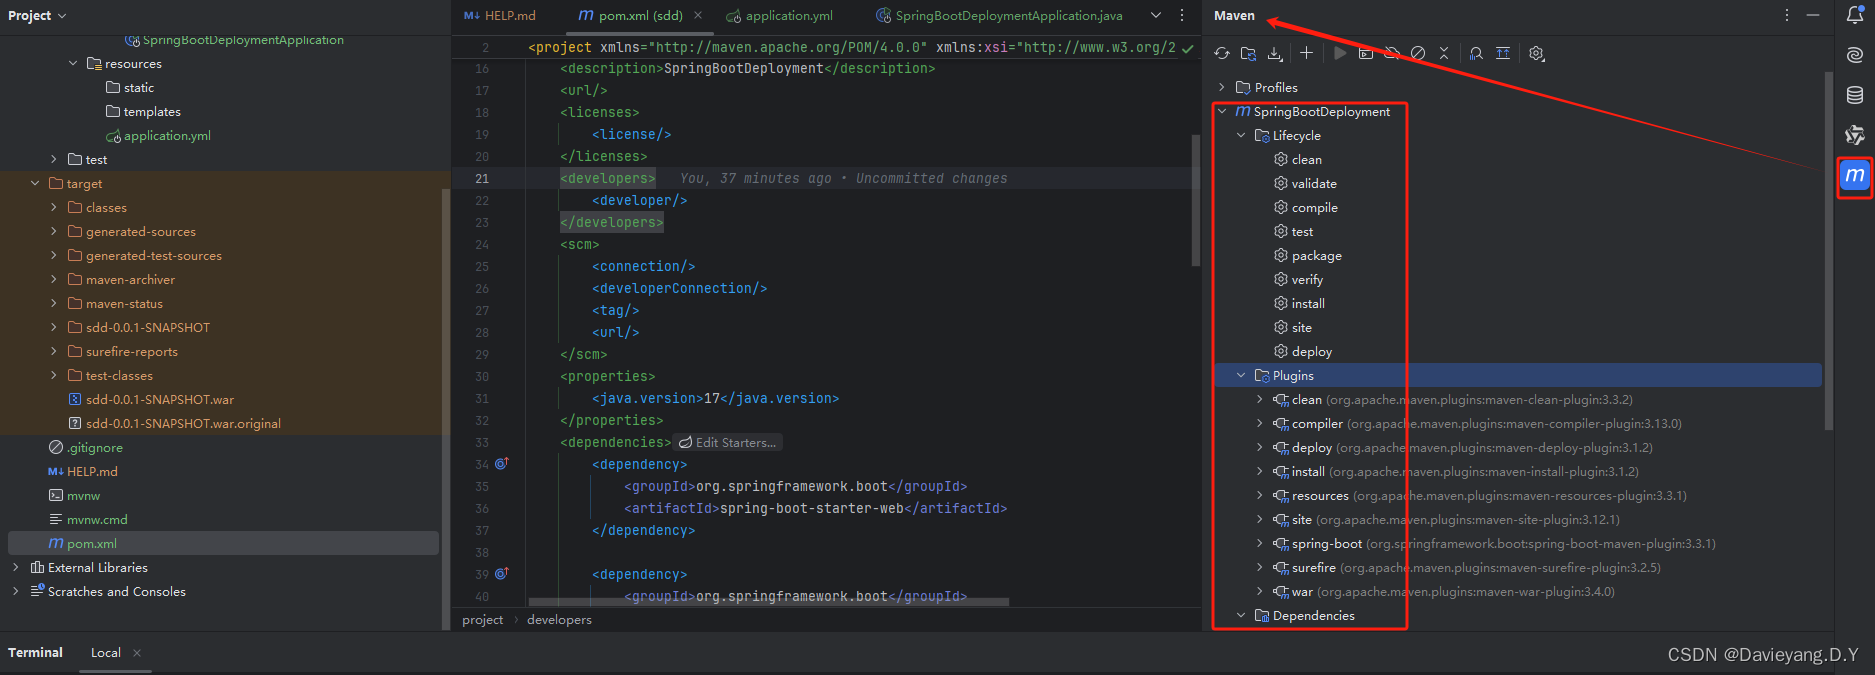
这里之所以是war包而不是jar包,来自于pom.xml文件的配置内容<packaging>war</packaging>
xml
<?xml version="1.0" encoding="UTF-8"?>
<project xmlns="http://maven.apache.org/POM/4.0.0" xmlns:xsi="http://www.w3.org/2001/XMLSchema-instance"
         xsi:schemaLocation="http://maven.apache.org/POM/4.0.0 https://maven.apache.org/xsd/maven-4.0.0.xsd">
    <modelVersion>4.0.0</modelVersion>
    <parent>
        <groupId>org.springframework.boot</groupId>
        <artifactId>spring-boot-starter-parent</artifactId>
        <version>3.3.1</version>
        <relativePath/> <!-- lookup parent from repository -->
    </parent>
    <groupId>com.sbd</groupId>
    <artifactId>sdd</artifactId>
    <version>0.0.1-SNAPSHOT</version>
    <packaging>war</packaging>
    <name>SpringBootDeployment</name>
    <description>SpringBootDeployment</description>
    <url/>
在编译器里也有相关的入口,直接操作也能编译,其实就是代替了命令行
运行SpringBoot项目
在命令行执行命令java -jar sdd-0.0.1-SNAPSHOT.war
bash
PS D:\Programs\SpringBootDeployment\SpringBootDeployment\target> java -jar sdd-0.0.1-SNAPSHOT.war

  .   ____          _            __ _ _
 /\\ / ___'_ __ _ _(_)_ __  __ _ \ \ \ \
( ( )\___ | '_ | '_| | '_ \/ _` | \ \ \ \
 \\/  ___)| |_)| | | | | || (_| |  ) ) ) )
  '  |____| .__|_| |_|_| |_\__, | / / / /
 =========|_|==============|___/=/_/_/_/

 :: Spring Boot ::                (v3.3.1)

2024-06-25T15:23:20.760+08:00  INFO 14836 --- [SpringBootDeployment] [           main] c.sbd.SpringBootDeploymentApplication    : Starting SpringBootDeploymentApplication v0.0.1-SNAPSHOT using Java 17.0.1 with PID 14836 (D:\Programs\SpringBootDeployment\SpringBootDeployment\target\sdd-0.0.1-SNAPSHOT.war started by EDY in D:\Programs\SpringBootDeployment\SpringBootDeployment\target)
2024-06-25T15:23:20.764+08:00  INFO 14836 --- [SpringBootDeployment] [           main] c.sbd.SpringBootDeploymentApplication    : No active profile set, falling back to 1 default profile: "default"
2024-06-25T15:23:21.589+08:00 ERROR 14836 --- [SpringBootDeployment] [           main] o.a.catalina.core.AprLifecycleListener   : An incompatible version [1.2.14] of the Apache Tomcat Native library is installed, while Tomcat requires version [1.2.34]
2024-06-25T15:23:21.928+08:00  INFO 14836 --- [SpringBootDeployment] [           main] o.s.b.w.embedded.tomcat.TomcatWebServer  : Tomcat initialized with port 8001 (http)
2024-06-25T15:23:21.936+08:00  INFO 14836 --- [SpringBootDeployment] [           main] o.apache.catalina.core.StandardService   : Starting service [Tomcat]
2024-06-25T15:23:21.937+08:00  INFO 14836 --- [SpringBootDeployment] [           main] o.apache.catalina.core.StandardEngine    : Starting Servlet engine: [Apache Tomcat/10.1.25]
2024-06-25T15:23:22.433+08:00  INFO 14836 --- [SpringBootDeployment] [           main] org.apache.jasper.servlet.TldScanner     : At least one JAR was scanned for TLDs yet contained no TLDs. Enable debug logging for this logger for a complete list of JARs that were scanned but no TLDs were found in them. Skipping unneeded JARs during scanning can improve startup time and JSP compilation time.
2024-06-25T15:23:22.498+08:00  INFO 14836 --- [SpringBootDeployment] [           main] o.a.c.c.C.[Tomcat].[localhost].[/]       : Initializing Spring embedded WebApplicationContext
2024-06-25T15:23:22.499+08:00  INFO 14836 --- [SpringBootDeployment] [           main] w.s.c.ServletWebServerApplicationContext : Root WebApplicationContext: initialization completed in 1673 ms
Loading class `com.mysql.jdbc.Driver'. This is deprecated. The new driver class is `com.mysql.cj.jdbc.Driver'. The driver is automatically registered via the SPI and manual loading of the driver class is generally unnecessary.
2024-06-25T15:23:23.231+08:00  WARN 14836 --- [SpringBootDeployment] [           main] .s.s.UserDetailsServiceAutoConfiguration :

Using generated security password: cb547c22-4501-44e6-83f6-9391bee03cb8

This generated password is for development use only. Your security configuration must be updated before running your application in production.

2024-06-25T15:23:23.253+08:00  INFO 14836 --- [SpringBootDeployment] [           main] r$InitializeUserDetailsManagerConfigurer : Global AuthenticationManager configured with UserDetailsService bean with name inMemoryUserDetailsManager
2024-06-25T15:23:23.332+08:00  INFO 14836 --- [SpringBootDeployment] [           main] o.s.b.a.e.web.EndpointLinksResolver      : Exposing 1 endpoint beneath base path '/actuator'
2024-06-25T15:23:23.451+08:00  INFO 14836 --- [SpringBootDeployment] [           main] o.s.b.w.embedded.tomcat.TomcatWebServer  : Tomcat started on port 8001 (http) with context path '/'
2024-06-25T15:23:23.463+08:00  INFO 14836 --- [SpringBootDeployment] [           main] c.sbd.SpringBootDeploymentApplication    : Started SpringBootDeploymentApplication in 3.116 seconds (process running for 3.46)
如果是需要部署到其他服务器上,例如Tomcat等等,直接将该war包复制过去,启动tomcat即可
项目的配置文件application.yml被打包到war包中,后续修改比较麻烦,不过Spring Boot 配置加载的优先级遵循一定的规则,以确保不同来源的配置能够合理地覆盖和互补。以下是Spring Boot配置加载的优先级列表,从高到低排列:
- 命令行参数:通过命令行直接传递给应用程序的参数(如
--spring.profiles.active=prod)具有最高优先级 - JVM系统属性:通过 -D 参数设置的Java系统属性(例如
-Dspring.datasource.url=jdbc:mysql://localhost/test) - 环境变量:以
SPRING_APPLICATION_JSON形式存在的环境变量中的属性,这些属性通常以JSON格式定义 - 应用以外的配置文件:
- 当前目录下的
config子目录中的配置文件(比如./config/application.yml) - 当前目录下的配置文件(如
./application.yml)
- 当前目录下的
- 打包内的配置文件:
classpath:/config/目录下的配置文件(项目resources目录下的config/文件夹中)classpath:/根目录下的配置文件(项目resources目录的根文件中,如application.yml)
- 默认配置:
Spring Boot自带的默认配置,位于其自动配置模块中
如果在多个位置都定义了相同的配置项,那么优先级高的配置会覆盖优先级低的配置。例如,如果在命令行参数中设置了某个属性,那么这个属性的值将覆盖所有其他位置的相同属性值。
此外,Spring Boot 支持多环境配置,通过命名约定(如 application-{profile}.yml)来区分不同环境的配置,其中{profile}是激活的配置文件名(如 dev、prod)。当激活特定的配置文件时,对应环境的配置会根据上述优先级规则进行加载,并且可以在不同环境之间进行切换而不需要更改主要的配置文件。
根据加载顺序,比较典型的场景就是命令行的参数优先级大于配置文件,那么在命令行添加参数是可以覆盖配置文件的
外部配置文件优先级大于war包内的配置文件,因此在war包同路径下再建一个application.yml,写进新的配置也可以覆盖war包内的配置文件的配置
Spring Boot Actuator
Spring Boot Actuator 是一种度量,可以实时监控SpringBoot项目的健康状况,通过请求Actuator的端点,可以查看项目运行时不同的信息,比如JVM运行情况,项目是否正常、项目的配置和SpringIoC容器的内容,要是用该工具需要引入如下依赖
xml
        <!-- 引入Spring Boot的Actuator模块 -->
        <dependency>
            <groupId>org.springframework.boot</groupId>
            <artifactId>spring-boot-starter-actuator</artifactId>
</dependency>当我们引入了这个依赖到项目中后,SpringBoot就会提供对应的端点供我们查看项目运行的情况,在application.yml里还需要增加一个对应的配置
yml
# 该文档描述了一个Spring Boot应用程序的部署信息
info:
  # 应用程序的标识部分,包含名称、描述和版本
  application:
    # 应用程序的名称
    name: SpringBootDeployment
    # 应用程序的描述,此处与名称相同,可能是为了强调
    description: SpringBootDeployment
    # 应用程序的版本号
    version: 1.0.0

# 配置管理端点的暴露设置# 使用"*"表示暴露所有端点,可以根据实际需求调整包括的端点列表。
management:
  endpoints:
    web:
      exposure:
        # 表示除了env以外全部暴露
        include: "*"
        exclude: "env"
  # 信息配置部分,用于存储和管理应用程序的环境信息
  info:
    # 环境配置,定义了当前运行环境是否启用某些特定功能或设置
    env:
      # 是否启用,true表示启用,false表示禁用, 默认为false,在请求info端点的时候显示为空
enabled: true启动项目之后,访问页面/sdb/actuator/health便可以看到相关信息


Actuator端点
Actuator的端点会以ANT风格的路径/actuator/{端点}提供,如下是SpringBoot3.0的一些端点,这个东西很变态,每个版本都有所不同,例如是否默认启用,配置格式什么的

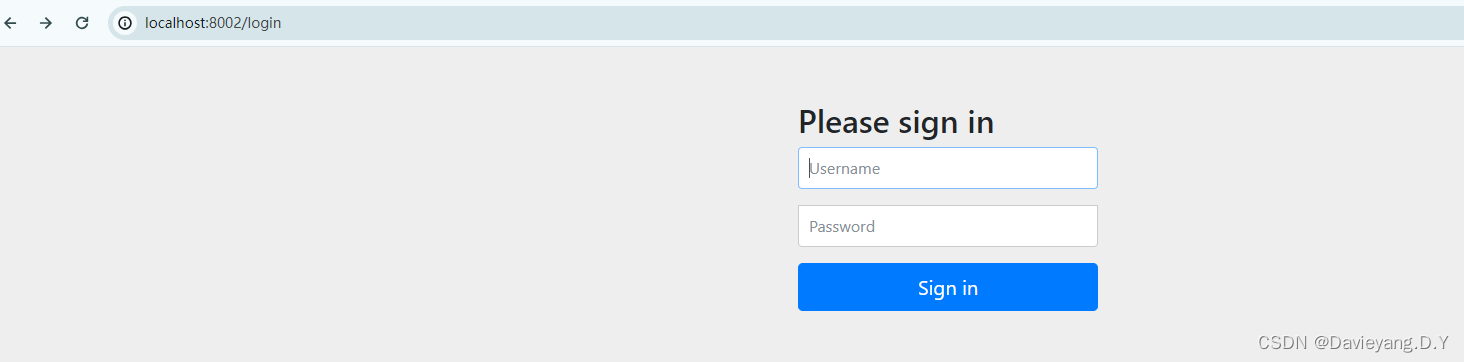
保护Actuator端点
有些端点不能随意暴露给别人看,但又需要暴露出来给需要的人看,因此需要增加一层安全机制,为此需要引入如下依赖
xml
        <!-- 引入Spring Boot的Security模块,用于应用程序的安全性管理。 -->
        <dependency>
            <groupId>org.springframework.boot</groupId>
            <artifactId>spring-boot-starter-security</artifactId>
        </dependency>
        <!-- 引入Tomcat的Jasper引擎,用于处理JSP页面。 -->
        <dependency>
            <groupId>org.apache.tomcat.embed</groupId>
            <artifactId>tomcat-embed-jasper</artifactId>
</dependency>spring-boot-starter-security也需要tomcat-embed-jasper因此一起引入,然后需要编写一个安全认证类来限制请求的权限,代码如下
java
package com.sbd.config;

import org.springframework.boot.actuate.autoconfigure.security.servlet.EndpointRequest;
import org.springframework.context.annotation.Bean;
import org.springframework.context.annotation.Configuration;
import org.springframework.security.config.annotation.authentication.builders.AuthenticationManagerBuilder;
import org.springframework.security.config.annotation.web.builders.HttpSecurity;
import org.springframework.security.config.annotation.web.configuration.WebSecurityConfigurerAdapter;
import org.springframework.security.crypto.bcrypt.BCryptPasswordEncoder;
import org.springframework.security.crypto.password.PasswordEncoder;

/**
 * 安全配置类,继承自WebSecurityConfigurerAdapter,用于配置Spring Security。
 */
@Configuration
public class SecurityConfig extends WebSecurityConfigurerAdapter {

    private PasswordEncoder passwordEncoder = new BCryptPasswordEncoder();
    /**
     * 使用BCryptPasswordEncoder作为密码编码器。
     * @return 返回BCryptPasswordEncoder实例。
     */
    @Bean // 密码编码器
    public PasswordEncoder passwordEncoder() {return passwordEncoder;}

    /**
     * 配置认证管理器,用于设置内存中的用户认证信息。
     * @param auth AuthenticationManagerBuilder的实例,用于配置认证信息。
     * @throws Exception 如果配置出错,抛出异常。
     */
    @Override
    protected void configure(AuthenticationManagerBuilder auth) throws Exception {
        // 使用内存存储
        auth.inMemoryAuthentication()
                // 设置密码编码器
                .passwordEncoder(passwordEncoder)
                // 注册用户admin,密码为abc,并赋予USER和ADMIN的角色权限
                .withUser("admin")
                // 可通过passwordEncoder.encode("abc")得到加密后的密码
                .password(passwordEncoder.encode("a123456"))
                // 赋予角色ROLE_USER和ROLE_ADMIN
                .roles("ADMIN");
    }

    /**
     * 配置HTTP安全设置,用于定义哪些URL需要安全访问。
     * @param http HttpSecurity的实例,用于配置HTTP安全设置。
     * @throws Exception 如果配置出错,抛出异常。
     */
    @Override
    protected void configure(HttpSecurity http) throws Exception {
        // 限定签名后的权限
        http.authorizeRequests()
                .antMatchers("/sbd/actuator/**", "/sbd/admin/**")
                .hasAnyRole("ADMIN")
                .anyRequest().permitAll()
                .and().anonymous()
                .and().formLogin();
    }
}
启动项目便会,再次访问端点,便会弹出登录窗口
自定义端点
有时候我们要加入自己的端点,例如DataSource端点,用于监控数据库的健康情况,代码如下
java
package com.sbd.endpoint;


import org.springframework.beans.factory.annotation.Value;
import org.springframework.boot.actuate.endpoint.annotation.Endpoint;
import org.springframework.boot.actuate.endpoint.annotation.ReadOperation;
import org.springframework.stereotype.Component;

import java.sql.Connection;
import java.sql.DriverManager;
import java.sql.SQLException;
import java.util.HashMap;
import java.util.Map;

@Component
@Endpoint(id = "database", enableByDefault = true)
public class DatabaseEndpoint {

    @Value("${spring.datasource.driver-class-name}")
    private String driverClassName = null;;

    @Value("${spring.datasource.url}")
    private String url = null;

    @Value("${spring.datasource.username}")
    private String username = null;

    @Value("${spring.datasource.password}")
    private String password = null;

    // 测试SQL
    private static final String TEST_SQL = "select 1 from dual";

    // 一个端点只能存在一个@ReadOperation标注的方法
    // 它代表的是HTTP的GET请求
    @ReadOperation
    public Map<String, Object> test() {
        Connection conn = null;
        Map<String, Object> msgMap = new HashMap<>();
        try {
            Class.forName(driverClassName);
            conn = DriverManager.getConnection(url, username, password);
            // 执行测试SQL
            conn.createStatement().executeQuery(TEST_SQL);
            msgMap.put("success", true);
            msgMap.put("message", "测试数据库连接成功");
        } catch (Exception ex) {
            msgMap.put("success", false);
            msgMap.put("message", ex.getMessage());
        } finally {
            if (conn != null) {
                try {
                    conn.close(); // 关闭数据库连接
                } catch (SQLException e) {
                    e.printStackTrace();
                }
            }
        }
        return msgMap;
    }
}
@Endpoint注解声明该类为Actuator的一个端点
@ReadOperation注解标识该端点为读取端点,对应HTTP的GET请求
@WriteOperation注解标识该端点为写入端点,对应HTTP的POST请求
@DeleteOperation注解标识该端点为删除端点,对应HTTP的DELETE请求
将自定义端点加入配置
yml
management:
  endpoints:
    web:
      exposure:
        # 表示除了env以外全部暴露
        include: "*"
        exclude: "env"

  endpoint:
    database:
      enabled: true
访问该端点

健康指标项
health端点只显示服务器的状态,要显示更多的指标,需要进一步配置management.endpoint.health.showdetails,该配置项存在三个选项即never、always、when-authorized,第一个为默认值,不显示指标项,第二个显示所有指标项,第三个需要认证后显示指标项
修改一下配置文件,将配置添加进去
yml
# 配置管理端点的暴露设置# 使用"*"表示暴露所有端点,可以根据实际需求调整包括的端点列表。
management:
endpoints:
web:
exposure:
# 表示除了env以外全部暴露
include: "*"
exclude: "env"
endpoint:
database:
enabled: true
health:
enabled: true
show-details: when_authorized
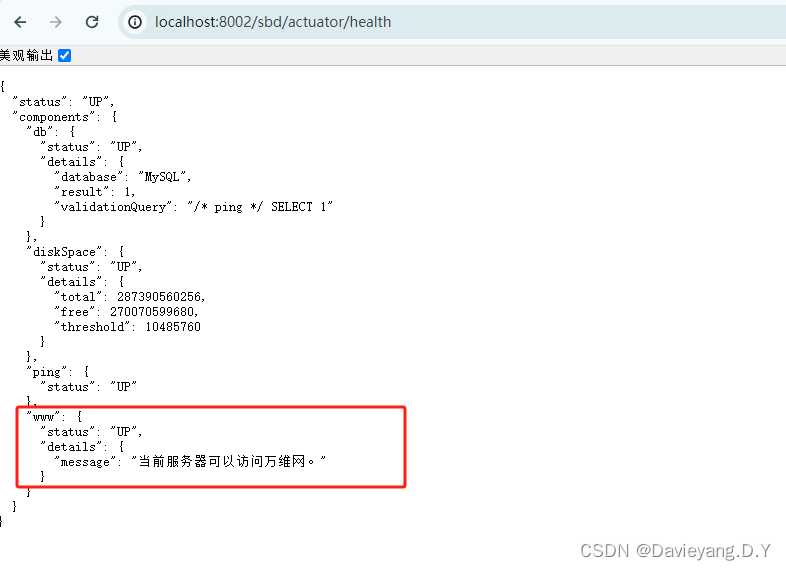
roles: "ADMIN"然后再次访问health端点即可

health端点还可以添加如下指标项,但需要在pom中引入对应的Spring Boot启动器(starter)最好对应的配置,指标才会自动启用

自定义指标项
java
package com.sbd.indicator;

import org.springframework.boot.actuate.autoconfigure.health.ConditionalOnEnabledHealthIndicator;
import org.springframework.boot.actuate.health.AbstractHealthIndicator;
import org.springframework.boot.actuate.health.Health;
import org.springframework.stereotype.Component;

import java.net.InetAddress;

// 当配置项management.health.www.enabled为true时才展示指标项
@ConditionalOnEnabledHealthIndicator("www")

/**
 * 指标项名称,是根据Bean名称来决定的,比如Bean名称为xxxHealthIndicator,那么指标项名称就为xxx。
 * 本例如果使用默认的类名为Bean名称,则指标项名称为internet
 * 这里重新定义Bean名称为wwwHealthIndicator,则指标项为名称为www
 */
@Component(value="wwwHealthIndicator")
public class InternetHealthIndicator extends AbstractHealthIndicator {

    // 通过监测腾讯服务器,看能否访问互联网
    private final static String QQ_HOST = "www.qq.com";
    // 超时时间为5s
    private final static int TIMEOUT = 5000;

    @Override
    protected void doHealthCheck(Health.Builder builder) throws Exception {
        // 监测腾讯服务器
        boolean status = ping();
        if (status) {
            // 健康指标为可用状态,并添加一个消息项
            builder.withDetail("message", "当前服务器可以访问万维网。").up();
        } else {
            // 健康指标为不再提供服务,并添加一个消息项
            builder.withDetail("message", "当前无法访问万维网").outOfService();
        }
    }

    // 监测腾讯服务器能够访问,用以判断能否访问万维网
    private boolean ping() throws Exception {
        try {
            // 当返回值是true时,说明host是可用的,是false则不可用
            return InetAddress.getByName(QQ_HOST).isReachable(TIMEOUT);
        } catch (Exception ex) {
            return false;
        }
    }
}
实现指标项的开发可以通过HealthIndicator接口或者继承抽象类AbstractHealthIndicator,而实际上AbstractHealthIndicator也实现了HealthIndicator接口
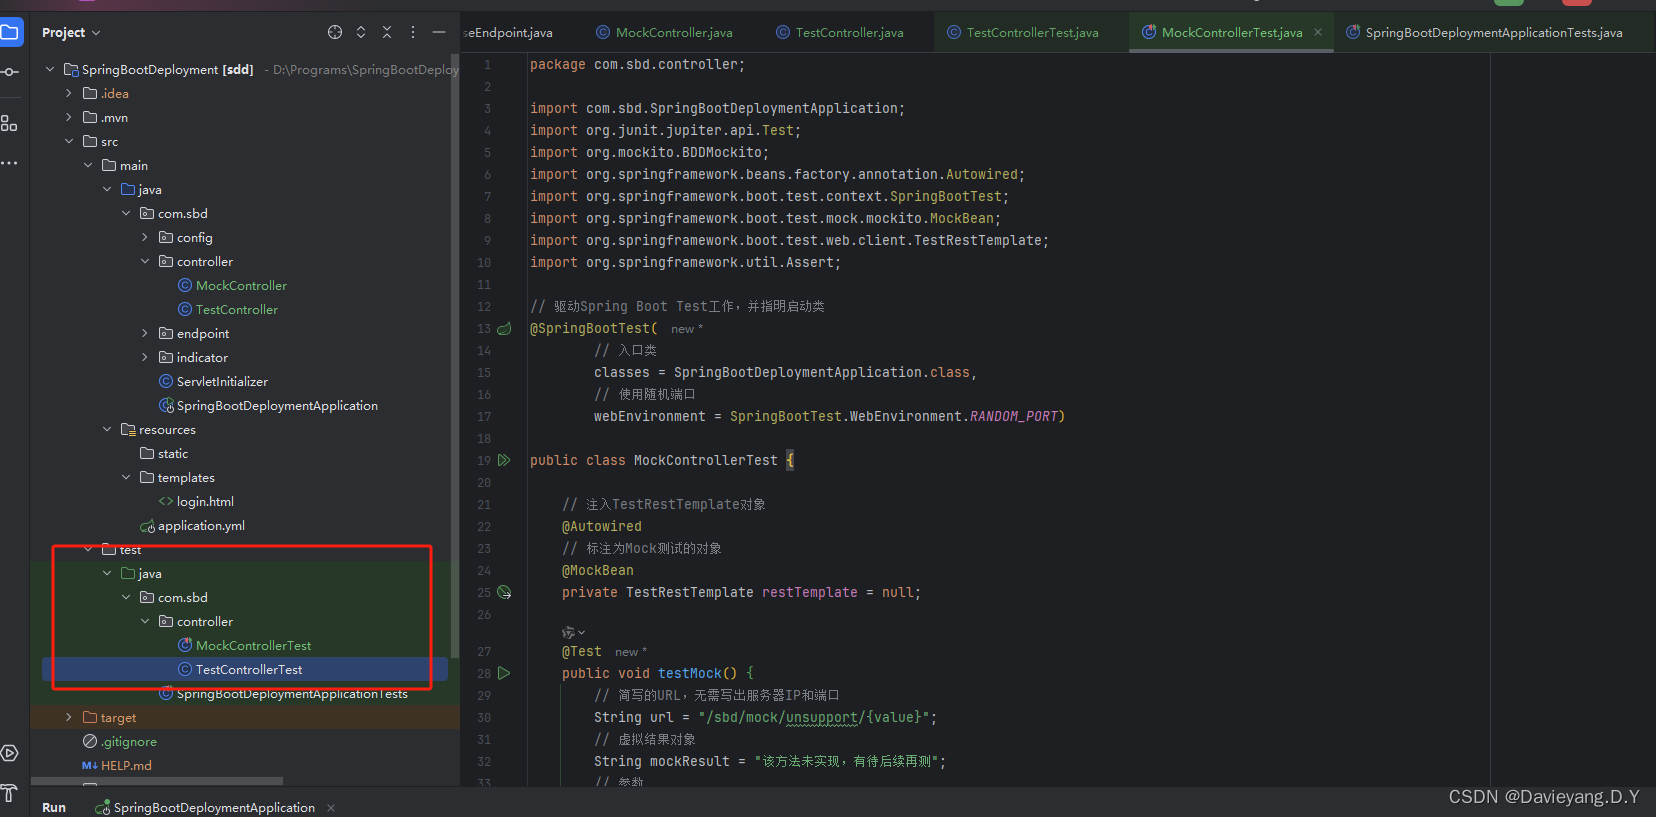
SpringBoot测试
基本的测试可参考文章单元测试系列v1.0.0SpringBootTest
使用随机端口测试REST风格的请求
java
package com.sbd.controller;


import com.sbd.SpringBootDeploymentApplication;
import org.junit.jupiter.api.Test;
import org.junit.jupiter.api.extension.ExtendWith;
import org.junit.jupiter.api.extension.Extensions;
import org.mockito.BDDMockito;
import org.springframework.beans.factory.annotation.Autowired;
import org.springframework.boot.test.autoconfigure.web.servlet.AutoConfigureMockMvc;
import org.springframework.boot.test.context.SpringBootTest;
import org.springframework.boot.test.mock.mockito.MockBean;
import org.springframework.boot.test.web.client.TestRestTemplate;
import org.springframework.test.context.junit.jupiter.SpringExtension;
import org.springframework.util.Assert;
import org.springframework.web.client.RestTemplate;


// 驱动Spring Boot Test工作,并指明启动类
@SpringBootTest(
        // 入口类
        classes = SpringBootDeploymentApplication.class,
        // 使用随机端口
        webEnvironment = SpringBootTest.WebEnvironment.RANDOM_PORT)

public class TestControllerTest {

    // 注入控制器
    @Autowired
    private TestController testController = null;

    // 测试方法
    @Test
    public void testHello() {
        String result = testController.hello("Jim");
        System.out.println(result);
        Assert.notNull(result, "判定结果为空(null)");
    }

    // 注入TestRestTemplate对象
    @Autowired
    private TestRestTemplate restTemplate = null;

    // 测试方法
    @Test
    public void testRestHello() {
        // 简写的URL,无需写出服务器IP和端口
        String url = "/sbd/test/hello/{name}";
        String value = "Jim";
        // 通过REST风格请求获取结果
        String result = restTemplate.getForObject(url, String.class, "Jim");
        System.out.println(result);
        Assert.notNull(result, "判定结果为空(null)");
    }


}
Mock测试
java
package com.sbd.controller;

import com.sbd.SpringBootDeploymentApplication;
import org.junit.jupiter.api.Test;
import org.mockito.BDDMockito;
import org.springframework.beans.factory.annotation.Autowired;
import org.springframework.boot.test.context.SpringBootTest;
import org.springframework.boot.test.mock.mockito.MockBean;
import org.springframework.boot.test.web.client.TestRestTemplate;
import org.springframework.util.Assert;

// 驱动Spring Boot Test工作,并指明启动类
@SpringBootTest(
        // 入口类
        classes = SpringBootDeploymentApplication.class,
        // 使用随机端口
        webEnvironment = SpringBootTest.WebEnvironment.RANDOM_PORT)

public class MockControllerTest {

    // 注入TestRestTemplate对象
    @Autowired
    // 标注为Mock测试的对象
    @MockBean
    private TestRestTemplate restTemplate = null;

    @Test
    public void testMock() {
        // 简写的URL,无需写出服务器IP和端口
        String url = "/sbd/mock/unsupport/{value}";
        // 虚拟结果对象
        String mockResult = "该方法未实现,有待后续再测";
        // 参数
        String value = "mock";
        // 对Mock对象进行声明调用的方法和参数
        BDDMockito.given(restTemplate.getForObject(url, String.class, value))
                // 使用自定义的虚拟对象,取代方法返回的结果
                .willReturn(mockResult);
        // 通过REST风格请求获取结果(会被虚拟结果对象取代)
        String result = restTemplate.getForObject(url, String.class, value);
        System.out.println(result);
        Assert.notNull(result, "判定结果为空(null)");
    }
}