目录
[1. 容器启动](#1. 容器启动)
[2. 容器启动/重启/停止](#2. 容器启动/重启/停止)
[3. 进入容器](#3. 进入容器)
[4. 容器查询](#4. 容器查询)
[5. docker 镜像的构建](#5. docker 镜像的构建)
[方式一:docker 容器 commit](#方式一:docker 容器 commit)
[方式二:Dockerfile 定制镜像](#方式二:Dockerfile 定制镜像)
1. 容器启动
docker run --it/-d --p/P --name imageID/name
2. 容器启动/重启/停止
bash
docker start
docker restart
docker stop
3. 进入容器
# 查看容器id
docker ps
# 容器ID:057572c53888
docker attach containerID
docker exec -it containerID /bin/bash
4. 容器查询
docker inspect containerID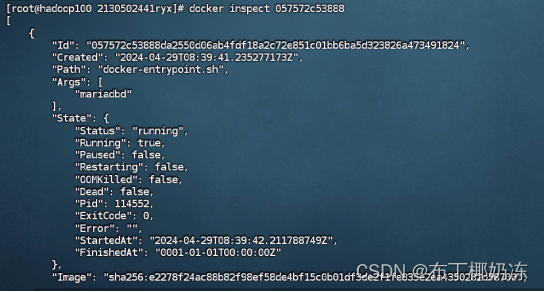
docker top containerID
docker diff containerID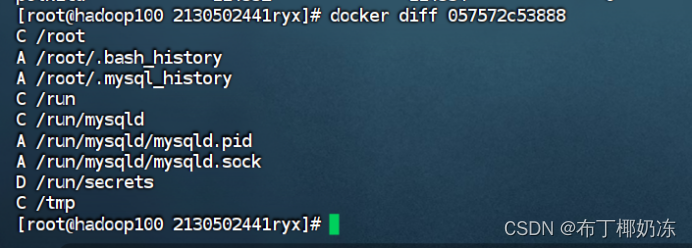
5. docker 镜像的构建
方式一:docker 容器 commit
docker commit
1、运行docker
docker run --name webserver -d -p 80:80 nginx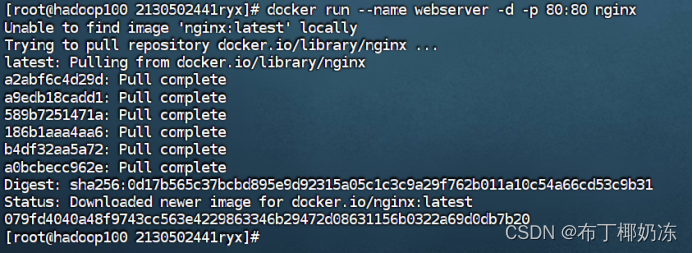
2、进入容器的方法
# 方式1
docker attach webserver
ctrl+p、q退出!!!!
# 方式2
docker exec -it webserver bash
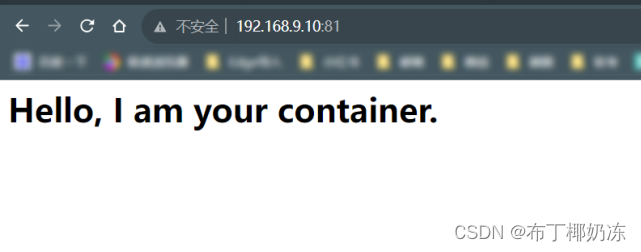
docker exec -it 容器id bash -c "echo
'<h1>Hello,I am your container.</h1>' > /usr/share/nginx/html/index.html"
3、提交docker
docker commit --author "szzz" --message "chang index" webserver nginx:v2
4、运行docker
docker run --name webserver2 -d -p 81:80 nginx:v2
5、查看历史记录
docker history nginx:v2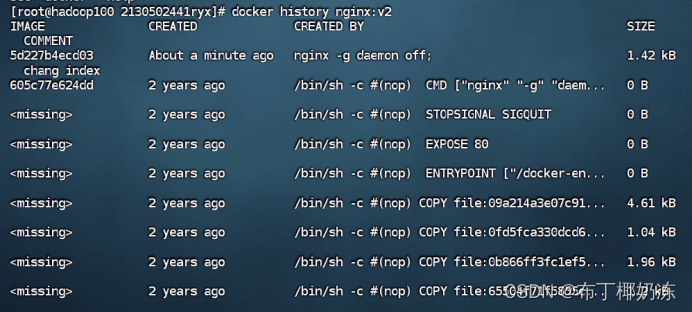
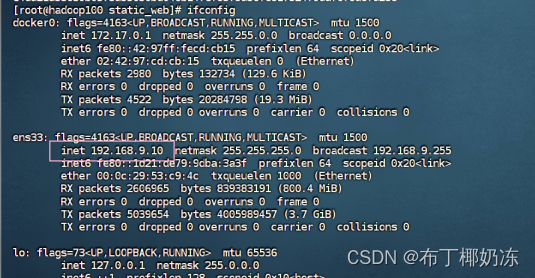
6、测试:http://192.168.9.10:81 (用该虚拟机的ip地址)
方式二:Dockerfile 定制镜像
确保 docker 主机可以上网
docker buildDockerfile 的编写方法
1、 网络确认
ping www.baidu.com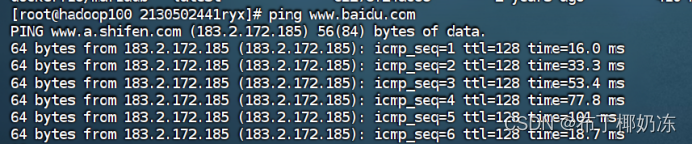
2、准备文件夹和 Dockerfile 文件
mkdir static_web # 创建文件夹

cd static_web # 进入文件夹

touch Dockerfile # 创建一个 Dockerfile 文件
3、编写 Dockerfile
vi Dockerfile 编辑文件,写入镜像代码
# Version: 0.0.1
FROM ubuntu:14.04
MAINTAINER James Turnbull "james@example.com"
RUN apt-get update && apt-get install -y nginx
RUN echo 'Hi, I am in your containe' > /usr/share/nginx/html/index.html
EXPOSE 80
CMD ["nginx", "-g", "daemon off;"]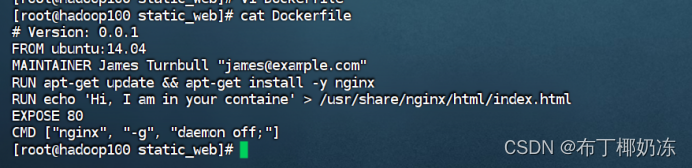
4、构建镜像
docker build -t="jamur01/static_web" 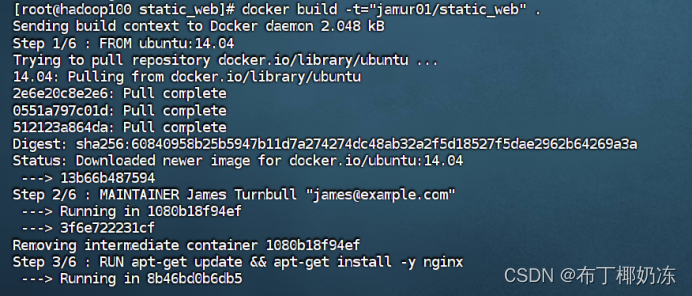
5、容器测试
docker run -itd --name test -p 8080:80 jamur01/static_web
http://192.168.9.10:8080 (根据自己的虚拟机ip地址访问)
