ubuntu环境
一、安装
可以参考官网进行或其他博客进行安装
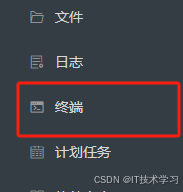
1.进入宝塔面板
进图Docker菜单,查看是否提示安装。

2.查看是否安装
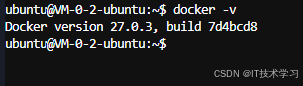
查看版本
docker -v证明已经安装
二、常用命令
1.查看版本
docker -v2.启动、停止、重启docker
systemctl start docker    #启动
systemctl stop docker     #停止
systemctl restart docker  #重启
3.开机启动
systemctl enable docker4.查看概要信息
docker info5.查看docker帮助文档
docker help
6.镜像的相关操作
nginx为例
docker pull nginx   #从仓库拉取镜像到本地
docker images       #查看镜像
docker save --help  #查看帮助文档
docker save -o nginx.tar nginx  #镜像打包
ll      #查看当前目录内容
docker rmi --help   #查看帮助文档
docker rmi -f nginx #删除镜像
docker images       #查看镜像
docker load --help  #加载镜像
docker images       #查看镜像
docker run -d --name test_nginx -p 8080:80 nginx  #运行镜像(参数解释参考docker安装应用)
7.容器的相关操作
docker ps    #查看运行的容器
docker ps -a #查看所有的容器
docker rm -f test_nginx       #删除正在运行的容器
docker rm test_nginx          #删除正在运行的容器
docker start test_nginx  #启动容器
docker stop test_nginx   #停止容器

docker logs test_nginx        #查看容器日志
docker logs -f test_nginx     #查看容器日志(一直监听,Ctrl+C结束)

docker exec -it test_nginx bash    #进入容器的命令行(exit退出)
8.数据卷操作
获取帮信息

docker volume --help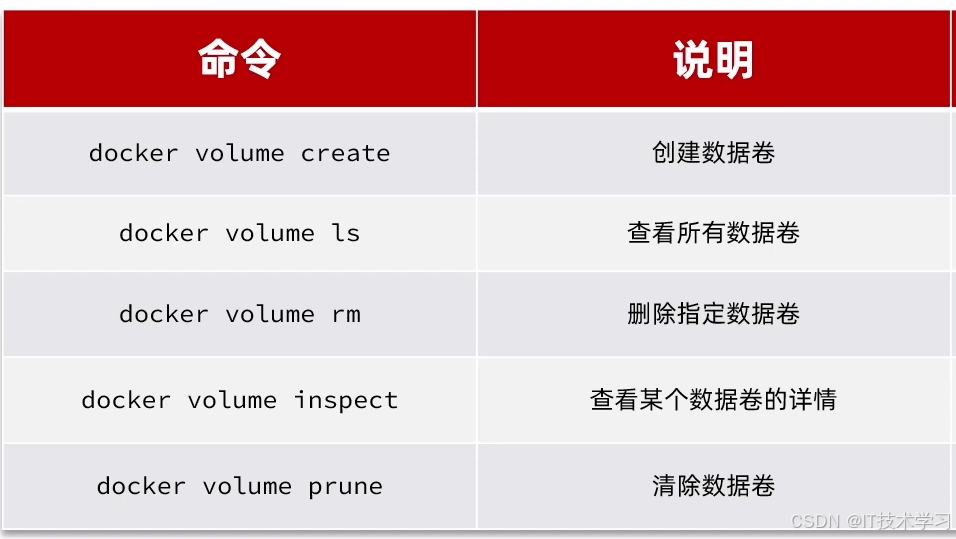
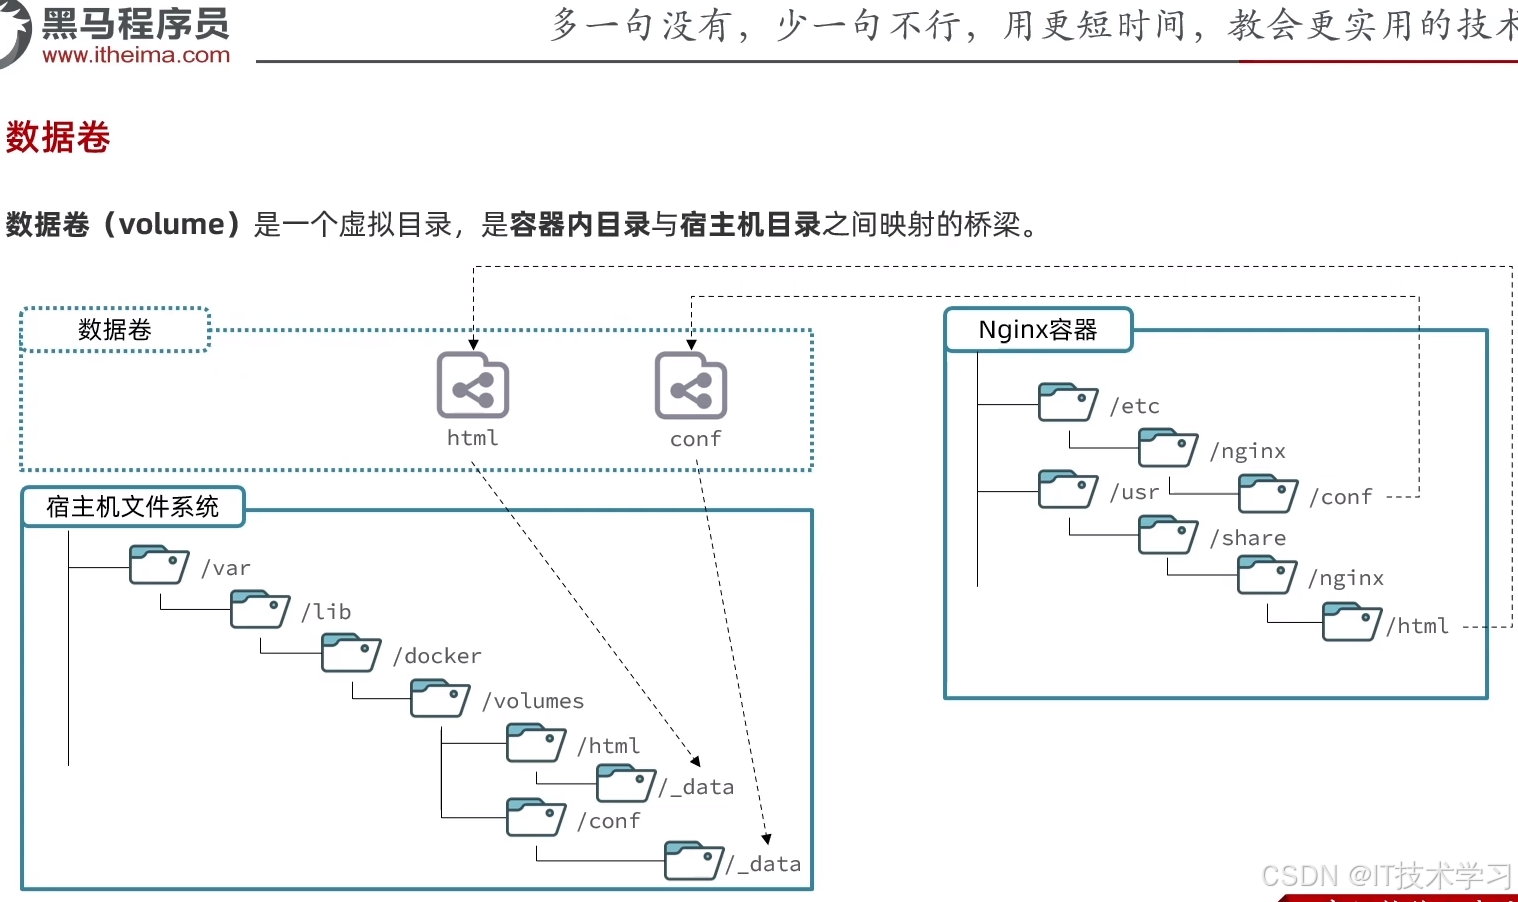
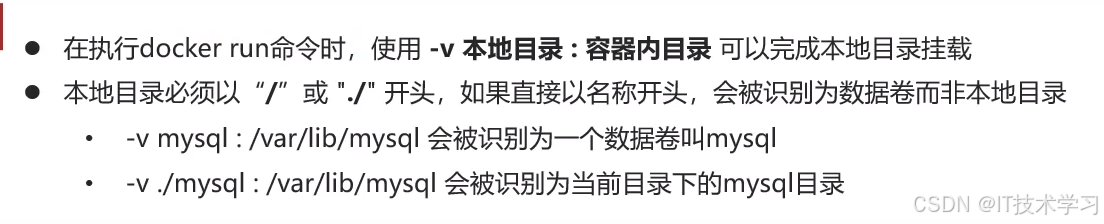
9. 挂载
9.1nginx 静态目录

只能在创建容器的时候设置挂载(删除已存在的 docker rm -f test_nginx 重新创建)
#-v html:/usr/share/nginx/html 是新加的,前部分是本地的:后部分是容器内的目录
#本地的目录在 /var/lib/docker/volumes/
/var/lib/docker/volumes/html/_data(本地的宿主机) 相对应/usr/share/nginx/html(容器里)
docker run -d --name test_nginx -p 8080:80 -v html:/usr/share/nginx/html nginx


docker volume ls   #查看所有卷
docker volume inspect html   #查看具体卷的详细信息
9.2本地挂载
只是数据卷的名称变成目录文件
了解:mysql通常需要挂载的目录
9.3查看容器的挂载
test_nginx为例
docker inspect test_nginx 存在已经手动挂载的目录
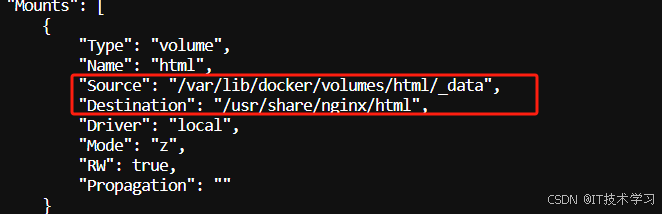
test-mysql容器为例
docker inspect test-mysql存在默认的目录:默认将数据库文件挂载,方便备份迁移等。
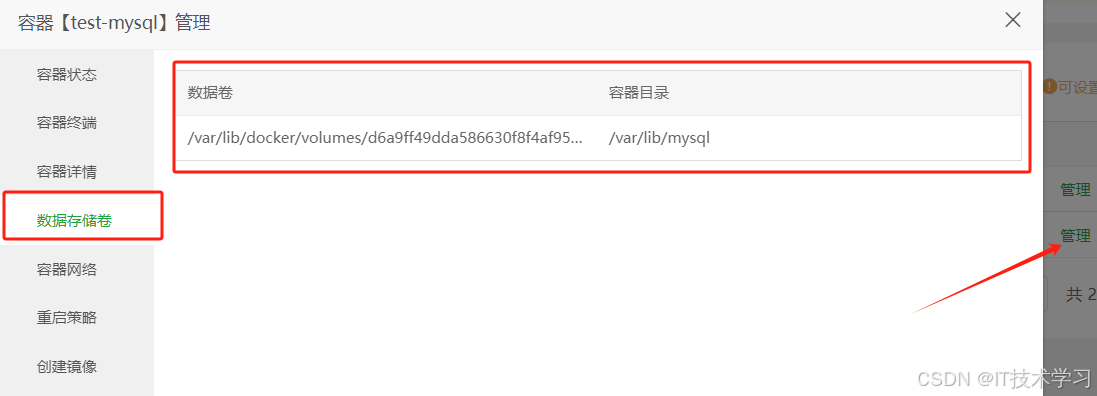
 9.4宝塔挂载、查看数据卷

三、开机启动等设置
1.测试是否已经启动
docker images进程连接失败 ,说明进行没有启动进程

2.启动docker,
systemctl start docker #启动如果权限不够需要切换成root账户
参考:https://it-chengzi.blog.csdn.net/article/details/132208106
su root #回车后会输入密码测试是否启动成功
docker images
3. 设置开机启动
systemctl enable docker
说明之前就已经开启,可以使用以下命令取消"开机启动"
sudo systemctl disable docker
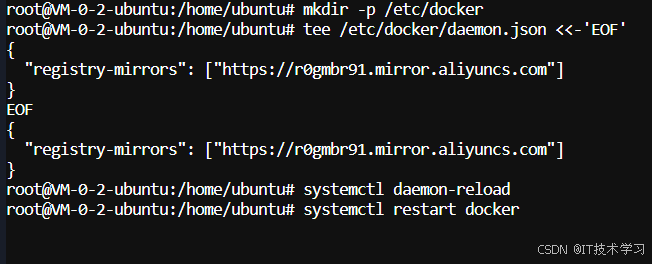
四、配置镜像
1.手动配置
阿里云获取:https://www.aliyun.com/
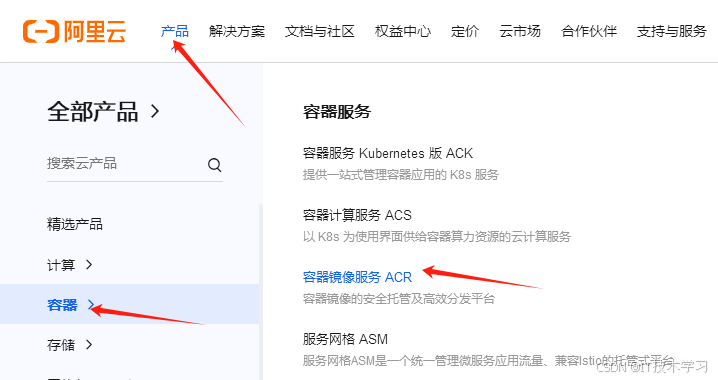


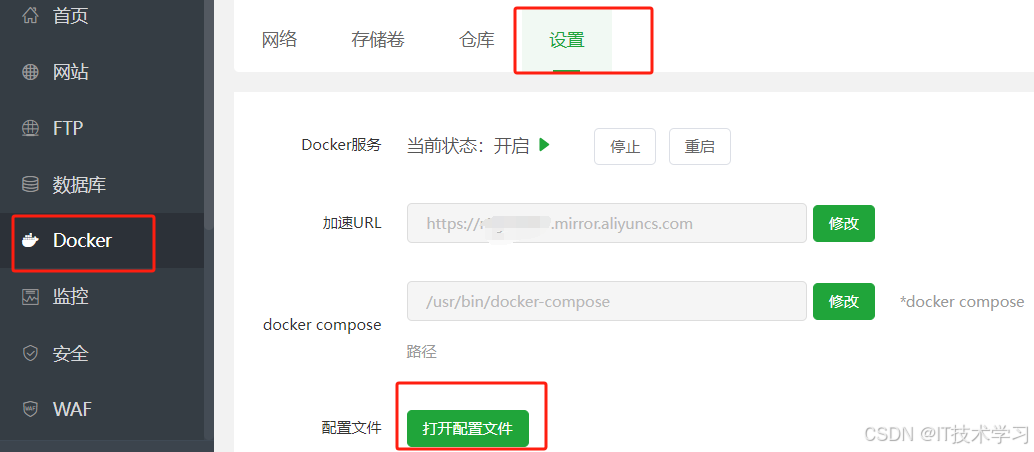
2.宝塔配置
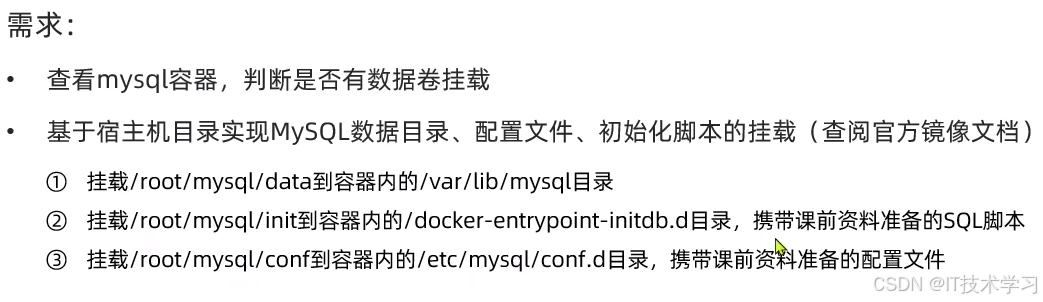
五、docker安装应用
参考:黑马程序员
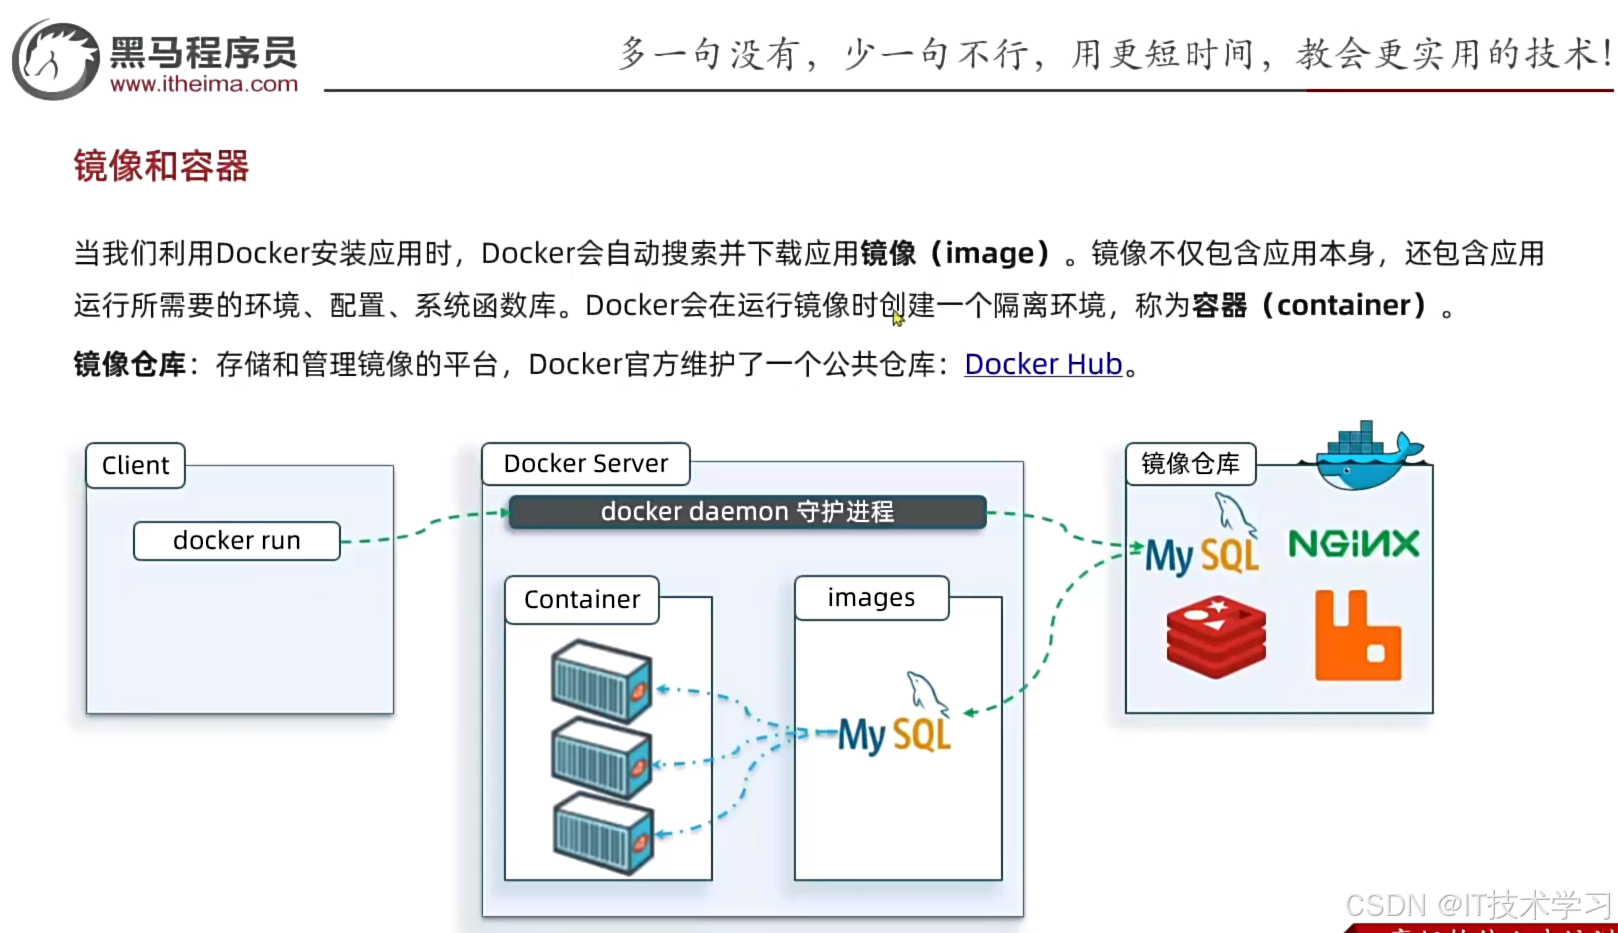
1.过程描述
1.1 首先DockDer Server进程是运行的,镜像仓库(https://hub.docker.com/)是存在的,镜像一般由软件官方提供。
1.2 命令行窗口相当于客户端,输入的命令会给到DockDer Server进程。
1.3 DockDer Server进程去仓库下载软件镜像(相当于绿色免安装的软件压缩包)
1.4 运行的时候,docker会提供一个隔离的环境(容器),运行这个软件。
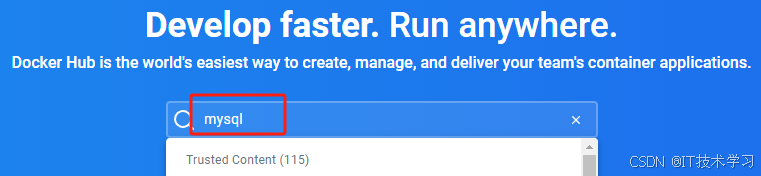
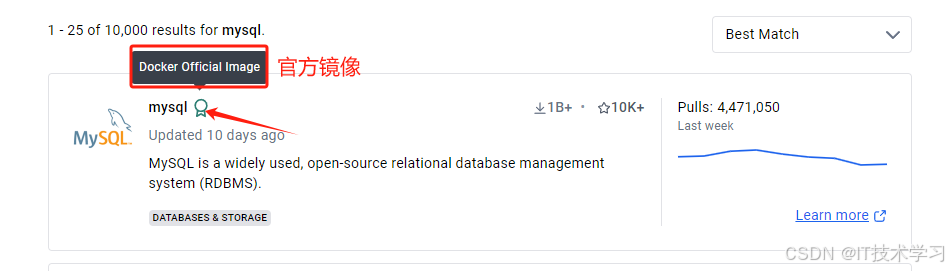
2.搜索应用 (mysql为例)
3.运行镜像
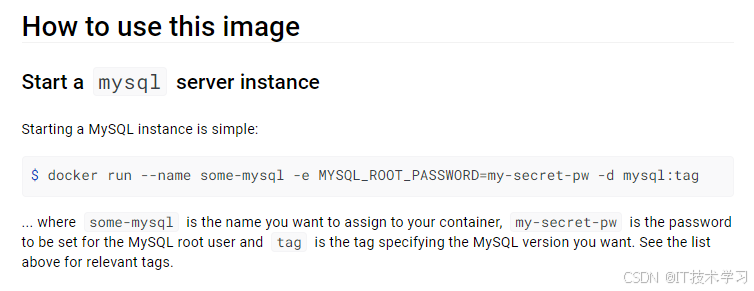
$ docker run --name some-mysql -e MYSQL_ROOT_PASSWORD=my-secret-pw -d mysql:tag示例:(加上端口映射)
docker run --name test-mysql -p 3306:3306 -e MYSQL_ROOT_PASSWORD=root -d mysql:5.74.参数说明
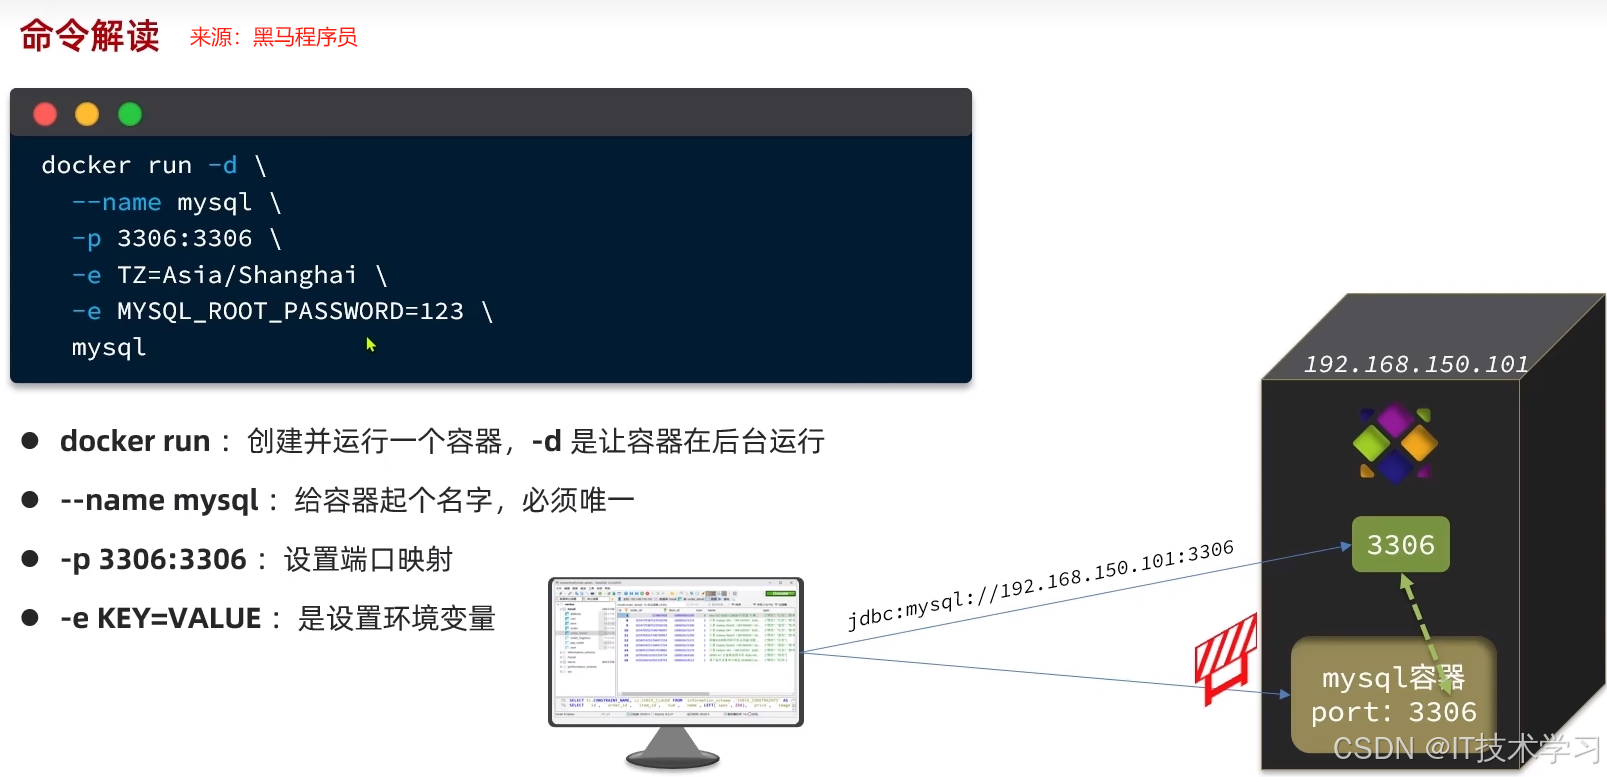

端口映射,前部分端口是宿主机端口,后部分端口是容器端口。
宿主机端口一般需要改,尤其是多开的情况,容器端口不用改。
环境变量由镜像提供者规定(键值对形式存在)
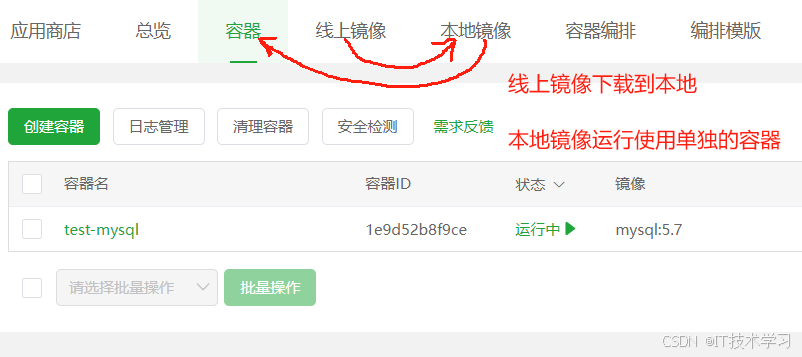
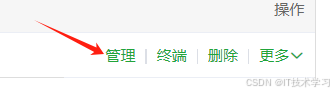
5.宝塔面板
拉取镜像,创建容器等操作,可以可视化完成。
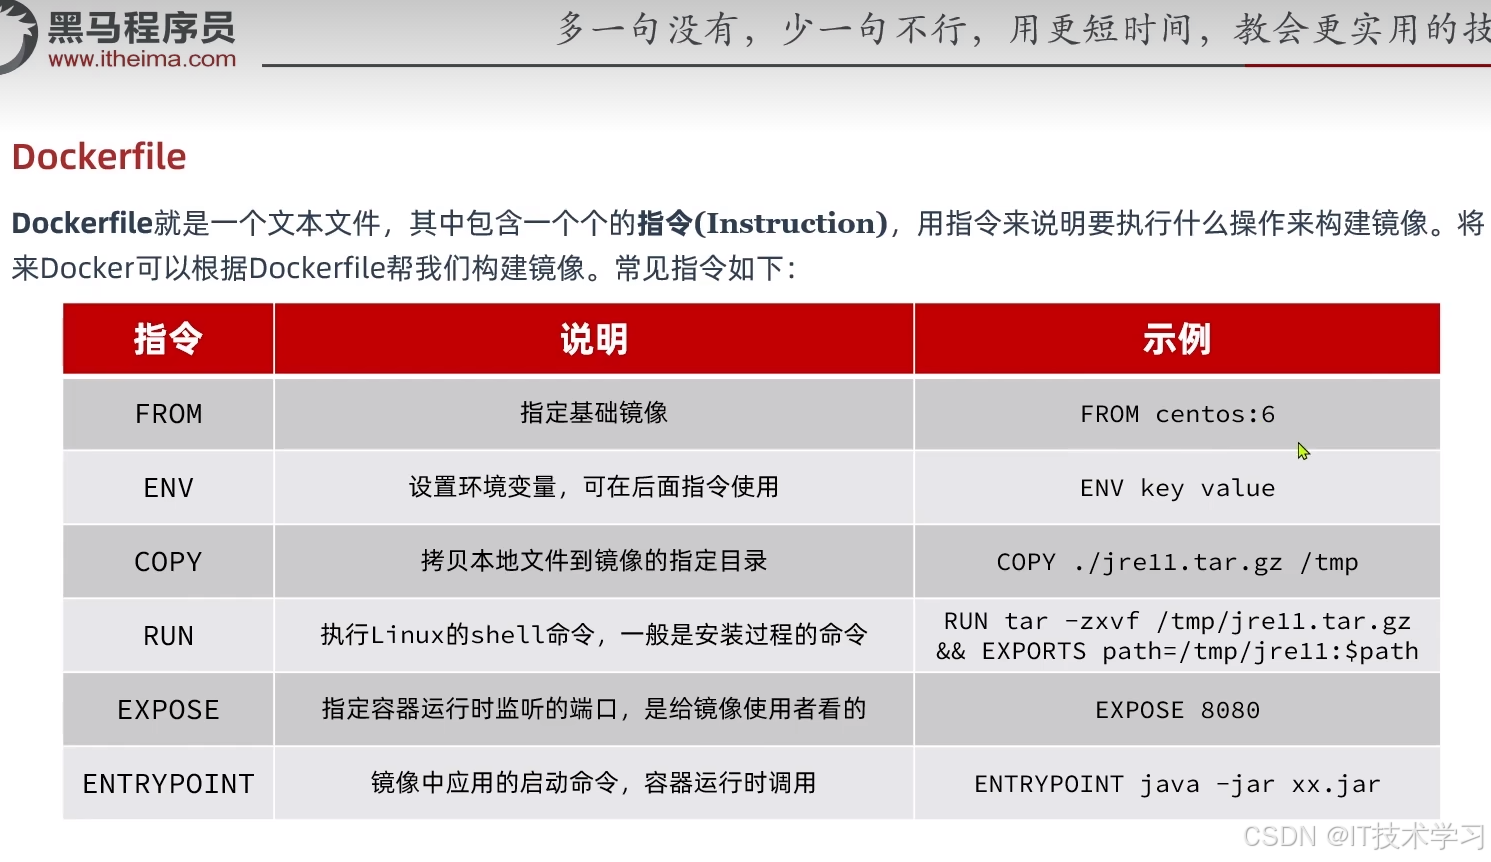
六、Dockerfile
参考:https://www.bilibili.com/video/BV1HP4118797?p=9&vd_source=7a3288a643559c6d0b9d002c931e350a
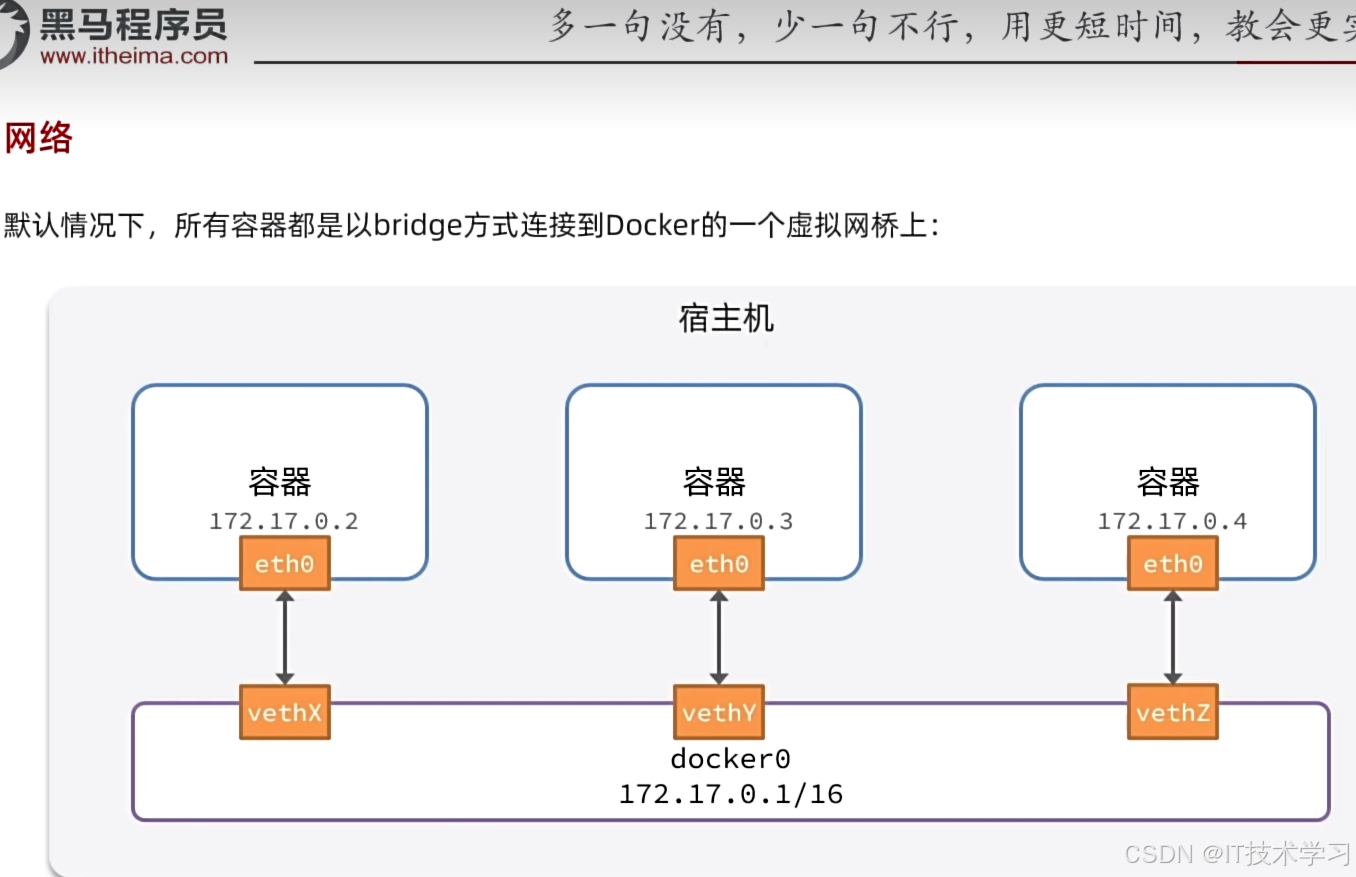
七、网络
八、说明
视频教程参考:https://www.bilibili.com/video/BV1HP4118797
创建镜像略微有点难度,学会了镜像的使用,就可以去github上或其他平台,找一些支持docker的项目进行部署、体验。