一、概述
数据增强是一种通过人工或自动方式对数据进行修改或变换,以增加数据集规模和多样性的技术。在机器学习中,数据增强被广泛应用于解决数据稀缺、数据不平衡、数据噪声等问题,提高模型的泛化能力和鲁棒性。
二、为什么需要数据增强
图像增强在深度学习卷积神经网络 (CNN) 背景下至关重要,因为它有助于满足有效模型训练对大型且多样化数据集的需求。 CNN 需要大量图像才能有效训练,而图像增强提供了一种人为扩展现有数据集的方法。通过缩放、旋转、剪切或裁剪等技术创建图像变化,图像增强有助于生成更全面的可能图像集。这种多样化的数据集使模型能够更好地泛化,减少过度拟合,并在测试或验证过程中对以前未见过的数据进行评估时提高其性能。因此,图像增强对于提高训练数据的质量和数量至关重要,最终导致更强大和更准确的 CNN 模型。
三、什么时候使用数据增强
图像增强可以作为训练模型之前的预处理步骤,也可以在训练过程中实时应用。当用作预处理步骤时,应用增强来增加数据集的大小,特别是在处理需要扩展的小型训练数据集时。这种方法称为离线或预处理增强,涉及生成现有图像的变体以创建更多样化的数据集。应用图像增强时仔细考虑问题领域非常重要,因为某些增强策略可能与特定任务无关或无用。例如,在对不同类型的汽车进行分类时,垂直翻转汽车可能不会为数据集增加价值。因此,图像增强的应用应根据问题领域的具体要求进行定制。
四、数据增强实战
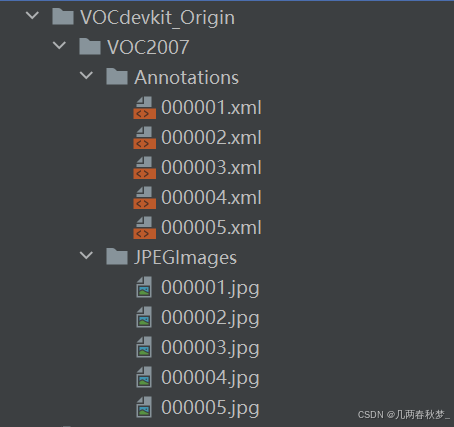
原始图像及标签:
运行数据增强代码:

增强后的数据及标签: 
 关键代码:
关键代码:
数据增强:
python
import cv2
import numpy as np
from PIL import Image, ImageDraw


def rand(a=0, b=1):
    return np.random.rand()*(b-a) + a

def get_random_data(annotation_line, input_shape, jitter=.3, hue=.1, sat=0.7, val=0.4, random=True):
    line    = annotation_line.split()
    #------------------------------#
    #   读取图像并转换成RGB图像
    #------------------------------#
    image   = Image.open(line[0])
    image   = image.convert('RGB')

    #------------------------------#
    #   获得图像的高宽与目标高宽
    #------------------------------#
    iw, ih  = image.size
    h, w    = input_shape
    #------------------------------#
    #   获得预测框
    #------------------------------#
    box     = np.array([np.array(list(map(int,box.split(',')))) for box in line[1:]])

    if not random:
        scale = min(w/iw, h/ih)
        nw = int(iw*scale)
        nh = int(ih*scale)
        dx = (w-nw)//2
        dy = (h-nh)//2

        #---------------------------------#
        #   将图像多余的部分加上灰条
        #---------------------------------#
        image       = image.resize((nw,nh), Image.BICUBIC)
        new_image   = Image.new('RGB', (w,h), (128,128,128))
        new_image.paste(image, (dx, dy))
        image_data  = np.array(new_image, np.float32)

        #---------------------------------#
        #   对真实框进行调整
        #---------------------------------#
        if len(box)>0:
            np.random.shuffle(box)
            box[:, [0,2]] = box[:, [0,2]]*nw/iw + dx
            box[:, [1,3]] = box[:, [1,3]]*nh/ih + dy
            box[:, 0:2][box[:, 0:2]<0] = 0
            box[:, 2][box[:, 2]>w] = w
            box[:, 3][box[:, 3]>h] = h
            box_w = box[:, 2] - box[:, 0]
            box_h = box[:, 3] - box[:, 1]
            box = box[np.logical_and(box_w>1, box_h>1)] # discard invalid box

        return image_data, box

    #------------------------------------------#
    #   对图像进行缩放并且进行长和宽的扭曲
    #------------------------------------------#
    new_ar = iw/ih * rand(1-jitter,1+jitter) / rand(1-jitter,1+jitter)
    scale = rand(.25, 2)
    if new_ar < 1:
        nh = int(scale*h)
        nw = int(nh*new_ar)
    else:
        nw = int(scale*w)
        nh = int(nw/new_ar)
    image = image.resize((nw,nh), Image.BICUBIC)

    #------------------------------------------#
    #   将图像多余的部分加上灰条
    #------------------------------------------#
    dx = int(rand(0, w-nw))
    dy = int(rand(0, h-nh))
    new_image = Image.new('RGB', (w,h), (128,128,128))
    new_image.paste(image, (dx, dy))
    image = new_image

    #------------------------------------------#
    #   翻转图像
    #------------------------------------------#
    flip = rand()<.5
    if flip: image = image.transpose(Image.FLIP_LEFT_RIGHT)

    image_data      = np.array(image, np.uint8)
    #---------------------------------#
    #   对图像进行色域变换
    #   计算色域变换的参数
    #---------------------------------#
    r               = np.random.uniform(-1, 1, 3) * [hue, sat, val] + 1
    #---------------------------------#
    #   将图像转到HSV上
    #---------------------------------#
    hue, sat, val   = cv2.split(cv2.cvtColor(image_data, cv2.COLOR_RGB2HSV))
    dtype           = image_data.dtype
    #---------------------------------#
    #   应用变换
    #---------------------------------#
    x       = np.arange(0, 256, dtype=r.dtype)
    lut_hue = ((x * r[0]) % 180).astype(dtype)
    lut_sat = np.clip(x * r[1], 0, 255).astype(dtype)
    lut_val = np.clip(x * r[2], 0, 255).astype(dtype)

    image_data = cv2.merge((cv2.LUT(hue, lut_hue), cv2.LUT(sat, lut_sat), cv2.LUT(val, lut_val)))
    image_data = cv2.cvtColor(image_data, cv2.COLOR_HSV2RGB)

    #---------------------------------#
    #   对真实框进行调整
    #---------------------------------#
    if len(box)>0:
        np.random.shuffle(box)
        box[:, [0,2]] = box[:, [0,2]]*nw/iw + dx
        box[:, [1,3]] = box[:, [1,3]]*nh/ih + dy
        if flip: box[:, [0,2]] = w - box[:, [2,0]]
        box[:, 0:2][box[:, 0:2]<0] = 0
        box[:, 2][box[:, 2]>w] = w
        box[:, 3][box[:, 3]>h] = h
        box_w = box[:, 2] - box[:, 0]
        box_h = box[:, 3] - box[:, 1]
        box = box[np.logical_and(box_w>1, box_h>1)]

    return image_data, box
调用代码:
python
import os
from random import sample

import numpy as np
from PIL import Image, ImageDraw

from utils.random_data import get_random_data, get_random_data_with_MixUp
from utils.utils import convert_annotation, get_classes

#-----------------------------------------------------------------------------------#
#   Origin_VOCdevkit_path   原始数据集所在的路径
#-----------------------------------------------------------------------------------#
Origin_VOCdevkit_path   = "VOCdevkit_Origin"
#-----------------------------------------------------------------------------------#
#   input_shape             生成的图片大小。
#-----------------------------------------------------------------------------------#
input_shape             = [640, 640]

if __name__ == "__main__":
    Origin_JPEGImages_path  = os.path.join(Origin_VOCdevkit_path, "VOC2007/JPEGImages")
    Origin_Annotations_path = os.path.join(Origin_VOCdevkit_path, "VOC2007/Annotations")

    #---------------------------#
    #   遍历标签并赋值
    #---------------------------#
    xml_names = os.listdir(Origin_Annotations_path)

    #------------------------------#
    #   获取一个图像与标签
    #------------------------------#
    sample_xmls     = sample(xml_names, 1)
    unique_labels   = get_classes(sample_xmls, Origin_Annotations_path)

    jpg_name        = os.path.join(Origin_JPEGImages_path, os.path.splitext(sample_xmls[0])[0] + '.jpg')
    xml_name        = os.path.join(Origin_Annotations_path, sample_xmls[0])

    line = convert_annotation(jpg_name, xml_name, unique_labels)

    #------------------------------#
    #   各自数据增强
    #------------------------------#
    image_data, box_data  = get_random_data(line, input_shape)

    img = Image.fromarray(image_data.astype(np.uint8))
    for j in range(len(box_data)):
        thickness = 3
        left, top, right, bottom  = box_data[j][0:4]
        draw = ImageDraw.Draw(img)
        for i in range(thickness):
            draw.rectangle([left + i, top + i, right - i, bottom - i],outline=(255, 255, 255))
    img.show()