目录
__init__方法:
-
- 初始化类的实例时,创建一个
onnxruntime的推理会话,加载名为yolov8n.onnx的模型,并指定使用 CPU 进行推理。
- 初始化类的实例时,创建一个
pre_process方法:
-
接受一个图像路径作为参数。
-
读取图像并将其从 BGR 颜色空间转换为 RGB 颜色空间。
-
计算图像的最大边长,创建一个全零的新图像,大小为最大边长的正方形,将原始图像复制到新图像中。
-
将新图像调整为
640x640的大小并归一化,然后增加一个维度并交换维度,以满足模型输入的要求。 -
计算图像的缩放比例并返回预处理后的图像和缩放比例。
def pre_process(self,img_path):
img=cv2.imread(img_path)
img=cv2.cvtColor(img,cv2.COLOR_BGR2RGB)
max_edge=max(img.shape)
h,w,c=img.shape
img_back=np.zeros((max_edge,max_edge,3),dtype=np.float32)
img_back[:h,:w]=img
img_scale=cv2.resize(img_back,(640,640))/255
img_scale=np.expand_dims(img_scale,axis=0)#升维度(1,640,640,3)
img_scale=img_scale.transpose(0,3,1,2)#交换维度
scale=max_edge/640
return img_scale,scale
run方法:
-
接受一个图像路径作为参数。
-
调用
pre_process方法对图像进行预处理,得到预处理后的图像和缩放比例。 -
使用预处理后的图像进行模型推理,得到输出结果。
-
将输出结果传递给
filter_boxes方法进行进一步处理。def run(self,img_path):
img_process,scale=self.pre_process(img_path)
input_name=self.session._inputs_meta[0].name
session_out=self.session.run(None,{input_name:img_process})[0][0]#(84,8400)
session_out=session_out.transpose(1,0)#8400,84
self.filter_boxes(session_out,scale)
filter_boxes方法:
-
接受模型输出结果和缩放比例作为参数。
-
遍历模型输出的每一行,提取边界框信息(中心坐标、宽、高)和类别信息。
-
根据边界框信息计算边界框的四个顶点坐标,并找到最大置信度的类别索引和置信度值。
-
如果置信度大于 0.6,则将边界框信息、类别索引和置信度值分别添加到对应的列表中。
-
调用
view_img方法显示图像和检测结果。def filter_boxes(self,session_out,scale):
#cx,cy,w,h,cls(80)
boxes=[]
confs=[]
classes=[]
rows=session_out.shape[0]
for row in range(rows):
infos = session_out[row]
cx,cy,w,h=infos[:4]
x1=(cx-w//2)*scale
y1=(cy-h//2)*scale
x2=(cx+w//2)*scale
y2=(cy+h//2)*scale
cls=infos[4:]
idx=np.argmax(cls)
conf=cls[idx]
if conf>0.6:
confs.append(conf)
boxes.append((x1,y1,x2,y2))
classes.append(idx)
self.view_img(img_path,boxes,classes,confs)
view_img方法:
-
接受图像路径、边界框列表、类别列表和置信度列表作为参数。
-
读取图像。
-
遍历边界框列表,对于每个边界框,绘制在图像上,并打印类别和置信度信息。
-
显示处理后的图像,并等待用户按下任意键退出程序,关闭所有窗口。
def view_img(self,img_path,boxes,classes,confs):
img=cv2.imread(img_path)
size=len(boxes)
for i in range(size):
cls=classes[i]
conf=confs[i]
x1,y1,x2,y2=boxes[i]
x1,y1,x2,y2=int(x1),int(y1),int(x2),int(y2)
cv2.rectangle(img,(x1,y1),(x2,y2),color=(0,0,255),thickness=3,lineType=cv2.LINE_AA)
print(f'cls={cls},conf={conf}')
cv2.imshow('win', img)
cv2.waitKey(0)
cv2.destroyAllWindows()
所有代码如下:
import cv2
import numpy as np
from ultralytics import YOLO
import onnxruntime as ort
# model=YOLO('yolov8n.pt')
# model.export(format='onnx')
class Onnx:
    def __init__(self):
        self.session=ort.InferenceSession('yolov8n.onnx',providers=['CPUExecutionProvider'])
        pass
        #创建一个会话
    def pre_process(self,img_path):
        img=cv2.imread(img_path)
        img=cv2.cvtColor(img,cv2.COLOR_BGR2RGB)
        max_edge=max(img.shape)
        h,w,c=img.shape
        img_back=np.zeros((max_edge,max_edge,3),dtype=np.float32)
        img_back[:h,:w]=img
        img_scale=cv2.resize(img_back,(640,640))/255
        img_scale=np.expand_dims(img_scale,axis=0)#升维度(1,640,640,3)
        img_scale=img_scale.transpose(0,3,1,2)#交换维度
        scale=max_edge/640
        pass
        return img_scale,scale
    def run(self,img_path):
        img_process,scale=self.pre_process(img_path)
        input_name=self.session._inputs_meta[0].name
        session_out=self.session.run(None,{input_name:img_process})[0][0]#(84,8400)
        session_out=session_out.transpose(1,0)#8400,84
        self.filter_boxes(session_out,scale)
    def filter_boxes(self,session_out,scale):
        #cx,cy,w,h,cls(80)
        boxes=[]
        confs=[]
        classes=[]
        rows=session_out.shape[0]
        for row in range(rows):
            infos = session_out[row]
            cx,cy,w,h=infos[:4]
            x1=(cx-w//2)*scale
            y1=(cy-h//2)*scale
            x2=(cx+w//2)*scale
            y2=(cy+h//2)*scale
            cls=infos[4:]
            idx=np.argmax(cls)
            conf=cls[idx]
            if conf>0.8:
                confs.append(conf)
                boxes.append((x1,y1,x2,y2))
                classes.append(idx)
        self.view_img(img_path,boxes,classes,confs)
        pass
    def view_img(self,img_path,boxes,classes,confs):
        img=cv2.imread(img_path)
        size=len(boxes)
        for i in range(size):
            cls=classes[i]
            conf=confs[i]
            x1,y1,x2,y2=boxes[i]
            x1,y1,x2,y2=int(x1),int(y1),int(x2),int(y2)
            cv2.rectangle(img,(x1,y1),(x2,y2),color=(0,0,255),thickness=3,lineType=cv2.LINE_AA)
            print(f'cls={cls},conf={conf}')
        cv2.namedWindow('win',cv2.WINDOW_NORMAL)
        cv2.imshow('win', img)
        cv2.waitKey(0)
        cv2.destroyAllWindows()

if __name__ == '__main__':
    img_path='bus.jpg'
    ort_infer=Onnx()
    # ort_infer.pre_process(img_path)
    ort_infer.run(img_path)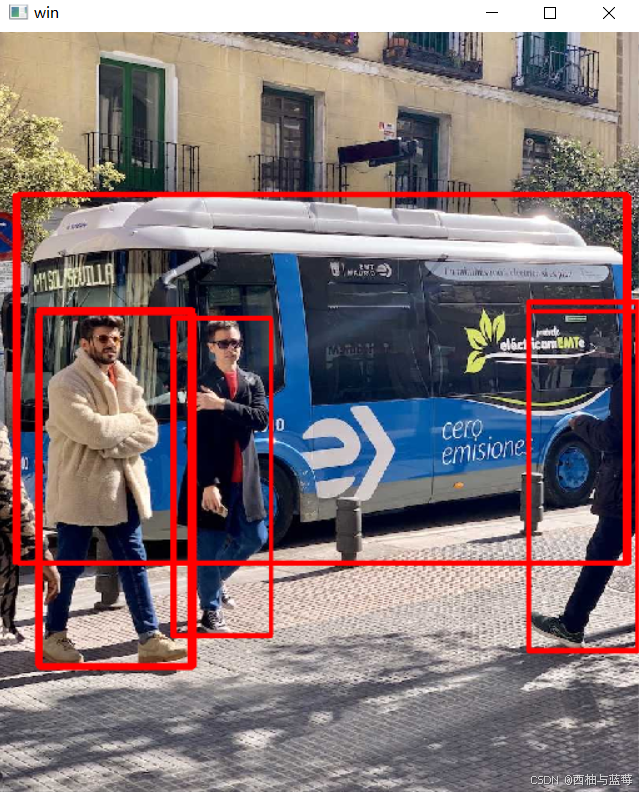
还可以添加一个nms