前端:Vue3学习-2
-
- [1. vue3 新特性-defineOptions](#1. vue3 新特性-defineOptions)
- [2. vue3 新特性-defineModel](#2. vue3 新特性-defineModel)
- [3. vue3 Pinia-状态管理工具](#3. vue3 Pinia-状态管理工具)
- [4. Pinia 持久化插件 -> pinia-plugin-persistedstate](#4. Pinia 持久化插件 -> pinia-plugin-persistedstate)
1. vue3 新特性-defineOptions
如果要定义组件的name或其他自定义的属性,还是得回归原始得方法----再添加一个普通得script标签,这样就会存在两个script标签。
html
<script>
export default{
	name:'组件名'
}
</script>
<script setup>
</script>
<template>
</template>因此在vue3.3中新引入了defineOptions宏,这样上述就可以这样写了。
html
<script setup>
defineOptions({
	name:'组件名'
})
</script>
2. vue3 新特性-defineModel
在vue3中,自定义组件上使用v-model,相当于传递一个modelValue属性,同时触发update:modelValue事件。即
html
<Child v-model="isVisible">
// 相当于
<Child :modelValue="isVisible" @update:modelValue="isVisble=$event">
还需要在子组件中定义props和emits,如下
父组件
html
<script setup>
import sonCom from '@/components/son-com.vue'
import { ref } from 'vue';

const _str = ref('');

</script>
<template>
  <div>
    <sonCom v-model="_str"></sonCom>
    <p>{{ _str }}</p>
  </div>
</template>
子组件
html
<script setup>
const props = defineProps({
    modelValue:String
})

const emits = defineEmits(['update:modelValue'])
const inp = (event)=>{
    emits('update:modelValue',event.target.value)
}
</script>

<template>
    <div>
        <input type="text" :value="modelValue" @input="inp">
    </div>
</template>
运行结果:

现在使用defineModel,子组件代码可以修改如下:
html
<script setup>
import { defineModel } from 'vue'
const modelValue = defineModel()
const inp = (event)=>{
    modelValue.value = event.target.value
}
</script>

<template>
    <div>
        <input type="text" :value="modelValue" @input="inp">
    </div>
</template>需要注意的是,如果modelValue在结构代码中使用时,不需要".value",直接如下:
html
<input type="text" :value="modelValue" @input="e=>modelValue=e.target.value">需要在vite.config.js进行配置,上述才能生效,如下:
js
import { fileURLToPath, URL } from 'node:url'

import { defineConfig } from 'vite'
import vue from '@vitejs/plugin-vue'

// https://vitejs.dev/config/
export default defineConfig({
  plugins: [
    vue({
      script:{
        defineModel:true
      }
    }),
  ],
  resolve: {
    alias: {
      '@': fileURLToPath(new URL('./src', import.meta.url))
    }
  }
})
3. vue3 Pinia-状态管理工具
Pinia时vue的最新状态管理工具,是vuex的替代品。
优势如下:
- 提供了更加简明的api,去掉了mutation;
- 提供符合组合式风格的api
- 去掉了modules的概念,每一个store都是一个独立的模块;
pinia的安装命令为:
js
npm install pinia使用,首先需要在main.js文件中导入pinia,然后创建pinia实例,进行pinia注册。
js
import { createApp } from 'vue'
import App from './App.vue'

import { createPinia } from 'pinia'
// 导包
const pinia = createPinia()
// 创建pinia实例

createApp(App).use(pinia).mount('#app')
新建store js文件,用于初始化和操作数据。
js
import { defineStore } from "pinia"
import { ref } from "vue"
// counter作为store的唯一标识
export const useStore = defineStore('counter',()=>{
const count = ref(0)
// 数据state count
const increment = ()=>{
count.value ++
}
return{
count, increment
}
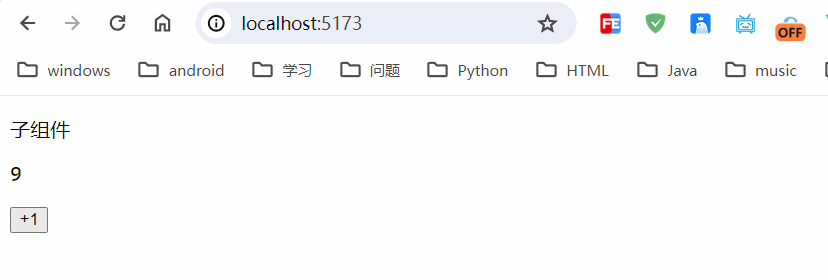
})使用上述数据,直接在对应组件中导入,然后使用即可,如下:
html
<script setup>
import { useStore } from '@/store/counter'

const counter = useStore()
</script>

<template>
    <div>
        <p>子组件</p>
        <p>{{ counter.count }}</p>
        <button @click="counter.increment">+1</button>
    </div>
</template>
使用storeToRefs对store进行解构
由于store 是一个用reactive 包裹的对象,reactive包裹的对象只有当为对象时,才是响应式的,因此如果直接进行解构数据,那么所结构出的数据不具有响应式 ,此时解构数据,需要用到storeToRefs,方法直接解构即可。
html
<script setup>
import { useStore } from '@/store/counter'
import {storeToRefs} from 'pinia'
const counter = useStore()
const { count } = storeToRefs(counter)
const { increment } = counter
</script>

<template>
    <div>
        <p>子组件</p>
        <p>{{ count }}</p>
        <button @click="increment">+1</button>
    </div>
</template>
4. Pinia 持久化插件 -> pinia-plugin-persistedstate
安装命令
js
npm install pinia-plugin-persistedstate或
js
yarn add pinia-plugin-persistedstate在mian.js文件添加插件配置
js
import { createApp } from 'vue'
import App from './App.vue'

import { createPinia } from 'pinia'
// 导包
import persist from 'pinia-plugin-persistedstate'

const pinia = createPinia()
// 创建pinia实例
pinia.use(persist)
createApp(App).use(pinia).mount('#app')
在需要持久化的模块添加如下配置即可
js
import { defineStore } from "pinia"
import { ref } from "vue"
// counter作为store的唯一标识
export const useStore = defineStore('counter',()=>{
    const count = ref(0)
    // 数据state count
    const increment = ()=>{
        count.value ++
    }

    return{
        count, increment
        }
    },
    {
        persist: true
    // 开启当前模块的持久化
    }
)
运行结果:
只是在本地浏览器进行存储,具体存储在localstorage里边。
