1. 功能描述工控人加入PLC工业自动化精英社群
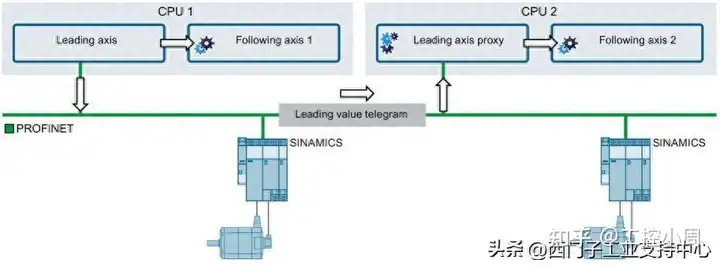
在一些实际应用中,会需要很多轴进行同步运行,如印刷机、纸尿裤生产线等。由于一个 PLC 的运动控制资源有限,控制轴的数量也是有限的,就会需要多个 PLC 间协调实现轴工艺对象的跨CPU的同步运行。从博途V16开始,S7-1500T PLC固件版本2.8 可以实现不同CPU上的轴 工艺对象之间的同步操作(齿轮同步或凸轮同步)。所有跟随轴均同时获得相同的引导值。
图1显示了基于一个应用案例的分布式同步结构,两个CPU上分别有两个跟随轴。
本文以S7-1517TF及 S7-1511T PLC为例,介绍了项目配置的主要步骤,为有需求的工程师提供参考。
2.主要配置步骤
1. 步骤1 - 通信组态
a.首先确保所有的设备组态到同一PROFINET网络中,一个PLC设置为同步主,其他设置为同步从。
S7-1517TF CPU为主:
图2配置S7-1517TF为同步主站

S7-1511TCPU为从:
图3 配置S7-1511T 为同步从站

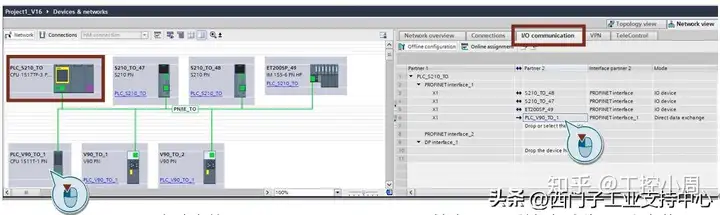
b.配置数据交换区,首先选择引导轴所在的PLC,本文使用S7-1517TF,选中S7-1517TF之后,在"IO communication"中拖拽接收PLC"S7-1511T"到Partner 2 列的"Drop or select the device here"位置中。
图4 通过拖拽的方式建立直接数据交换
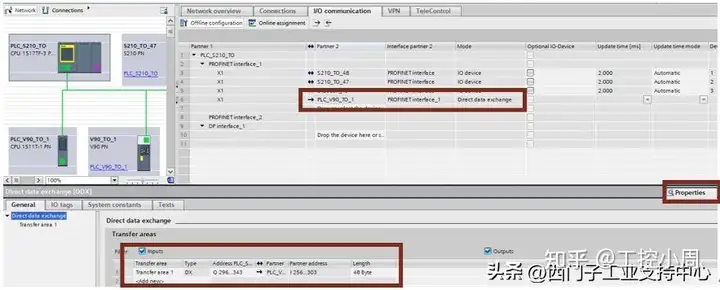
c.在建立的"Direct data exchange"属性中,配置数据长度为48个字节。
图5 配置48个字节的发送数据
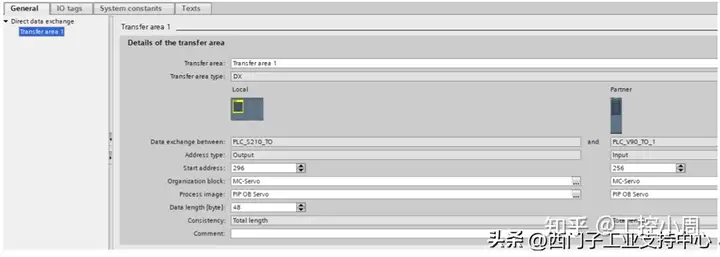
d.配置IO区属性,在"Organization block"属性中选择 "MC-Servo":
图6 配置直接交换数据
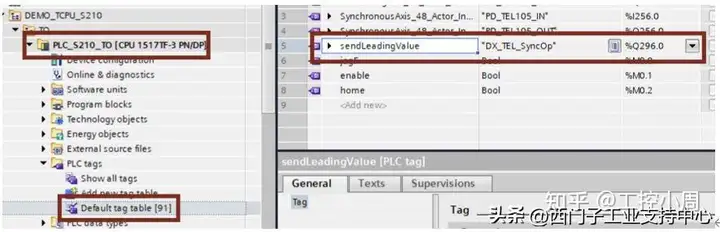
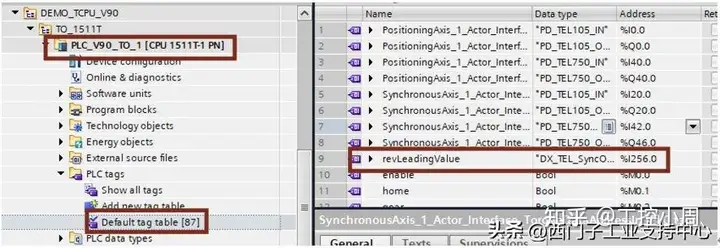
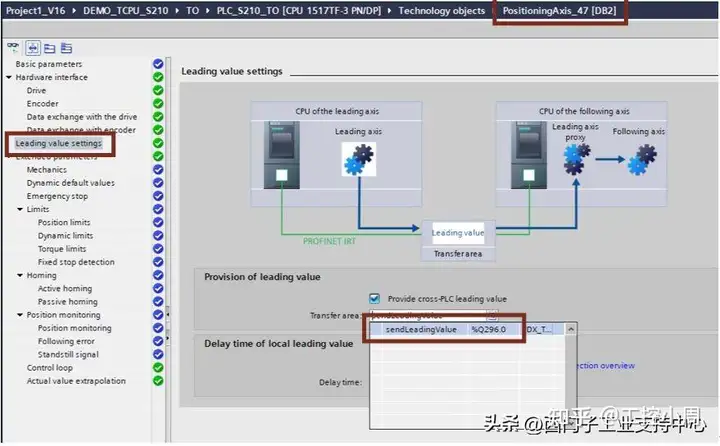
2. 步骤2 - 准备变量和工艺对象
a.创建引导轴的数据变量,数据类型为"DX_TEL_SyncOp",地址为创建的输出区的首地址:
图7 在S7-1517TF中建立变量
b.创建跟随轴的数据变量,数据类型为"DX_TEL_SyncOp",地址为创建的输入区的首地址:
图8在S7-1511T中建立变量
c. 关联引导轴数据,在作为主轴的属性中选中输出变量:
图9在S7-1517TF中关联发送变量
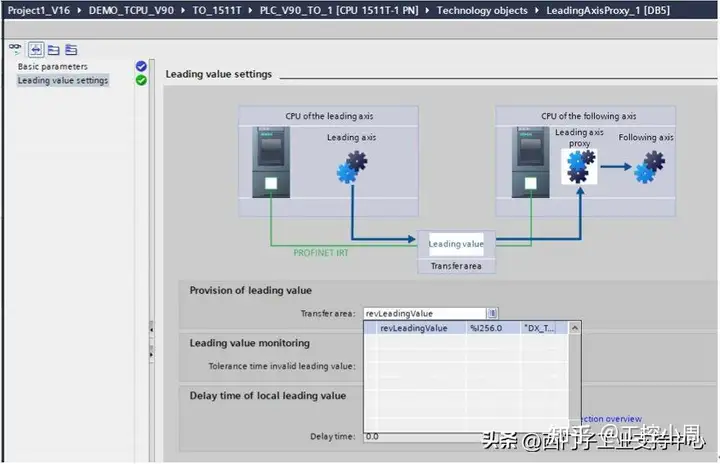
d.创建引导轴代理工艺对象,关联引导轴数据,在属性中选中输入变量:
图10 在S7-1511T中建立引导轴代理
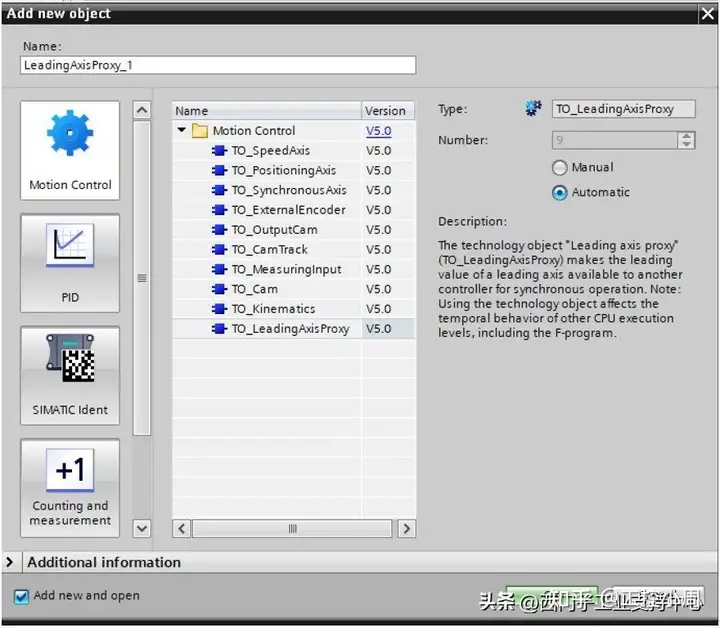
图11在S7-1511T中关联接收变量
3. 步骤3 - 编写程序:
图12在S7-1511T中编写测试程序

4. 步骤4 - 测试结果:
通过使用Project trace功能,可以监控两个工艺对象的同步效果。
图13 测试结果

欢迎访**工控人加入PLC工业自动化精英社群**