原文链接
上一篇【Next.js 入门教程系列】06-上传文件
身份验证
本篇包括以下内容:
- Setting up Next Auth
- Configuring the Google Provider
- Authentication sessions
- Protecting routes
- Database adapters
- Configuring the Credentials Provider
Setting up Next Auth
使用 npm install next-auth 安装 Next-Auth(Auth.js)。安装好后首先去 .env 中配置环境变量
DATABASE_URL="mysql://root:@localhost:3306/nextapp"
NEXT_PUBLIC_CLOUDINARY_CLOUD_NAME="dzwywfjst"
# 添加下面两行
NEXTAUTH_URL=http:localhost:5050 # 你的项目位置
NEXTAUTH_SECRET=5xNi+cY1LdL1YnBWD9cUi4A34tTZJfUjKTlMCMjFcL0= # 随机数,可以使用 openssl random -base64 32 生成
设置完成后,在 api 文件夹下添加 auth/...nextauth/route.ts,并添加以下内容,为接下来做准备
api\auth...nextauth\route.ts
import NextAuth from "next-auth/next";

const handler = NextAuth({});

export { handler as GET, handler as POST };
设置 Provider
在Next Auth Provider可以看到 Next-Auth 支持多个 Authenticator Provider,包括 Google,Github,Facebook 等
创建项目
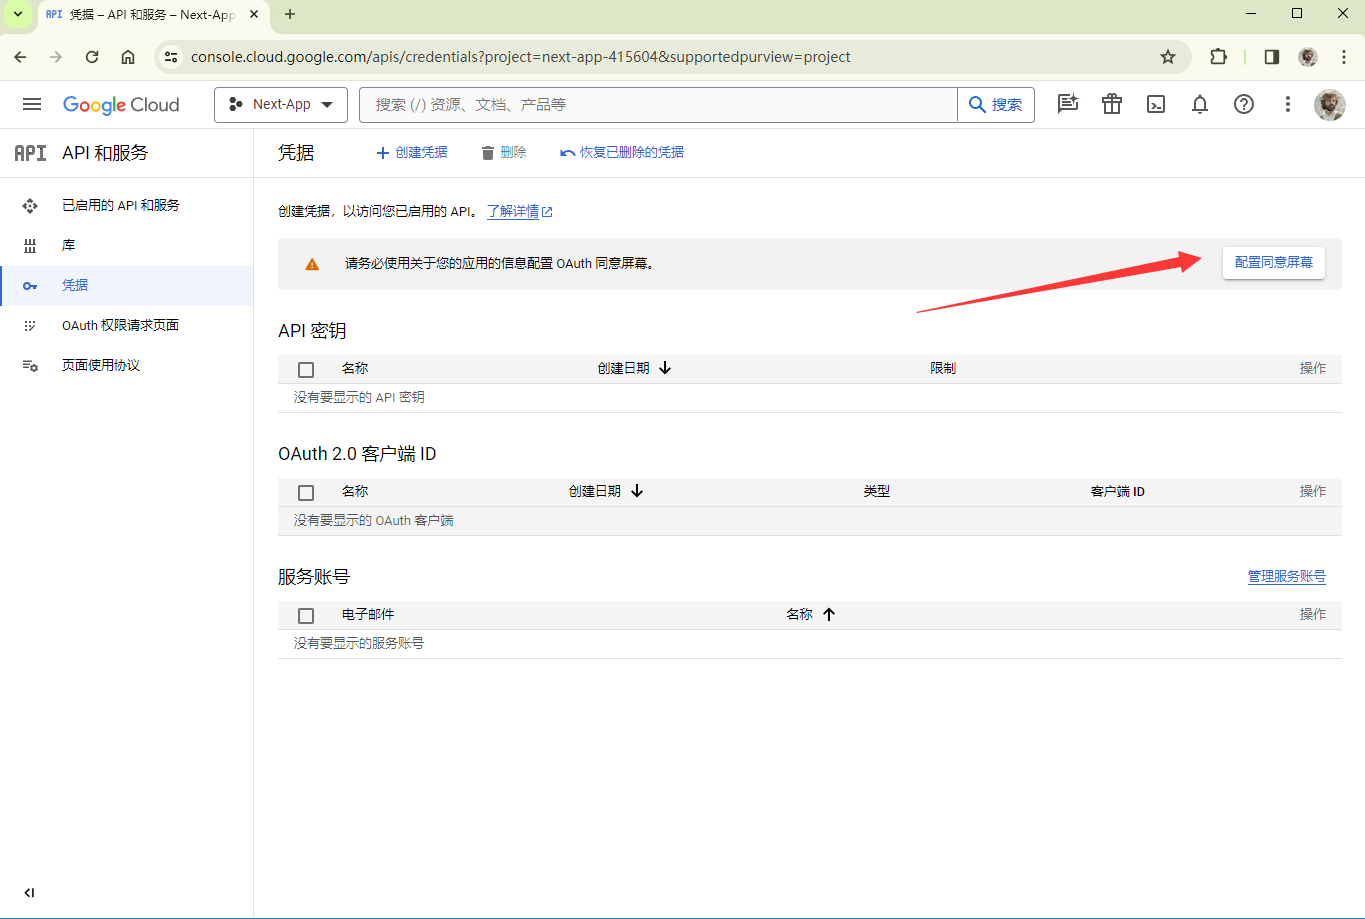
此处以 Google 为例,首先进入 Google Credentials 页面新建一个 Project

设置项目名称后点击创建即可

如下图,点击配置 Consent Screen
首先设置为供外部使用
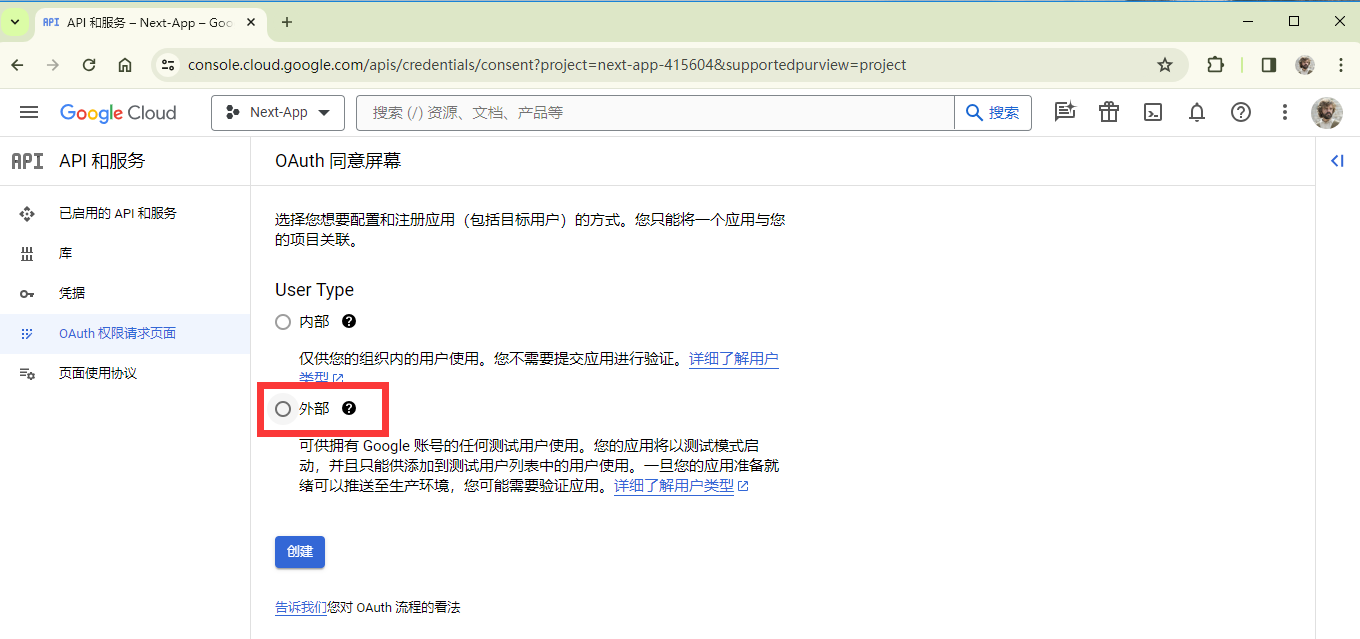
在弹出页面填写三个必须字段 应用名称,用户支持电子邮件,以及最下面的开发者联系信息,其他字段都可选填,比如图片 logo 之类的
点击页面最下面的保存并继续,设置应用权限,一般只添加 email 和 profile 即可。再点击保存并继续,添加测试用户,把自己的账户添加即可。
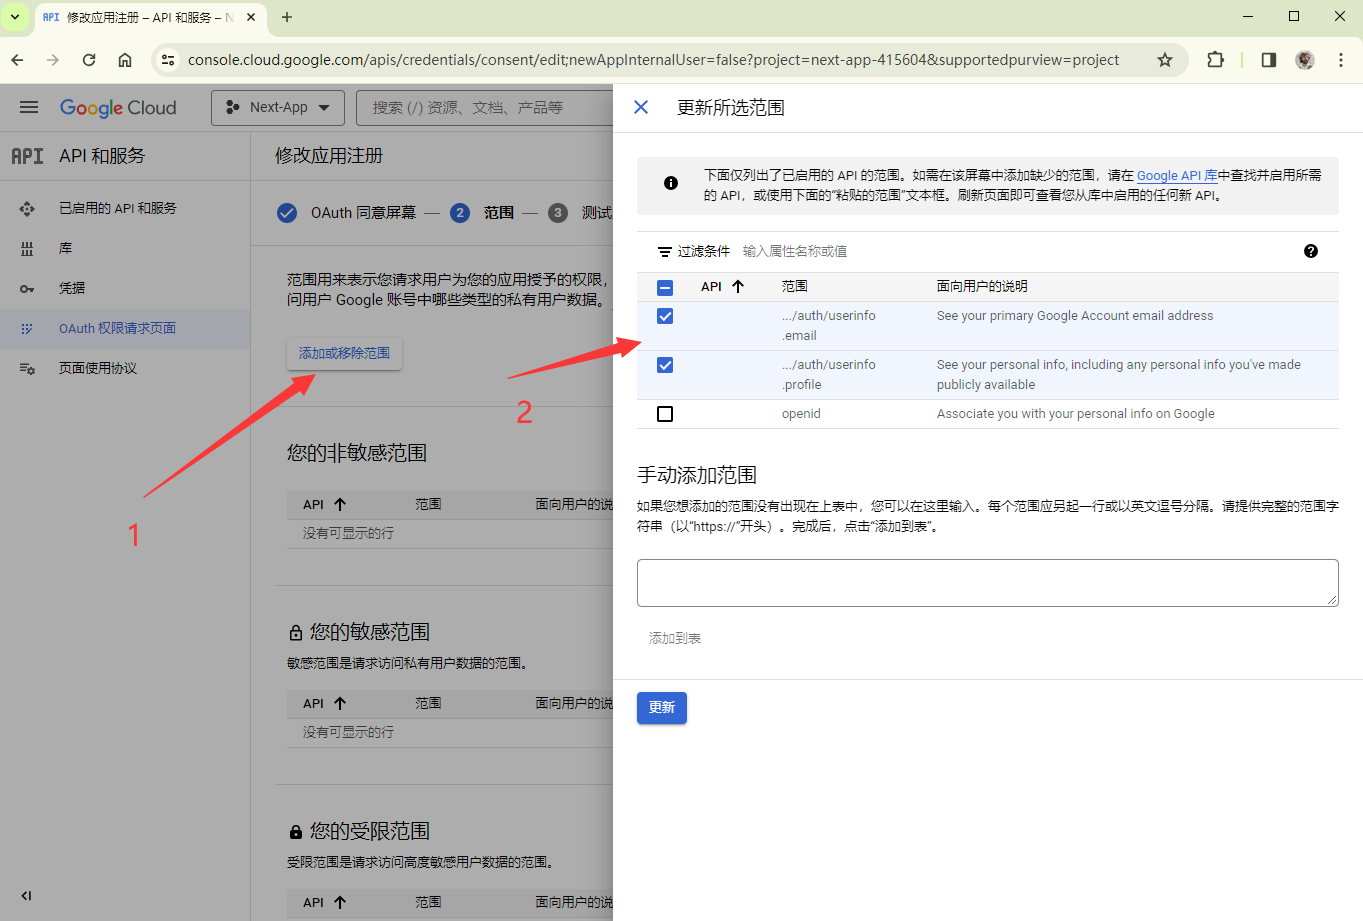
最后保存返回信息中心即可
创建 OAuth
在 凭据 页面点击创建 OAuth 客户端 ID
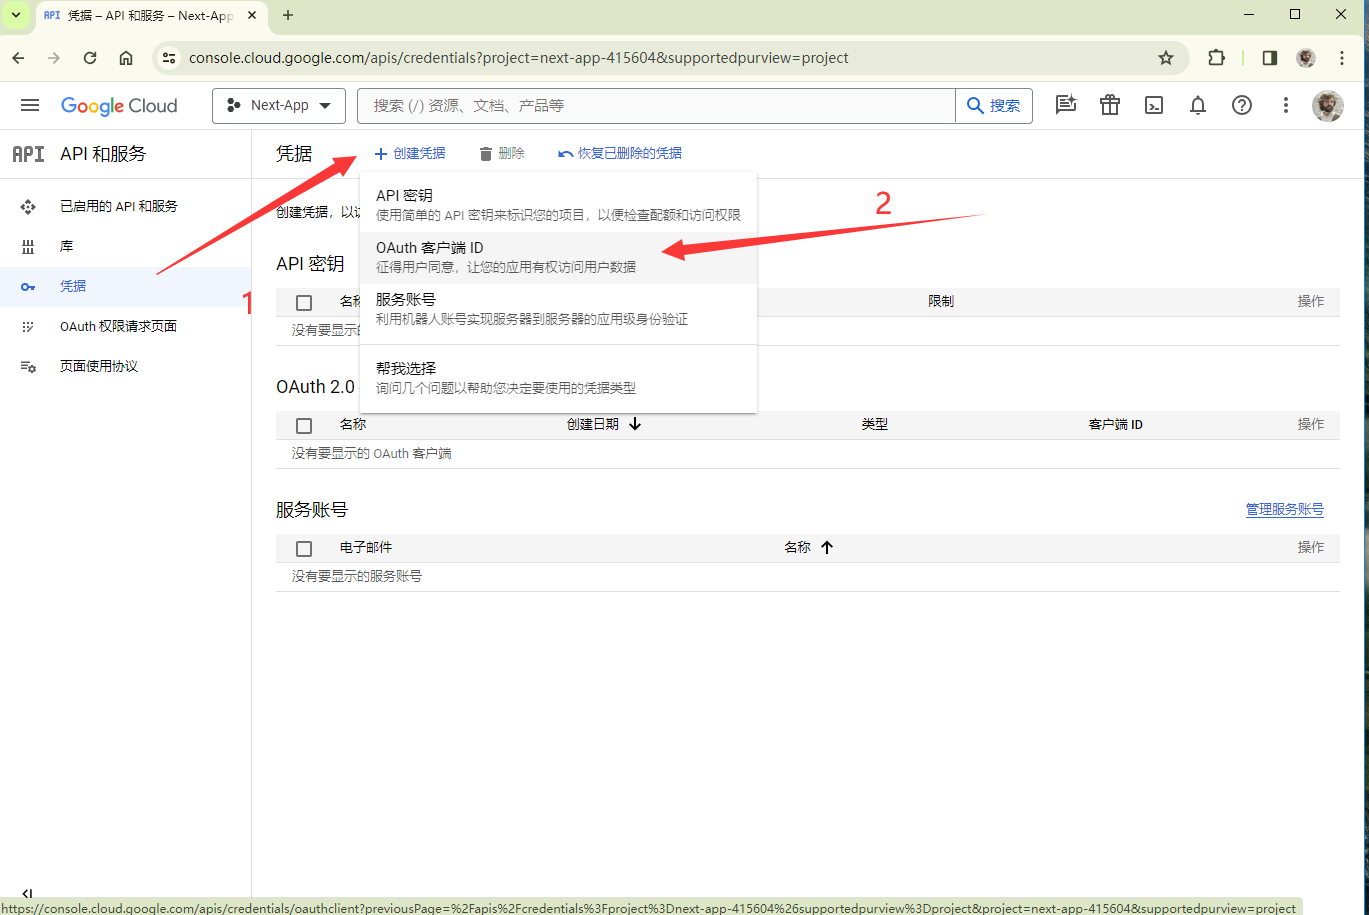
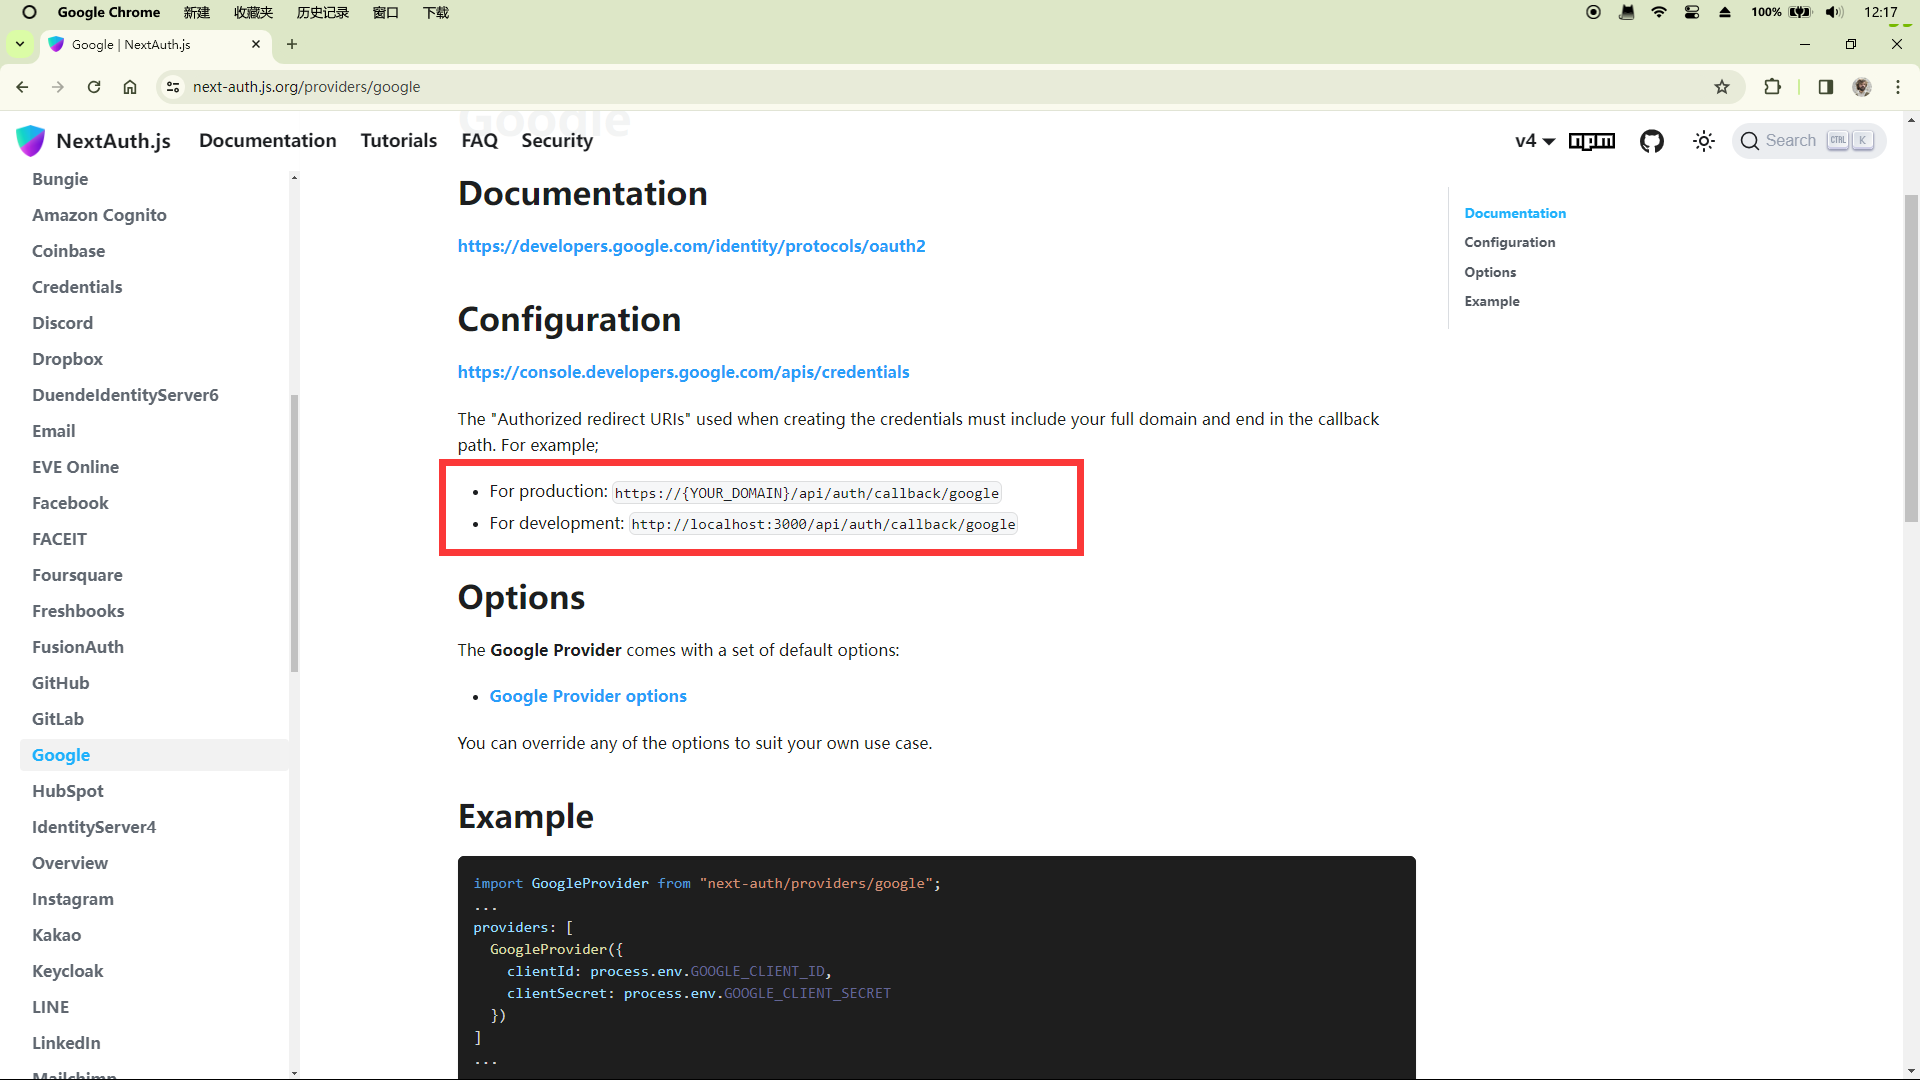
设置 OAuth,首先设置为 Web 应用,设置应用名,下方 JavaScript 来源设置为部署的端口(开发环境),再下方设置重定向的 URI,在Next Auth Google页面有写
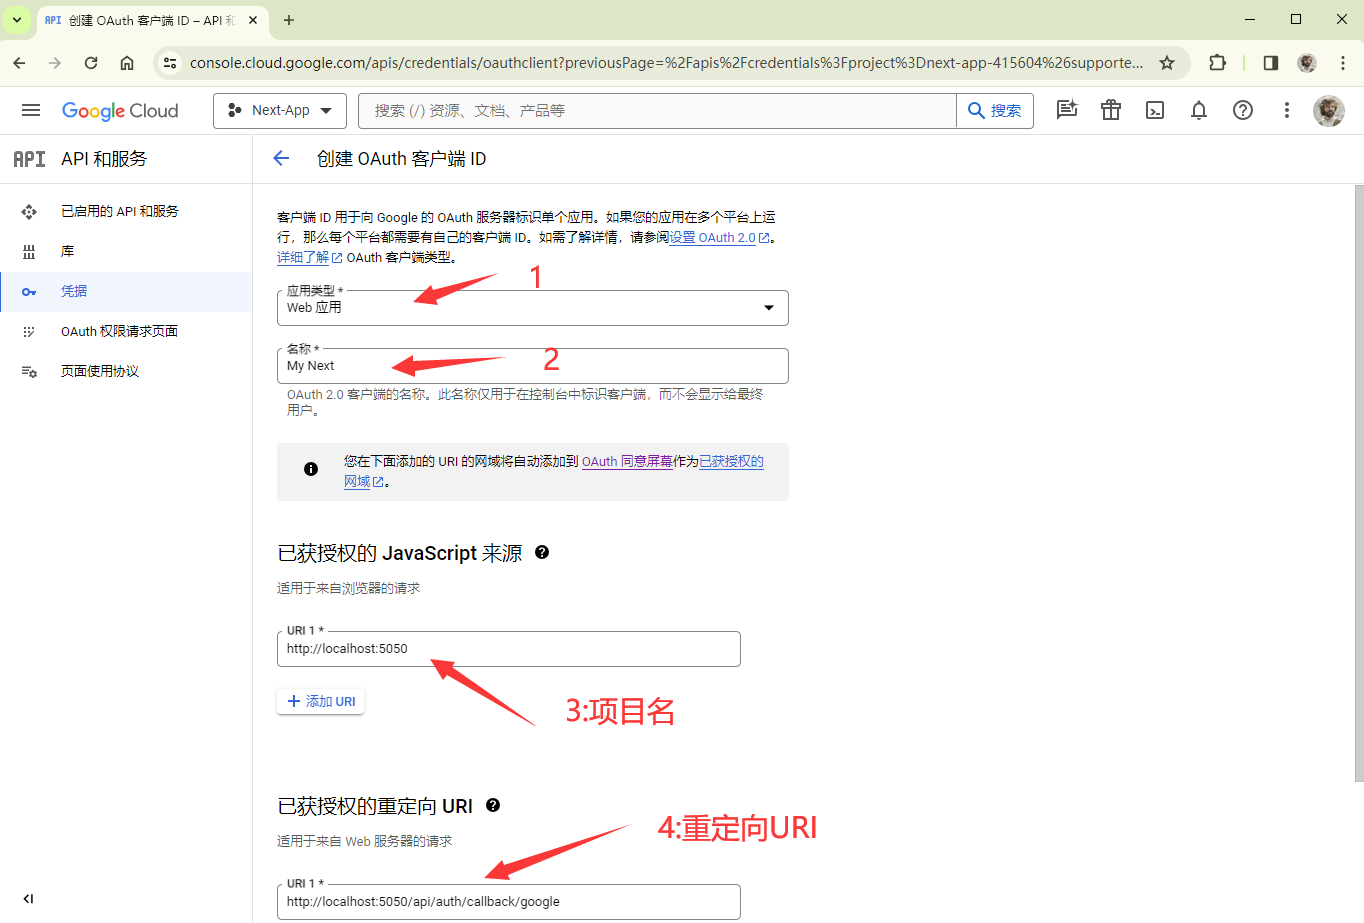
点击创建即可
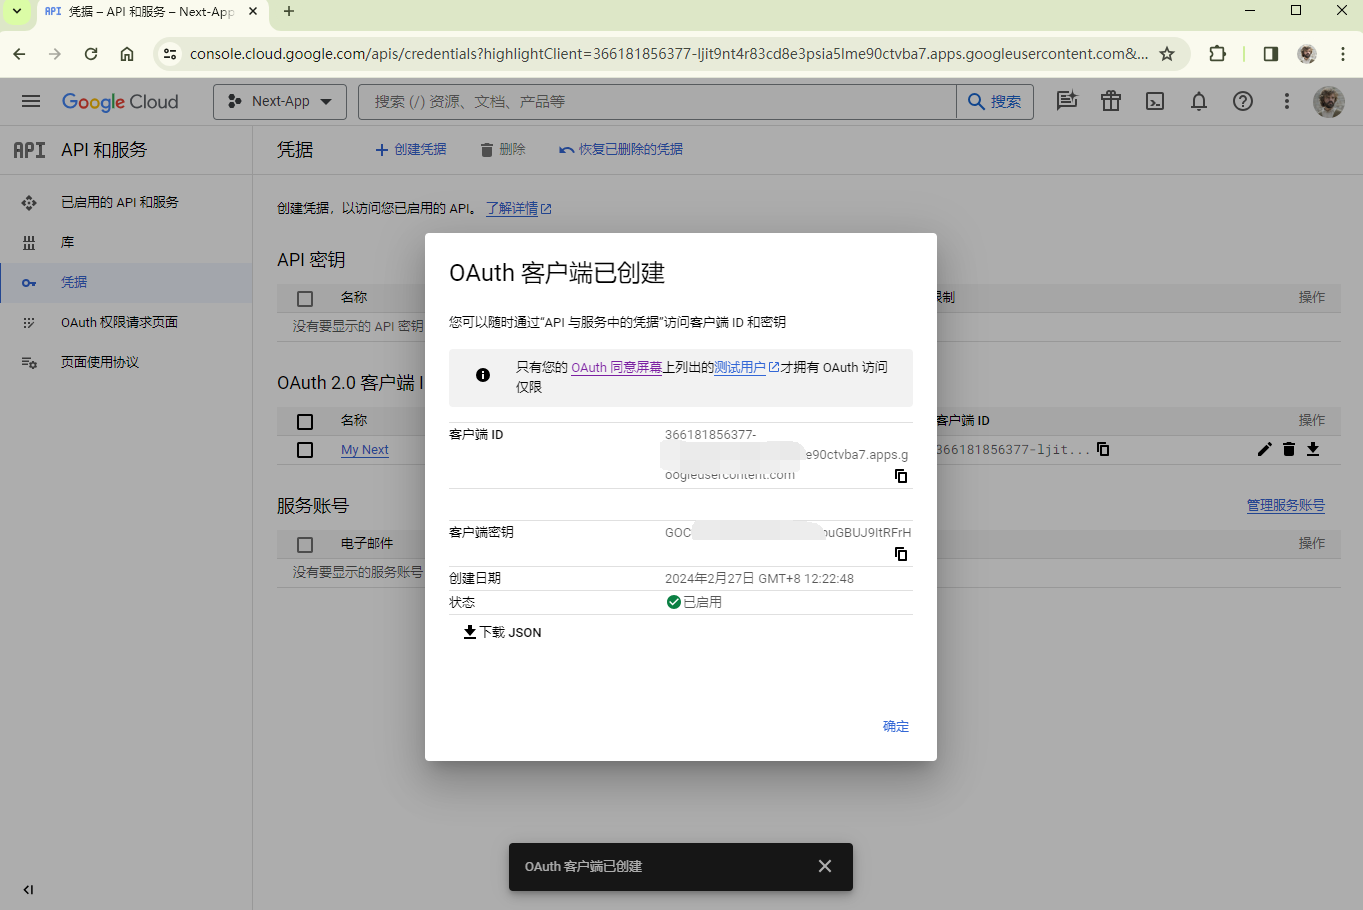
复制好客户端 id 和密钥备用
调用
回到 .env 中添加 GOOGLE_CLIENT_ID 和 GOOGLE_CLIENT_SECRET
DATABASE_URL="mysql://root:@localhost:3306/nextapp"
NEXT_PUBLIC_CLOUDINARY_CLOUD_NAME="dzwywfjst"
# 添加下面两行
NEXTAUTH_URL=http:localhost:5050 # 你的项目位置
NEXTAUTH_SECRET=5xNi+cY1LdL1YnBWD9cUi4A34tTZJfUjKTlMCMjFcL0= # 随机数,可以使用 openssl random -base64 32 生成
# 刚刚的客户端id 和 密钥
GOOGLE_CLIENT_ID=479267153395-gpqe25rbf62p0aj4h7icnfd01qt0p3qo.apps.googleusercontent.com
GOOGLE_CLIENT_SECRET=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
在 auth/...nextauth/route.ts,并添加以下内容(直接复制即可)
api\auth...nextauth\route.ts
import NextAuth from "next-auth";
import GoogleProvider from "next-auth/providers/google";

const handler = NextAuth({
  providers: [
    GoogleProvider({
      clientId: process.env.GOOGLE_CLIENT_ID!,
      clientSecret: process.env.GOOGLE_CLIENT_SECRET!,
    }),
  ],
});

export { handler as GET, handler as POST };
在 Navbar.tsx 中添加一个 Link 到 login
NavBar.tsx
import Link from "next/link";
import React from "react";
const NavBar = () => {
return (
<div className="flex bg-slate-200 p-5 space-x-3">
<Link href="/" className="mr-5">
Next.js
</Link>
<Link href="/users">Users</Link>
{/* Add this Link */}
<Link href="/api/auth/signin">Login</Link>
</div>
);
};
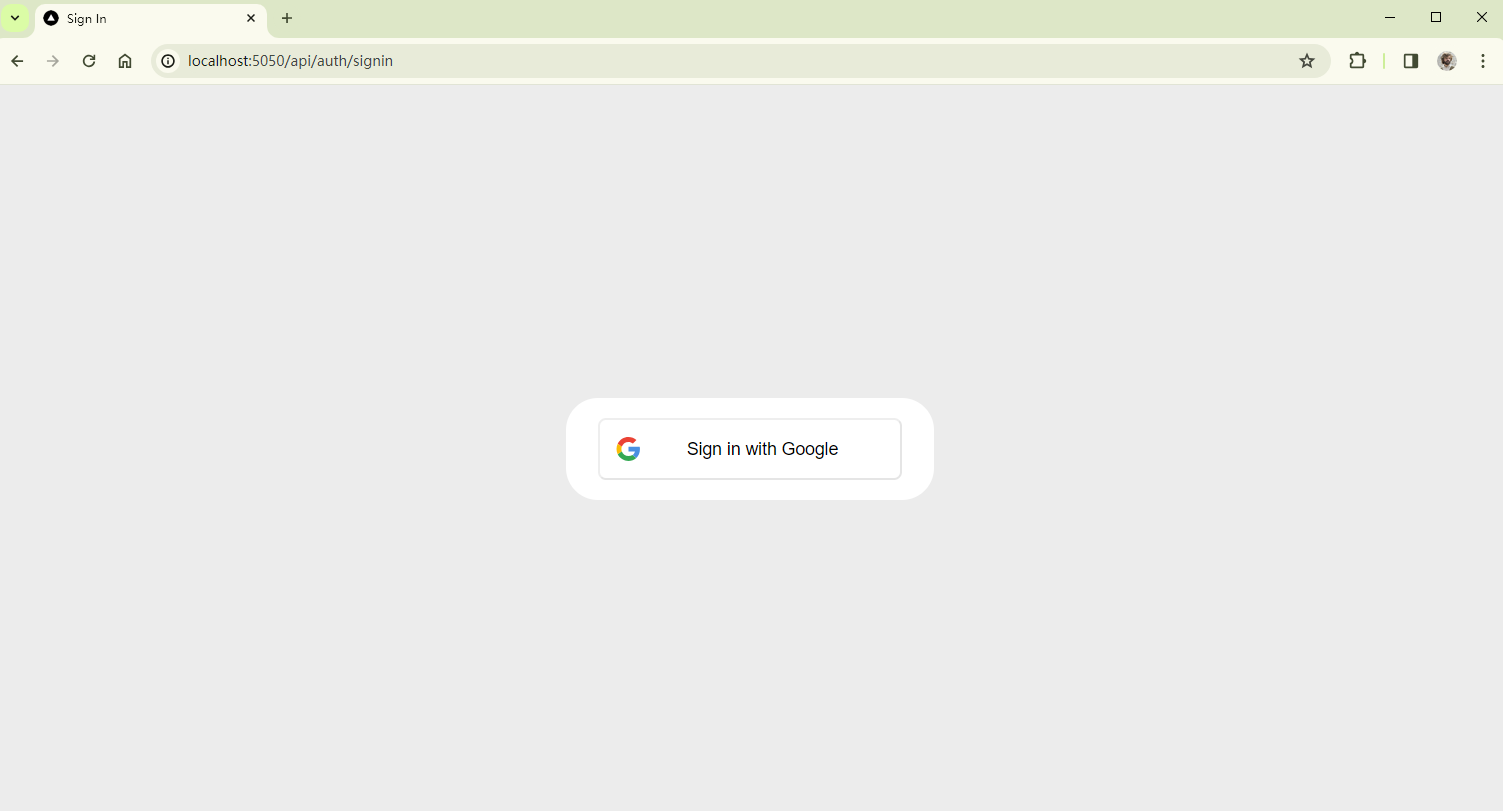
export default NavBar;回到浏览器,点击 login,即可看到如下页面
由于某些魔法原因,next-auth 使用 google 一直在报 ERROR,笔者寻找多方也未解决,尝试使用 Github Provider 可行,故向读者推荐使用 Github Provider,并在下面给出演示
[next-auth][error][SIGNIN_OAUTH_ERROR]
https://next-auth.js.org/errors#signin_oauth_error outgoing request timed out after 3500ms {
  error: {
    message: 'outgoing request timed out after 3500ms',
    stack: 'RPError: outgoing request timed out after 3500ms\n' +
      .......
  name: 'RPError'
  },
  providerId: 'google',
  message: 'outgoing request timed out after 3500ms'
}
Github Provider
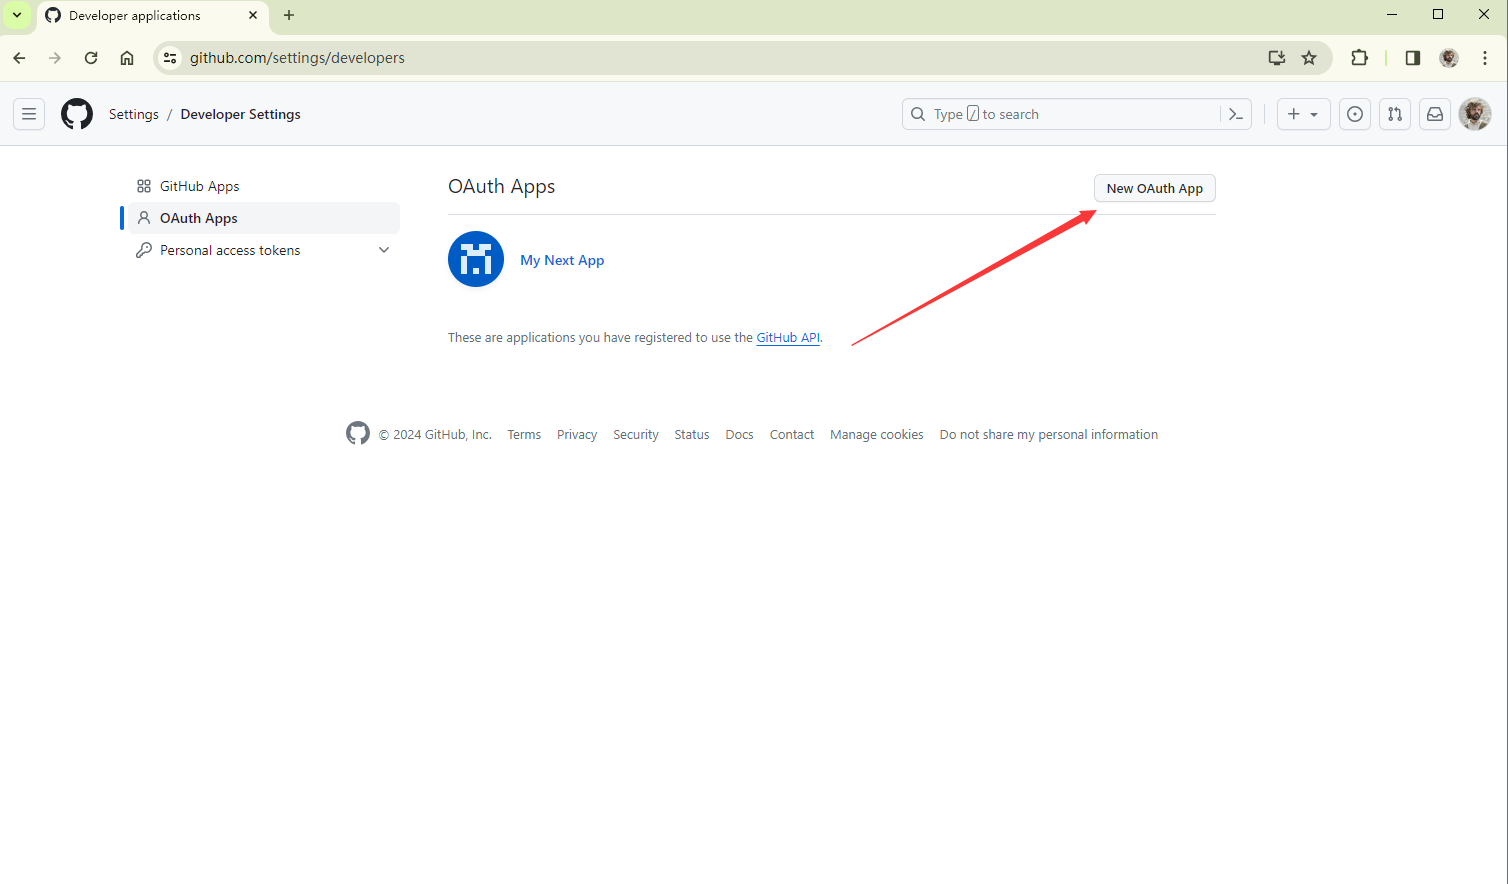
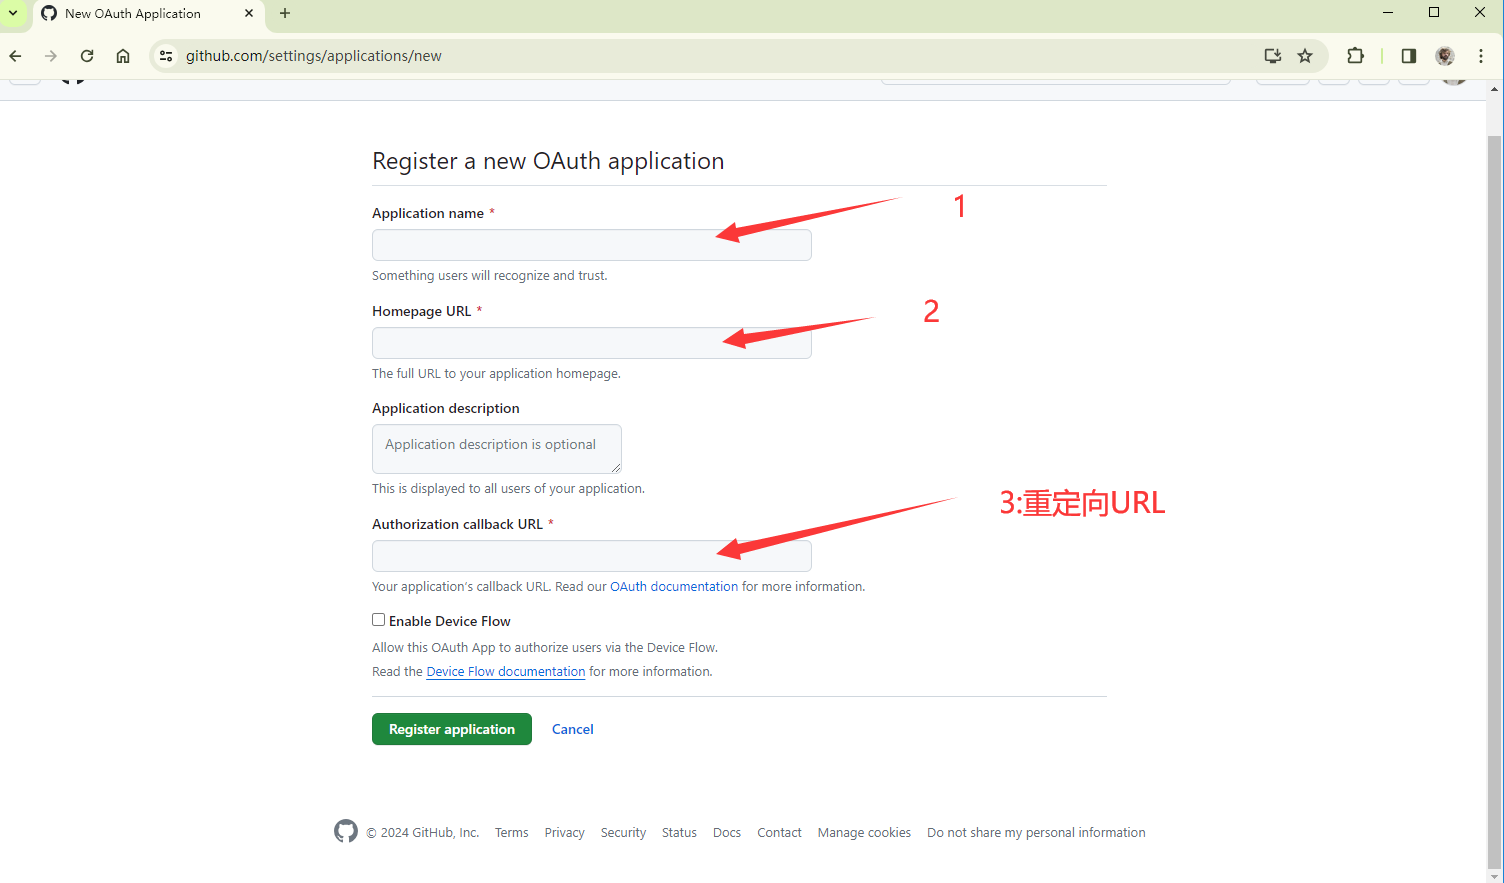
进入Github OAuth App页面,新建 OAuth App
设置内容和 Google 内容差不多,Callback url 最后换成 Github 即可 http://localhost:5050/api/auth/callback/github
点击创建凭证
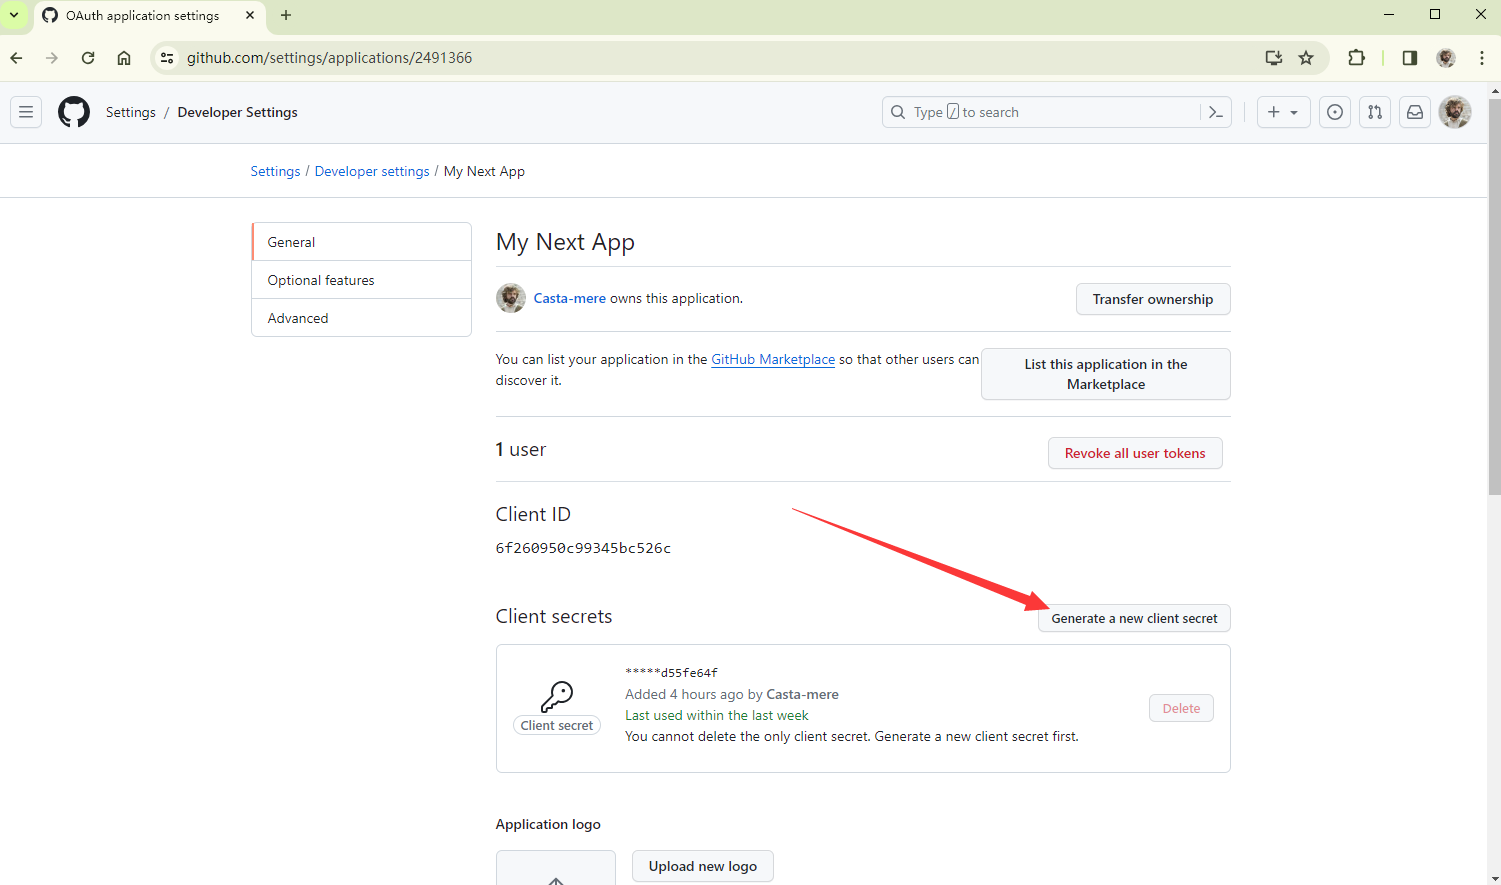
IMPORTANT
注意,创建好后仅能在该页面复制一次,以后再也无法复制
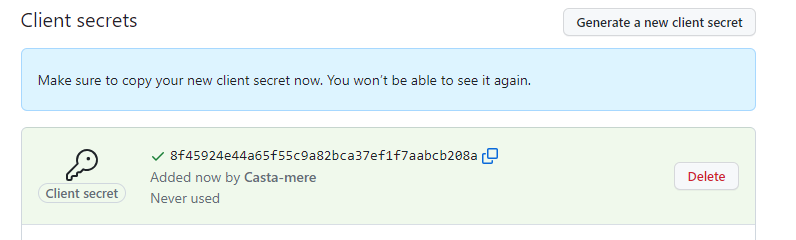
回到 .env 中添加 GITHUB_CLIENT_ID 和 GITHUB_CLIENT_SECRET
DATABASE_URL="mysql://root:@localhost:3306/nextapp"
NEXT_PUBLIC_CLOUDINARY_CLOUD_NAME="dzwywfjst"
# 添加下面两行
NEXTAUTH_URL=http:localhost:5050 # 你的项目位置
NEXTAUTH_SECRET=5xNi+cY1LdL1YnBWD9cUi4A34tTZJfUjKTlMCMjFcL0= # 随机数,可以使用 openssl random -base64 32 生成
# 刚刚的客户端id 和 密钥
GITHUB_CLIENT_ID=6f1433456dsfa526c
GITHUB_CLIENT_SECRET=ec8055183a9adfefsf0b305c282be6d55fe64f
修改 auth/...nextauth/route.ts 中的 provider 为 Github
import NextAuth from "next-auth";
import Github from "next-auth/providers/github";

const handler = NextAuth({
  providers: [
    Github({
      clientId: process.env.GITHUB_CLIENT_ID!,
      clientSecret: process.env.GITHUB_CLIENT_SECRET!,
    }),
  ],
});

export { handler as GET, handler as POST };
保存,进入 Login 界面即可正常使用 Github 登录
Session
Check Session
在浏览器中打开开发者工具,进入应用,选择 cookie,即可看到这里有一条 next-auth.session-token ,其本质为一个 json web token,为了查看这个 cookie,我们可以在 /api/auth 下新建 token/route.ts,并添加以下内容
import { getToken } from "next-auth/jwt";
import { NextRequest, NextResponse } from "next/server";

export async function GET(request: NextRequest) {
  const token = await getToken({ req: request });
  return NextResponse.json(token);
}
去浏览器访问 http://localhost:5050/api/auth/token 即可看到如下内容
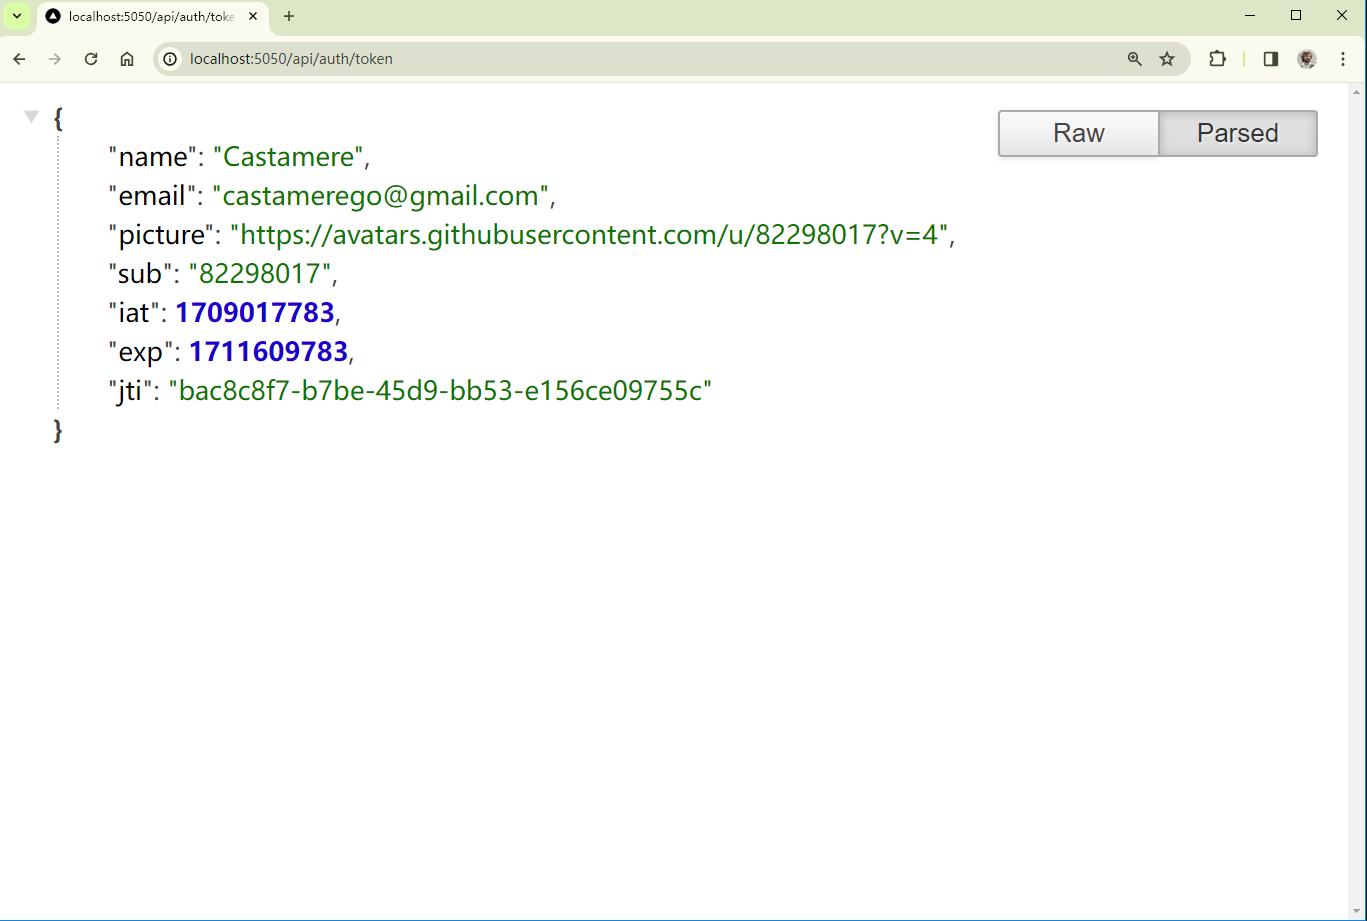
其包含如用户名,邮箱,头像,过期时间等信息
Accessing Session from client
在用户端获取 session 信息需要用到 SessionProvider。我们首先创建一个新 component /auth/AuthProvider.tsx。将所有 children 用 SessionProvider 包起来
"use client";
import React, { ReactNode } from "react";
import { SessionProvider } from "next-auth/react";

const AuthProvider = ({ children }: { children: ReactNode }) => {
  return (
    <>
      <SessionProvider>{children}</SessionProvider>
    </>
  );
};
export default AuthProvider;
然后回到根文件夹的 layout.tsx 中
  import "./globals.css";
  import type { Metadata } from "next";
  import { Inter } from "next/font/google";
  import NavBar from "./NavBar";
// 导入刚刚的 AuthProvider
+ import AuthProvider from "./auth/Provider";

  const inter = Inter({ subsets: ["latin"] });

  export const metadata: Metadata = {
    title: "Create Next App",
    description: "Generated by create next app",
  };

  export default function RootLayout({
    children,
  }: {
    children: React.ReactNode;
  }) {
    return (
      <html lang="en" data-theme="winter">
        <body className={inter.className}>
{/*将 body 里的内容都用 AuthProvider 包起来*/}
+         <AuthProvider>
            <NavBar />
            <main className="p-5">{children}</main>
+         </AuthProvider>
        </body>
      </html>
    );
  }
之后到 NavBar 组件里获取 Session 内容
"use client";
// improt useSession
+ import { useSession } from "next-auth/react";
import Link from "next/link";
import React from "react";
const NavBar = () => {
// 使用 useSession() 来获取 Session 中的数据
+ const { status, data: session } = useSession();
return (
<div className="flex bg-slate-200 p-5 space-x-3">
<Link href="/" className="mr-5">
Next.js
</Link>
<Link href="/users">Users</Link>
{/*根据status的不同状态来渲染 "登录" 或者 "用户" 或 "加载中"*/}
+ {status === "loading" && <div>Loading...</div>}
+ {status === "authenticated" && <div>{session.user!.name}</div>}
+ {status === "unauthenticated" && (
+ <Link href="/api/auth/signin">Login</Link>
+ )}
</div>
);
};
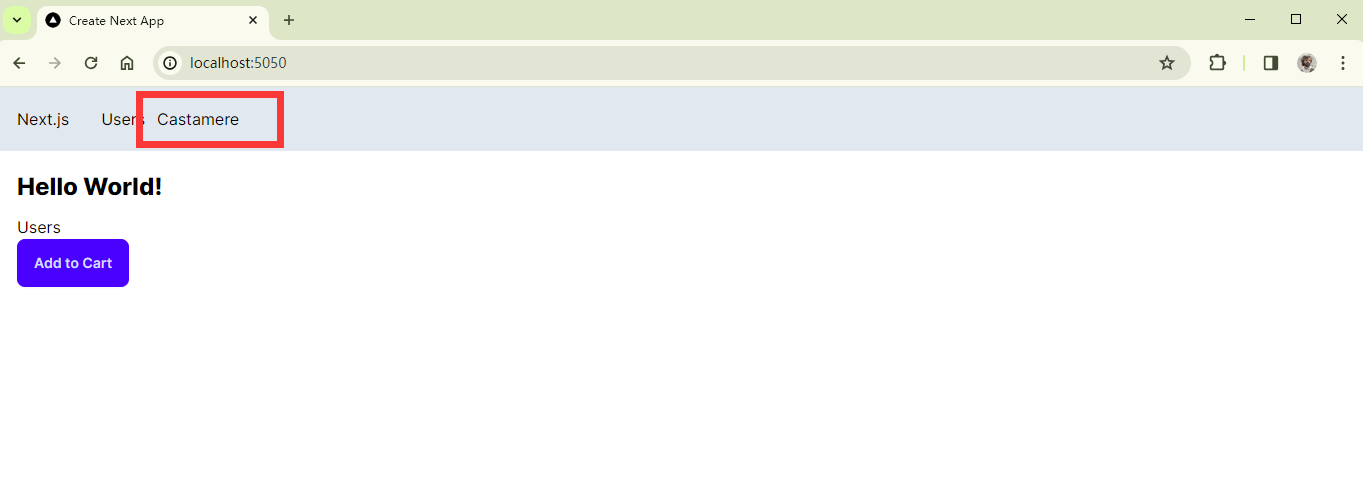
export default NavBar;此时回到浏览器,刷新即可看到,可以正常显示用户名了
Accessing Session from server
在服务器端获取 session 也很简单,首先要先回到 api/auth/[...nextauth]/route.ts 中修改一下,将刚刚的 providers 作为一个 const export 出来,以便在其他页面使用(注意笔者使用的还是 Github 作为 Provider)
import NextAuth from "next-auth";
import Github from "next-auth/providers/github";
// import GoogleProvider from "next-auth/providers/google";

export const authOptions = {
  providers: [
    Github({
      clientId: process.env.GITHUB_CLIENT_ID!,
      clientSecret: process.env.GITHUB_CLIENT_SECRET!,
    }),
  ],
};

const handler = NextAuth(authOptions);

export { handler as GET, handler as POST };
然后在主页面的 page.tsx 中可以调用 getServerSession() 来获取 session
import Link from "next/link";
import ProductCard from "./components/ProductCard/ProductCard";
// 导入 getServerSession 方法和刚刚的 authOptions 设置
+ import { getServerSession } from "next-auth";
+ import { authOptions } from "./api/auth/[...nextauth]/route";
export default async function Home() {
// 调用 getServerSession 来获取 session
+ const session = await getServerSession(authOptions);
return (
<>
<main>
{/*直接调用session中的内容(user!中的!代表该变量不会为空)"*/}
+ <h1>Hello {session && session.user!.name}!</h1>
<Link href="/users">Users</Link>
<ProductCard />
</main>
</>
);
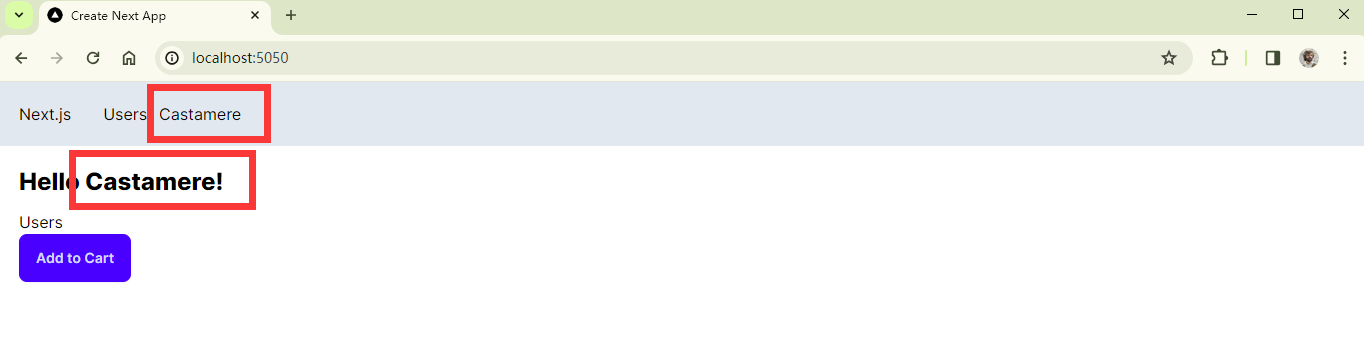
}最终显示效果如下
Sign Out
使用一个 Link 跳转到 api/auth/signout 即可
"use client";
import { useSession } from "next-auth/react";
import Link from "next/link";
import React from "react";
const NavBar = () => {
const { status, data: session } = useSession();
return (
<div className="flex bg-slate-200 p-5 space-x-3">
<Link href="/" className="mr-5">
Next.js
</Link>
<Link href="/users">Users</Link>
{status === "loading" && <div>Loading...</div>}
{/*跳转至 api/auth/signout 即可*/}
+ {status === "authenticated" && (
+ <div>
+ {session.user!.name}
+ <Link href="api/auth/signout" className="ml-3">
+ Sign Out
+ </Link>
+ </div>
+ )}
{status === "unauthenticated" && (
<Link href="/api/auth/signin">Login</Link>
)}
</div>
);
};
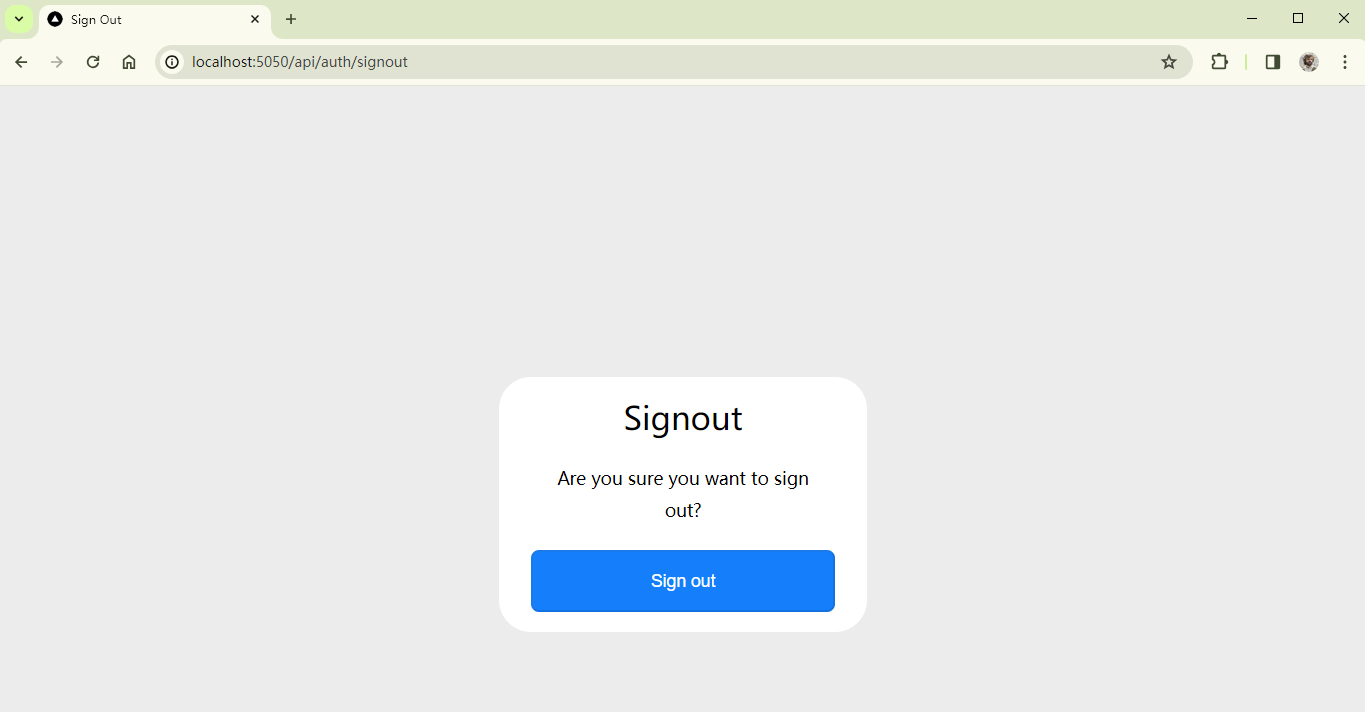
export default NavBar;最终效果如下
Protecting Route
有时候,我们需要防止用户在没有登录的情况下跳转至某些页面,比如想要直接使用 url 进入到 profile 页面,此时我们需要重定向到登录界面。在 Next.js 中内置了 MiddleWare 帮我们完成这个任务,我们不需要手动在每个界面自己写跳转。我们只需要在根目录(注意是和 app 同级目录,之前都是在 app 文件夹中)下添加 middleware.ts 添加设置即可,如下代码则表示所有以 /dashboard 开头的路由,都需要有 session。其最后一个字符代表子路由的层级
export { default } from "next-auth/middleware";

export const config = {
  // *: zero or more
  // +: one or more
  // ?: zero or one
  matcher: ["/dashboard/:path*"],
};
Database Adapters
在Next-Auth Prisma页面可以找到,使用 npm i @next-auth/prisma-adapter 以安装 adapter
备注
Next-Auth 正在改名为 Auth.js,截止 2024.2.27,仍然可以使用上方 npm 指令安装,如果读者使用时出错,访问Next-Auth Prisma页面应该可以找到新的安装命令
安装好之后,配置 schema.prisma,同样在Next-Auth Prisma Schema页面可以找到教程,也可以把我下面的代码直接复制到 schema.prisma 中,再使用 npx prisma migrate dev 指令进行合并即可
schema.prisma配置
// This is your Prisma schema file,
// learn more about it in the docs: https://pris.ly/d/prisma-schema

// Looking for ways to speed up your queries, or scale easily with your serverless or edge functions?
// Try Prisma Accelerate: https://pris.ly/cli/accelerate-init

generator client {
  provider = "prisma-client-js"
}

datasource db {
  provider = "mysql"
  url      = env("DATABASE_URL")
}

model Account {
  id                 String  @id @default(cuid())
  userId             String
  type               String
  provider           String
  providerAccountId  String
  refresh_token      String?  @db.Text
  access_token       String?  @db.Text
  expires_at         Int?
  token_type         String?
  scope              String?
  id_token           String?  @db.Text
  session_state      String?

  user User @relation(fields: [userId], references: [id], onDelete: Cascade)

  @@unique([provider, providerAccountId])
}

model Session {
  id           String   @id @default(cuid())
  sessionToken String   @unique
  userId       String
  expires      DateTime
  user         User     @relation(fields: [userId], references: [id], onDelete: Cascade)
}

model User {
  id            String    @id @default(cuid())
  name          String?
  email         String?   @unique
  emailVerified DateTime?
  image         String?
  accounts      Account[]
  sessions      Session[]
}

model VerificationToken {
  identifier String
  token      String   @unique
  expires    DateTime

  @@unique([identifier, token])
}
完成后在 api\auth[...nextauth]\route.ts 设置 PrismaAdapter
import NextAuth, { NextAuthOptions } from "next-auth";
import Github from "next-auth/providers/github";
import GoogleProvider from "next-auth/providers/google";
+ import { PrismaAdapter } from "@next-auth/prisma-adapter";
+ import prisma from "@/prisma/client";
export const authOptions: NextAuthOptions = {
// 设置 PrismaAdapter
+ adapter: PrismaAdapter(prisma),
providers: [
GoogleProvider({
clientId: process.env.GOOGLE_CLIENT_ID!,
clientSecret: process.env.GOOGLE_CLIENT_SECRET!,
}),
Github({
clientId: process.env.GITHUB_CLIENT_ID!,
clientSecret: process.env.GITHUB_CLIENT_SECRET!,
}),
],
session: {
strategy: "jwt",
},
};
const handler = NextAuth(authOptions);
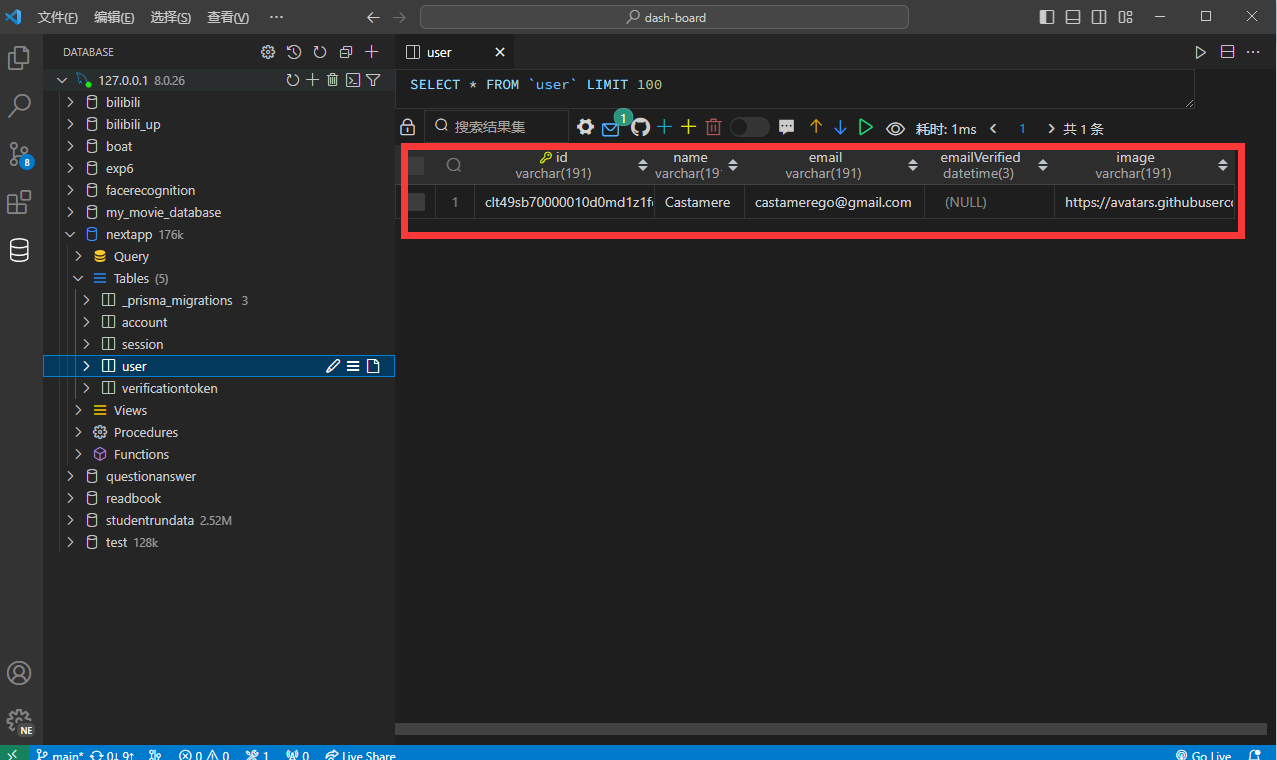
export { handler as GET, handler as POST };再次尝试登陆后,即可在数据库中看到
下一篇讲发送邮件