嘿,小伙伴们!今天给大家带来的是计算机视觉领域里的一项关键技术------3D到2D的变换。无论你是电影特效爱好者,还是游戏开发小白,甚至是对虚拟现实充满好奇的小白兔,这篇教程都会让你感受到3D到2D变换的魅力所在。让我们一起来看看,如何用Python和OpenCV实现这种神奇的转换吧!
📝 理论基础:3D到2D的投影变换
在计算机视觉中,我们经常需要将三维空间中的物体映射到二维平面上。这个过程叫做投影变换,是很多应用如增强现实(AR)、虚拟现实(VR)、3D建模等的基础。投影变换涉及到坐标系统的转换,其中最常用的方法有两种:正交投影(Orthographic Projection)和平行投影(Perspective Projection)。
📑 实战案例:3D立方体的投影
为了让大家更好地理解3D到2D的变换,我们来做一个简单的实验------将一个3D立方体投影到2D平面上。这不仅是一个很好的视觉效果演示,而且还能帮助我们理解投影变换的工作原理。
1. 环境准备
首先,确保你安装了必要的库:
bash
pip install numpy opencv-python2. 定义3D立方体
接着,我们需要定义一个简单的3D立方体,并设定它的顶点坐标。
python
import cv2
import numpy as np

# 立方体的顶点坐标
cube_vertices = np.array([
    [1, 1, 1],
    [-1, 1, 1],
    [-1, -1, 1],
    [1, -1, 1],
    [1, 1, -1],
    [-1, 1, -1],
    [-1, -1, -1],
    [1, -1, -1]
], dtype=np.float32)
3. 构建变换矩阵
接下来,我们构建变换矩阵来对立方体进行变换。这里我们只考虑平移和旋转,而不涉及缩放。
python
def get_transformation_matrix(translation=(0, 0, 0), rotation=(0, 0, 0)):
    # 平移矩阵
    T = np.array([
        [1, 0, 0, translation[0]],
        [0, 1, 0, translation[1]],
        [0, 0, 1, translation[2]],
        [0, 0, 0, 1]
    ])

    # 旋转矩阵
    Rx = np.array([[1, 0, 0],
                   [0, np.cos(rotation[0]), -np.sin(rotation[0])],
                   [0, np.sin(rotation[0]), np.cos(rotation[0])]])
    Ry = np.array([[np.cos(rotation[1]), 0, np.sin(rotation[1])],
                   [0, 1, 0],
                   [-np.sin(rotation[1]), 0, np.cos(rotation[1])]])
    Rz = np.array([[np.cos(rotation[2]), -np.sin(rotation[2]), 0],
                   [np.sin(rotation[2]), np.cos(rotation[2]), 0],
                   [0, 0, 1]])
    R = Rz @ Ry @ Rx

    # 将旋转矩阵扩展为 4x4 的形式
    R_expanded = np.eye(4)
    R_expanded[:3, :3] = R

    return T @ R_expanded
4. 应用变换
然后,应用变换矩阵来更新3D模型的位置。
python
def apply_transformation(vertices, transformation_matrix):
    # 将顶点转换为齐次坐标
    vertices_homogeneous = np.hstack((vertices, np.ones((vertices.shape[0], 1))))
    # 应用变换
    transformed_vertices_homogeneous = transformation_matrix @ vertices_homogeneous.T
    # 归一化齐次坐标
    transformed_vertices = (transformed_vertices_homogeneous[:3, :] /         transformed_vertices_homogeneous[3, :]).T
    return transformed_vertices
# 假设相机内参
# fx, fy 是焦距,cx, cy 是光心坐标
camera_matrix = np.array([
    [1000, 0, 320],  # 假设水平焦距为1000像素,光心横坐标为320像素
    [0, 1000, 240],  # 假设垂直焦距为1000像素,光心纵坐标为240像素
    [0, 0, 1]
], dtype=np.float32)

# 假设没有畸变系数
distortion_coeffs = None

image = np.zeros((480, 640, 3), np.uint8) + 255

# 构造变换矩阵
transformation_matrix = get_transformation_matrix(
    translation=(0, 0, -5),
    rotation=(np.pi / 4, 0, 0)
)

# 应用变换
transformed_vertices = apply_transformation(cube_vertices, transformation_matrix)
5. 投影与绘制
将变换后的3D坐标投影到2D图像上,并绘制出来。
python
# 绘制立方体
def project_and_draw(image, vertices, camera_matrix, distortion_coeffs=None):
    # 投影矩阵
    projected_points, _ = cv2.projectPoints(vertices, np.zeros(3), np.zeros(3), camera_matrix, distortion_coeffs)

    # 连接顶点形成边框
    edges = [(0, 1), (1, 2), (2, 3), (3, 0),
             (4, 5), (5, 6), (6, 7), (7, 4),
             (0, 4), (1, 5), (2, 6), (3, 7)]

    for edge in edges:
        p1 = tuple(projected_points[edge[0]].ravel().astype(int))
        p2 = tuple(projected_points[edge[1]].ravel().astype(int))
        cv2.line(image, p1, p2, (255, 0, 0), 2)

    return image
6. 创建图像
最后,我们创建一个图像,并应用上述所有的变换。
python
image = project_and_draw(image, transformed_vertices, camera_matrix, distortion_coeffs)

cv2.imshow('3D Cube Projection', image)
cv2.waitKey(0)
cv2.destroyAllWindows()
🌟 成功案例
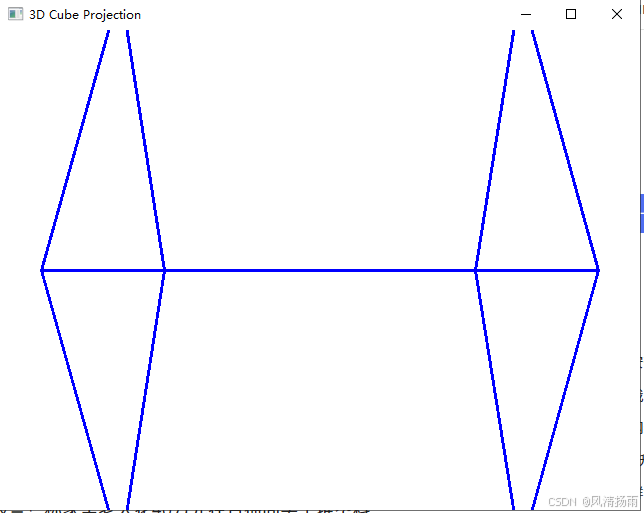
当你运行这段代码时,你会看到一个经过变换的3D立方体被渲染在了一个空白的图像上。这只是一个简单的示例,你可以在此基础上扩展,比如加入更多的变换类型、使用真实的图像背景,甚至制作一段动画视频。
🌟运行效果

🌟 小贴士
- 变换顺序:注意变换的顺序会影响到最终效果,不同的顺序可能产生不同的视觉效果。
- 相机校准:在实际应用中,相机的校准参数非常重要,它决定了投影的质量。
🚀 结语
通过今天的实战演练,大家已经掌握了如何使用Python来实现3D到2D变换的基础知识。这些简单的变换是构建复杂视觉应用的基石,掌握了它们,你就能够开启无限可能的大门!如果你有任何问题或想法,欢迎留言交流。喜欢我的朋友请点赞,关注并收藏,我们下次再见!👋