个人经常有在家Windows上开启linux虚拟机的需求。我知道有好几种方式,WSL 2,docker, virtualbox/vmware,qemu等。前两种方式用得少,总感觉弄出来的linux不像真的。后面两种更像真的,且qemu还能跑不同架构的。
本文主要集中于在Windows上启动qemu arm虚拟机。这块网络教程的命令大多是基于Linux的,很少有一次性在Windows上跑通的。所以我的实战命令可以让想在Windows跑arm的人少走点弯路。
我会贴出很多我参考的链接,更多细节可自行查看。
Win上安装qemu
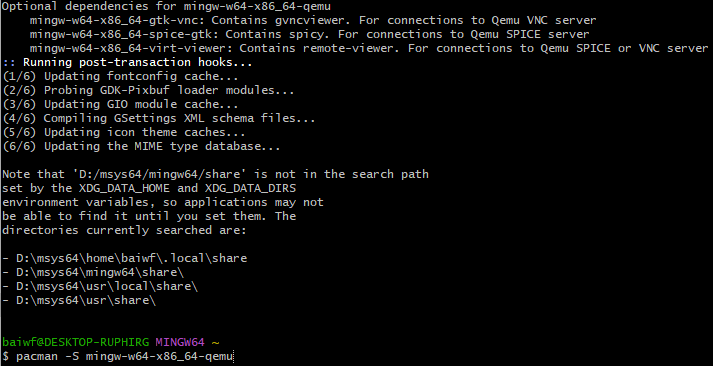
可以直接下载qemu.exe安装,但我发现了一种更便捷的方式,即在msys2 mingw64命令行下可直接用 pacman -S mingw-w64-x86_64-qemu 安装
qemu命令行不细讲,细看[1]
aarch32 on Qemu
树霉派raspbian-jessie
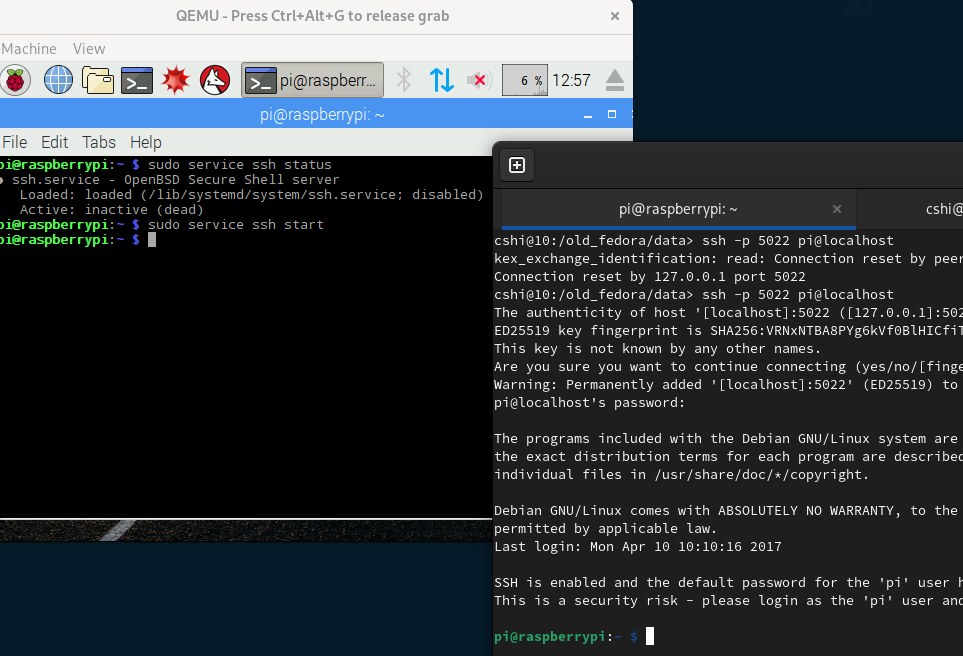
最早接触的是树霉派镜像,网上也有很多有qemu跑树霉派的,可还是没有在windows上启动成功过。所以干脆我就在virtualbox里的linux上启动了:
  qemu-system-arm -kernel kernel-qemu-4.4.34-jessie \
  -cpu arm1176 -m 256 -M versatilepb -serial stdio \
  -append "root=/dev/sda2 rootfstype=ext4 rw" \
  -hda 2017-04-10-raspbian-jessie.img \
-nic user,hostfwd=tcp::5022-:22 -no-reboot视频参考链接[2]
然后把sshd 打开 : ssh -p 5022 pi@localhost
code: raspberry
树霉派安了不少教育工具,对我都不需要,全部卸载以节省img文件空间
sudo apt-get purge libreoffice-* chromium-browser oracle-java8-jdk minecraft-pi claws-mail greenfoot wolfram-engine
不过我现在没兴趣了,一方面jessie版本太低,另一方面我想windows上跑arm32
openEuler版
文件下载:[3]
qemu-system-arm -M virt-4.0 -m 1G -cpu cortex-a15 \
  -nographic -kernel zImage -initrd openeuler-image-qemu-arm-20230329220826.rootfs.cpio.gz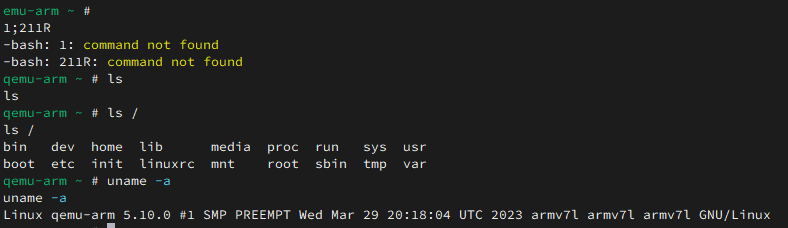
这样写有效,但没有网络功能,无法ssh, 如果加上 -net nic -net user,hostfwd=tcp::2222-:22 不管用
听官方说法似乎要创建tap 接口,而有一次在windows上用openvpn搞tap接口,有点把正常网络搞坏了。不想在windows上弄了,不过转到linux上很方便了。
  qemu-system-arm -M virt-4.0 -m 1G -cpu cortex-a15 -nographic \
  -kernel zImage -initrd openeuler-image-qemu-arm-20230329220826.rootfs.cpio.gz \
  -device virtio-net-device,netdev=tap0 \
  -netdev tap,id=tap0,script=/etc/qemu-ifup
命令自动创建了tap0接口,且ip 是在/etc/qemu-ifup 中设置的 192.168.10.1,与宿主机可ssh
参考[4]
缺陷是:++不自带gcc,编个程序还是传进去跑,麻烦++。
自编译kernel
参考教程:[5]
通过-kernel -dtb的方式启动,作者的镜像我曾经跑通过了,但没细致配置,是我下一步的主要使用方向
arm64 on Qemu
mac qemu安装ubuntu aarch64
家里有mac,有时为了方便,也试着在mac上启动成功了。参考[6]
bios下载[7]
先下载好ubuntu.iso ,执行安装
  qemu-system-aarch64 \
  -monitor stdio \
  -M virt,highmem=off \
  -accel hvf \
  -cpu host \
  -smp 4 \
  -m 3000 \
  -bios QEMU_EFI.fd \
  -device virtio-gpu-pci \
  -display default,show-cursor=on \
  -device qemu-xhci \
  -device usb-kbd \
  -device usb-tablet \
  -device intel-hda \
  -device hda-duplex \
  -drive file=ubuntu22.04.qcow2,if=virtio,cache=writethrough \
-cdrom ubuntu-22.04.3-live-server-arm64.iso给了highmem=off,如果内存给4g会报:qemu-system-aarch64: Addressing limited to 32 bits, but memory exceeds it by 1073741824 bytes
安装到qcow2硬盘文件后,就可从硬盘启动,
  qemu-system-aarch64 \
  -monitor stdio \
  -M virt,highmem=off \
  -accel hvf \
  -cpu host \
  -smp 4 \
  -m 3000 \
  -bios QEMU_EFI.fd \
  -device virtio-gpu-pci \
  -display default,show-cursor=on \
  -device qemu-xhci \
  -device usb-kbd \
  -device usb-tablet \
  -device intel-hda \
  -device hda-duplex \
  -drive file=ubuntu22.04.qcow2,if=virtio,cache=writethrough \
  -net nic -net user,hostfwd=tcp::2200-:22,hostfwd=tcp::8083-:8083
其中hostfwd可以设置本地端口转发到虚机端口
若想共享主机目录到guest,再接选项:
-fsdev local,security_model=passthrough,id=fsdev0,path=/Users/xxx/sharedFolder \
-device virtio-9p-pci,id=fs0,fsdev=fsdev0,mount_tag=hostshare
然后在guest内挂载, sudo mount -t 9p -o trans=virtio,version=9p2000.L hostshare /mnt
9pfs 参考链接:[8] [9]
openEuler版
之前参考的网页[10] 打不开了,感兴趣的可到 [11] 找教程
我使用的是qcow2格式硬盘,下载:[12]
bios文件 QEMU_EFI.fd下载:[13](我也不知道它是怎么适用于openEuler的,反正就是能用了)
效果: 
root默认密码:openEuler12#$
跑img云镜像
ubuntu官方准备了已经编好的img 镜像,见:https://cloud-images.ubuntu.com/
比如我下了[14]
img文件启动似乎又有些不一样,我参考[15] [16]做了如下事情:
  truncate.exe -s 64m varstore.img
truncate.exe -s 64m efi.img
dd if=/mingw64/share/qemu/edk2-aarch64-code.fd of=efi.img conv=notrunc
cloud-localds --disk-format qcow2 cloud.img cloud.txt
用户登陆配置文件cloud.txt:
  #cloud-config
users:
- name: cshi
ssh-authorized-keys:
- ssh-rsa xxxxx
sudo: ['ALL=(ALL) NOPASSWD:ALL']
groups: sudo
shell: /bin/bash
启动:
  qemu-system-aarch64.exe -m 4096 -cpu cortex-a57 -M virt \
  -serial stdio -drive if=pflash,format=raw,file=efi.img,readonly=on \
  -drive if=pflash,format=raw,file=varstore.img \
  -drive if=none,file=oracular-server-cloudimg-arm64.img,id=hd0 \
  -device virtio-blk-device,drive=hd0 \
  -device virtio-blk-device,drive=cloud \
  -drive if=none,id=cloud,file=cloud.img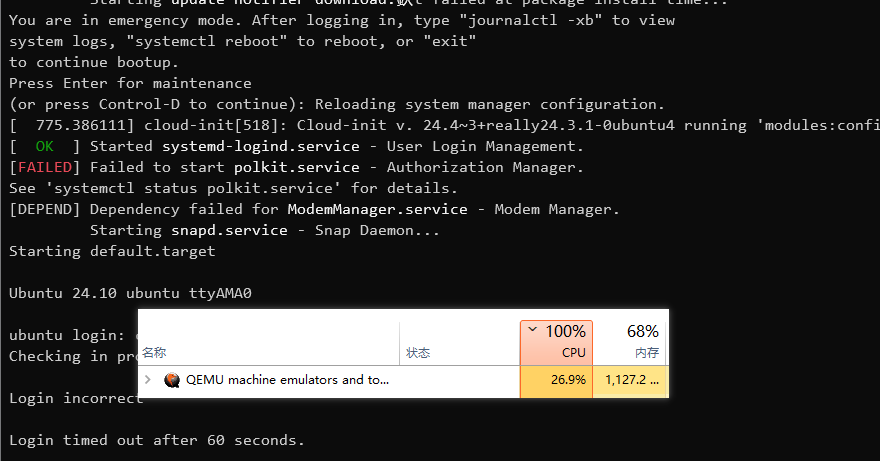
一个大问题:启动时间超慢。。还占CPU ,以后再修复
更多硬核技术,关注公众号"全栈Hacker之路", Happy Coding ~
References
参考资料 1
https://www.qemu.org/docs/master/system/qemu-manpage.html: qemu-manual
2
https://www.youtube.com/watch?v=gfmRrPjnEw4\&t=7089s: arm32-qemu启动
3
https://mirrors.163.com/openeuler/openEuler-23.03/embedded_img/arm32/arm-std/: openEuler-arm32-image
4
https://embedded.pages.openeuler.org/openEuler-23.09/develop_help/qemu/qemu_start.html#openeuler-embedded: openEuler-arm32-qemu-ref
5
https://blog.csdn.net/weixin_40837318/article/details/123688236: 自编译kernel
6
https://theboreddev.com/run-ubuntu-on-mac-using-qemu/: mac-run-arm64
7
8
https://wiki.qemu.org/Documentation/9psetup: 9pfs-wiki
9
https://blog.csdn.net/gatieme/article/details/82912921: 9pfs-csdn-tutorial
10
https://openeuler.gitee.io/yocto-meta-openeuler/openEuler-22.03-LTS/getting_started/index.html: old-openEuler-arm64-ref
11
https://docs.openeuler.org/zh/: openeuler-manaul
12
https://mirrors.163.com/openeuler/openEuler-23.03/virtual_machine_img/aarch64/: openEuler-qcow2-arm64
13
https://releases.linaro.org/components/kernel/uefi-linaro/16.02/release/qemu64/QEMU_EFI.fd: openEuler-efi.fd
14
https://cloud-images.ubuntu.com/oracular/current/oracular-server-cloudimg-arm64.img: oracular-ubuntu-cloud-image
15
https://ubuntu.com/server/docs/boot-arm64-virtual-machines-on-qemu: ubuntu-run-on-x86
16
https://gitcode.csdn.net/65acab86b8e5f01e1e4519ad.html: 网友在x86跑arm64,带解决用户登陆问题
本文由mdnice多平台发布