YOLOv8目标检测(一)_检测流程梳理:YOLOv8目标检测(一)_检测流程梳理_yolo检测流程-CSDN博客
YOLOv8目标检测(二)_准备数据集:YOLOv8目标检测(二)_准备数据集_yolov8 数据集准备-CSDN博客
YOLOv8目标检测(三)_训练模型:YOLOv8目标检测(三)_训练模型_yolo data.yaml-CSDN博客
YOLOv8目标检测(三*)_最佳超参数训练:YOLOv8目标检测(三*)_最佳超参数训练_yolo 为什么要选择yolov8m.pt进行训练-CSDN博客
YOLOv8目标检测(四)_图片推理:YOLOv8目标检测(四)_图片推理-CSDN博客
YOLOv8目标检测(五)_结果文件(run/detrct/train)详解:YOLOv8目标检测(五)_结果文件(run/detrct/train)详解_yolov8 yolov8m.pt可以训练什么-CSDN博客
YOLOv8目标检测(六)_封装API接口:YOLOv8目标检测(六)_封装API接口-CSDN博客
YOLOv8目标检测(七)_AB压力测试:YOLOv8目标检测(七)_AB压力测试-CSDN博客
在Python中将YOLOv8模型封装为API接口后,用户可以通过调用该接口上传自定义的测试图片,并获取识别结果
为什么要封装成API接口使用?
- 模块化和可重用性:封装成API后,模型可以独立于其他代码运行,使得它更容易被其他应用或服务调用,而不需要直接依赖模型的具体实现细节。
- 易于扩展:API接口可以方便地进行版本管理和功能扩展。如果未来需要替换或升级YOLOv8模型,可以通过修改API内部实现而不影响其他依赖该API的系统。
- 跨平台兼容性:通过API,可以让不同平台或不同编程语言的应用访问和使用YOLOv8模型,而无需关心底层的实现细节。比如,前端应用可以通过HTTP请求访问API,得到模型的推理结果。
- 简化部署与维护:API接口使得模型部署变得更加标准化和可管理。你可以将模型托管在服务器上,任何需要使用该模型的用户或系统都可以通过API进行交互,方便维护和监控。
- 灵活性:API接口可以通过参数化设计,支持不同的输入输出形式,甚至可以根据请求动态调整模型的行为(如使用不同的推理参数、处理不同类型的输入等)。
- 分离前后端:对于Web应用来说,封装成API接口可以将前端和后端分离,前端只需要通过HTTP请求和API进行交互,无需了解YOLOv8模型的具体实现。
注:笔者的情况是模型和API代码都在服务器(linux)Docker容器中,在容器中起服务,本地调用服务推理图片。
1.Python封装API
服务器中操作
app.py具体代码如下
import json
import numpy as np
from flask import Flask, request, jsonify
from loguru import logger
import base64
import cv2
from ultralytics import YOLO

app = Flask(__name__)

# 只处理 base64 编码图像
def read_img_cv(base64_str):
    try:
        img_data = base64.b64decode(base64_str)
        img = np.frombuffer(img_data, np.uint8)
        return cv2.imdecode(img, cv2.IMREAD_COLOR)
    except Exception:
        return None

def invasion(xyxy, points):
    # 检查目标框中心是否在给定区域内
    center_x, center_y = (xyxy[0] + xyxy[2]) / 2, (xyxy[1] + xyxy[3]) / 2
    return any(point[0] < center_x < point[2] and point[1] < center_y < point[3] for point in points)

# 设置日志记录
logger.add("./logs/{0}".format("log.log"), rotation="10 MB")

# 自定义标签列表
custom_labels = {
    0: 'backpack',
    1: 'plastic bag',
    2: 'shoulder bag',
    3: 'person',
    4: 'handbag',
    5: 'suitcase'
    # 根据你的标签数目和顺序调整
}

# 参数设置
def set_parameters():
    return {'device': 'cuda', 'port': 5000}

args = set_parameters()
logger.info("start load Model!")
model = YOLO('/your_path/best.pt')  # 修改为你自己的路径

@app.route('/predict', methods=['POST'])
def predict():
    if request.method == 'POST':
        try:
            data = request.get_json()
            img_object = data.get('image')
            minScore = float(data.get('minScore', 0.45))
            maxScore = float(data.get('maxScore', 1.0))
            customerID = data.get('customerID')
            imageID = data.get('imageID')
            axisall = data.get('axis', [])

            # 校验置信度范围
            if not (0 <= minScore <= 1 and 0 <= maxScore <= 1 and minScore <= maxScore):
                return jsonify({'customerID': customerID, 'imageID': imageID, 'code': 1, 'msg': '置信度错误', "marks": None, "result": None})

            # 解码图像
            img0 = read_img_cv(img_object)
            if img0 is None:
                return jsonify({'customerID': customerID, 'imageID': imageID, 'code': 1, 'msg': '图片解码出错', "marks": None, "result": None})

            w, h = img0.shape[:2]
            if axisall:
                axisall = [[max(0, a[0]), max(0, a[1]), min(w, a[2]), min(h, a[3])] for a in axisall]

            det_list = []
            try:
                # 使用YOLO模型进行预测
                annos = model(img0, conf=minScore)
                annos = annos[0].boxes.data.clone().cpu().detach().tolist()

                if annos:
                    for cls, *xyxy, conf in zip(np.array(annos)[:, -1], np.array(annos)[:, :-2], np.array(annos)[:, -2]):
                        category = str(int(cls))
                        # 映射到自定义标签
                        custom_category = custom_labels.get(int(cls), "未知")
                        x0, y0, x1, y1 = map(int, xyxy[0])
                        info = {"cls": custom_category, "axis": [x0, y0, x1, y1], "score": round(conf, 2)}
                        if axisall and not invasion(xyxy[0], axisall):
                            continue
                        det_list.append(info)

            except Exception:
                return jsonify({'customerID': customerID, 'imageID': imageID, 'code': 1, 'msg': '内部错误', "marks": None, "result": None})

            out = {'customerID': customerID, 'imageID': imageID, 'code': 0, 'msg': 'OK', "marks": det_list, "result": bool(det_list)}
            logger.info(f'outputs: {out}')
            return jsonify(out)

        except Exception:
            return jsonify({'customerID': None, 'imageID': None, 'code': 1, 'msg': '未知错误', "marks": None, "result": None})

if __name__ == "__main__":
    app.run(host='0.0.0.0', port=args['port'], debug=True)
2.起服务
服务器中操作
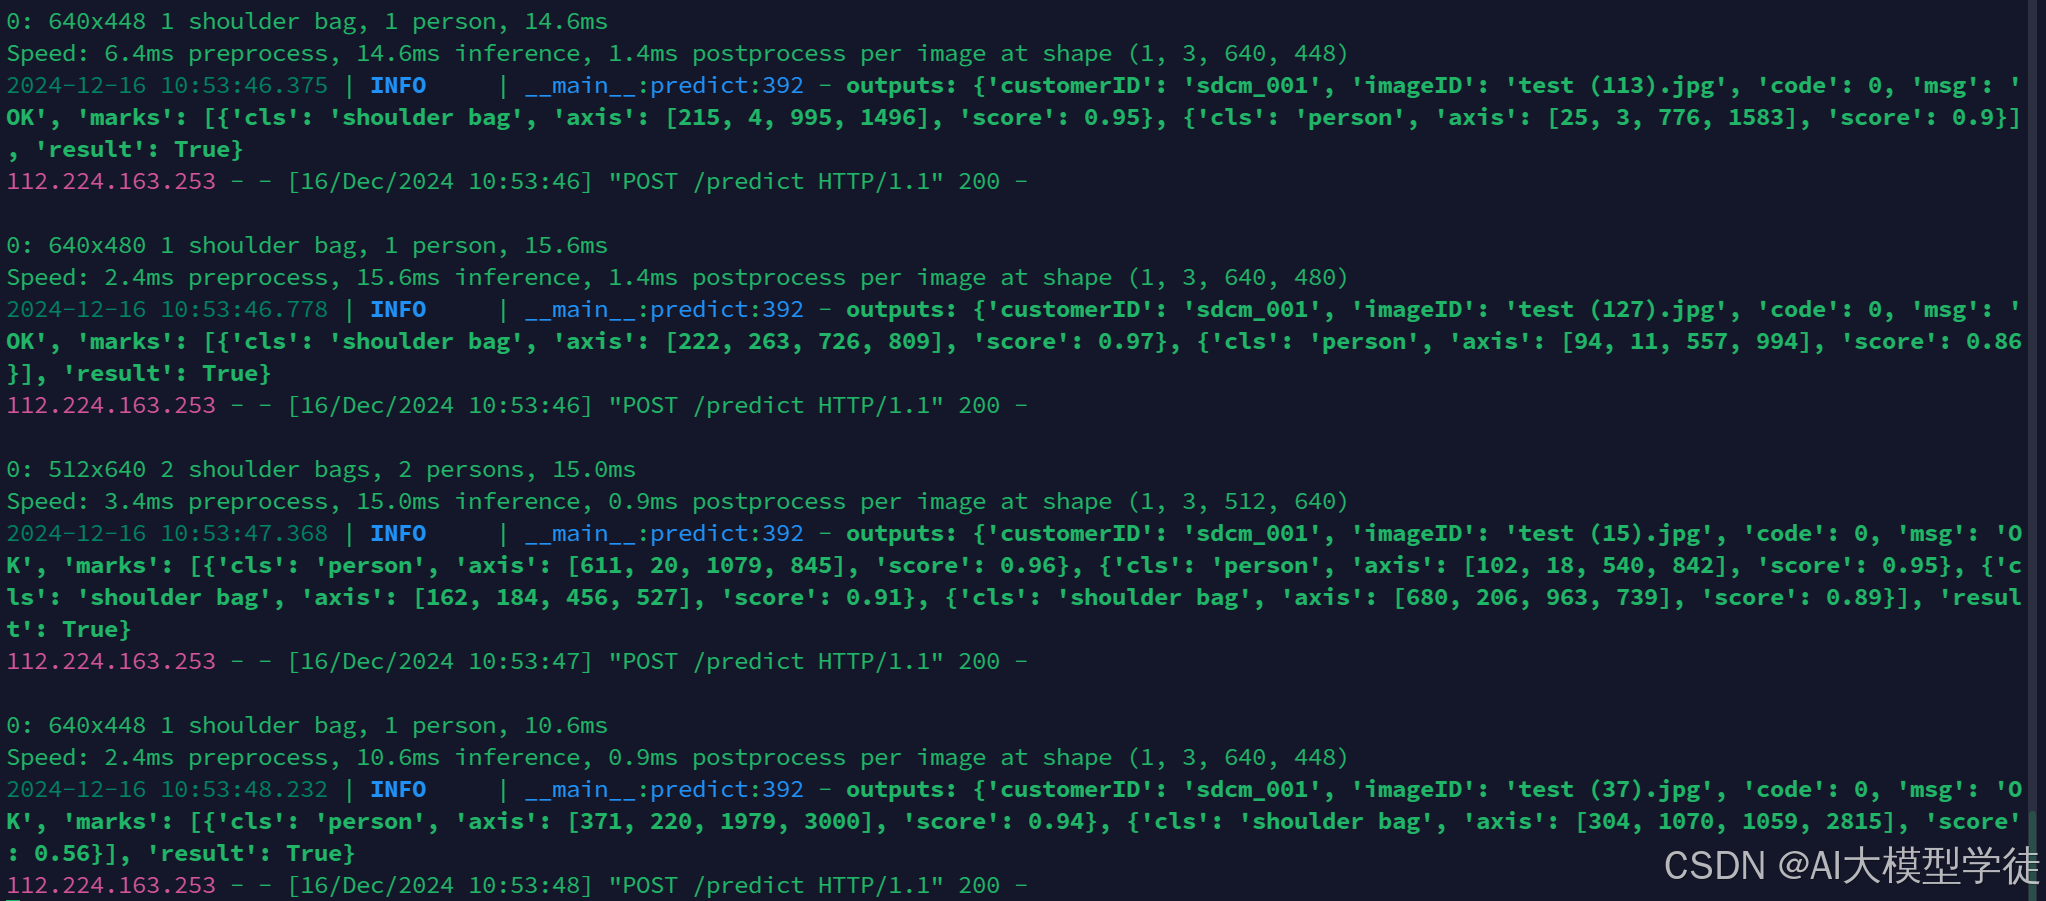
运行python app.py,成功截图如下:

3.推理
本地操作
注:这个模型best.pt是检测人和背包的。
(1)准备测试图片

(2)请求服务器处理代码
client.py具体代码如下:
import os
import base64
import cv2
import requests
from pathlib import Path

# 设置输入图片文件夹和输出文件夹
input_folder = r"D:\\Desktop/857"
output_folder = r"D:\\Desktop/857_123"
url = "<http://12.345.678.101:8888/predict>" #你的服务器ip和端口

# 确保输出文件夹存在
os.makedirs(output_folder, exist_ok=True)

# 类别颜色映射
class_colors = {
    "person": (0, 255, 0),  # 绿色
    "bag": (255, 0, 0),     # 蓝色
    "car": (0, 0, 255),     # 红色
    "phone": (255, 255, 0), # 黄色
    # 可以继续添加其他类别的颜色
}

# 将图片转换为base64格式
def image_to_base64(image_path):
    with open(image_path, 'rb') as f:
        img_byte = f.read()
    img_b64 = base64.b64encode(img_byte)
    return img_b64.decode()

# 从接口返回的结果画框和置信度
def draw_predictions(image, marks):
    for mark in marks:
        cls = mark["cls"]  # 获取类别
        x1, y1, x2, y2 = map(int, mark["axis"])  # 获取坐标
        score = mark["score"]  # 获取置信度
        label = f'{cls}: {score:.2f}'  # 标注类别和置信度

        # 获取类别颜色,如果没有指定颜色则使用默认颜色(白色)
        color = class_colors.get(cls, (255, 255, 255))

        # 画框
        cv2.rectangle(image, (x1, y1), (x2, y2), color, 5)

        font_scale = 0.8

        # 计算标签的大小
        label_size = cv2.getTextSize(label, cv2.FONT_HERSHEY_SIMPLEX, font_scale, 2)[0]
        label_x, label_y = x1, y1 - 10

        # 检查标签是否会超出图像或框的顶部
        if label_y - label_size[1] - 5 < 0:
            label_y = y1 + 10  # 将标签位置调整到框的下方

        # 绘制背景色以便突出显示类别标签
        cv2.rectangle(image, (label_x, label_y - label_size[1] - 5),
                      (label_x + label_size[0], label_y), color, -1)

        # 在框上方标注类别和置信度
        cv2.putText(image, label, (label_x, label_y - 5), cv2.FONT_HERSHEY_SIMPLEX, font_scale, (0, 0, 0), 2, cv2.LINE_AA)

    return image

# 处理每一张图片
for image_name in os.listdir(input_folder):
    image_path = os.path.join(input_folder, image_name)

    # 跳过非图片文件
    if not image_name.lower().endswith(('.png', '.jpg', '.jpeg', '.bmp')):
        print(f"跳过非图片文件: {image_name}")
        continue

    print(f'正在处理图片: {image_name}')
    try:
        # 读取图片并转换为base64
        image_base64 = image_to_base64(image_path)

        # 构建POST请求的JSON数据
        payload = {
            "customerID": "abc_123",
            "imageID": image_name,
            "minScore": 0.35,
            "maxScore": 0.99,
            "timeStamp": "1234455",
            "flexibleParams": "",
            "image": image_base64
        }

        # 调用接口
        response = requests.post(url, json=payload, timeout=10)
        print("Response status code:", response.status_code)

        if response.status_code == 200:
            try:
                response_data = response.json()  # 尝试解析 JSON 数据
                print("Response JSON:", response_data)

                # 读取原始图片
                image = cv2.imread(image_path)

                # 获取并画出预测结果
                if response_data.get("marks"):
                    image = draw_predictions(image, response_data["marks"])

                # 保存处理后的图片
                output_path = os.path.join(output_folder, image_name)
                cv2.imwrite(output_path, image)
                print(f"Processed and saved: {output_path}")
            except requests.exceptions.JSONDecodeError:
                print(f"JSON 解码失败,服务器返回内容: {response.text}")
        else:
            print(f"服务器返回错误状态码: {response.status_code}, 内容: {response.text}")

    except requests.exceptions.RequestException as e:
        print(f"请求失败: {e}")
    except Exception as e:
        print(f"处理图片时发生错误: {e}")
(3)查看结果
app.py服务器返回结果:

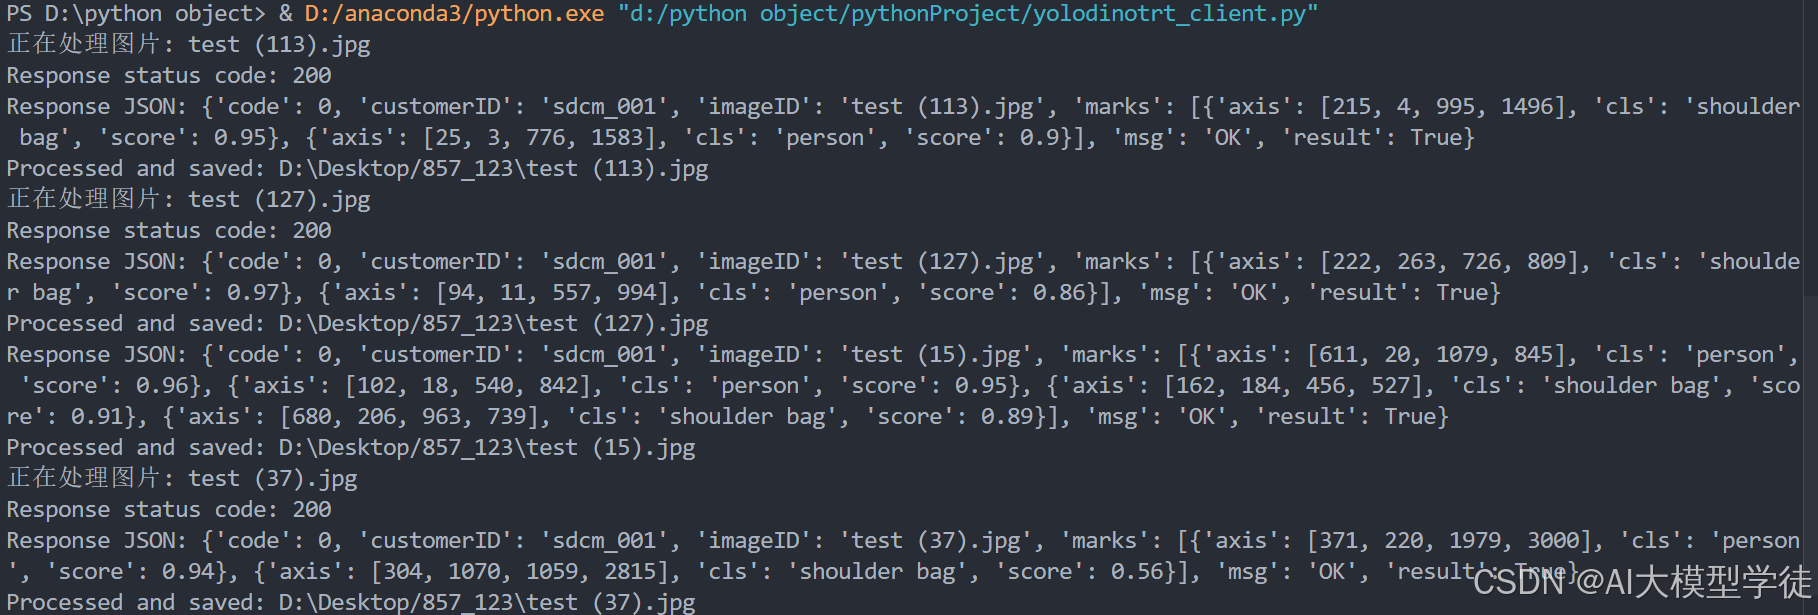
client返回结果:

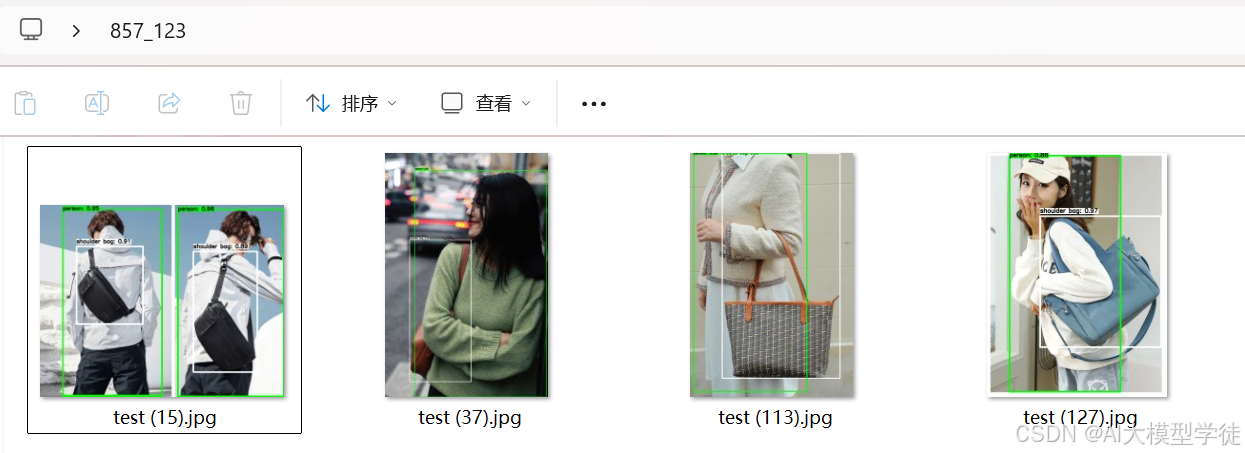
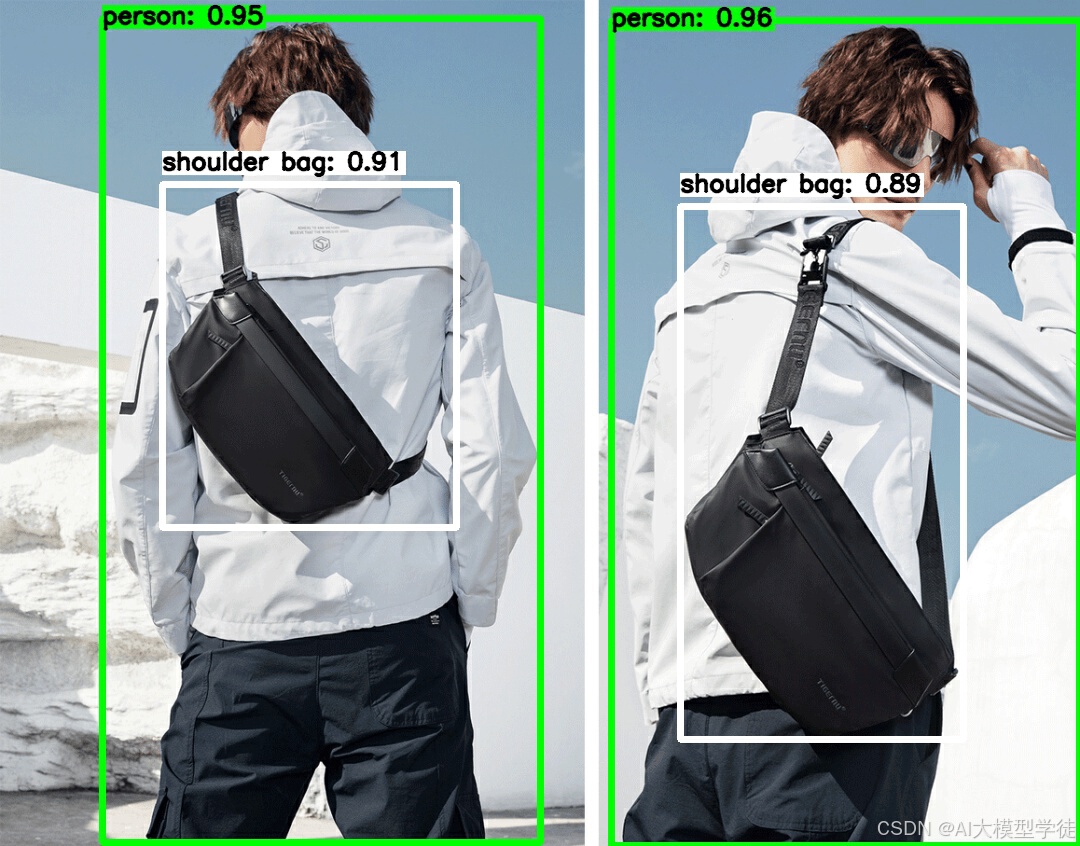
图片返回结果:


看过这六期文章,恭喜你基本掌握了YOLOv8实战流程:数据处理、数据集制作、模型训练、API封装、调用API推理。