前端开发 -- 自定义鼠标指针样式
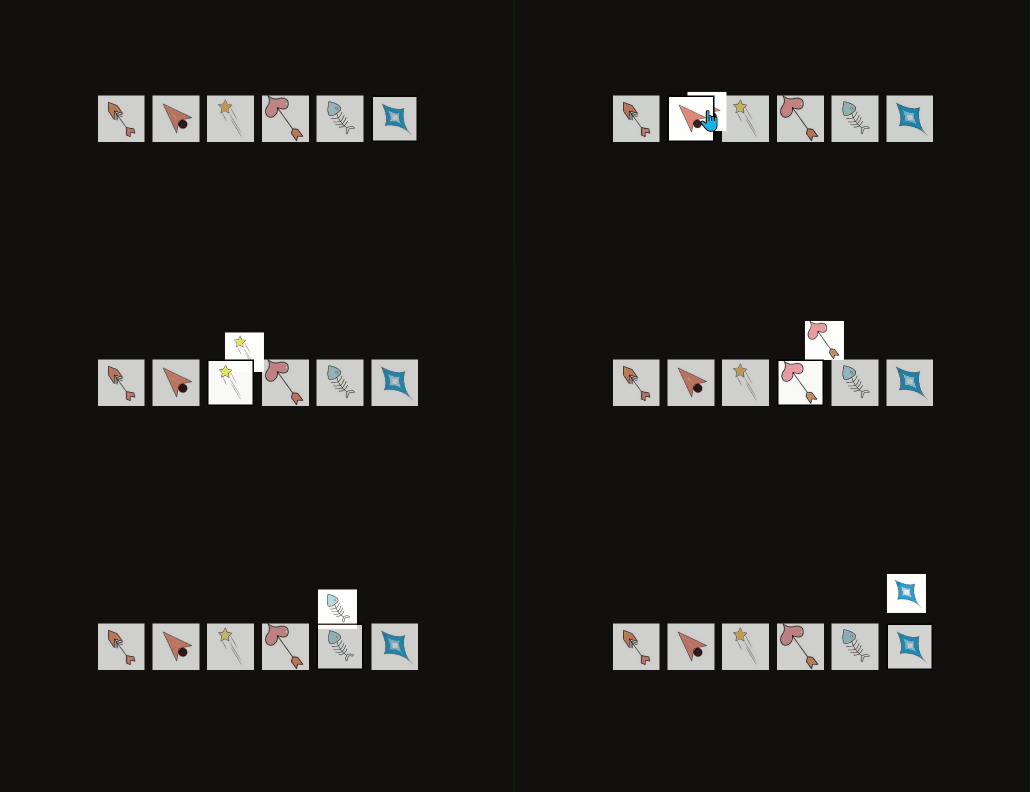
一:效果展示
由于我使用的图片是
JPEG格式,所以显得很突兀。大家使用使用矢量图形SVG格式就会显得很正常

二:源码分享
html
<!DOCTYPE html>
<html lang="en">
<head>
    <meta charset="UTF-8">
    <meta name="viewport" content="width=device-width, initial-scale=1.0">
    <title>自定义鼠标样式</title>
    <style>
        body {
            margin: 0;
            height: 100vh;
            display: flex;
            justify-content: center;
            align-items: center;
            text-align: center;
            cursor: none;
            background-color: #130f0f;
            overflow: hidden;
        }

        .container {
            position: relative;
            z-index: 1;
        }

        .custom-cursor {
            width: 50px;
            height: 50px;
            position: absolute;
            pointer-events: none;
            z-index: 0;
            transform: translate(-50%, -50%);
        }

        .cursor-style-1 { background-image: url('111.jpg'); }
        .cursor-style-2 { background-image: url('222.jpg'); }
        .cursor-style-3 { background-image: url('333.jpg'); }
        .cursor-style-4 { background-image: url('444.jpg'); }
        .cursor-style-5 { background-image: url('555.jpg'); }
        .cursor-style-6 { background-image: url('666.jpg'); }

        .cursor-style-1, .cursor-style-2, .cursor-style-3, .cursor-style-4, .cursor-style-5, .cursor-style-6 {
            background-size: cover;
            background-position: center center;
        }

        .button-container {
            display: flex;
            flex-wrap: wrap;
            gap: 10px;
        }

        .style-button {
            width: 60px;
            height: 60px;
            background-size: cover;
            background-position: center;
            border: none;
            cursor: pointer;
            outline: none;
            opacity: 0.8;
            transition: opacity 0.3s;
        }

        .style-button:hover {
            opacity: 1;
        }

        .style-button.active {
            border: 2px solid #000;
        }
    </style>
</head>
<body>
    <div class="container">
        <div class="button-container">
            <button class="style-button active" onclick="setCursorStyle('cursor-style-1')" style="background-image: url('111.jpg');"></button>
            <button class="style-button" onclick="setCursorStyle('cursor-style-2')" style="background-image: url('222.jpg');"></button>
            <button class="style-button" onclick="setCursorStyle('cursor-style-3')" style="background-image: url('333.jpg');"></button>
            <button class="style-button" onclick="setCursorStyle('cursor-style-4')" style="background-image: url('444.jpg');"></button>
            <button class="style-button" onclick="setCursorStyle('cursor-style-5')" style="background-image: url('555.jpg');"></button>
            <button class="style-button" onclick="setCursorStyle('cursor-style-6')" style="background-image: url('666.jpg');"></button>
        </div>
    </div>

    <script>
        document.addEventListener('DOMContentLoaded', () => {
            const cursor = document.createElement('div');
            cursor.classList.add('custom-cursor', 'cursor-style-1');
            document.body.appendChild(cursor);

            document.addEventListener('mousemove', (e) => {
                cursor.style.left = `${e.clientX}px`;
                cursor.style.top = `${e.clientY}px`;
            });

            const buttons = document.querySelectorAll('.style-button');

            window.setCursorStyle = function(style) {
                cursor.classList.remove('cursor-style-1', 'cursor-style-2', 'cursor-style-3', 'cursor-style-4', 'cursor-style-5', 'cursor-style-6');
                cursor.classList.add(style);
                buttons.forEach(button => button.classList.remove('active'));
                document.querySelector(`.style-button[onclick*="${style}"]`).classList.add('active');
            };
        });
    </script>
</body>
</html>
三:代码解析
1.HTML代码解析
html
<!DOCTYPE html>
<html lang="en">
<head>
    <meta charset="UTF-8">
    <meta name="viewport" content="width=device-width, initial-scale=1.0">
    <title>自定义鼠标样式</title>
    <!-- 引入CSS样式 -->
    <style>/* CSS样式在这里定义 */</style>
</head>
<body>
    <div class="container">
        <!-- 按钮容器,包含多个用于切换鼠标样式的按钮 -->
        <div class="button-container">
            <!-- 每个按钮通过onclick事件调用setCursorStyle函数来切换鼠标样式 -->
            <button class="style-button active" onclick="setCursorStyle('cursor-style-1')" style="background-image: url('111.jpg');"></button>
            <button class="style-button" onclick="setCursorStyle('cursor-style-2')" style="background-image: url('222.jpg');"></button>
            <button class="style-button" onclick="setCursorStyle('cursor-style-3')" style="background-image: url('333.jpg');"></button>
            <button class="style-button" onclick="setCursorStyle('cursor-style-4')" style="background-image: url('444.jpg');"></button>
            <button class="style-button" onclick="setCursorStyle('cursor-style-5')" style="background-image: url('555.jpg');"></button>
            <button class="style-button" onclick="setCursorStyle('cursor-style-6')" style="background-image: url('666.jpg');"></button>
        </div>
    </div>

    <!-- JavaScript脚本,用于处理鼠标样式的切换逻辑 -->
    <script>
        /* JavaScript代码在这里定义 */
    </script>
</body>
</html>2.CSS代码解析
css
<style>
    body {
        margin: 0; /* 移除body的默认外边距 */
        height: 100vh; /* 使body的高度等于视口高度 */
        display: flex; /* 使用Flexbox布局 */
        justify-content: center; /* 水平居中 */
        align-items: center; /* 垂直居中 */
        text-align: center; /* 文本居中 */
        cursor: none; /* 隐藏浏览器的默认鼠标指针 */
        background-color: #130f0f; /* 设置背景颜色 */
        overflow: hidden; /* 防止页面滚动 */
    }

    .container {
        position: relative; /* 设置相对定位,以便子元素(如自定义光标)可以相对于此定位 */
        z-index: 1; /* 确保容器及其内容(如按钮)位于自定义光标之上 */
    }

    .custom-cursor {
        width: 50px; /* 自定义光标的宽度 */
        height: 50px; /* 自定义光标的高度 */
        position: absolute; /* 设置绝对定位,以便能够自由移动光标 */
        pointer-events: none; /* 使自定义光标不影响页面上的点击事件 */
        z-index: 0; /* 确保自定义光标位于其他内容之下 */
        transform: translate(-50%, -50%); /* 使光标的中心对准鼠标位置 */
    }

    /* 定义6种不同的光标样式,通过背景图片实现 */
    .cursor-style-1 { background-image: url('111.jpg'); }
    .cursor-style-2 { background-image: url('222.jpg'); }
    .cursor-style-3 { background-image: url('333.jpg'); }
    .cursor-style-4 { background-image: url('444.jpg'); }
    .cursor-style-5 { background-image: url('555.jpg'); }
    .cursor-style-6 { background-image: url('666.jpg'); }

    .cursor-style-1, .cursor-style-2, .cursor-style-3, .cursor-style-4, .cursor-style-5, .cursor-style-6 {    /* 为所有光标样式设置了共同的背景图片属性 */
        background-size: cover; /* 背景图片覆盖整个元素 */
        background-position: center center; /* 背景图片居中显示 */
    }

    .button-container {    /* 该类用于包裹所有按钮,使按钮能够灵活布局并保持间距 */
        display: flex; /* 使用Flexbox布局 */
        flex-wrap: wrap; /* 允许按钮换行 */
        gap: 10px; /* 按钮之间的间距 */
    }

    .style-button {		   /* 定义了按钮的基本样式,包括大小、背景图片、边框、透明度过渡等 */

        width: 60px; /* 按钮宽度 */
        height: 60px; /* 按钮高度 */
        background-size: cover; /* 背景图片覆盖整个按钮 */
        background-position: center; /* 背景图片居中显示 */
        border: none; /* 移除按钮边框 */
        cursor: pointer; /* 尽管设置了,但因为body的cursor为none,所以不会影响自定义光标 */
        outline: none; /* 移除按钮聚焦时的轮廓线 */
        opacity: 0.8; /* 按钮初始透明度 */
        transition: opacity 0.3s; /* 按钮透明度的过渡效果,持续0.3秒 */
    }

    .style-button:hover {
        opacity: 1; /* 鼠标悬停时按钮完全不透明 */
    }

    .style-button.active {
        border: 2px solid #000; /* 当前激活的按钮显示边框 */
    }
</style>3.JavaScript代码解析
js
<script>
    document.addEventListener('DOMContentLoaded', () => {
        // 创建一个div元素作为自定义光标
        const cursor = document.createElement('div');
        cursor.classList.add('custom-cursor', 'cursor-style-1'); // 默认光标样式
        document.body.appendChild(cursor);

        // 监听鼠标移动事件,更新自定义光标的位置
        document.addEventListener('mousemove', (e) => {
            cursor.style.left = `${e.clientX}px`;
            cursor.style.top = `${e.clientY}px`;
        });

        // 获取所有样式按钮
        const buttons = document.querySelectorAll('.style-button');

        // 定义全局函数,用于切换光标样式
        window.setCursorStyle = function(style) {
            // 移除自定义光标上的所有样式类
            cursor.classList.remove('cursor-style-1', 'cursor-style-2', 'cursor-style-3', 'cursor-style-4', 'cursor-style-5', 'cursor-style-6');
            cursor.classList.add(style); // 添加新的样式类

            // 移除所有按钮的active类
            buttons.forEach(button => button.classList.remove('active'));

            // 给当前点击的按钮添加active类
            document.querySelector(`.style-button[onclick*="${style}"]`).classList.add('active');
        };
    });
</script>