目录
[(四)Android Studio](#(四)Android Studio)
一、介绍
安卓与ios需要的工具
安卓介绍(本文介绍):
- Android SDK :提供与设备交互的基础工具和功能(如模拟器、
adb)。- Node.js :为 Appium 提供运行环境,支持它正常工作。
- Appium:控制 Android 设备或模拟器,执行自动化测试。
- Appium-Python-Client :用 Python 编写自动化测试脚本,控制 Appium。
- 手机模拟器:提供一个虚拟的 Android 设备,进行测试。
ios介绍:
- Xcode:提供 iOS 模拟器、构建工具和设备调试工具,是 iOS 自动化测试的基础。
- Appium:自动化测试框架,可以用来控制 iOS 模拟器或真实设备上的应用。
- XCUITest:苹果的原生测试框架,Appium 在后台通过它来执行 iOS 自动化测试。
- iOS Simulator:Xcode 提供的虚拟设备,用来模拟 iPhone 或 iPad 进行测试。
所以,对于 iOS 自动化测试,最关键的工具是 Xcode 和 Appium ,而 XCUITest 是 iOS 自动化测试的底层框架,Appium 用它来控制设备。如果你要测试 iOS 应用,首先需要安装 Xcode 和 Appium,然后就可以开始编写自动化测试脚本了。
自动化测试工具介绍
node.js:这是Appium的环境。因为Appium是基于node.js开发的,所以运行需要APPium离不开node.js
Appium-Windows:这是移动测试的核心工具,没有这个就不能进行自动化测试,提供点击、移动、输入功能
手机模拟器:模拟手机来进行测试
Appium Python Client:这是语言客户端库:如果是python测试就下载Appium Python Client、Java测试就下载Appium Java Client、JavaScript测试就使用 Appium JS Client
Android SDK:管理Android模拟器的。Android SDK 扮演着至关重要的角色。它提供了一系列的工具和库,这些工具和库帮助自动化测试工具(如 Appium )与 Android 设备或模拟器进行交互,执行测试脚本时所需的各种操作。因为SDK下载很慢很慢就下载了Android Studio,这个包含了Android SDK
通俗易懂介绍
想象你要测试一个手机应用,但是没有手机,你就用电脑上的 手机模拟器 来模拟一个虚拟的手机。为了让模拟器和测试工具能正常工作,你需要一些"工具包"和"平台":
Android SDK 就是这些工具包,提供了让模拟器和手机"运行起来"的必要工具,比如用来启动模拟器、安装应用、控制设备等功能。
Node.js 是一个运行环境,它让 Appium (控制工具)能够正常工作。你可以把它看作是 Appium 运行的基础。
Appium 是一个自动化测试工具,它就像一个遥控器,通过它你可以让模拟器(或真手机)上的应用执行各种操作,比如点击按钮、输入文字等。Appium 就是让你"控制"手机应用的工具。
Appium-Python-Client 是 Appium 的一个 Python 版本,允许你用 Python 编写测试脚本来控制 Appium,进而操控手机应用。
简而言之,Android SDK 提供了模拟器和设备的运行支持,Node.js 是 Appium 的"发动机",Appium 是遥控器,Appium-Python-Client 让你用 Python 来写控制指令,而 手机模拟器 则是你用来测试的虚拟手机设备。
二、下载安装步骤
(下载)全部获取
步骤1.点击文章底部的云边快乐猫公众号扫
步骤2.去那边 回复:自动化测试工具
(一)node.js
(二)Appium-Windows
下载
**前提:**GitHub需要科学上网才能进入
**1.**在GitHub官网进入Appium下载的位置
https://github.com/appium/appium-desktop/releases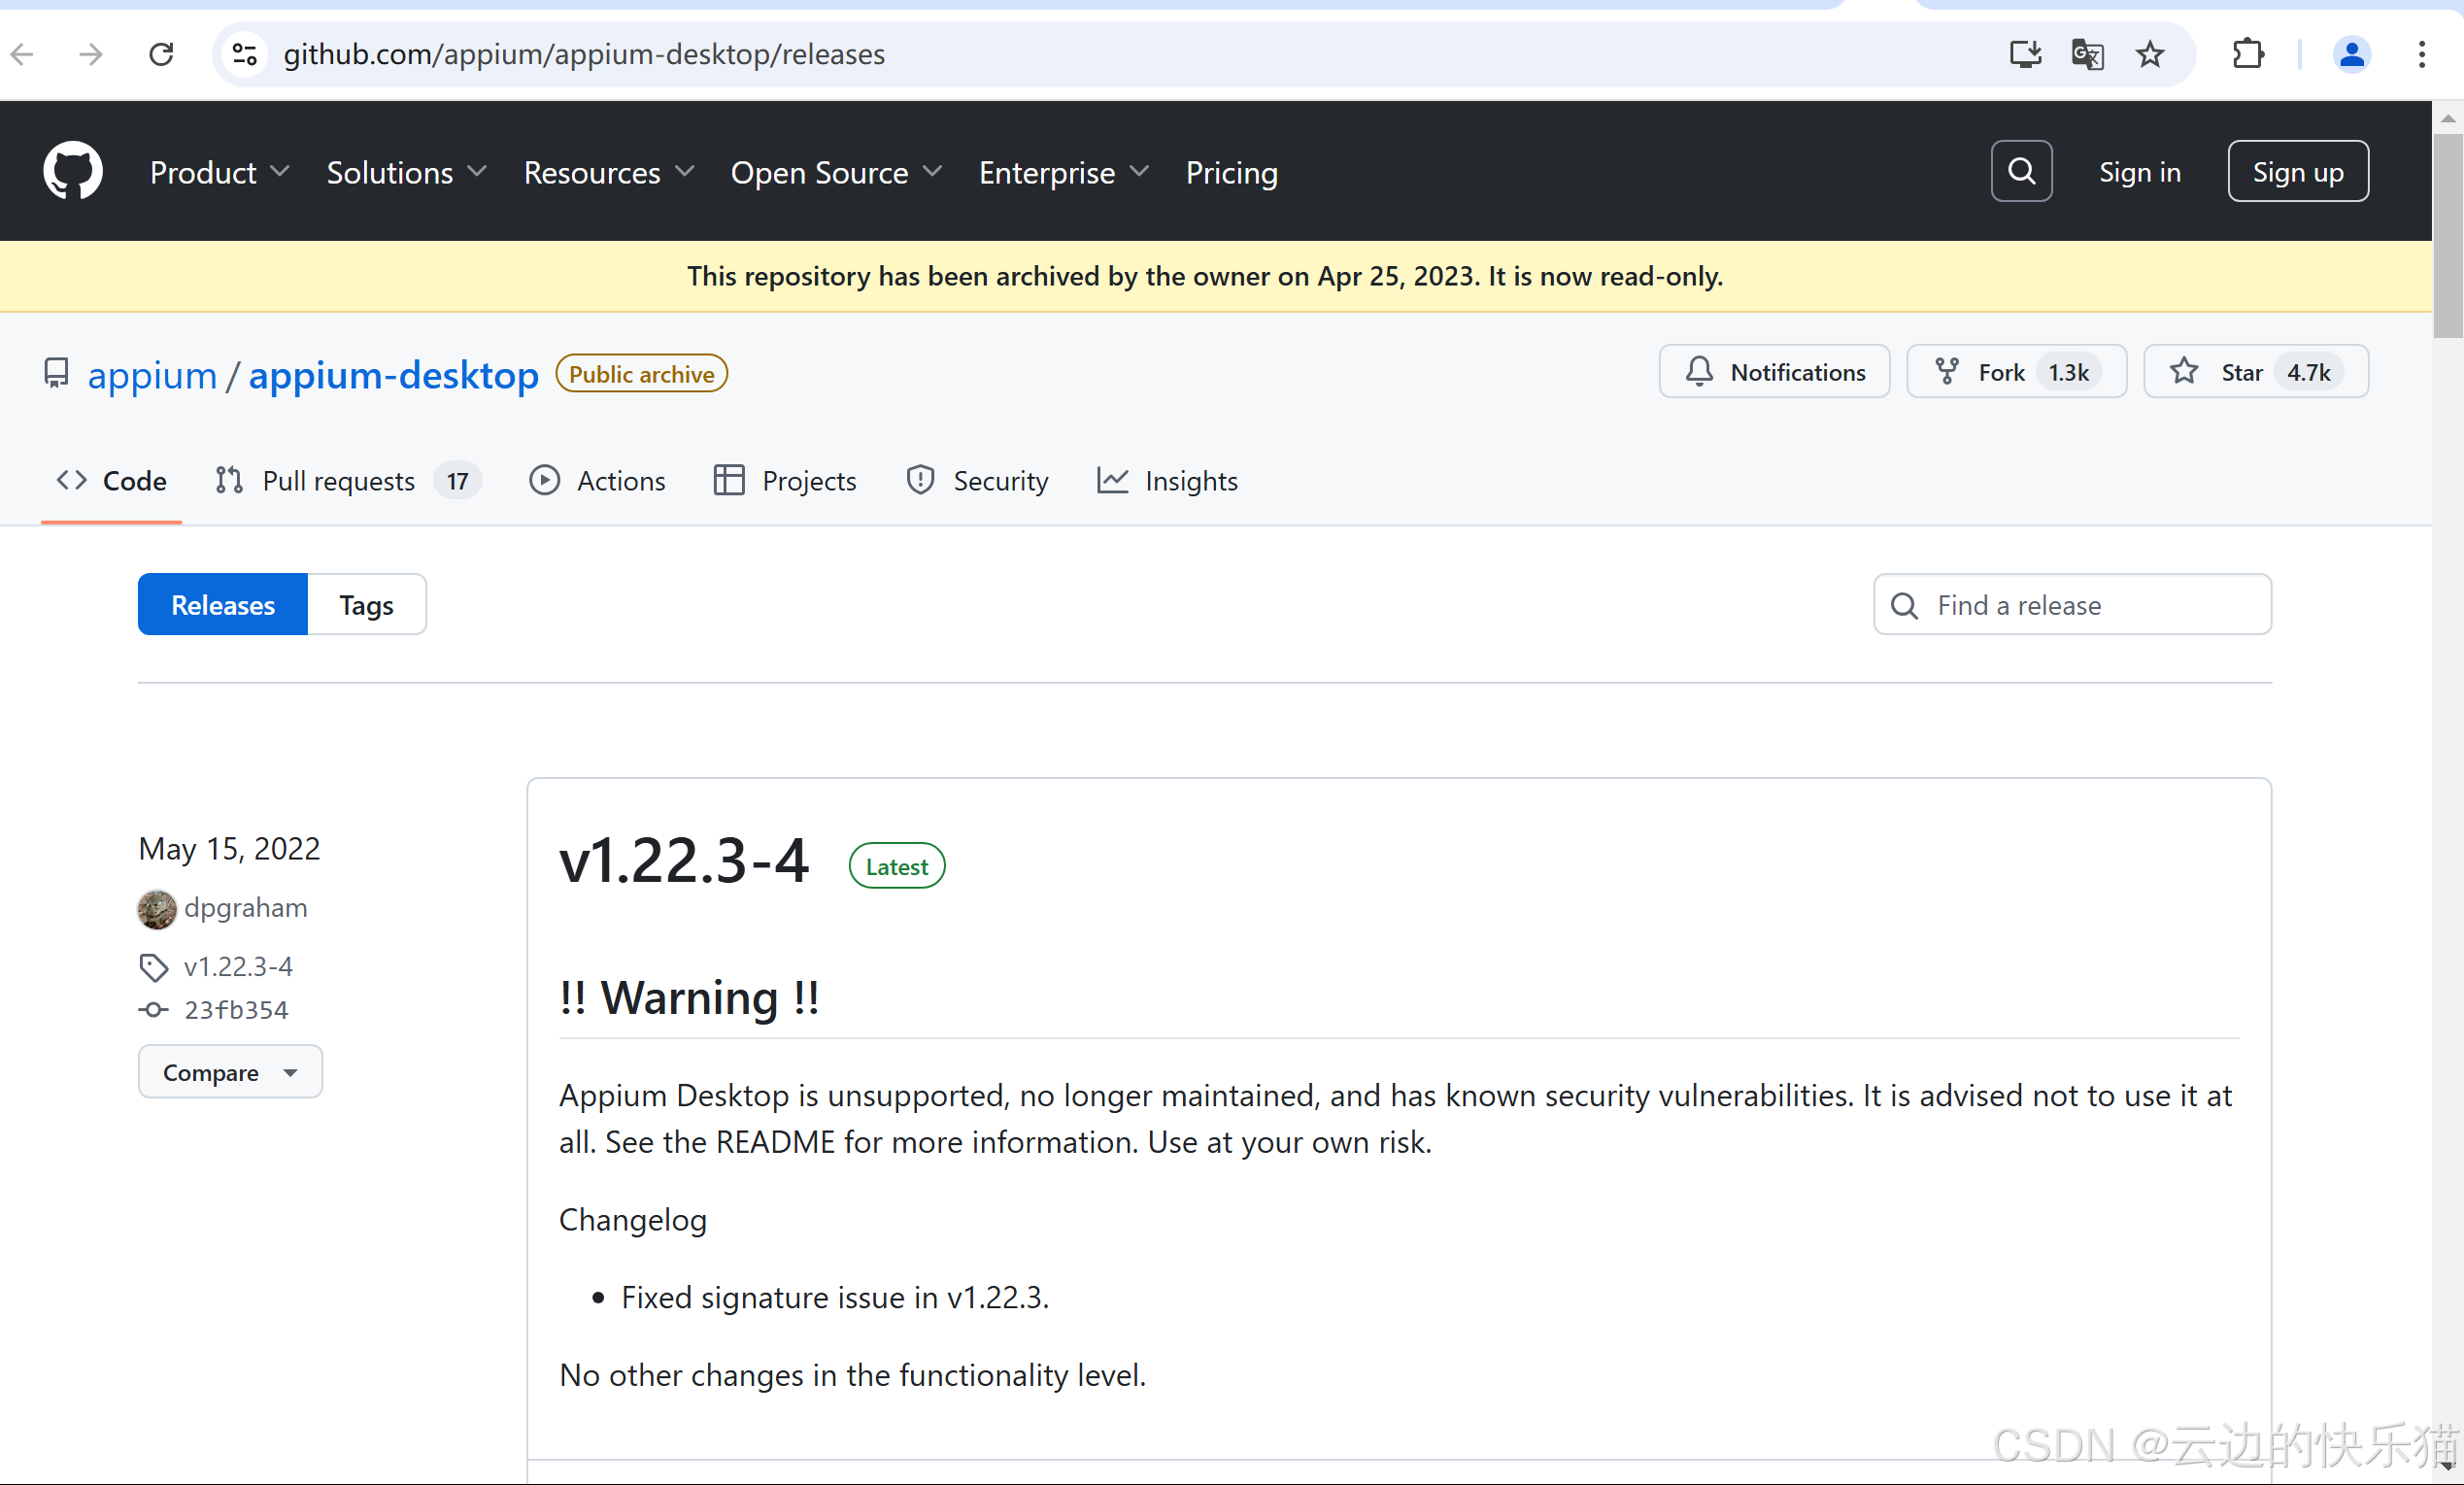
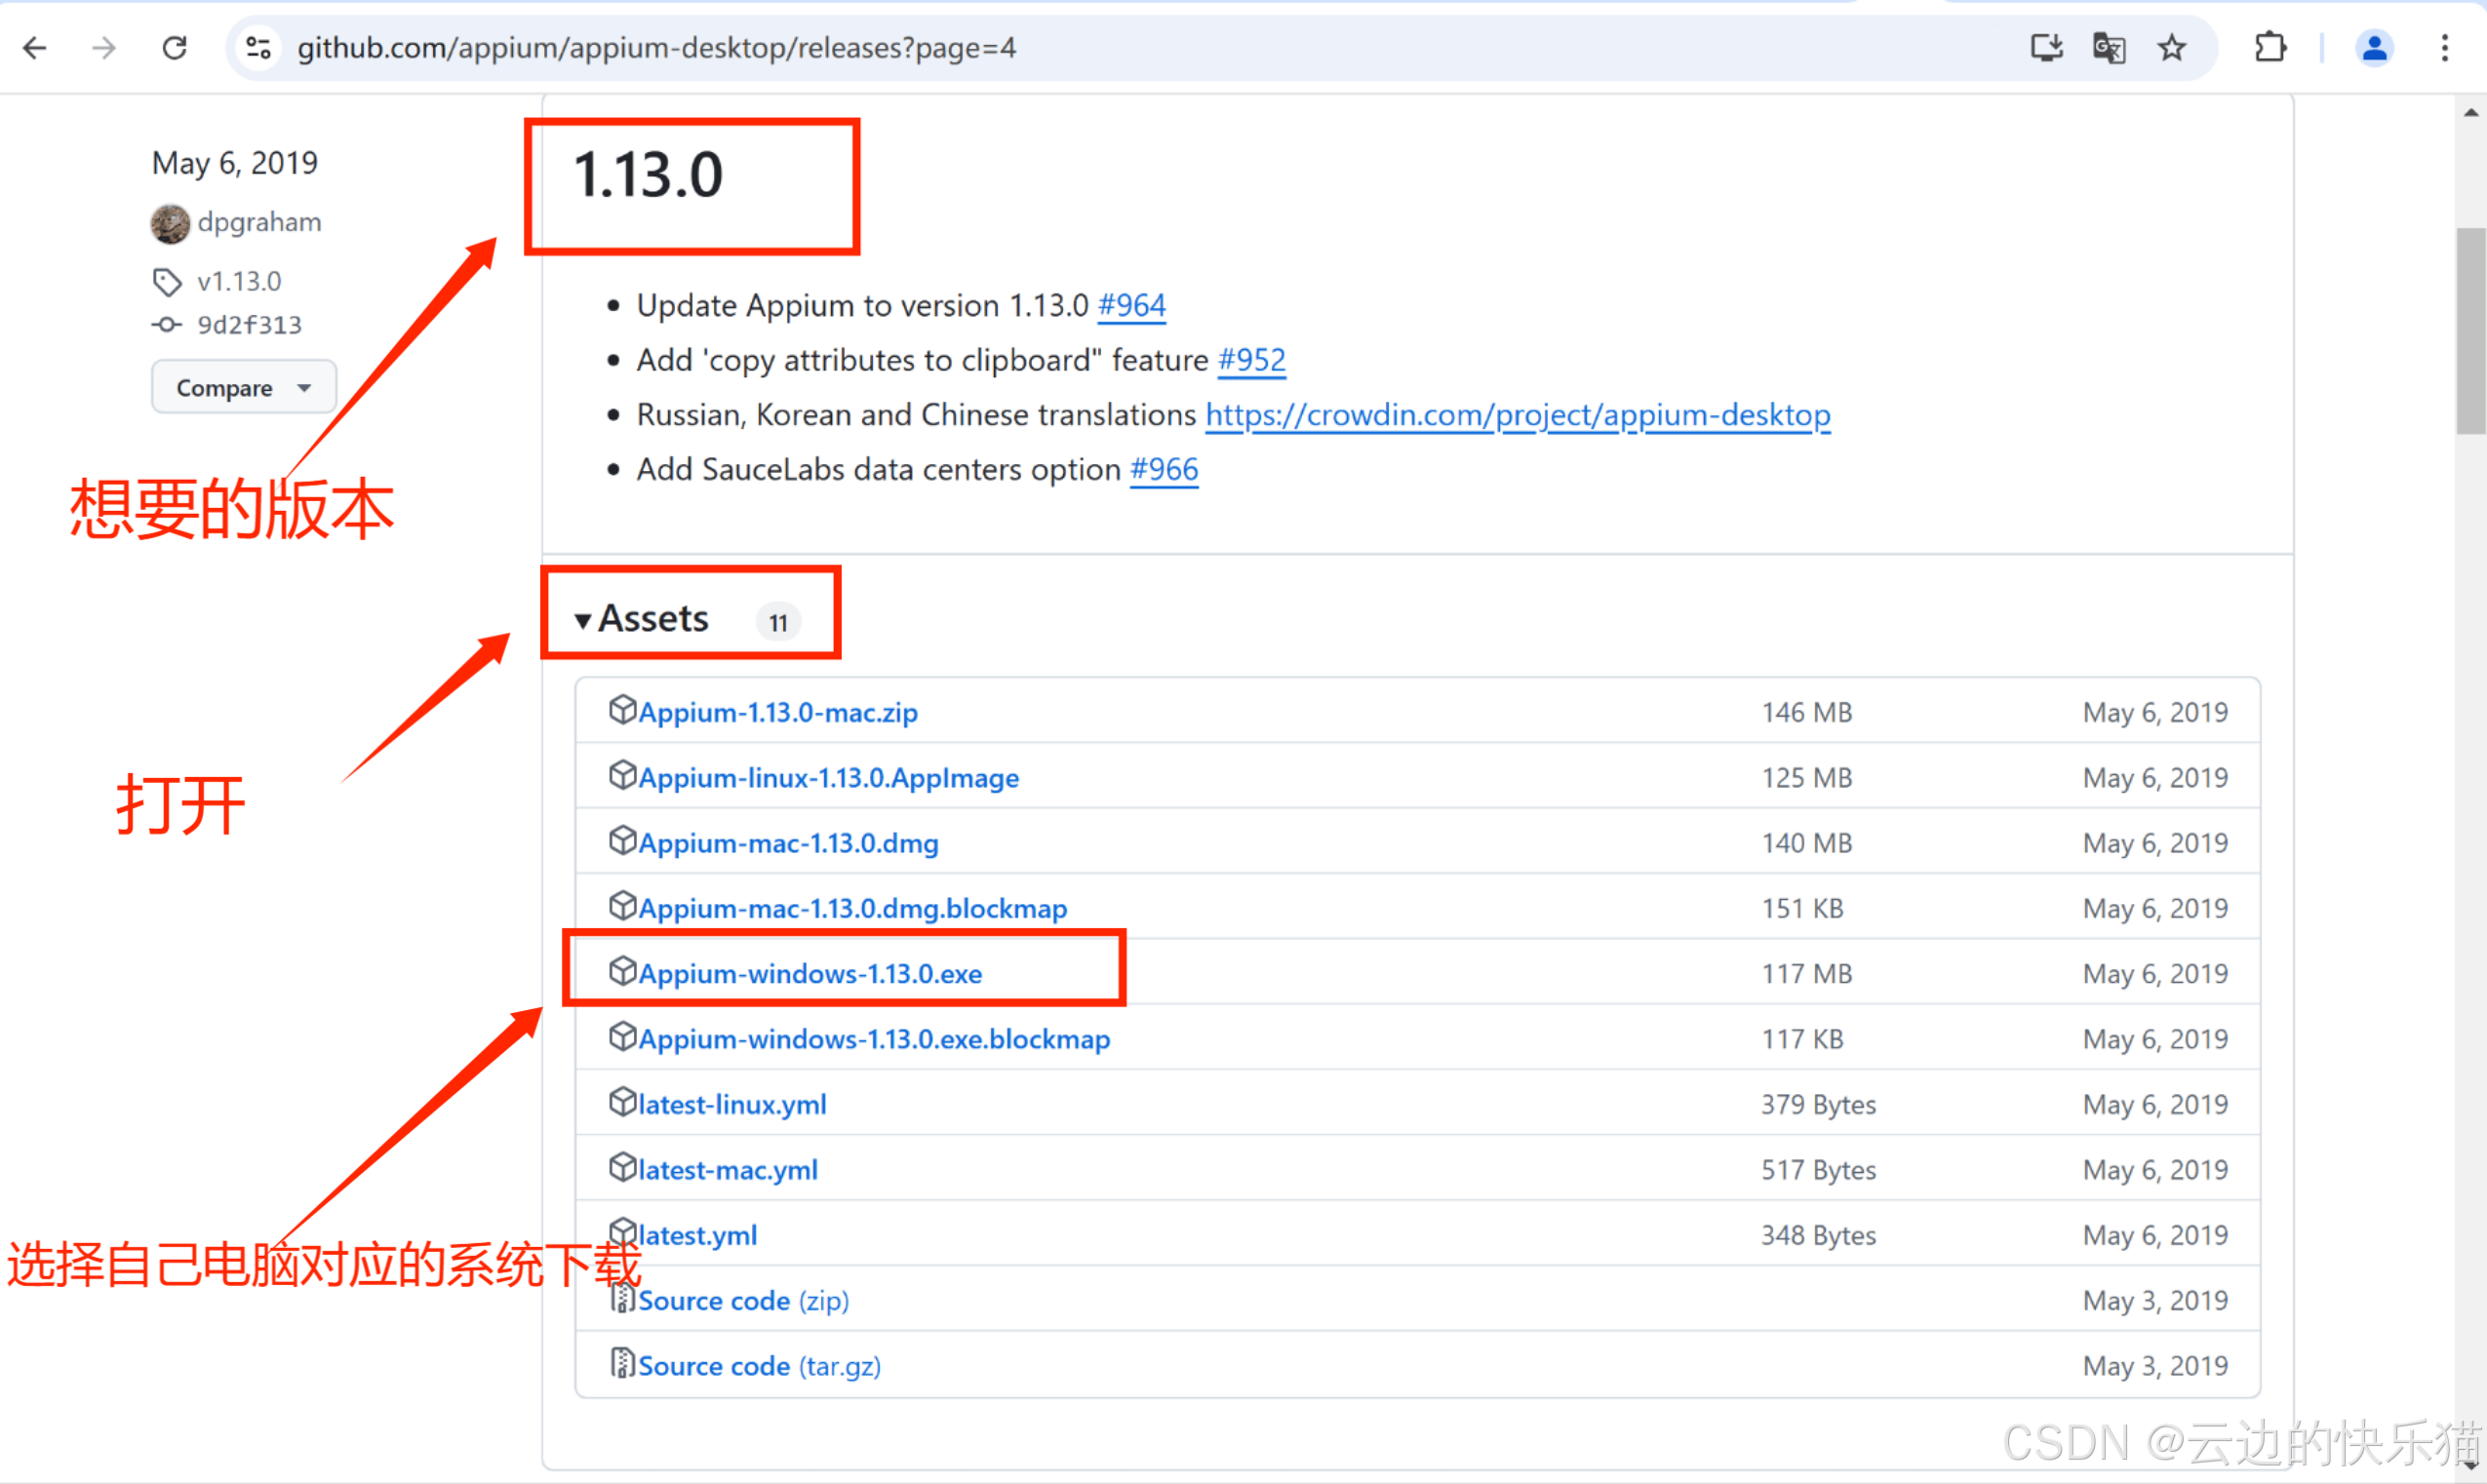
**2.**往下滑翻页找到想要的版本
我这里想要下载的是1.13版本的
下载完成

安装
**3.**下载完成打开进行安装
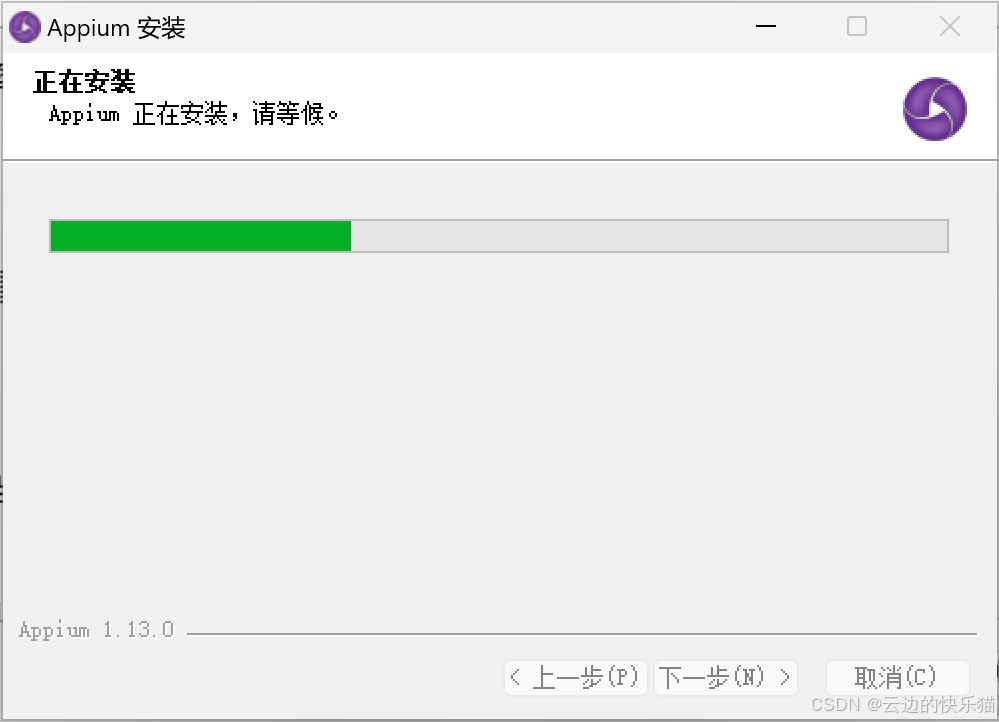
 **4.**安装中
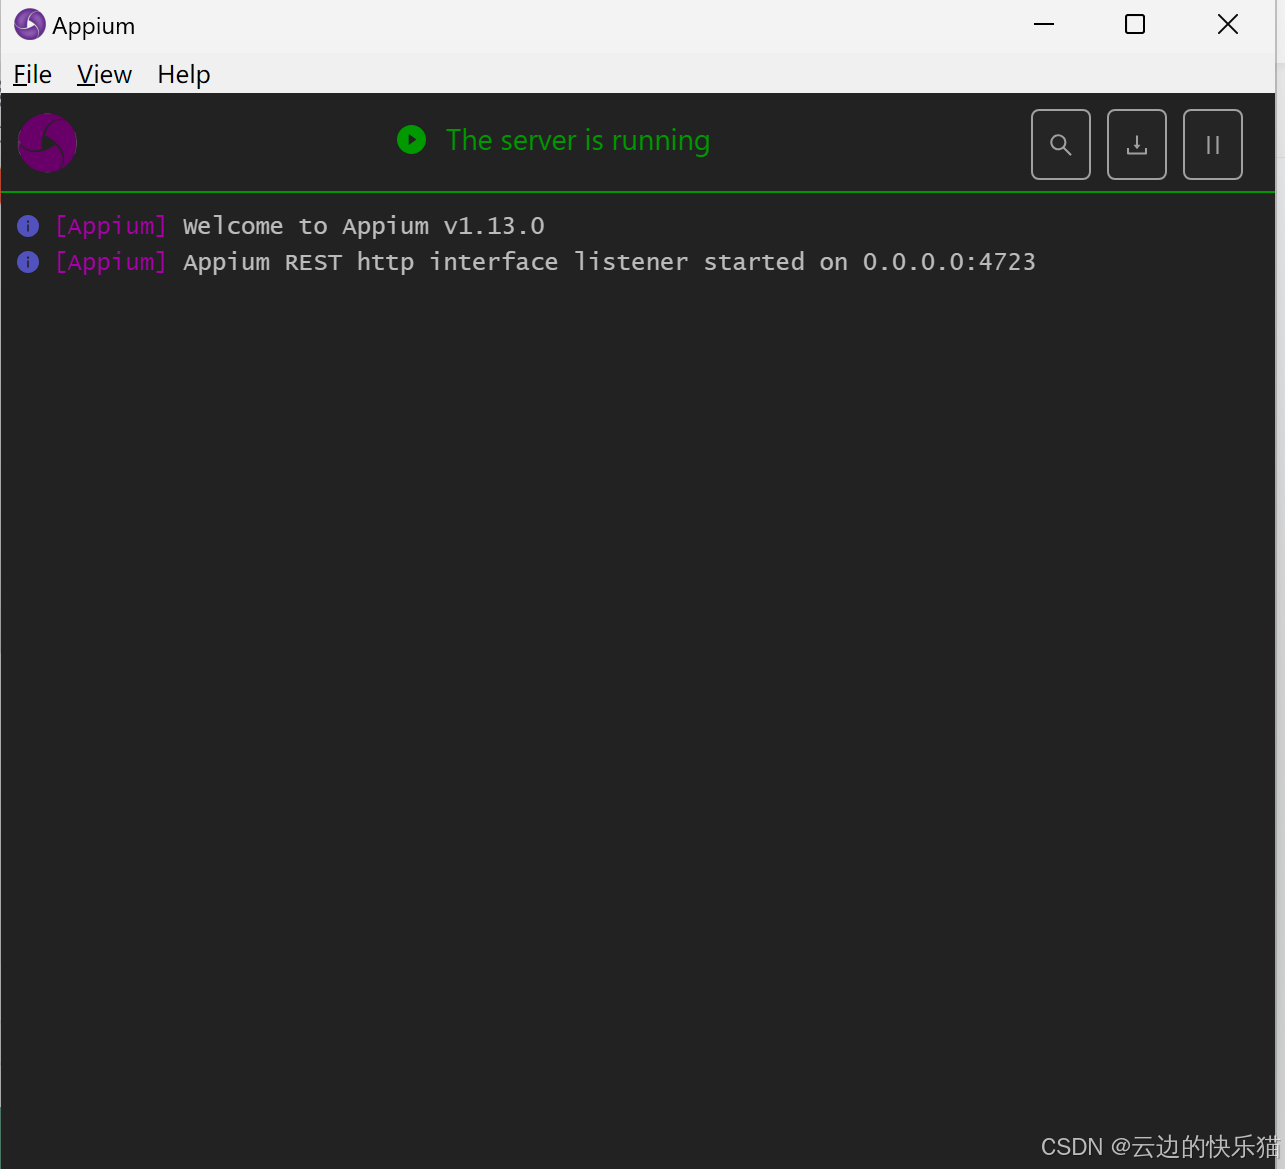
**5.**安装完成
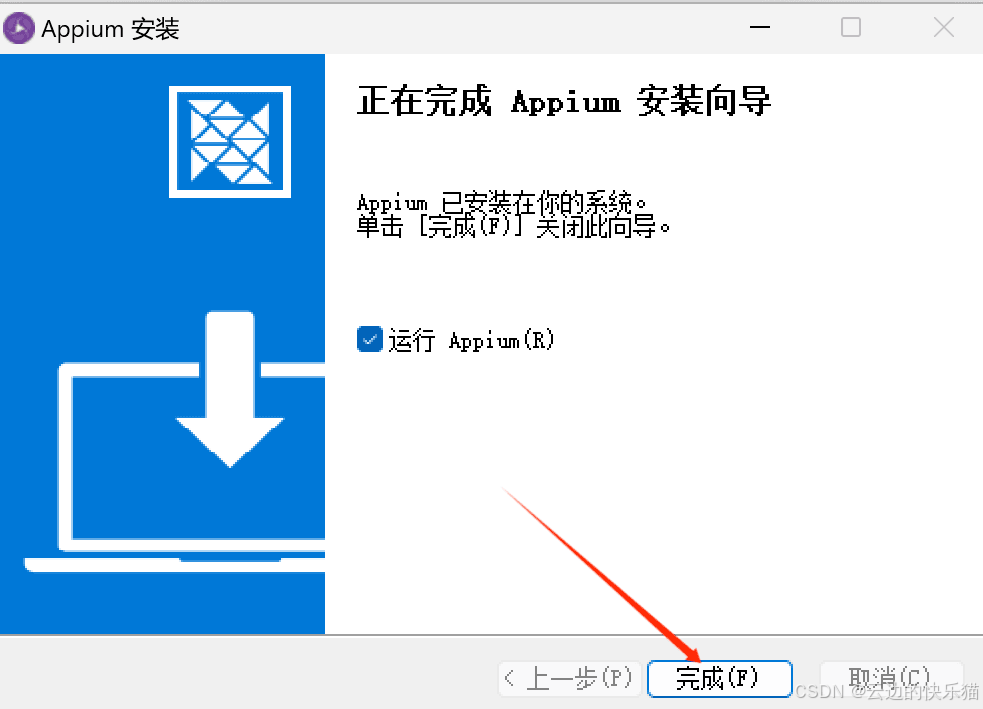
**6.**弹窗出来这个直接点击这个,还有网络弹出来让是否给网络权限点击是

**7.**进入成功
(三)APPium-python-Client
下载
**1.**进入官网进行下载查看版本有哪些(这个步骤不进去也可以,知道想要的版本就没问题)
ps:这里有历史的各种版本
https://pypi.org/project/Appium-Python-Client/#history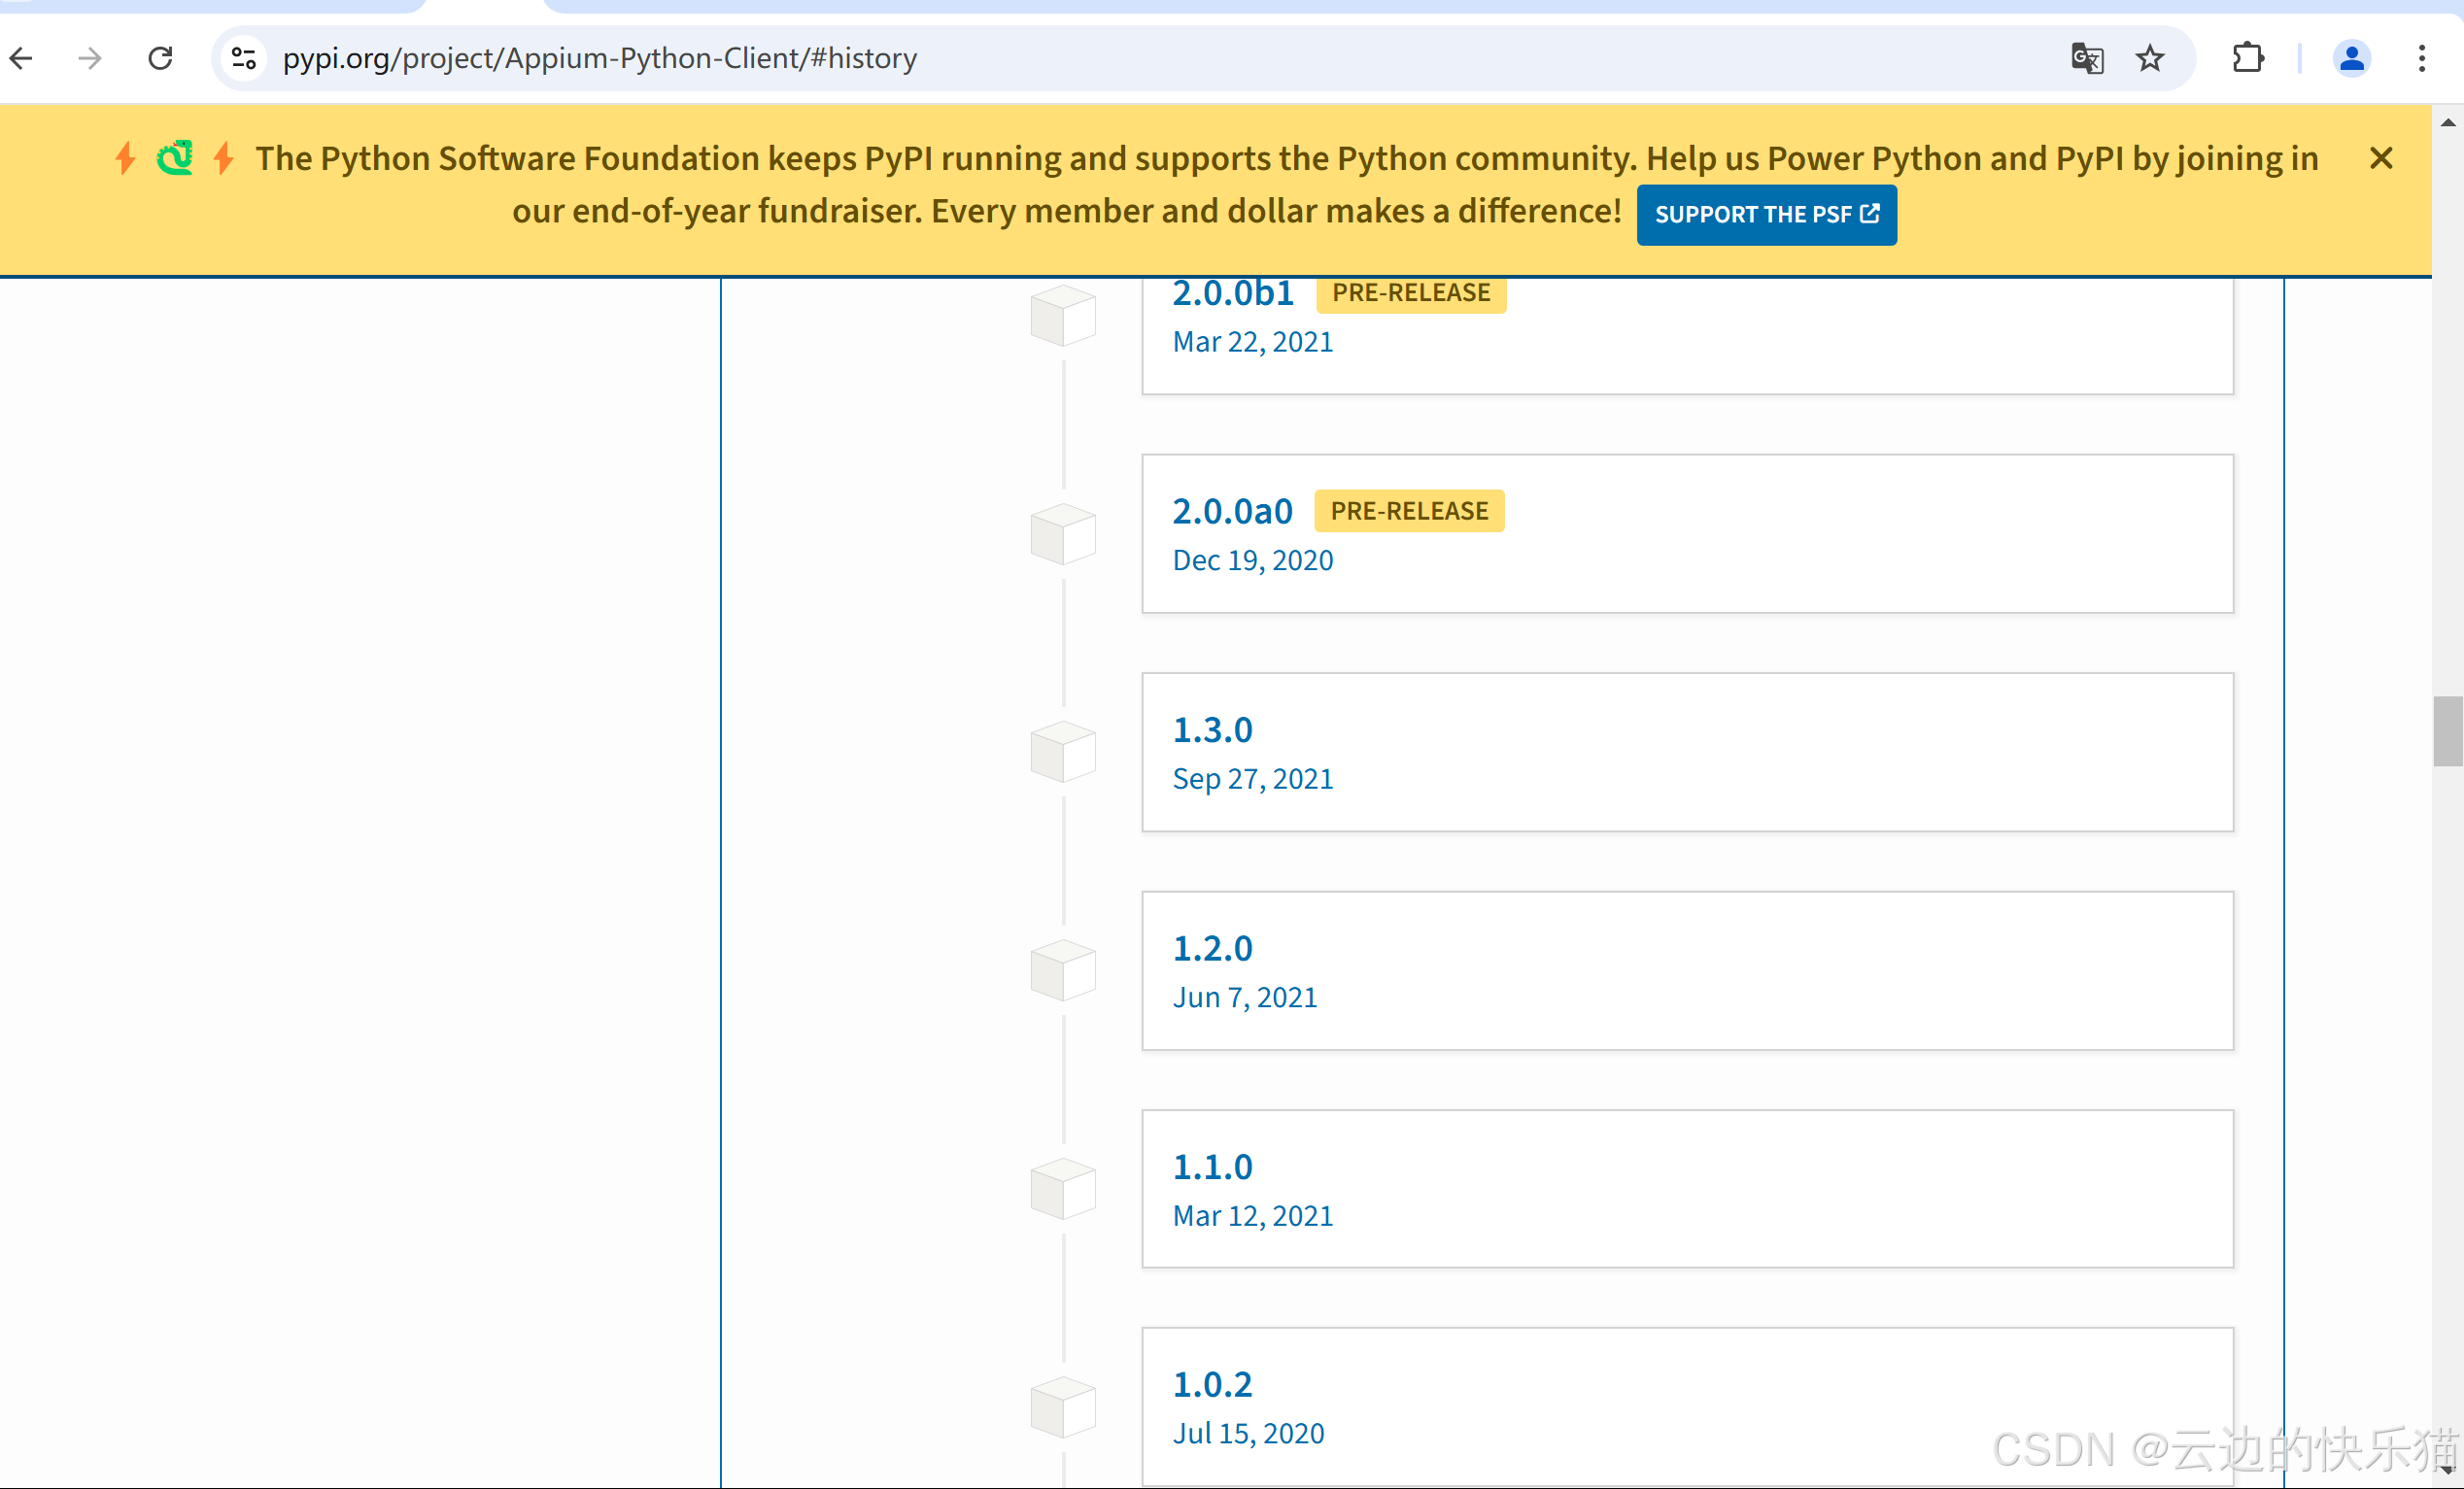
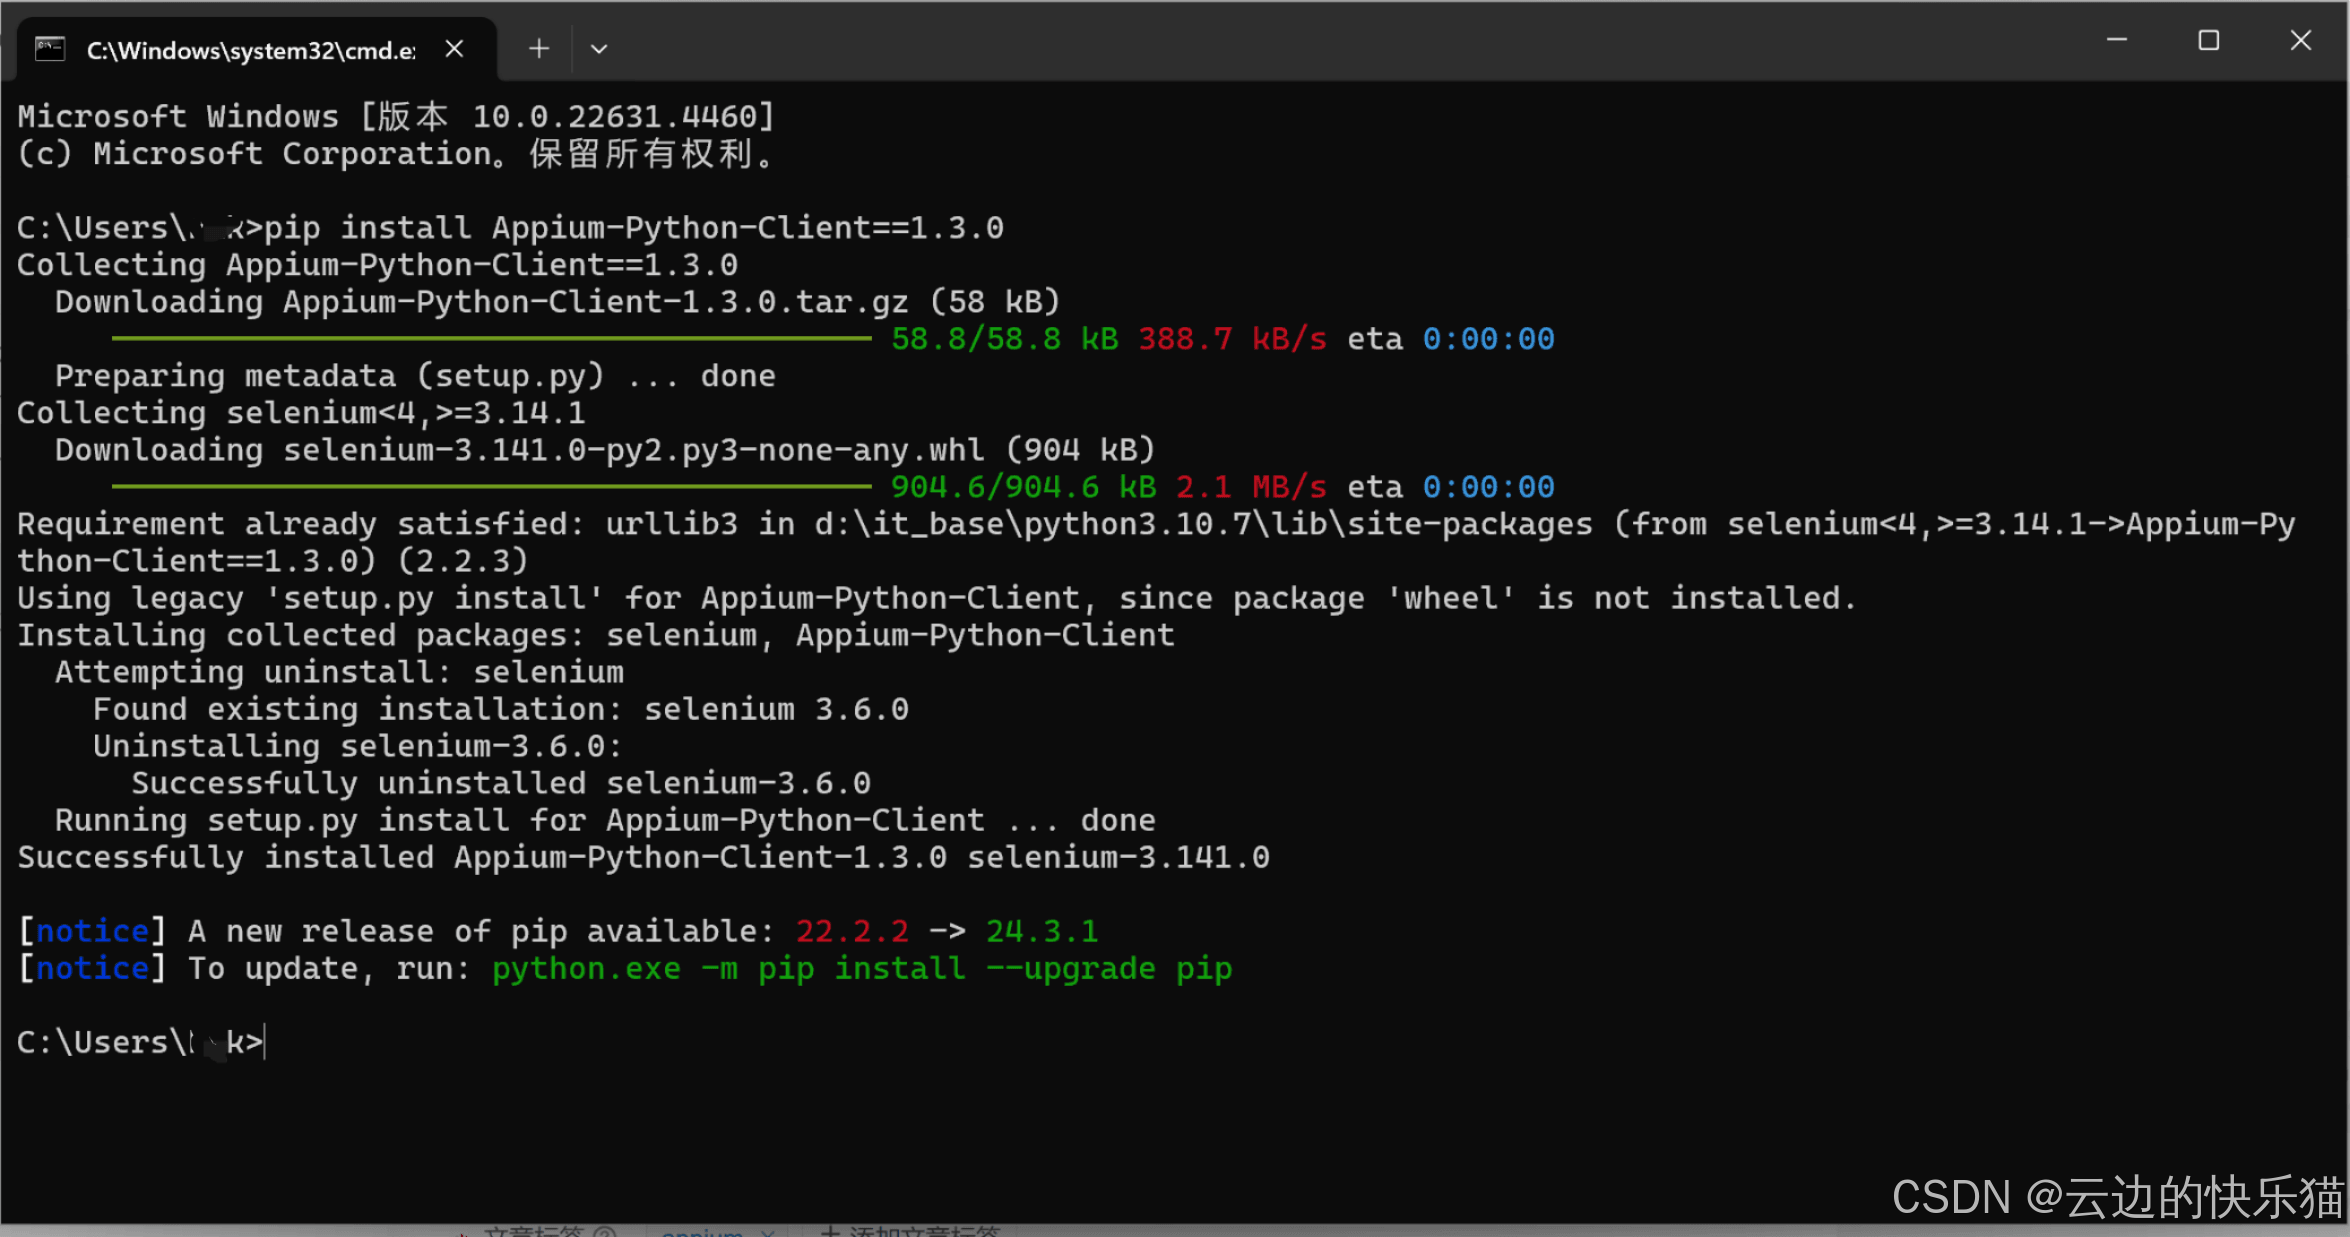
**2.**查看到想要的版本,然后win+R快捷键输入cmd进行命令下载指定的版本进行下载
ps:我这里想要的是1.3.0的版本
pip install Appium-Python-Client==1.3.0如果下载失败
方式1.换个好一点的网络
方式2.升级pip
python -m pip install --upgrade pip
方式3.换源(版本号自己指定)
命令代表使用阿里云或者清华源下载Appium-Python-Client的1.3.0版本
阿里云:pip install -i https://mirrors.aliyun.com/[pypi](https://so.csdn.net/so/search?q=pypi&spm=1001.2101.3001.7020 "pypi")/simple/ Appium-Python-Client==1.3.0
清华:pip install -i https://pypi.tuna.tsinghua.edu.cn/simple Appium-Python-Client==1.3.0
方式4.清理缓存
pip cache purge
下面这是下载成功了
(四)Android Studio
下载解压
**1.**进入官网
https://www.androiddevtools.cn/index.html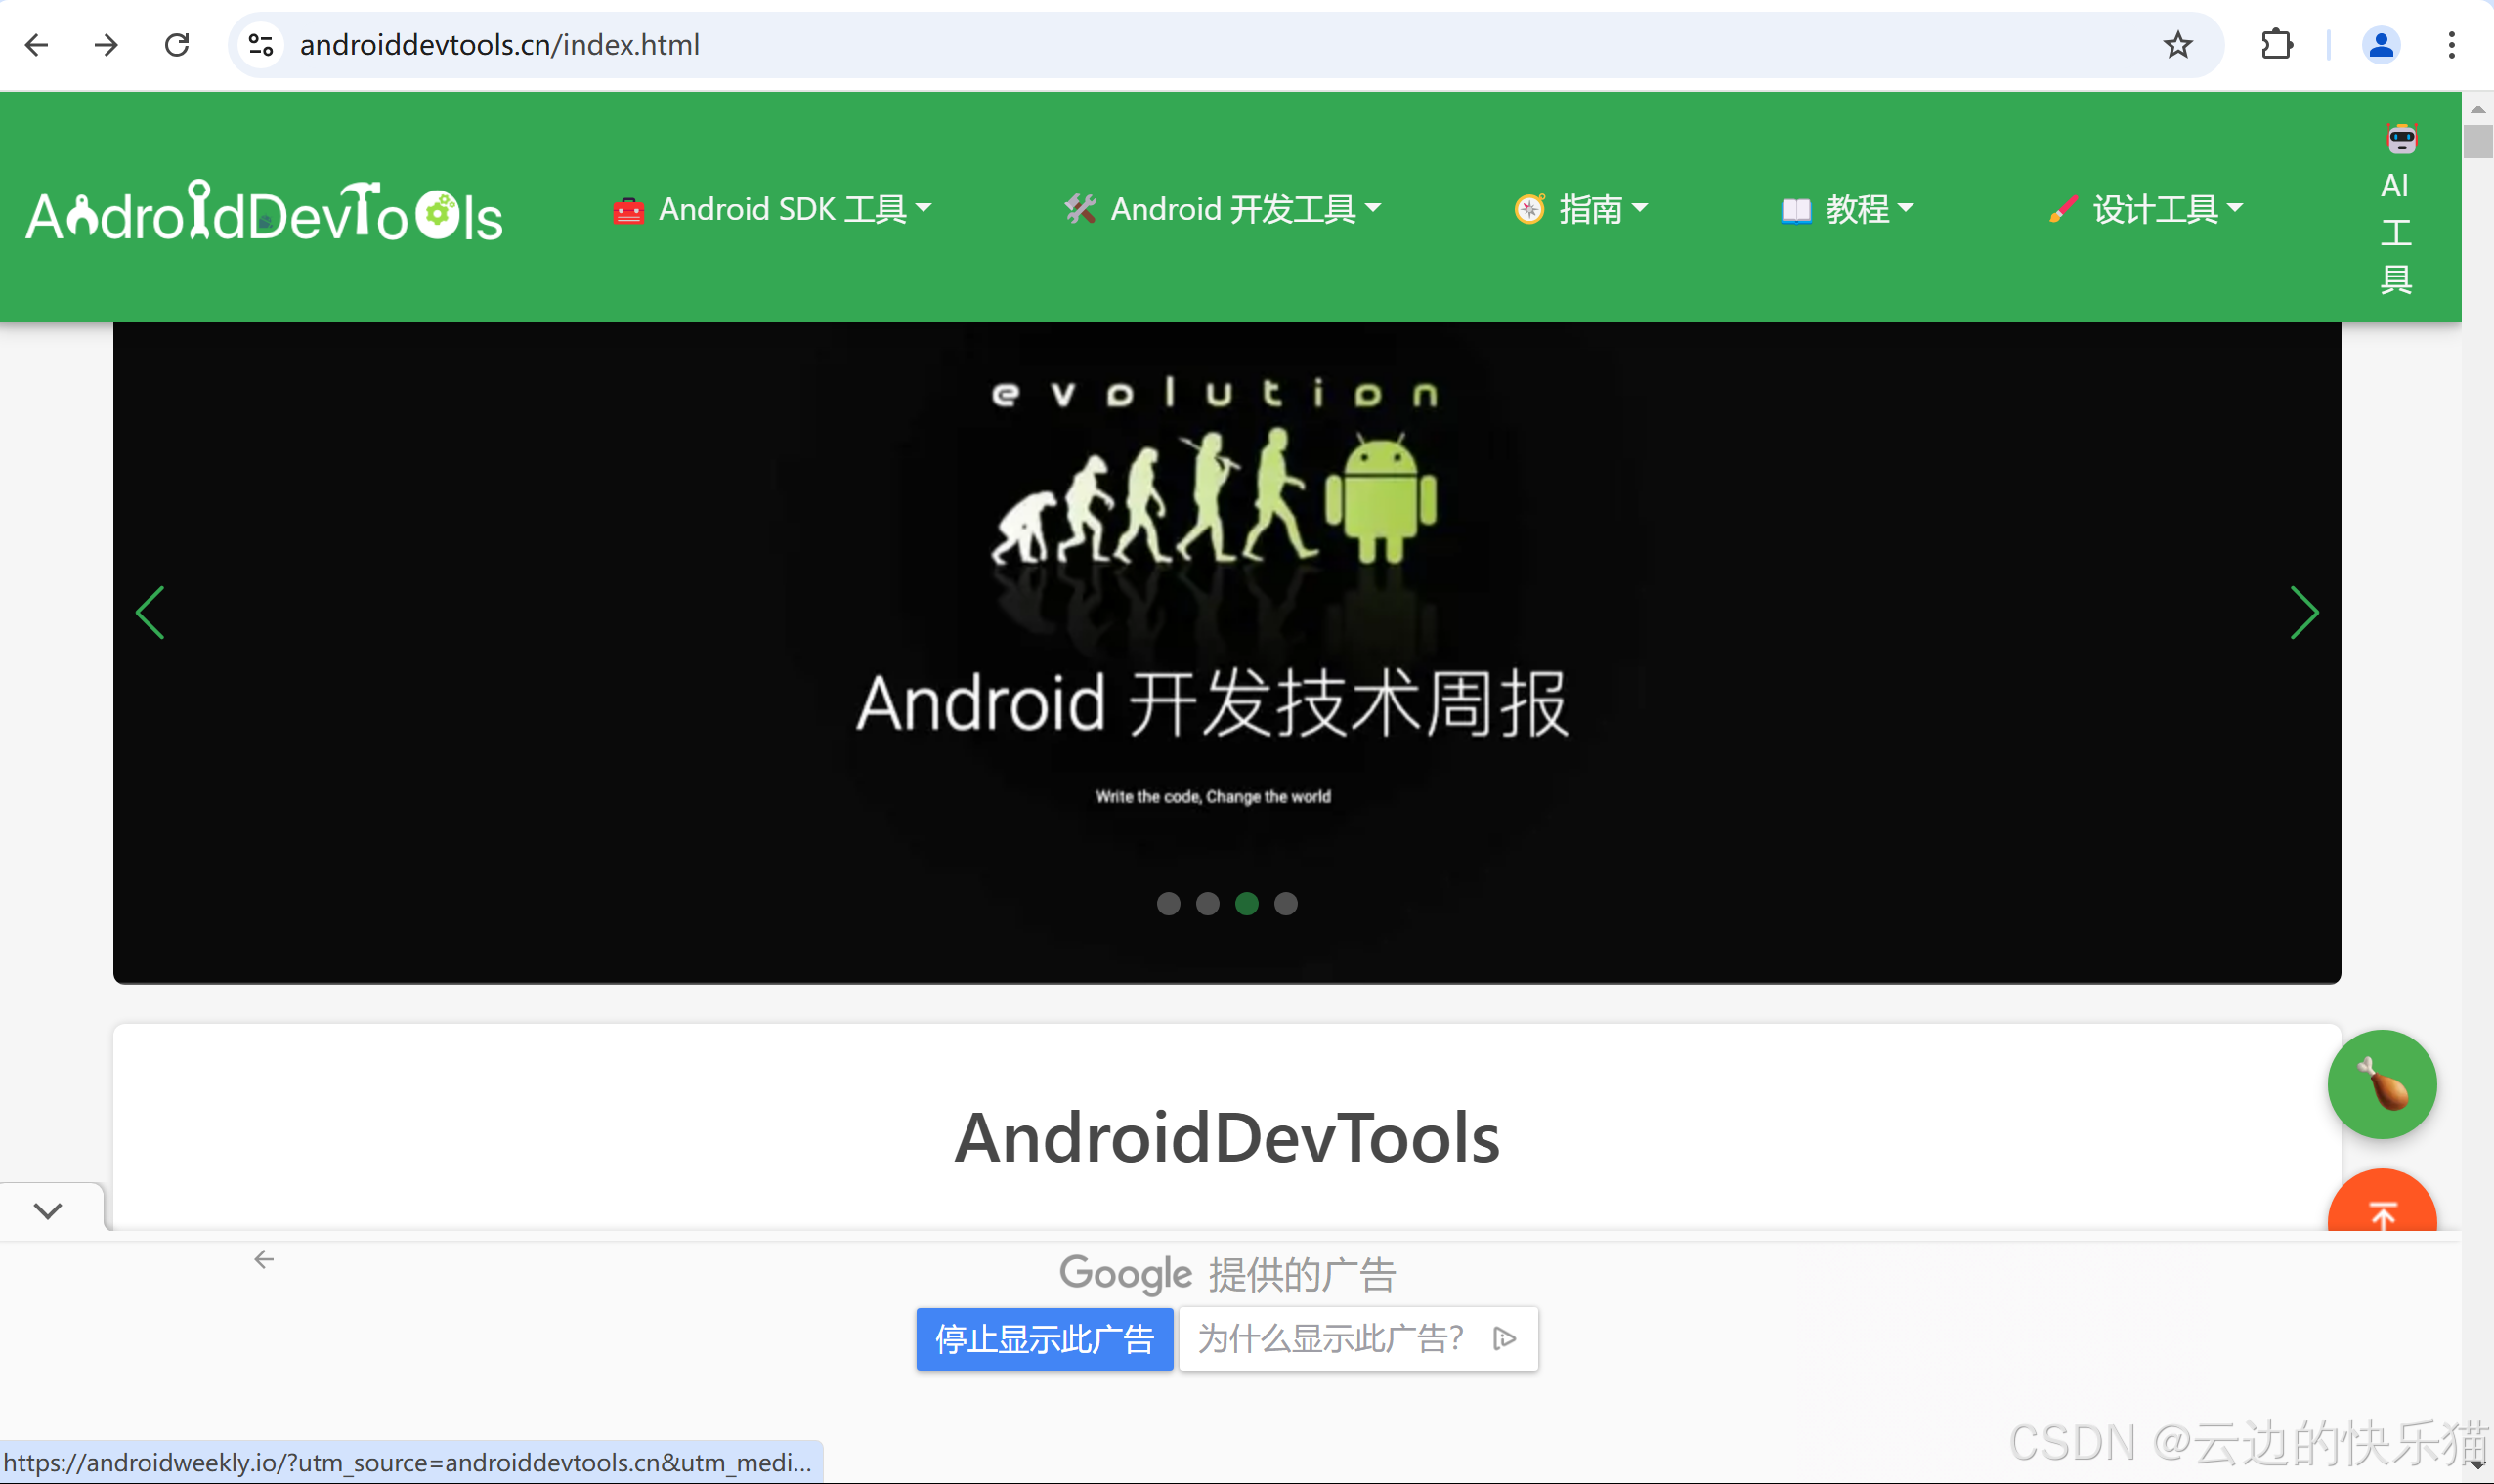
**2.**Android SDK工具--Android Studio
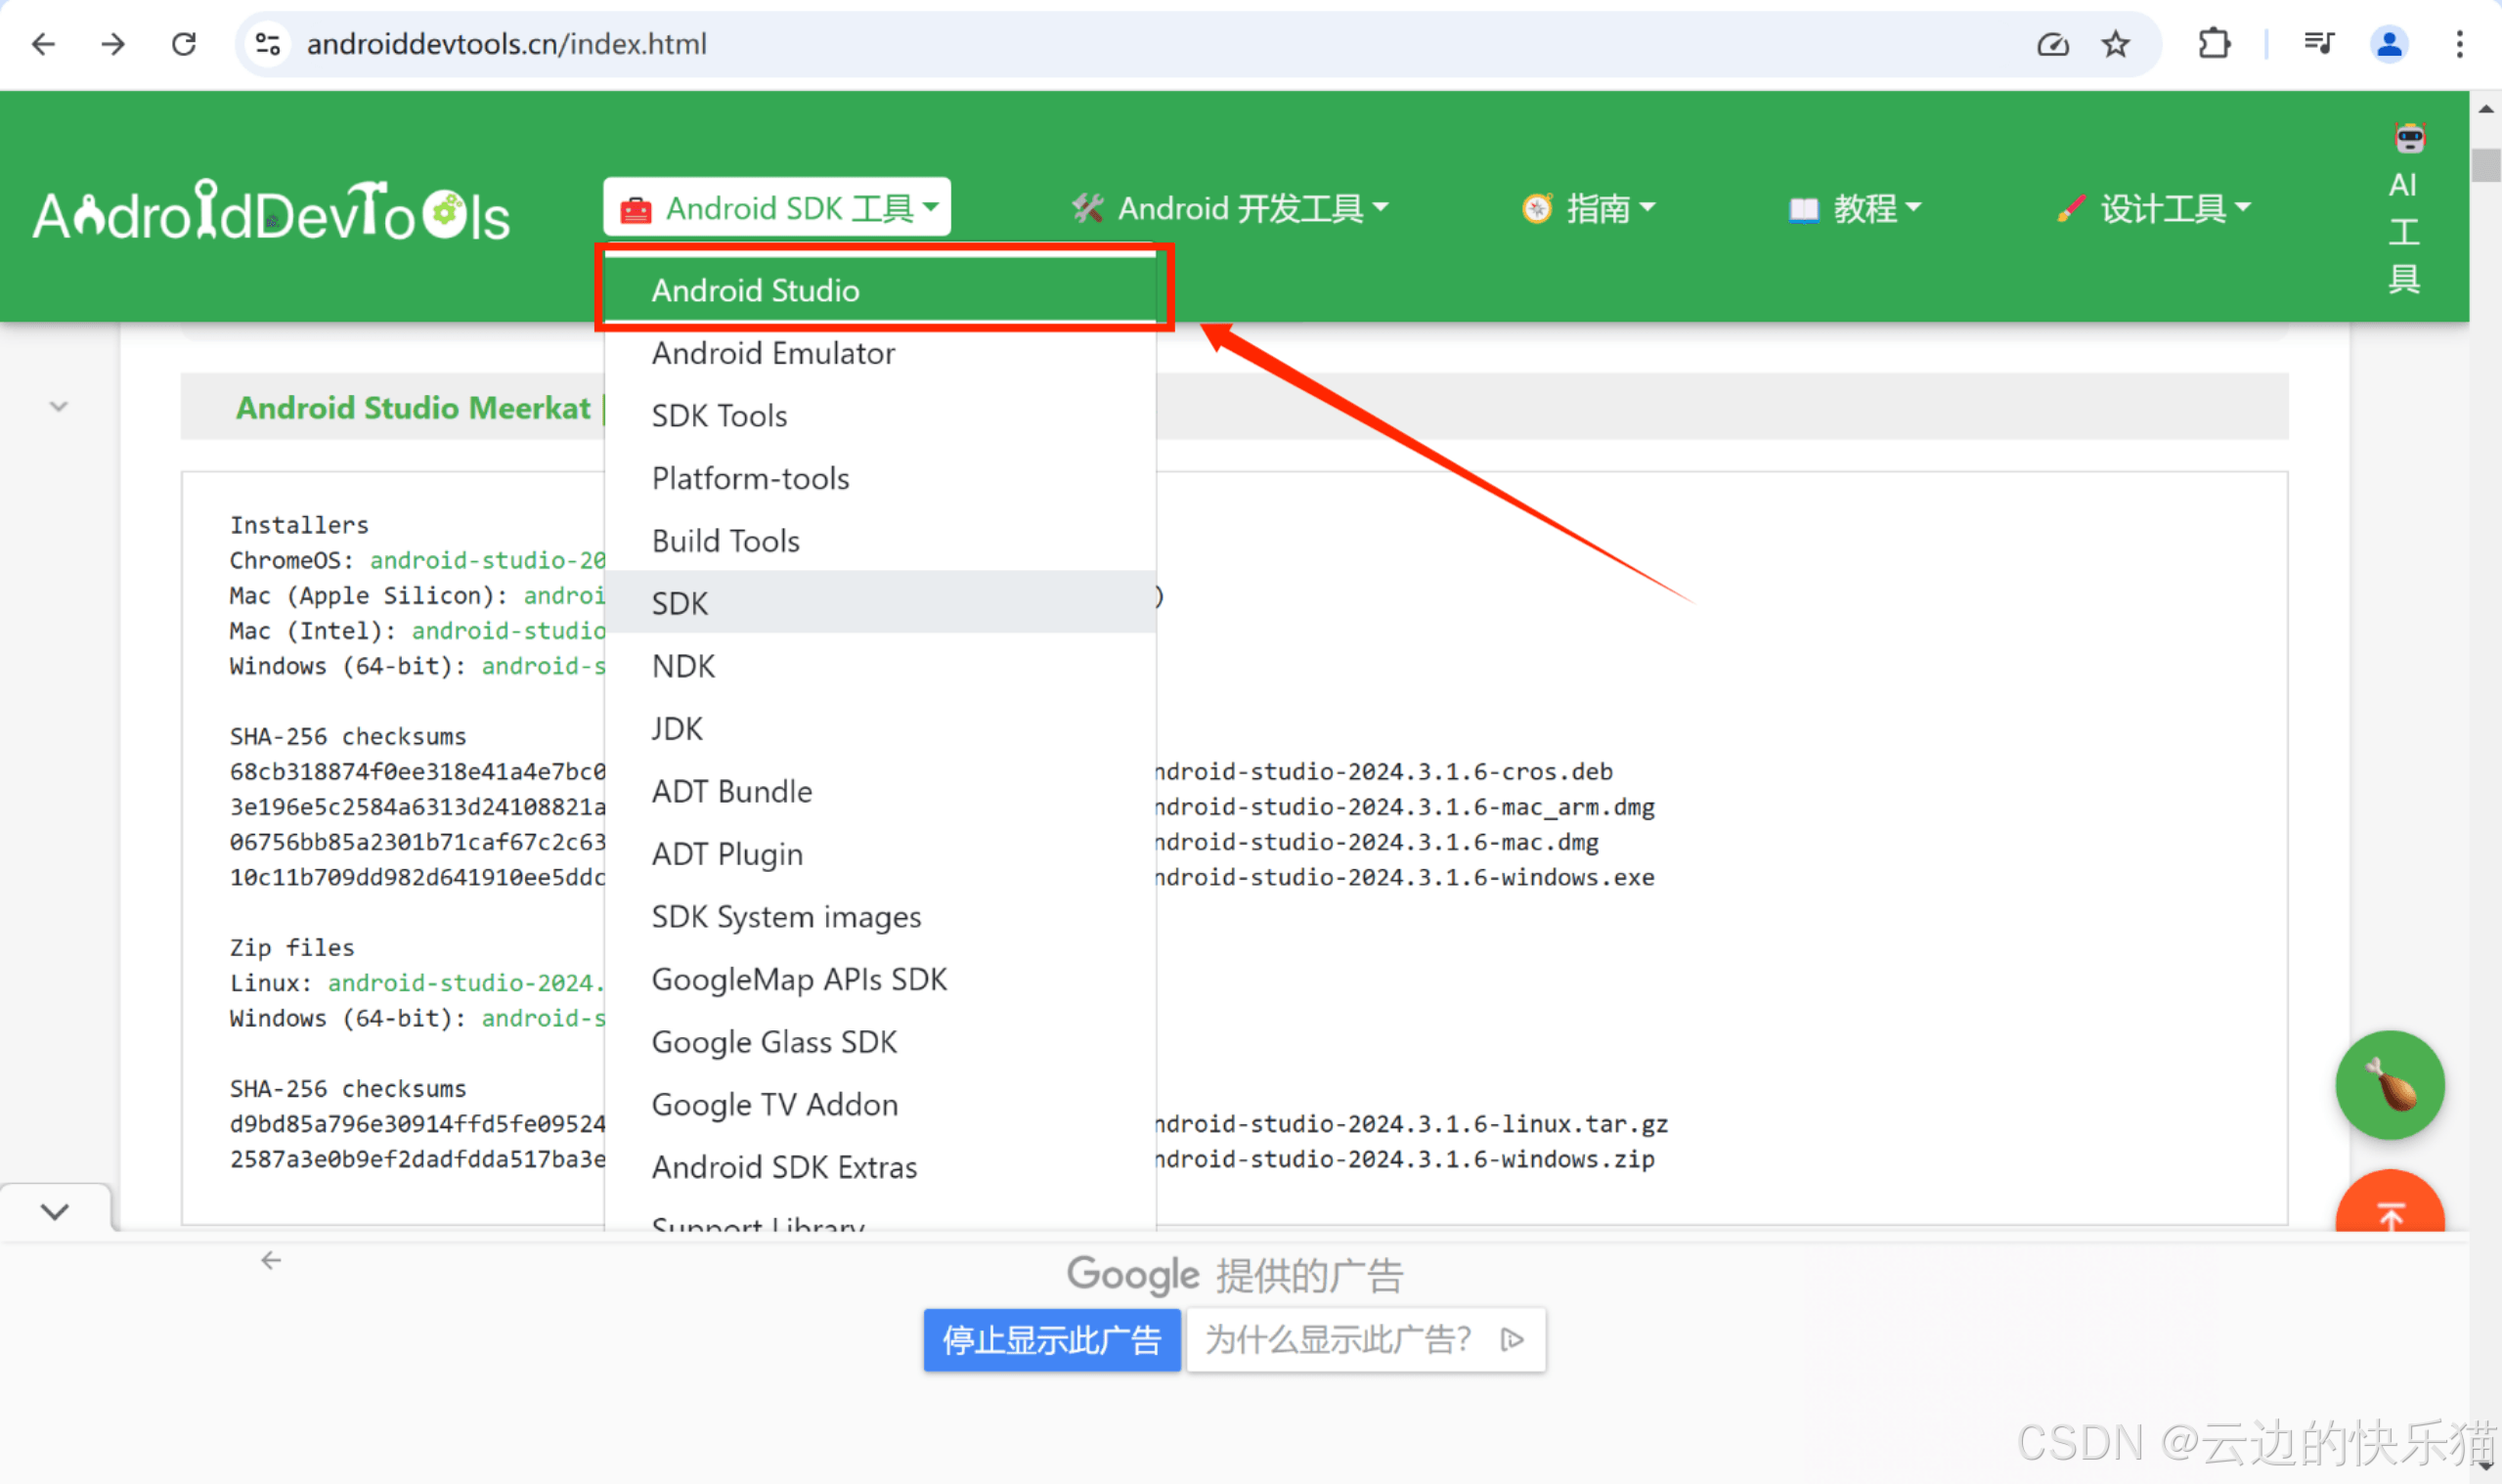
**3.**下载exe安装包,如果需要下载其他的历史版本可以往下滑
 下载完成
下载完成

安装
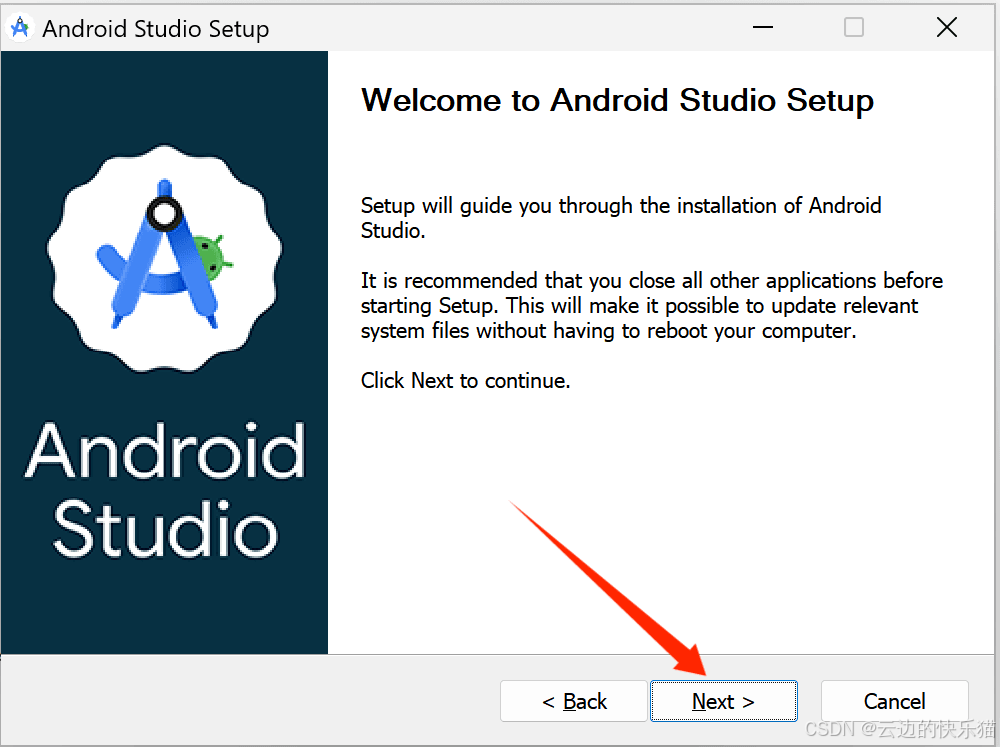
**4.**点击打开,点下一步
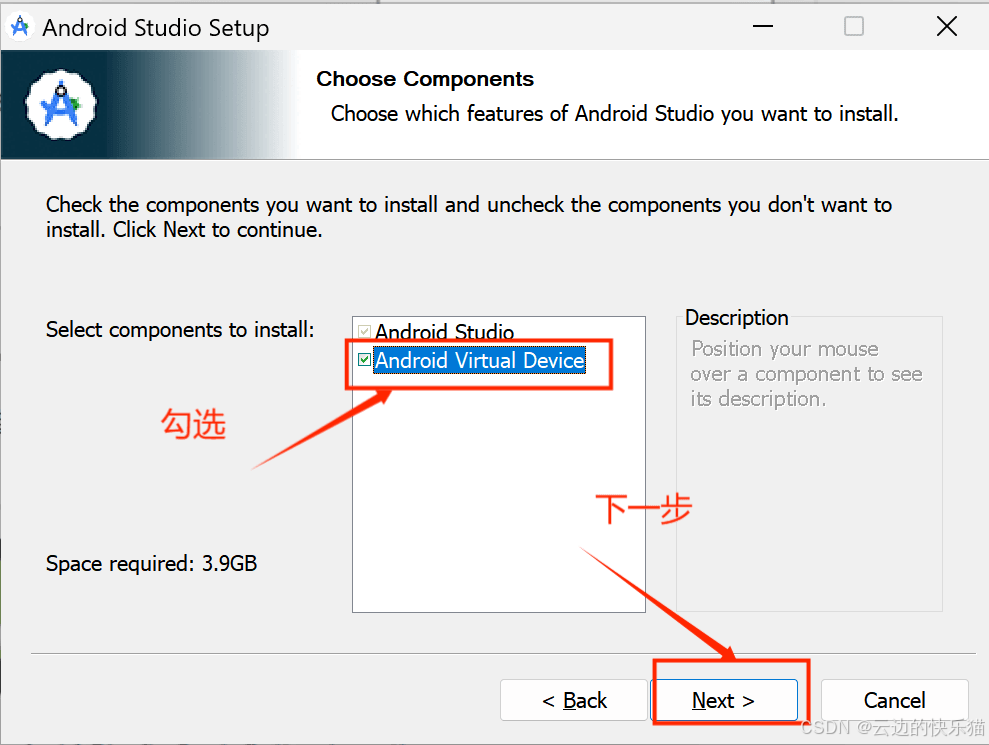
**5.**勾选Android Virtual Device然后下一步
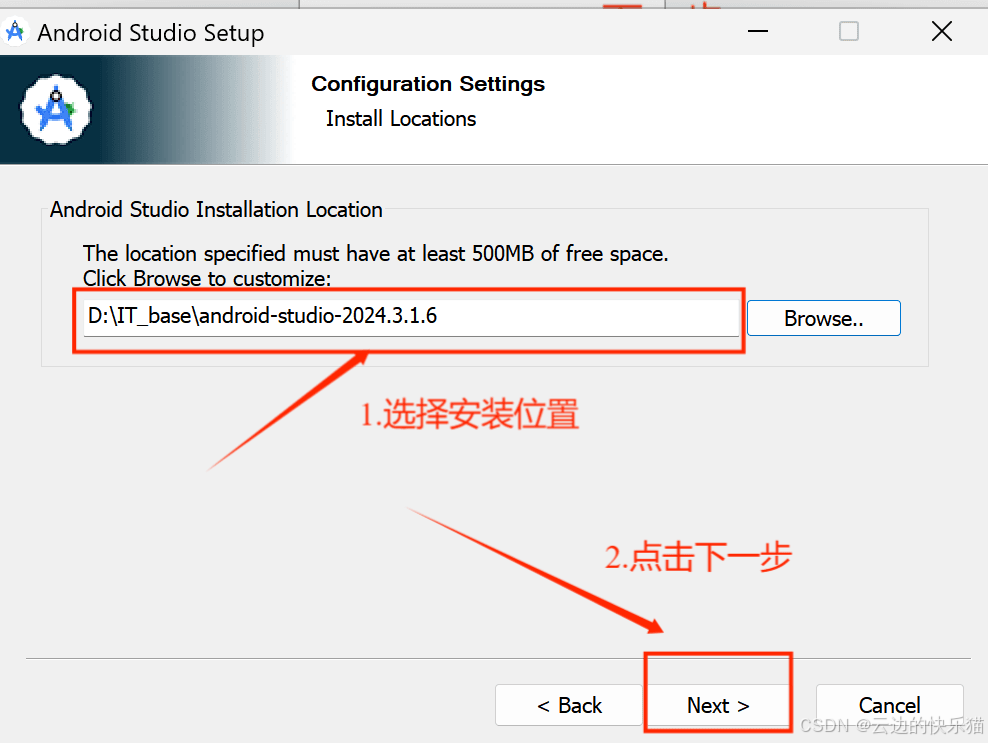
**6.**选择安装位置,点击下一步
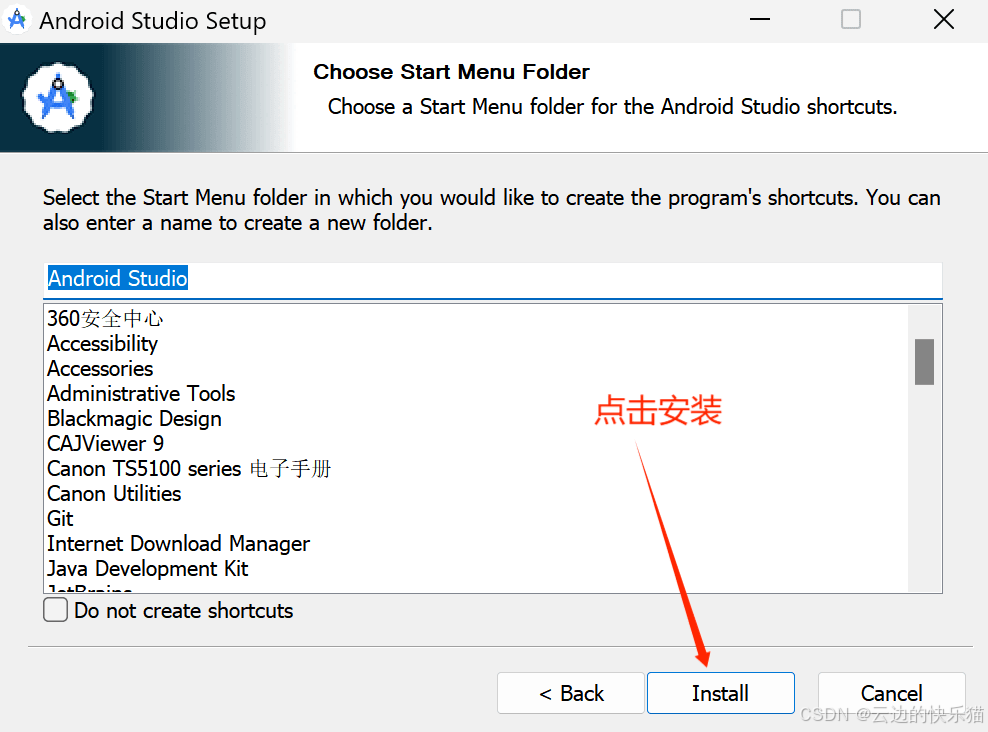
**7.**点击安装
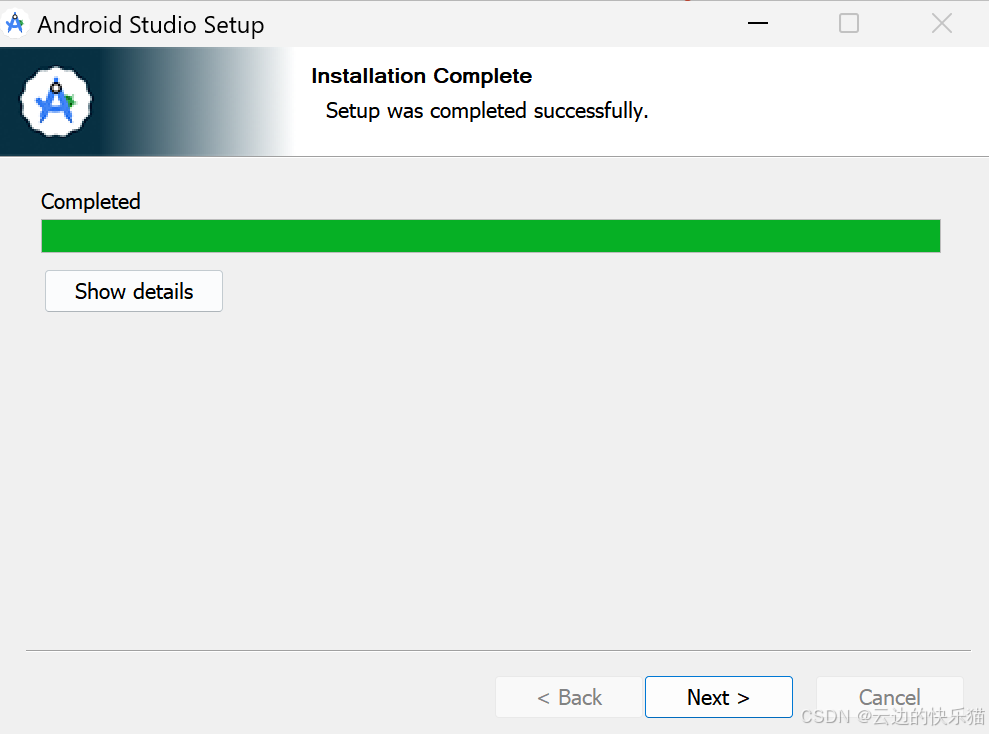
**8.**点击Next
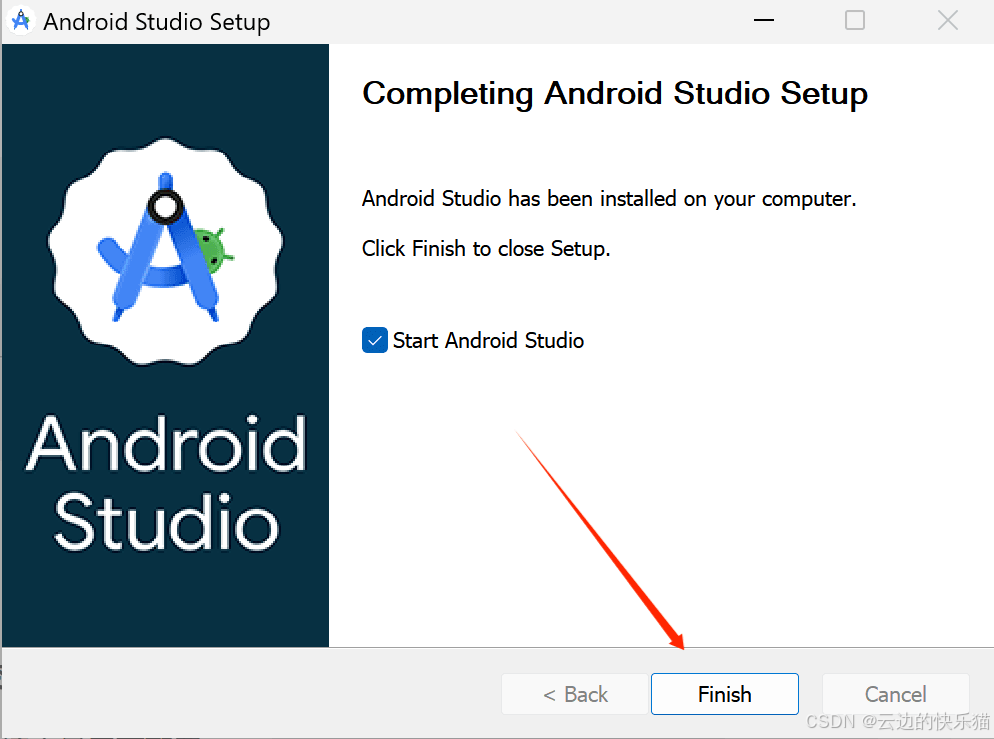
**9.**点击Finsh
安装完成
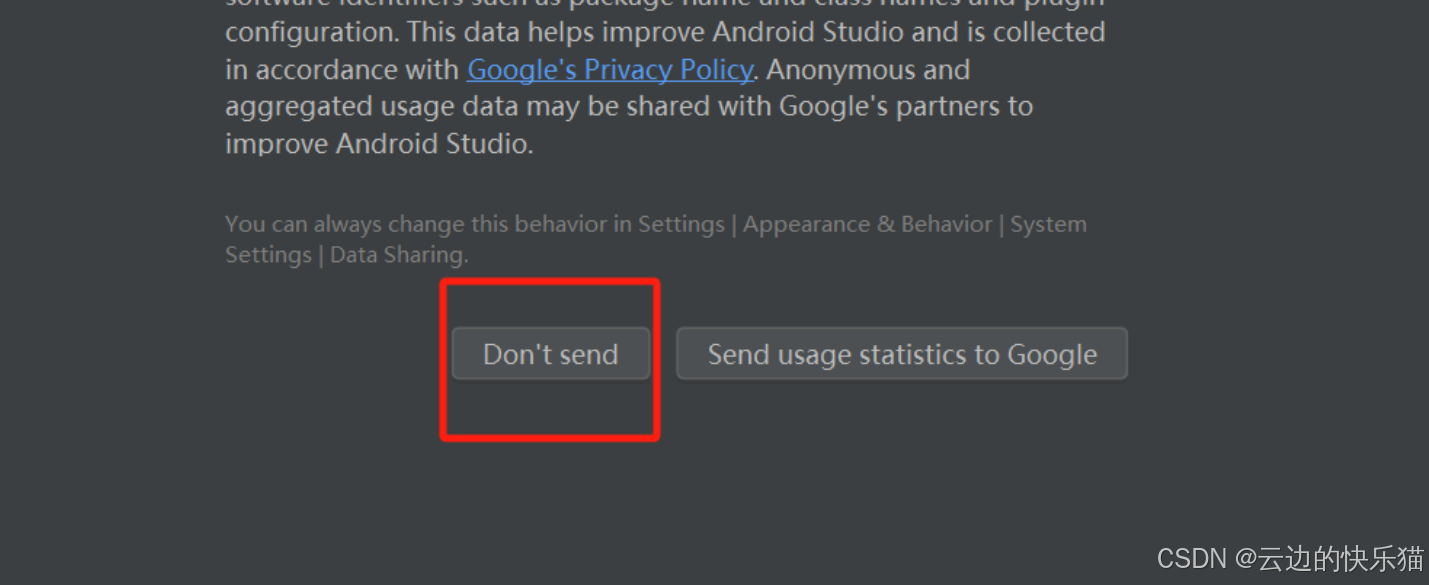
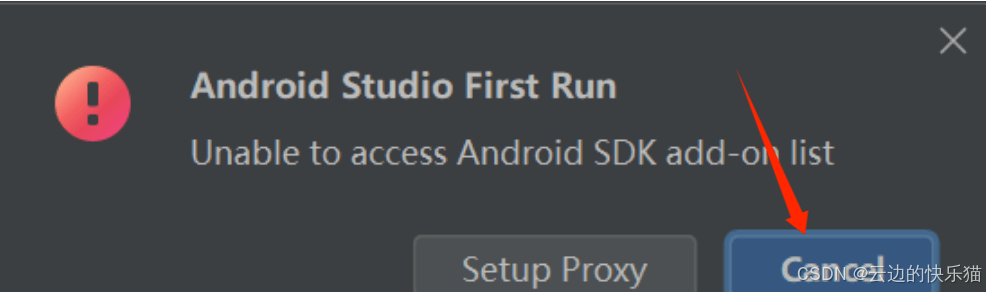
**10.**安装完成打开应用选择Don'tsenf
**11.**点击cancel
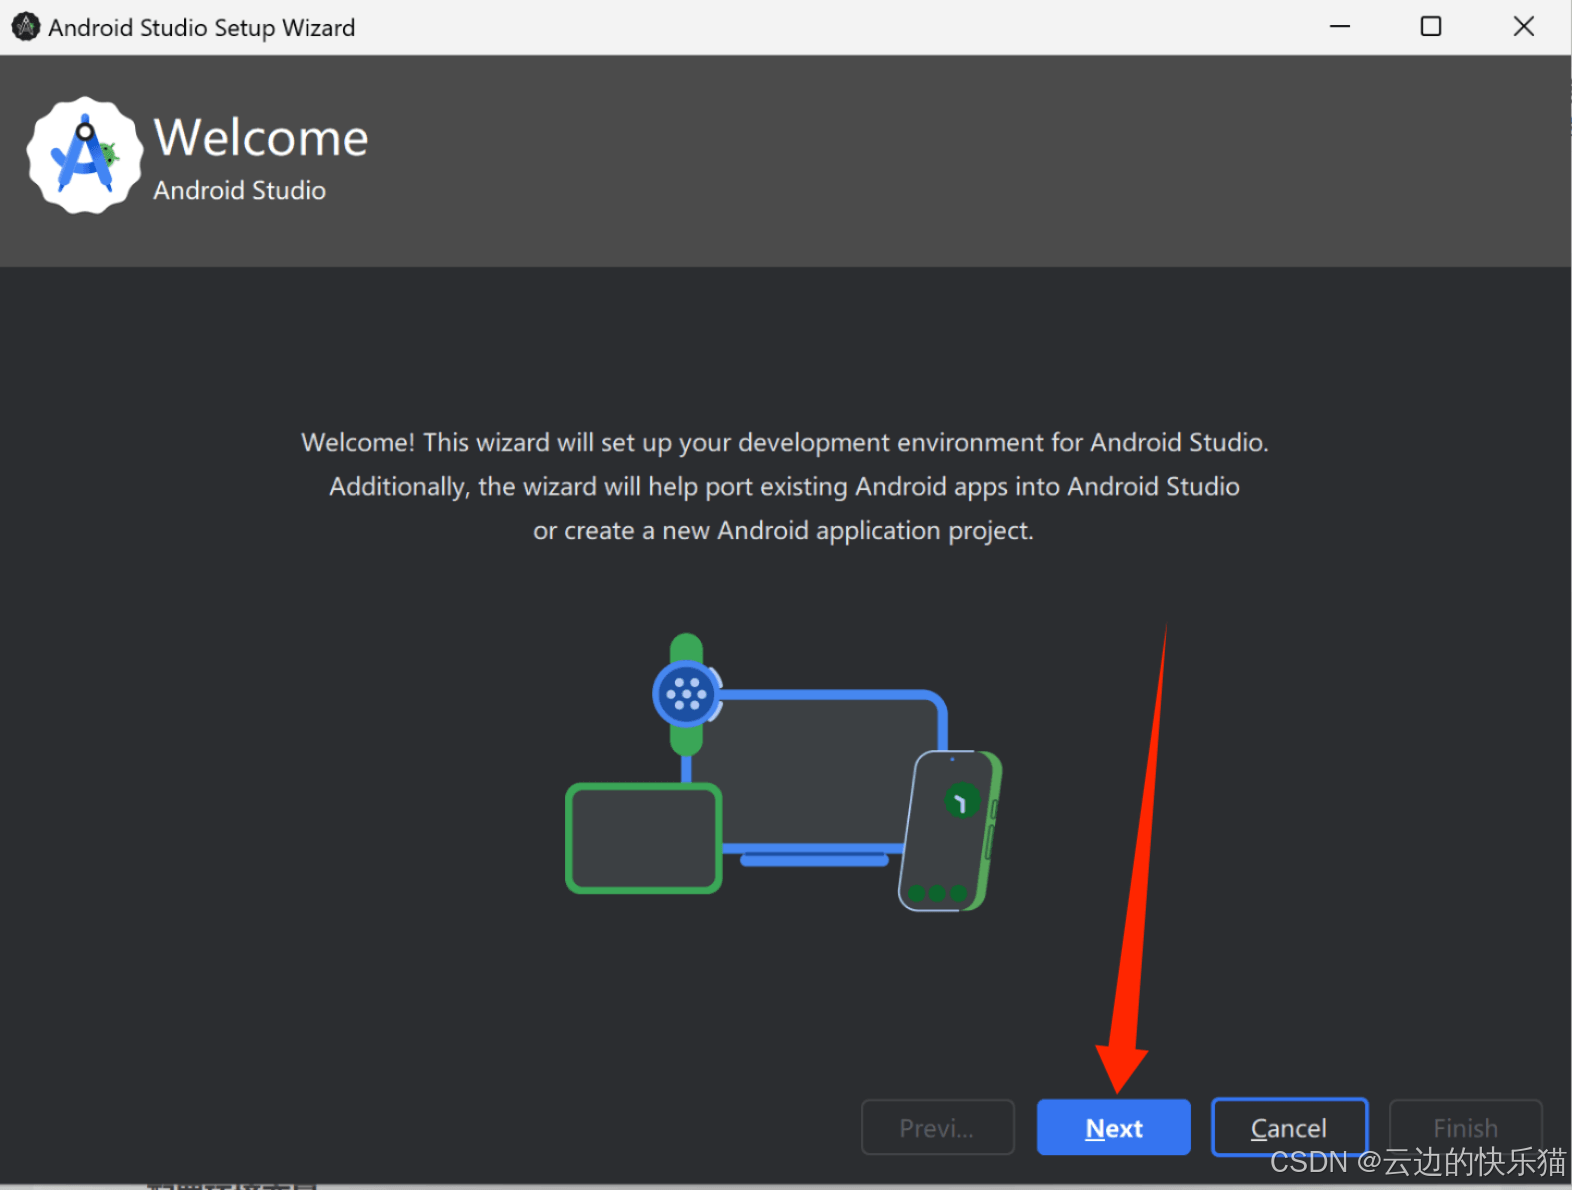
**12.**点击Next
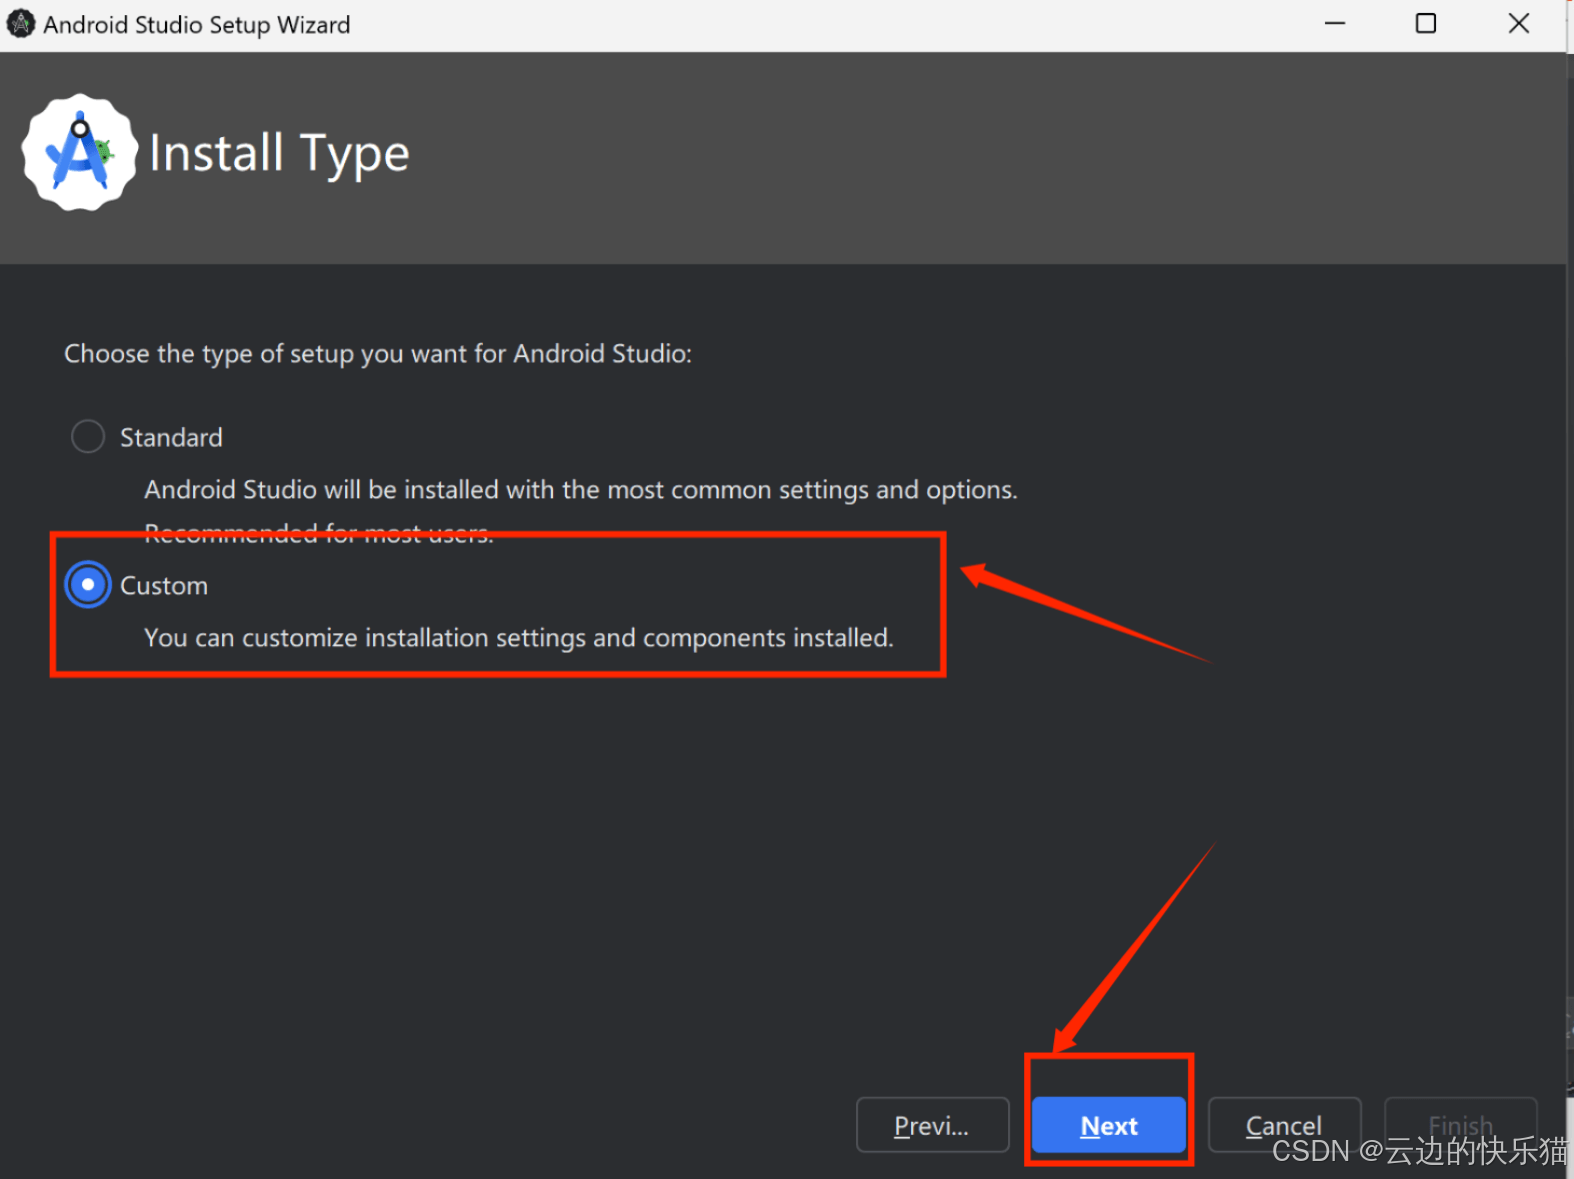
**13.**点击自定义安装,然后Next
**14.**创建一个文件夹来存放这个SDK的位置,然后点击下一步
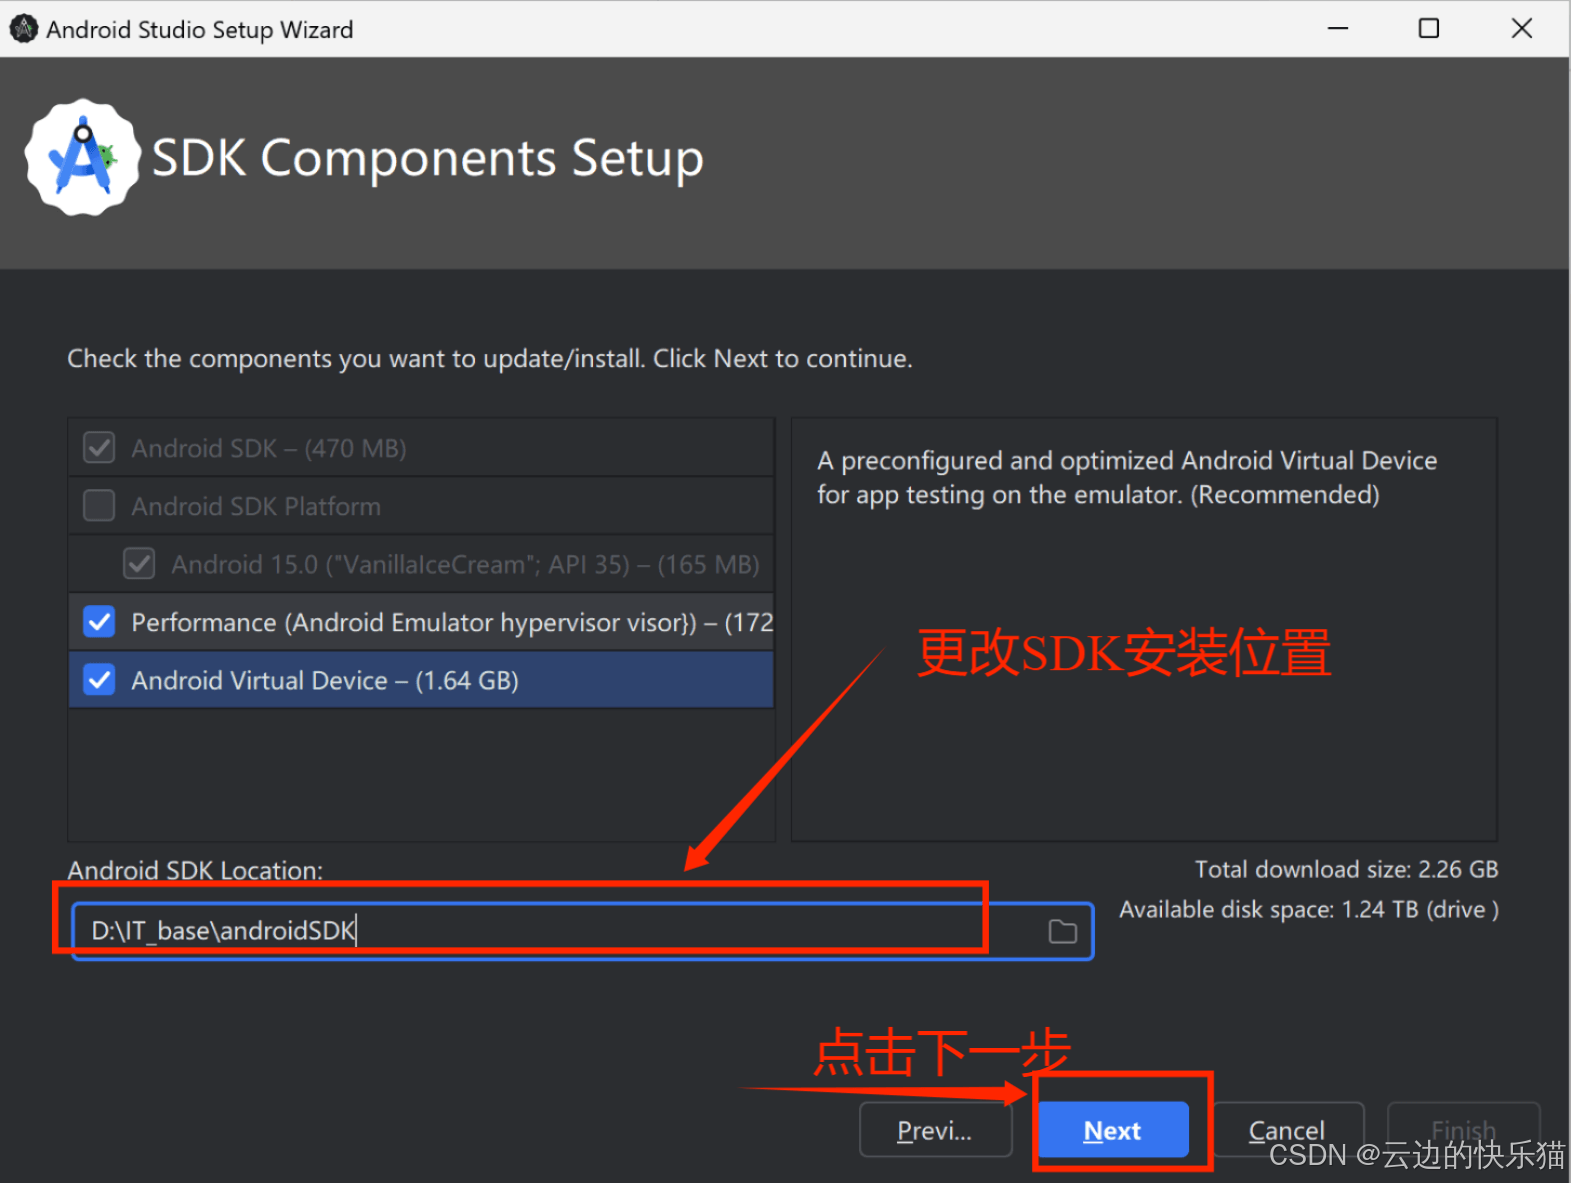
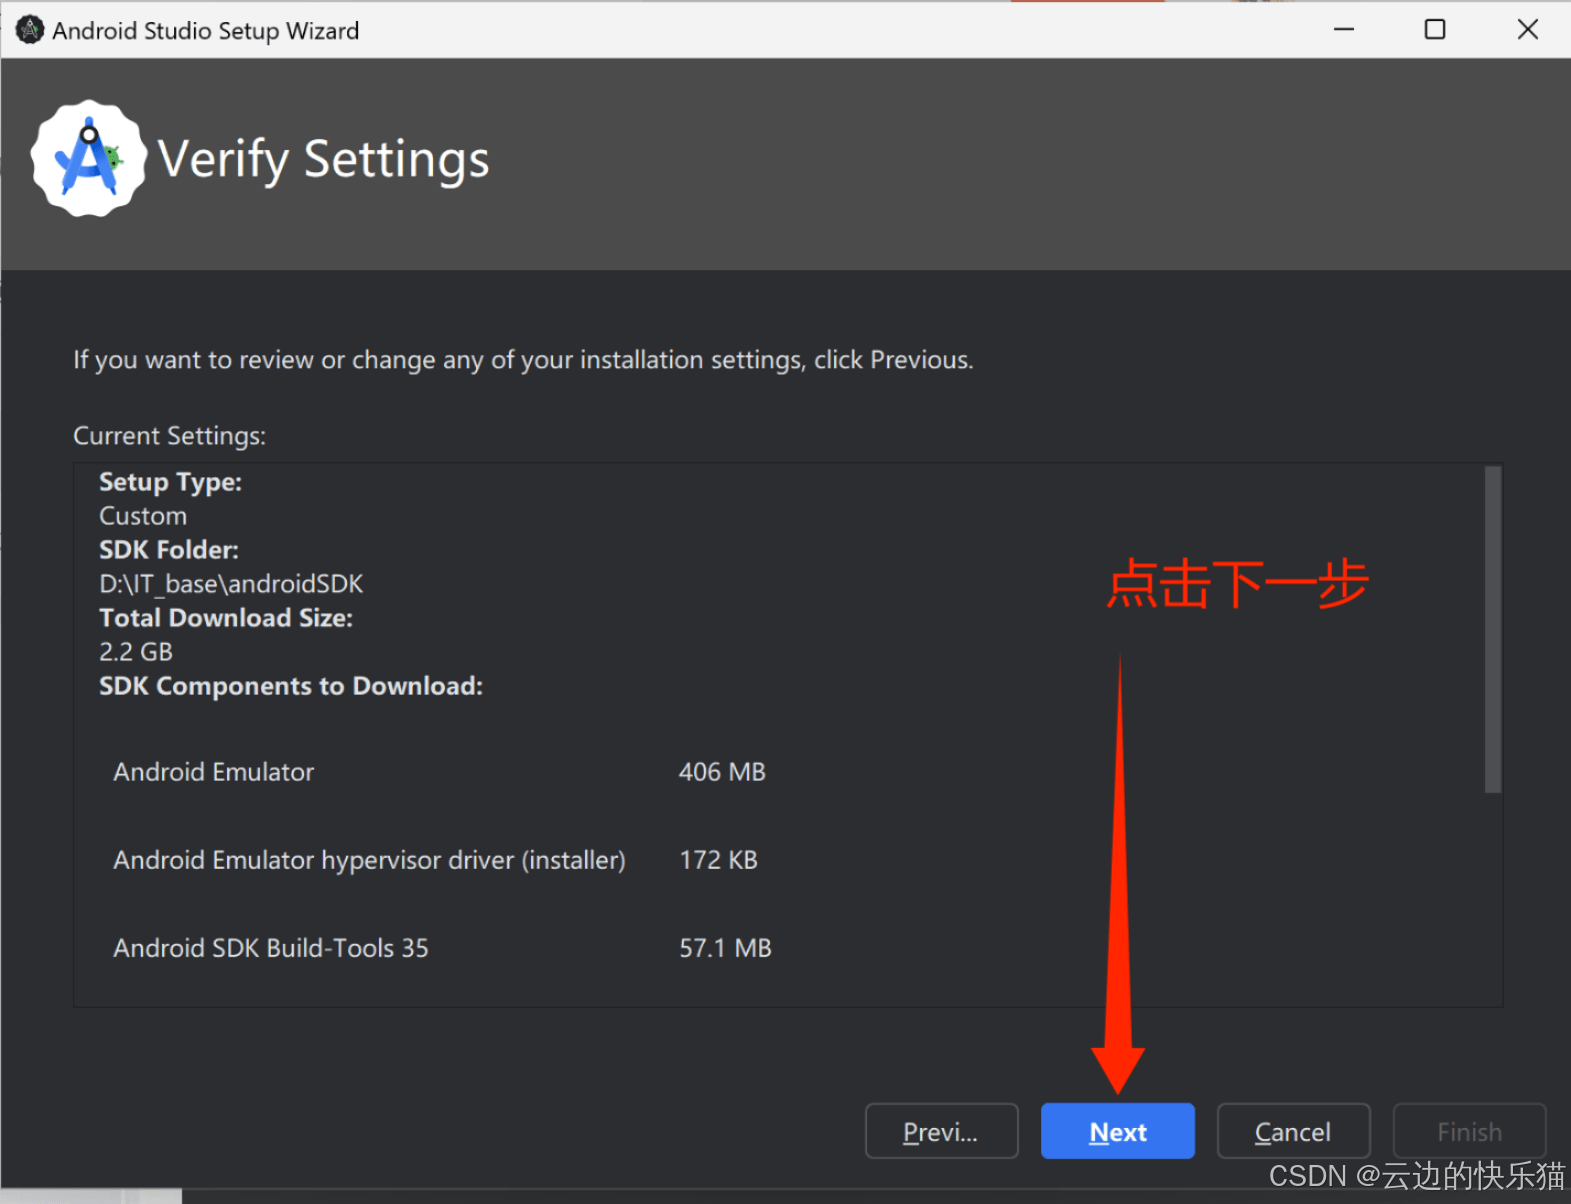
**15.**点击下一步
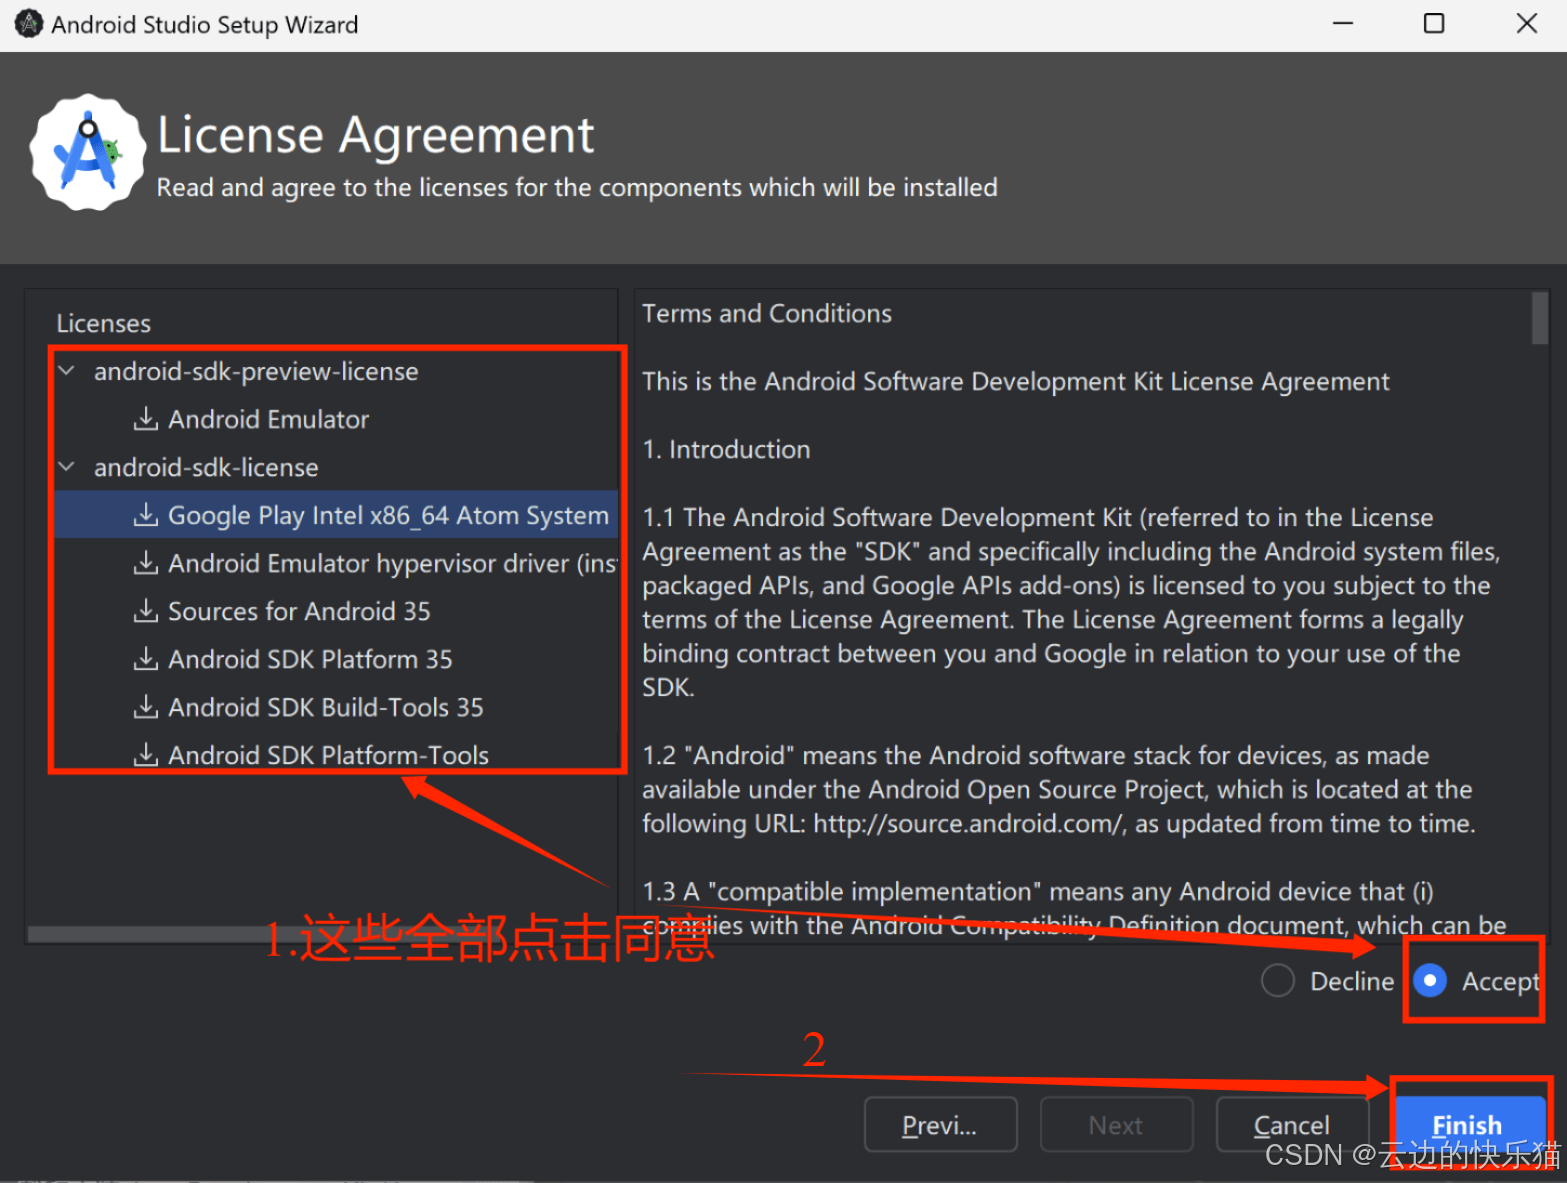
**16.**全部勾选同意后,点击Finish
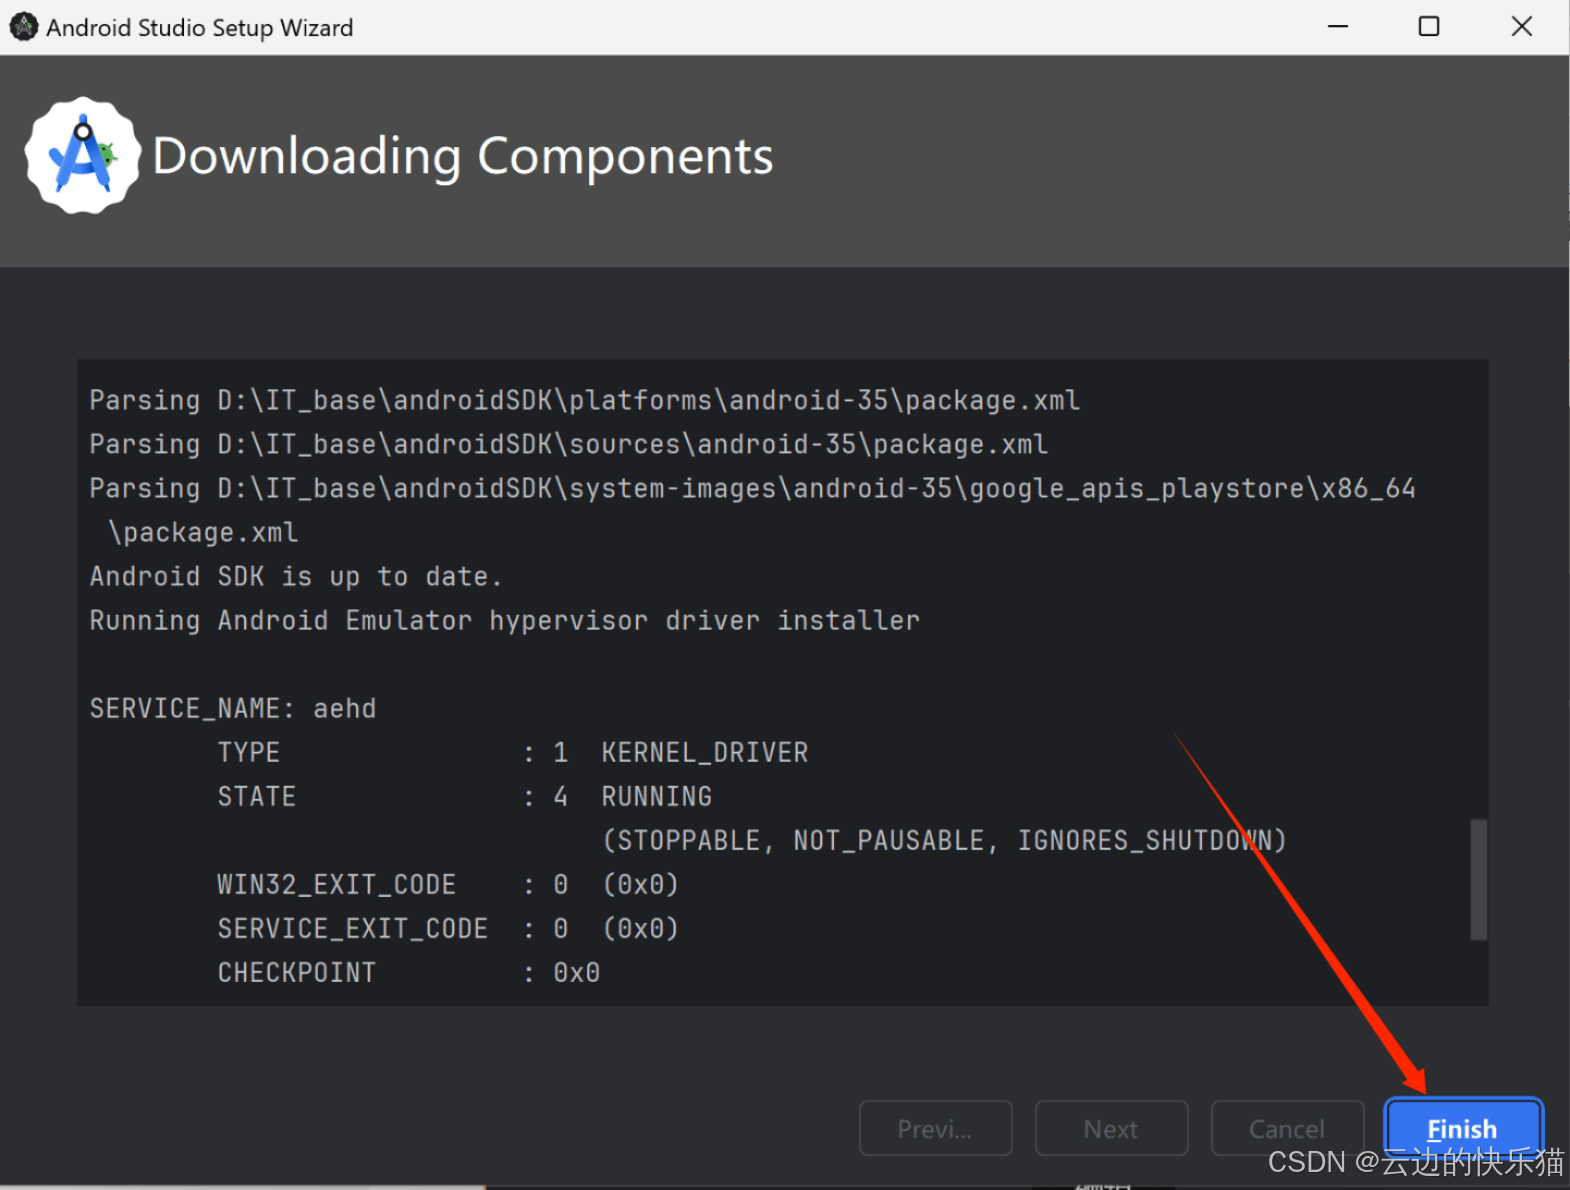
**17.**下载中(有点慢,要等一会)
 **18.**下载完成,点击Finish
**19.**然后关闭这个页面
(五)下载安装模拟器
**1.**进入逍遥模拟器官网点击下载
ps:也可以选择其他模拟器,例如雷电、月神这些。但是这些不适用我
https://www.xyaz.cn/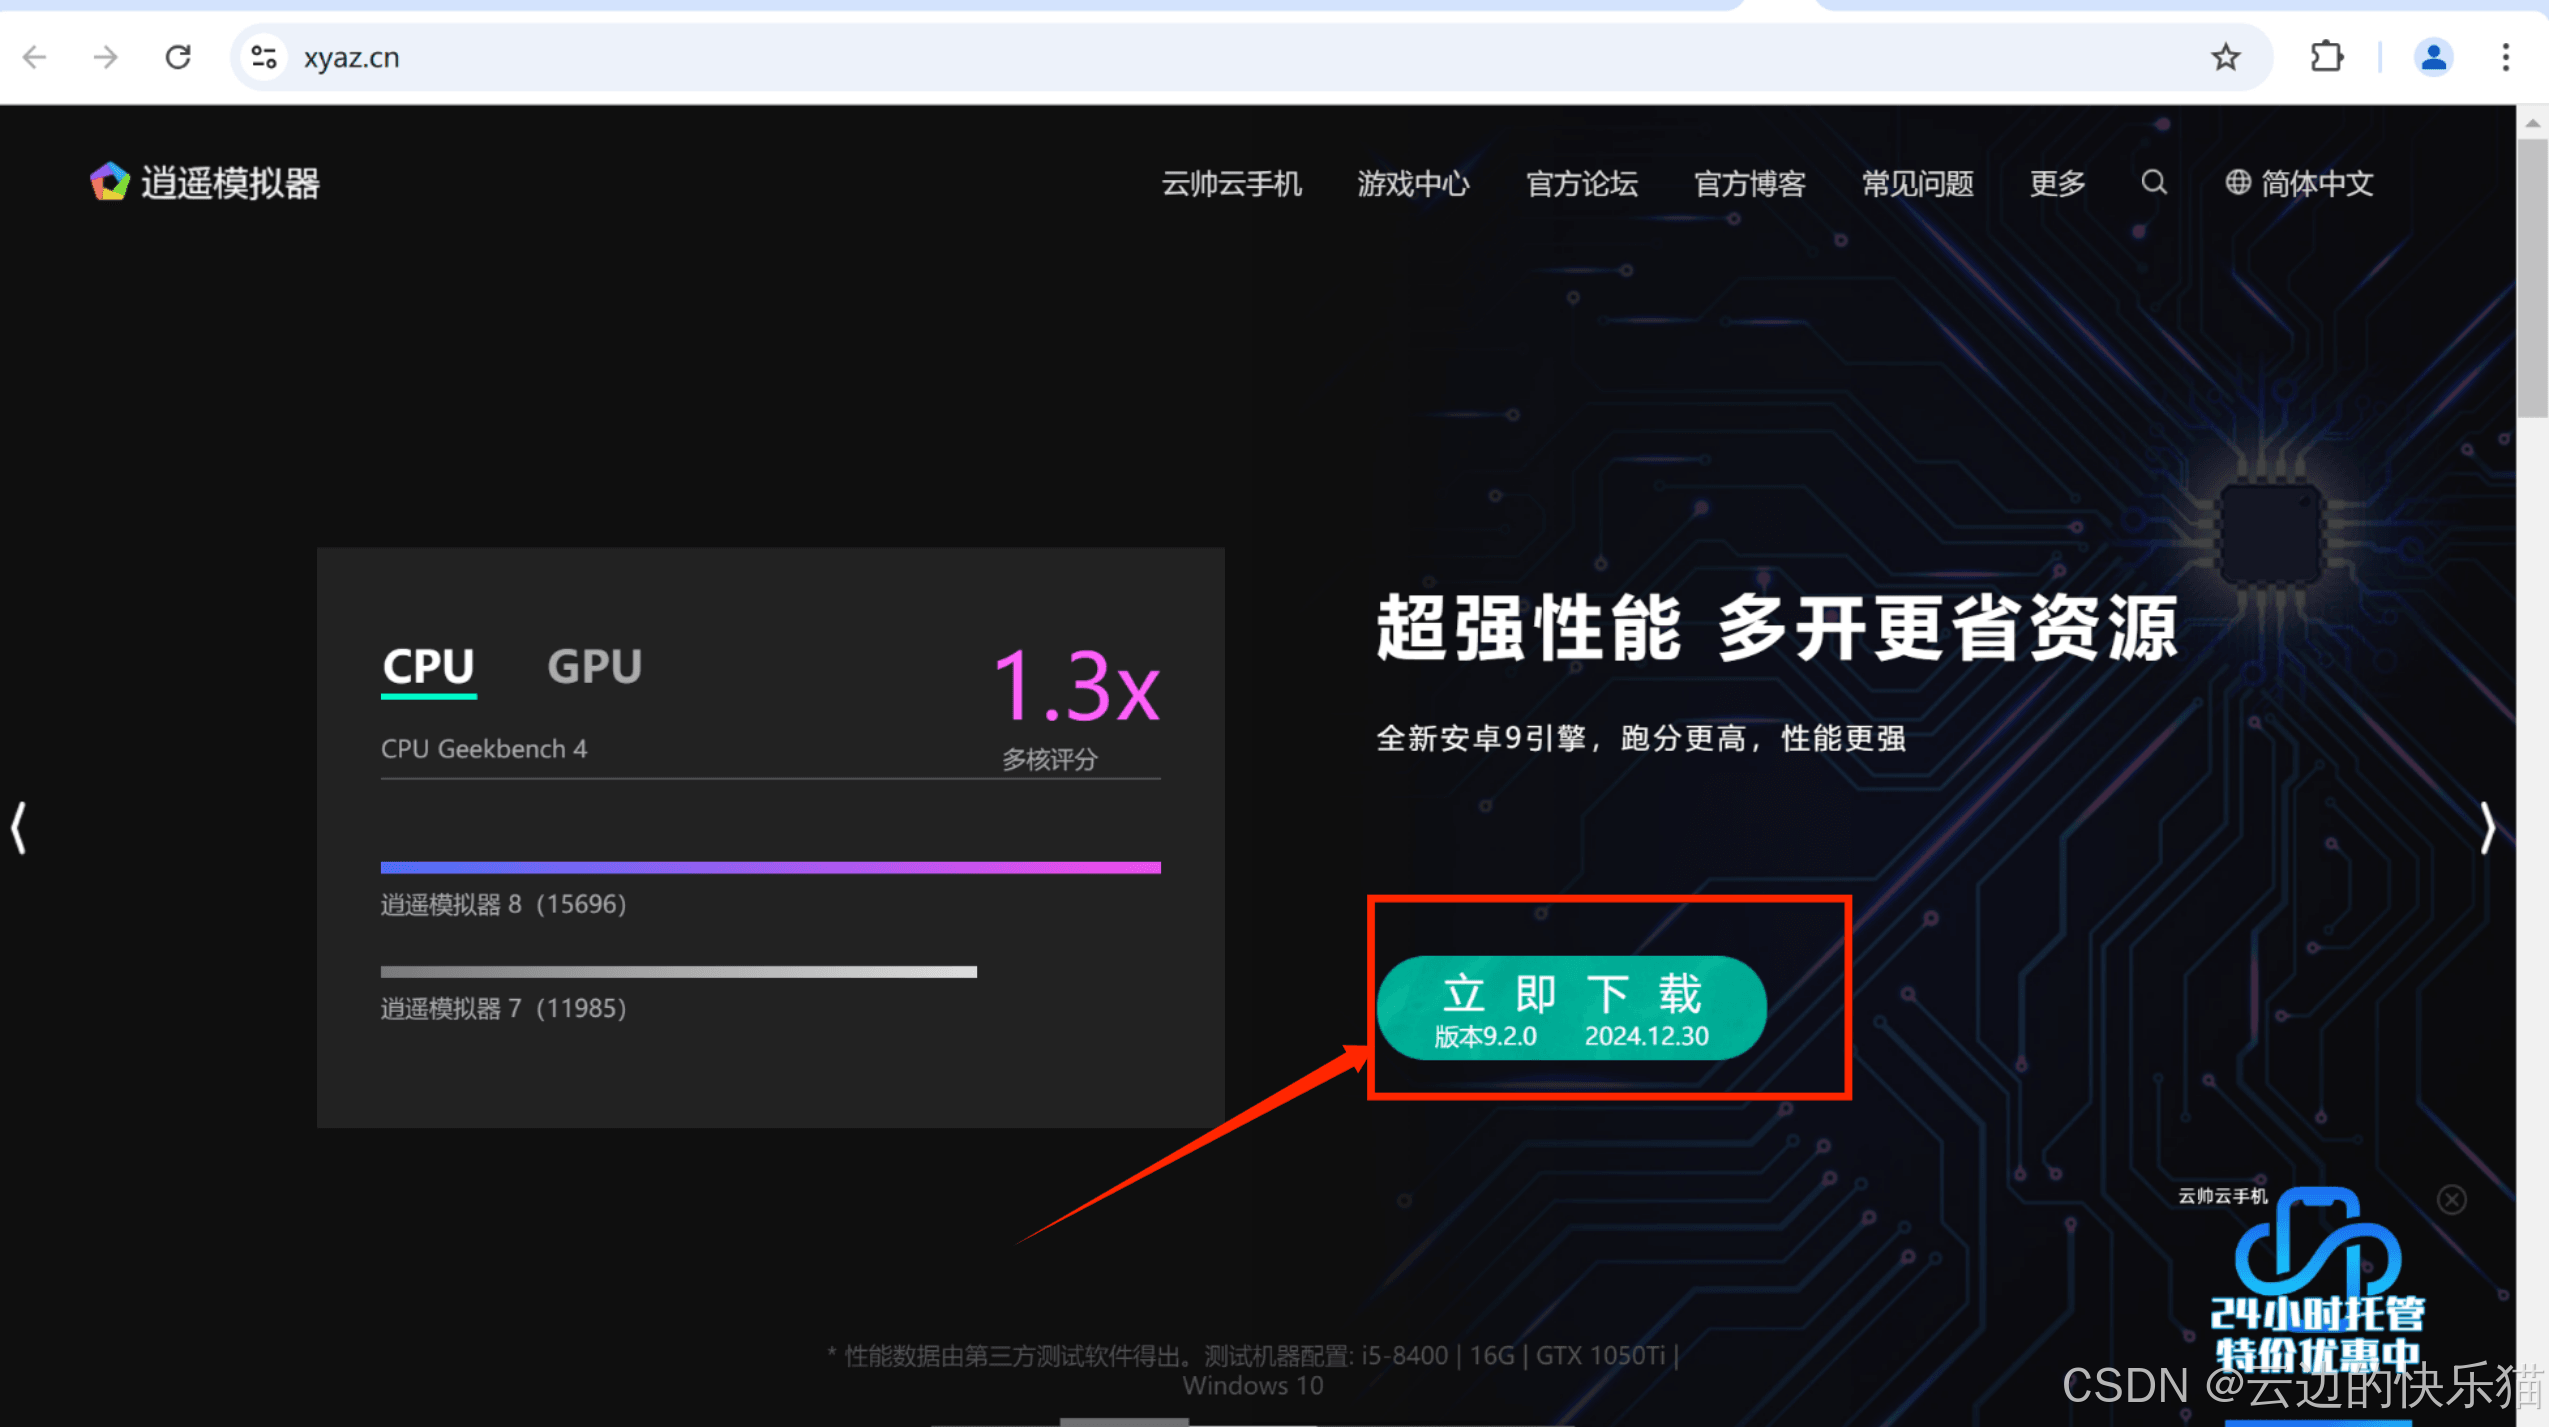
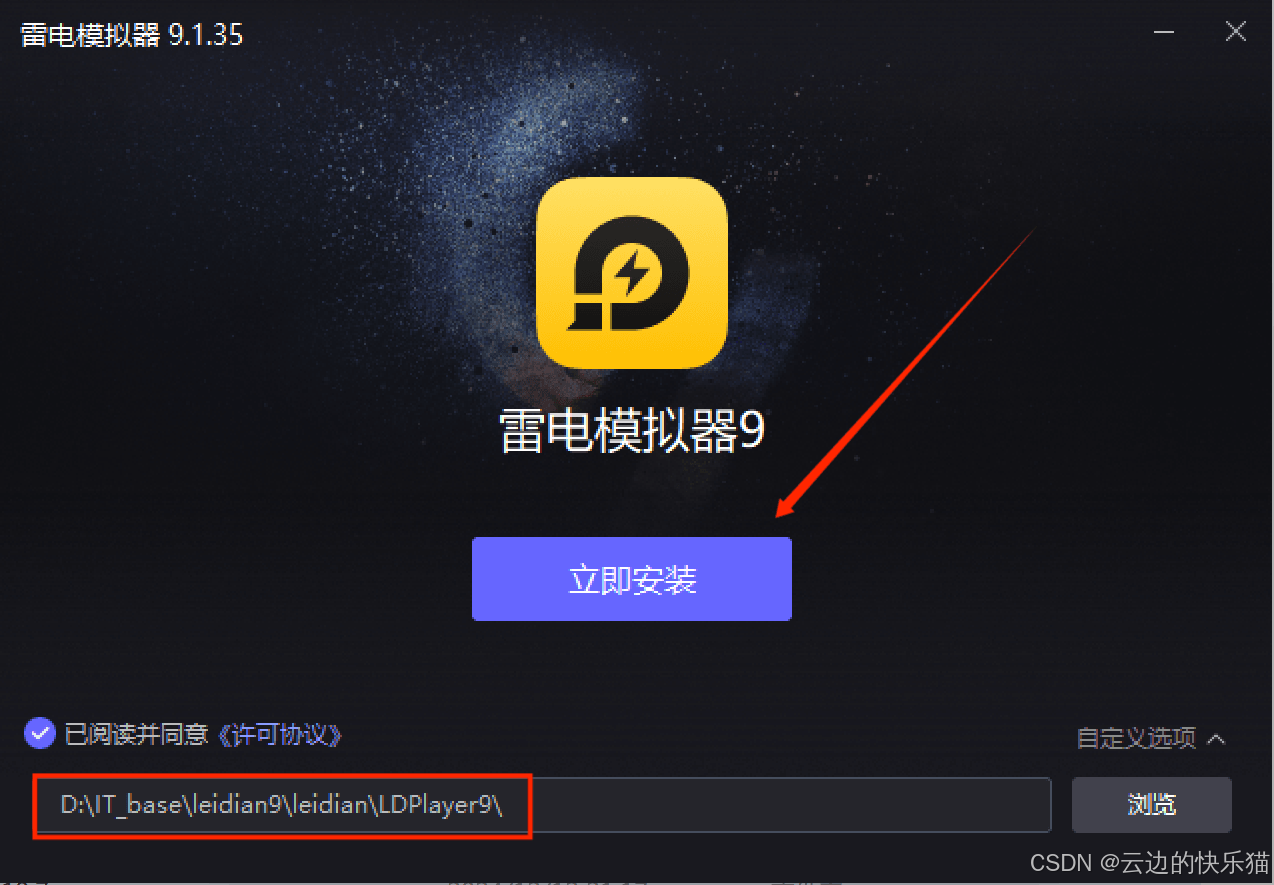
**2.**自定义位置安装就可以了
连接模拟器
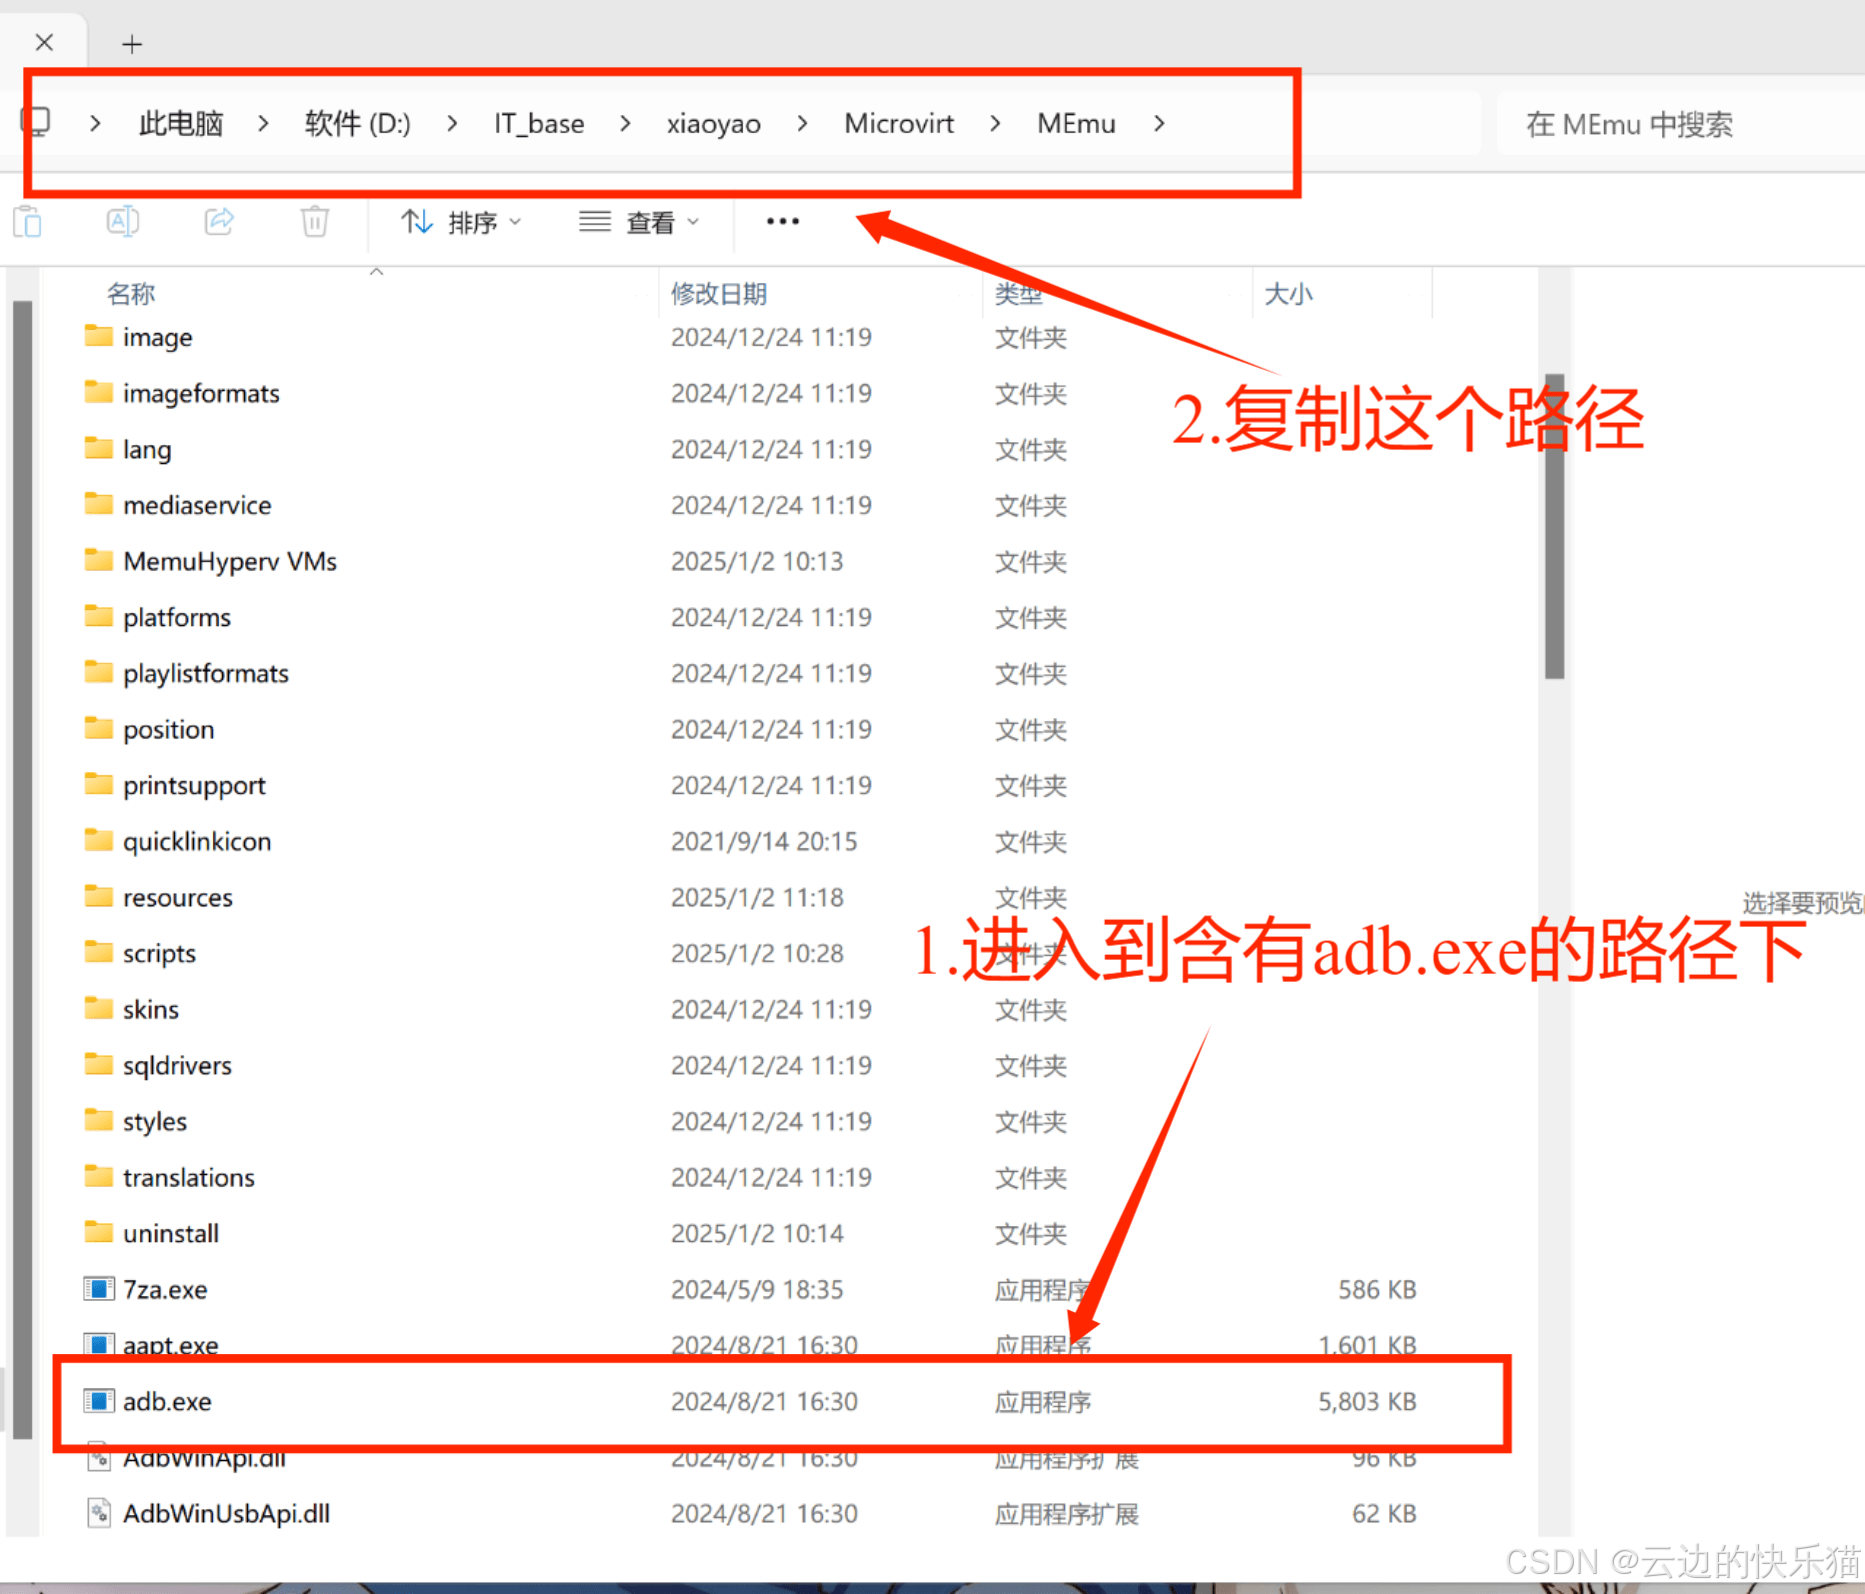
**1.**进入到模拟器的安装位置里面,找到含有adb.exe的目录,然后复制这个目录下来
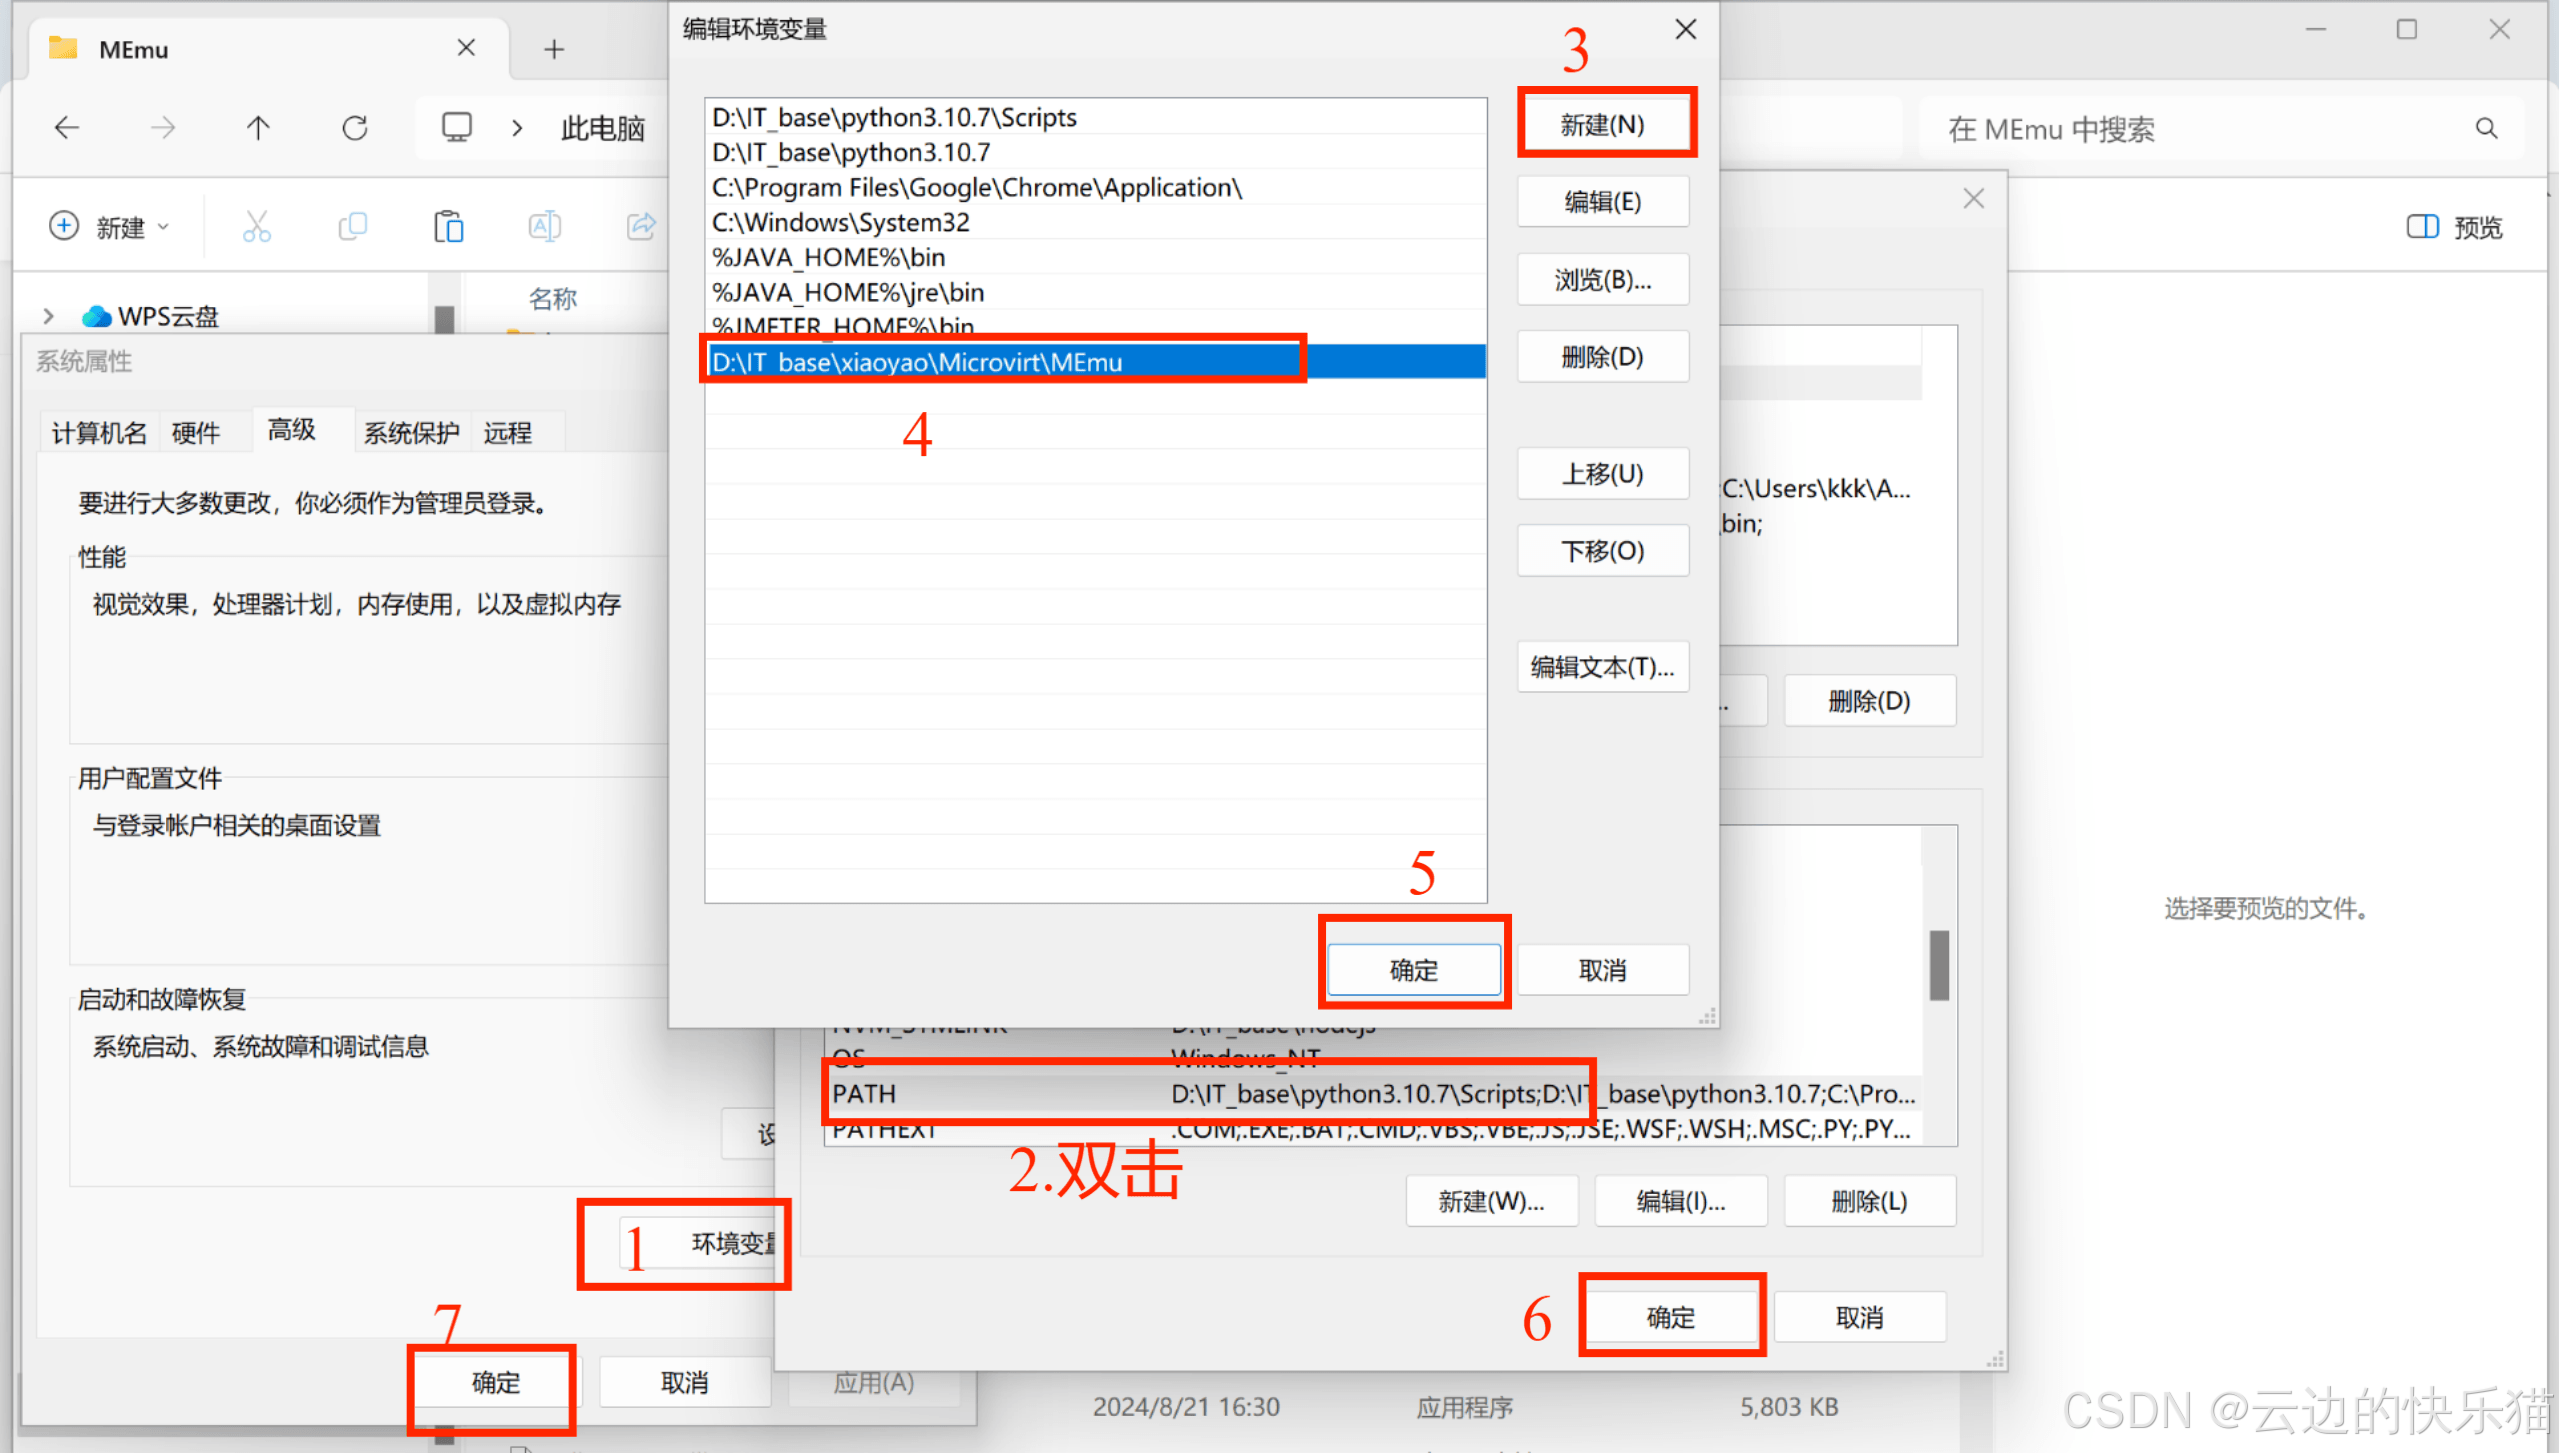
**2.**进入到系统环境变量的path里面添加这个路径
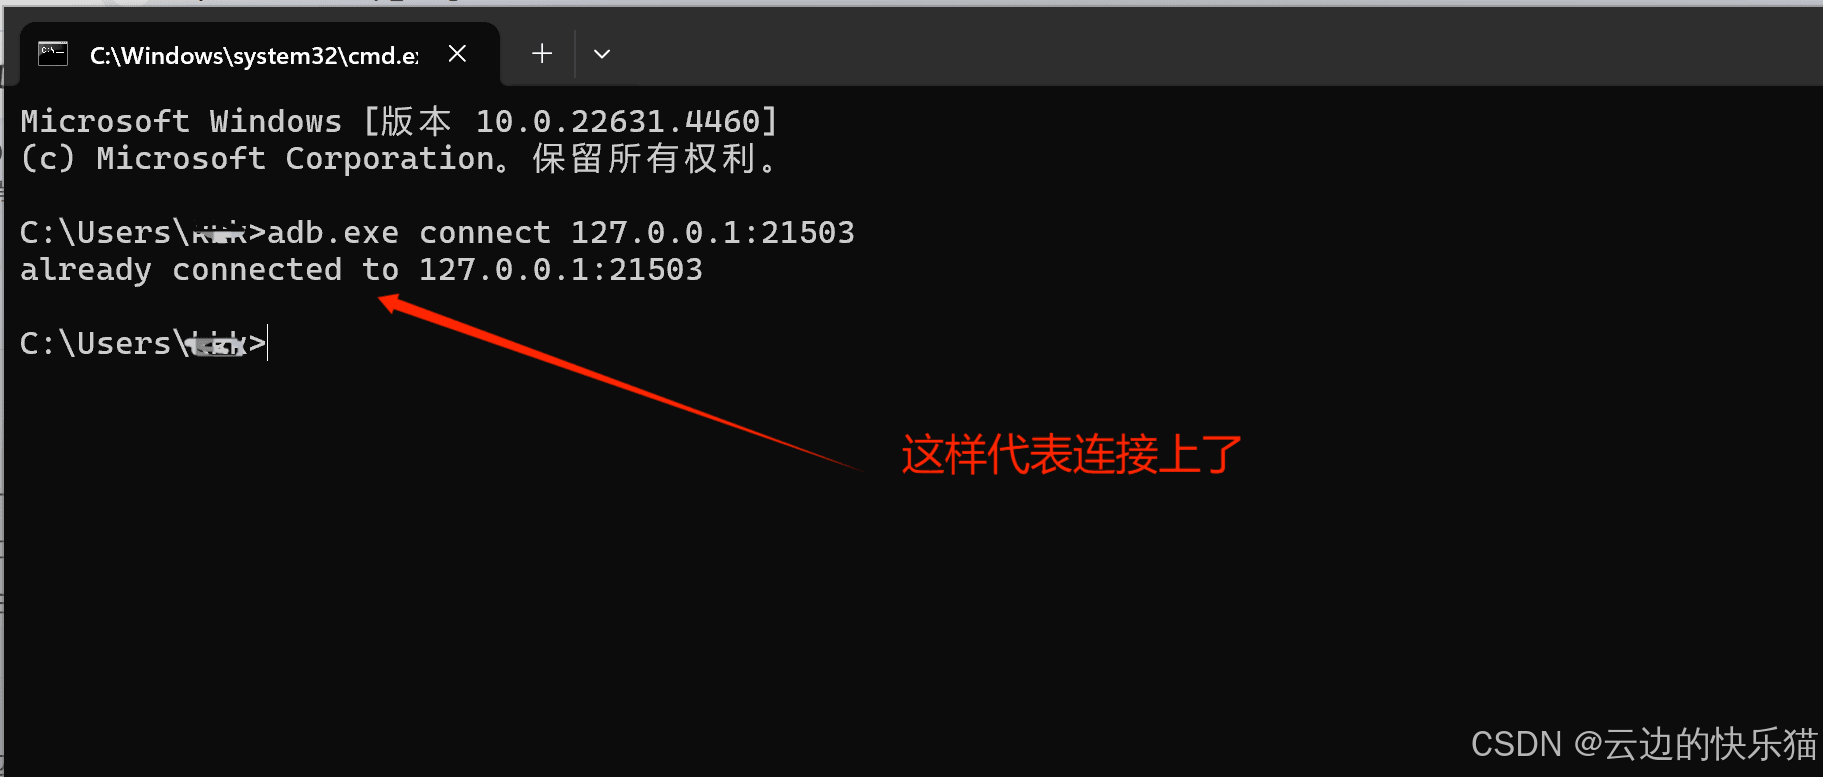
**3.**使用命令连接模拟器(前提是手机模拟器要打开),使用快捷键win+R,输入cmd,然后输入如下的连接命令
这是逍遥的
adb.exe connect 127.0.0.1:21503其他的模拟器为
mumu模拟器:adb connect 127.0.0.1:7555
海马玩模拟器:adb connect 127.0.0.1:26944
逍遥安卓模拟器:adb connect 127.0.0.1:21503
夜神玩模拟器:adb connect 127.0.0.1:62001
天天模拟器:adb connect 127.0.0.1:6555
连接成功
有什么问题都可以评论区留言,看见都会回复的
如果你觉得本篇文章对你有所帮助的,把"文章有帮助的"打在评论区
多多支持吧!!!
点赞收藏评论,当然也可以点击文章底部的红包或者👇订阅付费文章创作支持一下了。抱拳了!
vip文章:
https://blog.csdn.net/m0_52861000/category_12272616.html
bug文章大全
https://blog.csdn.net/m0_52861000/category_12215546.html
口令大全: