1、前言
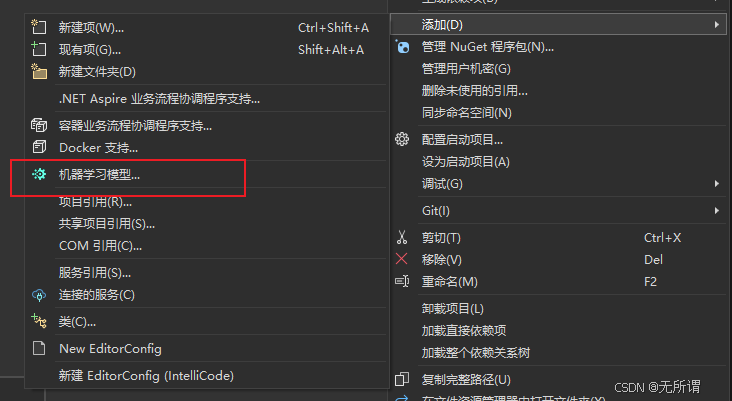
ML.NET 是面向 .NET 开发人员的开源跨平台机器学习框架,支持将自定义机器学习模型集成到 .NET 应用程序中。 它包含一个 API,其中包含不同的 NuGet 包、名为 模型生成器的 Visual Studio 扩展,以及作为 .NET 工具安装的 命令行接口。
链接:ML.NET 概述 - ML.NET | Microsoft Learn
2、效果展示
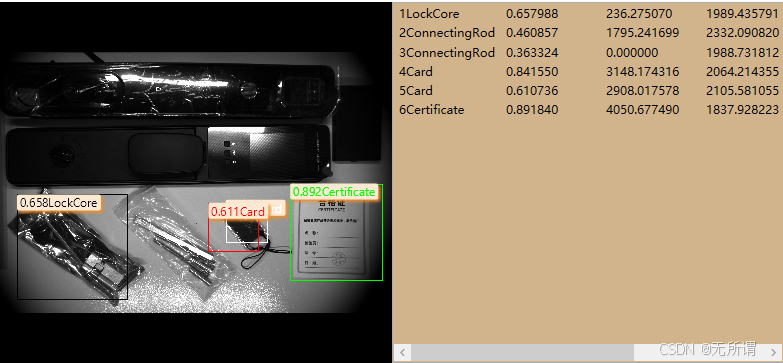
3、实现
1)、环境依赖
借用Halcon做图像显示控件。
WPF应用程序。
2)、前台代码
html
 <Grid>
     <Grid.ColumnDefinitions>
         <ColumnDefinition />
         <ColumnDefinition />
     </Grid.ColumnDefinitions>
     <Grid.RowDefinitions>
         <RowDefinition Height="50" />
         <RowDefinition />
     </Grid.RowDefinitions>
     <StackPanel Grid.ColumnSpan="2" Orientation="Horizontal">
         <Button
             Click="Button_Click"
             Content="选择图像"
             Tag="1" />
         <TextBox
             x:Name="tbFiltScore"
             Width="50"
             Margin="15"
             VerticalAlignment="Center"
             BorderBrush="NavajoWhite"
             BorderThickness="0,0,0,1"
             Text="0.5"
             TextAlignment="Center" />
         <Button
             Click="Button_Click"
             Content="执行推理"
             Tag="2" />
     </StackPanel>
     <halconDot:HSmartWindowControlWPF x:Name="ImgControl" Grid.Row="1" />
     <ListView
         Grid.Row="1"
         Grid.RowSpan="2"
         Grid.Column="1"
         Background="DarkCyan"
         ItemsSource="{Binding DataInfos}">
         <ListView.ItemTemplate>
             <DataTemplate DataType="local:ResultInfo">
                 <StackPanel Orientation="Horizontal">
                     <TextBlock Width="Auto" Text="{Binding Index}" />
                     <TextBlock Width="100" Text="{Binding BoxLabel}" />
                     <TextBlock Width="100" Text="{Binding Score, StringFormat={}{0:F6}}" />
                     <TextBlock Width="100" Text="{Binding Box.XTop, StringFormat={}{0:F6}}" />
                     <TextBlock Width="100" Text="{Binding Box.YTop, StringFormat={}{0:F6}}" />
                     <TextBlock Width="100" Text="{Binding Box.XBottom, StringFormat={}{0:F6}}" />
                     <TextBlock Width="100" Text="{Binding Box.YBottom, StringFormat={}{0:F6}}" />
                 </StackPanel>
             </DataTemplate>
         </ListView.ItemTemplate>
     </ListView>
 </Grid>
3)、后台代码
1.推理处理
cs
 public class DeepHelp
 {
     public List<ResultInfo> Test(string filename)

     {
         // Create single instance of sample data from first line of dataset for model input.
         //var image = MLImage.CreateFromFile(@"D:\3项目文件\门锁项目\智能门锁图像\Image_20241119105244991.bmp");
         var image = MLImage.CreateFromFile(filename);
         SentimenModel.ModelInput sampleData = new SentimenModel.ModelInput()
         {
             Image = image,
         };
         // Make a single prediction on the sample data and print results.
         var predictionResult = SentimenModel.Predict(sampleData);
         Console.WriteLine("\n\nPredicted Boxes:\n");
         if (predictionResult.PredictedBoundingBoxes == null)
         {
             Console.WriteLine("No Predicted Bounding Boxes");
             return null;
         }
         List<ResultInfo> boxes =
             predictionResult.PredictedBoundingBoxes.Chunk(4)
                 .Select(x => new BoxInfo { XTop = x[0], YTop = x[1], XBottom = x[2], YBottom = x[3] })
                 .Zip(predictionResult.Score, (a, b) => new ResultInfo { Box = a, Score = b }).ToList();

         for (int i = 0; i < boxes.Count; i++)
         {
             boxes[i].BoxLabel = predictionResult.PredictedLabel[i];
             boxes[i].Index = i + 1;
         }
         return boxes;
         //foreach (var item in boxes)
         //{
         //    Console.WriteLine($"XTop: {item.Box.XTop},YTop: {item.Box.YTop},XBottom: {item.Box.XBottom},YBottom: {item.Box.YBottom}, Score: {item.Score}");
         //}
     }
 }

 public class ResultInfo
 {
     public int Index { get; set; }
     public float Score { get; set; }
     public BoxInfo Box { get; set; }

     public string BoxLabel { get; set; }
 }

 public class BoxInfo
 {
     public float XTop { get; set; }
     public float YTop { get; set; }
     public float XBottom { get; set; }
     public float YBottom { get; set; }
 }
2.调用
cs
   private async Task<List<ResultInfo>> ProcessAnayleData(string fileName)
   {
       List<ResultInfo> boxes = await Task.Run(() => { return new DeepHelp().Test(fileName); });
       return boxes;
   }
3.显示
cs
 private void DispResultInfo(List<ResultInfo> res)
 {
     ImgControl.HalconWindow.SetDraw("margin");
     int i = 0;
     double minScore = Convert.ToDouble(tbFiltScore.Text.Trim());
     foreach (ResultInfo info in res)
     {
         if (info.Score < minScore)
         {
             continue;
         }
         HRegion hRegion = new HRegion();
         hRegion.GenRectangle1(info.Box.YTop, info.Box.XTop * 1.0, info.Box.YBottom, info.Box.XBottom);

         if (i >= colors.Length)
         {
             i = 0;
         }
         string colorStr = colors[i++];

         ImgControl.HalconWindow.SetColor(colorStr);

         ImgControl.HalconWindow.DispRegion(hRegion);
         ImgControl.HalconWindow.DispText(info.Score.ToString("F3") + info.BoxLabel, "image", info.Box.YTop, info.Box.XTop * 1.0, colorStr, new HTuple(), new HTuple());
         //   break;
     }

     //DrawBoundingBox("/output", FileName,res);
 }
4、模型准备
使用扩展创建深度学习模型训练,按照图示走。
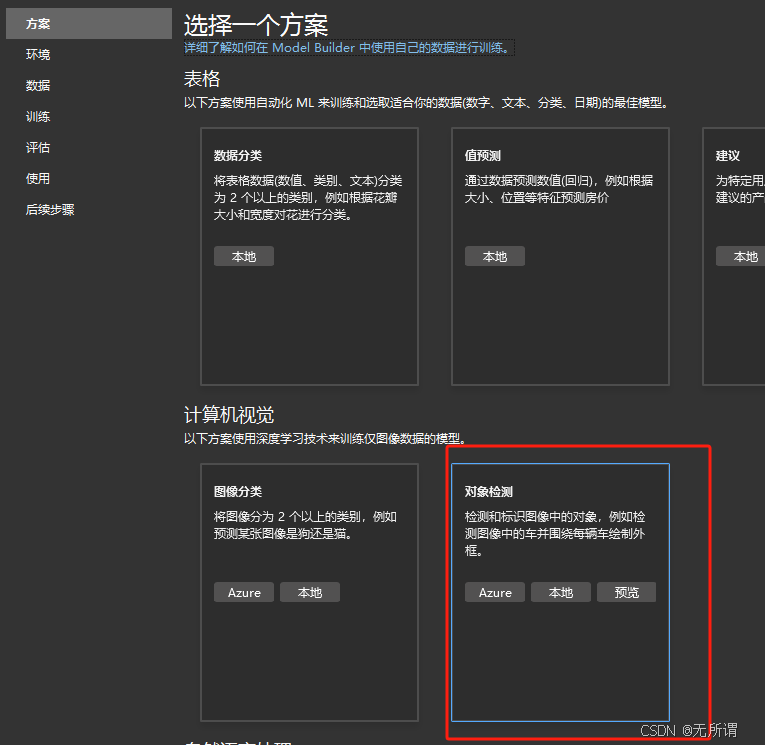
1)、选择方案
我这里是选择为对象检测。
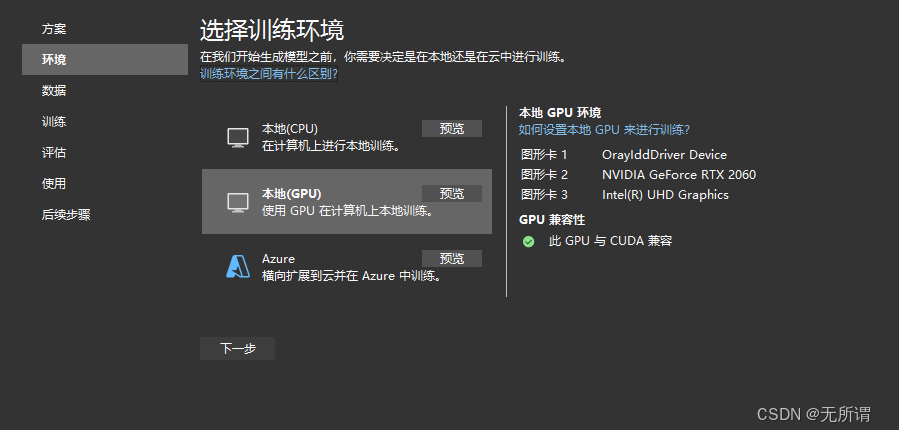
2)、选择环境
最好是使用本地GPU来处理,CPU肯定是很慢的。如果有条件也可以使用他们的服务器。
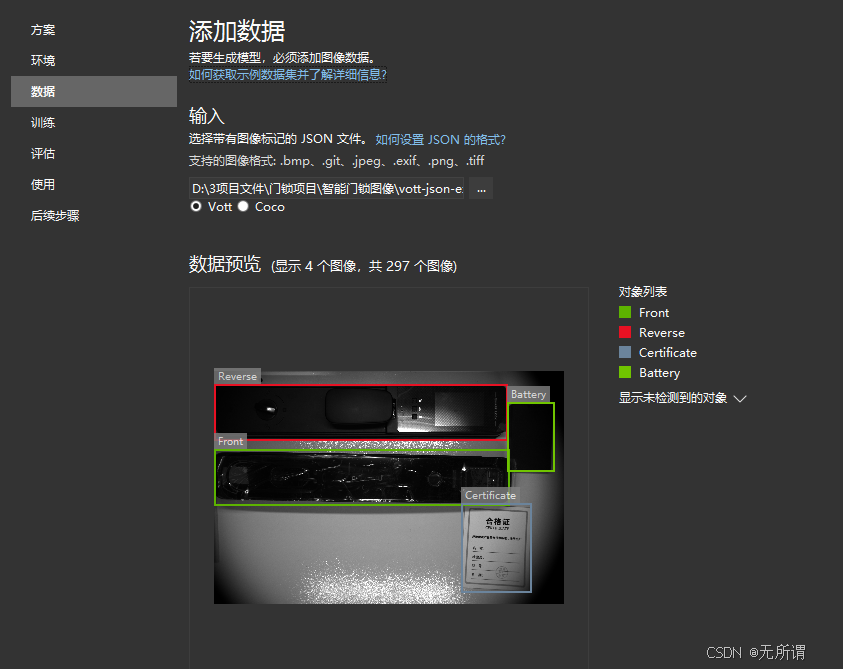
3)、添加数据
这里就是要费点时间了 ,需要下载工具进行批注。
点击蓝字即可跳转链接下载工具,我使用Vott。
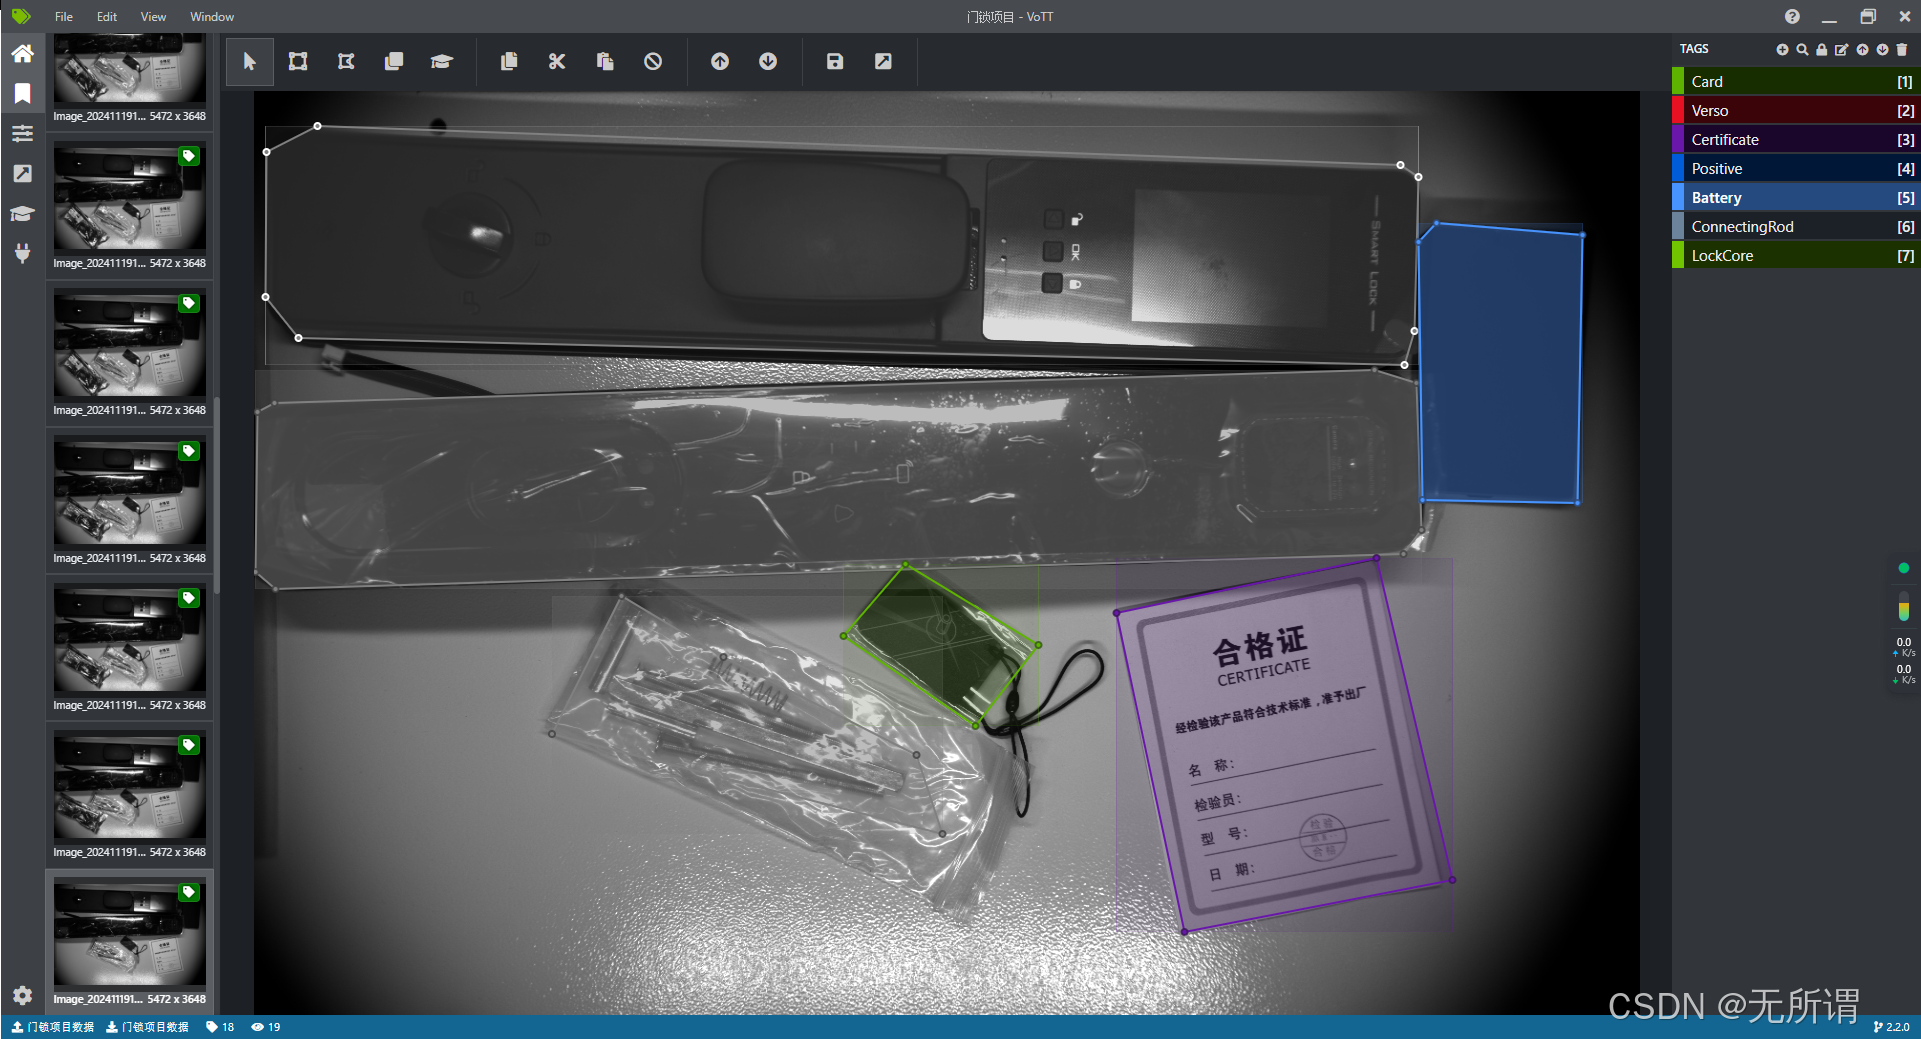
4)、数据批注
这个工作只能慢慢弄了,花点时间
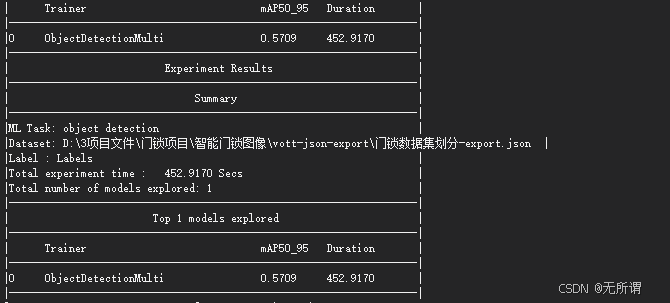
5)、训练

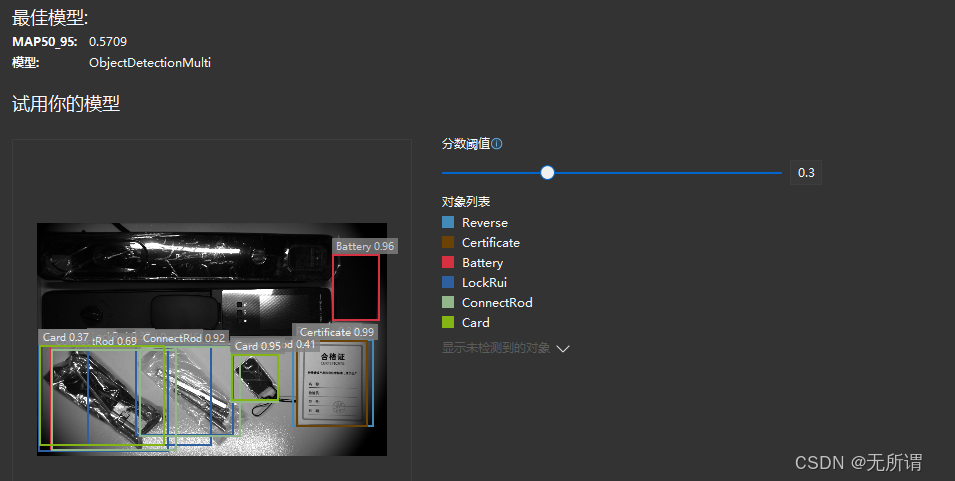
6)、评估
这里是需要上传png、jpg图像,如果原图不是这种格式,需要借用工具处理下图像格式。
7)、将模型复制
将生成的模型复制出来,放在我们的工程里面就可以了。
当然,如果感兴趣还可以对训练进行封装了。