准备工作
在Unity工程中新建Editor文件夹存放编辑器脚本,

Unity中其他的特殊文件夹可以参考官方文档链接,如下:
Unity - 手册:保留文件夹名称参考 (unity3d.com)
一、菜单栏扩展
1.增加顶部菜单栏选项
使用MenuItem,包含三个参数,官方文档描述如下:
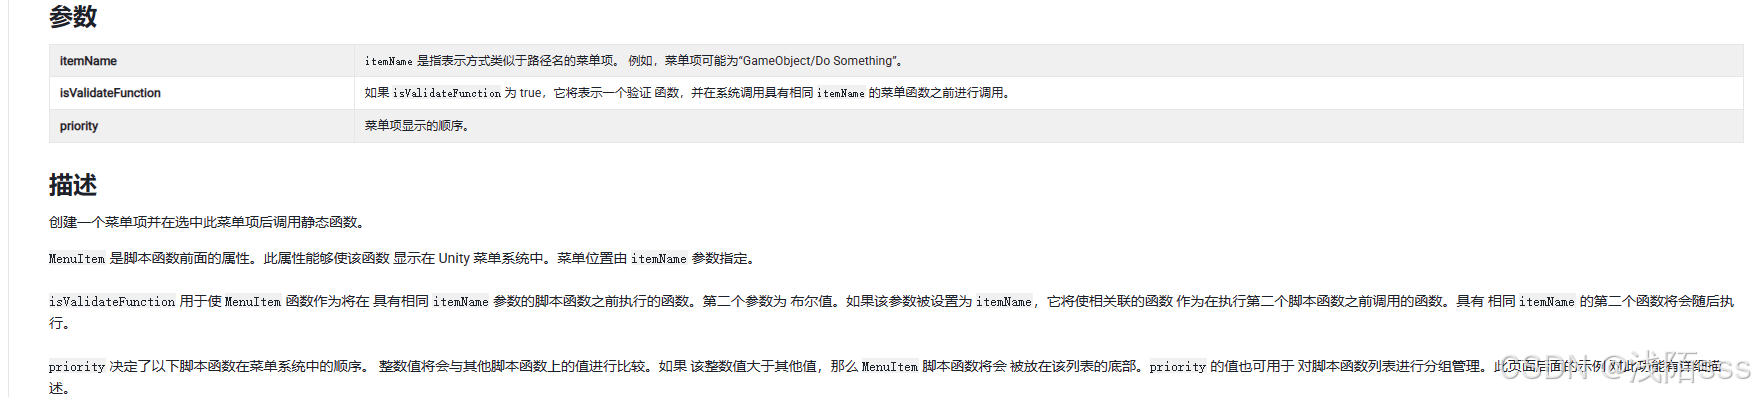
代码:
cs
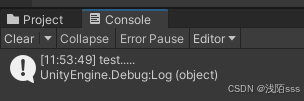
   [MenuItem("Tool/test")]
   public static void test()
   {
       Debug.Log("test.....");
   }
结果:

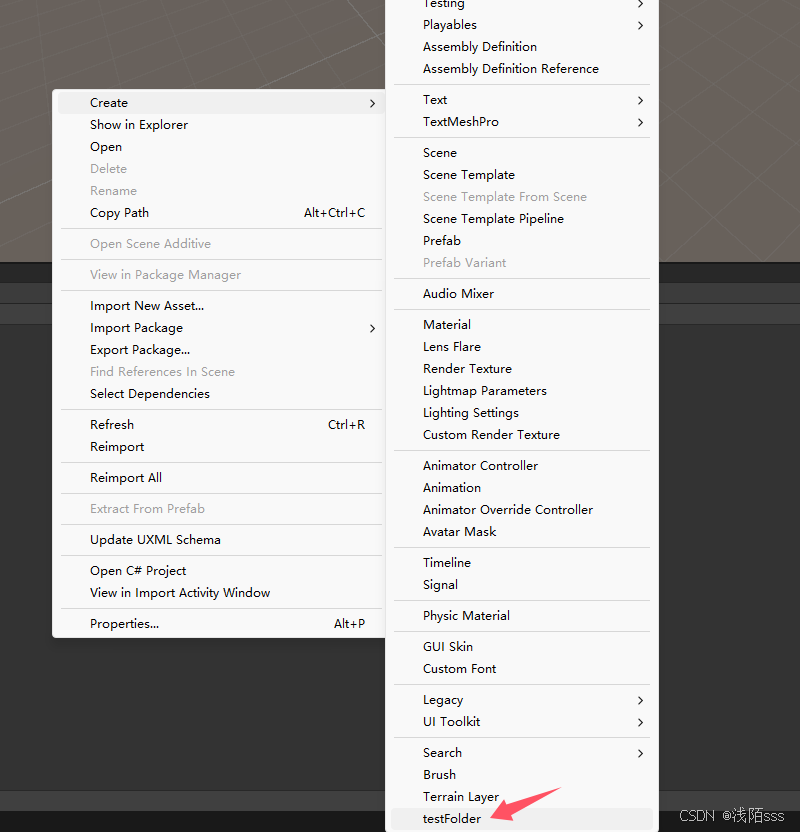
2.增加右键Create菜单栏选项
使用MenuItem,ItemName需要从"Assets"开始,比如需要在Create菜单栏加一个testFolder的函数
代码:
cs
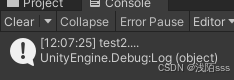
   [MenuItem("Assets/Create/testFolder")]
   public static void test2()
   {
       Debug.Log("test2....");
   }
结果:
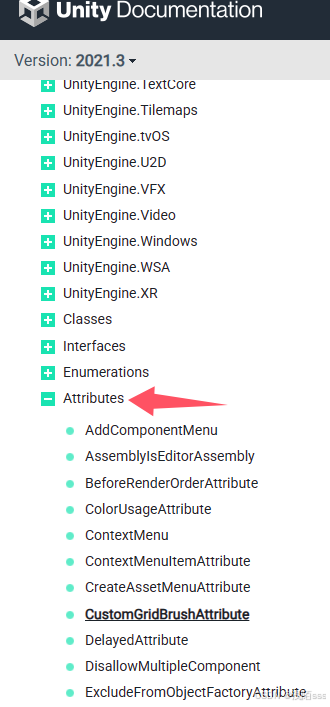
更多Unity支持的编辑器特性,可查看官方API,地址:
CustomGridBrushAttribute - Unity 脚本 API
3.使用快捷键
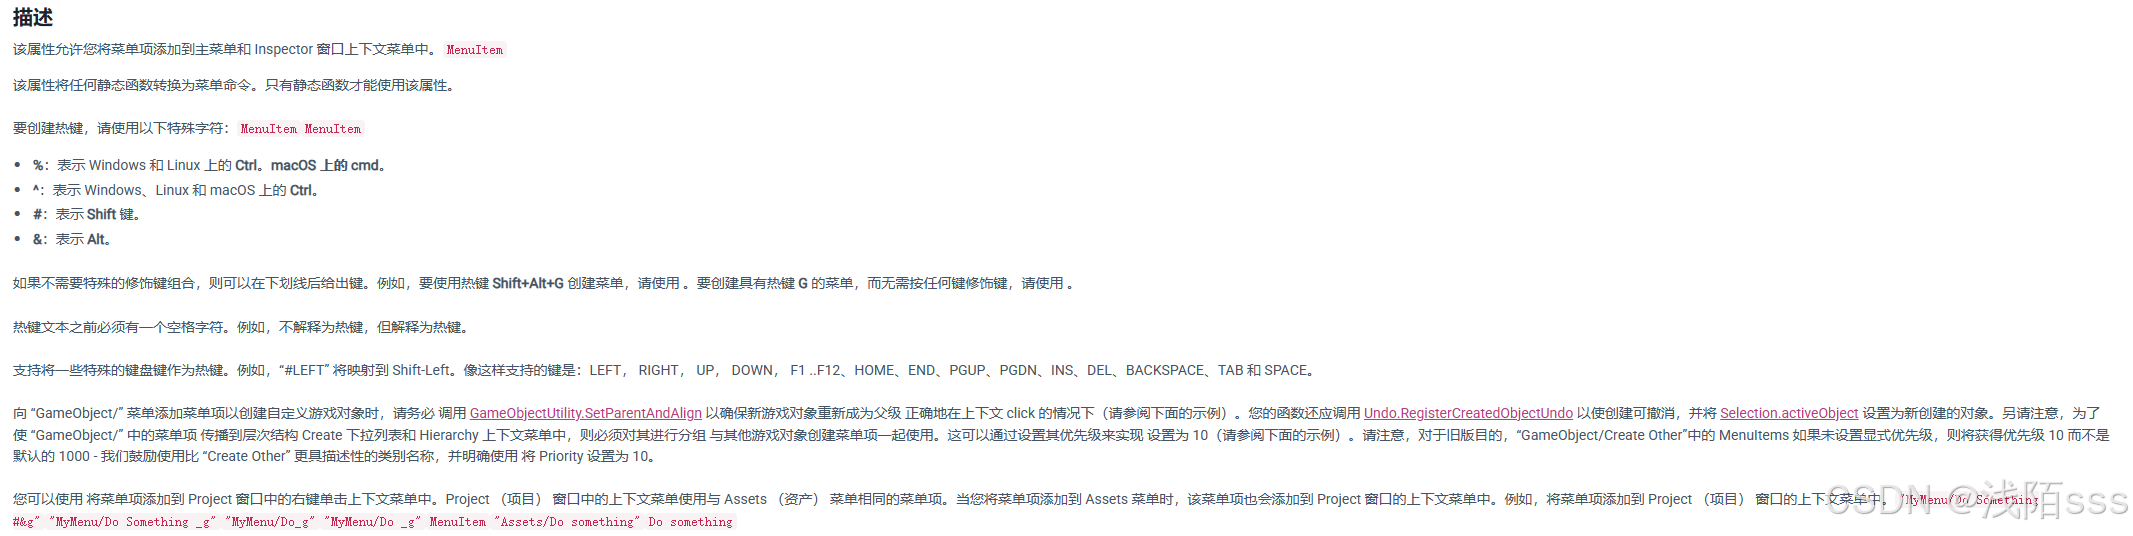
官方文档的MenuItem中使用快捷键描述如下:
官方文档链接:
Unity - 脚本 API:MenuItem (unity3d.com)
热键文本之前必须有一个空格字符:
代码:
cs
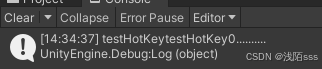
    [MenuItem("Tool/testHotKey0 _g")]
    public static void testHotKey0()
    {
        Debug.Log("testHotKeytestHotKey0..........");
    }
结果:

如果不需要特殊的修饰键组合,则可以在下划线后给出键:
代码:
cs
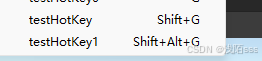
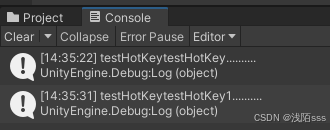
   [MenuItem("Tool/testHotKey #g")]
   public static void testHotKey()
   {
       Debug.Log("testHotKeytestHotKey..........");
   }

   [MenuItem("Tool/testHotKey1 #&g")]
   public static void testHotKey1()
   {
       Debug.Log("testHotKeytestHotKey1..........");
   }
结果:
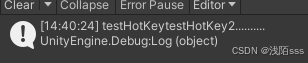
支持将一些特殊的键盘键(LEFT, RIGHT, UP, DOWN, F1 ..F12、HOME、END、PGUP、PGDN、INS、DEL、BACKSPACE、TAB 和 SPACE)作为热键:
代码:
cs
 [MenuItem("Tool/testHotKey2 #LEFT")]
 public static void testHotKey2()
 {
      Debug.Log("testHotKeytestHotKey2..........");
 }
结果:

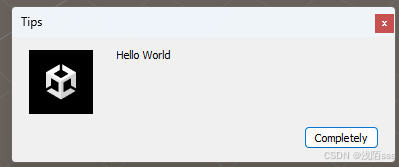
4.弹出一个提示窗口
使用EditorUtility.DisplayDialog显示窗口,第一个参数是弹窗名,第二个参数是提示内容,第三个参数是按钮名字
代码:
cs
    [MenuItem("Tool/testDialog")]
    public static void DisplayDialog()
    {
        EditorUtility.DisplayDialog("Tips", "Hello World", "Completely");
    }
结果:
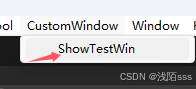
二、自定义窗口扩展
1.创建自定义窗口
自定义窗口需要创建的窗口脚本继承子EditorWindow,然后在OnGUI中渲染窗口的实际内容,
新建一个TestWindow脚本,代码如下:
cs
public class TestWindow : EditorWindow
{
    private void OnGUI()
    {
        //渲染窗口的实际内容
    }
}
编写打开窗口的函数,代码如下:
cs
[MenuItem("CustomWindow/ShowTestWin")]
public static void ShowWindow()
{
//显示窗口实例
//EditorWindow.GetWindow(typeof(TestWindow));
//显示窗口按照自定位置和大小,比如(0,0)点,宽600,长800
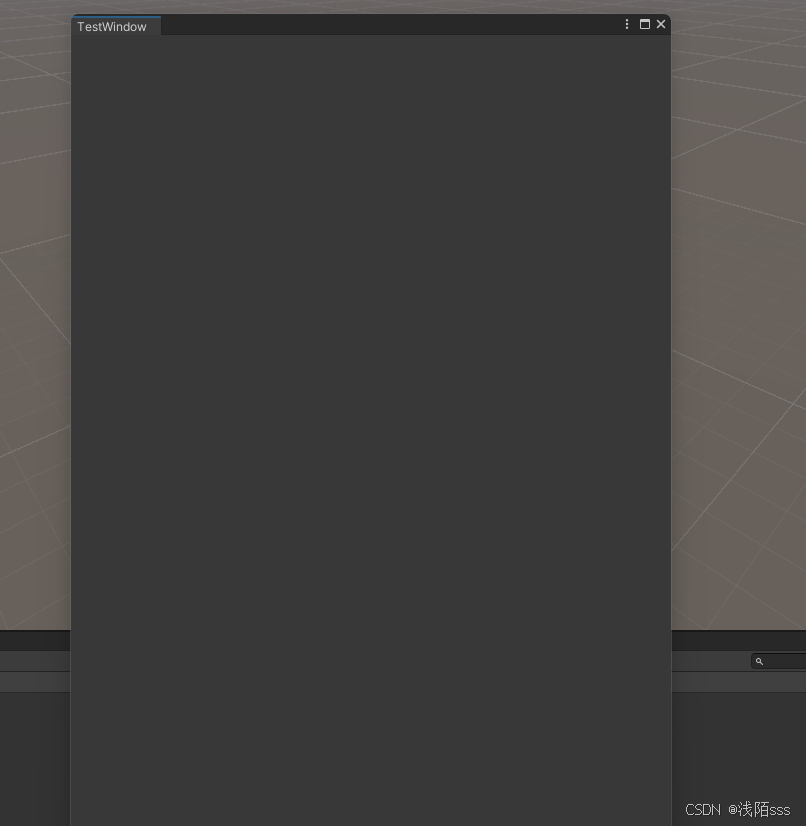
EditorWindow.GetWindowWithRect<TestWindow>(new Rect(new Vector2(0,0),new Vector2(600,800)));
}结果:
EditorWindow类中的方法:
官方文档描述如下:
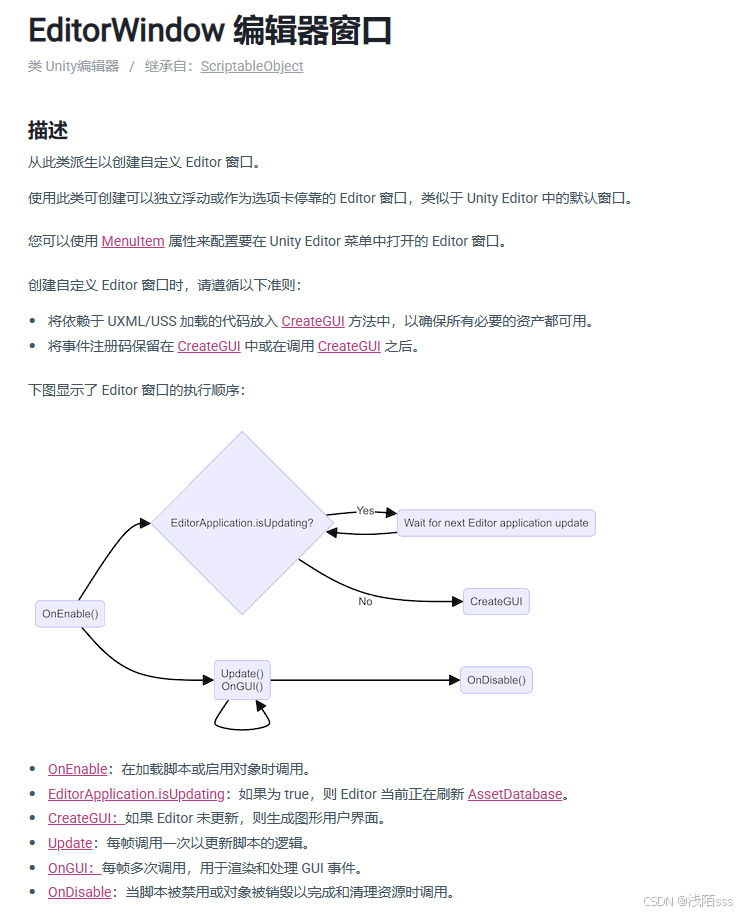
更多方法可参考:Unity - 脚本 API:EditorWindow (unity3d.com)
代码:
cs
public class TestWindow : EditorWindow
{
    [MenuItem("CustomWindow/ShowTestWin")]
    public static void ShowWindow()
    {
        //显示窗口实例
        EditorWindow.GetWindow(typeof(TestWindow));
        //显示窗口按照自定位置和大小,比如(0,0)点,宽600,长800
        EditorWindow.GetWindowWithRect<TestWindow>(new Rect(new Vector2(0,0),new Vector2(600,800)));
    }

    private void OnEnable()
    {
        //在加载脚本或者启用对象时调用
        Debug.Log("OnEnable");
    }

    private void CreateGUI()
    {
        //如果Editor未更新,则生成图形用户界面
        Debug.Log("CreateGUI");
    }

    private void Update()
    {
        //每帧调用一次以更新脚本的逻辑
        Debug.Log("Updaete");
    }

    private void OnDisable()
    {
        //当脚本被禁用或者对象被销毁以完成和清理资源时调用
        Debug.Log("OnDisable");
    }

    private void OnGUI()
    {
        //每帧多次调用,用于渲染和处理GUI事件
        //渲染窗口的实际内容
        Debug.Log("OnGUI");
    }
}
结果:

2.增加窗口内容
1.使用EditorGUI类
1.actionKey
使用代码:
cs
private void OnGUI()
{
//渲染窗口的实际内容
if (EditorGUI.actionKey)
{
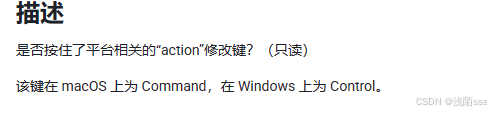
//是否按住了平台相关的"action"修改键?(只读),该键在 macOS 上为 Command,在 Windows 上为 Control
Debug.Log("按下了actionKey");
}
}结果:

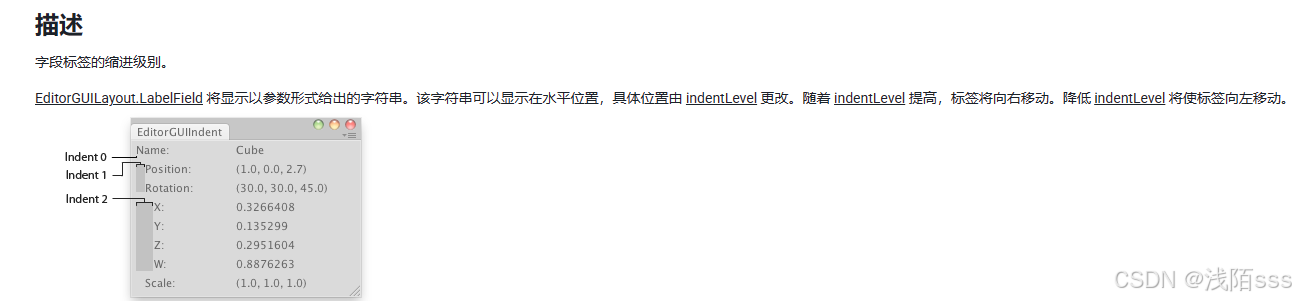
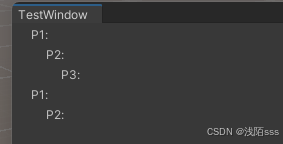
2.indentLevel
使用代码:
cs
    private void OnGUI()
    {
        //渲染窗口的实际内容
        //使用indentLevel缩进文本
        EditorGUI.indentLevel++;
        EditorGUILayout.LabelField("P1:");
        EditorGUI.indentLevel++;
        EditorGUILayout.LabelField("P2:");
        EditorGUI.indentLevel++;
        EditorGUILayout.LabelField("P3:");
        EditorGUI.indentLevel--;
        EditorGUI.indentLevel--;
        EditorGUILayout.LabelField("P1:");
        EditorGUI.indentLevel++;
        EditorGUILayout.LabelField("P2:");
    }
结果:
3.showMixedValue

具体作用可以看下面两篇文章
EditorGUI.showMixedValue 什么都不做?- Unity 引擎 - Unity 讨论
Unity - 脚本 API:EditorGUI.showMixedValue (unity3d.com)
就是可以让在 GUI 中以非标准方式表示值,同时支持多对象编辑,也就是通过设置此值为true,让枚举值没有在面板选择值时显示为
代码:
cs
    private void OnGUI()
    {
        //渲染窗口的实际内容
        EditorGUI.showMixedValue = true;
        // 将isFast布尔值转换为enum值
        SpeedOption speedOptionEnumValue = SpeedOption.Fast;
        // 在下拉菜单中显示枚举值:
        speedOptionEnumValue = (SpeedOption)EditorGUILayout.EnumPopup("Speed", speedOptionEnumValue);
        // 将showMixedValue设置为false,这样它就不会影响以下控件(如果有的话):
        EditorGUI.showMixedValue = false;
    }
结果:

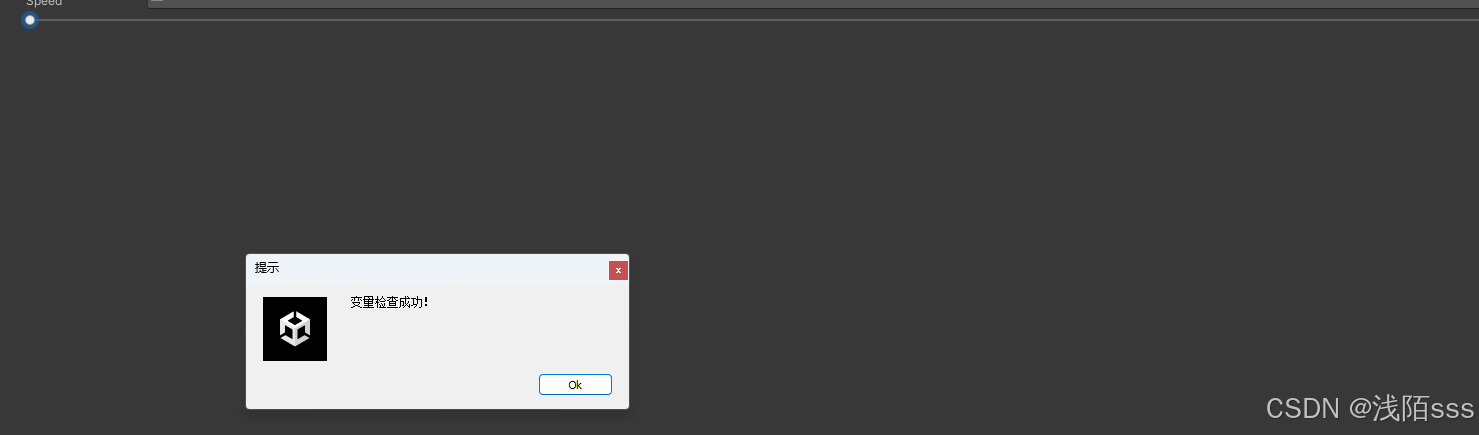
4.BeginChangeCheck,EndChangeCheck

EndChangeCheck返回值如下
代码:
cs
float value = 0;
private void OnGUI()
{
     //渲染窗口的实际内容
     EditorGUI.BeginChangeCheck();
     value = EditorGUILayout.Slider(value, 0, 1);
     if (EditorGUI.EndChangeCheck())
     {
         this.ShowTips("变量检查成功!");
     }
}
结果:
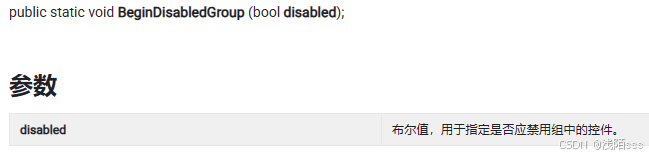
5.BeginDisabledGroup,EndDisabledGroup

BeginChangeCheck参数如下:
使用这两个API可以禁用执行在其中间的多个组件。
代码:
cs
    private void OnGUI()
    {
        //渲染窗口的实际内容
        EditorGUI.BeginDisabledGroup(false);
        EditorGUI.TextField(new Rect(new Vector2(0,150),new Vector2(300,50)), "TestDisabledGroup");
        EditorGUI.DropdownButton(new Rect(new Vector2(300, 150), new Vector2(100, 50)),this.titleContent,FocusType.Keyboard);
        EditorGUI.EndDisabledGroup();

    }
结果:
当BeginDisabledGroup传入值为false时,

当BeginDisabledGroup传入值为true时,

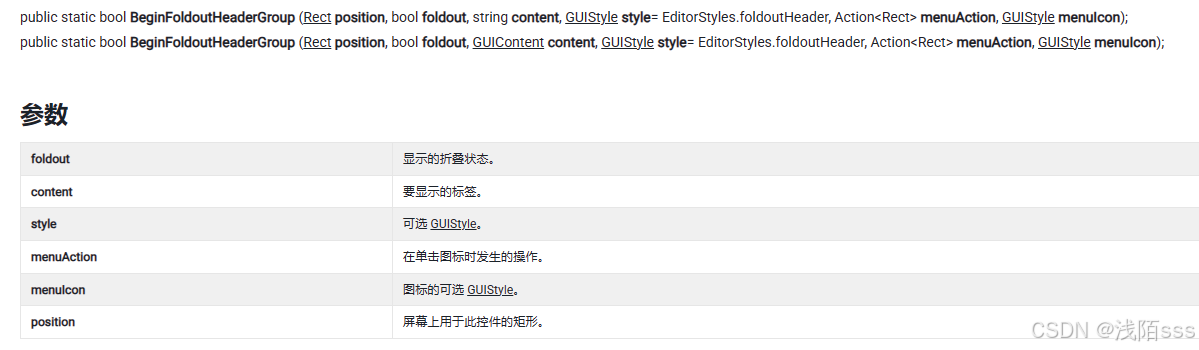
6.BeginFoldoutHeaderGroup,EndFoldoutHeaderGroup

BeginFoldoutHeaderGroup参数如下:
代码:
结果:
7.BeginProperty,EndProperty
8.文本字段(Field)
以下API都是在面板中创建一个字段显示,故放在一起整理:
BoundsField
BoundsIntField
ColorField
CurveField
EnumFlagsField
DoubleField
FloatField
IntField
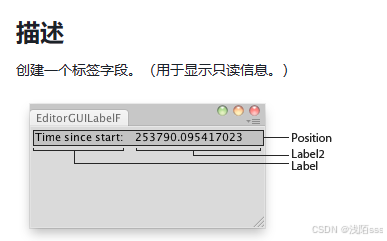
LabelField
LayerField
GradientField
LongField
MaskField
MultiFloatField
MultiIntField
MultiPropertyField
ObjectField
PasswordField
PropertyField
RectField
RectIntField
TagField
TextField
Vector2Field
Vector2IntField
Vector3Field
Vector3IntField
Vector4Field
使用代码:
9.DelayedDoubleField,DelayedFloatField,DelayedIntField,DelayedTextField
10.CanCacheInspectorGUI
11.DrawPreviewTexture
12.DrawRect
13.DrawTextureAlpha
14.DropdownButton
15.DropShadowLabel
16.EnumPopup,IntPopup,Popup
17.FocusTextInControl
18.Foldout
19.GetPropertyHeight
20.HandlePrefixLabel
21.HelpBox
22.InspectorTitlebar
23.IntSlider
24.LinkButton
25.MinMaxSlider
26.PrefixLabel
27.ProgressBar
28.SelectableLabel
29.Slider
30.TextArea
31.Toggle,ToggleLeft
2.使用EditorGUILayout类
与EditorGUI不相同的API部分:
相同的部分:
三、自定义Inspectors面板扩展
1.建立一个脚本面板扩展的编辑器脚本
2.EditorGUILayout与EditorGUI部分与上面的使用相同
未完待续。。。
参考:
《Extending Unity with Editor Scripting》