- 🍨 本文为 🔗365天深度学习训练营中的学习记录博客
- 🍖 原作者: K同学啊
一.导入数据
from torchvision.transforms import transforms
from torch.utils.data       import DataLoader
from torchvision            import datasets
import torchvision.models   as models
import torch.nn.functional  as F
import torch.nn             as nn
import torch,torchvision

device = torch.device("cuda" if torch.cuda.is_available() else "cpu")
device

1.获取类别名
import os,PIL,random,pathlib
import matplotlib.pyplot as plt
# 支持中文
plt.rcParams['font.sans-serif'] = ['SimHei']  # 用来正常显示中文标签
plt.rcParams['axes.unicode_minus'] = False  # 用来正常显示负号

data_dir = '../data/015_licence_plate/'
data_dir = pathlib.Path(data_dir)

data_paths  = list(data_dir.glob('*'))
classeNames = [str(path).split("\\")[3].split("_")[1].split(".")[0] for path in data_paths]
print(classeNames)

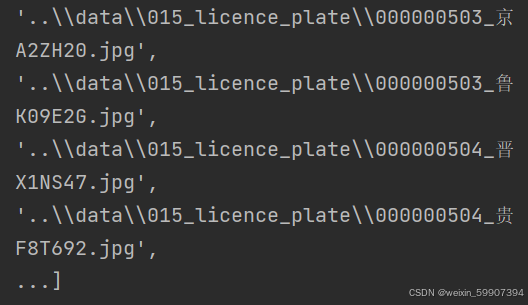
data_paths     = list(data_dir.glob('*'))
data_paths_str = [str(path) for path in data_paths]
data_paths_str
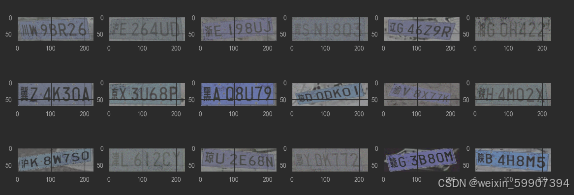
2.数据可视化
plt.figure(figsize=(14,5))

for i in range(18):
    plt.subplot(3,6,i+1)

    images = plt.imread(data_paths_str[i])
    plt.imshow(images)

plt.show()
3.标签数字化
import numpy as np

char_enum = ["京","沪","津","渝","冀","晋","蒙","辽","吉","黑","苏","浙","皖","闽","赣","鲁",\
              "豫","鄂","湘","粤","桂","琼","川","贵","云","藏","陕","甘","青","宁","新","军","使"]

number   = [str(i) for i in range(0, 10)]    # 0 到 9 的数字
alphabet = [chr(i) for i in range(65, 91)]   # A 到 Z 的字母

char_set       = char_enum + number + alphabet
char_set_len   = len(char_set)
label_name_len = len(classeNames[0])

# 将字符串数字化
def text2vec(text):
    return [char_set.index(c) for c in text]

all_labels = [text2vec(i) for i in classeNames]
4.加载数据文件
import os
import pandas as pd
from torchvision.io import read_image
from torch.utils.data import Dataset
import torch.utils.data as data
from PIL import Image

class MyDataset(data.Dataset):
    def __init__(self, all_labels, data_paths_str, transform):
        self.img_labels = all_labels      # 获取标签信息
        self.img_dir    = data_paths_str  # 图像目录路径
        self.transform  = transform       # 目标转换函数

    def __len__(self):
        return len(self.img_labels)

    def __getitem__(self, index):
        image = Image.open(self.img_dir[index]).convert('RGB')
        label = self.img_labels[index]

        if self.transform:
            image = self.transform(image)

        return image, torch.tensor(label, dtype=torch.long)
total_datadir = './03_traffic_sign/'


train_transforms = transforms.Compose([
    transforms.Resize([224, 224]),  # 将输入图片resize成统一尺寸
    transforms.ToTensor(),          # 将PIL Image或numpy.ndarray转换为tensor,并归一化到[0,1]之间
    transforms.Normalize(           # 标准化处理-->转换为标准正太分布(高斯分布),使模型更容易收敛
        mean=[0.485, 0.456, 0.406],
        std =[0.229, 0.224, 0.225])
])

total_data = MyDataset(all_labels, data_paths_str, train_transforms)
total_data

5.划分数据
train_size = int(0.8 * len(total_data))
test_size  = len(total_data) - train_size
train_dataset, test_dataset = torch.utils.data.random_split(total_data, [train_size, test_size])
train_size,test_size
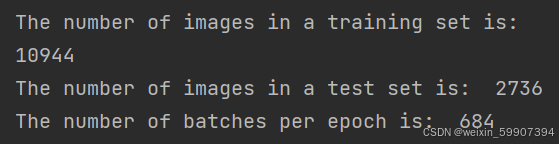
train_loader = torch.utils.data.DataLoader(train_dataset,
                                           batch_size=16,
                                           shuffle=True)
test_loader = torch.utils.data.DataLoader(test_dataset,
                                          batch_size=16,
                                          shuffle=True)

print("The number of images in a training set is: ", len(train_loader)*16)
print("The number of images in a test set is: ", len(test_loader)*16)
print("The number of batches per epoch is: ", len(train_loader))
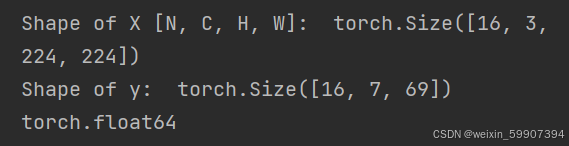
for X, y in test_loader:
    print("Shape of X [N, C, H, W]: ", X.shape)
    print("Shape of y: ", y.shape, y.dtype)
    break
二.自建模型
class Network_bn(nn.Module):
    def __init__(self):
        super(Network_bn, self).__init__()
        self.conv1 = nn.Conv2d(in_channels=3, out_channels=12, kernel_size=5, stride=1, padding=0)
        self.bn1 = nn.BatchNorm2d(12)
        self.conv2 = nn.Conv2d(in_channels=12, out_channels=12, kernel_size=5, stride=1, padding=0)
        self.bn2 = nn.BatchNorm2d(12)
        self.pool = nn.MaxPool2d(2,2)
        self.conv4 = nn.Conv2d(in_channels=12, out_channels=24, kernel_size=5, stride=1, padding=0)
        self.bn4 = nn.BatchNorm2d(24)
        self.conv5 = nn.Conv2d(in_channels=24, out_channels=24, kernel_size=5, stride=1, padding=0)
        self.bn5 = nn.BatchNorm2d(24)
        self.fc1 = nn.Linear(24*50*50, label_name_len*char_set_len)
        self.reshape = Reshape([label_name_len,char_set_len])

    def forward(self, x):
        x = F.relu(self.bn1(self.conv1(x)))
        x = F.relu(self.bn2(self.conv2(x)))
        x = self.pool(x)
        x = F.relu(self.bn4(self.conv4(x)))
        x = F.relu(self.bn5(self.conv5(x)))
        x = self.pool(x)
        x = x.view(-1, 24*50*50)
        x = self.fc1(x)

        # 最终reshape
        x = self.reshape(x)

        return x

# 定义Reshape层
class Reshape(nn.Module):
    def __init__(self, shape):
        super(Reshape, self).__init__()
        self.shape = shape

    def forward(self, x):
        return x.view(x.size(0), *self.shape)

device = "cuda" if torch.cuda.is_available() else "cpu"
print("Using {} device".format(device))

model = Network_bn().to(device)
model

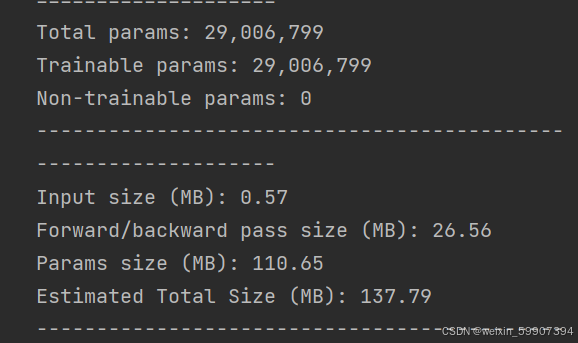
import torchsummary

torchsummary.summary(model, (3, 224, 224))
三.模型训练
1.优化器与损失函数
optimizer  = torch.optim.Adam(model.parameters(),
                              lr=1e-4,
                              weight_decay=0.0001)

loss_model = nn.CrossEntropyLoss()
from torch.autograd import Variable

def test(model, test_loader, loss_model):
    size = len(test_loader.dataset)
    num_batches = len(test_loader)

    model.eval()
    test_loss, correct = 0, 0
    with torch.no_grad():
        for X, y in test_loader:
            X, y = X.to(device), y.to(device)
            pred = model(X)
            pred=pred.view(-1, char_set_len)
            y=y.view(-1)

            test_loss += loss_model(pred, y).item()
            correct   +=(pred.argmax(1)==y).type(torch.float).sum().item()

    test_loss /= num_batches
    correct /=size

    print(f"Avg loss: {test_loss:>8f} \n")
    return correct,test_loss

def train(model,train_loader,loss_model,optimizer):
    model=model.to(device)
    model.train()

    for i, (images, labels) in enumerate(train_loader, 0):

        images = Variable(images.to(device))
        labels = Variable(labels.to(device))

        optimizer.zero_grad()
        outputs = model(images)
        labels = labels

        outputs = outputs.view(-1, char_set_len)
        labels  = labels.view(-1)

        loss = loss_model(outputs, labels)
        loss.backward()
        optimizer.step()

        if i % 1000 == 0:
            print('[%5d] loss: %.3f' % (i, loss))
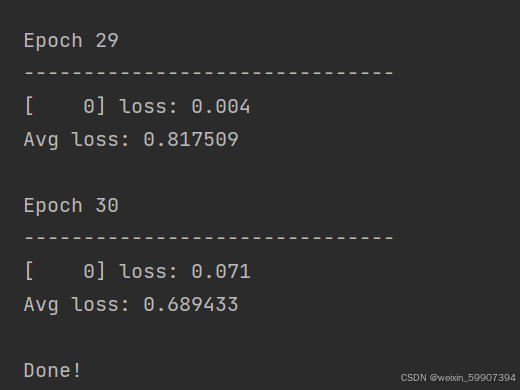
test_acc_list  = []
test_loss_list = []
epochs = 30

for t in range(epochs):
    print(f"Epoch {t+1}\n-------------------------------")
    train(model,train_loader,loss_model,optimizer)
    test_acc,test_loss = test(model, test_loader, loss_model)
    test_acc_list.append(test_acc)
    test_loss_list.append(test_loss)
print("Done!")
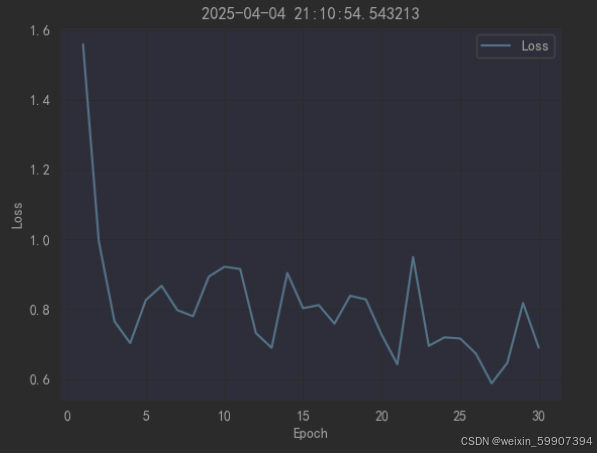
import numpy as np
import matplotlib.pyplot as plt

from datetime import datetime
current_time = datetime.now() # 获取当前时间

x = [i for i in range(1,31)]

plt.plot(x, test_loss_list, label="Loss", alpha=0.8)

plt.xlabel("Epoch")
plt.ylabel("Loss")
plt.title(current_time)

plt.legend()
plt.show()
对无法使用 datasets.ImageFolder 导入的非预分类数据集,通过自定义 Dataset 类手动加载图像路径与标签,实现对原始数据的灵活读取与转换,使模型能够适用于更复杂、更自由的数据组织方式