在当今互联网应用开发中,点赞功能几乎成为了各类内容平台的标配。它不仅能增加用户与内容之间的互动,还能直观地反映内容的受欢迎程度。本文将详细介绍如何使用 Spring Boot 整合 Redis 来实现一个简单的文章点赞功能,让你轻松掌握这一实用技术。
一、Redis 简介
Redis 是一个开源的、基于内存的数据结构存储系统,它可以用作数据库、缓存和消息中间件。Redis 支持多种数据结构,如字符串(String)、哈希(Hash)、列表(List)、集合(Set)和有序集合(Sorted Set)等,这使得它在处理各种场景时都能表现出色。其高性能、低延迟的特性,使其成为处理点赞、缓存等高频读写场景的首选技术。
二、实验目的与任务
本次实验的核心目的是学习如何在 Spring Boot 项目中整合 Redis,实现一个简单而实用的文章点赞功能。具体任务为:当用户对一篇文章进行点赞操作时,点赞数在 Redis 缓存中实时加 1;当用户取消点赞时,点赞数减 1。所有数据都存储在 Redis 缓存中,以确保高效的读写操作。
三、实验内容与要求
(一)环境准备
- Redis 安装 :
- 可以选择 Windows 版或 Linux 版的 Redis 进行安装。对于有虚拟机或云服务器的同学,建议尝试 Linux 版安装,以更好地模拟生产环境。
Windows 版安装步骤:
bash
D:
cd Redis
cd Redis-x64-3.2.100\
redis-server --service-install redis.windows.conf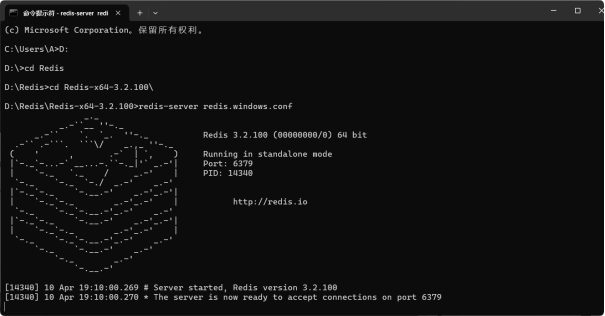
- 从下载地址下载 Redis-x64-3.2.100.msi 安装包。
- 将安装包解压到 D 盘的 Redis 文件夹中。
- 打开 cmd 指令窗口,依次输入以下命令启动 Redis 服务:
- 若要部署 Redis 在 Windows 下的服务,可输入:
bash
D:
cd Redis
cd Redis-x64-3.2.100\
redis-server --service-install redis.windows.conf
- RedisDesktopManager 安装 :
- RedisDesktopManager 是一个可视化操作 Redis 数据的工具,方便我们管理和查看 Redis 中的数据。
- 访问相关链接下载并完成安装,安装完成后即可使用它连接到 Redis 服务。
(二)Spring Boot 项目配置
- 引入依赖:在项目的 pom.xml 文件中引入 Spring Boot 整合 Redis 的相关依赖:
XML
<dependency>
    <groupId>org.springframework.boot</groupId>
    <artifactId>spring-boot-starter-data-redis</artifactId>
</dependency>
同时,为了构建完整的 Web 应用,还需引入 Spring Boot Web 和 Thymeleaf 等依赖:
XML
<dependency>
    <groupId>org.springframework.boot</groupId>
    <artifactId>spring-boot-starter-web</artifactId>
</dependency>
<dependency>
    <groupId>org.springframework.boot</groupId>
    <artifactId>spring-boot-starter-thymeleaf</artifactId>
</dependency>
配置 Redis 属性:在 src/main/resources/application.properties 文件中配置 Redis 相关属性:
java
spring.redis.host=localhost
spring.redis.port=6379
这里假设 Redis 服务运行在本地,端口为默认的 6379。
(三)实现点赞功能
- 选择 Redis 数据类型 :
- 对于文章点赞信息,我们选用 Set 数据结构。Set 具有唯一性,非常适合存储点赞用户的标识,能确保每个用户对同一篇文章只能点赞一次。键名格式为:article:{articleId}:likes。
- 为了统计点赞数量,我们使用 String 数据结构,键名格式为:article:like_count:{id}。
- 后端代码实现 :Redis 配置类:在 src/main/java/org/example/demo/config/RedisConfig.java 中配置 Redis 连接工厂和 RedisTemplate:
java
package org.example.demo.config;
import org.springframework.beans.factory.annotation.Value;
import org.springframework.context.annotation.Bean;
import org.springframework.context.annotation.Configuration;
import org.springframework.data.redis.connection.RedisConnectionFactory;
import org.springframework.data.redis.connection.lettuce.LettuceConnectionFactory;
import org.springframework.data.redis.core.RedisTemplate;
import org.springframework.data.redis.serializer.GenericJackson2JsonRedisSerializer;
import org.springframework.data.redis.serializer.StringRedisSerializer;

@Configuration
public class RedisConfig {

    @Value("${spring.redis.host}")
    private String host;

    @Value("${spring.redis.port}")
    private int port;

    @Bean
    public RedisConnectionFactory redisConnectionFactory() {
        return new LettuceConnectionFactory(host, port);
    }

    @Bean
    public RedisTemplate<String, Object> redisTemplate(RedisConnectionFactory factory) {
        RedisTemplate<String, Object> template = new RedisTemplate<>();
        template.setConnectionFactory(factory);
        template.setKeySerializer(new StringRedisSerializer());
        template.setValueSerializer(new GenericJackson2JsonRedisSerializer());
        template.setHashKeySerializer(new StringRedisSerializer());
        template.setHashValueSerializer(new GenericJackson2JsonRedisSerializer());
        return template;
    }
}- 文章服务类:在 src/main/java/org/example/demo/service/ArticleService.java 中实现点赞和获取点赞数的业务逻辑:
java
package org.example.demo.service;

import org.example.demo.model.Article;
import org.slf4j.Logger;
import org.slf4j.LoggerFactory;
import org.springframework.beans.factory.annotation.Autowired;
import org.springframework.data.redis.core.RedisTemplate;
import org.springframework.stereotype.Service;

import java.util.concurrent.TimeUnit;

@Service
public class ArticleService {

    private static final Logger logger = LoggerFactory.getLogger(ArticleService.class);

    @Autowired
    private RedisTemplate<String, Object> redisTemplate;

    // 点赞/取消点赞
    public int likeArticle(int id) {
        try {
            String key = "article:likes:" + id;
            if (redisTemplate.opsForSet().isMember(key, "liked")) {
                // 已点赞,取消点赞
                redisTemplate.opsForSet().remove(key, "liked");
                String countKey = "article:like_count:" + id;
                // 处理点赞数递减可能出现的空指针问题
                if (redisTemplate.hasKey(countKey)) {
                    redisTemplate.opsForValue().decrement(countKey);
                }
                return 0;
            } else {
                // 未点赞,进行点赞
                redisTemplate.opsForSet().add(key, "liked");
                redisTemplate.opsForValue().increment("article:like_count:" + id);
                return 1;
            }
        } catch (Exception e) {
            logger.error("Error occurred while liking or unliking article with id: {}", id, e);
            return -1; // 返回 -1 表示操作异常
        }
    }

    public long getArticleLikeCount(int id) {
        try {
            String key = "article:like_count:" + id;
            Object value = redisTemplate.opsForValue().get(key);
            if (value == null) {
                return 0;
            }
            if (value instanceof Long) {
                return (Long) value;
            } else if (value instanceof Integer) {
                return ((Integer) value).longValue();
            } else {
                logger.error("Unexpected data type for like count of article with id: {}. Value: {}", id, value);
                return 0;
            }
        } catch (Exception e) {
            logger.error("Error occurred while getting like count for article with id: {}", id, e);
            return 0;
        }
    }
}- 控制器类:在 src/main/java/org/example/demo/controller/MyController.java 中定义处理点赞请求的接口:
java
package org.example.demo.controller;

import org.example.demo.model.Article;
import org.example.demo.service.ArticleService;
import org.springframework.beans.factory.annotation.Autowired;
import org.springframework.stereotype.Controller;
import org.springframework.ui.Model;
import org.springframework.web.bind.annotation.GetMapping;
import org.springframework.web.bind.annotation.PathVariable;
import org.springframework.web.bind.annotation.ResponseBody;

@Controller
public class MyController {

    @Autowired
    private ArticleService articleService;

    @GetMapping("/article/{id}")
    public String getArticleById(@PathVariable int id, Model model) {
        // 根据文章ID查询文章内容
        Article article = articleService.getArticleById(id);
        // 将文章内容传递给前端页面
        model.addAttribute("article", article);
        return "article";
    }

    @GetMapping("/article/{id}/like")
    @ResponseBody
    public int judgment(@PathVariable int id) {
        return articleService.likeArticle(id);
    }

    @GetMapping("/article/{id}/likeCount")
    @ResponseBody
    public long getArticleLikeCount(@PathVariable int id) {
        return articleService.getArticleLikeCount(id);
    }
}- 前端代码实现:在 src/main/resources/templates/article.html 中实现点赞按钮的交互逻辑:
html
<!DOCTYPE html>
<html xmlns:th="http://www.thymeleaf.org">

<head>
    <meta charset="UTF-8">
    <meta name="viewport" content="width=device-width, initial-scale=1.0">
    <title>文章详情</title>
    <!-- 引入Bootstrap CSS -->
    <link href="https://cdn.jsdelivr.net/npm/bootstrap@5.3.2/dist/css/bootstrap.min.css" rel="stylesheet">
    <!-- 引入Font Awesome图标库 -->
    <link rel="stylesheet" href="https://cdnjs.cloudflare.com/ajax/libs/font-awesome/6.4.2/css/all.min.css">
    <style>
      .like-btn {
            margin-top: 10px;
        }

        /* 定义选中文章的样式 */
      .active-article {
            color: #0dcaf0; /* 这里可以根据喜好设置颜色,比如浅蓝色 */
        }
    </style>
</head>

<body>
<div class="container-fluid">
    <nav class="navbar navbar-expand-lg navbar-dark bg-dark">
        <div class="container-fluid">
            <a class="navbar-brand" href="#">文章列表</a>
            <button class="navbar-toggler" type="button" data-bs-toggle="collapse" data-bs-target="#navbarNav"
                    aria-controls="navbarNav" aria-expanded="false" aria-label="Toggle navigation">
                <span class="navbar-toggler-icon"></span>
            </button>
            <div class="collapse navbar-collapse" id="navbarNav">
                <ul class="navbar-nav">
                    <li class="nav-item">
                        <a class="nav-link" href="/article/1" onclick="highlightArticle(this)">文章一</a>
                    </li>
                    <li class="nav-item">
                        <a class="nav-link" href="/article/2" onclick="highlightArticle(this)">文章二</a>
                    </li>
                    <li class="nav-item">
                        <a class="nav-link" href="/article/3" onclick="highlightArticle(this)">文章三</a>
                    </li>
                </ul>
            </div>
        </div>
    </nav>
    <div class="row">
        <div class="col-md-8 offset-md-2">
            <div class="card mt-4">
                <div class="card-body">
                    <h1 class="card-title" th:text="${article.title}">Article Title</h1>
                    <p class="card-text text-muted">
                        作者:<span th:text="${article.author}">Author</span>,出生时间:<span th:text="${article.date}">Date</span>
                    </p>
                    <p class="card-text" th:text="${article.content}">Article Content</p>
                    <button class="btn btn-primary like-btn" onclick="toggleLike()">
                        <i class="fa-solid fa-thumbs-up"></i>
                        <span id="likeStatus0">点赞</span>
                        <span id="likeStatus1" style="display: none;">已点赞</span>
                    </button>
                    <span id="likeCount" class="ml-2"></span>
                </div>
            </div>
        </div>
    </div>
</div>
<!-- 引入Bootstrap JavaScript -->
<script src="https://cdn.jsdelivr.net/npm/bootstrap@5.3.2/dist/js/bootstrap.bundle.min.js"></script>
<script>
    // 页面加载时获取点赞数量
    window.onload = function () {
        var articleId = window.location.pathname.split('/')[2];
        var xhr = new XMLHttpRequest();
        xhr.open('GET', '/article/' + articleId + '/likeCount', true);
        xhr.onreadystatechange = function () {
            if (xhr.readyState === XMLHttpRequest.DONE) {
                if (xhr.status === 200) {
                    document.getElementById('likeCount').innerText = '点赞数:' + xhr.responseText;
                }
            }
        };
        xhr.send();
    }

    // 点赞按钮点击事件
    function toggleLike() {
        var articleId = window.location.pathname.split('/')[2];
        // 发送GET请求到后端
        var xhr = new XMLHttpRequest();
        xhr.open('GET', '/article/' + articleId + '/like', true);
        xhr.onreadystatechange = function () {
            if (xhr.readyState === XMLHttpRequest.DONE) {
                if (xhr.status === 200) {
                    // 获取后端返回的点赞状态
                    var likeStatus = parseInt(xhr.responseText);
                    var likeStatus0 = document.getElementById('likeStatus0');
                    var likeStatus1 = document.getElementById('likeStatus1');
                    var likeBtn = document.querySelector('.like-btn');
                    if (likeStatus === 1) {
                        // 点赞成功
                        console.log('点赞成功1');
                        likeBtn.classList.remove('btn-primary');
                        likeBtn.classList.add('btn-success');
                        likeStatus0.style.display = 'none';
                        likeStatus1.style.display = 'inline';
                    } else {
                        // 取消点赞
                        console.log('取消点赞0');likeBtn.classList.remove('btn-success');
                        likeBtn.classList.add('btn-primary');
                        likeStatus0.style.display = 'inline';
                        likeStatus1.style.display = 'none';
                    }
                    // 更新点赞数量
                    var xhrCount = new XMLHttpRequest();
                    xhrCount.open('GET', '/article/' + articleId + '/likeCount', true);
                    xhrCount.onreadystatechange = function () {
                        if (xhrCount.readyState === XMLHttpRequest.DONE) {
                            if (xhrCount.status === 200) {
                               document.getElementById('likeCount').innerText = '点赞数:' + xhrCount.responseText;
                            }
                        }
                    };
                    xhrCount.send();
                } else {
                    console.error('请求失败:' + xhr.status);
                }
            }
        };
        xhr.send();
    }
    // 点击文章链接时高亮显示当前文章
    function highlightArticle(link) {
        var navLinks = document.querySelectorAll('.navbar-nav a');
        navLinks.forEach(function (a) {
            a.classList.remove('active-article');
        });
        link.classList.add('active-article');
    }
</script>
</body>

</html>
四、步骤总结
- 完成 Redis 和 RedisDesktopManager 的安装,并确保 Redis 服务正常运行。
- 在 Spring Boot 项目中引入相关依赖,配置 Redis 属性。
- 编写后端代码,包括 Redis 配置类、文章服务类和控制器类,实现点赞和获取点赞数的业务逻辑。
- 编写前端代码,实现点赞按钮的交互逻辑,包括点赞状态切换和点赞数更新。
- 使用 Maven 命令 mvn clean install 下载项目所需的依赖项,并编译项目代码,然后通过 mvn spring-boot:run 启动项目。
- 使用 Postman 或浏览器访问相关 URL,验证项目功能是否正常。访问http://localhost:8080/article/{articleId}/like进行文章点赞操作等。
五、运行截图展示
运行 redis 截图:展示 Redis 服务启动后的界面,确保 Redis 正常运行。

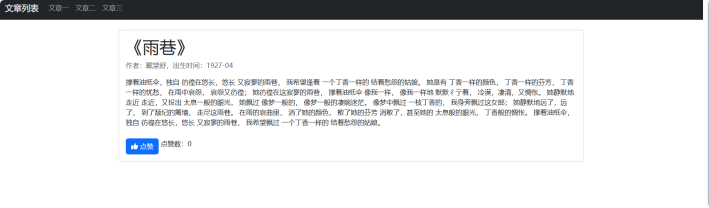
运行文章界面:展示文章详情页面,包括文章标题、作者、内容等信息。
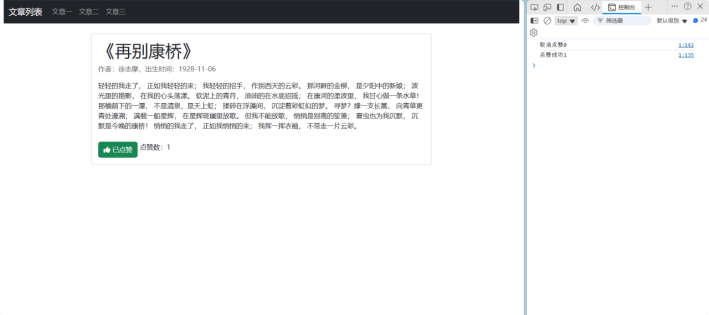
点赞文章界面:当用户点击点赞按钮后,展示点赞成功后的界面,点赞按钮样式改变,点赞数实时更新。
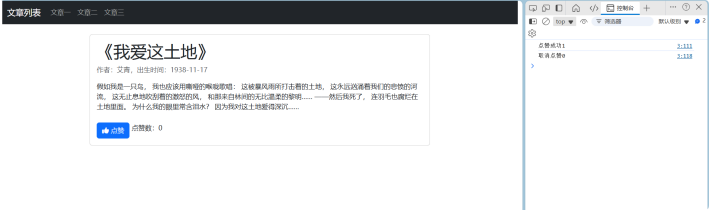
取消文章点赞界面:当用户再次点击已点赞的按钮取消点赞时,展示取消点赞后的界面,按钮样式恢复,点赞数相应减少。
通过以上步骤,我们成功实现了 Spring Boot 整合 Redis 的点赞功能。这一技术组合在实际项目中具有广泛的应用场景,希望本文能帮助你快速掌握并应用到实际开发中。如果在实践过程中有任何问题,欢迎在评论区留言交流。