通用型产品发布解决方案(基于分布式微服务技术栈:SpringBoot+SpringCloud+Spring CloudAlibaba+Vue+ElementUI+MyBatis-Plus+MySQL+Git+Maven+Linux+Docker+Nginx - 《01》
项目效果演示:
video(video-XmXsRKp2-1745292676448)(type-csdn)(url-[live.csdn.net/v/embed/474...](https://link.juejin.cn?target=https%3A%2F%2Flive.csdn.net%2Fv%2Fembed%2F474705)(image-https%3A%2F%2Fv-blog.csdnimg.cn%2Fasset%2F1ab367e031405a8c7b8b5955d576328e%2Fcover%2FCover0.jpg)(title-%25E9%2580%259A%25E7%2594%25A8%25E5%259E%258B%25E4%25BA%25A7%25E5%2593%2581%25E5%258F%2591%25E5%25B8%2583%25E8%25A7%25A3%25E5%2586%25B3%25E6%2596%25B9%25E6%25A1%2588%25E6%25BC%2594%25E7%25A4%25BA "https://live.csdn.net/v/embed/474705)(image-https://v-blog.csdnimg.cn/asset/1ab367e031405a8c7b8b5955d576328e/cover/Cover0.jpg)(title-%E9%80%9A%E7%94%A8%E5%9E%8B%E4%BA%A7%E5%93%81%E5%8F%91%E5%B8%83%E8%A7%A3%E5%86%B3%E6%96%B9%E6%A1%88%E6%BC%94%E7%A4%BA"))
项目的源码地址:
- GitHub:github.com/China-Rainb...
- Gitee:gitee.com/Rainbow--Se...
当你一个项目模块当中的 pom.xml 指明的 parent 父类,不是一个你本地上的配置的 module 。而是远程仓库当中一个 module
当你的一个项目模块当中的 pom.xml 其中指明的 parent 父类,不是一个你本地上配置的一个 module 模块(就是不是一个本地当中可以找到的内容),而是某个远程仓库当中一个 module。
比如:Spring-Cloud 就会发生一个报错信息,我们可以配置在对应的配置上加上一个查询顺序的方式。进行处理解决。

xml
    <parent>
        <groupId>org.springframework.boot</groupId>
        <artifactId>spring-boot-starter-parent</artifactId>
        <version>2.1.8.RELEASE</version>
        <relativePath/> <!-- lookup parent from repository -->
        <!--
              从父级仓库查找依赖仓库
              maven 构建jar 包时候查找顺序: relativePath 元素中的地址 > 本地仓库 > 远程仓库
              <relativePath/> 设定一个空值将始终从仓库中获取,不从本地路径获取。
        -->
    </parent>
跨域问题,解决(设计到一个跨域,没有云存储)
**跨域问题:**我们的浏览器是默认禁止我们进行一个跨域访问的,所谓的跨域访问就是:当我们一个微服务模块的访问另外一个微服务模块的,这两微服务模块的端口号是不同的,比如 8080 端口------> 访问的是 9090 端口的。这样就存在一个跨域的问题了。
解决跨域问题:


递归层级分类显示

json
{
    "msg": "success",
    "code": 0,
    "page": {
        "totalCount": 0,
        "pageSize": 10,
        "totalPage": 0,
        "currPage": 1,
        "list": [
            {
                "id": 1,
                "name": "家用电器",
                "parentId": 0,
                "catLevel": 1,
                "isShow": 1,
                "sort": 0,
                "icon": "",
                "proUnit": "",
                "proCount": 0,
                "childrenCategories": null
            },
            {
                "id": 2,
                "name": "家居家装",
                "parentId": 0,
                "catLevel": 1,
                "isShow": 1,
                "sort": 0,
                "icon": "",
                "proUnit": "",
                "proCount": 0,
                "childrenCategories": null
            },
            {
                "id": 21,
                "name": "大 家 电",
                "parentId": 1,
                "catLevel": 2,
                "isShow": 1,
                "sort": 0,
                "icon": "",
                "proUnit": "",
                "proCount": 0,
                "childrenCategories": null
            },
            {
                "id": 22,
                "name": "厨卫大电",
                "parentId": 1,
                "catLevel": 2,
                "isShow": 1,
                "sort": 0,
                "icon": "",
                "proUnit": "",
                "proCount": 0,
                "childrenCategories": null
            },
            {
                "id": 41,
                "name": "家纺",
                "parentId": 2,
                "catLevel": 2,
                "isShow": 1,
                "sort": 0,
                "icon": "",
                "proUnit": "",
                "proCount": 0,
                "childrenCategories": null
            },
            {
                "id": 42,
                "name": "灯具",
                "parentId": 2,
                "catLevel": 2,
                "isShow": 1,
                "sort": 0,
                "icon": "",
                "proUnit": "",
                "proCount": 0,
                "childrenCategories": null
            },
            {
                "id": 201,
                "name": "燃气灶",
                "parentId": 22,
                "catLevel": 3,
                "isShow": 1,
                "sort": 0,
                "icon": "",
                "proUnit": "",
                "proCount": 0,
                "childrenCategories": null
            },
            {
                "id": 202,
                "name": "油烟机",
                "parentId": 22,
                "catLevel": 3,
                "isShow": 1,
                "sort": 0,
                "icon": "",
                "proUnit": "",
                "proCount": 0,
                "childrenCategories": null
            },
            {
                "id": 301,
                "name": "平板电视",
                "parentId": 21,
                "catLevel": 3,
                "isShow": 1,
                "sort": 0,
                "icon": "",
                "proUnit": "",
                "proCount": 0,
                "childrenCategories": null
            },
            {
                "id": 601,
                "name": "桌布/罩件",
                "parentId": 41,
                "catLevel": 3,
                "isShow": 1,
                "sort": 0,
                "icon": "",
                "proUnit": "",
                "proCount": 0,
                "childrenCategories": null
            },
            {
                "id": 602,
                "name": "地毯地垫",
                "parentId": 41,
                "catLevel": 3,
                "isShow": 1,
                "sort": 0,
                "icon": "",
                "proUnit": "",
                "proCount": 0,
                "childrenCategories": null
            },
            {
                "id": 651,
                "name": "台灯",
                "parentId": 42,
                "catLevel": 3,
                "isShow": 1,
                "sort": 0,
                "icon": "",
                "proUnit": "",
                "proCount": 0,
                "childrenCategories": null
            },
            {
                "id": 652,
                "name": "节能灯",
                "parentId": 42,
                "catLevel": 3,
                "isShow": 1,
                "sort": 0,
                "icon": "",
                "proUnit": "",
                "proCount": 0,
                "childrenCategories": null
            }
        ]
    }
}
增加一个数据库当中没有的属性(类)字段的思想


java
import com.baomidou.mybatisplus.annotation.TableField;

	/**
	 *  增加一个属性,childrenCategories
	 *  1.childrenCategories 表示某个分类的子分类集合
	 *  2.childrenCategories 没有对应表 commodity_category 字段
	 *  3. @TableField(exist = false) 表示 childrenCategories 不对应表的字段
	 */
	@TableField(exist = false)
	private List<CategoryEntity> childrenCategories;
java
package com.rainbowsea.rainbowsealiving.commodity.entity;

import com.baomidou.mybatisplus.annotation.TableField;
import com.baomidou.mybatisplus.annotation.TableId;
import com.baomidou.mybatisplus.annotation.TableName;

import java.io.Serializable;
import java.util.List;

import lombok.Data;

/**
 * 商品分类表
 *
 * @author rainbowsea
 * @email rainbowsea@gmail.com
 * @date 2025-03-04 16:38:22
 */
@Data
@TableName("commodity_category")
public class CategoryEntity implements Serializable {
	private static final long serialVersionUID = 1L;

	/**
	 * id
	 */
	@TableId
	private Long id;
	/**
	 * 名称
	 */
	private String name;
	/**
	 * 父分类 id
	 */
	private Long parentId;
	/**
	 * 层级
	 */
	private Integer catLevel;
	/**
	 * 0 不显示,1 显示]
	 */
	private Integer isShow;
	/**
	 * 排序
	 */
	private Integer sort;
	/**
	 * 图标
	 */
	private String icon;
	/**
	 * 统计单位
	 */
	private String proUnit;
	/**
	 * 商品数量
	 */
	private Integer proCount;


	/**
	 *  增加一个属性,childrenCategories
	 *  1.childrenCategories 表示某个分类的子分类集合
	 *  2.childrenCategories 没有对应表 commodity_category 字段
	 *  3. @TableField(exist = false) 表示 childrenCategories 不对应表的字段
	 */
	@TableField(exist = false)
	private List<CategoryEntity> childrenCategories;

}
是一个递归的方式,增加的一个属性。
增加子分类集合属性
java
	/**
	 *  增加一个属性,childrenCategories
	 *  1.childrenCategories 表示某个分类的子分类集合
	 *  2.childrenCategories 没有对应表 commodity_category 字段
	 *  3. @TableField(exist = false) 表示 childrenCategories 不对应表的字段
	 */
	@TableField(exist = false)
	private List<CategoryEntity> childrenCategories;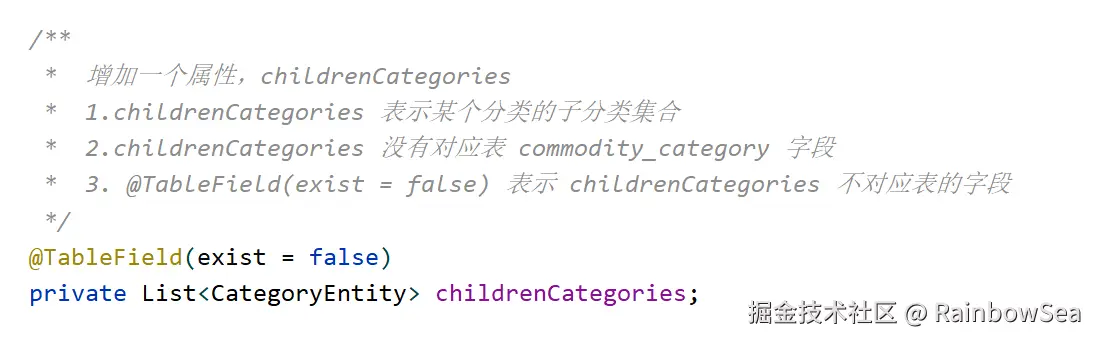

java
 /**
     * 核心方法: 返回所有分类及其子分类(带有层级关系-即树形)
     * 这里我们会使用 java8的,流式计算(stream api) + 递归操作(有一定难度)
     *
     * @return
     */
    @Override
    public List<CategoryEntity> listTree() {
        // 思路分析-步骤:
        // 1. 查出所有的分类数据
        List<CategoryEntity> entities = baseMapper.selectList(null);

        // 2.组装成层级树形结构使用到 Java8 的 stream api + 递归操作
        // 思路:
        // 1.过滤,返回1级分类
        // 2.2 进行 map 映射操作,给每个分类设置对应的子分类(这个过程会使用到递归)
        // 2.3 进行排序 sorted 操作
        // 2.4 将处理好的数据收集/转换到集合

        // 3.返回 带有层级关系数据-即树形
        // 需求:从 List 中过滤出 person.id % 2 != 0 的 person对象
        // list.stream() : 把 List 转成流对象,目的是为了使用流的方法,
        // 这样就可以处理一些比较负载的业务

        List<CategoryEntity> categoryTree =
                entities.stream().filter(categoryEntity -> {
                    // 2.1 过滤filter,返回 1级分类
                    return categoryEntity.getParentId() == 0; // 0 就是一级分类
                }).map(category -> {
                    // 2.2 进行map映射操作,给每个分类设置对应的子分类(这个过程会使用到递归)
                    category.setChildrenCategories(getChildrenCategories(category,entities));
                    return category;
                }).sorted((category1, category2) -> {
                    // 2.3 进行排序sorted 操作,按照 sort 的升序排列
                    return (category1.getSort() == null ? 0 : category1.getSort()) -
                            (category2.getSort() == null ? 0 : category2.getSort());
                }).collect(Collectors.toList());  // // 2.4 将处理好的数据收集 collect/转换到集合中


        // 3. 返回带有层级关系的-即树形
        return categoryTree;
    }


    /**
     * 递归查询所有的分类的子分类
     * * 该方法的任务就是把 root 下的所有子分类的层级关系组织好,并返回。
     * * all 就是所有的分类信息(即上个方法的 entities )
     *
     * @param root
     * @param all
     * @return
     */
    private List<CategoryEntity> getChildrenCategories(CategoryEntity root,
                                                       List<CategoryEntity> all) {
        // 1.过滤
        List<CategoryEntity> children = all.stream().filter(categoryEntity -> {
            return categoryEntity.getParentId() == root.getId();
        }).map(categoryEntity -> {
            // 2. 找到子分类,并设置递归
            categoryEntity.setChildrenCategories(getChildrenCategories(categoryEntity, all));
            return categoryEntity;
        }).sorted((category1, category2) -> {
            // 按照 sort 排序-升序
            return (category1.getSort() == null ? 0 : category1.getSort()) -
                    (category2.getSort() == null ? 0 : category2.getSort());
        }).collect(Collectors.toList()); // 将处理好的数据收集 collect/转换到集合中
        return children;
    }

}
json
{
    "msg": "success",
    "code": 0,
    "data": [
        {
            "id": 1,
            "name": "家用电器",
            "parentId": 0,
            "catLevel": 1,
            "isShow": 1,
            "sort": 0,
            "icon": "",
            "proUnit": "",
            "proCount": 0,
            "childrenCategories": [
                {
                    "id": 21,
                    "name": "大 家 电",
                    "parentId": 1,
                    "catLevel": 2,
                    "isShow": 1,
                    "sort": 0,
                    "icon": "",
                    "proUnit": "",
                    "proCount": 0,
                    "childrenCategories": [
                        {
                            "id": 301,
                            "name": "平板电视",
                            "parentId": 21,
                            "catLevel": 3,
                            "isShow": 1,
                            "sort": 0,
                            "icon": "",
                            "proUnit": "",
                            "proCount": 0,
                            "childrenCategories": []
                        }
                    ]
                },
                {
                    "id": 22,
                    "name": "厨卫大电",
                    "parentId": 1,
                    "catLevel": 2,
                    "isShow": 1,
                    "sort": 0,
                    "icon": "",
                    "proUnit": "",
                    "proCount": 0,
                    "childrenCategories": [
                        {
                            "id": 201,
                            "name": "燃气灶",
                            "parentId": 22,
                            "catLevel": 3,
                            "isShow": 1,
                            "sort": 0,
                            "icon": "",
                            "proUnit": "",
                            "proCount": 0,
                            "childrenCategories": []
                        },
                        {
                            "id": 202,
                            "name": "油烟机",
                            "parentId": 22,
                            "catLevel": 3,
                            "isShow": 1,
                            "sort": 0,
                            "icon": "",
                            "proUnit": "",
                            "proCount": 0,
                            "childrenCategories": []
                        }
                    ]
                }
            ]
        },
        {
            "id": 2,
            "name": "家居家装",
            "parentId": 0,
            "catLevel": 1,
            "isShow": 1,
            "sort": 0,
            "icon": "",
            "proUnit": "",
            "proCount": 0,
            "childrenCategories": [
                {
                    "id": 41,
                    "name": "家纺",
                    "parentId": 2,
                    "catLevel": 2,
                    "isShow": 1,
                    "sort": 0,
                    "icon": "",
                    "proUnit": "",
                    "proCount": 0,
                    "childrenCategories": [
                        {
                            "id": 601,
                            "name": "桌布/罩件",
                            "parentId": 41,
                            "catLevel": 3,
                            "isShow": 1,
                            "sort": 0,
                            "icon": "",
                            "proUnit": "",
                            "proCount": 0,
                            "childrenCategories": []
                        },
                        {
                            "id": 602,
                            "name": "地毯地垫",
                            "parentId": 41,
                            "catLevel": 3,
                            "isShow": 1,
                            "sort": 0,
                            "icon": "",
                            "proUnit": "",
                            "proCount": 0,
                            "childrenCategories": []
                        }
                    ]
                },
                {
                    "id": 42,
                    "name": "灯具",
                    "parentId": 2,
                    "catLevel": 2,
                    "isShow": 1,
                    "sort": 0,
                    "icon": "",
                    "proUnit": "",
                    "proCount": 0,
                    "childrenCategories": [
                        {
                            "id": 651,
                            "name": "台灯",
                            "parentId": 42,
                            "catLevel": 3,
                            "isShow": 1,
                            "sort": 0,
                            "icon": "",
                            "proUnit": "",
                            "proCount": 0,
                            "childrenCategories": []
                        },
                        {
                            "id": 652,
                            "name": "节能灯",
                            "parentId": 42,
                            "catLevel": 3,
                            "isShow": 1,
                            "sort": 0,
                            "icon": "",
                            "proUnit": "",
                            "proCount": 0,
                            "childrenCategories": []
                        }
                    ]
                }
            ]
        }
    ]
}
前端层级展示部分

MyBatis-plus 逻辑删除
查询的时候,会添加上,我们的在 application.yaml 当中配置的逻辑条件的(自动的方式)。
一句话: 表指定一个字段,标识是否显示该记录,而不是真正删除该记录

yaml
mybatis-plus:
  global-config:
    db-config:
      logic-delete-field: deleted # 全局逻辑删除字段名
      logic-delete-value: 1 # 逻辑已删除值
      logic-not-delete-value: 0 # 逻辑未删除值
yaml
import com.baomidou.mybatisplus.annotation.TableLogic;

public class User {
    // 其他字段...

    @TableLogic
    private Integer deleted;
}
例子:

yaml
spring:
  datasource:
    username: root
    password: root
    url: jdbc:mysql://192.168.56.100:3306/hspliving_commodity
    driver-class-name: com.mysql.cj.jdbc.Driver
#    driver-class-name: com.mysql.jdbc.Driver

# 配置 mybatis-pus
mybatis-plus:
  mapper-locations: classpath:/mapper/**/*.xml
  global-config:
    db-config:
      id-type: auto # 配置主键信息
      logic-delete-value: 0 # 逻辑已经被删除值(默认为1,这里我们调整为我们自己的 0 )
      logic-not-delete-value: 1 # 逻辑未被删除值(默认值为0,这里我们调整成我们自己的)
  configuration:
    log-impl: org.apache.ibatis.logging.stdout.StdOutImpl

MySQL 前端添加内容,中文乱码,mysql5.7 以后
useSSL=false 和 true 的区别
useSSL=false和true的区别_usessl=false与true的区别-CSDN博客
useSSL=false和true的区别:
SSL(Secure Sockets Layer 安全套接字协议),在mysql进行连接的时候,如果mysql的版本是5.7之后的版本必须要加上useSSL=false,mysql5.7以及之前的版本则不用进行添加useSSL=false,会默认为false,一般情况下都是使用useSSL=false,尤其是在将项目部署到linux上时,一定要使用useSSL=false!!!,useSSL=true是进行安全验证,一般通过证书或者令牌什么的,useSSL=false就是通过账号密码进行连接,通常使用useSSL=false!!!


yaml
spring:
  datasource:
    username: root
    password: root
    url: jdbc:mysql://192.168.56.100:3306/hspliving_commodity?useUnicode=true&characterEncoding=utf-8&useSSL=false
    driver-class-name: com.mysql.cj.jdbc.Driver
#    driver-class-name: com.mysql.jdbc.Driver
Vue 报错 取消 ESLint 检测
renren-generator 自动生成 crud 代码
renren-generator 默认是 80 端口,浏览器默认就是 80 端口,不需要特别指明该 80 端口。
- renren-generator 是一个代码生成器,可生成 entity ,xml,dao,service,vue,sql 代码,减少 70% 的开发认为。
- renren-generator 模块的官方地址:gitee.com/renrenio/re...
- 删除 renren-generator 项目的 .git 目录,并拷贝到 RainbowSealiving 项目下,当做一个子模块 (如图)

- 修改 RainbowSealiving/pom.xml , 将 renren-generator 加入到父项目,统一管理

xml
<!--    指定聚合管理的模块/微服务模块-->
    <modules>
        <module>RainbowSealiving-commodity</module>
        <module>renren-fast</module>
        <module>renren-generator</module>
        <module>RainbowSealiving-common</module>
        <module>raibnowsealiving-service</module>
        <module>rainbowsealiving-gateway</module>
</modules>- 修改 RainbowSealiving\renren-generator\src\main\resources\application.yml , 配置数据库,修改为我们自己的数据库的配置信息。

yaml
server:
  port: 80

# mysql
spring:
  datasource:
    type: com.alibaba.druid.pool.DruidDataSource
    #MySQL配置
    driverClassName: com.mysql.cj.jdbc.Driver
    url: jdbc:mysql://192.168.56.100:3306/hspliving_commodity?useUnicode=true&characterEncoding=UTF-8&useSSL=false&serverTimezone=Asia/Shanghai
    username: root
    password: root
    #oracle配置
    #    driverClassName: oracle.jdbc.OracleDriver
    #    url: jdbc:oracle:thin:@47.100.206.162:1521:xe
    #    username: renren
    #    password: 123456
    #SQLServer配置
    #    driverClassName: com.microsoft.sqlserver.jdbc.SQLServerDriver
    #    url: jdbc:sqlserver://192.168.10.10:1433;DatabaseName=renren_fast
    #    username: sa
    #    password: 123456
    #PostgreSQL配置
  #    driverClassName: org.postgresql.Driver
  #    url: jdbc:postgresql://192.168.10.10:5432/renren_fast
  #    username: postgres
  #    password: 123456


  jackson:
    time-zone: GMT+8
    date-format: yyyy-MM-dd HH:mm:ss
  resources:
    static-locations: classpath:/static/,classpath:/views/

#mongodb:
#  host: localhost
#  port: 27017
#  auth: false #是否使用密码验证
#  username: tincery
#  password: renren
#  source: 123456
#  database: test

mybatis-plus:
  mapperLocations: classpath:mapper/**/*.xml


pagehelper:
  reasonable: true
  supportMethodsArguments: true
  params: count=countSql


#指定数据库,可选值有【mysql、oracle、sqlserver、postgresql、mongodb】
renren:
database: mysql- 修改 RainbowSealiving\renren-generator\src\main\resources\generator.properties , 指定生成代码的相关信息


properties
#\u4EE3\u7801\u751F\u6210\u5668\uFF0C\u914D\u7F6E\u4FE1\u606F
mainPath=com.rainbowsea
#\u5305\u540D
package=com.rainbowsea.rainbowsealiving
moduleName=commodity
#\u4F5C\u8005
author=rainbowsea
#Email
email=rainbowsea@gmail.com
#\u8868\u524D\u7F00(\u7C7B\u540D\u4E0D\u4F1A\u5305\u542B\u8868\u524D\u7F00)
# 数据表的前缀
tablePrefix=commodity_
完整的 generator.properties 的配置信息
properties
#\u4EE3\u7801\u751F\u6210\u5668\uFF0C\u914D\u7F6E\u4FE1\u606F
mainPath=com.rainbowsea
#\u5305\u540D
package=com.rainbowsea.rainbowsealiving
moduleName=commodity
#\u4F5C\u8005
author=rainbowsea
#Email
email=rainbowsea@gmail.com
#\u8868\u524D\u7F00(\u7C7B\u540D\u4E0D\u4F1A\u5305\u542B\u8868\u524D\u7F00)
# 数据表的前缀
tablePrefix=commodity_
#\u7C7B\u578B\u8F6C\u6362\uFF0C\u914D\u7F6E\u4FE1\u606F
tinyint=Integer
smallint=Integer
mediumint=Integer
int=Integer
integer=Integer
bigint=Long
float=Float
double=Double
decimal=BigDecimal
bit=Boolean
char=String
varchar=String
tinytext=String
text=String
mediumtext=String
longtext=String
date=Date
datetime=Date
timestamp=Date
NUMBER=Integer
INT=Integer
INTEGER=Integer
BINARY_INTEGER=Integer
LONG=String
FLOAT=Float
BINARY_FLOAT=Float
DOUBLE=Double
BINARY_DOUBLE=Double
DECIMAL=BigDecimal
CHAR=String
VARCHAR=String
VARCHAR2=String
NVARCHAR=String
NVARCHAR2=String
CLOB=String
BLOB=String
DATE=Date
DATETIME=Date
TIMESTAMP=Date
TIMESTAMP(6)=Date
int8=Long
int4=Integer
int2=Integer
numeric=BigDecimal
nvarchar=String- 修改 RainbowSealiving\renren-generator\pom.xml ,替换掉 自动生成的 parent 配置, 这个配置信息可以从 rainbowseaiving-commodity 模块拷贝即可

xml
 <parent>
        <groupId>org.springframework.boot</groupId>
        <artifactId>spring-boot-starter-parent</artifactId>
        <version>2.2.6.RELEASE</version>
        <relativePath></relativePath>
</parent>- 启动RainbowSeaiving\renrengenerator\src\main\java\io\renren\RenrenApplication.java 保证没有错误

- 访问浏览器的 localhost:80


注意:我们这里的覆盖是将 main 覆盖的时候,已有的文件并不会被覆盖,没有的数据会被添加上去。

注意:我们需要查看 renren-generator 自动生成的 CRUD 的代码,它所生成的包路径是否,满足你的要求,或者是有错误需要处理。

阿里云存储-oss 配置
java
用户登录名称 rainbowsealiving-10000@1562236733667461.onaliyun.com
AccessKey ID LTAI5tP4G6hDJqh7FPe1Cahh
AccessKey Secret vl5kaBORH1QADEzKq9NInpRdD8JJeF
java
LTAI5tP4G6hDJqh7FPe1Cahh
java
vl5kaBORH1QADEzKq9NInpRdD8JJeF
java
用户登录名称 rainbowsealiving-10000@1562236733667461.onaliyun.com
AccessKey ID LTAI5tP4G6hDJqh7FPe1Cahh
AccessKey Secret vl5kaBORH1QADEzKq9NInpRdD8JJeF
编写一个简单的上传文件:
java
import java.io.*;
import java.util.Random;
import com.aliyun.oss.ClientException;
import com.aliyun.oss.OSS;
import com.aliyun.oss.OSSClientBuilder;
import com.aliyun.oss.OSSException;
import com.aliyun.oss.common.auth.CredentialsProviderFactory;
import com.aliyun.oss.common.auth.EnvironmentVariableCredentialsProvider;
import com.aliyun.oss.model.OSSObject;
import com.aliyun.oss.model.ObjectListing;
import com.aliyun.oss.model.OSSObjectSummary;

public class OssJavaSdkQuickStart {
    /** 生成一个唯一的 Bucket 名称 */
    public static String generateUniqueBucketName(String prefix) {
        // 获取当前时间戳
        String timestamp = String.valueOf(System.currentTimeMillis());
        // 生成一个 0 到 9999 之间的随机数
        Random random = new Random();
        int randomNum = random.nextInt(10000); // 生成一个 0 到 9999 之间的随机数
        // 连接以形成一个唯一的 Bucket 名称
        return prefix + "-" + timestamp + "-" + randomNum;
    }

    public static void main(String[] args) throws com.aliyuncs.exceptions.ClientException {
        // 设置 OSS Endpoint 和 Bucket 名称
        String endpoint = "https://oss-cn-hangzhou.aliyuncs.com";
        String bucketName = generateUniqueBucketName("demo");
        // 替换为您的 Bucket 区域
        String region = "cn-hangzhou";
        // 创建 OSSClient 实例
        EnvironmentVariableCredentialsProvider credentialsProvider =
                CredentialsProviderFactory.newEnvironmentVariableCredentialsProvider();
        OSS ossClient = OSSClientBuilder.create()
                .endpoint(endpoint)
                .credentialsProvider(credentialsProvider)
                .region(region)
                .build();
        try {
            // 1. 创建存储空间(Bucket)
            ossClient.createBucket(bucketName);
            System.out.println("1. Bucket " + bucketName + " 创建成功。");
            // 2. 上传文件
            String objectName = "exampledir/exampleobject.txt";
            String content = "Hello OSS";
            ossClient.putObject(bucketName, objectName, new ByteArrayInputStream(content.getBytes()));
            System.out.println("2. 文件 " + objectName + " 上传成功。");
            // 3. 下载文件
            OSSObject ossObject = ossClient.getObject(bucketName, objectName);
            InputStream contentStream = ossObject.getObjectContent();
            BufferedReader reader = new BufferedReader(new InputStreamReader(contentStream));
            String line;
            System.out.println("3. 下载的文件内容:");
            while ((line = reader.readLine()) != null) {
                System.out.println(line);
            }
            contentStream.close();
            // 4. 列出文件
            System.out.println("4. 列出 Bucket 中的文件:");
            ObjectListing objectListing = ossClient.listObjects(bucketName);
            for (OSSObjectSummary objectSummary : objectListing.getObjectSummaries()) {
                System.out.println(" - " + objectSummary.getKey() + " (大小 = " + objectSummary.getSize() + ")");
            }
            // 5. 删除文件
            ossClient.deleteObject(bucketName, objectName);
            System.out.println("5. 文件 " + objectName + " 删除成功。");
            // 6. 删除存储空间(Bucket)
            ossClient.deleteBucket(bucketName);
            System.out.println("6. Bucket " + bucketName + " 删除成功。");
        } catch (OSSException oe) {
            System.out.println("Caught an OSSException, which means your request made it to OSS, "
                    + "but was rejected with an error response for some reason.");
            System.out.println("Error Message:" + oe.getErrorMessage());
            System.out.println("Error Code:" + oe.getErrorCode());
            System.out.println("Request ID:" + oe.getRequestId());
            System.out.println("Host ID:" + oe.getHostId());
        } catch (ClientException | IOException ce) {
            System.out.println("Caught an ClientException, which means the client encountered "
                    + "a serious internal problem while trying to communicate with OSS, "
                    + "such as not being able to access the network.");
            System.out.println("Error Message:" + ce.getMessage());
        } finally {
            if (ossClient != null) {
                ossClient.shutdown();
            }
        }
    }
}
spring cloud 整合
使用 SpringCloud Alibaba OSS 传文件到阿里云对象 Bucket

xml
<!--        引入 oss starter 我们引入的 stater 和 文档给的不一样,请注意观察 artifactId-->
        <dependency>
            <groupId>com.alibaba.cloud</groupId>
            <artifactId>spring-cloud-starter-alicloud-oss</artifactId>
            <version>2.1.0.RELEASE</version>
        </dependency>
修改 RainbowSealiving\RainbowSealiving-commodity\src\main\resources\application.yml , 增加 oos 相关
配置参数

yaml
spring:
  datasource:
    username: root
    password: root
    url: jdbc:mysql://192.168.56.100:3306/hspliving_commodity?useUnicode=true&characterEncoding=utf-8&useSSL=false
    driver-class-name: com.mysql.cj.jdbc.Driver
#    driver-class-name: com.mysql.jdbc.Driver
# 配置 阿里云 oss
  cloud:
    alicloud:
      oss:
        endpoint: oss-cn-hangzhou.aliyuncs.com # 杭州位置
      access-key: LTAI5tP4G6hDJqh7FPe1Cahh
      secret-key: vl5kaBORH1QADEzKq9NInpRdD8JJeF
# 配置 mybatis-pus
mybatis-plus:
  mapper-locations: classpath:/mapper/**/*.xml
  global-config:
    db-config:
      id-type: auto # 配置主键信息
      logic-delete-value: 0 # 逻辑已经被删除值(默认为1,这里我们调整为我们自己的 0 )
      logic-not-delete-value: 1 # 逻辑未被删除值(默认值为0,这里我们调整成我们自己的)
  configuration:
    log-impl: org.apache.ibatis.logging.stdout.StdOutImpl
java
    // 装配 OSSClient
    @Resource
    private OSSClient ossClient;

    // 上传指定的文件到 bucket 当中
    @RequestMapping("/test2")
    public R testUpload2() throws FileNotFoundException {
        InputStream inputStream = new FileInputStream("E:\\Java\\project\\RainbowSealiving\\redis.jpg");
        ossClient.putObject("rainbowsealiving-10000","redis.jpg",inputStream);
        ossClient.shutdown();
        // redis.jpg
        return R.ok("上传 OK");
    }
第三方接入(微服务模块)
配置 pom.xml 文件信息
xml
<?xml version="1.0" encoding="UTF-8"?>
<project xmlns="http://maven.apache.org/POM/4.0.0"
         xmlns:xsi="http://www.w3.org/2001/XMLSchema-instance"
         xsi:schemaLocation="http://maven.apache.org/POM/4.0.0 http://maven.apache.org/xsd/maven-4.0.0.xsd">

    <modelVersion>4.0.0</modelVersion>


    <parent>
        <groupId>org.springframework.boot</groupId>
        <artifactId>spring-boot-starter-parent</artifactId>
        <version>2.1.8.RELEASE</version>
        <relativePath/> <!-- lookup parent from repository -->
    </parent>

    <groupId>com.rainbowsea.RainbowSealiving</groupId>
    <artifactId>raibnowsealiving-service</artifactId>
    <version>1.0-SNAPSHOT</version>
    <name>raibnowsealiving-service</name>
    <description>顺平( 家居生活)- 第三方服务模块 OSS</description>
    <properties>
        <java.version>1.8</java.version>
        <spring-cloud.version>2020.0.5</spring-cloud.version>
    </properties>

    <dependencies>
        <dependency>
            <groupId>com.alibaba.cloud</groupId>
            <artifactId>spring-cloud-starter-alicloud-oss</artifactId>
            <version>2.1.0.RELEASE</version>
        </dependency>

        <!--        引入公共模块-->
        <dependency>
            <groupId>com.rainbowsea.RainbowSealiving</groupId>
            <artifactId>RainbowSealiving-common</artifactId>
            <version>1.0-SNAPSHOT</version>
            <!--            排除公共模块当中的 mybatis-plus-boot-starter 依赖-->
            <exclusions>
                <exclusion>
                    <groupId>com.baomidou</groupId>
                    <artifactId>mybatis-plus-boot-starter</artifactId>
                </exclusion>
            </exclusions>
        </dependency>

        <dependency>
            <groupId>org.springframework.boot</groupId>
            <artifactId>spring-boot-starter-web</artifactId>
        </dependency>

        <dependency>
            <groupId>org.springframework.boot</groupId>
            <artifactId>spring-boot-starter-test</artifactId>
            <scope>test</scope>
        </dependency>
    </dependencies>

    <build>
        <plugins>
            <plugin>
                <groupId>org.springframework.boot</groupId>
                <artifactId>spring-boot-maven-plugin</artifactId>
            </plugin>
        </plugins>
    </build>
</project>
生成一个时间戳的文件格式,用于存储/备份信息
java
    //指定过期时间,单位为秒。
    Long expire_time = 3600L;

    /**
     * 通过指定有效的时长(秒)生成过期时间。
     * @param seconds 有效时长(秒)。
     * @return ISO8601 时间字符串,如:"2014-12-01T12:00:00.000Z"。
     */
    public static String generateExpiration(long seconds) {
        // 获取当前时间戳(以秒为单位)
        long now = Instant.now().getEpochSecond();
        // 计算过期时间的时间戳
        long expirationTime = now + seconds;
        // 将时间戳转换为Instant对象,并格式化为ISO8601格式
        Instant instant = Instant.ofEpochSecond(expirationTime);
        // 定义时区
        ZoneId zone = ZoneId.systemDefault();  // 使用系统默认时区
        // 将 Instant 转换为 ZonedDateTime
        ZonedDateTime zonedDateTime = instant.atZone(zone);
        // 定义日期时间格式,例如2023-12-03T13:00:00.000Z
        DateTimeFormatter formatter = DateTimeFormatter.ofPattern("yyyy-MM-dd'T'HH:mm:ss.SSS'Z'");
        // 格式化日期时间
        String formattedDate = zonedDateTime.format(formatter);
        // 输出结果
        return formattedDate;
    }
跨域处理-CORS 问题(设计到 2 个跨域,有云存储)
两个位置,
- 一个是我们商品模块 9090 访问图片服务模块的 7070 端口的一个,不是同源策略上的跨域问题:
添加上:

java
/**
 * Copyright (c) 2016-2019 人人开源 All rights reserved.
 *
 * https://www.renren.io
 *
 * 版权所有,侵权必究!
 */

package com.rainbowsea.rainbowsealiving.service.config;

import org.springframework.context.annotation.Configuration;
import org.springframework.web.servlet.config.annotation.CorsRegistry;
import org.springframework.web.servlet.config.annotation.WebMvcConfigurer;

@Configuration
public class CorsConfig implements WebMvcConfigurer {

    @Override
    public void addCorsMappings(CorsRegistry registry) {
        registry.addMapping("/**")
            .allowedOrigins("*")
            .allowCredentials(true)
            .allowedMethods("GET", "POST", "PUT", "DELETE", "OPTIONS")
            .maxAge(3600);
    }
}- 第二个则是我们,我们的图片服务 7070 访问阿里云(或者其他的云)的一个,不是同源策略上的 CORS 问题。解决-阿里云上设置。


pom.xml 排除公共模块

xml
<!--        引入公共模块,排除 mybatis-plus -->
        <dependency>
            <groupId>com.rainbowsea.RainbowSealiving</groupId>
            <artifactId>RainbowSealiving-common</artifactId>
            <version>1.0-SNAPSHOT</version>
            <!--            排除公共模块当中的 mybatis-plus-boot-starter 依赖-->
            <exclusions>
                <exclusion>
                    <groupId>com.baomidou</groupId>
                    <artifactId>mybatis-plus-boot-starter</artifactId>
                </exclusion>
            </exclusions>
        </dependency>
在公共模块引入 nacos + Gateway,简化配置
目前我们的项目创建了多个独立微服务模块,但还不是分布式的
带来的问题主要是各个微服务模式独立,不能统一的进行管理和调度,
- 可以配置上,网关 Nacos 上的自动调度,或者集群
- 可以一些 Spring Cloud 微服务的配置信息,放置到 Nacos 上,进行读取,而不是放置到本地。'

这里我们可以配置,放置在公共模块(微服务)当中,用于其他的微服务模块的访问和使用。
xml
    <!--
        解读
        1. dependencyManagement是包依赖管理
        2.该微服务模块的 pom.xml
        的<dependencies></dependencies>引入 spring cloud alibaba
        相关依赖的时候,就不需要指定版本了
        3. 仅仅只是声明,并没有对引入加载相关的依赖信息。
        -->
    <dependencyManagement>
        <dependencies>
            <dependency>
                <groupId>com.alibaba.cloud</groupId>
                <artifactId>spring-cloud-alibaba-dependencies</artifactId>
                <version>2.1.0.RELEASE</version>
                <type>pom</type>
                <scope>import</scope>
            </dependency>
        </dependencies>
xml
        <!--
          解读
         1. 引入 nacos 服务注册/ 发现
         2. 以后,引入了 hspliving-common 的微服务模块就有了 nacos服务注册/发现依赖,不需要在引入 -->
        <dependency>
            <groupId>com.alibaba.cloud</groupId>
            <artifactId>spring-cloud-starter-alibaba-nacos-discovery</artifactId>
        </dependency>
当我们已经在"公共模块" 的服务当中,引入配置上了,相关的 Nacos ,同时,该对应的服务的 pom.xml 文件当中导入了相关的公共模块。下面就需要我们在对应的服务当中,配置对应 Spring Cloud 微服务的上的 Nacos 配置信息即可。
对应上的 Nacos 配置信息,可以配置到 properties 配置,或者是 yaml 配置文件。都可以,这里使用的是 yaml 配置文件,注意:层级关系,层级对应是在 Spring cloud 下的

yaml
spring:
  datasource:
    username: root
    password: root
    url: jdbc:mysql://192.168.56.100:3306/hspliving_commodity?useUnicode=true&characterEncoding=utf-8&useSSL=false
    driver-class-name: com.mysql.cj.jdbc.Driver
#    driver-class-name: com.mysql.jdbc.Driver
# 配置 阿里云 oss
  cloud:
    alicloud:
      oss:
        endpoint: oss-cn-hangzhou.aliyuncs.com # 杭州位置
      access-key: LTAI5tP4G6hDJqh7FPe1Cahh
      secret-key: vl5kaBORH1QADEzKq9NInpRdD8JJeF
    nacos:
      discovery:
        server-addr: 127.0.0.1:8848 #  Nacos 服务的地址
  application:
name: RainbowSealiving-commodity # 该微服务的 name 信息同时在对应微服务的启动类上,启动服务注册发现。加入注册发现服务注解

java
package com.rainbowsea.rainbowsealiving.commodity;


import org.mybatis.spring.annotation.MapperScan;
import org.springframework.boot.SpringApplication;
import org.springframework.boot.autoconfigure.SpringBootApplication;
import org.springframework.cloud.client.discovery.EnableDiscoveryClient;


// dao 路径扫描映射
// @MapperScan指定扫描的dao包,如果我们在Dao指定的有 @Mapper ,也可以不写
//@MapperScan("com.rainbowsea.rainbowsealiving.commodity.dao")
@EnableDiscoveryClient
@SpringBootApplication
public class RainbowSealivingCommodityApplication {
    public static void main(String[] args) {
        SpringApplication.run(RainbowSealivingCommodityApplication.class, args);
    }
}
完成测试: 启动相关配置好的微服务, rainbowsealiving-commodity, 看看是否注册到 Nacos

在来一个,微服务配置上 Nacos 服务。

yaml
server:
  port: 7070
# 配置 oss
spring:
  cloud:
    alicloud:
      access-key: LTAI5tP4G6hDJqh7FPe1Cahh
      secret-key: vl5kaBORH1QADEzKq9NInpRdD8JJeF
      oss:
        endpoint: oss-cn-hangzhou.aliyuncs.com # 杭州位置
        bucket: rainbowsealiving-10000
    # 将 raibnowsealiving-service 注册到  nacos 当中去。
    nacos:
      discovery:
        server-addr: 127.0.0.1:8848
  application:
    name: raibnowsealiving-service
文件覆盖-策略-就上面的一个通过时间戳的方式创建的文件,进行备份,记录的方式
上引。
管理版本仲裁依赖
可以通过, 进行一个版本上的声明,和管理版本。
注意:这种方式,是不会实际引入到相关的依赖的,仅仅只是声明

xml
    <!--
        解读
        1. dependencyManagement是包依赖管理
        2.该微服务模块的 pom.xml
        的<dependencies></dependencies>引入 spring cloud alibaba
        相关依赖的时候,就不需要指定版本了
        3. 注意:这里仅仅只是声明了,并没有进入实际上的 依赖。
        -->
    <dependencyManagement>
        <dependencies>
            <dependency>
                <groupId>com.alibaba.cloud</groupId>
                <artifactId>spring-cloud-alibaba-dependencies</artifactId>
                <version>2.1.0.RELEASE</version>
                <type>pom</type>
                <scope>import</scope>
            </dependency>
        </dependencies>
    </dependencyManagement>
xml
<?xml version="1.0" encoding="UTF-8"?>
<project xmlns="http://maven.apache.org/POM/4.0.0"
         xmlns:xsi="http://www.w3.org/2001/XMLSchema-instance"
         xsi:schemaLocation="http://maven.apache.org/POM/4.0.0 http://maven.apache.org/xsd/maven-4.0.0.xsd">
    <parent>
        <artifactId>RainbowSealiving</artifactId>
        <groupId>com.rainbowsea.RainbowSealiving</groupId>
        <version>1.0-SNAPSHOT</version>
    </parent>
    <modelVersion>4.0.0</modelVersion>

    <artifactId>RainbowSealiving-common</artifactId>
    <description>公共模块</description>

    <!--    引入相关依赖-->
    <dependencies>

        <!--引入mysql驱动-->
        <dependency>
            <groupId>mysql</groupId>
            <artifactId>mysql-connector-java</artifactId>
            <version>8.0.17</version>
        </dependency>
        <!--               mybatis-plus  依赖-->
        <dependency>
            <groupId>com.baomidou</groupId>
            <artifactId>mybatis-plus-boot-starter</artifactId>
            <version>3.2.0</version>
        </dependency>

        <!-- lombok  依赖,简化开发-->
        <dependency>
            <groupId>org.projectlombok</groupId>
            <artifactId>lombok</artifactId>
            <version>1.18.8</version>
        </dependency>

        <!-- 这是 hspliving-common  需要的依赖 -->
        <dependency>
            <groupId>org.apache.httpcomponents</groupId>
            <artifactId>httpcore</artifactId>
            <version>4.4.12</version>
        </dependency>

        <!-- 这是 hspliving-common  需要的依赖,
从 renren-generator 拷贝即可,指定 version -->
        <dependency>
            <groupId>commons-lang</groupId>
            <artifactId>commons-lang</artifactId>
            <version>2.6</version>
        </dependency>


        <!--
          解读
         1. 引入 nacos 服务注册/ 发现
         2. 以后,引入了 hspliving-common 的微服务模块就有了 nacos服务注册/发现依赖,不需要在引入 -->
        <dependency>
            <groupId>com.alibaba.cloud</groupId>
            <artifactId>spring-cloud-starter-alibaba-nacos-discovery</artifactId>
        </dependency>
    </dependencies>

    <!--
        解读
        1. dependencyManagement是包依赖管理
        2.该微服务模块的 pom.xml
        的<dependencies></dependencies>引入 spring cloud alibaba
        相关依赖的时候,就不需要指定版本了
        3. 注意:这里仅仅只是声明了,并没有进入实际上的 依赖。
        -->
    <dependencyManagement>
        <dependencies>
            <dependency>
                <groupId>com.alibaba.cloud</groupId>
                <artifactId>spring-cloud-alibaba-dependencies</artifactId>
                <version>2.1.0.RELEASE</version>
                <type>pom</type>
                <scope>import</scope>
            </dependency>
        </dependencies>
最后:
"在这个最后的篇章中,我要表达我对每一位读者的感激之情。你们的关注和回复是我创作的动力源泉,我从你们身上吸取了无尽的灵感与勇气。我会将你们的鼓励留在心底,继续在其他的领域奋斗。感谢你们,我们总会在某个时刻再次相遇。" 