一、案例题目:
1.多 IP 访问多网站(在 RHCE 练习二中的实验二)
2.多端口访问多网站
3.多域名访问多网站
4.虚拟目录和用户控制
5.https/443
二、案例实验
2.多端口访问多网站
① 开始还是先关闭我们的防火墙以及 selinux
bash
[root@server ~]# systemctl stop firewalld
[root@server ~]# setenforce 0
② 开启我们的 nginx 程序并编辑配置文件(端口可自己设置,但不要设置固有端口)
bash
[root@server ~]# systemctl start nginx
[root@server ~]# vim /etc/nginx/conf.d/ip.conf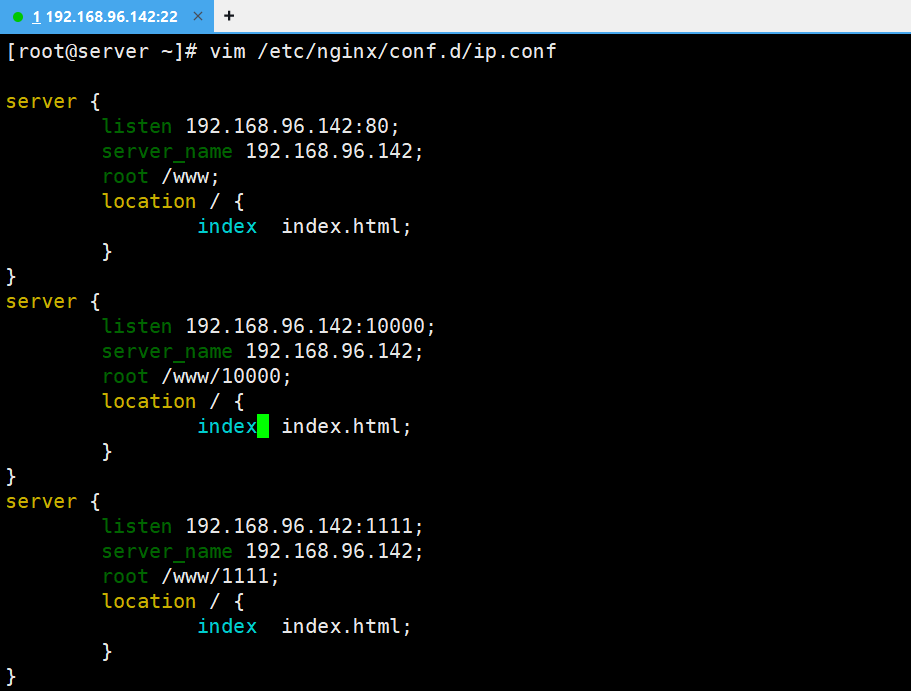
③ 创建对应目录
bash
[root@server ~]# mkdir -pv /www/{10000,1111}
mkdir: created directory '/www/'
mkdir: created directory '/www/10000'
mkdir: created directory '/www/1111'
④ 写入对应 index.html 文件内容并重启程序
bash
[root@server ~]# echo this is 10000 > /www/10000/index.html
[root@server ~]# echo this is 1111 > /www/1111/index.html
[root@server ~]# systemctl restart nginx
⑤ 利用 curl 测试网址,没有 curl 工具需要自行下载

3.多域名访问多网站
① 关闭防火墙以及 selinux
bash
[root@server ~]# systemctl stop firewalld
[root@server ~]# setenforce 0
② 开启我们的 nginx 程序并编辑配置文件(域名跟端口有所不同的是只改变server_name域名)
bash
[root@server ~]# systemctl start nginx
[root@server ~]# vim /etc/nginx/conf.d/ip.conf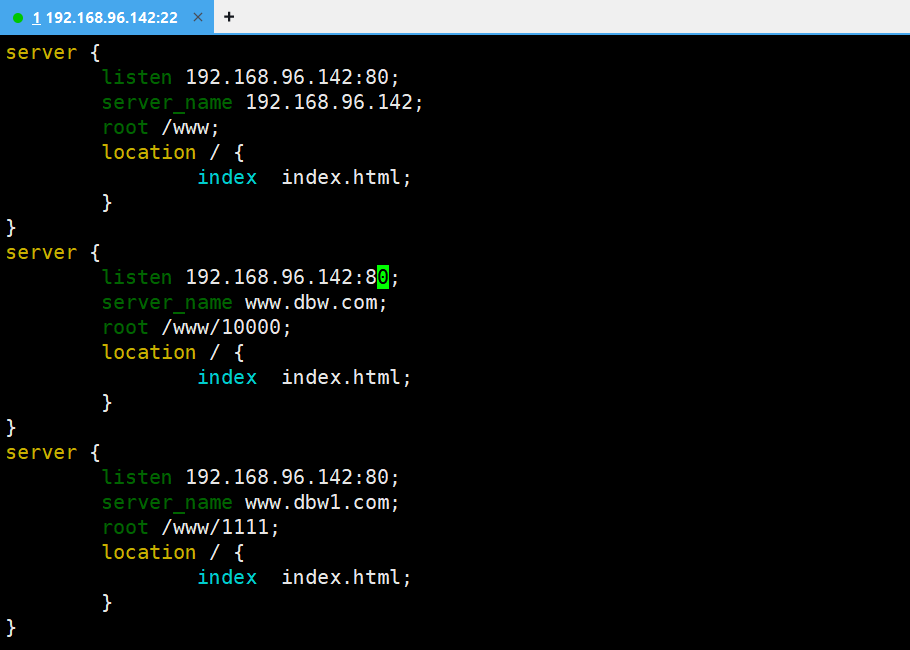
③ 写入对应 index.html 文件内容并重启程序
bash
[root@server ~]# echo 10000 > /www/10000/index.html
[root@server ~]# echo 1111 > /www/1111/index.html
[root@server ~]# systemctl restart nginx
④ 在 /etc/hosts 里追加写入我们添加进去的两个域名
bash
[root@server ~]# vim /etc/hosts
⑤ linux 客户端测试:利用 curl 测试网址
bash
[root@server ~]# curl 192.168.96.142
[root@server ~]# curl www.dbw.com
[root@server ~]# curl www.dbw1.com
4.虚拟目录和用户控制
① 编辑配置文件,当用户访问 192.168.96.142/real/index.html 时,实际在服务器找的路径为 /openweb/real/index.html
bash
[root@server ~]# vim /etc/nginx/conf.d/ip.conf 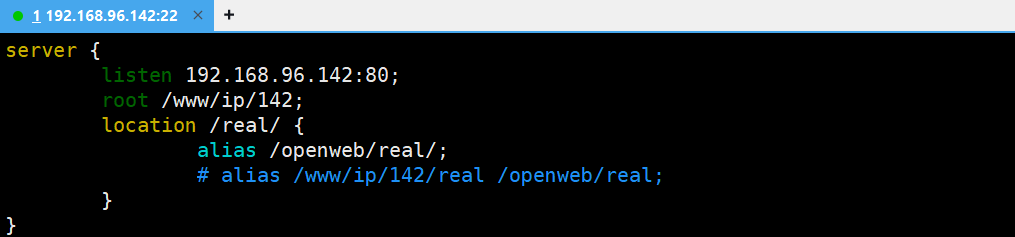
② 创建目录并写入内容
bash
[root@server ~]# mkdir /openweb/real -pv
mkdir: 已创建目录 '/openweb'
mkdir: 已创建目录 '/openweb/real'
[root@server ~]# mkdir /www/ip/142 -pv
mkdir: 已创建目录 '/www/ip'
mkdir: 已创建目录 '/www/ip/142'
[root@server ~]# echo this is real > /openweb/real/index.html
③ 重启程序服务并测试
bash
[root@server ~]# systemctl restart nginx
[root@server ~]# curl http://192.168.96.142/real/
####################用户认证####################
① 修改 ip.conf 文件
bash
[root@server ~]# vim /etc/nginx/conf.d/ip.conf 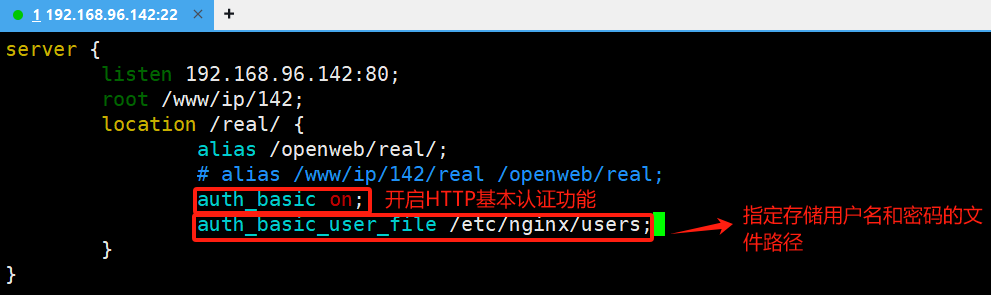
② 先进行磁盘挂载,在进行下载操作
bash
[root@server ~]# mount /dev/sr0 /mnt     # 磁盘挂载
[root@server ~]# yum provides htpasswd     # 查询htpasswd软件包提供了指定的文件
[root@server ~]# yum install httpd-tools    # 下载httpd-tools软件包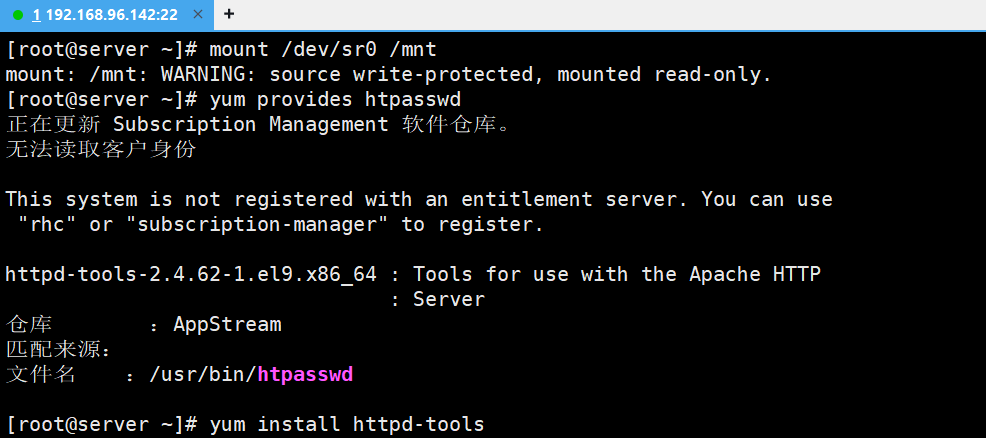
③ 更新 HTTP 基本认证的用户密码文件
bash
[root@server ~]# htpasswd -c /etc/nginx/users tom
④ 重启程序并测试结果
bash
[root@server ~]# systemctl restart nginx
[root@server ~]# curl 192.168.96.142/real/ -u tom
5.https/443
① 编辑 ip.conf 文件
bash
[root@server ~]# vim /etc/nginx/conf.d/ip.conf 
② 按照配置创建资源文件(确认权限)
bash
[root@server ~]# mkdir -pv /www
[root@server ~]# echo this is www > /www/index.html
③ 使用 openssl 工具创建一个新的 RSA 私钥,并生成一个基于该私钥的自签名 X509 证书,用于加密网络通信(通常用于网站启用 HTTPS 协议)。以下信息可随意填写,注意"陕西为shaanxi","山西为shanxi"
bash
[root@server ~]# openssl req -newkey rsa:4096 -nodes -keyout /etc/pki/tls/private/openlab.key -x509 -days 365 -out /etc/pki/tls/certs/openlab.crt 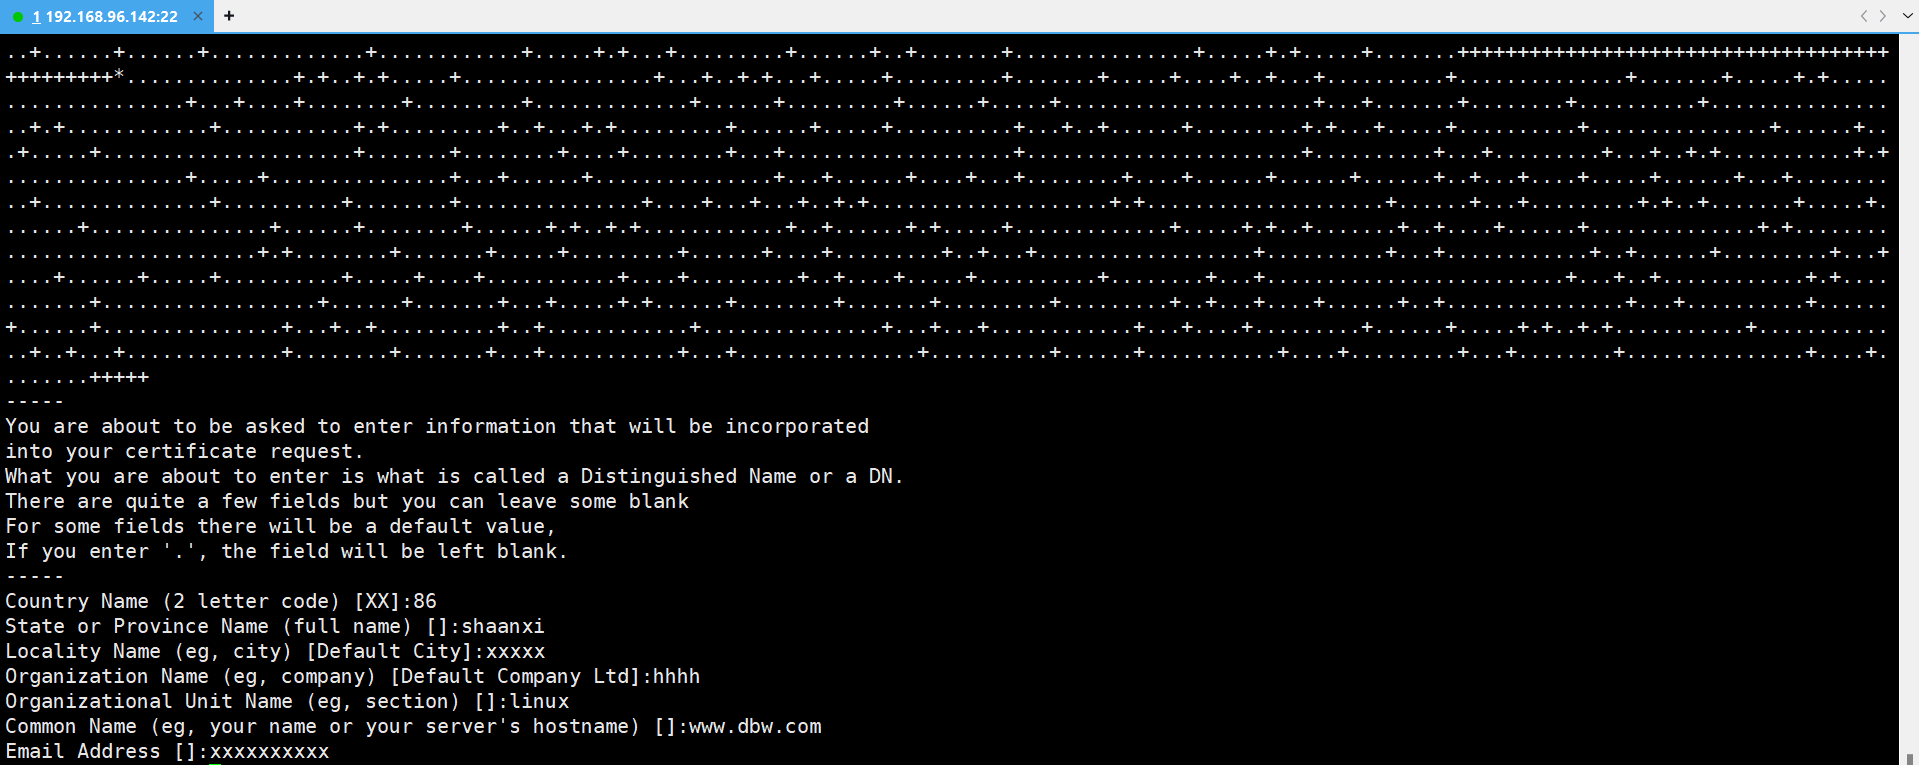
④ 查看生成的文件是否存在
bash
[root@server ~]# ll /etc/pki/tls/private/
[root@server ~]# ll /etc/pki/tls/certs/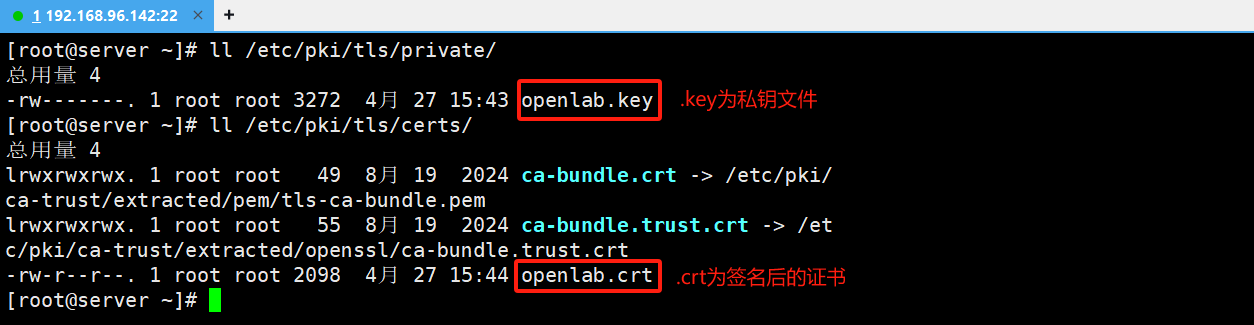
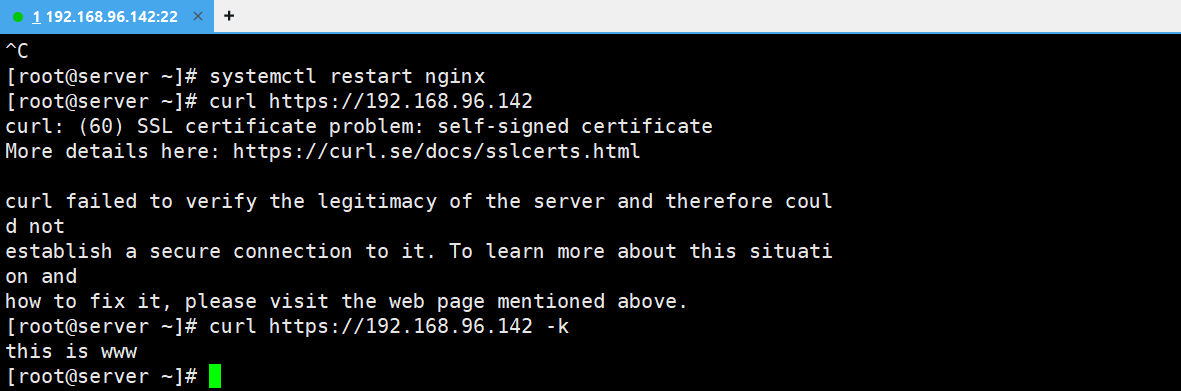
⑤ 重启服务,提供信息响应(加载新的配置)
bash
[root@server ~]# systemctl restart nginx
[root@server ~]# curl https://192.168.96.142 -k  # 加k表示在进行 HTTPS 请求时,跳过对服务器 SSL/TLS 证书的验证